Your trailer works as hard as you do, hauling everything from weekend toys to essential equipment through rain, snow, salt, and gravel. While you’re focused on what you’re towing, your trailer’s undercarriage is engaged in a constant battle against corrosion. That silent enemy—rust—doesn’t just affect aesthetics; it compromises structural integrity, reduces resale value, and can lead to catastrophic failures when you least expect it. Undercoating isn’t merely an optional upgrade; it’s a critical investment in longevity and safety that too many trailer owners postpone until they spot the first orange bloom of oxidation.
Understanding the landscape of trailer undercoating options empowers you to make informed decisions that match your specific usage patterns, climate challenges, and maintenance philosophy. This comprehensive guide dives deep into the science, materials, and application strategies that separate effective protection from wasted money. Whether you’re maintaining a boat trailer exposed to saltwater ramps or a utility trailer that sees winter road chemicals, we’ll explore what matters most when selecting an undercoating system.
Top 10 Undercoating For Trailers
Detailed Product Reviews
1. Undercoating In A Can - Black Wax Coating (12) 12oz. Case

Overview: Undercoating In A Can’s Black Wax Coating delivers professional-grade protection in a convenient 12-pack of 12-ounce aerosol cans. This MIL-PRF-62218B approved formula represents military-specification corrosion prevention technology adapted for civilian vehicles. Designed to stop existing rust from spreading while preventing new corrosion, this wax-based coating provides comprehensive undercarriage defense for cars, trucks, and trailers operating in harsh environments.
What Makes It Stand Out: The military approval sets this product apart from consumer-grade alternatives, ensuring rigorous testing for performance and durability. Its unique wax formulation claims to last four times longer than traditional asphalt-based and rubberized coatings, significantly reducing reapplication frequency. Unlike many competitors, it actively halts existing rust progression rather than merely sealing over it. The built-in sound deadening properties add value by reducing road noise and vibration.
Value for Money: At $74.18 for 144 total ounces, the per-ounce cost is approximately $0.52—competitive for professional-grade protection. While the upfront investment exceeds single-can alternatives, the bulk packaging suits serious DIYers, restorers, or small shops. The extended longevity claim translates to lower long-term costs and less labor compared to annual applications of cheaper products.
Strengths and Weaknesses: Strengths include military-grade specifications, proven rust-stopping capability, superior durability claims, effective sound dampening, and convenient aerosol application. Weaknesses involve higher initial cost, potential overspray waste inherent to aerosols, and the need for thorough surface preparation. Multiple cans are required for complete vehicle coverage.
Bottom Line: This is an excellent investment for those prioritizing long-term, professional-quality undercarriage protection. Ideal for vehicle preservation in salt-heavy regions, it’s worth the premium for serious automotive enthusiasts and professionals.
2. Zenex Rubberized Undercoat - Heavy Duty Undercoating for Vehicles | Rubberized Undercoating Spray for Cars, Trucks, and Trailers | Waterproof Rust Prevention | Sound Deadening | 16 oz (2 Count)

Overview: Zenex Rubberized Undercoat offers accessible, heavy-duty protection in a practical two-pack of 16-ounce cans. This USA-made formula creates a flexible, waterproof barrier designed for vehicle underbodies, frames, rocker panels, trailers, and machinery exposed to severe road conditions. The rubberized coating promises comprehensive defense against moisture, salt, and debris while providing secondary sound deadening benefits.
What Makes It Stand Out: The “Made in the USA” designation appeals to buyers seeking domestic manufacturing quality and reliability. Its paintable finish distinguishes it from many rubberized coatings, allowing color-matching or topcoating for aesthetic purposes. The formulation maintains elasticity across temperature extremes, resisting the cracking and peeling common in inferior products. Clear, detailed application instructions demonstrate manufacturer confidence and user support.
Value for Money: Priced at $24.99 for 32 ounces ($0.78 per ounce), this represents a mid-range option balancing affordability with performance. The two-can quantity is ideal for spot treatments, touch-ups, or smaller vehicles rather than complete undercoating jobs. While more expensive per ounce than bulk professional products, it eliminates large-quantity waste for casual users.
Strengths and Weaknesses: Strengths include domestic manufacturing, paintable flexible finish, waterproof protection, sound reduction, and accessible pricing for entry-level users. Weaknesses encompass smaller quantity requiring multiple purchases for full coverage, rubberized formulation that may not match wax-based longevity claims, and aerosol application limitations.
Bottom Line: A solid choice for DIY enthusiasts seeking reliable, American-made underbody protection without professional equipment. Best suited for maintenance, touch-ups, and smaller projects rather than comprehensive vehicle restoration.
3. Trailer Floor Coating Protects Trailer Floors, Ramps and Walls; Non Skid Paint (Grey, 1 Quart Includes 3" Roller)
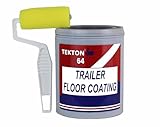
Overview: This specialized Trailer Floor Coating addresses a specific niche: protecting trailer floors, ramps, and walls with a durable, non-skid finish. The quart-sized container includes a 3-inch roller for straightforward application without mixing or dilution. Formulated for multi-surface adhesion, it bonds effectively to wood, painted surfaces, bare metals, and concrete while filling minor cracks and nail holes.
What Makes It Stand Out: The roll-on application method provides superior control compared to aerosol sprays, eliminating overspray and allowing precise coverage. The textured, non-slip finish is critical for cargo safety, preventing load shift and providing stable footing. Its self-leveling thickness actively repairs minor surface imperfections, adding structural integrity beyond mere protection. The ready-to-use formula saves preparation time.
Value for Money: At $54.45 for 32 ounces ($1.70 per ounce), this commands a premium price reflecting its specialized nature. The included roller adds convenience value, and the multi-surface versatility maximizes utility across different trailer materials. For trailer owners specifically needing floor protection, it eliminates the cost of separate anti-slip treatments.
Strengths and Weaknesses: Strengths include excellent non-slip safety features, versatile substrate adhesion, crack-repair capability, controlled application, and immediate usability. Weaknesses are the highest per-ounce cost among reviewed products, limited quantity for large trailers, and unsuitability for full underbody applications.
Bottom Line: Essential for trailer owners prioritizing cargo area safety and protection. While pricey, its specialized performance justifies the cost for its intended purpose. Not recommended as a general undercoating substitute.
4. Undercoating In A Can - Black Wax Coating (5 Gallon Pail)
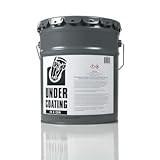
Overview: The five-gallon pail of Undercoating In A Can Black Wax Coating brings professional-grade, MIL-PRF-62218B approved protection to bulk users. This industrial-size container delivers the same military-specification rust prevention and sound deadening as the aerosol version but optimized for spray gun application. Designed for shops, fleet operators, and serious enthusiasts, it treats multiple vehicles or extensive equipment.
What Makes It Stand Out: The massive quantity dramatically reduces per-ounce cost while ensuring consistent product availability for large projects. The five-gallon format eliminates aerosol waste and allows professional airless or compressed air spray system application, resulting in superior, uniform coverage. The same four-times longevity claim over rubberized coatings makes this economically compelling for high-volume users.
Value for Money: At $223.91 for 640 ounces, the cost drops to approximately $0.35 per ounce—representing exceptional value for professional-grade material. The initial investment pays for itself after treating 3-4 vehicles compared to buying individual aerosol cans. For commercial operations, the bulk pricing directly impacts profitability.
Strengths and Weaknesses: Strengths include lowest per-ounce cost, bulk efficiency, professional application compatibility, superior durability claims, and sound deadening properties. Weaknesses involve substantial upfront cost, requirement for spray equipment, limited portability, and storage space needs.
Bottom Line: The optimal choice for automotive professionals, fleet maintenance facilities, and serious DIYers with appropriate equipment. The value proposition is unbeatable for high-volume applications, making it a business-savvy investment.
5. Undercoating in a Can Clear Wax Coating - 12/12oz. Case

Overview: Undercoating In A Can Clear Wax Coating provides the same MIL-PRF-62218B approved protection as its black counterpart but in a transparent formula. This 12-pack of 12-ounce aerosols delivers military-grade corrosion prevention while preserving the original appearance of treated surfaces. Ideal for show vehicles, restorations, or visible components where aesthetics matter.
What Makes It Stand Out: The clear formulation offers invisible protection, maintaining factory finishes on frames, suspension components, and other visible undercarriage parts. This is crucial for concourse restorations or enthusiast vehicles where original appearance is paramount. It retains all the military-specification performance benefits—stopping existing rust, preventing new corrosion, and providing sound deadening—without the conspicuous black coating.
Value for Money: At $74.18 for 144 ounces ($0.52 per ounce), pricing matches the black wax version exactly. The premium over rubberized coatings buys military-approved performance and aesthetic versatility. For restorers, the ability to protect without visual alteration justifies the cost entirely.
Strengths and Weaknesses: Strengths include invisible protection, military-grade specifications, rust-stopping capability, sound deadening, and preservation of original appearance. Weaknesses are identical to the black aerosol version: higher upfront cost, aerosol overspray potential, and need for meticulous surface preparation. Clear coating may reveal dirt accumulation more readily.
Bottom Line: Indispensable for automotive restorers and show car owners requiring maximum protection with zero visual impact. Delivers professional-grade defense while maintaining factory-correct aesthetics, making it worth every penny for its target audience.
6. Dominion Sure Seal Gravel Guard – Black Textured Spray Paint for Rust Protection, Undercoating & Bed Liner Spray – Durable Rust Converter & Encapsulator for Cars, Trucks, Trailers - 405 g

Overview: Dominion Sure Seal Gravel Guard is a specialized protective spray designed for automotive enthusiasts seeking robust defense against rust and road debris. This 405-gram aerosol delivers a textured black finish that adheres to metal surfaces, creating a barrier against stone chips and corrosion. Formulated as both a rust converter and encapsulator, it seals existing oxidation to prevent further spread, making it ideal for undercarriages, wheel wells, and truck beds.
What Makes It Stand Out: The dual-action rust conversion capability sets this product apart from standard undercoatings. Rather than merely covering rust, it chemically stabilizes it. The textured finish provides superior impact resistance compared to smooth coatings, while its compatibility with other brands allows for flexible application in multi-product systems. Fast-drying properties enable efficient DIY projects without professional equipment.
Value for Money: At $22.95 per can, this product offers reasonable value for targeted applications. While premium-priced compared to generic undercoatings, its rust-converting chemistry justifies the cost for vehicles already showing corrosion. One can sufficiently covers wheel wells or small bed sections, though full undercarriage protection requires multiple units.
Strengths and Weaknesses: Strengths include excellent rust encapsulation, durable textured finish, user-friendly spray application, and versatile use across automotive and industrial settings. Weaknesses involve limited coverage per can, single color option (black), and potential need for surface preparation to ensure optimal adhesion.
Bottom Line: Dominion Sure Seal Gravel Guard excels for spot treatments and moderate protection projects. Its rust-converting formula makes it particularly valuable for vehicles with existing corrosion, delivering professional-grade results without specialized tools.
7. RecPro Trailer Fender Rubberized Undercoating Spray | Prevent Rust | Buildable & Paintable | Automotive | Black (2 Pack)
Overview: RecPro’s Trailer Fender Rubberized Undercoating comes as a convenient two-pack solution specifically formulated for protecting trailer fenders and adjacent surfaces. This high-grade rubberized coating creates a flexible barrier against moisture and rust while offering buildable coverage for customized protection levels. Designed for automotive applications, it provides a foundation that accepts paint for color-matching needs.
What Makes It Stand Out: The two-pack configuration delivers immediate value for symmetrical applications like dual fenders. Its high-quality rubber formulation maintains flexibility after curing, preventing cracks from vibration and temperature fluctuations. The buildable nature allows users to apply multiple thin layers for optimal thickness control, while paintability ensures aesthetic integration with existing trailer colors.
Value for Money: Priced at $42.95 for two cans, this offering sits in the mid-range category. The per-can cost reflects its high-grade rubber composition versus budget alternatives. For trailer owners specifically, targeting fender protection makes this more economical than purchasing bulk cases intended for full undercarriage coverage.
Strengths and Weaknesses: Strengths include premium rubber formulation, buildable layering capability, paintable surface compatibility, and targeted two-pack sizing. Weaknesses involve limited product information regarding coverage area, potential requirement for multiple coats on heavily corroded surfaces, and lack of specialized application equipment.
Bottom Line: This RecPro undercoating suits trailer owners prioritizing fender protection with a quality rubberized barrier. Its paintable finish and buildable nature provide customization options that generic undercoatings lack, making it worth the modest premium.
8. Undercoating In A Can Rubberized (12) 12oz. Case
Overview: Undercoating In A Can Rubberized offers a bulk solution for comprehensive vehicle protection, delivering twelve 12-ounce cans of rubberized protective coating. This case format provides a durable moisture barrier against rust and road debris for automotive undercarriages and other metal surfaces. The straightforward aerosol application eliminates the need for expensive spray equipment while maintaining professional-grade protection.
What Makes It Stand Out: The bulk packaging immediately distinguishes this product for large-scale projects. Each can delivers consistent rubberized coating, allowing users to treat multiple vehicles or extensive surface areas without reordering. The formulation creates a strong protective barrier that remains flexible after curing, essential for withstanding undercarriage flex and vibration. Its universal compatibility suits various automotive and industrial applications.
Value for Money: At $80.44 for twelve cans, the per-unit cost drops to approximately $6.70, representing significant savings over individual purchases. This pricing structure makes it highly economical for professional mechanics, restoration shops, or fleet maintenance operations. DIY enthusiasts with multiple vehicles also benefit from the bulk discount.
Strengths and Weaknesses: Strengths include exceptional bulk value, consistent rubberized protection, easy aerosol application, and versatile usage scenarios. Weaknesses involve substantial upfront cost, storage requirements for unused cans, and potential product waste for single-vehicle owners. The generic branding may concern users preferring established automotive names.
Bottom Line: This case delivers outstanding value for high-volume users. Whether maintaining a fleet or undertaking major restoration projects, the cost-per-can advantage makes it a smart investment, though casual users should consider smaller quantities to avoid waste.
9. Chemicar Gravel Guard Grey Automotive Undercoating for Trucks, Cars, Buses, Trailers Sprayable Protection Against Rust, Corrosion, and Abrasion (4 cans + 1 spray gun + 1 wand)

Overview: Chemicar Gravel Guard presents a comprehensive grey undercoating system designed for professional results across trucks, cars, buses, and trailers. This kit includes four cans of rubber-based coating, a dedicated spray gun, and extension wand, enabling precise application on bumpers, fenders, rocker panels, and chassis. The formulation delivers OEM-quality finish duplication with enhanced sound deadening properties.
What Makes It Stand Out: The complete application system eliminates guesswork, providing professional tools alongside premium coating. Its ability to duplicate factory OEM finishes ensures seamless repairs and protection. Rapid 2-3 hour drying time accelerates project completion, while inherent sound deadening characteristics add value beyond mere corrosion protection. The grey color option offers an alternative to standard black undercoatings.
Value for Money: At $150.70, this kit represents a premium investment. However, inclusion of spray gun and wand, plus four coating cans, justifies the price versus purchasing components separately. For users seeking professional-grade results without hiring contractors, the cost breaks even quickly. The OEM finish capability adds value for restoration projects requiring authenticity.
Strengths and Weaknesses: Strengths include professional spray equipment, quick drying formula, authentic OEM finish replication, superior sound deadening, and comprehensive kit packaging. Weaknesses center on higher price point, grey color limitation for those wanting black, and potential overspray concerns without proper setup. The specialized nature may exceed casual DIY needs.
Bottom Line: This Chemicar kit suits serious enthusiasts and professionals demanding OEM-quality results. The included application tools and superior formulation justify the premium, making it ideal for restoration projects where finish authenticity matters.
10. CURT 52022 6-Inch x 5-1/2-Inch x 3-1/4-Inch Lockable Trailer Breakaway Battery Case

Overview: The CURT 52022 Breakaway Battery Case provides essential protection and security for trailer breakaway systems. Measuring 6" x 5.5" x 3.25", this lockable polyethylene case shields the battery and charger from environmental damage and corrosion. Specifically designed for CURT breakaway battery #52023, it features a bolt-on mounting system for secure trailer installation.
What Makes It Stand Out: Purpose-built compatibility ensures perfect fit with CURT’s breakaway system, eliminating universal-case guesswork. The lockable lid design accepts standard padlocks, providing theft deterrence for valuable battery components. Durable polyethylene construction withstands UV exposure, moisture, and road chemicals better than metal alternatives. The integrated bolt-on mounting system offers more secure installation than strap-mounted cases.
Value for Money: At $8.69, this case represents exceptional value for CURT breakaway system owners. Comparable universal cases typically cost $15-25, making this purpose-built option surprisingly affordable. The corrosion protection alone extends battery life, delivering ROI through reduced replacement frequency. Security features add value without price premium.
Strengths and Weaknesses: Strengths include perfect CURT system compatibility, integrated lockable security, durable weather-resistant construction, secure bolt-on mounting, and remarkable affordability. Weaknesses involve limited to CURT #52023 battery, padlock not included, and lack of color options. Non-CURT system owners must verify compatibility before purchase.
Bottom Line: For CURT breakaway system users, this case is a no-brainer upgrade. The combination of security, weather protection, and perfect fit at an unbeatable price makes it essential equipment for trailer safety compliance.
Understanding Trailer Undercoating: More Than Just Rust Protection
The Science Behind Corrosion on Trailers
Corrosion is an electrochemical reaction that accelerates when metal, moisture, and oxygen intersect. Trailers face a perfect storm of these elements. Unlike daily-driven vehicles, trailers often sit unused for extended periods, allowing moisture to pool in frame rails and crevices. The galvanic corrosion process intensifies when dissimilar metals contact each other—think steel frames with aluminum siding or stainless hardware. Quality undercoatings create a barrier that interrupts this reaction, but they also must manage moisture that inevitably finds its way beneath the coating.
Why Trailers Are Particularly Vulnerable
Trailers experience unique stressors that passenger vehicles rarely face. Submersion at boat launches introduces raw water into brake assemblies and frame members. Gravel roads pelt undersides with abrasive projectiles that chip protective layers. Infrequent use means corrosion can progress undetected for months. The combination of static storage and extreme duty cycles demands a more robust approach than typical automotive undercoating provides.
Types of Undercoating Materials: Pros and Cons
Asphalt-Based Undercoatings
Asphalt-based formulations deliver maximum thickness and impact resistance, making them popular for heavy-duty commercial trailers. These products dry to a rock-hard finish that deflects gravel and withstands serious abuse. However, their rigidity becomes a liability on flexing trailer frames, potentially cracking at stress points. They also add considerable weight—up to 15 pounds per gallon applied. For static equipment trailers or those traversing harsh terrain, this trade-off often makes sense. For lighter-duty applications, the weight penalty and potential for hidden corrosion beneath cracks merit careful consideration.
rubberized undercoatings
Rubberized compounds strike a balance between durability and flexibility, remaining pliable enough to move with frame flex while providing substantial protection. These formulations typically contain recycled tire rubber suspended in a solvent or water base. The elasticity prevents cracking during temperature swings and load-induced frame twisting. Sound dampening is a secondary benefit, reducing road noise transmitted through the trailer structure. The downside? Rubberized coatings can soften in extreme heat, attracting dirt and debris that becomes embedded in the surface, potentially masking developing rust.
Wax-Based and Oil-Based Options
Penetrating wax and oil formulations work differently than film-building coatings. These “creeping” products seep into seams, spot welds, and hidden cavities where rust typically initiates. They never fully harden, remaining active to displace moisture and self-heal minor scratches. Lanolin-based derivatives fall into this category and excel at protecting hard-to-reach areas. The trade-off is shorter service life—typically requiring annual reapplication—and reduced effectiveness against physical abrasion. They’re ideal for boat trailers with extensive nooks and crannies but less suitable for gravel-road warriors.
Polyurethane and Polyurea Coatings
Professional-grade polyurea and polyurethane spray coatings represent the premium tier, offering exceptional chemical resistance, flexibility, and adhesion. These two-part systems cure rapidly to form a seamless membrane that bonds tenaciously to properly prepared metal. They withstand extreme temperature cycling without cracking or peeling and resist degradation from UV exposure if overspray reaches visible areas. The primary barriers are cost—often three to four times more expensive than DIY options—and the need for specialized spray equipment. For high-value trailers or those operating in corrosive environments, the 10+ year protection span justifies the investment.
Lanolin-Based Natural Protectants
Derived from sheep’s wool, lanolin-based undercoatings appeal to environmentally conscious owners and those seeking non-toxic alternatives. These products create a waxy, water-repellent barrier that actively displaces moisture from metal surfaces. They’re particularly effective for trailers used near waterways where chemical runoff concerns exist. Performance degrades faster than synthetic options, typically requiring reapplication every 12-18 months. They also offer minimal impact resistance, making them better suited as maintenance topcoats over more robust base layers than as standalone protection.
Key Performance Features to Evaluate
Salt and Chemical Resistance
Road salt represents the most aggressive corrosive agent most trailers encounter. Sodium chloride lowers water’s freezing point, keeping it liquid and conductive on metal surfaces for extended periods. Calcium and magnesium chloride deicers are even more corrosive, actively drawing moisture from the air. Effective undercoatings must resist these chemicals without breaking down. Look for products specifically tested against ASTM B117 salt spray standards, which simulate years of exposure in controlled conditions. The best formulations create a non-porous barrier that prevents salt-laden moisture from reaching the substrate.
Flexibility and Crack Resistance
Trailer frames flex during loading, cornering, and traversing uneven terrain. An undercoating that can’t move with the metal will crack, creating entry points for moisture that become trapped beneath the coating—accelerating corrosion rather than preventing it. Flexibility is measured by elongation-at-break percentages; quality rubberized coatings typically exceed 200% elongation. Consider your trailer’s construction: tubular frames flex less than C-channel frames, while torsion axles create different stress patterns than leaf spring setups.
Sound Dampening Properties
While rust prevention is the primary goal, undercoating’s secondary benefit of noise reduction deserves attention. Rubberized and asphalt-based products significantly reduce stone impact noise and road vibration transmission. This matters more for enclosed cargo trailers where interior noise levels affect usability, and less for open utility trailers. The mass-loaded vinyl effect of thick undercoatings can transform a tinny-sounding trailer into a solid-feeling piece of equipment.
Curing Time and Application Windows
Curing characteristics affect both application logistics and final performance. Solvent-based products may require 24-48 hours before full chemical resistance develops, during which time rain or dew can compromise the finish. Water-based formulas often cure faster but may need specific temperature ranges (typically 50-90°F) to properly cross-link. Polyurea coatings cure within seconds, allowing immediate return to service but demanding precise application technique. Factor your climate and available workspace into this decision—applying a slow-curing product in a humid environment invites failure.
Application Methods: Professional vs. DIY
Professional Spray Systems Explained
Professional shops use high-pressure, heated spray systems that atomize undercoating into a fine mist, ensuring complete coverage of complex geometries. These systems can deliver material at 2,000+ PSI, forcing it into frame rails through access holes and creating uniform thickness. Heated hoses reduce viscosity, allowing thicker films without runs or sags. The professional advantage extends beyond equipment to expertise in masking brake components, wiring, and suspension parts that must remain coating-free. Expect to pay $400-$800 for professional application, but the warranty and consistent results often justify the cost for valuable trailers.
DIY Application: Brushes, Rollers, and Aerosols
The DIY route offers significant cost savings and scheduling flexibility. Aerosol cans provide convenience for touch-ups and spot treatments but lack the volume and control for complete coverage. Brush application allows meticulous work around brackets and welds but leaves brush marks and thin spots. Roller application covers large flat areas efficiently but struggles with complex shapes. For comprehensive DIY protection, consider undercoating guns that attach to air compressors—these bridge the gap between aerosols and professional systems, delivering material at 40-60 PSI with reasonable pattern control.
Surface Preparation: The Non-Negotiable First Step
Every undercoating failure trace back to inadequate prep. The process begins with pressure washing at 3,000+ PSI to remove existing scale and debris, followed by degreasing with wax-and-grease remover. Next comes mechanical abrasion—wire brushing or media blasting to create a clean, textured surface profile. For trailers with existing rust, phosphoric acid-based rust converters chemically transform iron oxide into a stable, paintable surface. Skipping any step guarantees premature failure, as undercoating bonds to contamination rather than metal, eventually delaminating in sheets.
Cost Considerations: Beyond the Price Tag
Initial Investment vs. Long-Term Value
A $50 aerosol treatment seems economical until it fails after one season, requiring complete removal and reapplication. Conversely, a $1,200 polyurea job amortized over 12 years costs $100 annually while providing superior protection. Calculate cost-per-year-of-service rather than upfront expense. Factor in your time value for DIY projects—what takes a professional three hours might consume your entire weekend. Also consider the cost of trailer downtime; a failure during hauling season creates expensive delays.
Hidden Costs of Cheap Undercoatings
Budget undercoatings often contain high levels of solvents and fillers that shrink dramatically as they cure, leaving a thin, porous film. They may require three coats to achieve adequate thickness, tripling material costs and labor time. Some contain clay fillers that absorb moisture, accelerating rust beneath the coating. The real hidden cost emerges during removal—a cheap, failed undercoating often requires days of scraping, chemical stripping, or media blasting before reapplication, easily exceeding the cost of doing it right the first time.
Environmental Factors and Climate-Specific Choices
Cold Weather and Road Salt Regions
In salt-belt states, undercoating must withstand constant chemical assault and freeze-thaw cycling. Products with high solids content and low permeability are essential. Asphalt-based coatings perform well here due to their hardness and salt resistance, but must be applied during warm months to ensure proper curing. Consider supplemental cavity wax injection for frame rails and enclosed spaces where salt spray accumulates but washing can’t reach.
Coastal Areas and Salt Air Exposure
Salt air corrosion differs from road salt—it’s constant, not seasonal, and attacks every exposed surface, not just the undercarriage. In marine environments, prioritize coatings with exceptional adhesion and resistance to hydrolysis (chemical breakdown by water). Polyurea systems excel here, as do lanolin-based products that actively displace saltwater from metal. Avoid products with water-soluble components that wash out over time. Annual inspection becomes critical, as even pinhole failures allow rapid corrosion in salt-laden air.
High-Humidity and Rain-Heavy Climates
Constant moisture creates ideal conditions for rust, especially when humidity exceeds 80%. In these regions, breathability becomes a paradoxical concern—you want a coating that blocks liquid water but allows trapped moisture to escape. Modern rubberized formulations achieve this through microporous structures that permit vapor transmission while blocking liquid. Wax-based products also perform well by actively displacing water. The key is avoiding completely impermeable coatings over poorly prepared surfaces, as this traps pre-existing moisture and accelerates corrosion.
Maintenance and Reapplication Schedules
Signs Your Undercoating Needs Attention
Visual inspection reveals most undercoating failures before they become critical. Look for cracking, especially at frame bends and weld joints where flex occurs. Blistering indicates trapped moisture or inadequate prep—the coating is delaminating. Chalking or powdery residue on the surface shows UV degradation (on visible overspray) or chemical breakdown. Soft, tacky areas suggest incomplete curing or chemical contamination. Use a screwdriver to gently probe suspicious areas; soft or crumbly undercoating needs immediate attention. Check inside frame rails with a borescope camera annually after year three.
How Often Should You Reapply?
Reapplication intervals vary dramatically by product and use. Penetrating oils need annual application, while quality rubberized coatings typically last 3-5 years. Polyurea systems can exceed 10 years but should be inspected every two years. Heavy commercial use, frequent submersion, or harsh chemical exposure halves these intervals. The calendar is less important than condition—develop a baseline inspection schedule and reapply when the coating shows wear, not when the manufacturer suggests. Many trailer owners develop a rotating schedule, touching up high-wear areas annually while doing complete recoats every 3-4 years.
Common Application Mistakes to Avoid
Inadequate Surface Prep Pitfalls
The most frequent DIY error is insufficient cleaning. Pressure washing alone doesn’t remove embedded rust scale or manufacturing oils. Skipping the degreasing step leaves a hydrophobic layer that prevents adhesion. Another critical mistake is applying coating over active rust without conversion treatment—the coating seals in moisture and accelerates corrosion. Always achieve a uniform dull metal finish before applying any product. For previously coated trailers, complete removal of old, failing material is mandatory; spot repairs over delaminated areas guarantee future failure.
Weather-Related Application Errors
Applying undercoating when temperatures are too low prevents proper curing and adhesion. Most products specify minimum ambient and surface temperatures of 50-60°F for 24 hours. High humidity during application can cause solvent pop—trapped moisture creating bubbles as the coating cures. Applying before rain is forecast invites wash-off or dilution. Wind carries overspray onto brake components and painted surfaces. Ideal conditions are calm, dry days with moderate temperatures and low humidity, allowing 24-48 hours of cure time before exposure to moisture or road use.
Legal and Warranty Implications
How Undercoating Affects Manufacturer Warranties
Trailer manufacturers increasingly specify warranty language regarding aftermarket rust protection. Some void frame warranties if undercoating is applied before documented factory corrosion begins, arguing that coatings trap factory-applied rust inhibitors or hide defects. Others require professional application to maintain coverage. Always review your warranty terms before undercoating a new trailer. For used trailers, documentation of the undercoating application date and product type can support insurance claims if corrosion-related failures occur.
Environmental Regulations to Consider
Volatile Organic Compound (VOC) regulations restrict certain solvent-based undercoatings in some states. California’s SCAQMD rules limit VOC content to 250 grams per liter for many coating categories. Water-based formulas comply everywhere but may sacrifice performance in extreme conditions. Professional shops must capture overspray and properly dispose of waste material—DIYers should follow similar practices. Never apply undercoating near storm drains or waterways, and check local regulations regarding pressure washing runoff containing heavy metals from rust scale.
The Role of Electronic Rust Inhibitors
Do They Work Alongside Undercoatings?
Electronic rust inhibitors claim to use impressed current to prevent corrosion, but peer-reviewed studies show mixed results in automotive applications. For trailers, which lack the continuous electrical ground of tow vehicles, these systems face additional challenges. They may provide supplemental protection for enclosed, continuously powered trailer compartments but should never replace physical barrier coatings. If you choose to install one, view it as an adjunct to, not a substitute for, quality undercoating. The most effective combination uses undercoating for external protection and cavity wax for internal spaces, with electronic systems offering minimal additional benefit.
Inspecting Your Trailer Before Undercoating
What to Look for: Existing Rust, Damage, etc.
A thorough pre-coating inspection prevents sealing in problems. Check frame rails for bending or cracking that indicates structural issues needing repair before coating. Probe weld joints with a pick—rust often starts in the heat-affected zone. Inspect crossmembers for impact damage that creates stress risers. Look for previous repairs using dissimilar metals, which accelerate galvanic corrosion. Document existing rust with photos; this establishes a baseline for future comparison. Any rust scale deeper than surface flash rusting requires mechanical removal or conversion treatment. Pay special attention to areas where moisture collects: inside frame rails, behind spring hangers, and around mounting brackets.
Specialty Considerations for Different Trailer Types
Boat Trailers
Boat trailers face unique challenges: constant submersion, dissimilar metal contact (aluminum hulls on steel bunks), and saltwater exposure. Prioritize products specifically formulated for marine use, with proven resistance to hydrolysis. Focus application on the lower 18 inches of the frame and all running gear. Cavity wax injection into frame rails is critical, as water expelled during launch enters these spaces and cannot drain. Consider sacrificial anodes for additional protection, especially on steel trailers used exclusively in saltwater.
Utility and Cargo Trailers
Utility trailers need abrasion resistance above all, as they regularly traverse construction sites and gravel roads. Asphalt-based or thick rubberized coatings perform best. For enclosed cargo trailers, also consider interior floor undercoating, as moisture penetrates from the top down. Pay special attention to door thresholds and ramp hinges, which see constant flexing and moisture exposure. The underside of wooden decks needs protection too—use a coating compatible with pressure-treated lumber to prevent chemical reactions.
Livestock Trailers
Animal waste creates ammonia vapors that accelerate corrosion, while pressure washing for sanitation drives water into every crevice. Undercoatings for livestock trailers must resist chemical attack from urine and cleaning agents. Polyurea systems excel here due to their chemical inertness. Focus on complete coverage inside frame rails and behind aluminum or rubber matting. Ensure coatings are non-toxic and fully cured before animal exposure—some products release VOCs for weeks after application.
Seasonal Timing for Application
Best Times of Year to Undercoat
Spring and early fall offer optimal conditions in most climates—moderate temperatures, low humidity, and minimal precipitation. Spring application cleans away winter salt accumulation and protects through the wet summer months. Fall application shields against upcoming winter road chemicals. Avoid summer’s high heat, which causes solvents to flash off too quickly, creating porous films. Winter application is impossible in freezing climates and marginal even in heated garages due to metal condensation issues. Schedule your project during a forecasted dry spell, allowing 48-72 hours of cure time before the trailer faces moisture or road debris.
Professional Installation: What to Ask Your Shop
Questions About Their Process
Before committing to professional application, ask detailed questions. What specific product do they use, and can they provide technical data sheets? Do they warranty their work, and what does it cover? How do they prepare surfaces—do they media blast or just pressure wash? What’s their masking protocol for brake components and suspension parts? Can they inject cavity wax into frame rails? Request photos of previous work, especially on trailers similar to yours. Ask about cure time and when you can safely use the trailer. A reputable shop will welcome these questions and provide clear, technical answers rather than vague assurances.
Long-Term Care and Inspection Routine
Creating a Maintenance Schedule
Develop a written maintenance schedule based on your trailer’s use and environment. At minimum, perform a visual undercarriage inspection every spring and fall, looking for coating damage or rust breakthrough. After each winter season in salt regions, pressure wash the undercarriage to remove accumulated salt deposits. Touch up any chips or cracks immediately with compatible product—don’t wait for widespread failure. Document each inspection with dated photos. For high-value trailers, consider professional inspection every three years, where technicians use ultrasonic thickness gauges to check for hidden rust beneath intact coating. This proactive approach extends undercoating life and catches problems before they become expensive repairs.
Frequently Asked Questions
How long does trailer undercoating typically last?
Lifespan varies from 1 year for basic penetrating oils to 10+ years for premium polyurea systems. Most quality rubberized or asphalt-based coatings provide 3-5 years of effective protection under normal use. Factors like climate, frequency of use, exposure to road salt, and application quality significantly impact durability. The key is regular inspection and touch-ups rather than relying on manufacturer timelines.
Can I apply undercoating over existing rust?
Light surface rust can be treated with phosphoric acid-based rust converters before coating, but heavy scale must be removed mechanically. Never apply undercoating over loose, flaking rust—it seals in moisture and accelerates corrosion. The coating will bond to the rust, not the metal, and delaminate as the rust expands. Proper prep is non-negotiable for lasting protection.
Is professional application worth the extra cost for a utility trailer?
For trailers valued under $2,000, DIY application often makes financial sense if you’re meticulous about prep. However, professional application becomes cost-effective when you factor in your time value and the superior equipment professionals use. For trailers over $5,000 or those used commercially, professional application with warranty coverage typically pays for itself through extended protection and documented maintenance history.
What’s the difference between undercoating and bedliner material?
While both are protective coatings, bedliners prioritize abrasion resistance and texture for cargo grip, often using harder, less flexible formulations. Trailer undercoatings emphasize flexibility, moisture barrier properties, and creep into seams. Some modern polyurea products serve both purposes, but traditional bedliner materials may crack on flexing trailer frames. Use products specifically formulated for undercarriage applications.
How much does it cost to undercoat a trailer?
DIY materials range from $50 for aerosol cans covering a small utility trailer to $300 for professional-grade rubberized coating on a 20-foot enclosed trailer. Professional application typically costs $400-$800 depending on trailer size and coating type. Polyurea systems can exceed $1,200 but last three times longer than conventional options. Factor in 4-8 hours of labor for DIY prep and application.
Will undercoating affect my trailer’s brakes?
Properly applied undercoating won’t affect brakes if masking is done correctly. The coating must never contact brake pads, rotors, drums, or friction surfaces. It should also avoid ABS sensors and wiring. Professional shops use specialized masking techniques. If DIYing, use heavy-duty aluminum foil and tape to protect these components thoroughly. Overspray on brake parts can cause contamination and reduce stopping power.
Can I undercoat a trailer in winter?
Only if you have a heated, well-ventilated space maintaining 60-70°F for 48+ hours. Cold metal causes condensation, preventing adhesion. Most products won’t cure below 50°F. Winter road salt makes spring the ideal time—clean off winter accumulation and protect before the next season. If you must coat in cold weather, consider professional shops with climate-controlled booths.
How do I remove old, failing undercoating?
Mechanical removal works best: pressure washing at 4,000 PSI, wire wheels on angle grinders, or media blasting for severe cases. Chemical strippers exist but are messy and environmentally problematic. Heat guns soften some coatings for scraping but release toxic fumes. Complete removal is essential before reapplication; new coating over failed material guarantees future failure. Budget 6-10 hours for thorough removal on a 16-foot trailer.
Does undercoating add significant weight?
Yes, but less than you might think. A typical rubberized undercoating adds 8-12 pounds to a 20-foot tandem axle trailer. Asphalt-based products add 12-18 pounds. Polyurea coatings are surprisingly light at 4-6 pounds due to their thin application. For most trailers, the weight penalty is negligible compared to the protection benefit. Only ultra-light racing trailers should consider weight a major factor.
Should I undercoat a brand new trailer?
Yes, but timing matters. New trailers often ship with light oil-based rust inhibitors that should be removed before applying permanent undercoating. Wait 3-6 months for initial factory coatings to fully cure and for any manufacturing moisture to dissipate. Inspect for defects first—undercoating can void warranty coverage if applied over factory defects the dealer should address. Document the trailer’s condition with photos before coating. Early protection is most effective, but proper prep remains essential.