Foggy, yellowed headlights aren’t just an eyesore—they’re a serious safety hazard that reduces nighttime visibility by up to 80%. While replacing headlight assemblies can cost anywhere from $200 to $2,000 per pair, a quality headlight restoration kit with UV coating offers a compelling alternative that restores clarity for a fraction of the price. But not all kits deliver on their promises, and understanding the critical role of UV protection separates temporary cosmetic fixes from lasting professional results.
The headlight restoration market has exploded with options ranging from $10 quick-fix wipes to $80 professional-grade systems. The difference isn’t just marketing—it’s in the chemistry of the polishing compounds, the precision of the sanding abrasives, and most importantly, the durability of the UV-blocking sealant that prevents re-oxidation. This guide cuts through the noise to help you identify what truly matters when selecting a restoration kit that will keep your headlights crystal-clear for years, not months.
Top 10 Headlight Restoration Kits
Detailed Product Reviews
1. CERAKOTE® Ceramic Headlight Restoration Kit – Guaranteed To Last As Long As You Own Your Vehicle – Brings Headlights Back to Like New Condition - No Power Tools Required - 10 Wipe Kit

Overview: The CERAKOTE Ceramic Headlight Restoration Kit positions itself as a premium, permanent solution for cloudy headlights. This kit employs proprietary ceramic coating technology that chemically bonds to plastic lenses, offering a three-step wipe-based process that requires no power tools. Designed for DIYers seeking longevity, it promises to restore optical clarity while providing lifetime UV protection in approximately 30 minutes.
What Makes It Stand Out: The lifetime guarantee is the defining feature—this isn’t a temporary polish but a durable ceramic barrier engineered to last your vehicle’s entire ownership period. The wipe-only application system eliminates risks associated with sanding tools or masking tape that could damage paint. The kit’s chemical bonding process creates a hydrophobic, UV-resistant layer that actually strengthens the headlight surface rather than simply coating it.
Value for Money: At $17.95, this mid-priced kit delivers exceptional long-term value. While competitors require annual reapplication ($15-25 yearly), Cerakote’s permanent solution saves $75-200 over a typical 5-10 year ownership period. The comprehensive 10-wipe system includes oxidation removers and ceramic coatings, eliminating hidden costs. Compared to professional headlight replacement ($200-400), it offers 95% cost savings.
Strengths and Weaknesses: Pros include the permanent ceramic protection, foolproof wipe application, zero risk to paintwork, and genuine UV-blocking technology. The three-step process is straightforward for moderately oxidized lights. However, the wipe system may struggle with severely pitted or deeply yellowed headlights that require aggressive mechanical sanding. Application demands careful technique to prevent streaking, and results depend heavily on following time-sensitive steps precisely.
Bottom Line: For vehicle owners prioritizing convenience and permanent results, Cerakote delivers unmatched longevity. It’s ideal for lightly to moderately oxidized headlights where a one-time, risk-free solution outweighs the need for heavy-duty restoration.
2. 3M Ultra Headlight Restoration Kit, Contains Masking Tape, Light Sanding Discs, Wax Protectant and More, Use on Plastic Lenses Headlights, Taillights and More, Easy Heavy-Duty Restoration (39195)

Overview: The 3M Ultra Headlight Restoration Kit leverages industrial-grade abrasive technology for professional-quality results. This comprehensive kit includes progressive sanding discs (500, 800, and 3000 grit), masking tape, wax protectant, and a disc pad holder. It accommodates both manual application and drill-assisted methods, making it versatile for tackling severe oxidation across multiple plastic lenses including headlights, taillights, and fog lights.
What Makes It Stand Out: 3M’s proprietary multi-stage abrasive system removes yellowing systematically without scratching the plastic substrate. The inclusion of masking tape and a dedicated pad holder demonstrates professional-grade thinking, protecting paint while ensuring even pressure distribution. The Trizact 3000-grit refining disc uses microreplication technology for a factory-smooth finish that rivals professional services.
Value for Money: Priced at $14.50, this kit offers outstanding value for challenging restoration projects. The multi-stage approach handles severe damage that cheaper kits cannot, potentially saving $100-150 versus professional detailing. One kit can restore 2-3 vehicles, reducing per-use cost to under $5. The 3M brand ensures consistent quality and reliable results across varying oxidation levels.
Strengths and Weaknesses: Strengths include the progressive sanding system, drill compatibility for efficiency, comprehensive component selection, and ability to restore heavily damaged lenses. The masking tape prevents paint damage effectively. Weaknesses include requiring more skill and time (45-60 minutes) than wipe-only systems. Drill use, while optional, is practically necessary for severe cases. Improper technique can create uneven surfaces, and the process generates plastic dust requiring cleanup.
Bottom Line: Perfect for enthusiasts and those with severely oxidized headlights, the 3M Ultra kit delivers superior results where simpler methods fail. It’s the best choice for thorough, professional-grade restoration when you have the time and patience for proper technique.
3. Sylvania Headlight Restoration Kit - Long-Lasting Headlight Repair Kit for Restoring to Like-New Condition - Surface Activator, Exclusive UV Coating, Clarifying Compound & More - No Tools Required

Overview: Sylvania’s Headlight Restoration Kit combines 100+ years of lighting expertise with advanced chemical restoration technology. This all-in-one system treats two headlight lenses completely using a surface activator, clarifying compound, premium sandpaper, and an exclusive UV-blocking clear coat. The tool-free design emphasizes optical performance improvement alongside cosmetic restoration, targeting drivers concerned about nighttime visibility.
What Makes It Stand Out: Unlike generic kits, Sylvania’s formulation specifically targets light transmission and beam pattern accuracy. The surface activator chemically prepares the plastic for maximum coating adhesion, while the clarifying compound removes oxidation at a molecular level. The UV clear coat is engineered for optical clarity rather than just surface protection, ensuring restored headlights perform like new illumination devices.
Value for Money: At $22.75, this premium-priced kit justifies its cost through specialized engineering and brand heritage. Treating two headlights completely, it costs $11.38 per lens—still 90% less than replacement. The focus on visibility improvement provides safety value beyond aesthetics. For vehicles with advanced halogen or LED systems, maintaining optical precision is worth the premium over basic restoration kits.
Strengths and Weaknesses: Pros include Sylvania’s lighting expertise, comprehensive chemical activation system, exclusive UV coating for optics, and emphasis on safety improvement. The no-tool design is beginner-friendly. Cons include the highest price point and potentially longer application time due to chemical curing stages. While effective for moderate to heavy oxidation, it may not match the cutting speed of power tool-assisted sanding for extreme cases. Annual reapplication may be needed.
Bottom Line: Best for safety-conscious drivers and vehicles with sophisticated lighting systems, the Sylvania kit is worth the premium. It excels when optical performance is as important as appearance, making it ideal for family vehicles and daily drivers.
4. 3M Auto Restore and Protect Headlight Restoration Kit, Use On Plastic Lenses, Headlights, Taillight, Fog Lights and More, Includes Sanding Discs, Headlight Clear Coat Wipes, Foam Pad and Glove (39194)

Overview: The 3M Auto Restore and Protect Kit delivers professional-grade technology at an entry-level price. This streamlined system includes Trizact refining discs (1000 and 3000 grit), clear coat wipes, a foam pad, and a protective glove. Designed for plastic lenses, it simplifies the restoration process while maintaining 3M’s reputation for quality abrasives that remove yellowing without damaging underlying surfaces.
What Makes It Stand Out: This kit makes 3M’s patented Trizact technology accessible to budget-conscious consumers. The microreplication abrasive structure ensures consistent cutting and finishing with fewer steps than traditional sandpaper. The inclusion of a disposable glove and precisely sized foam pad shows attention to user experience often missing in budget kits. The dual-grit system balances effectiveness with simplicity.
Value for Money: At $9.83, this represents exceptional value—nearly 50% cheaper than comparable kits while retaining premium abrasive technology. It’s ideal for first-time users hesitant to invest heavily or those with lightly oxidized headlights. The kit can restore 1-2 vehicles, bringing per-use cost under $5. Compared to $75+ professional services, it delivers 85% savings with minimal equipment requirements.
Strengths and Weaknesses: Strengths include the unbeatable price point, quality Trizact discs, trusted 3M performance, and simplified two-stage sanding process. The kit effectively handles typical fogging and yellowing. Weaknesses include fewer sanding stages than the Ultra version, limiting effectiveness on severely damaged lenses. Supplies are modest, potentially insufficient for multiple vehicles. Optimal results require a drill (not included), and the lack of masking tape increases paint damage risk if not careful.
Bottom Line: The best value proposition for casual DIYers and budget-conscious shoppers. It provides authentic 3M quality without premium pricing, making it perfect for first-time restoration projects and moderately oxidized headlights where simplicity and cost matter most.
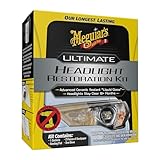
5. Meguiar’s Two Step Headlight Restoration Kit, Headlight Cleaner Restores Clear Car Plastic and Protects from Re-Oxidation, Includes Headlight Coating and Cleaning Solution - 4 Count (1 Pack)

Overview: Meguiar’s Two Step Headlight Restoration Kit revolutionizes the process by eliminating traditional sanding entirely. This kit uses a chemical cleaning solution with abrasive pads followed by a protective coating, completing restoration in minimal time. Designed for convenience, it promises year-long protection against re-oxidation while improving nighttime visibility through enhanced clarity.
What Makes It Stand Out: The two-step chemical approach is the fastest, most beginner-friendly method available. By removing oxidation chemically rather than mechanically, it eliminates sanding errors, dust, and paint damage risks. The included abrasive pads provide just enough mechanical action to assist the chemical cleaner without requiring power tools. The coating’s 12-month protection guarantee is backed by Meguiar’s reputation in automotive care.
Value for Money: At $21.93, this premium kit justifies its price through time savings and accessibility. The 20-minute process saves hours compared to multi-stage sanding kits. For those without drills or sanding experience, it prevents costly mistakes that could require headlight replacement. The per-year cost of $21.93 is reasonable compared to annual professional detailing services at $50-75.
Strengths and Weaknesses: Pros include the fastest application time, zero risk to paint, no power tools required, foolproof operation, and effective chemical cleaning system. It’s ideal for beginners and busy owners. Cons include the highest price for a two-step system, inability to handle severely pitted or deeply yellowed headlights, and mandatory annual reapplication. The chemical approach may not provide the same glass-like finish as progressive wet-sanding.
Bottom Line: Perfect for time-pressed car owners seeking maximum convenience with professional-grade results. Meguiar’s kit excels for maintenance restoration and situations where avoiding any sanding is paramount, delivering impressive clarity with minimal effort and skill required.
6. Meguiar’s Ultimate Headlight Restoration Kit - The Perfect Headlight Repair Kit to Remove Yellowing and Cloudiness from Headlights - Easy to Use and Seals Headlights with 18 Plus Months of Protection
Overview: The Meguiar’s Ultimate Headlight Restoration Kit delivers professional-grade clarity restoration for $22.56, targeting mild to severe headlight oxidation. This comprehensive manual kit uses a two-stage wet sanding process followed by a protective sealant, promising over 18 months of UV protection without requiring power tools.
What Makes It Stand Out: The standout feature is Meguiar’s proprietary UV-blocking sealant that chemically bonds to create a durable, crystal-clear barrier. Unlike basic polishing kits, this includes both 1000-grit and 3000-grit sandpaper for progressive defect removal, plus pre-saturated sealing wipes that eliminate guesswork. The brand’s automotive expertise ensures compatibility with all clear plastic lenses and delivers results that enhance nighttime visibility significantly.
Value for Money: At $22.56, this kit costs 80% less than professional restoration services while delivering comparable longevity. The 18-month protection guarantee means you won’t be reapplying every few months like cheaper sprays. When amortized over its service life, it’s one of the most cost-effective solutions for severe oxidation, making it a smart investment for older vehicles.
Strengths and Weaknesses: Strengths include proven brand reliability, long-lasting UV protection, and complete material inclusion. The manual sanding process ensures control but requires significant elbow grease—expect 30-45 minutes per headlight. It’s overkill for lightly fogged lenses and the sealant’s effectiveness diminishes after the promised period, requiring eventual reapplication.
Bottom Line: This is the premium choice for drivers seeking durable, professional results. If your headlights suffer from heavy yellowing and you want a long-term fix without paying a shop, Meguiar’s delivers exceptional value and performance.
7. WAZNFYV Headlight Restoration Kit, Automotive Headlight Cleaner Oxidized and Yellowed Head Light Restoring Kit for All Vehicle Types (400, Grams)

Overview: The WAZNFYV Headlight Restoration Kit offers a simplified approach to headlight renewal at $16.99. This spray-based system targets oxidation and yellowing through a straightforward three-step process: spray, wipe, and dry. Marketed as a universal solution for all vehicle types, it emphasizes convenience over intensive labor, making it appealing to casual car owners.
What Makes It Stand Out: Its primary differentiator is the elimination of sanding entirely. The formula claims to dissolve oxidation chemically while depositing a protective layer simultaneously. This makes it accessible to users intimidated by abrasive methods. The 400-gram quantity provides ample product for multiple applications across several vehicles, adding to its practicality.
Value for Money: At $16.99, it sits in the budget-friendly category, costing less than a tank of gas. For drivers with lightly to moderately oxidized headlights, it offers a quick cosmetic improvement without equipment investment. However, the lack of abrasive mechanical removal means heavily damaged lenses may not achieve full clarity, potentially requiring professional intervention later.
Strengths and Weaknesses: Strengths include foolproof application, rapid results (under 15 minutes), and universal compatibility. It’s ideal for maintenance rather than restoration. Weaknesses center on durability concerns—the protective layer likely lasts 3-6 months versus 18+ months for sanding kits. It cannot correct deep pitting or severe UV damage that requires physical material removal, limiting its restoration capability.
Bottom Line: Perfect for DIY beginners seeking a fast, affordable refresh. Choose this for mildly fogged headlights or as a periodic maintenance product, but set realistic expectations for severely degraded lenses.
8. 3M Headlight Lens Restoration System, 39008, 1 Kit

Overview: The 3M Headlight Lens Restoration System ($22.98) represents the power-tool approach to headlight renewal. This kit leverages drill-activated sanding discs to aggressively remove severe yellowing and oxidation, targeting users comfortable with power tools who demand professional-grade results in less time than manual methods.
What Makes It Stand Out: The system’s mechanical advantage is its key differentiator. It includes 500-grit and 800-grit sanding discs plus a Trizact refining disc that creates a uniform surface finish. The drill-powered operation cuts restoration time by 60% compared to manual sanding, making it efficient for heavily degraded headlights that would take hours by hand.
Value for Money: Priced similarly to premium manual kits, the 3M system offers superior speed for severe cases. However, the hidden cost is drill ownership and the learning curve required to avoid damaging lenses. For those already equipped, it’s exceptional value. For novices, the risk of uneven sanding or lens overheating may lead to costly replacements, offsetting initial savings.
Strengths and Weaknesses: Strengths include rapid material removal, professional results on heavily oxidized lenses, and the trusted 3M engineering. Weaknesses involve requiring a variable-speed drill, generating significant dust, and demanding careful technique to prevent lens distortion. The single-ounce rubbing compound may be insufficient for larger vehicles or multiple restorations.
Bottom Line: Ideal for experienced DIYers tackling severely neglected headlights. If you own a drill and value speed over simplicity, this delivers unmatched efficiency. Beginners should practice on scrap plastic first to master the technique.
9. TIEDXIOY Car Headlight Restoration Polishing Kits Headlamp Repair Kits Car Light Polisher Cleaning Kits Ceramic Coating Spray Shiny Stuff Headlight Cleaner-6.3Fl.Oz

Overview: The TIEDXIOY Headlight Restoration Kit ($11.88) offers the simplest, most affordable entry into headlight improvement. This spray-only solution eliminates sanding entirely, targeting oxidation through a chemical formula enhanced with ceramic coating technology. The 6.3-ounce bottle provides multiple applications for budget-conscious users seeking quick cosmetic fixes.
What Makes It Stand Out: Its absolute simplicity—spray and wipe in minutes without any tools or abrasives—makes it uniquely accessible to anyone. The ceramic-infused formula claims to provide both cleaning and protection in one step, a feature rarely seen at this price point. The generous volume allows for periodic reapplication across several vehicles, maximizing utility.
Value for Money: At under $12, it’s the cheapest viable option, costing less than a car wash. For vehicles with minimal hazing, it delivers visible improvement for pennies. However, it’s a surface treatment that cannot physically remove deep UV damage, making it a temporary cosmetic fix rather than true restoration that addresses underlying material degradation.
Strengths and Weaknesses: Strengths include unbeatable ease-of-use, safety for all lens types, and suitability for maintenance. The ceramic additive offers marginal protection against future oxidation. Weaknesses are significant: no mechanical removal means results last 2-4 months, it cannot fix severe yellowing, and multiple coats may create uneven buildup that further diffuses light.
Bottom Line: A decent budget option for maintaining already-decent headlights or improving appearance before selling a vehicle. For long-term clarity on heavily oxidized lenses, invest in a sanding-based kit instead.
10. XPERTCHEMY Headlight Restoration Kit-Headlight Cleaner Removing The Heavy-Duty Yellowing, Clouding and Stains, Even Buffs Out Unsightly Hairline Scratches,No Power Tools Needed

Overview: The XPERTCHEMY Headlight Restoration Kit ($14.99) bridges the gap between simple sprays and professional sanding kits. This hybrid solution combines manual sanding discs (P2000-P3000 grit) with ceramic UV protection wipes, offering a comprehensive approach without requiring power tools. It targets heavy-duty yellowing, clouding, and even minor scratches for complete lens renewal.
What Makes It Stand Out: The inclusion of genuine ceramic coating technology in a sub-$15 kit is remarkable. The two-stage sanding process removes substantial oxidation while the chemically-bonding ceramic protector cures to provide up to 18 months of UV resistance. The kit’s completeness—featuring masking tape, gloves, and detailed instructions—demonstrates thoughtful design for user success.
Value for Money: This kit delivers premium features at a mid-tier price. The ceramic protection matches Meguiar’s longevity claims while costing 33% less. For DIYers wanting durable results without drill investment, it’s arguably the best value proposition. The eight oxidation remover wipes provide generous material for thorough treatment of both headlights with product to spare.
Strengths and Weaknesses: Strengths include the ceramic UV protector’s durability, comprehensive accessory package, and effective two-stage sanding that addresses real damage. The manual process ensures safety but demands physical effort and patience. As a newer brand, long-term track record is limited compared to established competitors like 3M or Meguiar’s.
Bottom Line: An excellent value for those wanting long-lasting protection without power tools. If you’re willing to put in manual labor for professional-grade durability at a budget price, XPERTCHEMY outperforms what its cost suggests and deserves serious consideration.
Why Headlight Restoration Matters More Than You Think
Beyond the obvious aesthetic improvement, restoring your headlights directly impacts your safety on the road. Oxidized lenses scatter light rather than projecting it, creating glare for oncoming drivers while leaving you with dangerously dim illumination. Most drivers don’t realize their headlights have degraded until they’re struggling to see during a rainy night drive. The oxidation process is gradual and UV-driven, meaning it will only worsen without proper intervention. A comprehensive restoration doesn’t just buff the surface—it rebuilds the lens’s protective layers.
The Science Behind Foggy Headlights
Modern headlight lenses are made from polycarbonate plastic, which is impact-resistant but porous and vulnerable to UV radiation. Manufacturers apply a factory UV hardcoat, but after years of sun exposure, this coating breaks down. The plastic beneath begins to oxidize, creating microscopic cracks and a cloudy appearance. Road debris, acid rain, and harsh chemicals accelerate this degradation. Simply polishing the surface removes the oxidized layer but leaves the raw polycarbonate exposed—making UV coating not just beneficial, but absolutely essential for preventing rapid re-yellowing.
What Is UV Coating and Why It’s Non-Negotiable
UV coating is a clear, protective sealant that acts as sunscreen for your headlights. It contains UV inhibitors that absorb or reflect harmful radiation before it can attack the plastic substrate. The best headlight restoration kits include a dedicated UV-blocking clear coat that chemically bonds to the sanded surface. Unlike generic car wax or sealants that wash away within weeks, proper headlight UV coatings cure into a hard, optically clear layer that can last 1-3 years depending on environmental exposure. Skipping this step or using an inferior product means your restoration work will literally evaporate within 30-90 days.
Key Components of a Professional-Grade Restoration Kit
A complete system includes more than just polish and a cloth. Look for kits containing multiple sanding discs (typically 400, 800, 1000, and 2000 grit), a foam polishing pad, a cutting compound, a finishing polish, and a UV sealant with applicator. Premium options also include masking tape, microfiber towels, and a backing plate for drill attachment. The absence of any component signals a compromised system that forces you to source materials separately, often at higher cost and with mismatched chemistry.
Sanding Grit Progression: The Make-or-Break Detail
The single most critical factor in achieving optical clarity is proper sanding progression. Aggressive 400-grit paper removes deep oxidation but leaves heavy scratches. Each subsequent grit—600, 800, 1000, 1500, 2000, and sometimes 3000—removes the previous grit’s scratches until the surface is microscopically smooth. Kits that skip grits or only include two sanding stages force you to either spend hours sanding ineffectively or stop prematurely, leaving visible swirl marks that become glaringly obvious when the coating is applied. Professional-grade systems include 5-7 distinct grits for a reason.
Understanding Different Types of UV Coatings
UV sealants come in three primary formulations: wipe-on liquid coatings, spray aerosols, and wipe-on paste compounds. Wipe-on liquids typically offer the longest protection (1-2 years) and bond most effectively to sanded surfaces. Spray coatings provide more even application but may require multiple coats and careful masking. Paste sealants are easiest to apply but generally last only 6-12 months. The curing mechanism matters too—some require 24-hour air curing while others need direct sunlight to activate cross-linking polymers. Consider your climate and available application time when evaluating options.
Professional vs. DIY: What Kits Can Realistically Achieve
A skilled DIYer with a premium kit can achieve 90% of a professional shop’s results. The key differences are equipment—professionals use pneumatic polishers with variable speed control and paint booth conditions for dust-free coating application. DIY kits rely on household drills and outdoor conditions. However, the chemistry is often identical. Where professionals excel is in assessing lens damage: if the UV degradation has penetrated deeper than 0.2mm, sanding alone won’t suffice. Most kits can handle moderate oxidation but won’t repair physical cracks or internal moisture condensation.
Critical Features to Compare When Shopping
When evaluating kits, examine the abrasive quality—premium kits use aluminum oxide or silicon carbide that cuts efficiently without loading up. Check the compound volume: a 4oz polish bottle services 2-3 restorations, while 1oz packets barely cover one vehicle. Instruction quality varies dramatically; look for kits with video QR codes and detailed troubleshooting guides. Finally, scrutinize UV coating specs: seek products specifying SAE durability testing or ASTM standards rather than vague “long-lasting” claims.
The Hidden Costs: What Many Kits Don’t Include
That $15 kit suddenly becomes $40 when you factor in necessary extras. Most budget kits omit painter’s tape for masking, requiring you to purchase 3M automotive tape separately. You’ll need lint-free microfiber towels—regular cotton towels leave fibers that ruin the coating. Nitrile gloves protect your skin from harsh compounds but are rarely included. Perhaps most importantly, many kits assume you own a power drill; manual sanding versions require significant elbow grease. Factor in spray bottle for wet sanding, plastic sheeting for overspray protection, and possibly a headlight polishing ball attachment.
Step-by-Step Application Process Overview
The restoration follows a precise sequence: First, thoroughly clean and mask surrounding paint. Begin wet sanding with the coarsest grit, using consistent cross-hatch patterns and keeping the surface lubricated. Progress through each grit, spending 3-5 minutes per lens per grit. After final sanding, dry completely and apply polishing compound with a foam pad at low speed. The polish stage removes micro-scratches and restores optical clarity. Finally, apply UV coating in thin, overlapping passes, ensuring complete coverage without drips. The coating requires 12-24 hours of cure time without moisture or contamination—plan your garage space accordingly.
Common Mistakes That Ruin Restorations
Rushing the sanding process is the number one failure point. Each grit must completely remove the previous grit’s scratches; insufficient sanding means haze returns within weeks. Applying UV coating to a damp or contaminated surface causes fisheyes and poor adhesion. Using too much pressure while polishing generates heat that warps the plastic. Perhaps most damaging is applying coating in direct sunlight—the rapid cure traps bubbles and creates an orange-peel texture. Always work in shade with temperatures between 60-80°F for optimal results.
How to Evaluate Durability Claims
Manufacturers’ longevity promises range from “1 year” to “lifetime protection.” Understand that these claims are based on ideal conditions: garaged vehicles in moderate climates. Real-world durability depends on sun exposure, automatic car washes (which degrade coatings), and geographic UV index. A realistic expectation is 12-18 months for spray coatings and 24-36 months for premium wipe-on formulas in daily-driver conditions. Look for kits offering replacement UV coating bottles rather than one-time-use packets, as reapplication every 2 years maintains optimal protection.
Maintenance Tips to Maximize Your Restoration
Post-restoration care dramatically extends results. Wash headlights with pH-neutral car shampoo only—degreasers strip UV coatings. Apply a spray sealant like a silica-based detailer every 3 months to reinforce protection. Park facing away from direct sun when possible, or use a car cover. Avoid waxing headlights; carnauba fills micro-texture and dulls clarity. If you notice water beading disappearing, it’s time for a UV coating touch-up. Some enthusiasts apply a clear paint protection film over the restored lens for ultimate durability, though this adds significant cost.
Environmental Considerations and Safe Disposal
Headlight restoration generates plastic particulate waste and uses chemical compounds with varying VOC levels. Wet sanding captures most particles, preventing airborne microplastic pollution. Dispose of used sanding pads and microfiber towels in sealed bags—never wash them in household laundry, as plastic dust contaminates wastewater. Check local regulations for disposing of solvent-soaked materials; some municipalities require hazardous waste drop-off. Eco-conscious DIYers should seek low-VOC, water-based compounds, though these may require longer cure times. Always wear a respirator during the final coating stage, as isocyanates in professional-grade sealants are respiratory sensitizers.
Frequently Asked Questions
How long does a UV-coated headlight restoration actually last?
With proper application and ideal conditions (garaged parking, regular maintenance), premium wipe-on UV coatings last 2-3 years. Daily drivers exposed to intense sun and automatic car washes typically see 12-18 months of clarity before reapplication is needed. The key is reapplying the UV sealant before yellowing reappears—don’t wait for complete failure.
Can I restore headlights without sanding?
No-sand “wipe-on” products only remove surface grime and provide temporary optical improvement through oils that fill micro-cracks. They don’t remove oxidized plastic and fail within weeks. Proper restoration requires mechanical removal of the damaged layer; sanding is non-negotiable for lasting results. The only exception is extremely mild haze on newer vehicles, where a heavy polish might suffice.
What’s the real difference between $15 and $80 restoration kits?
Price differences reflect abrasive quality, compound volume, and coating chemistry. Budget kits use lower-grade sandpaper that loads up quickly, include minimal polish (often just cerium oxide), and provide acrylic-based sealants that last 3-6 months. Premium kits feature premium abrasives, multi-stage compounds, and automotive-grade UV hardcoats with photoinitiators for 2+ year durability. The cost per year of protection often favors mid-range kits around $30-40.
Do I need a power drill, or can I sand by hand?
Hand sanding is possible but requires 3-5 times more effort and risks uneven pressure. A variable-speed drill (800-1500 RPM) with a foam backing plate ensures consistent results and saves your wrists. If using a drill, keep speed low to avoid melting the plastic. Manual kits are viable for single restorations but become impractical for multiple vehicles or severe oxidation.
How do I know if my headlights are too damaged for a kit?
If deep cracks penetrate through the lens or the interior shows moisture condensation, replacement is necessary. Test severity by sanding a small corner with 400-grit paper—if haze disappears after 10 seconds of wet sanding, the kit will work. If yellowing remains after 30 seconds of aggressive sanding, oxidation has penetrated too deeply. Also, headlights with factory-applied protective films that are peeling require professional stripping first.
Can I apply ceramic coating instead of the included UV sealant?
Automotive ceramic coatings provide excellent gloss and chemical resistance but lack the UV-specific inhibitors headlight plastics need. Most ceramics are designed for clear coat paint, not polycarbonate. While better than nothing, ceramic coatings on headlights typically fail within 6 months as UV penetrates to the plastic beneath. Always use a dedicated headlight UV coating; you can layer ceramic over it after full cure for added protection.
Why do my headlights look hazy immediately after applying the coating?
Haze indicates contamination—either moisture trapped beneath the coating, silicone residue from previous treatments, or application in humid conditions. It can also result from insufficient final polishing, leaving micro-scratches that the coating’s solvent swells and makes visible. The fix is stripping the coating with isopropyl alcohol and re-polishing with a finer grit before reapplication in controlled conditions.
How long must I wait before driving after coating application?
Most UV coatings require 12-24 hours of cure time before exposure to moisture or debris. While the surface may feel dry in 2-4 hours, the coating hasn’t fully cross-linked. Driving too soon exposes headlights to road splash, dust, and temperature fluctuations that compromise adhesion. For best results, apply in the evening and let cure overnight in a garage. Some fast-cure formulas allow 6-hour curing, but check manufacturer specifications.
Will restoration kits work on yellowed fog lights or taillights?
The same oxidation process affects all polycarbonate lenses. Fog lights restore identically to headlights using the same process. Taillights, however, often have interior reflectors that can be damaged by aggressive sanding—use only the finest grits (2000+) and minimal pressure. For colored lenses, test an inconspicuous area first; some dyes are surface-level and may be removed by sanding, altering the lens color.
Can I use a headlight restoration kit on motorcycle windscreens or boat windows?
Yes, but with critical modifications. Motorcycle windscreens are often thinner and more flexible—use minimal pressure and skip coarse grits entirely, starting with 1000-grit. Boat windows may be acrylic rather than polycarbonate; acrylic scratches more easily and requires specialized plastic polish. Always verify the plastic type and test in a corner. Never use power tools on flexible or curved surfaces; hand sanding only.