If you’ve ever spent a Saturday morning meticulously polishing your car’s glass only to find white residue caked in your trim and streaks that won’t quit when the sun hits, you’re not alone. The promise of crystal-clear windows often comes with a hidden price: the dreaded post-polish cleanup that can take longer than the actual job. In the world of car care, where precision meets passion, the difference between a frustrating experience and a satisfying one often boils down to one critical factor—choosing formulations and techniques designed to stay where you put them.
Mess-free glass polishing isn’t just about convenience; it’s about protecting your vehicle’s delicate trim, preserving your sanity, and achieving that professional, streak-free finish that makes your car look like it just rolled off the show floor. Whether you’re prepping for a concours event or simply want unobstructed visibility on your daily commute, understanding what makes certain glass polishes cleaner to work with will transform your detailing routine.
Top 10 Glass Polish
Detailed Product Reviews
1. Griot’s Garage Fine Glass Polish, Car Window, Windshield Polishing Cleaner for Automotive and Home, Removes Stains and Water Spots, 11017, 16 oz

Overview: Griot’s Garage Fine Glass Polish is a versatile 16-ounce liquid formula designed to tackle mild water spots and stains on automotive and household glass surfaces. This dual-purpose cleaner restores clarity to windshields, sunroofs, side windows, shower doors, and patio doors, leaving a streak-free, sparkling finish that makes glass look like new.
What Makes It Stand Out: Unlike single-purpose products, this polish excels in both automotive and home environments. Its standout feature is the ability to extend wiper blade life by maintaining a smooth, clean windshield surface that reduces friction and wear. The gentle yet effective formulation allows for regular use without damaging glass, making it ideal for ongoing maintenance rather than just heavy correction.
Value for Money: At $27.99 ($1.75 per ounce), this polish sits in the mid-range price point. While not the cheapest option, its versatility eliminates the need for separate household and automotive glass cleaners. The 16-ounce bottle provides ample product for multiple applications across various surfaces, offering reasonable value for those seeking a multi-tasking solution.
Strengths and Weaknesses: Strengths include impressive versatility, ease of use with various application methods, wiper life extension benefits, and a gentle formula safe for regular application. The main weakness is that it requires specific polishing pads and potentially a dual-action orbital for optimal results, adding to the initial investment. Additionally, its mild formulation may struggle with deep scratches or heavily etched water spots.
Bottom Line: This is an excellent choice for car owners who want a dual-purpose glass maintenance product that delivers consistent results. It’s perfect for those prioritizing prevention and regular upkeep over heavy restoration.
2. 3D Glass Polish – Cerium Oxide Glass Scratch Remover for Car Windows – Restores Clarity & Removes Wiper Marks, Swirls, Water Spots - 16oz

Overview: The 3D Glass Polish is a professional-grade cerium oxide-based formula engineered to remove stubborn wiper marks, etched water spots, fine scratches, and swirl marks from automotive glass. This 16-ounce bottle delivers pro-level clarity restoration for windshields, windows, and other glass surfaces on cars, trucks, and RVs.
What Makes It Stand Out: This polish’s cerium oxide formulation provides serious cutting power while remaining gentle on glass. Its extended open time gives users maximum workability, allowing for thorough correction without rushing. The product excels as a prep step for ceramic or hydrophobic coatings, creating an impeccably smooth surface that enhances coating bonding and durability.
Value for Money: Priced at $32.99 ($2.06 per ounce), this is a premium product that justifies its cost through professional-grade results. For enthusiasts who want flawless glass without paying for professional services, it offers significant savings. The concentrated formula ensures minimal product waste per application.
Strengths and Weaknesses: Major strengths include exceptional effectiveness on stubborn imperfections, minimal effort required, long workability window, and excellent coating prep capabilities. However, it requires a rotary polisher and felt pad for optimal results, representing additional equipment costs. The higher price point may deter casual users, and improper technique could potentially damage glass.
Bottom Line: Ideal for automotive enthusiasts and professionals seeking showroom-quality glass restoration. If you own a rotary polisher and demand perfection, this polish delivers unmatched results that justify the premium investment.
3. Finisolva 8 Pack Diamond Polishing Paste Kit 80,000 to 4,000 Grit with Different Concentrations of Diamond Powders Lapping Compound for Marble Glass Metal Rock Jewelry Resin Silver Chrome Gemstone
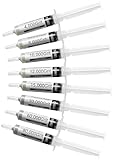
Overview: The Finisolva Diamond Polishing Paste Kit is a comprehensive 8-pack syringe set featuring grits ranging from 4,000 to 80,000, designed for precision polishing across numerous materials. Each 5-gram syringe contains oil-based diamond lapping compound formulated for ultra-fine finishing on glass, metal, gemstones, resin, and more.
What Makes It Stand Out: This kit’s graduated syringe design provides unparalleled precision in application, minimizing waste while allowing exact dosage control. The varying diamond concentrations—optimized for each specific grit—demonstrate thoughtful engineering. With eight distinct grit levels, users can progress from scratch removal to mirror finishing in a single, cohesive system.
Value for Money: At just $7.79 for eight syringes, this kit represents exceptional value, costing less than a dollar per syringe. For jewelers, craftspeople, and DIY enthusiasts working with multiple materials, it’s an unbeatable entry point into professional-grade diamond polishing. The versatility across countless applications maximizes return on investment.
Strengths and Weaknesses: Strengths include incredible affordability, precise syringe dispensing, wide material compatibility, and the comprehensive grit range. The oil-based formula with high-purity diamonds performs reliably under friction. Weaknesses include the small 5-gram quantity per syringe, which may be insufficient for large projects, and the kit may be unnecessarily complex for users only needing basic glass polishing.
Bottom Line: Perfect for hobbyists, jewelers, and craftsmen requiring precision polishing across diverse materials. The value is unmatched, though automotive specialists may prefer dedicated glass-specific products for larger surface areas.
4. Cerium Oxide Glass Polishing Kit - Remove Scratches, Water Spots & Restore Clarity | Windshield Scratch Remover with Polish & Sealant | Complete DIY Kit
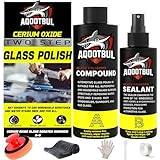
Overview: This complete DIY kit combines professional-grade cerium oxide polish with essential accessories to remove scratches, water spots, and restore optical clarity to automotive and household glass. The all-in-one package includes polish, protective sealant, manual polishing tool, microfiber cloth, gloves, scraper, and protective tape.
What Makes It Stand Out: The comprehensive nature of this kit eliminates guesswork and additional purchases, providing everything needed for glass restoration in one box. The innovative three-step process—Clean, Polish, Seal—simplifies what is often a complex procedure. The included manual polisher makes professional results accessible to those without expensive rotary tools.
Value for Money: At $25.99 for a complete restoration system, this kit offers outstanding value. Competitors often charge similar amounts for just the polish alone. The inclusion of sealant, tools, and accessories makes it particularly cost-effective for beginners who would otherwise need to source components separately.
Strengths and Weaknesses: Strengths include the all-inclusive package, beginner-friendly design, effective cerium oxide formula, and protective sealant that provides six months of hydrophobic protection. The manual tool offers precise control. Weaknesses include potentially more physical effort compared to machine polishing, and the sealant’s longevity may vary based on environmental conditions and application quality.
Bottom Line: An excellent entry point for DIY enthusiasts wanting professional results without investing in power tools. The complete package and straightforward process make it the best choice for first-time glass restoration projects.
5. SONAX PROFILINE GlassPolish (250 ml) - removes slight scratches, blinding and etching from car windows made from glass. Silicone free | Item No. 02731410

Overview: SONAX PROFILINE GlassPolish is a German-engineered, silicone-free formula designed to remove slight scratches, blinding, and etching from automotive glass surfaces. This 250-milliliter bottle represents the brand’s commitment to professional-grade car care products manufactured to exacting European standards.
What Makes It Stand Out: The silicone-free composition ensures compatibility with subsequent coatings and prevents contamination issues that can affect bonding. Manufactured in Germany, it benefits from SONAX’s automotive expertise and quality control. The formula specifically targets the unique contaminants and wear patterns found on European vehicles’ glass surfaces.
Value for Money: At $22.95 ($2.71 per ounce), this polish commands a premium price point, particularly given the smaller 250ml volume. However, for professionals and enthusiasts of European vehicles, the specialized formulation and brand reputation justify the investment. The concentrated nature means a little goes a long way when applied correctly.
Strengths and Weaknesses: Strengths include exceptional quality control, silicone-free formulation, reputable German engineering, and effective removal of light imperfections. The brand’s automotive focus inspires confidence. Weaknesses include the requirement for specific application equipment (felt pad, rotary at 1000 rpm), higher per-ounce cost, and limited quantity that may not suit high-volume users.
Bottom Line: Best suited for professionals and European car enthusiasts who demand OEM-quality results and appreciate German manufacturing precision. The specialized formula justifies the premium for those who value brand reputation and coating compatibility.
6. Invisible Glass 91411 Glass Stripper – Hard Water Spot Remover – Strips Coatings, Waxes, Oils & Road Film – Preps Windshields for Rain Repellent & Ceramic Coating – 4 Fl Oz

Overview: Invisible Glass 91411 is a specialized glass treatment designed to strip contaminants and prepare surfaces for protective coatings. This 4-ounce bottle delivers a powerful formula that removes waxes, silicones, oils, tar, sap, and road film from automotive glass. Made in the USA, it specifically targets hard water spots and mineral deposits, restoring clarity to windshields and windows before applying rain repellents or ceramic coatings.
What Makes It Stand Out: Unlike general glass cleaners, this stripper chemically dissolves bonded contaminants rather than just wiping them away. Its ability to prep glass surfaces ensures that subsequent coatings adhere properly and last longer. The formula effectively eliminates stubborn water spots that regular cleaners can’t touch, though it won’t repair etched glass. The satisfaction guarantee and domestic manufacturing add confidence for professional and DIY users alike.
Value for Money: At $10.99 for 4 ounces ($2.75/fl oz), this specialized prep solution offers solid value. While pricier than basic glass cleaners, its targeted action justifies the cost when preparing for expensive ceramic coatings or rain repellents. Using this ensures you don’t waste money on coatings that fail due to poor surface prep.
Strengths and Weaknesses: Strengths include effective contaminant removal, professional-grade results, USA manufacturing, and a money-back guarantee. It successfully preps surfaces for optimal coating adhesion and tackles stubborn water spots. Weaknesses include the small bottle size for larger vehicles, inability to remove etched-in spots, and the need for manual elbow grease during application.
Bottom Line: Invisible Glass 91411 is an essential prep step before applying glass coatings. For best results on windshields and windows, this stripper ensures long-lasting protection and clarity.
7. Glass Polish 5 inch P500 ProMesh Pre-Polish Abrasive disc for Glass Restoration - 20 Pack

Overview: This 20-pack of 5-inch P500 ProMesh discs provides professional-grade abrasive power for glass restoration projects. Designed for the pre-polishing stage, these silicon carbide discs refine surfaces after initial scratch removal. The hook-and-loop backing ensures quick changes and efficient workflow, making them suitable for both professionals and serious DIY enthusiasts working on automotive or architectural glass.
What Makes It Stand Out: The specialized silicon carbide abrasive delivers uniform cutting action specifically engineered for glass, unlike woodworking sandpaper that can cause uneven results. The P500 grit hits the sweet spot for refining medium scratches before final polishing. The ProMesh design allows debris to escape, preventing clogging and ensuring consistent performance throughout the restoration process.
Value for Money: At $39.95 for 20 discs ($2 per disc), these represent a reasonable investment for professional results. Generic abrasive discs may cost less but risk inconsistent grit or premature wear on glass. For anyone tackling multiple restoration projects, the durability and precision justify the price over cheaper alternatives that could damage glass.
Strengths and Weaknesses: Strengths include high-quality silicon carbide construction, efficient hook-and-loop system, clog-resistant mesh design, and precise grit sizing for glass work. Weaknesses include requiring a compatible polishing tool, being too aggressive for minor blemishes, and the need for subsequent polishing steps with finer compounds.
Bottom Line: These ProMesh discs are indispensable for serious glass restoration. They deliver consistent, professional pre-polishing results that set the foundation for crystal-clear finishes.
8. Glass Polish 1.7oz (50ml) GP-PRO Glass Polishing Compound for Professional Polishing of All Glass Surfaces - 2.3 microns

Overview: The GP-PRO Glass Polishing Compound is a professional-grade cerium oxide formula designed for the final polishing stage of glass restoration. This 1.7-ounce (50ml) container holds a ready-to-use 2.3-micron compound that removes fine scratches, sanding marks, and surface stains from all glass types including tempered and laminated surfaces. It’s the finishing touch that brings glass back to optical clarity.
What Makes It Stand Out: This compound uses optimized cerium oxide, the gold standard for glass polishing, in a precisely milled 2.3-micron particle size. This fineness effectively removes imperfections without creating new marks. Its versatility across all glass surfaces—from automotive windshields to household mirrors—makes it exceptionally practical. The ready-to-use formula eliminates mixing guesswork, ensuring consistent results every time.
Value for Money: Priced at $11.95 ($7.07 per fluid ounce), this concentrated compound offers good value despite the small container. A little goes a long way, and the professional results justify the cost compared to cheaper, less effective alternatives. For those investing time in multi-stage restoration, this final step ensures maximum return on effort.
Strengths and Weaknesses: Strengths include professional-grade cerium oxide, precise micron sizing, ready-to-use convenience, and compatibility with all glass types. Weaknesses include the limited quantity for large projects, requirement for prior sanding stages, and need for polishing equipment to achieve best results.
Bottom Line: GP-PRO is the perfect finale for glass restoration. For achieving showroom-quality clarity, this compound delivers professional results that DIYers and experts will appreciate.
9. E.J. Wheaton Glass Wax, Polishes and Protects Windows, Mirrors and Metal Surfaces, Dries Chalk White, Easy to Apply and to Remove, Made in USA
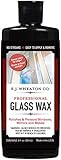
Overview: E.J. Wheaton Glass Wax offers a traditional approach to glass care, polishing and protecting windows, mirrors, and metal surfaces. This American-made product applies as a dark pink liquid and dries to a chalk white finish that buffs off to reveal protected, shining surfaces. Designed for easy hand application, it provides a nostalgic yet effective method for maintaining clarity and adding protective layers.
What Makes It Stand Out: This old-school formula represents a dying breed of glass care products that rely on physical buffing rather than chemical bonding. Its multi-surface compatibility extends beyond glass to mirrors and metal, offering versatility uncommon in modern specialized products. The chalk-white drying indicator ensures you know exactly when it’s ready to buff, preventing premature removal that compromises results.
Value for Money: At $14.99, this wax positions itself as an affordable protective solution. While modern ceramic sprays might offer longer durability, this traditional wax provides satisfactory protection at a lower entry cost. For those who prefer straightforward, equipment-free application, it eliminates the need for expensive polishing tools.
Strengths and Weaknesses: Strengths include easy hand application, multi-surface use, clear visual drying cue, made in USA quality, and simple removal even after extended periods. Weaknesses include dated protection technology compared to modern sealants, chalky residue during application, and limited corrective power for damaged glass.
Bottom Line: E.J. Wheaton Glass Wax suits those seeking traditional, uncomplicated glass protection. For routine maintenance without equipment investment, it delivers reliable results.
10. Glass Polish 50ml Cerium Oxide Glass Polishing Solution for Removing Oil Film, Water Spots, Eddies, Glass Water Stains, Wiper Marks on The Glass Surface, Restoring clearity

Overview: This 50ml Cerium Oxide Glass Polishing Solution targets common automotive glass issues including oil film, water spots, wiper marks, and oxidation. Formulated with over 40% high-quality cerium oxide and ultra-fine 0.3-micron particles, this pre-mixed solution offers professional-grade results in a ready-to-use bottle. The included friction pad simplifies application, making it accessible for DIY users tackling windshield and window restoration.
What Makes It Stand Out: The exceptionally high concentration of cerium oxide (exceeding 40%) combined with remarkably fine 0.3-micron particles sets this apart from competitors. This formulation removes stubborn contaminants without leaving swirl marks or residue. The pre-mixed, ready-to-use design eliminates mixing errors, while the included applicator pad provides everything needed to start immediately. Its versatility spans from automotive to household glass applications.
Value for Money: At $9.99 with an included applicator pad, this solution offers excellent value. The high concentration means less product per use, extending the life of the small bottle. Competing products often require separate pad purchases and separate mixing, making this all-in-one package both cost-effective and convenient for most users.
Strengths and Weaknesses: Strengths include high cerium oxide concentration, ultra-fine particle size, ready-to-use convenience, included friction pad, and wide application range. Weaknesses include limited volume for extensive projects, requiring physical effort for results, and potentially needing multiple applications for deep damage.
Bottom Line: This cerium oxide solution excels at removing common glass contaminants. For restoring automotive glass clarity without professional equipment, it’s an outstanding choice.
Why Mess-Free Glass Polishing Matters for Car Enthusiasts
The Hidden Costs of Traditional Glass Polish Residue
That white, powdery film that settles on your dashboard and door panels isn’t just an annoyance—it’s a potential hazard. Traditional abrasive polishes contain fillers and carriers that, when not properly formulated, break down into fine dust that infiltrates every crevice of your interior. This residue can permanently stain porous trim materials, clog window seals, and even interfere with electronic sensors embedded in modern windshields. For cars with advanced driver assistance systems (ADAS), contamination near camera mounting points can compromise calibration, leading to costly dealer visits.
Beyond the vehicle itself, airborne polishing dust settles into your garage’s ventilation system, coats nearby tools, and creates a respiratory irritant that makes enclosed-space polishing downright unpleasant. The cleanup often requires multiple passes with interior detailer sprays, compressed air, and hours of additional labor—negating any time saved during the initial application.
Professional Results Start with Clean Application
Showroom-quality glass clarity demands precision. When polish stays confined to the glass surface, you maintain complete control over the process. Clean application means you can accurately assess your progress, identify remaining imperfections, and build technique without fighting product migration. Professional detailers understand that the best results come from tools and products that enhance their skill, not ones that create variables they can’t control. A mess-free formulation allows you to polish in sections, work methodically around complex mirror mounts and windshield wipers, and inspect under varying light conditions without residue obscuring your view.
Understanding Glass Polish Formulations
Water-Based vs Solvent-Based Polishes
The foundation of any low-mess polish lies in its carrier system. Water-based formulations leverage modern polymer technology to suspend abrasives in a solution that evaporates cleanly, leaving minimal solid residue behind. These polishes typically break down into harmless water vapor and trace amounts of polishing agents that wipe away with minimal effort. They’re particularly advantageous for enclosed garage environments where ventilation might be limited.
Solvent-based polishes, while historically more common, present greater challenges for clean application. The volatile organic compounds (VOCs) evaporate quickly, often causing the product to flash before you’ve finished working it, which leads to uneven breakdown and stubborn residue. However, advanced solvent systems using slower-evaporating, refined carriers can still deliver clean results when properly formulated with residue-inhibiting additives. The key is understanding that the base chemistry directly impacts how much cleanup you’ll face.
Abrasive vs Chemical Polishing Action
Mechanical abrasives physically level the glass surface, removing water spots, mineral deposits, and fine scratches. Modern micro-abrasives are engineered to break down progressively, starting with aggressive cutting power and refining to a polish-ready finish. The mess factor enters when these abrasives aren’t properly lubricated or when the breakdown process leaves behind clumped particles that scatter across the surface.
Chemical polishing agents, conversely, work by dissolving microscopic high points on the glass through controlled etching. These formulations rely on mild acids or alkaline compounds that react with silica in the glass. The cleanest chemical polishes use buffered pH systems that neutralize themselves upon completion, leaving only a thin film that rinses away with water. For automotive applications, hybrid approaches that combine diminishing abrasives with chemical cleaners often provide the best balance of effectiveness and cleanliness.
The Role of Lubricants in Clean Application
Lubricants aren’t just about reducing friction—they’re the primary mechanism controlling where polish goes and how it behaves during breakdown. Premium formulations incorporate lubricating agents that maintain a stable film thickness throughout the polishing cycle. This prevents the product from slinging off rotating pads or running down vertical glass surfaces. Look for descriptions mentioning “high-load lubrication” or “extended work time,” as these characteristics indicate the presence of sophisticated lubricant packages designed to keep the polish exactly where you apply it.
Key Features of No-Mess Glass Polishes
Quick-Breakdown Technology
The most advanced mess-free polishes employ engineered abrasives that pulverize into increasingly smaller particles as you work them. This breakdown process happens within a controlled window—typically 60 to 90 seconds of machine polishing—after which the product transforms into a near-liquid state that wipes away with a single pass. The technology relies on precise particle size distribution and friability, ensuring that larger cutting particles fracture into polishing particles rather than clumping or drying out.
Anti-Static Properties
Static electricity is the silent culprit behind polish migration. As you buff, friction generates static charges that can cause fine particles to jump from the glass to adjacent surfaces. Modern formulations incorporate anti-static agents that neutralize these charges, keeping spent polish attached to your applicator or microfiber towel. This is particularly crucial when working around sensitive electronic components or black plastic trim that shows dust immediately.
Non-Drip Viscosity
Rheology—the study of flow properties—plays a massive role in mess prevention. Ideal glass polishes exhibit thixotropic behavior: they thin under the shear force of buffing but return to a gel-like state when at rest. This means the product spreads easily during application but won’t run down your windshield the moment you pause to inspect your work. The viscosity sweet spot allows the polish to cling to vertical surfaces while still permitting abrasive action.
Buff-Free Formulations
The ultimate in clean application, true buff-free polishes require no secondary wiping or removal step. These advanced formulas use volatile carriers that evaporate completely, leaving behind only the polished surface. While traditionally associated more with paint sealants than glass polishes, emerging ceramic-infused glass treatments are adopting this technology. The key is ensuring complete evaporation without leaving a hazy film, which requires precise formulation of the volatile fraction.
Application Methods That Minimize Mess
The Microfiber Advantage
Not all microfiber is created equal when it comes to glass polishing. Low-pile, tight-weave microfiber pads—typically 200-300 GSM—provide the ideal balance of cutting ability and product control. The dense construction holds polish in the fiber matrix rather than letting it pool on the surface. When using hand application, fold your towel into quarters, creating eight clean surfaces to work with. This prevents product buildup in one area and maintains consistent contact pressure.
For machine application, dedicated glass polishing pads feature a closed-cell foam backing that prevents polish from soaking through and contaminating your polisher. The face material uses a blend of microfiber and foam that grips the product during the initial spreading phase, then releases it gradually as breakdown occurs.
Foam Applicator Techniques
When hand-polishing, foam applicators offer superior control over product placement compared to loose microfiber. Opt for firm, closed-cell foam blocks with a slight texture. Apply polish in a thin line across the center of the block, then dab it onto the glass in a grid pattern rather than smearing it across the entire surface. This “stamping” technique ensures even distribution without excess product slinging off the edges during your first passes.
Machine Polishing vs Hand Application
Dual-action polishers with forced rotation provide the most consistent breakdown and minimal mess when paired with the right pad and speed setting. Keep speeds between 3,000-4,000 OPM for glass work—higher speeds generate excess heat and cause product to flash too quickly, creating dust. Use a slow arm speed, moving at about one inch per second, and maintain constant pad pressure. The machine’s oscillation pattern actually helps contain the polish within the pad’s footprint.
Hand polishing requires more discipline. Use overlapping linear strokes with moderate pressure, working in 12x12 inch sections. The key is maintaining consistent speed and pressure—variations cause uneven breakdown and residue.
Temperature and Humidity Considerations
Glass temperature dramatically affects polish behavior. Work in the shade when surface temperatures are between 60-80°F. Hot glass causes immediate product flash, while cold glass prevents proper breakdown. Humidity above 70% slows evaporation, extending work time but potentially causing the polish to remain tacky. In high humidity, reduce your polish quantity by 30% and increase buffing passes to compensate.
Common Mistakes That Create Unnecessary Mess
Over-Application Problems
The number one cause of mess is simply using too much product. A pea-sized amount is sufficient for a standard side window. Over-application doesn’t increase cutting power—it just creates excess residue that never properly breaks down. The polish needs the friction and heat generated by pad contact to activate its diminishing properties. Too much product acts as insulation, preventing this activation and leaving a slurry that smears rather than polishes.
Wrong Buffing Techniques
Circular motions might feel natural, but they cause polish to migrate outward from your work area, accumulating in corners and along edges. Instead, use cross-hatch patterns: horizontal passes followed by vertical passes. This keeps the product distributed evenly and prevents buildup. Always finish with a final pass using minimal pressure to ensure complete breakdown before wiping.
Ignoring Surface Temperature
Polishing glass that’s been sitting in direct sunlight is a recipe for disaster. The surface can reach 120°F or higher, causing the polish to dry almost instantly into a cement-like film. Use an infrared thermometer to check glass temperature before starting. If it’s too hot, cool the surface with a damp microfiber towel and wait for it to stabilize.
Surface Preparation for Clean Results
Decontamination Before Polishing
Polish mess multiplies when applied over contaminated surfaces. Iron particles, tree sap, and road film create a barrier that prevents proper polish bonding, causing it to skim across the surface rather than work effectively. Use a dedicated automotive glass cleaner with mild detergents first, followed by an isopropyl alcohol wipe-down. This removes oils and ensures the polish interacts directly with the glass.
Clay Bar Treatment for Glass
Claying glass before polishing serves two purposes: it removes embedded contaminants that would otherwise mix with your polish, creating an abrasive slurry, and it smooths the surface so polish spreads more evenly. Use a fine-grade clay bar with plenty of lubricant. Work in small sections and inspect the clay frequently—glass contamination is often invisible but will show up as dark spots on the clay. After claying, wipe the surface with a 50/50 mix of distilled water and isopropyl alcohol to remove any clay residue.
Proper Cleaning Protocols
Your final pre-polish cleaning step should involve two microfiber towels: one damp with glass cleaner, one dry. Spray cleaner onto the towel, not the glass, to prevent overspray onto painted surfaces. Wipe in one direction only with the damp towel, then immediately buff dry with the clean towel using opposite-direction strokes. This cross-directional technique reveals any remaining residue before you start polishing.
Evaluating Performance Without Product Names
What to Look for in Independent Testing
Reputable manufacturers provide data on work time, residue levels, and optical clarity improvements. Look for quantitative measures rather than marketing claims. “Residue rating: <5%” tells you more than “minimal dust.” Videos showing the complete process—from application through final wipe—reveal more than static before-and-after photos. Pay attention to how easily the demonstrator removes the polish and whether they need multiple towels.
Understanding Manufacturer Claims
Terms like “zero-dust,” “haze-free,” and “one-wipe removal” have specific meanings in formulation chemistry. Zero-dust indicates the polish breaks down into particles smaller than 10 microns that become airborne. Haze-free suggests the formula contains anti-hazing agents that prevent microscopic residue from bonding to the glass. One-wipe removal implies a lubricant package that keeps broken-down polish in suspension until removed. Cross-reference these claims across multiple sources to verify consistency.
Reading Between the Lines of Marketing
When a product description emphasizes “easy cleanup” or “no messy residue,” examine what isn’t said. If the instructions still recommend taping off trim, that suggests potential migration issues. True mess-free polishes won’t require extensive masking. Also, check the recommended quantity—products requiring “a thin layer” or “minimal product” typically have better containment properties than those suggesting liberal application.
Environmental and Health Considerations
VOC Regulations and Indoor Use
Many traditional glass polishes contain VOCs that exceed safe limits for enclosed spaces. California’s CARB regulations have pushed manufacturers toward water-based systems that perform cleanly without harmful emissions. For garage-based detailers, choosing VOC-compliant formulas means you can polish year-round without opening doors in freezing weather. Look for “CARB compliant” or “50-state legal” designations, which guarantee minimal airborne pollutants.
Biodegradable Options
Eco-conscious formulations use plant-derived lubricants and natural abrasives like diatomaceous earth processed to pharmaceutical grade. These break down completely in wastewater without harming aquatic life. The trade-off historically has been performance, but modern biodegradable polishes now rival traditional formulas in both cutting ability and cleanliness. They often cost more but provide peace of mind and safer handling.
Respiratory Safety
Even mess-free polishes generate fine particles during breakdown. Always wear a N95-rated respirator when machine polishing, as the process aerosolizes microscopic glass and polish particles. The cleanest formulations reduce but don’t eliminate this risk. Set up a box fan to create positive airflow away from your work area, and vacuum surfaces with a HEPA-filter shop vac after polishing to capture settled dust before it becomes airborne again.
Cost-Effectiveness of Premium Formulations
Concentrated vs Ready-to-Use
Concentrated glass polishes offer superior value and reduced mess. By diluting with distilled water, you control viscosity for specific conditions—a thicker mix for vertical surfaces, thinner for horizontal. A single 16-ounce bottle of concentrate typically yields 64 ounces of usable polish, reducing packaging waste and storage needs. The concentrated form also has a longer shelf life since active ingredients remain stable until activated.
Shelf Life and Storage
Mess-free polishes rely on delicate chemical balances that degrade over time. Unopened, most formulations last 2-3 years when stored between 50-70°F. Once opened, use within 12 months as exposure to air introduces moisture and contaminants that affect breakdown characteristics. Store bottles upside-down to prevent the cap from crusting and to keep the product ready to dispense. Never store polish in your garage if temperatures drop below freezing, as this can cause irreversible separation.
Coverage Area Calculations
Professional-grade concentrated polishes typically cover 200-250 square feet per ounce when applied correctly. For reference, an average sedan’s glass surfaces total about 30 square feet. This means a single ounce should complete an entire vehicle with some to spare. If you find yourself using significantly more, you’re likely over-applying, which directly increases mess. Track your usage to develop a feel for proper quantity.
Storage and Handling Best Practices
Preventing Product Separation
Mess-free polishes often contain emulsions that can separate if left undisturbed. Invert your bottles every two weeks during storage to keep ingredients suspended. If separation occurs, shake vigorously for two full minutes—don’t just give it a quick swirl. For concentrates, stir with a clean glass rod rather than shaking to avoid introducing air bubbles that affect dilution accuracy.
Avoiding Contamination
Always dispense polish onto your applicator, never double-dip a used applicator back into the bottle. Pouring onto the glass and then picking it up with your pad seems efficient but introduces glass particles and contaminants into your main supply. Use pump dispensers or squeeze bottles with narrow openings to minimize exposure to air and airborne particles. Keep a dedicated microfiber towel around the bottle neck to catch drips before they run down the side and collect dust.
Dispensing Systems
Professional detailers often transfer polish to smaller, labeled squeeze bottles for field use. This reduces the main bottle’s exposure to air and prevents accidental spills from knocking over a large container. For machine application, consider using a polish dispenser that meters a consistent dose with each pump. This eliminates guesswork and ensures you’re using the minimal effective amount every time.
Troubleshooting Common Issues
Dealing with Stubborn Residue
If polish has dried to a cement-like consistency, don’t reach for aggressive solvents. Spray the area with a 10:1 diluted all-purpose cleaner and cover with a damp microfiber towel for 5 minutes. This rehydrates the residue, allowing it to wipe away. For truly stubborn spots, a plastic razor blade at a 30-degree angle will lift the bulk without scratching glass. Never use metal scrapers or abrasive pads, which will create new scratches requiring more polishing.
Streak Formation Prevention
Streaks occur when polish residue isn’t fully removed or when removal happens before complete breakdown. The solution is patience—work the polish until it becomes nearly transparent, then remove immediately. If streaks appear, spray a quick detailer formulated for glass onto a clean microfiber and buff lightly. The quick detailer’s lubricants emulsify the streak-causing residue without requiring re-polishing.
Haze and Cloudiness Solutions
Haze indicates either incomplete polish removal or microscopic surface marring from overly aggressive technique. First, try re-buffing with a clean, dry microfiber using light pressure. If haze persists, apply a tiny amount of polish—just a dab—to a foam applicator and work it over the hazy area for 15 seconds, then remove immediately. This micro-polish step often clears haze by re-breaking down residue. For persistent issues, the glass may require a proper de-hazing treatment with a dedicated finishing polish.
The Science Behind Streak-Free Finishes
Molecular Bonding on Glass
Glass is not the perfectly smooth surface it appears to be. At the molecular level, it’s a network of silicon and oxygen atoms with countless microscopic peaks and valleys. Polish residue streaks occur when product molecules bond more strongly to these high points than to each other. Clean-formulation polishes use surfactants that reduce surface tension, allowing the product to release evenly during removal. The ideal polish forms weak hydrogen bonds with the glass that break easily when wiped, taking all residue with them.
Evaporation Rates and Residue
The volatility curve of a polish’s carrier system determines its mess potential. Fast-evaporating carriers flash off quickly, leaving abrasives and lubricants behind as a paste that smears. Slow-evaporating carriers stay liquid too long, allowing polish to migrate. The sweet spot is a carrier that evaporates at the same rate the abrasives break down, so by the time the polish is spent, there’s minimal liquid left to cause drips or runs. This is achieved through blends of solvents with different boiling points.
pH Balance Importance
Glass is chemically stable but not invincible. Highly acidic or alkaline polishes can etch the surface, creating a haze that’s often mistaken for residue. Mess-free polishes maintain a neutral pH (6.5-7.5) that cleans without damaging. Some even include pH buffers that neutralize any residual acidity as they break down. This is crucial for vehicles with window tint, as aggressive pH levels can degrade the film’s adhesive and cause bubbling or delamination.
Seasonal Considerations for Glass Polishing
Winter Challenges
Cold weather thickens polish, preventing proper breakdown and causing it to ball up rather than spread. If you must polish in temperatures below 50°F, warm your polish bottle in a bowl of warm (not hot) water for 10 minutes before use. Work smaller sections—no larger than 6x6 inches—to maintain pad temperature. Keep your microfiber towels in the house until needed; cold towels cause immediate condensation that interferes with polish performance.
Summer Heat Factors
High ambient temperatures accelerate evaporation, reducing work time and increasing dust. Polish in early morning or late evening when surfaces are cool. Keep your polish in a cooler with ice packs between uses. Work in the smallest sections possible—4x4 inches—and have your removal towel ready before you even start applying product. Some detailers in extreme heat climates keep a spray bottle of cool water to mist the glass lightly before polishing, which extends work time by a few critical seconds.
Humidity’s Impact
High humidity (above 70%) prevents proper evaporation, leaving polish tacky and prone to smearing. In these conditions, reduce your polish quantity by half and increase machine speed slightly to generate more frictional heat for breakdown. Use a dehumidifier in your garage if possible. Low humidity (below 30%) causes rapid flashing, so slow your arm speed and consider using a slightly heavier polish application to compensate.
Professional Tips for Showroom-Quality Results
Lighting Inspection Techniques
Mess-free polishing allows for real-time inspection because you’re not fighting residue. Use a powerful LED inspection light held at a low angle to the glass—this reveals imperfections, residue, and haze instantly. Work in a pattern where you polish, inspect, then polish adjacent sections. The ability to see your true progress without residue masking the surface is the hallmark of a clean formulation. Many professionals use two lights: one stationary overhead light for general work, and a portable light for detailed inspection.
Multi-Stage Polishing Approaches
Even with mess-free products, aggressive correction may require multiple steps. Start with a cutting polish on a firm foam pad for defect removal, then immediately follow with a finishing polish on a soft microfiber pad. The key is using minimal product for each stage—typically less than you think necessary. The clean formulation allows you to complete both stages without extensive cleanup between steps, as long as you remove each polish completely before proceeding.
Maintenance Schedules
Once you’ve achieved perfection with a mess-free polish, maintain it with a silica-based glass coating that repels contaminants. These coatings reduce the need for frequent polishing and make future cleanup effortless. Reapply the coating every 6-12 months depending on climate and usage. Between major polishing sessions, use a maintenance spray designed for coated glass—these spray-on, wipe-off formulas contain mild cleaners and coating reinforcements that take seconds to apply and leave zero residue.
Frequently Asked Questions
Can I use the same mess-free polish on both windows and windshield?
Yes, but adjust your technique. Windshields have a more complex curvature and often more severe contamination. Use smaller sections and slightly more pressure on the windshield, while side windows require lighter pressure due to their angle and potential for tint film. The same polish formulation works on all automotive glass, but always test a small area on tinted windows first.
How do I know if I’m using too much polish?
If you see product squeezing out from under your pad or running down the glass, you’re using too much. A proper application should appear nearly transparent after 30 seconds of buffing. You should never have to wipe away piles of residue. Start with half the amount you think you need—you can always add more, but removing excess creates unnecessary mess.
Will mess-free polishes remove water spots from glass?
Most will remove mild to moderate water spots, which are mineral deposits on the surface. For severe etching that has physically damaged the glass, you’ll need a more aggressive compound or professional treatment. Mess-free formulations excel at removing spots without creating the additional cleanup that traditional compounds require.
Can I polish glass in direct sunlight if the product is truly mess-free?
Even the best formulations struggle in direct sun. The issue isn’t just the polish—it’s the thermal expansion of the glass itself, which can cause microscopic stress fractures during aggressive polishing. Always work in shade when possible. If you must polish in sun, work in tiny sections and keep the surface misted with cool water.
How long should I wait before removing the polish?
With quality mess-free polishes, removal timing is critical. Work the product until it becomes nearly transparent and feels almost dry to the touch—usually 60-90 seconds with a machine, 2-3 minutes by hand. Waiting longer doesn’t improve results; it just makes removal harder. The polish should come off with minimal pressure in one or two passes.
Do I need to tape off trim with mess-free polishes?
Quality mess-free polishes shouldn’t require taping for routine application, but it’s still wise to mask off extremely porous or sensitive materials like raw carbon fiber or uncoated aluminum trim. The time spent taping these areas is less than the time spent cleaning them if contamination occurs. For standard plastic and rubber trim, a good mess-free polish should wipe away easily if contacted.
What’s the difference between glass polish and glass cleaner?
Cleaners remove surface dirt and oils through detergents and solvents. Polishes contain abrasives or chemicals that physically or chemically level the glass surface to remove embedded contamination and micro-scratches. Think of it this way: cleaners wash, polishes correct. Some products claim to do both, but dedicated tools for each job always yield better results.
Can I apply a ceramic coating immediately after polishing?
Yes, and you should. Polishing creates a pristine surface that coatings bond to optimally. With mess-free polishes, you can often apply the coating within minutes of your final wipe, as there’s no residue to interfere with bonding. Just ensure you’ve removed all polish and the surface feels perfectly clean to the touch. A final wipe with an isopropyl alcohol solution ensures the best coating adhesion.
How often should I polish my car’s glass?
For daily drivers, once or twice a year is sufficient. Over-polishing thins the glass over time, though this takes many years to become problematic. Vehicles exposed to harsh conditions—frequent highway driving, construction zones, or hard water—may benefit from quarterly polishing. Use a maintenance spray monthly to extend the time between full polishing sessions.
Are mess-free polishes safe for all window tints?
Never polish over window film—always polish the exterior glass only. Factory tint is embedded in the glass and safe to polish, but aftermarket film sits on the interior surface and will be destroyed by abrasives. For tinted windows, polish the exterior normally but clean the interior with only gentle, ammonia-free cleaners. If you must remove interior contamination on tinted windows, use a plastic polish designed specifically for film surfaces.