Your brake calipers live in one of the harshest environments on your entire vehicle. Constantly bombarded by ferocious heat cycles exceeding 500°F, corrosive brake dust, road salt, and abrasive contaminants, they’re often the first component to show age on an otherwise pristine build. While many enthusiasts focus on paint protection film for their bodywork, they’re leaving their calipers vulnerable to oxidation, fading, and that telltale brown discoloration that screams neglect. Ceramic coatings engineered specifically for brake components represent a paradigm shift in caliper preservation—offering a level of protection that traditional high-temperature paints simply cannot match. This comprehensive guide dives deep into the critical factors that separate exceptional coatings from mediocre ones, equipping you with the knowledge to make an informed decision that will keep your brake hardware looking factory-fresh for years.
What Makes Ceramic Coatings Essential for Brake Calipers?
Top 10 Ceramic Caliper Coating
Detailed Product Reviews
1. Gyeon Rim EVO Ceramic Wheel Coating Kit Brake Dust Repellent High‑Heat Resistant Hydrophobic Wheel Protectant Satin Finish Self‑Cleaning Ceramic Protection for Alloy Painted Rims

Overview:
Gyeon Rim EVO is a professional-grade ceramic coating engineered specifically for wheels, offering extreme heat resistance and self-cleaning properties. This kit provides a complete solution for protecting alloy and painted rims from harsh contaminants, brake dust, and environmental damage while delivering a refined satin finish.
What Makes It Stand Out:
The 1400°F heat resistance sets a new standard for wheel coatings, far exceeding typical brake operating temperatures. Its advanced formula creates an ultra-slick surface that actively repels iron particles and road grime, making maintenance nearly effortless. The hydrophobic shield causes water to bead and roll off instantly, preventing water spots and reducing wash frequency. Unlike glossy competitors, the satin enhancement preserves factory aesthetics while deepening color richness.
Value for Money:
At $55.99, Rim EVO positions itself in the premium DIY category. Professional ceramic applications can cost $200-400, making this an economical alternative for enthusiasts. The kit includes enough product for multiple applications, effectively coating 4-5 sets of wheels. When compared to cheaper sealants that last weeks, this 1-2 year protection offers superior long-term value despite the higher upfront cost.
Strengths and Weaknesses:
Strengths: Extreme temperature tolerance; exceptional brake dust repellency; genuine self-cleaning effect; enhances satin factory finishes; straightforward hand application; professional-level durability.
Weaknesses: Requires meticulous surface prep for proper bonding; price may deter casual users; not suitable for brake calipers; application demands controlled environment; cure time means vehicle downtime.
Bottom Line:
Gyeon Rim EVO is the top choice for serious enthusiasts seeking maximum wheel protection with minimal upkeep. The investment pays dividends in reduced cleaning time and preserved wheel condition, making it worth every penny for performance and luxury vehicles.
2. POR-15 Red Caliper Paint - 8 fl. Oz.- Superior Heat Resistant Coating - High Temperature Brake Caliper Paint

Overview:
POR-15 Red Caliper Paint is a specialized high-temperature coating designed specifically for brake calipers. Formulated to withstand up to 350°F, this 8-ounce bottle provides a durable, ceramic-like finish that resists brake dust and corrosion while delivering vibrant color enhancement to otherwise dull brake components.
What Makes It Stand Out:
This paint excels as part of POR-15’s renowned 3-step rust prevention system, creating a permanent bond that stops corrosion in its tracks. The ceramic-like finish offers excellent coverage with just two thin coats, and the formula is specifically engineered to resist the unique contaminants calipers face. Available in five brilliant colors, it allows for custom brake aesthetics without professional powder-coating costs.
Value for Money:
Priced at $24.89 ($3.11 per ounce), this represents solid value for a specialized automotive coating. However, true cost includes the recommended 3-step prep system (Cleaner Degreaser, Metal Prep, and Rust Preventive Coating), which adds $40-60. Compared to powder coating ($150-300), it’s economical, but budget alternatives exist at half the price—though with inferior durability.
Strengths and Weaknesses:
Strengths: Excellent rust inhibition; tough ceramic-like finish; multiple color options; professional-grade durability; resists brake dust effectively; trusted brand reputation.
Weaknesses: Requires extensive prep work; 350°F rating lower than modern ceramic alternatives; 24-hour cure time is inconvenient; not designed for wheel faces; must purchase separate prep products for best results.
Bottom Line:
Ideal for restoration projects and caliper-specific protection, POR-15 delivers reliable results when properly applied. It’s best suited for DIYers committed to thorough prep work seeking a durable, attractive caliper finish without powder-coating expense.
3. POR-15 High Temperature Brake Caliper Paint, Heat Resistant Coating, 8 Fluid Ounces, Yellow
Overview:
POR-15 Yellow Caliper Paint offers the same high-performance formula as its red counterpart, providing a vibrant yellow finish for brake calipers. This 8-ounce coating withstands temperatures up to 350°F while delivering a tough, ceramic-like surface that resists brake dust and prevents rust formation on caliper surfaces.
What Makes It Stand Out:
The striking yellow color provides excellent visibility and aesthetic appeal, perfect for performance builds where caliper color matters. Like all POR-15 caliper paints, it integrates seamlessly with the brand’s 3-step rust prevention system, creating a molecular bond that permanently seals metal surfaces. The formulation maintains color integrity under extreme braking conditions where conventional paints would fade or discolor.
Value for Money:
At $29.00 ($3.62 per ounce), the yellow variant carries a 16% premium over the red version for identical performance. While still economical compared to professional finishing, the color-specific pricing seems arbitrary. The value proposition remains dependent on investing in the complete prep system; without it, durability suffers significantly. Budget-conscious buyers may prefer the red option if color isn’t critical.
Strengths and Weaknesses:
Strengths: Vibrant, fade-resistant yellow finish; superior rust prevention when used with 3-step system; excellent brake dust resistance; professional-looking results; single bottle coats 4 calipers with two coats.
Weaknesses: Higher price than red version for same formula; mandatory extensive surface preparation; lower heat tolerance than modern ceramics; not suitable for wheel application; lengthy drying process.
Bottom Line:
Choose the yellow variant specifically for aesthetic preference in performance or show vehicles. The premium color cost is justified only if yellow is your desired finish. Otherwise, identical performance can be had for less with the red option.
4. POR-15 High Temperature Brake Caliper Paint, Heat Resistant Coating, 8 Fluid Ounces, Blue
Overview:
POR-15 Blue Caliper Paint delivers the brand’s trusted high-temperature coating formula in a deep blue finish. Designed for brake calipers, this 8-ounce bottle provides up to 350°F heat resistance with a durable, ceramic-like coating that actively prevents rust and repels brake dust contamination.
What Makes It Stand Out:
The blue color offers a sophisticated alternative to traditional red or yellow calipers, complementing modern wheel designs and darker vehicle colors. The paint’s formulation maintains its rich hue even after repeated high-heat cycling, resisting the browning effect common with inferior products. Its integration with POR-15’s rust-prevention ecosystem ensures long-term structural protection beyond mere aesthetics.
Value for Money:
Matching the yellow version at $29.00 ($3.62 per ounce), blue commands the same color premium. While cost-effective versus professional alternatives, the per-ounce price is steep compared to the red variant. The 8-ounce quantity generously covers multiple caliper sets, potentially offsetting the initial investment. However, the hidden cost of required prep chemicals remains the true financial consideration.
Strengths and Weaknesses:
Strengths: Distinctive blue color maintains vibrancy; exceptional rust prevention capabilities; resists harsh brake dust; professional-grade durability; ample quantity for multiple projects; trusted POR-15 quality.
Weaknesses: Identical price premium as yellow over red; complex multi-step application process; 350°F limit may not suit track applications; dedicated caliper product only; requires 24-hour cure time.
Bottom Line:
The blue version is perfect for enthusiasts seeking a unique caliper color with proven protection. If blue matches your vehicle’s theme, the slight premium is worthwhile. For maximum value, compare color pricing across the POR-15 line before committing.
5. CARPRO CQUARTZ DLUX Wheel and Trim Coat 30mL - Ceramic Coating UV Protection for Wheels and Exterior Plastics, Rubber, and Metals
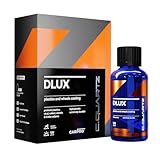
Overview:
CARPRO CQUARTZ DLUX is a versatile ceramic coating formulated for both wheels and exterior trim surfaces. This 30mL bottle provides high-temperature protection exceeding 800°F while restoring and protecting plastics, rubber, and metals from UV degradation and environmental contamination.
What Makes It Stand Out:
Unlike dedicated wheel coatings, DLUX’s multi-surface versatility treats an entire vehicle’s trim alongside wheels. The UV protection specifically addresses trim fading, a common issue other wheel coatings ignore. Its extreme temperature resistance suits modern high-performance brakes, while the nanotechnology creates a lasting hydrophobic barrier. The formula darkens faded trim without greasy residue, offering restorative properties beyond protection.
Value for Money:
At $42.99 for 30mL ($42.99 per fluid ounce), the per-ounce cost appears exorbitant, but context matters: 10mL typically covers four wheels plus all trim, providing three full applications per bottle. This breaks down to roughly $14 per complete vehicle treatment—exceptional value. Competing wheel coatings alone cost $50-70, while trim dressings add more expense. The 2-year durability further amortizes the investment.
Strengths and Weaknesses:
Strengths: Multi-surface versatility (wheels, trim, rubber, plastic); superior UV protection; 800°F heat resistance; restores faded trim; economical cost-per-application; professional nanotechnology; no greasy residue.
Weaknesses: Extremely high per-ounce price; small bottle size intimidates some users; requires careful application to avoid streaking on trim; shorter wheel durability than dedicated coatings; production date labeling confuses some buyers.
Bottom Line:
CQUARTZ DLUX is the smart choice for comprehensive exterior protection. It eliminates separate trim and wheel products, saving time and money. Ideal for detailers and enthusiasts wanting one solution for multiple surfaces, delivering professional results with surprising economy when usage rates are considered.
6. ZDBB Ceramic Brake Caliper Grease Synthetic Formula with Ceramic Reinforcement LifeEffective Noise EliminationSafe for Rubber & Plastic Components,1oz(2pcs)
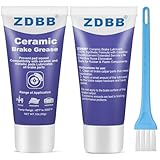
Overview: The ZDBB Ceramic Brake Caliper Grease arrives as a two-pack of 1-ounce tubes, delivering a 100% synthetic formula enhanced with ceramic solids specifically engineered for brake system maintenance. This professional-grade lubricant targets the critical contact points within your braking assembly, forming a protective barrier against moisture, road salts, and corrosive elements that typically degrade brake performance over time.
What Makes It Stand Out: This grease’s extraordinary temperature tolerance—from -40°F to 3000°F—sets it apart from conventional brake lubricants, ensuring reliable performance in both arctic conditions and during extreme braking heat cycles. The ceramic reinforcement actively eliminates squeaky brakes and vibrations while remaining completely safe for rubber and plastic components, a crucial feature often overlooked by competing products that can swell seals and degrade bushings.
Value for Money: At $9.99 for two ounces ($5.00 per ounce), this product sits in the sweet spot for DIY enthusiasts and professional mechanics alike. While cheaper petroleum-based greases exist, they lack the temperature stability and component safety, making this synthetic formula a cost-effective insurance policy against premature brake wear and noise complaints.
Strengths and Weaknesses: Strengths include exceptional thermal stability, comprehensive corrosion protection, noise elimination capabilities, and broad material compatibility. The small tube size ensures fresh product for each brake job. Weaknesses involve the modest quantity—insufficient for multiple complete brake overhauls—and the premium price point compared to basic greases. Novice users may also find proper application requires more research.
Bottom Line: For anyone tackling brake maintenance, this ceramic-reinforced grease delivers professional results that justify its modest premium. It’s an essential addition to any serious DIYer’s garage.
7. Nano Bond Professional Ceramic Coating for Cars - High Gloss Paint Protection Kit, UV & Corrsion Resistant for, Wheels, Glass, Plastic, Easy Application, Ultra Hydrophobic, Long Lasting, Shine, 30ml

Overview: The Nano Bond Professional Ceramic Coating Kit packages a 30ml bottle of high-concentration SiO2 coating with all necessary application tools, positioning itself as an accessible entry point into professional-grade paint protection. Designed for both novices and seasoned detailers, this formula promises to shield your vehicle’s exterior surfaces from UV degradation, chemical contaminants, and environmental hazards while delivering a deep, reflective gloss.
What Makes It Stand Out: Boasting nearly 80% pure SiO2 content, this coating achieves remarkable hydrophobic properties that cause water to bead and sheet off dramatically. The kit’s versatility stands out—it safely treats paint, wheels, glass, and plastic trim, eliminating the need for separate products. The three-year durability claim, while ambitious for a consumer product, reflects confidence in the formulation’s bonding capabilities.
Value for Money: At $37.90, this kit costs a fraction of professional ceramic coating services that typically run $500-$2,000. The inclusion of applicators, microfiber towels, and gloves means no hidden costs. For vehicles requiring comprehensive protection across multiple substrates, this represents exceptional value, though larger trucks or SUVs might need additional product.
Strengths and Weaknesses: Strengths include high SiO2 concentration, true multi-surface compatibility, straightforward wipe-on/buff-off application, and complete accessory inclusion. Weaknesses center on the ambitious longevity claim that real-world conditions may shorten, the critical importance of paint decontamination before application, and limited volume for extensive vehicle fleets.
Bottom Line: This kit democratizes ceramic coating technology, offering impressive performance and ease of use that makes it a smart investment for dedicated car enthusiasts seeking durable protection.
8. CERAKOTE® Platinum Rapid Ceramic Paint Sealant Spray - 14 oz Bottle - Maximum Gloss & Shine – Extremely Hydrophobic – Unmatched Slickness - Ceramic Spray Coating - 50 Wash Rating

Overview: CERAKOTE’s Platinum Rapid Ceramic Paint Sealant Spray delivers true ceramic protection in a convenient 14-ounce aerosol format, engineered for enthusiasts seeking maximum gloss without the complexity of traditional ceramic coatings. With an industry-leading 50-wash longevity rating, this product bridges the gap between short-lived spray waxes and labor-intensive ceramic coatings, promising mirror-like results from your driveway.
What Makes It Stand Out: The 50-wash durability claim significantly exceeds typical spray sealants that often fade after 5-10 washes. CERAKOTE’s reputation for ceramic technology translates into exceptional hydrophobicity and what they describe as “unsurpassed slickness”—a tactile quality that genuinely repels dirt and grime. The spray-and-buff application process eliminates curing times and intricate cross-hatching techniques, making it accessible to absolute beginners.
Value for Money: Priced at $19.69 for a generous 14-ounce bottle, this sealant offers outstanding cost-per-application value. One bottle can treat multiple vehicles, making it considerably more economical than traditional carnauba waxes with similar longevity. For maintenance washes or quick gloss boosts between major details, it’s a budget-friendly powerhouse.
Strengths and Weaknesses: Strengths include foolproof application, genuine ceramic technology, impressive water beading, extended durability for a spray product, and exceptional surface slickness. Weaknesses involve potential overspray on trim if careless, reduced longevity compared to true coating installations, and the need for frequent reapplication versus professional coatings. The spray format may also consume product faster than liquid concentrates.
Bottom Line: For time-pressed car owners wanting ceramic benefits without commitment, this spray sealant delivers remarkable performance and value, earning its place in any detailing arsenal.
9. Meguiar’s Ultimate Ceramic Coating Kit - Premium Kit for Cars Delivers Ultra-Durable Ceramic Protection with High Water Beading Action, Increased Gloss and Slickness, and Premium Microfiber Towels

Overview: Meguiar’s Ultimate Ceramic Coating Kit leverages decades of automotive care expertise to deliver a pro-grade ceramic protectant in an intuitive spray format. The kit includes two premium microfiber towels and a 15-ounce bottle of advanced SiO2-infused formula, designed to provide ultra-durable protection with enhanced gloss and water beading for painted surfaces and beyond.
What Makes It Stand Out: Unlike many ceramic products demanding flawless paint, this coating actively conceals minor swirls and defects during application—a unique benefit for daily drivers with imperfect finishes. Its compatibility with paint protection film, decals, and exterior plastic trim eliminates masking tedium, allowing comprehensive vehicle treatment. Meguiar’s reputation ensures reliable performance without the experimentation risk of unknown brands.
Value for Money: At $17.76 including two high-quality microfiber towels, this kit undercuts most competitors while delivering trusted brand performance. The spray format minimizes product waste compared to traditional wipe-on coatings, and the defect-concealing property can defer costly paint correction. For budget-conscious enthusiasts seeking legitimate ceramic benefits, this represents exceptional entry-level value.
Strengths and Weaknesses: Strengths include brand reliability, innovative defect-masking capability, true multi-surface safety, included premium accessories, and straightforward spray-spread-wipe process. Weaknesses encompass moderate longevity compared to professional installations, potential for streaking if over-applied, and limited information on exact SiO2 concentration. The coating may not satisfy perfectionists seeking maximum durability.
Bottom Line: Meguiar’s has created the ideal gateway ceramic product—affordable, forgiving, and genuinely effective—making it a top recommendation for first-time users and seasoned detailers alike.
10. Advanced Graphene Ceramic Coating for Cars(70ML),12H Graphene Coating for Auto Car Detailing,10+ Years of Long Lasting Car Protection,Gloss Hydrophobicty Anti Scratch

Overview: This Advanced Graphene Ceramic Coating positions itself at the cutting edge of paint protection technology, offering a 70ml bottle of 12H-rated graphene-infused formula that promises over a decade of durable protection. The kit includes comprehensive application accessories and targets serious enthusiasts ready to invest time in proper surface preparation for maximum longevity benefits.
What Makes It Stand Out: Graphene technology represents the next evolution beyond traditional SiO2 ceramics, providing enhanced heat dissipation, flexibility, and potentially superior bonding characteristics. The 12H hardness rating exceeds typical 9H-10H coatings, suggesting exceptional resistance to wash-induced swirls and light scratches. The ten-year protection claim, while bold, reflects graphene’s theoretical advantages in durability and chemical resistance.
Value for Money: At $22.99, this coating dramatically undercuts professional graphene applications costing thousands. The 70ml volume provides adequate coverage for most passenger vehicles, and the included accessories eliminate hidden expenses. If the longevity claims prove even partially accurate in real-world conditions, this represents unprecedented value in long-term paint protection.
Strengths and Weaknesses: Strengths include next-generation graphene chemistry, impressive hardness rating, comprehensive accessory package, anti-scratch properties, and hydrophobic performance. Weaknesses involve ambitious longevity claims requiring verification, stringent application requirements (clean, dry, scratch-free surface), and a 7-day curing period with water avoidance. The technology’s relative novelty means limited long-term user data compared to established SiO2 coatings.
Bottom Line: For meticulous DIYers willing to follow rigorous prep and curing protocols, this graphene coating offers potentially revolutionary protection at a fraction of professional costs, making it a compelling experiment for forward-thinking enthusiasts.
The Science Behind High-Temperature Protection
Unlike conventional waxes or sealants that vaporize under extreme heat, true ceramic coatings for calipers utilize silicon dioxide (SiO₂) or silicon carbide (SiC) polymers that form a semi-permanent, heat-resistant matrix. When properly applied, these formulations create a covalent bond with the substrate at a molecular level, essentially becoming a sacrificial layer of glass-like protection. The critical distinction lies in the thermal stability—quality formulations maintain their structural integrity up to 1,200°F or higher, well beyond the operational temperatures of even aggressive track-day braking. This isn’t merely a surface coating; it’s a thermal barrier that dissipates heat more efficiently than bare metal while preventing the oxidation cascade that begins when iron alloys reach critical temperatures.
How Caliper Coatings Differ from Standard Automotive Ceramics
The ceramic coating you’d apply to your vehicle’s paintwork would catastrophically fail within minutes on a brake caliper. Paint coatings prioritize hydrophobicity and scratch resistance at ambient temperatures, whereas caliper-specific formulations sacrifice some water-beading performance for exceptional thermal cycling resistance and chemical inertness. The resin systems are fundamentally different—caliper coatings employ phenolic-modified polysiloxanes that remain flexible under expansion and contraction, preventing the micro-fracturing that leads to delamination. They also incorporate specialized pigments and flattening agents that won’t degrade when exposed to ultraviolet radiation combined with intense infrared heat, a combination that rapidly breaks down standard automotive coatings.
Key Benefits of Ceramic Coating Your Brake Calipers
Heat Dissipation and Thermal Management
Quality ceramic coatings actually improve thermal management by creating a micro-textured surface that increases radiative heat transfer. Independent testing demonstrates coated calipers can run 15-25°F cooler during sustained aggressive braking compared to uncoated units. This occurs because the ceramic matrix emits infrared energy more efficiently than raw cast iron or aluminum. For track enthusiasts, this translates to reduced brake fade and more consistent pedal feel during repeated threshold braking zones. The coating acts as a thermal regulator, preventing localized hot spots that cause uneven pad deposition and the dreaded brake judder.
Chemical Resistance Against Road Contaminants
Your calipers face a chemical warfare arsenal: hydrochloric acid from ocean air, sulfates from industrial pollution, calcium chloride from road de-icing, and the abrasive metallic compounds shed by your own brake pads. Premium ceramic formulations create a genuinely impermeable barrier with a cross-link density that prevents these contaminants from reaching the substrate. The coating’s low surface energy means brake dust—the bane of any wheel cleaning regimen—cannot embed into the pores of the metal, instead resting loosely on the surface where it rinses away with minimal agitation. This chemical inertness also prevents the galvanic corrosion that occurs when dissimilar metals (like caliper brackets and mounting hardware) interact in the presence of an electrolyte.
Aesthetic Enhancement and Color Retention
Modern ceramic caliper coatings deliver a finish depth that rivals automotive clear coats, available in gloss, satin, and matte sheens that maintain their wet-look appearance indefinitely. The UV inhibitors and hindered amine light stabilizers (HALS) integrated into professional-grade formulations prevent the chalking and fading that plagues traditional caliper paints within 12-18 months. Whether you’ve restored factory calipers or upgraded to aftermarket monoblocks, the coating locks in that vibrant red, yellow, or custom color with a crystalline clarity that makes the hardware a legitimate styling element rather than an afterthought.
Simplified Maintenance and Cleaning
The hydrophobic and oleophobic properties of ceramic coatings reduce caliper cleaning time by approximately 70%. Contaminants cannot bond chemically or mechanically to the surface, meaning a simple pressure wash during your regular wheel cleaning routine removes accumulated debris. Unlike waxed or sealed surfaces that require reapplication every few months, a properly cured ceramic coating maintains these properties for multiple years, even under daily driver conditions. This self-cleaning characteristic proves invaluable for vehicles with intricate wheel designs where accessing the caliper for detailed scrubbing is nearly impossible.
Understanding Different Formulation Types
SiO2-Based Coatings for Enthusiasts
Silicon dioxide formulations represent the most accessible entry point, typically offering 2-3 years of protection with temperature thresholds around 800-1,000°F. These water-based or solvent-borne coatings cure through atmospheric moisture activation, making them more forgiving for DIY application. The SiO₂ content usually ranges from 30-60% by volume, with higher concentrations providing greater durability but requiring more precise application technique. Enthusiast-grade products often include user-friendly features like extended flash times and visible curing indicators, though they may sacrifice ultimate longevity compared to professional alternatives.
Professional-Grade SiC and Hybrid Polymers
Silicon carbide formulations represent the apex of caliper coating technology, engineered for motorsport applications where caliper temperatures regularly exceed 1,000°F. These two-component systems require precise mixing and typically cure through chemical reaction rather than air exposure, creating a denser, more abrasion-resistant film. Hybrid polymers that incorporate both SiC and polytetrafluoroethylene (PTFE) offer the ultimate combination of heat resistance and friction reduction, though they demand meticulous surface preparation and controlled application environments. The investment in professional-grade materials only makes sense when paired with proper equipment and technique—otherwise, you’re essentially putting racing fuel in a stock engine.
DIY-Friendly Consumer Formulations
The consumer market has evolved significantly, with single-component aerosol and brush-on formulations that approach the performance of early professional products. These typically utilize modified siloxane chemistry with lower solids content (15-25%) to improve flow and reduce application defects. While they won’t survive sustained track abuse, they provide excellent protection for street-driven vehicles with moderate brake upgrades. The trade-off comes in longevity—expect 12-24 months before noticeable degradation—and temperature limits around 600-800°F, which still covers 95% of real-world driving scenarios.
Critical Features to Evaluate Before Buying
Temperature Rating: The Non-Negotiable Metric
Always verify the continuous operating temperature rating, not the peak threshold. A coating rated for “up to 1,200°F” might only withstand brief excursions to that limit while degrading rapidly when exposed to continuous 600°F operation. For daily drivers with stock brakes, a rating of 600°F continuous provides ample headroom. Performance street cars with upgraded pads and rotors should target 800°F continuous ratings. Dedicated track cars demand 1,000°F+ continuous ratings with documented test data from actual brake dyno testing, not just laboratory oven tests.
Gloss Levels and Finish Options
The refractive index of the coating determines its final appearance. High-gloss formulations (90+ GU on the gloss unit scale) create that wet-look finish but highlight surface imperfections, requiring more extensive prep work. Satin finishes (30-50 GU) offer the best compromise, masking minor flaws while providing a contemporary OEM+ aesthetic. Matte coatings (10-20 GU) excel at hiding imperfections but can appear chalky if the formulation lacks sufficient resin content. Consider your wheel finish when selecting—highly polished wheels pair best with gloss calipers, while matte or satin wheels coordinate better with lower-sheen coatings.
Durability Metrics and Real-World Longevity
Manufacturers often cite ASTM testing standards like D3363 (pencil hardness) and D4060 (abrasion resistance), but these lab conditions rarely replicate caliper environments. Focus instead on real-world data: look for documented case studies showing coated calipers after 20,000+ miles of winter driving, or after multiple track seasons. The cross-link density, measured indirectly by solvent resistance (MEK rub tests), provides a better indicator of durability than simple hardness ratings. A coating that withstands 100+ double rubs with methyl ethyl ketone will likely survive years of chemical exposure.
UV Stability for Fade Prevention
Even calipers hidden behind wheels receive significant UV exposure, particularly on vehicles with open-spoke designs. Coatings without robust UV stabilization will fade noticeably within 18 months, especially in red and orange pigments. Examine technical data sheets for specific UV absorber packages—benzotriazoles and benzophenones are common, but hindered amine light stabilizers (HALS) provide superior long-term protection by scavenging free radicals. Premium formulations will specify the percentage of UV inhibitors and provide accelerated weathering test data (ASTM G154) showing less than 5% color change after 2,000 hours of UV exposure.
Surface Preparation: The Foundation of Success
Degreasing and Contaminant Removal
The single greatest cause of coating failure is inadequate cleaning. Begin with a dedicated iron fallout remover to dissolve embedded brake dust particles, followed by a wax-and-grease remover that leaves zero residue. Avoid brake cleaners containing heptane or acetone—they can leave behind a thin film that interferes with adhesion. Instead, use a panel wipe solution with >90% isopropyl alcohol content, changing cloths frequently to prevent recontamination. For used calipers, expect to spend 30-45 minutes per caliper on cleaning alone—this isn’t the step to rush.
Sanding and Surface Profiling Techniques
New calipers require light scuffing with 600-grit wet/dry paper to remove the factory preservative oil and create mechanical tooth. Refinished calipers demand more aggressive treatment—start with 320-grit to level any existing coating, then progress to 600-grit for the final profile. The goal isn’t to remove material but to create a uniform scratch pattern that increases surface area for bonding. Always sand wet with a few drops of dish soap in water to prevent loading and maintain consistent cutting. The final surface should feel uniformly dull, with no glossy spots that indicate insufficient abrasion.
Masking Critical Components
Precision masking separates professional results from amateur disasters. Use high-temperature silicone caps to seal bleeder screws and piston bores—never rely on tape alone as coating can wick underneath. For sliding pin bores, insert tightly rolled masking paper coated with a light layer of grease to prevent coating ingress. Mask the brake line fitting threads completely, as any coating here will compromise the seal. Apply masking tape to the caliper body, then trim it back with a fresh razor blade following the parting lines for crisp edges. The 30 minutes spent on meticulous masking saves hours of cleanup and potential brake system contamination.
Priming: When Is It Necessary?
Most modern ceramic caliper coatings are self-etching and don’t require separate primers on bare metal. However, severely corroded cast iron with pitting benefits from a high-build epoxy primer that fills micro-voids and creates a uniform substrate. Aluminum calipers, particularly aftermarket billet units, should always receive a dedicated etching primer to prevent galvanic corrosion between the coating and substrate. If priming is necessary, apply two thin coats and allow a full 24-hour cure before proceeding—rushing this step creates a weak boundary layer that will fail under thermal stress.
Step-by-Step Application Guide
Environmental Conditions for Optimal Results
Temperature and humidity dramatically affect curing and final appearance. Ideal application occurs between 65-75°F with relative humidity below 60%. Higher temperatures accelerate flash time, potentially causing solvent popping and orange peel. Excessive humidity introduces moisture cure issues, particularly with SiO₂ formulations, leading to cloudy finishes and poor adhesion. Never apply in direct sunlight or on surfaces warmer than 85°F—even if the ambient air is cool, radiant heat from a driveway can elevate caliper temperatures enough to cause application defects. A garage with basic climate control and particulate filtration (a simple box fan with HVAC filter works) yields infinitely better results than a driveway.
Layering Strategies: Single vs. Multiple Coats
Contrary to paint protection film logic, multiple thin coats outperform a single heavy coat for caliper ceramics. Apply the first coat as a “tack” layer—just enough to wet the surface without building film thickness. This layer penetrates the abrasion scratches and creates the chemical bond. Wait for the manufacturer’s specified flash time (typically 15-30 minutes), then apply subsequent coats at 90-degree angles to ensure complete coverage. Two to three coats of 1.5-2 mils dry film thickness each provide optimal protection. Heavy single coats exceeding 4 mils will crack during the first heat cycle as the exterior cures while the interior remains solvent-laden.
Flash Times and Recoating Windows
The recoat window—the period during which subsequent coats will chemically fuse with the previous layer—is critical. Miss this window, and you’re relying on mechanical adhesion between layers, which fails under thermal cycling. Most formulations provide a 1-4 hour recoat window at standard temperature. Set a timer and work systematically: coat all four calipers, then return to the first one for the second coat. If you exceed the window, you must wait a full 24 hours and lightly scuff the surface before applying additional material. This isn’t a suggestion—it’s the chemistry of cross-linking polymers.
Edge Work and Detail Areas
Caliper edges, cooling fins, and embossed lettering are failure points if not addressed properly. Use a fine-tipped brush to work material into these areas, ensuring complete coverage without bridging or sagging. For intricate designs, consider thinning the first coat 10-15% with the manufacturer’s recommended reducer to improve flow and penetration. Always coat edges twice—once during the main application and again as a dedicated edge coat after the first layer flashes. These areas experience the highest thermal stress and mechanical abrasion from road debris, making them the most likely sites for premature failure.
Curing Process and Timeline Expectations
Air Curing vs. Accelerated Curing Methods
Most consumer formulations cure through ambient moisture activation, reaching initial hardness in 24-48 hours and full cure in 5-7 days. Professional two-part systems may require forced-air curing at elevated temperatures (150-200°F) for 30-60 minutes to initiate full polymerization. While heat lamps or industrial ovens accelerate the process, they also introduce risks—uneven heating causes differential cure rates, leading to internal stresses and potential cracking. For DIY applications, patience is the superior approach. Allow the coated calipers to cure in a dust-free environment for a full week before subjecting them to any heat or washing.
Initial Cure, Full Cure, and Service-Ready States
Understanding cure stages prevents premature failure. The initial cure (tack-free) occurs when solvents have evaporated enough to handle the part—typically 4-6 hours. However, the coating remains soft and vulnerable to solvents and abrasion. Full cure, when maximum cross-link density is achieved, requires 7-14 days depending on formulation and environmental conditions. The caliper becomes truly service-ready only after a proper heat cycling procedure—gradually bringing the brakes to operating temperature through gentle driving, then allowing complete cool-down. This final step relieves internal stresses and ensures the coating won’t crack when you first hammer the brakes in anger.
Post-Application Heat Cycling
Never bed in new brake pads on freshly coated calipers. Wait a minimum of 72 hours after the final coat, then perform a controlled heat cycle: drive gently for 10 miles to warm the brakes to 200-300°F, then park and allow complete cooling for 2 hours. Repeat this process three times, gradually increasing peak temperatures. This controlled approach allows the coating to expand and contract with the substrate, relieving internal stresses. Skipping this step and heading directly to the track is the most common cause of thermal shock cracking in otherwise properly applied coatings.
Maintenance Protocols for Maximum Lifespan
Proper Washing Techniques
Coated calipers don’t require special cleaners—actually, the opposite. Avoid aggressive wheel acids and alkaline degreasers that can etch the ceramic surface over time. Use a pH-neutral car shampoo and a dedicated soft-bristle brush for calipers. The coating’s self-cleaning properties mean you’ll rarely need more than a gentle agitation followed by a thorough rinse. Never use abrasive pads or brushes, as they can micro-mar the surface and reduce hydrophobicity. For stubborn contamination, a dedicated iron fallout remover safe for coated surfaces works effectively without compromising the ceramic matrix.
Touch-Up Procedures for Damaged Areas
Despite robust protection, rock strikes and improper jack placement can chip caliper coatings. Address damage immediately to prevent undercutting corrosion. Clean the affected area with isopropyl alcohol, then lightly scuff with 1000-grit paper feathering into the surrounding coating. Apply a thin touch-up coat using a fine artist’s brush, extending 1/4 inch beyond the damage. Allow proper flash time, then apply a second coat if needed. While the repair won’t be invisible, it will prevent the damage from propagating and maintain protection integrity.
Reapplication Indicators
Coatings don’t fail catastrophically—they degrade gradually. The first sign is reduced water beading; when water no longer sheets off but begins to cling in droplets, the hydrophobic layer is compromised. Next, brake dust will start adhering more tenaciously, requiring brush agitation instead of rinsing away. Visual indicators include slight dulling or a return of metallic hazing on the surface. Don’t wait for visible failure—when you notice these early signs, schedule a reapplication. Light scuffing and a single refresher coat can extend protection indefinitely, whereas waiting until flaking occurs requires complete stripping and starting over.
Common Application Pitfalls to Avoid
Inadequate Surface Prep Consequences
The temptation to skip sanding on fresh calipers or rely solely on brake cleaner kills more coatings than any other mistake. Even brand-new calipers from reputable manufacturers arrive with preservative oils and casting release agents embedded in the metal’s pores. These contaminants prevent chemical bonding, resulting in delamination that appears as random spider-web cracking within weeks. The coating may look perfect initially, but the first heat cycle reveals the truth as differential expansion causes immediate failure. There’s no shortcut—proper prep is non-negotiable.
Environmental Misjudgments
Applying coating in a garage that’s 50°F because you’re eager to finish the project ensures poor flow, inadequate leveling, and incomplete cure. The coating becomes thixotropic, refusing to self-level and creating a textured finish that traps contaminants. Conversely, applying at 90°F causes the solvents to flash too quickly, resulting in solvent popping—tiny pinholes that compromise protection. Invest in a thermometer and hygrometer; these $20 tools save hundreds in rework. If conditions aren’t right, wait. The coating will be there tomorrow.
Layering Mistakes That Compromise Performance
Recoating outside the specified window creates a classic “layer cake” failure mode. The second coat sits on top of a fully cured first coat without chemical fusion, and thermal cycling causes the layers to expand at different rates. The result is intercoat delamination that appears as large flakes peeling away, often taking the underlying coat with it. Always set a timer and work methodically. If life interrupts and you miss the window, stop completely, allow a full cure, and plan to sand and recoat another day. A partial job done right beats a complete job done wrong.
Cost Analysis: Budgeting for Your Project
Material Costs vs. Professional Service Pricing
Quality diy ceramic coating kits range from $80-$150 for enough material to coat four calipers, including cleaners and applicators. Professional application typically runs $400-$800 depending on caliper complexity and whether they’re removed from the vehicle. The price difference reflects labor—proper prep and application requires 4-6 hours of skilled work. However, the professional advantage includes warranty coverage, proper equipment, and experience that prevents costly mistakes. If you’re coating a $3,000 set of monoblock calipers, the professional premium is cheap insurance. For stock calipers on a daily driver, DIY provides excellent value if you follow procedures meticulously.
Hidden Expenses in DIY Applications
The sticker price of a coating kit rarely tells the full story. Quality masking tape and high-temperature caps add $20-30. If you don’t own a decent random orbital sander and quality respirator, factor in another $80-150. Chemical-resistant gloves, lint-free cloths, and proper lighting contribute another $30-40. And if you make a critical error due to inexperience, stripping and restarting costs both time and additional material. Budget 50% above the kit price for ancillary supplies and contingency. The first DIY job is never cheap; subsequent applications on other vehicles become dramatically more cost-effective as you already own the tools.
Long-Term Value Proposition
Amortize the cost over the coating’s service life. A $120 DIY kit providing three years of protection costs $40 annually—less than a single professional detailing session. Compare this to powder coating at $200-400 per caliper set, which while permanent, cannot be repaired if damaged and must be completely stripped for any future modifications. Ceramic coatings offer a removable, renewable protection layer that preserves the underlying substrate. For leased vehicles or enthusiasts who frequently change colors, this reversibility provides significant value. Factor in the reduced cleaning time and prevention of caliper replacement due to corrosion, and the ROI becomes compelling for any vehicle you plan to keep beyond two years.
Professional Application vs. DIY: Making the Right Choice
Skill Level Assessment
Be brutally honest about your attention to detail and patience. Can you methodically clean and sand for hours without rushing? Do you have experience with automotive finishing? Professional results demand professional discipline. If you’ve successfully painted engine components or applied vinyl wrap, you likely possess the necessary skills. If your DIY experience is limited to oil changes, consider practicing on a spare caliper or bracket first. The application isn’t physically difficult, but the margin for error is razor-thin. One dust particle or fingerprint in the coating area creates a permanent defect.
Equipment Investment Requirements
Professional shops use downdraft spray booths with HEPA filtration and forced-air curing ovens—equipment costing tens of thousands. While you can’t replicate this at home, you can approach it with smart purchases: a $30 explosion-proof fan with HVAC filter creates a clean air environment, and IR heat lamps provide controlled curing. The non-negotiable items are a quality respirator (not a dust mask) rated for organic solvents and nitrile gloves rated for chemical resistance. Eye protection is mandatory; coating splashes in eyes require immediate medical attention. Factor these safety investments into your decision—skimping on protection is never acceptable.
Warranty Implications
Professional applications typically include a 2-5 year warranty against delamination, fading, and yellowing—provided you maintain the calipers according to their specifications. DIY products offer material warranties only, covering defects in the coating itself but not application errors. Read the fine print: many warranties require annual documentation of proper maintenance and prohibit certain cleaning chemicals. For high-value vehicles or show cars where flawless appearance is critical, the warranty alone justifies professional application. For daily drivers where perfect aesthetics are secondary to protection, DIY warranties are sufficient.
Safety Considerations and Best Practices
Respiratory Protection
Caliper coating solvents include xylene, toluene, and various ketones that cause central nervous system depression and permanent organ damage with chronic exposure. A NIOSH-approved respirator with organic vapor cartridges is mandatory—those cheap paper masks provide zero protection. Replace cartridges after 40 hours of use or when you detect any odor breakthrough. Work in a well-ventilated area with active exhaust; even with a respirator, solvent concentrations can exceed safe levels in enclosed spaces. Never spray-coat in a garage attached to living spaces—vapors can migrate through wall penetrations.
Skin Contact Protocols
Isocyanate hardeners in two-part coatings can cause sensitization, leading to severe allergic reactions upon subsequent exposure. Wear nitrile gloves (not latex) rated for chemical resistance, and if coating contacts skin, wash immediately with soap and water—never use solvents to clean skin, as they increase absorption. Long sleeves and eye protection prevent accidental splashes. Keep a bottle of sterile eye wash solution readily accessible. The chronic effects of repeated exposure are cumulative; what doesn’t bother you today can trigger a severe reaction months later.
Ventilation Requirements
Solvent vapors are heavier than air, pooling in low areas and creating explosion hazards. Any ignition source—including water heater pilots, furnace igniters, or power tool switches—can trigger catastrophic fires. Use explosion-proof ventilation equipment and maintain airflow that replaces the entire volume of your workspace every 3-5 minutes. Store rags soaked with solvents in approved metal safety containers, never in piles where they can spontaneously combust. The flash point of many coating solvents is below 70°F—room temperature in many garages. Treat these materials with the same respect you give gasoline.
Realistic Longevity Expectations
Track Use vs. Street Driving Impact
A coating rated for 5 years on a street car may survive only 2-3 track weekends before showing degradation. The cumulative heat cycles on track are exponentially more severe than street driving—where you might see 10-15 significant heat cycles monthly, track use subjects calipers to 50+ extreme cycles in a single day. The constant thermal shock from 400°F to ambient within minutes accelerates polymer degradation. Track enthusiasts should plan on annual inspections and likely biennial reapplication, regardless of manufacturer claims. Consider this maintenance, not failure.
Climate and Environmental Factors
Vehicles operated in coastal environments face accelerated degradation due to salt air penetrating micro-fissures in the coating. Desert environments subject coatings to intense UV and thermal cycling that can cause premature fading. Winter climates with road salt represent the ultimate torture test—while the coating protects against corrosion, the constant freeze-thaw cycles and chemical assault reduce effective lifespan by 30-40%. In these harsh environments, annual top-coat applications or dedicated ceramic boosters formulated for high-heat components provide cheap insurance. Garage storage dramatically extends life; daily outdoor parking in harsh climates may require reapplication every 18 months despite quality initial application.
Manufacturer Claims vs. Reality
Take “lifetime warranty” claims with healthy skepticism. No polymer coating is truly permanent under caliper conditions. Reputable manufacturers base claims on accelerated testing that simulates years of exposure in months, but these tests can’t perfectly replicate real-world variables. A realistic expectation: quality DIY coatings last 2-3 years on daily drivers, professional-grade coatings last 3-5 years under similar conditions. Track use cuts these figures in half. Factor reapplication into your long-term maintenance budget rather than expecting permanence. The coating will provide exceptional protection during its service life, but it is consumable, not permanent.
Troubleshooting Common Issues
Orange Peel and Texture Problems
If your coated calipers resemble an orange peel rather than smooth glass, you’ve experienced solvent entrapment or improper flash time. Light orange peel (texture visible only under close inspection) can be wet-sanded with 2000-grit paper and polished using a ceramic-specific polishing compound. Severe texture requires stripping and reapplication—attempting to sand heavily textured coatings usually cuts through to the substrate before achieving smoothness. Prevention beats correction: maintain proper application temperature, use appropriate reducers if needed, and respect flash times.
Adhesion Failure Causes
Flaking or peeling within weeks always traces back to prep or environmental issues. Perform a cross-hatch adhesion test on an inconspicuous area: score the coating in a grid pattern with a razor blade, apply adhesive tape, and rip it off. If coating lifts, adhesion is compromised. Common culprits include silicone contamination from previous dressings, inadequate abrasion, or applying over condensation. Unfortunately, partial adhesion failure requires complete removal—spot repairs won’t address the underlying bond issue. Strip with aircraft paint remover, re-prep meticulously, and start fresh.
Discoloration and Yellowing
Yellowing in white or light-colored coatings indicates UV degradation or chemical contamination. If it occurs uniformly, the coating lacked sufficient UV inhibitors—unfortunately, nothing short of reapplication with a better product solves this. Spotty yellowing suggests brake fluid contamination or reaction with incompatible cleaning chemicals. Test a hidden area with brake fluid: if it discolors immediately, the coating isn’t chemically resistant enough for your application. Darker colors mask this issue, but the underlying degradation still occurs. Always use pH-neutral cleaners and address brake fluid leaks immediately.
Ceramic Coatings vs. Alternative Caliper Finishes
Powder Coating: The Permanent Alternative
Powder coating provides a thicker, more durable finish that’s essentially permanent—but permanence is a double-edged sword. While it withstands incredible abuse, any damage is impossible to repair invisibly, and color changes require complete stripping. Powder coating also adds 3-5 mils of thickness, which can interfere with pad clearance on tight-fitting aftermarket calipers. The thermal conductivity is lower than ceramic coatings, potentially trapping heat. For show cars that never see track use, powder coating excels. For performance vehicles requiring periodic maintenance access or potential color changes, ceramic coatings offer superior flexibility.
Traditional High-Temp Paint Comparison
Traditional caliper paints (typically silicone-modified polyester resins) cost less initially but require reapplication every 6-12 months. They lack the nano-scale filling properties of ceramics, meaning surface imperfections remain visible. Their temperature ratings are often overstated—while they might survive 500°F peak, they degrade rapidly at sustained 400°F operation. The chemical resistance is minimal; brake dust etches into the paint within weeks. When you factor in the labor of annual repainting and inferior protection, ceramic coatings prove more economical within 18 months. The only advantage of traditional paint is forgiveness during application—it’s harder to mess up.
Vinyl Wrapping Feasibility
Vinyl wraps on calipers represent a short-term aesthetic solution, not genuine protection. Quality cast vinyl with high-tack adhesive might survive 6-12 months on street cars, but track use causes immediate failure. The adhesive softens above 200°F, leading to peeling and bubbling. Vinyl also insulates the caliper, reducing heat dissipation and potentially causing brake fade. While vinyl offers infinite color and finish options for temporary transformations, it provides zero corrosion protection and actively degrades brake performance. Consider it a styling mod for car shows, not a protective solution.
Environmental and Regulatory Factors
VOC Compliance in Your Region
Volatile Organic Compound regulations vary dramatically by state and country. Many high-performance ceramic coatings exceed California’s 250 g/L VOC limit, making them illegal for retail sale or professional application there. Check your local air quality management district regulations before purchasing. Waterborne formulations offer VOC compliance but often sacrifice temperature resistance and durability. Some regions require record-keeping and reporting for professional applications. DIY users face less scrutiny, but using non-compliant products during emissions testing periods can contribute to regional air quality violations. Responsible enthusiasts choose compliant products when available, or travel to jurisdictions where their use is permitted.
Disposal Considerations
Leftover coating, solvent-soaked rags, and empty containers are hazardous waste. Never pour solvents down drains or into the ground. Cured solid waste (mixing cups, brushes) can typically go in regular trash, but liquid waste requires disposal at household hazardous waste facilities. Check with your local waste management authority—many offer free disposal days for automotive chemicals. Keep materials in original containers with labels intact. The environmental impact of improper disposal far exceeds the convenience of casual disposal. Responsible car care includes responsible waste management.
Frequently Asked Questions
How long does a ceramic coating on brake calipers actually last?
For daily-driven street vehicles, quality DIY coatings typically provide 2-3 years of effective protection before requiring reapplication. Professional-grade formulations can extend this to 3-5 years under similar conditions. However, vehicles regularly driven on track or in harsh winter environments with road salt should expect 12-18 months of optimal performance. The coating doesn’t “fail” overnight—instead, you’ll notice reduced water beading and increased brake dust adhesion as early indicators of degradation. Regular maintenance with ceramic boosters can extend service life by 30-40%.
Can I apply ceramic coating to calipers without removing them from the car?
While technically possible, this approach yields subpar results and creates significant risk. Incomplete surface preparation is inevitable, leading to premature failure. Overspray can contaminate brake rotors, pads, and nearby components, potentially compromising braking performance. Professional results demand removal, thorough cleaning, and proper masking. The exception is touch-up work on small areas, but for initial application, the 2-3 hours spent removing calipers pays dividends in coating longevity and appearance. If removal isn’t feasible due to specialized tools or complexity, professional application with proper masking and protection is strongly recommended over a rushed DIY job.
What temperature rating do I really need for my application?
Stock brake systems on street cars rarely exceed 400°F during normal operation, so a coating rated for 600°F continuous provides ample safety margin. Performance street cars with upgraded pads and rotors can see 500-600°F during aggressive mountain driving, requiring 800°F continuous ratings. Dedicated track cars with race compounds regularly hit 800-1,000°F, necessitating 1,200°F+ continuous ratings. Always choose a coating with at least 200°F headroom above your expected maximum temperature. Remember that temperature ratings assume proper application—improperly applied coatings fail at much lower temperatures.
Will ceramic coating affect my brake performance or cooling?
Properly applied ceramic coatings can actually improve thermal management by increasing radiative heat transfer from the caliper surface. The micro-textured ceramic matrix emits infrared energy more efficiently than bare metal, potentially reducing caliper temperatures by 15-25°F during sustained use. The coating thickness (2-3 mils) is negligible and doesn’t impede heat conduction from pads to caliper. However, extremely thick or poorly applied coatings can act as an insulator. Follow manufacturer specifications for film thickness and application technique to ensure you gain the thermal benefits rather than drawbacks.
Can I ceramic coat already painted or powder coated calipers?
Yes, provided the existing finish is sound and properly prepared. Scuff the surface with 600-grit paper to create mechanical tooth, then clean thoroughly to remove contamination. The ceramic coating will bond mechanically to the underlying finish. This is an excellent way to refresh faded powder coating or add chemical resistance to traditional paint. However, if the base coating is failing (peeling, cracking), the ceramic layer will simply fail with it. Address any base-coat issues first. Never apply over rust or corrosion—this merely locks in the problem.
How does ceramic coating compare to powder coating for track use?
Powder coating provides superior impact resistance and is permanent, but its thicker film (3-5 mils) can slightly reduce heat dissipation. Ceramic coatings offer better thermal management and are easier to repair or change colors, but require more frequent reapplication on track cars. For dedicated track vehicles that see limited street use, powder coating’s durability edge makes it preferable. For dual-purpose cars, ceramic coatings provide the flexibility to refresh protection annually without permanent commitment. Many track enthusiasts use powder coating for the main caliper body and ceramic coating on areas requiring frequent maintenance access.
How soon can I drive the car after applying ceramic coating?
The vehicle can be driven after the initial cure period of 24-48 hours, but avoid heavy braking and high temperatures for a full 7 days. During the first week, brake gently and avoid sustained high-heat situations like mountain descents. The coating reaches full chemical resistance only after complete cure (5-7 days) and proper heat cycling. Rushing this timeline risks solvent entrapment, soft film, and premature failure. Professional shops often use accelerated curing to reduce this wait, but for DIY applications, patience is mandatory. Mark your calendar and resist the temptation to “test” the brakes aggressively before the cure is complete.
Will ceramic coating hide existing caliper damage or imperfections?
Ceramic coatings are not fillers—they’re thin-film protective layers that follow the substrate’s topography. Minor surface scratches will be less visible due to the coating’s gloss and clarity, but deep gouges, pitting, and casting imperfections remain visible. In some cases, the smooth, glossy finish can actually highlight flaws by creating uniform reflection that draws attention to disruptions. For damaged calipers, proper surface preparation including filling pits with high-temp epoxy filler and sanding smooth is necessary before coating. Think of ceramic coating as a magnifying glass: it enhances whatever is underneath, good or bad.
What’s the real cost difference between DIY and professional ceramic coating?
DIY material costs run $80-150 for a complete kit, plus $50-100 in tools and supplies if starting from scratch. Professional application costs $400-800 for a standard four-caliper job. The break-even point is approximately 2-3 DIY applications—your first job costs nearly as much as professional work when factoring tool investment, but subsequent applications on other vehicles become economical. However, this ignores the value of warranty coverage and professional expertise. For a $200 set of stock calipers, DIY makes financial sense. For $3,000 aftermarket monoblocks, the professional premium is cheap insurance against a $1,000 stripping and recoating job if you make a critical error.
Can I use ceramic coating on other brake components like brackets and rotors?
Brackets and mounting hardware benefit enormously from ceramic coating using the same preparation and application process. This prevents the rust that causes seized slide pins and uneven pad wear. However, never coat brake rotors—either the friction surfaces or the hats. The coating cannot withstand the 1,200°F+ temperatures at the rotor face and would create a dangerous reduction in friction. Coating rotor hats is also inadvisable, as the extreme thermal cycling causes rapid failure and potential contamination of brake pads. Focus your efforts on calipers, brackets, and dust shields, leaving rotors completely untouched.