There’s nothing quite as annoying as a sagging headliner brushing against your head while you’re driving. That once-taut fabric ceiling starts to droop, peel away from the board, and make your car’s interior look years older than it actually is. Before you consider shelling out hundreds of dollars at an upholstery shop, know this: modern car headliner repair kits have made DIY restoration surprisingly achievable for anyone willing to invest a few hours and a little patience.
Fabric headliner repair isn’t just about slapping on some glue and hoping for the best. The right kit, combined with proper technique, can deliver results that rival professional work—restoring that crisp, factory-fresh appearance while saving you serious money. Whether you’re dealing with a small corner detachment or a complete catastrophic failure where the entire headliner is hanging like a drapery, understanding what makes a quality repair kit and how to use it effectively is the difference between a six-month fix and a six-year restoration.
Top 10 Car Headliner Repair Kit
Detailed Product Reviews
1. 3M Headliner & Fabric Adhesive, 18.1 oz. Aerosol Can

Overview: The 3M Headliner & Fabric Adhesive delivers industrial-strength bonding in a convenient aerosol format. This 18.1-ounce can is specifically engineered for automotive headliner applications, providing a professional-grade solution that dries completely clear. The fast-acting formula sets within 30 to 60 minutes, allowing for efficient project completion without extended downtime. With an adjustable nozzle, users can control spray patterns for optimal coverage across various surface areas. This product represents 3M’s commitment to specialized automotive care, offering a straightforward approach to reattaching sagging fabric and upholstery.
What Makes It Stand Out: The 3M brand name carries decades of adhesive innovation and trust. Unlike brush-on alternatives, the aerosol application ensures uniform distribution without saturating materials, preventing bleed-through on delicate fabrics. The adjustable nozzle adapts from narrow streams to wide mist patterns, accommodating both precise edge work and broad surface coverage. Its rapid drying time significantly outperforms many liquid adhesives that require overnight curing. The clear-drying formula maintains your interior’s original appearance without discoloration or staining.
Value for Money: At $17.44 ($0.96 per ounce), this adhesive sits in the mid-range price category. While cheaper than professional upholstery services that cost hundreds, it’s pricier than some generic alternatives. However, the 3M reputation, specialized formulation, and generous quantity justify the investment. One can typically covers multiple vehicles or extensive repairs, making it economical for serious DIY enthusiasts.
Strengths and Weaknesses: Strengths include trusted brand quality, even spray application, fast tack time, versatile nozzle control, and professional results. The clear finish preserves interior aesthetics. Weaknesses involve potential overspray requiring masking, need for well-ventilated workspace, and inability to precisely target small areas. Aerosol cans have limited shelf life once opened.
Bottom Line: This is the go-to choice for those seeking professional spray adhesive performance. Ideal for large-scale headliner repairs where even coverage is critical. The premium price delivers reliable, lasting results that justify spending more for the 3M name.
2. Moibunka Universal 262PCS Car Headliner Repair Kit, Premium Auto Interior Ceiling Snap Rivets for Fixing Sagging Roofs, Easy Installation for All Cars, Perfect for DIY Repairs (Grey)

Overview: The Moibunka Universal Repair Kit offers a mechanical solution to sagging headliners with 262 components designed for universal vehicle compatibility. This budget-friendly kit eliminates the need for messy adhesives by using snap rivets and push pins to physically secure loose fabric. Included tools—a screwdriver and tape measure—enable precise installation without professional assistance. The grid cloth construction blends with most interior colors while providing a rust-resistant coating for longevity. This approach prioritizes simplicity and immediate results over chemical bonding.
What Makes It Stand Out: The purely mechanical fixation method stands apart from adhesive-heavy market options. Users avoid toxic fumes, lengthy curing times, and potential fabric damage from oversaturation. The comprehensive kit includes everything needed for installation, making it truly plug-and-play. The rust-resistant coating ensures durability in varying automotive environments, while the universal design fits everything from compact cars to trucks.
Value for Money: At $7.99, this is among the most affordable repair options available. It eliminates $200+ professional reupholstery costs and provides enough components for multiple repairs or several vehicles. The reusable nature of the tools adds ongoing value. For budget-conscious drivers or those with older vehicles, this represents exceptional cost-effectiveness.
Strengths and Weaknesses: Strengths include rock-bottom pricing, immediate results with no drying time, user-friendly installation, universal compatibility, and safe chemical-free operation. The kit’s completeness is commendable. Weaknesses center on aesthetic compromise—visible fasteners alter original interior appearance. Mechanical solutions may loosen over time, and improper installation can create fabric tears. Product description shows quantity inconsistencies (262 vs 65 pieces), raising quality control concerns.
Bottom Line: Perfect for temporary fixes or budget repairs on older vehicles where cosmetic perfection is secondary. Offers unbeatable value for those comfortable with visible hardware. Not recommended for luxury cars or concours-level restorations.
3. Headliner Repair Glue, Car Headliner Adhesive with Brush, Car Roof Liner Fabric Adhesive, Upholstery Glue for Cars,Headliner Repair Kit, Suitable for Automotive interiors, Fabric, Leather

Overview: This brush-applied headliner adhesive provides a precision-focused solution for interior fabric repairs. Formulated to bond sponge, leather, rubber, and fabric, the kit emphasizes versatility across automotive upholstery applications. The integrated brush applicator in the cap allows for controlled, targeted application without separate tools. With temperature resistance from -40°C to 120°C and a fully waterproof seal, this adhesive is engineered for extreme automotive conditions. The non-toxic, VOC-free formula prioritizes user safety during application.
What Makes It Stand Out: The built-in brush design eliminates mess and waste while enabling exact placement in tight corners and along seams. Its impressive temperature stability prevents winter brittleness and summer melting—a common failure point in lesser adhesives. The eco-friendly, child-and-pet-safe formulation allows worry-free use in family vehicles. Initial curing begins in just 5-10 hours, faster than many competitors requiring full 24-hour waits.
Value for Money: Priced at $13.99, this adhesive offers strong value considering its specialized automotive formulation and included applicator. Comparable general-purpose adhesives cost less but lack the temperature resistance and safety certifications. The waterproof guarantee and non-toxic premium justify the moderate price increase over bargain options.
Strengths and Weaknesses: Strengths include precise brush application, extreme temperature resilience, permanent waterproof bond, non-toxic formula, and fast initial cure time. The integrated applicator is convenient. Weaknesses involve a lengthy 12-24 hour full cure period requiring vehicle downtime. The brush may degrade with repeated use, and the 4.23oz quantity limits large repair scope. No additional tools like rollers are included.
Bottom Line: An excellent choice for health-conscious users needing precise, durable repairs. Ideal for families with children or pets. Best suited for small to medium repairs where application control trumps speed.
4. 50 Kits Car Roof Headliner Repair Kit, 202Pcs Rivets Repair Button Auto Roof Snap Rivets Retainer for Interior Ceiling Cloth Fixing Repair Buckle with Installation Tool (Grey Grid)

Overview: This comprehensive mechanical repair kit includes 50 roof buckles, 50 push pins, a screwdriver, and measuring tape—totaling 202 pieces for complete headliner restoration. Designed as a universal solution, the rivets feature grid cloth construction with anti-rust coating to match factory interiors. The manufacturer recommends 4.7-5.9 inch spacing between fasteners for optimal tension distribution. This kit specifically addresses edge separation by recommending supplemental glue application before mechanical fastening, demonstrating a hybrid approach to challenging repairs.
What Makes It Stand Out: The sheer component quantity provides exceptional coverage for large headliners or multiple vehicles. The color-matched grid cloth material mimics OEM appearance better than generic plastic fasteners. Rigorous testing across thousands of vehicles ensures genuine universal fitment. The included tape measure enables professional-grade spacing accuracy, preventing the sagging that results from uneven fastener distribution.
Value for Money: At $8.29, this kit delivers remarkable value—roughly $0.04 per component. It eliminates professional labor costs while providing enough hardware for several applications. The inclusion of both buckles and pins offers repair versatility. For comprehensive coverage at minimal cost, this is difficult to beat.
Strengths and Weaknesses: Strengths include massive component count, rust-resistant materials, universal compatibility, included installation tools, and cost-effectiveness. The hybrid glue-plus-rivet approach solves edge-lifting issues. Weaknesses involve aesthetic trade-offs from visible hardware, potential for improper spacing without careful measurement, and mechanical fastening that may not match adhesive seamlessness. The dependency on supplemental glue for edges adds hidden costs.
Bottom Line: The ultimate value proposition for mechanical headliner repair. Perfect for DIYers wanting comprehensive coverage without adhesive mess. Best for utility vehicles and daily drivers where function outweighs flawless appearance.
5. Headliner Repair Glue, Car Headliner Adhesive with Rubber Seam Roller Headliner Repair Kit,Upholstery Glue with Brush for Automotive interiors, Fabric, Leather (4.23oz)

Overview: This premium headliner repair kit combines high-strength adhesive with professional application tools, including a rubber seam roller and protective gloves. The 4.23-ounce formula covers up to 100 square feet, making it suitable for complete headliner replacements. Engineered for hard and soft porous and non-porous surfaces, it bonds leather, fabric, plastic, and rubber. The specialized roller features a solid wood handle and flexible rubber design with metal connector to eliminate air bubbles—a common DIY pitfall. The non-toxic, odorless, non-flammable formula ensures safe enclosed-space application.
What Makes It Stand Out: The inclusion of a professional-grade seam roller elevates this beyond basic glue kits. The roller mechanically works adhesive into fibers for superior mechanical bonding while preventing bubbles that cause future sagging. Protective gloves demonstrate thoughtful user experience design. The engineered roller construction—wood handle, metal connector, flexible rubber—provides durability and effectiveness missing from cheap plastic alternatives.
Value for Money: At $16.99, this kit commands a premium but justifies it through included tools. Comparable adhesives cost $10-12 without rollers or gloves. Considering professional rollers cost $8-15 separately, the bundled pricing offers savings. The 100 sq ft coverage maximizes utility per dollar.
Strengths and Weaknesses: Strengths include professional seam roller for bubble-free finishes, protective gloves, extreme temperature resistance, non-toxic formulation, and comprehensive multi-surface bonding. The integrated brush plus roller provides dual application modes. Weaknesses include higher upfront cost and smaller adhesive quantity (4.23oz) compared to spray cans. The premium price may deter budget-conscious buyers, and roller effectiveness depends on user technique.
Bottom Line: The best choice for DIY perfectionists seeking professional-grade results. The roller is a game-changer for smooth, bubble-free finishes. Worth the premium for those prioritizing appearance and longevity over minimal cost.
6. 50 Kits Car Roof Headliner Repair Kit, 50pcs Rivets Repair Button,202Pcs Auto Roof Snap Rivets Retainer for Interior Ceiling Cloth Fixing Repair Buckle with Installation Tool (Beige Flannelette)

Overview: This comprehensive repair kit provides a DIY solution for sagging car headliners with 50 rivets, 50 colorful push pins, a screwdriver, and tape. Designed for universal compatibility across thousands of vehicle models, the beige flannelette material features grid cloth construction with anti-rust coating to blend with most factory interiors. The kit enables home repairs without professional tools or structural modifications, making it accessible for budget-conscious car owners.
What Makes It Stand Out: The all-in-one package eliminates guesswork by including every necessary component. The color-matched fabric and specialized coating ensure durability while maintaining factory aesthetics. With tested compatibility across numerous vehicles and a recommended 4.7-5.9 inch spacing pattern, it provides clear guidance for effective repairs. The inclusion of both rivets and decorative push pins offers flexible fastening options for different headliner conditions.
Value for Money: At $8.99, this kit costs less than 5% of professional headliner replacement ($200-$500). The comprehensive nature means zero additional purchases, and the home-installation approach saves labor costs. For budget-conscious drivers, it delivers an accessible alternative to living with a sagging ceiling, though results remain temporary compared to full reupholstery.
Strengths and Weaknesses: Strengths include complete tool inclusion, universal vehicle fit, durable rust-resistant materials, and straightforward installation. Weaknesses involve visibility of fasteners (aesthetic compromise), requirement for separate glue on edge separations, potential color mismatch with some interiors, and that it’s fundamentally a temporary fix rather than permanent reupholstery.
Bottom Line: Ideal for DIY enthusiasts seeking an affordable, quick fix for minor to moderate headliner sagging. While not replacing professional reupholstery, it effectively extends your headliner’s life at a fraction of the cost and effort.
7. Car Headliner Repair Adhesive - Upholstery & Roof Liner Quick Fix Glue | Strong Bond for Fabric, Leather, | Professional Strength Automotive Interior Adhesive 100ml1pc

Overview: This professional-strength adhesive offers a chemical solution for headliner repair with a 100ml bottle of quick-fix glue. Formulated for automotive interiors, it creates transparent bonds on fabric, leather, sponge, and canvas surfaces. The adhesive cures initially in 5-10 hours with full strength achieved in 12-24 hours at room temperature, providing a relatively fast turnaround for DIY repairs.
What Makes It Stand Out: The high-viscosity formula provides exceptional heat resistance and waterproofing while maintaining elasticity to prevent hardening or cracking over time. Unlike mechanical fasteners, it creates an invisible repair without puncturing materials. The non-flammable composition adds safety, and its versatility extends beyond automotive use to household upholstery projects like furniture and jeans patching.
Value for Money: Priced at $8.99, this professional-grade adhesive competes with products costing twice as much. A single bottle can address multiple small repairs, making it economical compared to $200+ professional services. The multi-surface capability eliminates need for separate specialty glues, maximizing utility across various materials and projects.
Strengths and Weaknesses: Strengths include strong transparent bonding, weather resistance, flexible cure times, and multi-material compatibility. Weaknesses involve requiring clean, properly prepared surfaces; not suitable for completely detached headliners needing structural support; potential chemical odor during curing; and longer wait times compared to instant mechanical fixes that work immediately.
Bottom Line: Best suited for adhesive-based repairs where fabric remains intact but delaminated. Excellent for DIYers comfortable with surface preparation, but less effective for severely sagging headliners requiring physical fasteners or structural reinforcement.
8. 65 Set Car Roof Headliner Repair Kits, 262 Pcs Auto Roof Snap Rivets Retainer for Interior Ceiling Cloth Fixing Repair Buckle with Installation Tool (Beige Flannelette)

Overview: This expanded repair kit includes 65 rivets and 262 total pieces for comprehensive headliner restoration. The beige flannelette set contains multiple fastener types—rivets, repair buttons, snap rivets, and retainers—plus an installation tool. Constructed from high-quality plastic and premium ABS material, components resist corrosion and rust while providing secure attachment to vehicle ceilings.
What Makes It Stand Out: The higher piece count (65 vs. typical 50) provides extra fasteners for larger vehicles or installation mistakes. ABS snap rivets offer superior durability compared to standard plastic, while specialized repair buttons target small tears and holes. The inclusion of dedicated retainers for ceiling cloth creates a more professional fastening system than basic kits with only one fastener type.
Value for Money: At $9.49, it delivers 30% more rivets than $8.99 competitors for only 50 cents more, representing excellent per-piece value. The multi-component approach addresses various failure modes—sagging, tears, and loose edges—in one purchase, eliminating multiple store trips and providing spare parts for future repairs.
Strengths and Weaknesses: Strengths include generous quantity, durable ABS construction, versatile fastener types, and comprehensive tool inclusion. Weaknesses mirror other mechanical kits: visible fasteners compromise OEM appearance, beige may not match all interiors, installation requires careful spacing, and it’s ultimately a temporary solution rather than permanent reupholstery that restores factory condition.
Bottom Line: Superior to 50-piece kits for larger repairs or less experienced DIYers needing spare parts. Choose this for maximum fastener quantity and material durability at minimal price increase, accepting the trade-off of visible hardware for affordability.
9. Attmu 60 Pcs Upholstery Tacks Headliner Pins Clear Heads Twist Pins for Slipcovers and Bedskirts, 0.5 Inches Bed Skirt Pins
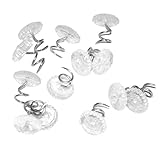
Overview: Attmu’s 60-piece twist pin set provides a tool-free solution for securing upholstery and headliner fabric. Featuring 0.5-inch clear plastic heads and stainless steel needles, these pins penetrate multiple fabric layers without tearing fibers. Designed primarily for slipcovers and bedskirts, they adapt to automotive headliner repairs as a temporary measure for minor sagging where permanent fasteners aren’t desired.
What Makes It Stand Out: The transparent button heads create a less conspicuous fastening system compared to colored rivets, while the twist-in design requires zero tools or drilling. Easy removal allows for adjustments and non-permanent installation. The stainless steel construction prevents bending during insertion, and the clear heads blend with most interior colors better than metallic alternatives that can stand out.
Value for Money: At $6.99, it’s the most economical option, costing less than a fast-food meal. For renters or those seeking immediate, non-committal fixes, the low price justifies the temporary nature. However, automotive-specific kits offer better long-term value for car owners needing durability, as these lack the specialized design for vehicle ceiling weight and heat conditions.
Strengths and Weaknesses: Strengths include easiest installation, removability, no surface damage, clear head aesthetics, and lowest price. Weaknesses involve inadequate holding power for automotive applications, unsuitable for heavy fabric sagging, purely temporary solution, and unprofessional appearance in vehicles compared to proper headliner kits designed specifically for automotive use.
Bottom Line: Best for testing repair approaches or emergency temporary fixes. Opt for automotive-specific rivet kits for durable, lasting headliner repairs instead of these household upholstery pins that aren’t engineered for vehicle environments and permanent solutions.
10. 65 Set Car Roof Headliner Repair Kits, 262 Pcs Auto Roof Snap Rivets Retainer for Interior Ceiling Cloth Fixing Repair Buckle with Installation Tool (Grey Flannelette)

Overview: This 65-set headliner repair kit mirrors its beige counterpart with identical 262-piece contents but features grey flannelette material. The comprehensive package includes 65 rivets, repair buttons, snap rivets, retainers, and installation tools. Premium ABS plastic construction ensures corrosion resistance and durable performance for interior ceiling cloth repairs in vehicles with darker interiors.
What Makes It Stand Out: The grey colorway provides an alternative interior matching option beyond standard beige, crucial for modern vehicles with darker headliners. Like the beige version, it offers 30% more rivets than standard 50-piece kits, with specialized fastener types for different repair scenarios. The ABS snap rivets deliver superior holding power compared to basic plastic rivets found in cheaper alternatives.
Value for Money: At $9.49, it presents identical value to the beige variant—excellent per-piece pricing with 65 rivets for only 50 cents more than basic 50-rivet kits. The color choice adds value without cost increase, letting buyers match their specific interior without compromise or additional expense, making it a smart choice for darker vehicle cabins.
Strengths and Weaknesses: Strengths include color option flexibility, generous quantity, durable ABS materials, versatile components, and comprehensive tool inclusion. Weaknesses remain consistent: visible fasteners detract from OEM appearance, installation requires careful spacing for proper hold, and mechanical fastening is ultimately temporary compared to professional reupholstery that restores original factory condition.
Bottom Line: Choose between this grey version and the beige based solely on interior color matching. Both offer identical quality and value, making this a smart purchase for DIYers needing quantity and durability with the added benefit of color selection for better aesthetic integration.
What Is a Car Headliner and Why Does It Sag?
Your car’s headliner is a multi-layered component: a rigid backing board (typically fiberglass or compressed cardboard), a layer of foam insulation, and the visible fabric or vinyl material. That foam layer is the weak link. Over time, heat, humidity, and age cause the foam to deteriorate into powder, destroying the bond between fabric and board. This breakdown is accelerated in hot climates, cars parked in direct sunlight, and vehicles with sunroofs that allow extra heat buildup. Understanding this failure mechanism helps you choose a repair strategy that addresses the root cause, not just the symptoms.
Why DIY Headliner Repair Makes Sense
Professional headliner replacement typically costs between $200 and $600 depending on your vehicle and location. A quality car headliner repair kit runs a fraction of that price, usually $30 to $80. Beyond the obvious savings, DIY repair gives you complete control over materials and timing. You can work at your own pace over a weekend, ensure color matching that satisfies your eye, and gain the satisfaction of preserving your vehicle’s interior yourself. Modern adhesives have evolved to be more forgiving and effective than ever, making this one of the most accessible automotive interior repairs.
Understanding Different Types of Headliner Repair Kits
Not all sagging headliners are created equal, and neither are the kits designed to fix them. The market offers several distinct approaches, each suited for different levels of damage and user expertise.
Spray Adhesive Kits
These are the most popular and user-friendly options, featuring aerosol cans of high-strength, heat-resistant adhesive. They’re ideal for minor to moderate sagging where the original fabric is still in good condition. The best formulations offer repositionable tack, allowing you to adjust the fabric before the bond sets permanently. Look for products specifically labeled for automotive headliner use—these withstand temperatures up to 170°F without softening.
Brush-On Adhesive Kits
For more severe failures or when you need maximum control, brush-on adhesives provide a thicker, more substantial bond. Applied with a brush or roller, these contact cements create an incredibly strong, permanent connection. They’re messier and require more skill to apply evenly, but they excel when the entire headliner needs reattachment or when working with replacement fabric. The open time is typically longer, giving you more working time to position material perfectly.
Headliner Replacement Fabric Kits
When your original fabric is stained, torn, or disintegrated, a replacement fabric kit becomes necessary. These include automotive-grade fabric pre-cut to approximate sizes or sold by the yard, plus specialized adhesive. The fabric features the same foam backing as OEM material and comes in various colors to match your interior. This approach is more labor-intensive but solves problems that adhesive alone cannot fix.
Complete Restoration Kits
The most comprehensive option includes everything: adhesive (spray or brush-on), replacement fabric, cleaning solvent, application tools, and protective supplies. These all-in-one solutions eliminate guesswork and ensure material compatibility. They’re perfect for first-timers who want professional results without hunting down individual components.
Key Features to Look for in a Quality Repair Kit
A superior headliner repair kit distinguishes itself through several non-negotiable features that separate temporary fixes from lasting restorations.
Adhesive Strength and Heat Resistance
The single most critical component is the adhesive formula. It must be specifically engineered for automotive interiors, capable of withstanding extreme temperature cycling from freezing winters to scorching summers. Check for temperature ratings exceeding 160°F and look for “high-tack” or “high-strength” designations. Water-based adhesives generally lack the heat resistance needed for this application—solvent-based formulas are the professional standard.
Fabric Quality and Color Matching
If your kit includes fabric, examine the weight and composition. Automotive headliner fabric typically weighs 40-60 grams per square meter and features a knit polyester face with polyurethane foam backing. The foam should be dense and uniform, not thin or irregular. For color matching, request fabric samples before purchasing if possible, as online photos rarely capture true interior shades accurately.
Coverage Area and Kit Completeness
Calculate your headliner’s square footage before buying. Most kits specify coverage in square feet—spray adhesives typically cover 30-50 square feet per can. A complete kit should include detailed instructions, safety warnings, and any necessary applicators. Some premium kits add edge trim, replacement buttons, or even headliner board repair patches for damaged backing material.
The Importance of Fabric Compatibility
Using the wrong adhesive-fabric combination leads to disaster. Spray adhesives work best with lightweight fabrics and minor repairs, while heavy replacement fabrics demand brush-on contact cement. The fabric’s foam backing must be compatible with the adhesive chemistry—some adhesives dissolve certain foam types. Always test a small, hidden section first. If you’re matching unusual textures like suede or alcantara, you’ll need specialized adhesives that won’t bleed through or discolor the material.
Essential Tools You’ll Need Beyond the Kit
Even the most complete kit won’t include every tool for professional results. Gather these essentials before starting: a Torx and socket set for removing handles and visors, a flathead screwdriver for gentle prying, a high-quality fabric scissors, a lint roller for cleaning fabric, 120-grit sandpaper for board preparation, a tack cloth for dust removal, and a heat gun for activating adhesives in cool conditions. Painter’s tape and plastic sheeting protect your interior from overspray, while a sturdy workbench with soft covering prevents scratching the headliner board.
Preparing Your Vehicle for Headliner Repair
Success is 90% preparation. Rushing this phase guarantees mediocre results and future sagging.
Safety First: Protecting Yourself and Your Car
Work in a well-ventilated area—outdoors or in a garage with doors open. Wear a respirator rated for organic vapors, not just a dust mask. Safety glasses protect eyes from adhesive overspray, while nitrile gloves prevent skin contact with solvents. Disconnect your vehicle’s battery before removing any interior components with airbags (like A-pillar covers) to avoid accidental deployment. Cover seats, dashboard, and windows with drop cloths; adhesive overspray is nearly impossible to remove from glass and plastic.
Removing the Headliner Board
This is often the most intimidating step, but patience prevents breakage. Start by removing all trim pieces: visors, dome lights, grab handles, coat hooks, and A/B/C pillar covers. Take photos of every step and organize hardware in labeled bags. Most headliners drop down after removing these fasteners, but some require flexing through the door opening. Never force it—if it’s stuck, you’ve missed a screw. SUVs and hatchbacks often have larger headliners that benefit from an extra set of hands during removal.
Cleaning Old Adhesive and Foam Residue
Once the board is out, lay it fabric-side up on your workbench. Gently peel away the sagging fabric—the deteriorated foam will likely come with it. Use a plastic scraper to remove loose foam, then sand the board lightly with 120-grit paper to create a smooth, clean surface. Vacuum thoroughly, then wipe with a tack cloth. For stubborn residue, apply a small amount of mineral spirits on a rag, but avoid saturating the board. The surface must be completely dry before applying new adhesive.
Step-by-Step: Using a Spray Adhesive Kit Effectively
Spray adhesive offers the fastest path to restoration when executed with precision. Temperature matters—work in 65-85°F conditions for optimal curing.
Step 1: Workspace Setup
Lay the headliner board on sawhorses covered with old sheets. Position it so you can walk around all sides. Shake the adhesive can vigorously for at least two minutes—this is crucial for proper chemical mixing. Test spray on cardboard to ensure an even fan pattern. Mask off any areas where you don’t want adhesive, like mounting holes or wiring channels.
Step 2: Application Technique
Apply light, even coats to both the board and fabric backing. Hold the can 8-10 inches away, moving in smooth, overlapping passes. Three light coats beat one heavy coat every time—heavy applications soak through fabric and create visible dark spots. Wait 30-60 seconds between coats for solvents to flash off. After the final coat, wait until the surface is tacky but doesn’t transfer to your finger (usually 2-3 minutes), then carefully lay the fabric onto the board.
Step 3: Drying and Reinstallation
Start from the center and work outward, using a soft squeegee or your hand wrapped in a lint-free cloth to smooth the fabric and eliminate bubbles. Work quickly but methodically—most spray adhesives offer a 5-10 minute repositioning window. Once positioned, allow 30 minutes of drying time before trimming edges. Full cure takes 24 hours, but you can carefully reinstall the headliner after 2-3 hours if necessary. Avoid rolling down windows or exposing the vehicle to extreme heat during the curing period.
Step-by-Step: Mastering the Brush-On Adhesive Method
Brush-on contact cement demands more skill but rewards you with unparalleled durability. This method is non-negotiable for heavy replacement fabrics.
Apply a thin, even coat to both surfaces using a high-quality bristle brush. Avoid bristle marks by brushing in one direction. Allow both surfaces to dry completely until they’re no longer tacky—this typically takes 15-30 minutes depending on humidity. The adhesive should look glossy but feel dry to the touch. Here’s the critical part: once you touch the two surfaces together, they bond instantly with no repositioning possible. Use dowels or thin strips of wood laid across the board to prevent contact while you position the fabric. Remove them one by one, smoothing each section before moving to the next. A wallpaper seam roller helps achieve maximum contact pressure.
Advanced Techniques for a Factory-Quality Finish
Professional results hide in the details that most DIYers overlook.
Trimming and Tucking Edges
Never cut fabric flush with the board edge. Leave a 1-inch overhang, then wrap it around the board’s edge and glue it to the back. This prevents fraying and creates a clean line when reinstalled. For curved edges, make small relief cuts in the fabric every few inches so it lays flat without puckering. Use sharp scissors and cut from the backside to avoid visible fraying on the face fabric.
Handling Contours and Cutouts
Sunroof openings, dome light holes, and visor mounts require precision. Make an X-cut in the fabric over each opening, then cut from the center outward, stopping 1/4 inch from the edge. Apply adhesive to the board’s edge, then carefully wrap and press the fabric tabs around the opening. For deep contours, use a heat gun on low setting to soften the fabric slightly, making it more pliable. Work slowly—heat can melt foam backing if held too close.
Common DIY Mistakes and How to Avoid Them
The number one error is insufficient surface preparation. Any residual foam dust or grease creates a weak bond that fails within months. The second mistake is applying adhesive too thickly, which actually weakens the bond and bleeds through fabric. Third is rushing reinstallation before full cure—this stresses the fresh bond and causes premature separation. Fourth is ignoring temperature requirements; applying adhesive in cold conditions prevents proper curing. Finally, using household glue or general-purpose spray adhesive guarantees failure—these products can’t withstand the 140°F+ temperatures that build up inside a parked car.
Maintaining Your Newly Repaired Headliner
Protect your investment with simple maintenance habits. Park in shade whenever possible or use a windshield sun reflector to reduce heat buildup. Leave windows cracked on hot days to vent interior heat. Clean the headliner only when necessary using a soft brush attachment on your vacuum. For stains, use a microfiber cloth dampened with water and mild soap—never saturate the fabric. Avoid hanging heavy objects from the headliner or using adhesive hooks, which concentrate stress on small areas. Annual inspection of edges and around openings catches potential issues before they become sagging problems.
When Professional Repair Is the Smarter Choice
Sometimes DIY isn’t the answer. If your headliner board is cracked, water-damaged, or warped, replacement is the only permanent solution—this requires professional equipment to fabricate a new board. Vehicles with integrated airbags in the headliner or complex panoramic sunroof systems often have delicate sensors and mechanisms that novices can damage. If you’ve attempted a repair that failed, the cumulative adhesive layers may prevent a successful second DIY attempt. Finally, if you own a luxury vehicle with alcantara, suede, or custom embroidery, the cost of messing up exceeds the price of professional work.
Cost Analysis: DIY Kits vs. Shop Repair
A comprehensive DIY kit with quality adhesive and fabric runs $50-$90. Add $20-$30 for essential tools if you don’t own them. Your time investment is 4-8 hours spread over a weekend. Professional replacement costs $250-$600 for standard vehicles, $800-$1,500 for luxury cars with premium materials or complex designs. The break-even point is clear: DIY saves 70-85% of professional costs. Even if you value your time at $50/hour, DIY typically comes out ahead. The real value, however, is in the learning experience and the confidence gained from mastering an automotive interior repair.
Frequently Asked Questions
1. How long does a DIY headliner repair typically last?
When using a quality automotive-specific adhesive and proper technique, a DIY repair should last 5-10 years, essentially matching the lifespan of the original installation. The key factors are thorough surface preparation, correct adhesive application, and working within recommended temperature ranges. Skipping steps or using household adhesives typically results in failure within 6-12 months.
2. Can I repair just a small sagging section without removing the entire headliner?
Yes, for localized sagging less than 6 inches in diameter, you can often inject adhesive through a small slit and press the fabric back into place using a plastic spatula. However, this is a temporary fix at best. The deteriorated foam underneath will continue to fail around the repaired area. For lasting results, removing the board and addressing the entire surface is always recommended.
3. What’s the difference between headliner fabric and regular upholstery fabric?
Automotive headliner fabric features a specialized knit construction with a polyurethane foam backing laminated directly to it. This foam provides the loft and contouring ability that regular fabric lacks. Standard upholstery fabric won’t conform to curves and will show every imperfection in the board. Headliner fabric is also engineered for flame resistance and UV stability—critical safety and durability factors.
4. How do I choose the right color fabric for my car’s interior?
Order fabric samples whenever possible, as camera screens and printed catalogs rarely show true colors. Compare samples in natural daylight inside your vehicle. Most headliners are a shade of gray, tan, or black, but there are dozens of variations. When in doubt, choose a slightly lighter shade rather than darker—lighter colors hide dust and make the interior feel more spacious. Some suppliers offer custom dye-matching services for classic or unusual vehicles.
5. Is it necessary to remove the headliner board, or can I glue it in place?
While tempting, in-place repairs almost always look mediocre and fail prematurely. You can’t properly clean the board’s surface or apply even adhesive pressure. The fabric ends up with wrinkles, missed spots, and weak edges. Removing the board takes 30-60 minutes on most vehicles but transforms the job from a frustrating hack to a professional restoration. The exception is heavy-duty commercial vehicles with flat, easily accessible headliners.
6. How many cans of spray adhesive do I need for a standard sedan?
Most sedan headliners measure 40-50 square feet. A quality spray adhesive can covers approximately 30-40 square feet when applied in the recommended light coats. For a complete re-glue job, purchase two cans. This allows for proper multi-coat application without skimping, plus extra for mistakes. Running out of adhesive mid-job is a nightmare scenario that ruins fabric and wastes time.
7. What temperature is too cold to apply headliner adhesive?
Never apply adhesive below 60°F. The chemical curing process slows dramatically, and the bond never reaches full strength. Cold adhesive is also thicker, leading to uneven application. Ideally, work in 70-80°F conditions with moderate humidity. If you must work in cooler weather, use a space heater to warm the workspace and the adhesive cans (never use open flame). The board and fabric should also be at room temperature.
8. Can I use a steam cleaner to remove old headliner adhesive?
Steam cleaners are too aggressive and will saturate the headliner board, causing warping or delamination of the board itself. Instead, use a plastic scraper and 120-grit sandpaper for mechanical removal, followed by a light wipe with mineral spirits on a clean rag. The goal is a smooth, clean surface—not necessarily removing every trace of old adhesive. Some staining is fine as long as the surface is flat and dust-free.
9. Why does my headliner sag more in the summer?
Heat accelerates the chemical breakdown of the polyurethane foam backing. On a 90°F day, interior temperatures can exceed 160°F, softening adhesives and causing the foam to off-gas and deteriorate faster. This is why using heat-rated automotive adhesive is non-negotiable. The sagging seems worse in summer because the fabric becomes more pliable and gravity pulls it down more easily when the adhesive softens.
10. How do I fix wrinkles that appeared after installation?
Small wrinkles can sometimes be smoothed out using a heat gun on the lowest setting, held 12 inches away, while gently pressing the fabric with a soft cloth. The heat softens the adhesive slightly, allowing you to stretch and reposition. For severe wrinkles or bubbles, you’ll likely need to peel back the fabric, apply additional adhesive, and re-smooth. Prevention is key: work slowly, maintain even tension, and use a squeegee during initial installation to eliminate air pockets before the adhesive sets.