That tiny chip in your windshield might seem harmless now, but anyone who’s watched a crack spiderweb across their glass at 70 mph knows better. Windshield damage is a ticking time bomb—temperature swings, road vibrations, and even slamming your car door can transform a minor blemish into a major safety hazard. The good news? You don’t always need a $300+ replacement. Modern windshield restoration kits have evolved from glorified super glue tubes to sophisticated repair systems that can make minor damage virtually disappear.
Understanding how these kits work and what separates a quality system from a disappointing gimmick is crucial for any car owner who wants to save money while maintaining their vehicle’s structural integrity. Whether you’re dealing with a bullseye from a rogue pebble or a star break that’s begging for attention, the right restoration approach can restore optical clarity and prevent further damage. This guide dives deep into the world of DIY windshield repair, giving you the expert knowledge to choose wisely and execute repairs like a pro.
Top 10 Windshield Restoration Kits
Detailed Product Reviews
1. Nu Finish Glass Restore & Repel Kit, Two Step Regimen for Car Windshield, Includes Polishing Compound, Ceramic Sealant, Precision Applicator Tool, and 2 Reusable Sponges

Overview: The Nu Finish Glass Restore & Repel Kit offers a comprehensive two-step solution for windshield restoration. This $23.99 kit includes a 4 oz glass polishing compound, 2 oz ceramic sealant, precision applicator, and two reusable sponges. Designed for manual application, it strips away road grime, water spots, and haze before sealing the glass with a protective ceramic coating that cures in 90 minutes.
What Makes It Stand Out: This kit’s standout feature is its two-year protective sealant longevity, significantly outperforming most competitors. The trusted Nu Finish brand brings decades of automotive care expertise to glass restoration. Unlike drill-powered alternatives, this manual system requires no power tools, making it accessible to anyone. The two-step process addresses both restoration and long-term protection in one package, while the precision applicator ensures even coverage without streaking.
Value for Money: At $23.99, this kit delivers exceptional value through its durable two-year sealant. Professional glass treatments can cost $100+, making this DIY solution economical. The included reusable sponges and precision applicator eliminate additional purchases. While manual application demands more elbow grease than drill-mounted systems, the extended protection period means less frequent reapplication, saving money long-term.
Strengths and Weaknesses: Strengths include the industry-leading two-year sealant, trusted brand reputation, complete accessory set, and no power tool requirement. The manual polishing process provides controlled, safe application. Weaknesses involve significant physical effort, a 90-minute cure time requiring weather planning, and limited effectiveness on deep scratches. The kit works best on surface-level defects rather than substantial glass damage.
Bottom Line: Perfect for DIY enthusiasts seeking long-lasting windshield protection without investing in power tools. The Nu Finish kit excels at maintaining and protecting glass rather than heavy restoration. If you prioritize durability over speed and have mostly surface-level defects, this offers unbeatable long-term value and convenience.
2. Cerium Oxide Glass Polishing Kit - Remove Scratches, Water Spots & Restore Clarity | Windshield Scratch Remover with Polish & Sealant | Complete DIY Kit
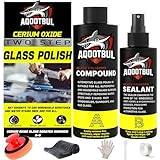
Overview: The Cerium Oxide Glass Polishing Kit provides professional-grade restoration for $25.99. This comprehensive system uses high-concentration cerium oxide compound to remove etched water stains, wiper marks, and fine scratches from auto glass and household windows. The all-in-one kit includes polish, sealant, manual polishing tool, microfiber cloth, gloves, scraper, and protective tape—everything needed for a complete DIY repair without additional purchases.
What Makes It Stand Out: This kit’s professional-grade cerium oxide formula delivers unmatched cutting power while remaining safe for glass surfaces. The complete accessory package sets it apart, eliminating the need for separate purchases. The manual polisher offers precise control without requiring expensive rotary tools, making professional results accessible to beginners. Its versatile application works on windshields, mirrors, and even household glass.
Value for Money: At $25.99, this kit costs slightly more than competitors but includes significantly more accessories. The comprehensive package represents savings over buying items separately. Professional glass restoration services cost hundreds of dollars, making this DIY alternative economical. However, the six-month sealant duration requires more frequent reapplication than some premium options, slightly diminishing long-term value.
Strengths and Weaknesses: Strengths include the high-performance cerium oxide formula, complete accessory set, beginner-friendly three-step process, and safe manual application. The kit effectively removes stubborn water spots and light scratches. Weaknesses are the shorter six-month sealant lifespan, physically demanding manual polishing, and slower process compared to drill-powered systems. The kit may struggle with deeper scratches despite its professional formulation.
Bottom Line: Ideal for users wanting professional-grade results without power tools. The comprehensive accessory package and safe, controlled application make it perfect for beginners tackling moderate glass defects. While requiring more frequent resealing, the superior polishing performance justifies the slightly higher price for those prioritizing restoration quality over convenience.
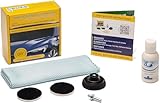
3. GLASS POLISH DIY 3” Windshield Polishing Kit for Car Glass Restoration, Remove Wiper Blade Damage, Fine Scratches, Haziness, and Water Spots, Restore Glass Clarity and Shine - GP21005

Overview: The GLASS POLISH DIY 3" Windshield Polishing Kit delivers power-tool efficiency for $24.95. Designed specifically for electric drills, this kit targets wiper blade damage, fine scratches, haziness, and water spots on automotive glass. The package includes a universal drill attachment and polishing pads, leveraging your existing drill for rapid restoration. The manufacturer explicitly states it’s for fine, shallow scratches only—defects barely detectable with a fingernail.
What Makes It Stand Out: This kit’s drill-powered design dramatically reduces application time and physical effort compared to manual systems. The universal drill attachment ensures compatibility with most household drills, making it highly accessible. Its focused formulation specifically addresses wiper blade streaks and light haziness, the most common windshield complaints. The straightforward approach prioritizes speed and efficiency over complex multi-step processes.
Value for Money: Priced at $24.95, this kit offers excellent value for drill owners. It transforms an existing tool into a glass restoration system, avoiding the cost of dedicated polishers. The targeted approach means less product waste on unnecessary steps. While it lacks a dedicated sealant, the efficiency gains offset this omission for users primarily concerned with clarity restoration rather than long-term protection.
Strengths and Weaknesses: Strengths include rapid application with power tools, universal drill compatibility, targeted effectiveness on wiper damage, and reduced physical effort. The kit is straightforward and user-friendly. Weaknesses are the requirement of a drill, limitation to fine scratches only, absence of a protective sealant, and potential for messier application. Deep scratches require a different kit entirely, limiting versatility.
Bottom Line: Perfect for drill owners needing quick removal of wiper streaks and light haziness. This kit excels at efficiency and ease of use for surface-level defects. If you already own a drill and want fast results without professional services, this offers excellent value. However, those needing sealant protection or dealing with deeper damage should consider alternatives.
4. GLASS POLISH DIY 3” Windshield Polishing Kit with Enhanced Cerium Oxide Formula – Remove Wiper Blade Damage, Fine Scratches, Haziness, Water Spots – Restore Glass Clarity and Shine - GP21007
Overview: The GLASS POLISH DIY 3" Kit with Enhanced Cerium Oxide Formula combines power tool compatibility with professional-grade chemistry for $24.25. This versatile system works with both electric drills and rotary polishers (5/8"-11 thread), making it adaptable to various user setups. The enhanced cerium oxide formula targets wiper blade damage, fine scratches, haziness, and water spots, restoring optical clarity to automotive glass surfaces.
What Makes It Stand Out: This kit’s dual compatibility with drills and professional polishers offers unmatched versatility in its price class. The enhanced high-grade cerium oxide formula provides superior cutting performance over standard compounds while maintaining safety for all glass types. The universal drill attachment and polisher threading accommodate both DIYers and serious enthusiasts, bridging the gap between consumer and professional equipment.
Value for Money: At $24.25, this is competitively priced despite its enhanced formula and dual compatibility. It essentially offers professional-grade performance at a consumer price point. Users can start with a household drill and later upgrade to a rotary polisher without buying new pads. The enhanced formula means potentially fewer applications, increasing long-term value compared to basic kits.
Strengths and Weaknesses: Strengths include versatile tool compatibility, enhanced cerium oxide performance, universal drill attachment, and professional-level results. The kit effectively eliminates common windshield defects. Weaknesses involve the limitation to fine scratches only, requirement of a power tool, and lack of included sealant for long-term protection. Users must purchase protective coating separately, adding to total cost.
Bottom Line: An excellent choice for users wanting flexibility in their restoration setup. The enhanced formula and dual compatibility make it ideal for both beginners with drills and enthusiasts with polishers. While it lacks integrated sealing, the superior polishing performance and adaptability justify the price. Best for those prioritizing restoration quality and equipment versatility over all-in-one convenience.
5. Glass Polish 21003 DIY Windshield Polishing Kit for Electric Drills - Restore Clarity to Windshields and Auto Glass Surfaces
Overview: The Glass Polish 21003 DIY Kit offers a straightforward drill-powered solution for $24.95. This focused kit targets haziness, wiper blade tracks, superficial scratches, and chemical stains on automotive glass surfaces. Designed exclusively for electric drills with its universal backing pad attachment, it emphasizes safety and compatibility with all automotive glass types, including tempered and laminated windshields. The kit prioritizes essential restoration without unnecessary complexity.
What Makes It Stand Out: This kit’s primary distinction is its explicit safety certification for all automotive glass types, including tempered and laminated surfaces—a critical consideration for modern vehicles. The straightforward, no-frills approach focuses specifically on haziness and wiper tracks, the most common visibility issues. The universal drill attachment ensures broad compatibility, while the simplified process appeals to users wanting quick results without learning complex techniques.
Value for Money: At $24.95, this kit offers solid value for its targeted application. It competes directly with similar drill-powered kits while adding the assurance of glass-type safety. The focused approach means no paying for unnecessary features. However, the lack of included sealant reduces long-term value compared to two-step systems. Users must factor in separate protective coating purchases for complete protection.
Strengths and Weaknesses: Strengths include certified safety on all automotive glass, universal drill compatibility, effective haziness removal, and straightforward operation. The kit restores original clarity efficiently. Weaknesses are the absence of protective sealant, basic accessory package, limitation to superficial defects, and potential for user error with power tools. The kit doesn’t address deeper scratches or provide long-term protection.
Bottom Line: Ideal for drill owners prioritizing safety and simplicity when removing windshield haziness and wiper tracks. The glass-type certification provides peace of mind for modern vehicles. While lacking protective sealant, it excels at its core task of clarity restoration. Choose this for straightforward haziness removal, but consider a two-step system if long-term protection is equally important.
6. Rain-X 600001 Windshield Repair Kit - Quick and Easy Durable Resin Based Windshield Repair Kit for Chips and Cracks, Good for Round Damage Below 1" in Diameter and Cracks Smaller Than 12" in Length

Overview: The Rain-X 600001 Windshield Repair Kit provides a practical, resin-based solution for minor automotive glass damage. Designed to address chips under 1 inch and cracks shorter than 12 inches, this kit aims to halt damage propagation while restoring structural integrity. It includes all necessary components for multiple repairs, making it a convenient addition to any vehicle maintenance toolkit.
What Makes It Stand Out: This kit’s durable resin formula penetrates laminated windshields to strengthen damaged areas beyond their original state. The straightforward application process requires minimal steps and no specialized tools, with most repairs completed in minutes. Its universal fit design works across various vehicle types, and the ability to perform multiple repairs from a single kit adds significant long-term value for proactive car owners.
Value for Money: At $11.49, this kit delivers exceptional savings compared to professional windshield repairs costing $50-100 per chip. The inclusion of sufficient resin for multiple applications further enhances its economic appeal. For drivers who frequently encounter road debris, this represents a smart investment that pays for itself after just one successful repair.
Strengths and Weaknesses: Strengths include affordability, comprehensive contents, and the trusted Rain-X brand reputation. The resin effectively stops crack propagation when applied correctly to fresh damage. However, results heavily depend on timing—repairs must be performed before contamination occurs. The requirement for direct sunlight curing limits usability in certain weather conditions, and rushed application can create air pockets that compromise results. Success rates vary significantly based on damage type and user technique.
Bottom Line: The Rain-X 600001 is an excellent entry-level solution for minor windshield damage. While it demands careful application and ideal conditions, its low cost and proven effectiveness make it worthwhile for proactive car owners comfortable with DIY repairs.
7. CERAKOTE® Ceramic Headlight Restoration Kit – Guaranteed To Last As Long As You Own Your Vehicle – Brings Headlights Back to Like New Condition - No Power Tools Required - 10 Wipe Kit

Overview: The CERAKOTE Ceramic Headlight Restoration Kit promises permanent restoration results through advanced ceramic coating technology. This 10-wipe system restores cloudy, yellowed headlights to like-new condition without requiring power tools, making it accessible for DIY enthusiasts seeking long-term protection rather than temporary fixes.
What Makes It Stand Out: Unlike traditional restoration kits that last months, Cerakote’s ceramic coating chemically bonds to headlights, providing UV protection guaranteed to last as long as you own your vehicle. The three-step process—oxidation removal, sanding, and ceramic coating—delivers professional results in about 30 minutes without risking paint damage from power tools. This chemical bonding creates a permanent protective layer that prevents future yellowing.
Value for Money: Priced at $17.95, this kit costs more than basic alternatives but eliminates recurring expenses. Professional headlight restoration services charge $75-150, making this one-time investment highly cost-effective. Compared to $10-15 kits requiring reapplication every 6-12 months, the long-term value becomes apparent for vehicle owners planning extended ownership.
Strengths and Weaknesses: Strengths include the permanent ceramic coating, comprehensive kit contents, and foolproof manual application process that prevents accidental paint damage. The UV protection effectively prevents future oxidation. However, the higher price point may deter budget-conscious buyers. The process demands careful attention to each step, and results depend on thorough execution. Some users may find the manual sanding step labor-intensive compared to drill-based systems, though this reduces risk of lens damage.
Bottom Line: For those seeking a permanent headlight restoration solution, the CERAKOTE kit justifies its premium price. It’s ideal for vehicle owners who value longevity over short-term savings and want professional results without professional costs.
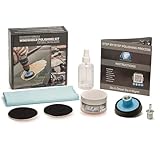
8. SHMZK Glass Polishing Kit, Windscreen Glass Scratch Removal Kit with 100g Cerium Oxide Powder, Felt Buffing Pad Wool Polishing Wheel Scratch Repair Kit for Glass Window Windshield

Overview: The SHMZK Glass Polishing Kit provides a mechanical approach to glass restoration, utilizing cerium oxide powder and wool polishing pads to remove scratches and water damage. This comprehensive kit targets surface-level imperfections on automotive and household glass, offering a versatile solution for clarity restoration without replacing expensive glass panels.
What Makes It Stand Out: The kit’s premium wool polishing pads adapt to curved surfaces while providing excellent elasticity and wear resistance. The included 100g of high-quality cerium oxide powder effectively polishes glass without causing additional micro-scratches. Its versatility extends beyond automotive use to home applications, making it a multi-purpose investment for tackling glass, mirrors, and even some metal polishing tasks.
Value for Money: At $14.99, this kit offers substantial savings compared to professional glass polishing services costing $100-200. The complete package includes multiple pads and sufficient cerium oxide for numerous projects, providing excellent long-term value for both car enthusiasts and homeowners dealing with scratched windows, shower doors, or glass tabletops.
Strengths and Weaknesses: Strengths include high-quality materials, a comprehensive accessory package, and versatile application across glass and metal surfaces. The wool pads are gentle yet effective when used correctly. However, the manual process requires significant physical effort and practice to master optimal pressure and speed. Results depend heavily on user technique and the scratch depth. The kit is unsuitable for deep cracks or chips, focusing solely on surface scratches. No power tool is included, requiring users to supply their own drill or polisher.
Bottom Line: The SHMZK kit is a solid choice for those willing to invest physical effort in glass restoration. It excels at removing light scratches and water spots but demands patience and practice. Ideal for DIYers with existing power tools seeking a versatile polishing solution.
9. BLUTOKS Windshield Repair Kit, 2 PCS Windshield Crack Repair Kit with Suction Cup Curing Light, Automotive Nano Fluid Vehicle Windscreen Tool, Glass Repair Kit for Chips and Cracks (Navy)

Overview: The BLUTOKS Windshield Repair Kit positions itself as a professional-grade solution with advanced vacuum technology and UV curing capabilities. This comprehensive system addresses various windshield damage types, from bullseyes to 12-inch cracks, promising near-invisible repairs through its innovative design that eliminates common DIY failure points.
What Makes It Stand Out: The innovative 20PA vacuum holder creates an airtight seal that forces resin deep into damage while preventing air bubbles—a critical advantage over gravity-fed systems. The included UV curing light with timer settings enables rapid 5-10 minute cures regardless of weather, eliminating reliance on sunlight. This professional-grade design delivers structural integrity restoration with remarkable shear strength that holds under pressure.
Value for Money: At $16.99, this kit costs slightly more than basic alternatives but offers superior technology. The advanced vacuum system and UV light significantly improve success rates and repair quality, justifying the modest premium. For multiple repairs or challenging damage types, the investment quickly pays for itself compared to professional repairs starting at $50-100.
Strengths and Weaknesses: Strengths include powerful vacuum technology, rapid UV curing, versatile damage coverage, and professional-grade resin strength. The user-friendly process yields consistent, reliable results with minimal practice. However, the higher price may be excessive for single, minor chip repairs. Some beginners might find the vacuum system intimidating initially, though instructions are clear. The kit’s effectiveness on very long cracks can still vary based on damage location and severity.
Bottom Line: The BLUTOKS kit is the top choice for serious DIYers who want professional-quality results. Its vacuum and UV technology justify the modest price premium, making it ideal for multiple repairs or challenging damage types where basic kits might fail.
10. NASILOOP Windshield Repair kit, Quick and Efficiency Glass Repair Fluid, Car Windshield Crack Repair Resin Kit for Fixing Chips, Bulls-Eye, Cracks and Star-Shape Cack-2 Pack

Overview: The NASILOOP Windshield Repair Kit offers an ultra-affordable solution for common windshield damage. This two-pack system uses nano glass repair fluid to address chips, bullseyes, star-shaped cracks, and cracks up to 12 inches, promising rapid curing and long-term durability through its specially-engineered polymer formula designed for DIY success.
What Makes It Stand Out: The kit’s high-speed curing formula works within minutes, cross-linking at a molecular level to restore structural integrity and optical clarity. The nano fluid technology penetrates micro-fissures deeply, creating a strong bond. Being a two-pack, it provides backup for multiple repairs or second attempts, which proves valuable for DIY beginners learning the repair process without risking additional costs.
Value for Money: At just $9.99 for a two-pack, this is the most economical option available. It costs less than a single professional repair while providing enough material for multiple fixes. For budget-conscious drivers, those with minor damage, or first-time users wanting practice material, the value proposition is unbeatable in the DIY windshield repair market.
Strengths and Weaknesses: Strengths include exceptional affordability, straightforward application process, and comprehensive damage coverage. The two-pack design offers excellent value and practice opportunities. However, the marketing language lacks technical specifics about resin strength, viscosity, or detailed curing mechanisms. Without advanced features like vacuum pressure or UV curing, results may be less consistent than premium kits. The long-term durability claims are difficult to verify without independent testing data.
Bottom Line: The NASILOOP kit is perfect for minor damage and budget-minded users. While it lacks advanced technology, its low cost and simplicity make it an excellent entry-level option. Consider it for small chips and bullseyes rather than extensive crack repair where structural integrity is critical.
What Is Windshield Restoration and How Does It Work?
Windshield restoration is a precision repair process that injects specialized resin into damaged laminated glass, bonding the fractured layers together and restoring structural integrity. Unlike replacement, which swaps out the entire pane, restoration targets only the damaged area, preserving your factory seal and original glass.
The process relies on capillary action and pressure differentials to force liquid resin into microscopic fissures. Once cured with UV light, this resin hardens to a strength that can exceed the original glass’s impact resistance in that specific spot. The key is matching the resin’s refractive index to your windshield’s glass—when done correctly, the repair becomes nearly invisible.
The Anatomy of Laminated Glass
Your windshield isn’t a single sheet of glass—it’s a sandwich. Two layers of tempered glass bonded with a polyvinyl butyral (PVB) interlayer. This design prevents shattering but creates unique challenges for repairs. Damage typically affects only the outer layer, which is why restoration is possible. The PVB layer stops cracks from penetrating completely, creating a pocket where resin can work its magic.
Why Windshield Restoration Beats Replacement for Minor Damage
Cost savings represent the most obvious advantage—a quality restoration kit costs $20-50 versus $200-500 for professional replacement. But the benefits run deeper than your wallet.
Factory-installed windshields contribute up to 30% of your vehicle’s cabin structural strength in a rollover accident. The original seal is irreplaceable; even the best replacement can’t replicate that factory bond. Restoration preserves this critical safety feature entirely.
Time efficiency is another major factor. A DIY repair takes 30-60 minutes, while replacement requires leaving your car at a shop for hours and waiting 24+ hours for the adhesive to cure before driving. For minor damage, the math is clear: restore when possible, replace only when necessary.
Environmental and Insurance Considerations
Every replaced windshield generates 20-25 pounds of non-recyclable waste sent to landfills. Restoration is the eco-conscious choice. Many insurance companies waive deductibles for chip repairs and may not count them against your policy since it prevents more expensive claims. Some states even require free windshield repairs under comprehensive coverage.
Types of Windshield Damage You Can Fix at Home
Not all glass damage is created equal. DIY kits excel at specific damage patterns but have clear limitations. Understanding the nomenclature helps set realistic expectations.
Bullseye breaks are circular chips with a clean cone-shaped impact point—these are the easiest repairs, often disappearing 90-95%. Star breaks feature multiple radial cracks extending from the impact point, requiring more skill but still very fixable. Half-moon or partial bullseye chips have an incomplete circle and respond well to treatment.
Combination breaks mix patterns (bullseye with star cracks) and need advanced techniques. Surface pits are shallow divots without cracks—cosmetic issues that resin can fill but won’t completely erase.
Size Matters: The Quarter Rule
The golden standard: if the damage is smaller than a quarter and not in the driver’s direct line of sight, DIY is viable. Cracks longer than 6 inches, damage at the windshield’s edge (within 2 inches), or multiple intersecting cracks typically require professional assessment. Depth is critical too—if you can feel the damage on the inside of the windshield, it’s beyond DIY scope.
Professional vs. DIY: When to Use a Restoration Kit
The decision tree starts with damage location. Any chip directly in the driver’s primary viewing area—the width of the steering wheel, top to bottom of wipers—should go to a pro. Even perfect repairs leave slight distortion, and insurance companies often mandate replacement for these spots.
Consider the damage age. Fresh chips repair best; contamination from weeks of driving, wiper fluid, and road grime reduces success rates. Professional shops use drills to open old damage and specialized tools to vacuum out debris—something most DIY kits can’t match.
Weather matters too. Resin cures best between 50-75°F in low humidity. If you’re facing freezing temperatures or can’t garage your car, a mobile pro with climate-controlled tools is worth the cost.
The Confidence Factor
Be honest about your mechanical aptitude. Windshield repair requires steady hands, patience, and attention to detail. If you struggle with detail work or get frustrated easily, professional repair prevents costly mistakes. A botched DIY job can make damage worse and render it unrepairable.
Key Components of a Quality windshield restoration kit
A professional-grade kit contains more than a tube of resin. The applicator system is the heart of the operation—look for a bridge-style injector that creates stable, even pressure. Suction cups should be heavy-duty with adjustable angles to accommodate curved windshields.
Resin quality varies dramatically. Premium kits include multiple viscosity options: thin resin for hairline cracks and thick resin for deep chips. The best resins cure crystal-clear with a refractive index between 1.51-1.53, matching automotive glass precisely.
Curing strips or curing film should be optically clear and UV-permeable. Cheap kits use cloudy film that interferes with curing. A proper razor blade scraper with a safety handle is essential for leveling the repair without scratching surrounding glass.
The UV Light Question
Entry-level kits rely on sunlight, which works but introduces variables. Mid-range and premium kits include a portable UV curing lamp—typically 365nm wavelength LED—for consistent, weather-independent results. These lamps cure resin in 2-5 minutes versus 15-30 minutes in direct sunlight.
Understanding Resin Types and Viscosity Levels
Resin chemistry separates bargain kits from professional systems. The main categories are acrylate-based and epoxy-based formulas. Acrylates dominate the automotive market for their rapid UV curing and glass-like clarity.
Viscosity is measured in centipoise (cP). Low-viscosity resin (50-100 cP) flows like water, penetrating tight cracks but requiring multiple applications for deep damage. Medium viscosity (200-400 cP) offers the best all-around performance for typical chips. High-viscosity (500+ cP) fills deep impact points but won’t seep into fine cracks without pressure assistance.
Premium kits include flexible resin additives that absorb impact better than rigid formulas, preventing re-cracking. These are worth the extra cost for high-mileage drivers or those in construction zones.
The Curing Process: Anaerobic vs. UV Activation
Most windshield resins are anaerobic—they start curing when oxygen is excluded. This gives you working time before UV exposure finalizes the reaction. Quality resins have a tack-free cure, meaning they won’t remain sticky after UV exposure. Cheap resins cure tacky, attracting dirt and requiring sanding that distorts the repair.
The Science Behind Windshield Repair: How Resin Bonds with Glass
The magic happens at the molecular level. Glass appears smooth but has microscopic pores and a network of silanol groups (Si-OH) on its surface. Quality resins contain silane coupling agents that form covalent bonds with these groups, creating a chemical weld stronger than mechanical adhesion alone.
The resin must match glass’s refractive index (1.52 average) to become optically invisible. When light passes through the repair, it bends at the same angle as the surrounding glass, eliminating the prism effect that makes damage visible. This is why cheap resins leave obvious “oil slick” patches—they’re optically mismatched.
Pressure during injection is critical—too little and air bubbles remain; too much and you create new micro-fractures. Professional applicators maintain 10-15 psi of consistent pressure, forcing resin into every crevice without stressing the glass.
The Role of the PVB Layer
The PVB interlayer is hydrophilic (water-attracting). Moisture trapped between layers causes “delamination fog” that no resin can fix. This is why timing matters—a chip that sat through rain may have moisture contamination that requires professional vacuum extraction. DIY kits work best on dry, fresh damage.
Essential Tools Every Kit Should Include
Beyond resin, the tool quality determines success. A stabilizing bridge with three-point contact prevents wobbling during injection. Look for aluminum or reinforced polymer construction—flimsy plastic bridges flex, creating pressure fluctuations.
The injector pedestal should have a sealed gasket that conforms to curved glass. Silicone gaskets outperform foam, which compresses unevenly. A threaded injector with fine adjustment gives precise pressure control versus simple push-syringe designs.
Advanced kits include a mini drill with 1/16" diamond bits for opening impact points. This isn’t for beginners but dramatically improves old or tight damage repair. The drill creates a reservoir that accepts resin more readily.
Cleaning and Preparation Tools
Isopropyl alcohol wipes (99% purity) remove silicone and oils that prevent bonding. A darning needle or probe clears loose glass from the impact point. Razor blades must be single-edge, carbon steel for clean scraping without chipping. Some kits cheap out on blades—replace them with quality ones from a hardware store.
UV Curing vs. Natural Sunlight: What You Need to Know
Natural sunlight works, but it’s the wild card of windshield repair. UV intensity varies by time of day, season, cloud cover, and latitude. Inconsistent curing leads to soft spots that yellow or crack later. Most resins require 365nm UV light—while sunlight contains this, window glass filters 90% of it, forcing you to work outside the vehicle.
Portable UV lamps eliminate guesswork. A 5-watt LED UV lamp cures most resins in 3 minutes with uniform intensity. The lamp should be held 1-2 inches from the repair, moving in slow circles to prevent overheating. Over-curing makes resin brittle; under-curing leaves it soft.
Weather Workarounds
If you must use sunlight, choose a clear day between 10 AM and 2 PM when UV is strongest. Place a mirror under the windshield to reflect light upward into the repair. Cover the area with a cardboard box to trap heat and UV, creating a mini curing oven. This hack improves consistency but still pales compared to a proper lamp.
Step-by-Step: The Windshield Restoration Process Explained
Preparation is 70% of success. Start by cleaning the damage with 99% isopropyl alcohol and a lint-free cloth. Use a probe to remove loose glass shards. If the chip is old and contaminated, a tiny drill bit can open the impact point—stop immediately when you feel the drill “pop” through to the PVB layer.
Mount the bridge applicator so the injector pedestal centers over the damage. The suction cups need a clean, dry surface; wipe them with alcohol first. Tighten the bridge until it’s rock-solid—any movement during injection ruins the repair.
Apply a drop of resin to the pedestal, then attach the injector. Pull back the plunger to create vacuum, holding for 30 seconds to draw air out of the cracks. Release and pressurize, forcing resin into the void. Repeat this vacuum-pressure cycle 3-5 times until no new bubbles appear.
The Final Cure
Place a curing strip over the repair, ensuring no air pockets. Cure with UV lamp for 3 minutes or direct sunlight for 15-20 minutes. The resin should feel hard, not tacky. Remove the applicator and scrape excess resin with a razor blade held at 45°, pulling toward the damage center to avoid lifting the repair.
Polish with a microfiber cloth and glass cleaner. Inspect from multiple angles—any remaining bubbles or unfilled cracks mean starting over. A perfect repair is invisible from most viewing angles.
Common Mistakes That Ruin Windshield Repairs
Over-drilling is the #1 DIY error. The drill only needs to penetrate the outer glass layer—about 1/8" deep. Going into the PVB layer creates a leak path and guarantees failure. If you see white plastic, you’ve gone too far.
Insufficient cleaning leaves silicone residue that repels resin. Never use household glass cleaners containing ammonia or silicone—they contaminate the repair area. Stick to alcohol or specialized glass prep solutions.
Pressure panic causes users to inject too aggressively. A slow, steady pressure allows resin to flow without creating new fractures. If resin squirts out sideways, you’re using too much force.
Curing Catastrophes
Moving the car before full cure is disastrous. Even vibration from closing doors can shift uncured resin. Wait the full cure time plus an extra 30 minutes before driving. In cold weather, resin thickens and won’t penetrate—warm the windshield to at least 60°F with a hairdryer before starting.
Features to Consider When Choosing Your Kit
Resin volume matters more than you think. A tiny 0.5ml tube might handle 2-3 repairs. Look for kits with 2-3ml of resin—enough for 10+ repairs, allowing practice on old glass before tackling your windshield.
Bridge adjustability is crucial for modern cars with steep windshield rakes. A bridge with a ball-joint or multiple pivot points adapts to severe curves. Fixed-angle bridges work only on flat spots, limiting their usefulness.
Instruction quality separates kits. Look for video QR codes, detailed diagrams, and troubleshooting sections. The best kits include a practice piece of laminated glass to hone technique.
Warranty and Support
Reputable manufacturers offer a repair warranty—not on the kit, but on successful repairs. This shows confidence in their resin chemistry. Phone or chat support for troubleshooting is invaluable for first-timers. Check reviews specifically for customer service responsiveness.
Price vs. Quality: Finding the Sweet Spot
Budget kits ($10-15) contain basic syringe injectors and single-viscosity resin. They work on fresh bullseye chips but struggle with complex damage. Tools are often single-use plastic. Consider these disposable—fine for one emergency repair, not for ongoing car care.
Mid-range kits ($25-40) hit the value sweet spot. You’ll get a metal bridge, multiple resin viscosities, a basic UV lamp, and enough supplies for 5-8 repairs. This is where most car enthusiasts should land—reliable results without pro-level investment.
Professional-grade kits ($60-150) include precision tools, premium flexible resins, high-power UV lamps, and drill bits. These replicate what mobile repair techs use. Worth it if you maintain multiple vehicles or live in gravel-road territory where chips are frequent.
The Hidden Cost of Cheap Resin
Inexpensive resin yellows within 6-12 months, especially in hot climates. UV exposure breaks down low-quality polymers, creating a visible amber spot that’s worse than the original chip. Premium resin stays clear for the windshield’s lifetime. Spending $10 more on quality resin saves a $500 replacement later.
Safety Considerations and Precautions
Eye protection is non-negotiable. Drilling glass creates microscopic shards that can embed in your cornea. Wear safety glasses with side shields, not just regular eyeglasses. When scraping cured resin, fragments can launch upward.
Ventilation matters. While most modern resins are low-VOC, they still release fumes during curing. Work in a garage with the door open or outside. Never work with your face inches from the repair—use the applicator’s extension features.
Temperature extremes are dangerous. Glass becomes brittle below 40°F and can crack during pressure injection. Above 90°F, resin cures too quickly, trapping bubbles. The sweet spot is 60-80°F ambient temperature.
Pressure and Glass Limits
Never attempt to repair damage that reaches the windshield’s edge. Edge cracks have compromised the structural bond to the frame. Applying pressure can cause the entire edge to delaminate, necessitating immediate replacement. When in doubt, tap the glass gently—if you hear a dull thud instead of a crisp tap, the damage is too deep.
Maintaining Your Restored Windshield
A successful repair isn’t the end of the story—it’s the beginning of a new maintenance routine. Avoid car washes for 48 hours post-repair. High-pressure water can penetrate the fresh resin before it reaches full hardness. Hand-wash around the area if needed.
Extreme temperature changes stress repairs. In winter, defrost gradually—never pour hot water on a cold windshield. In summer, crack windows when parking in direct sun to reduce interior heat buildup that flexes the glass.
Inspect repairs monthly. Quality resin shouldn’t change, but if you notice yellowing, cloudiness, or new cracking around the repair, professional evaluation is needed. Most failures happen within the first 90 days if they’re going to occur.
Long-Term Protection
Apply a glass sealant like a silica-based rain repellent over the repair after 30 days. This adds a protective layer and helps the repair blend visually. Park facing away from the sun when possible—UV exposure is the enemy of all automotive materials, including repair resin.
Frequently Asked Questions
1. How long does a DIY windshield repair actually last?
A properly executed repair with quality resin lasts the lifetime of the windshield. The resin creates a permanent chemical bond with the glass. However, cheap resin or poor technique can fail within months. Professional repairs using similar materials have been proven to last 10+ years in fleet vehicle studies.
2. Will my insurance cover a DIY kit, or do they only pay for professional repairs?
Most insurance companies only reimburse professional repairs, but many waive deductibles for chip repairs entirely. Using a DIY kit won’t affect your rates since you’re preventing a larger claim. Some insurers partner with kit manufacturers and offer discounts—check your policy’s comprehensive coverage details.
3. Can I repair a windshield crack that’s started to spread?
If the crack is less than 6 inches and hasn’t reached the edge, immediate DIY repair can stop it. Drill a tiny hole at the crack’s tip to relieve stress, then inject resin along the entire length. This is an advanced technique—if the crack is growing daily, a pro’s vacuum system has better success rates.
4. Is it legal to drive with a repaired windshield, or will it fail inspection?
Federal law permits repaired windshields if the damage isn’t in the driver’s critical viewing area and the repair doesn’t create significant distortion. Most states follow this guideline. However, some inspection stations are stricter about repairs in the wiper sweep area. Check your local DMV regulations.
5. How many chips can I repair on one windshield before it needs replacement?
There’s no legal limit, but practicality rules. If repairs are clustered within 3 inches of each other, the structural integrity becomes questionable. More than 3-4 repairs in the driver’s sightline creates cumulative distortion. Insurance typically totals a windshield when damage exceeds 6 distinct repairable areas.
6. Can I use a windshield repair kit on tempered glass side windows?
No. Tempered glass shatters into small pieces by design and lacks the PVB interlayer. Repair kits only work on laminated glass (windshields). Attempting to repair tempered glass is dangerous and ineffective—the internal stresses will cause it to explode during drilling.
7. Why does my repair still look slightly visible after curing?
Perfect invisibility is rare. A faint outline is normal, especially on star breaks. The repair is successful if it’s 80-90% less noticeable and doesn’t spread. Visibility depends on damage type, age, and your viewing angle. Professional repairs also leave slight traces—what matters is structural bonding, not cosmetic perfection.
8. Can I repair a chip that has moisture or condensation inside it?
Not effectively with DIY methods. Moisture trapped between glass layers blocks resin adhesion and causes white haze. Pros use specialized vacuum pumps to boil off moisture. You can try a hairdryer on low heat for 10-15 minutes, but success is limited. Fresh, dry damage repairs best.
9. Do windshield repair kits work on tinted or heated windshields?
Tinted windshields repair normally—the tint is on the inner layer, not the outer surface you’re treating. Heated windshields with embedded defrost wires require caution: avoid drilling near wires and don’t apply excessive pressure that could dislodge them. Damage directly over a defrost line needs professional evaluation.
10. What’s the biggest difference between $15 and $75 windshield repair kits?
Tool precision and resin chemistry. Expensive kits offer machined aluminum bridges with micro-adjustments, multi-viscosity resins with proven refractive index matching, and powerful UV lamps. The resin itself is formulated for flexibility and long-term clarity. Budget kits use generic acrylic formulas that yellow and tools with sloppy tolerances that make consistent pressure impossible. For one emergency fix, cheap works. For ongoing car care, invest in quality.