Your wheels take a beating. Every commute, grocery run, and school pickup subjects them to a relentless assault of brake dust, road salt, tar, and corrosive contaminants that bake onto the surface at temperatures exceeding 400°F. While enthusiasts with garage queens might spend weekends meticulously detailing, daily drivers need a set-it-and-forget-it solution that survives real-world punishment without demanding constant attention. That’s where wheel sealants transform from luxury to necessity.
Unlike traditional waxes that melt away after a few hot stops or ceramic coatings that require surgical-level application, modern wheel sealants offer the sweet spot of protection and practicality for vehicles that actually get driven. They create an invisible barrier that actively repels the grime your commute generates, turning a weekly scrubbing chore into a simple rinse-and-go routine. Understanding what separates an average sealant from one that genuinely protects your investment—without breaking the bank or your back—is crucial for anyone who values both their time and their wheels.
Top 10 Wheel Sealant
Detailed Product Reviews
1. CERAKOTE Rapid Ceramic Wheel Sealant - Ceramic Spray Coating for Wheels - Quick and Easy to Apply - Repels Brake Dust – Extremely Hydrophobic

Overview: CERAKOTE’s Rapid Ceramic Wheel Sealant delivers professional-grade ceramic protection specifically formulated for wheels. This spray-on solution creates an ultra-slick barrier that actively repels brake dust and road contaminants while delivering a deep, mirror-like shine. Designed for all wheel types, it serves as either a standalone sealant or a performance booster over existing ceramic coatings.
What Makes It Stand Out: The true ceramic formula distinguishes itself through exceptional hydrophobic properties that make water and grime literally slide off wheels. Unlike traditional waxes, this creates a durable, long-lasting barrier that actively prevents brake dust buildup rather than just making it easier to clean. The ability to enhance existing ceramic coatings makes it particularly versatile for enthusiasts who’ve already invested in premium protection.
Value for Money: At $15.95, this represents excellent value for a genuine ceramic wheel product. Most ceramic wheel coatings cost $30-50, and professional applications can exceed $200. The ease of DIY application eliminates labor costs while delivering comparable performance for a fraction of the price. Considering it reduces cleaning frequency and protects expensive wheels from corrosion, the cost-per-use is minimal.
Strengths and Weaknesses: Pros: True ceramic technology; exceptional brake dust repellency; works on all wheel finishes; enhances existing coatings; extremely easy application; hydrophobic effect lasts weeks Cons: Requires completely clean surface for proper bonding; may need reapplication every 4-6 weeks; smaller bottle size limits coverage
Bottom Line: For drivers tired of constant wheel cleaning, CERAKOTE’s Rapid Ceramic Wheel Sealant is a game-changer. It delivers legitimate ceramic protection at an accessible price point, making it ideal for both enthusiasts and everyday drivers seeking low-maintenance wheel care.
2. Chemical Guys HydroSpin Wheel & Rim Ceramic Coating and Quick Detailer - 16 oz Spray Protects Wheels, Rims, and Brake Parts with Hydrophobic Ceramic Shine - Safe for Cars, Trucks, SUVs, Motorcycles
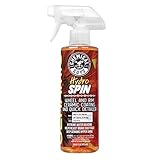
Overview: Chemical Guys HydroSpin merges ceramic coating technology with quick detailer convenience for comprehensive wheel protection. This 16-ounce spray shields wheels, rims, and brake components from brake dust, road grime, and water spots while maintaining a slick, glossy finish. Its versatile formula works safely across all wheel finishes, making it a universal solution for any vehicle.
What Makes It Stand Out: HydroSpin’s dual-action capability as both a protective coating and a quick detailer sets it apart. The ceramic polymers create an immediate water-beading barrier while simultaneously cleaning light dust and fingerprints. This makes it perfect for touch-ups between washes, extending protection without full reapplication. Its compatibility with anodized and clear-coated wheels addresses a gap where many competitors fall short.
Value for Money: Priced at $19.97 for 16 ounces, HydroSpin offers solid mid-range value. The larger bottle size provides more applications than budget options, while the dual-functionality essentially gives you two products in one. Compared to buying separate ceramic coating and quick detailer products, you’re saving roughly 30-40%. For regular detailers, the convenience factor adds significant value.
Strengths and Weaknesses: Pros: Dual-purpose formula saves time and money; safe for all wheel finishes including anodized; large 16oz bottle; excellent for maintenance touch-ups; creates strong hydrophobic barrier Cons: Protection doesn’t last as long as dedicated ceramic coatings; requires frequent reapplication for best results; spray nozzle can be inconsistent
Bottom Line: HydroSpin excels as a maintenance product for those who already have baseline protection. It’s perfect for enthusiasts who enjoy frequent detailing sessions and want to maintain that fresh ceramic look between major washes.
3. Chemical Guys WAC_303 Wheel Guard Max Coat and Rim Sealant, Safe for Cars, Trucks, SUVs, Motorcycles, RVs & More, 8 oz
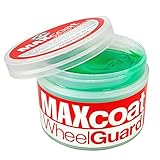
Overview: Chemical Guys Wheel Guard Max Coat is an advanced sealant engineered specifically for wheel protection and gloss enhancement. This 8-ounce formula creates a slippery shield that actively repels brake dust, dirt, and road grime while delivering a wet-look shine. Designed to make wheels easier to clean and keep them cleaner longer, it serves as a dedicated defense against corrosive contaminants.
What Makes It Stand Out: Max Coat’s emphasis on extreme gloss sets it apart from purely functional sealants. The formula is infused with specialized gloss agents that create a deep, wet appearance on painted wheels, giving them a show-car quality finish. The “make dirt slide off” technology creates an unusually slick surface where contaminants struggle to adhere, fundamentally changing how wheels accumulate grime between washes.
Value for Money: At $24.99 for 8 ounces ($3.12 per ounce), this is a premium-priced wheel sealant. While more expensive than entry-level options, the concentration means a little goes a long way. For show car owners or enthusiasts prioritizing appearance, the gloss enhancement justifies the premium. However, budget-conscious buyers might find better value in ceramic sprays that offer longer-lasting protection.
Strengths and Weaknesses: Pros: Exceptional gloss and wet-look finish; creates extremely slick surface; makes future washing effortless; repels brake dust effectively; concentrated formula Cons: Higher price per ounce; smaller bottle limits coverage; requires meticulous surface prep; protection duration shorter than true ceramics
Bottom Line: Wheel Guard Max Coat is ideal for show car owners and appearance-focused enthusiasts who prioritize gloss above all else. If you want wheels that look perpetually wet and detailed, this premium sealant delivers, though you’ll pay for the privilege.
4. PoorBoys PB-WS08 Wheel Sealant 8oz, 236ml
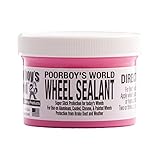
Overview: PoorBoys Wheel Sealant is a traditional yet effective protective solution for all wheel types. This 8-ounce bottle provides long-lasting protection against brake dust, dirt, tar, bugs, and water contamination. The sealant creates a durable barrier that makes wheels significantly easier to clean while preventing corrosive substances from etching into the finish.
What Makes It Stand Out: The product’s versatility across any wheel type without compatibility concerns makes it exceptionally user-friendly. Unlike specialized formulas that may react with certain finishes, PoorBoys takes a universal approach. The recommendation for multiple coats to enhance brake dust repellency demonstrates a buildable protection system, allowing users to customize durability based on their driving conditions and maintenance preferences.
Value for Money: At $21.98 for 8 ounces, PoorBoys sits in the mid-to-premium price range. While not the cheapest option, its universal compatibility eliminates the risk of costly damage to expensive wheels. The ability to layer coats for increased protection provides flexibility that single-coat products lack. For those with diverse vehicle collections or uncertain wheel finishes, this safety-first approach offers peace of mind worth the modest premium.
Strengths and Weaknesses: Pros: Universal compatibility with any wheel type; buildable protection with multiple coats; proven traditional formula; excellent contamination resistance; long-lasting when properly applied Cons: More labor-intensive application than spray ceramics; less hydrophobic than modern ceramic formulas; requires curing time between coats; outdated packaging design
Bottom Line: PoorBoys Wheel Sealant is a reliable, no-nonsense choice for conservative detailers who prioritize safety and universal compatibility. It’s perfect for those with multiple vehicles or rare wheel finishes who want proven protection without experimentation risks.
5. CERAKOTE® Platinum Rapid Ceramic Paint Sealant Spray - 14 oz Bottle - Maximum Gloss & Shine – Extremely Hydrophobic – Unmatched Slickness - Ceramic Spray Coating - 50 Wash Rating

Overview: CERAKOTE Platinum is a professional-grade ceramic paint sealant with an industry-leading 50-wash durability rating. This 14-ounce spray delivers maximum gloss and unmatched slickness through true ceramic technology. Designed for entire vehicle application, it creates an extremely hydrophobic surface that repels water, grime, and dirt while maintaining a mirror-like shine through dozens of washes.
What Makes It Stand Out: The 50-wash rating represents exceptional longevity in the consumer ceramic spray market, where most products last 5-10 washes. This durability transforms it from a cosmetic enhancer to a legitimate protective coating. The “unsurpassed slickness” claim is backed by true ceramic technology that creates a tangible difference you can feel. As a paint sealant that can be applied to wheels as well, it offers a unified protection solution for the entire vehicle.
Value for Money: At $19.69 for 14 ounces, this offers outstanding value considering its durability. Costing less than a single professional detail, it provides protection that lasts nearly a year for average drivers. When factoring in the 50-wash rating, the per-wash cost is under 40 cents—far cheaper than frequent reapplication of lesser products. It’s essentially a professional coating in a DIY package.
Strengths and Weaknesses: Pros: Industry-leading 50-wash durability; true ceramic technology; incredible hydrophobic properties; versatile for paint and wheels; excellent cost-per-use value; extremely slick finish Cons: Requires perfect surface preparation; overspray must be carefully managed; not specifically formulated for high-heat wheel surfaces; may be overkill for wheels alone
Bottom Line: CERAKOTE Platinum is the ultimate choice for owners wanting maximum durability and gloss for their entire vehicle. While excellent on wheels, its real value shines as a complete vehicle solution, making it perfect for enthusiasts seeking professional results with minimal reapplication effort.
6. Xtra-Seal - Bead Sealer Flammable 32Oz (TI250)

Overview: Xtra-Seal’s Bead Sealer addresses a frustrating problem for drivers and technicians alike—slow leaks caused by imperfect seals between tire beads and wheel rims. This 32-ounce canister delivers a professional-grade solution designed to create an airtight barrier, particularly useful for older rims with minor corrosion or imperfections that prevent proper sealing.
What Makes It Stand Out: The flammable formulation indicates a robust chemical composition that aggressively bonds to surfaces, creating a durable seal where traditional mounting methods fail. At 32 ounces, this product offers substantial volume for multiple applications, making it ideal for busy automotive shops or dedicated DIY enthusiasts who frequently work on their fleet. The brand’s emphasis on professional-grade design suggests this isn’t a watered-down consumer product but rather a serious tool for serious applications.
Value for Money: Priced at $16.84, this represents solid value compared to smaller 8-ounce bottles that often cost nearly as much. For professional technicians, the per-application cost is minimal, while hobbyists benefit from having ample supply for future projects. You’re paying for concentrated effectiveness rather than marketing frills.
Strengths and Weaknesses: Strengths include professional-strength formulation, generous quantity, and proven effectiveness on problematic rims. Weaknesses involve the flammable nature requiring careful handling and storage, vague marketing language that doesn’t specify exact chemical composition, and potential overkill for casual users who might only need a single application.
Bottom Line: Perfect for automotive professionals and serious DIY mechanics who regularly mount tires on challenging rims. Casual users should consider smaller, non-flammable alternatives unless dealing with persistent bead leaks. Handle with appropriate safety precautions.
7. McKee’s 37 Ceramic Wheel Sealant | Top Coat Polish, Brake Dust Repellent, and Ceramic Protectant for Wheels…
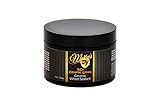
Overview: McKee’s 37 Ceramic Wheel Sealant targets the perpetual problem of brake dust accumulation on wheels, offering a comprehensive solution that cleans, polishes, and protects in one application. This specialized formula creates a heat-resistant ceramic coating designed specifically for the harsh environment wheels endure.
What Makes It Stand Out: Unlike generic car waxes, this product is engineered exclusively for wheels, withstanding extreme temperatures generated by braking systems while actively repelling metallic brake dust particles. Its ability to simultaneously remove minor scratches and scuffs while laying down protective coating saves significant time compared to multi-step processes. The high-gloss finish enhances wheel appearance beyond mere cleanliness.
Value for Money: At $39.99, this sits in the mid-premium range for wheel-specific coatings. Considering it combines cleaning, polishing, and sealing functions, it eliminates the need for separate wheel cleaner ($15), polish ($20), and sealant ($25) purchases. For enthusiasts maintaining premium wheels, the protection against corrosive brake dust justifies the investment, potentially saving hundreds in professional refurbishment.
Strengths and Weaknesses: Strengths include specialized wheel-specific formulation, heat resistance, multi-functionality, and professional-grade results. Weaknesses involve the price point being steep for casual users, requirement for thorough prep work to achieve best results, and limited volume for multiple vehicle applications. May not bond as long as pure ceramic coatings.
Bottom Line: An excellent choice for car enthusiasts with premium wheels who value convenience and professional results. Casual drivers might find dedicated wheel cleaners and basic sealants more economical, but those battling persistent brake dust will appreciate this specialized protection.
8. CERAKOTE Rapid Ceramic Tire Coat – Showroom New Tire Shine – Deep Tire Black Finish – Lasts Up to 10x Longer – No Sling, Non-Greasy Ceramic Tire Coating for Car, Truck & SUV – Easy Application (10oz)

Overview: CERAKOTE Rapid Ceramic Tire Coat revolutionizes tire dressing by leveraging ceramic technology to deliver a long-lasting, non-sling finish that maintains showroom-new appearance. This 10-ounce bottle promises durability far exceeding traditional spray-on tire shines that typically wash away within days.
What Makes It Stand Out: The ceramic formulation actually cures dry to the touch, eliminating the greasy residue and paint-slinging that plagues conventional tire dressings. The included foam applicator ensures even distribution without overspray on wheels or paintwork. Most impressively, the claim of lasting 10 times longer than standard products addresses the primary frustration with tire maintenance—frequent reapplication.
Value for Money: At $14.95, this product delivers exceptional value. Traditional tire shines require weekly application, making their per-month cost substantially higher. One bottle of Cerakote can treat a set of tires multiple times, with each treatment lasting weeks rather than days. The included applicator adds value, and the satisfaction guarantee removes purchase risk.
Strengths and Weaknesses: Strengths include true ceramic durability, non-greasy dry finish, no-sling formula, easy application process, and competitive pricing. Weaknesses involve requiring completely clean tires for proper bonding, potential for uneven application if rushed, and limited availability compared to mainstream brands. Results may vary based on tire composition and climate.
Bottom Line: A must-have for detail-oriented owners tired of constant tire dressing reapplication. Outperforms traditional tire shines in every meaningful way at a price that makes upgrading a no-brainer. Perfect for daily drivers and show cars alike seeking lasting curb appeal.
9. Gtechniq Wheel Sealant Long Term C5 Wheel Armour 15ml
Overview: Gtechniq’s C5 Wheel Armour represents the pinnacle of nanotechnology-based wheel protection, offering professional-grade durability through molecular bonding. This 15ml concentrate creates an ultra-slick, chemically resistant barrier specifically engineered for the extreme conditions wheels face.
What Makes It Stand Out: Born from quantum physics research, the C5 formula doesn’t merely coat surfaces—it chemically bonds at the molecular level, creating a semi-permanent non-stick barrier that actively repels brake dust and road grime. The super-slick surface means contaminants brush off with minimal effort, often requiring just water rinsing rather than harsh chemicals. Its compatibility with matte, satin, and powder-coated finishes demonstrates thoughtful formulation.
Value for Money: While $34.95 for 15ml seems expensive, this concentrate covers approximately five sets of wheels when properly applied, bringing per-vehicle cost to about $7. Compared to quarterly professional detailing at $100+ per session, the value proposition is compelling. For high-end vehicles with expensive wheel finishes, this prevention-focused approach pays dividends.
Strengths and Weaknesses: Strengths include cutting-edge nanotechnology, exceptional durability (1-2 years), true chemical bonding, safe for all finishes, and professional reputation. Weaknesses involve premium pricing, meticulous prep requirements, need for precise application, and small margin for error during curing. Not beginner-friendly.
Bottom Line: Ideal for owners of premium vehicles seeking maximum wheel protection with minimal maintenance. The technology justifies the cost for those who understand its benefits, but novices should practice on less visible wheels first. Delivers genuinely long-term protection that cheaper alternatives cannot match.
10. Slime 10193 Tire and Tube Sealant Puncture Repair Sealant, 2-in-1, Premium, Prevent and Repair, Suitable for Non-Highway Tires and Tubes, Non-Toxic, Eco-Friendly, 16oz Bottle
Overview: Slime’s 2-in-1 Tire and Tube Sealant provides an eco-friendly, proactive solution to punctures for non-highway vehicles. This 16-ounce bottle seals tread-area punctures up to 1/4 inch in tires and 1/8 inch in tubes, making it indispensable for equipment that operates in debris-prone environments.
What Makes It Stand Out: The non-toxic, water-soluble formula distinguishes Slime from harsh chemical alternatives, making it safe for users and the environment. Its dual-action capability both prevents punctures when pre-installed and repairs them when they occur, offering two years of continuous protection. The included valve core removal tool and clear installation hose demonstrate thoughtful packaging for DIY users.
Value for Money: At $11.98, this represents outstanding value for protecting equipment where downtime is disruptive. A single flat on a riding mower or wheelbarrow can cost more in time and frustration than this entire bottle. The prevention aspect is particularly valuable—addressing potential flats before they strand you with a loaded trailer or mid-mow.
Strengths and Weaknesses: Strengths include eco-friendly non-toxic formulation, effective puncture sealing, dual prevent/repair function, comprehensive installation kit, and versatility across multiple equipment types. Weaknesses involve unsuitability for highway tires, potential balance issues at high speeds, messiness if overfilled, and inability to repair sidewall damage. Requires periodic replacement every two years.
Bottom Line: Essential equipment for anyone maintaining lawn tractors, wheelbarrows, trailers, or dirt bikes. The peace of mind from puncture prevention far exceeds the modest cost. While not for automotive use, it excels in its intended niche and deserves a spot in every equipment shed.
What Are Wheel Sealants and Why Do Daily Drivers Need Them?
Wheel sealants are synthetic polymer-based protective coatings engineered specifically for the extreme environment wheel faces endure. Unlike paint sealants designed for body panels, these formulations contain specialized heat-resistant polymers and chemical inhibitors that bond to wheel surfaces at a molecular level, creating a hydrophobic and oleophobic barrier that contaminants cannot penetrate.
The Science Behind Wheel Protection
The chemistry revolves around cross-linking polymers that form a flexible, breathable membrane. When applied correctly, these polymers fill microscopic pits and pores in your wheel’s finish, eliminating the anchor points where brake dust particles typically embed. The result is a surface tension so high that water beads instantly, carrying away loose debris before it can bond. For daily drivers, this means the 30-minute scrubbing sessions with harsh wheel acids become a thing of the past.
How Sealants Differ from Traditional Waxes and Coatings
Carnauba waxes, while providing a warm gloss, begin breaking down around 180°F—well below typical braking temperatures. Ceramic coatings offer incredible durability but require pristine application conditions, multiple layers, and 24-48 hour curing times that most commuters can’t accommodate. Wheel sealants bridge this gap: they cure within 1-4 hours, withstand temperatures exceeding 500°F, and don’t demand a climate-controlled garage. They’re the practical middle ground that respects your schedule while delivering measurable protection.
Key Benefits of Using Wheel Sealants on Daily Drivers
The advantages extend far beyond mere aesthetics. A quality wheel sealant fundamentally changes your maintenance relationship with your vehicle.
Brake Dust Repellency
Metallic brake dust is essentially microscopic shrapnel with jagged edges that mechanically bond to wheel surfaces. Sealants create a slick, non-stick layer that prevents this bonding. Independent testing shows properly sealed wheels accumulate 70-85% less bonded contamination over a two-week daily driving period compared to unprotected surfaces. This isn’t just cleaner wheels—it’s protection against the galvanic corrosion that occurs when ferrous brake dust meets moisture and aluminum wheel material.
Easier Cleaning and Maintenance
The hydrophobic effect means most dirt rinses away with plain water pressure. When you do need to wash, a pH-neutral wheel cleaner and gentle agitation restore the finish in minutes rather than hours. For daily drivers facing winter road salt or summer construction dust, this translates to consistent cleanliness without weekend-detailing-level effort.
Protection Against Environmental Contaminants
Beyond brake dust, sealants defend against road salt, magnesium chloride, tar, rail dust, and acid rain. These contaminants etch into unprotected clear coats, causing permanent hazing and pitting. The chemical barrier maintains wheel finish integrity through seasons of exposure, preserving both appearance and resale value.
Enhanced Wheel Appearance
Quality sealants contain optical clarifiers that enhance the depth and richness of wheel finishes. Whether you have matte black powder coat or mirror-polished aluminum, the right sealant adds a crisp, defined look without artificial shine. It’s the difference between dull and dynamic under parking lot lights.
Understanding Different Types of Wheel Sealants
Not all sealants share the same DNA. The market segments into distinct categories, each with trade-offs between ease of use and longevity.
Synthetic polymer sealants
These are the traditional workhorses—typically acrylic or polymer-based liquids that bond through solvent evaporation. They offer 3-6 months of protection, apply easily with an applicator pad, and cost less per ounce. For daily drivers who don’t mind reapplying seasonally, they deliver exceptional value. Look for formulations labeled “high-temp” or “wheel specific,” as generic polymer sealants may lack the heat stabilizers necessary for brake rotor proximity.
Ceramic-Infused Sealants
These hybrid products suspend SiO2 (silicon dioxide) particles in a polymer carrier, providing a taste of ceramic coating performance with sealant application ease. They typically last 6-12 months and produce tighter water beading than pure polymer sealants. The ceramic content increases surface hardness slightly, offering marginally better scratch resistance. They’re ideal for daily drivers wanting extended protection without professional coating costs.
Hybrid Formulations
The latest evolution combines polymers, ceramic particles, and graphene oxide for multi-modal protection. These claim 12-24 month durability and extreme chemical resistance. While performance is impressive, daily drivers should scrutinize real-world reviews, as some hybrids sacrifice ease of removal when they eventually fail. They’re best for those who maintain meticulous wash schedules.
Spray vs Paste vs Liquid Applications
Spray sealants offer speed—mist on, wipe off, done in 10 minutes—but typically last 2-4 months. Pastes provide the longest durability and highest solids content but demand more elbow grease and careful buffing. Liquid squeeze bottles with applicator pads represent the sweet spot for most daily drivers, balancing application control with reasonable cure times.
Critical Features to Evaluate Before Buying
Marketing copy promises the moon. Focus on these measurable attributes when comparing options.
Durability and Longevity Claims
Check whether the manufacturer specifies durability in weeks, months, or washes. A claim of “up to 12 months” often includes fine print requiring garage storage and weekly washing. For daily drivers parked outside and washed bi-weekly, divide claimed durability by two for a realistic expectation. Look for independent testing data or third-party verification rather than anecdotal claims.
Heat Resistance Specifications
Wheels experience temperature cycling from ambient to over 500°F during aggressive braking. Quality sealants list specific heat ratings—aim for products rated to at least 400°F continuous, 600°F intermittent. Anything less will break down quickly on front wheels, especially in stop-and-go traffic.
Chemical Resistance Ratings
Your sealant faces constant exposure to brake fluid (highly corrosive), acidic wheel cleaners, and alkaline road salts. The best formulations resist pH 2-12 chemicals. Check for specific mentions of resistance to DOT 3/4 brake fluid and magnesium chloride. This matters more for daily drivers in northern climates where salt exposure is relentless.
Gloss and Finish Enhancement
Decide whether you want a high-gloss “wet look” or a natural satin finish. Some sealants contain gloss enhancers that darken and enrich colors, while others dry completely invisible. For matte or satin wheels, ensure the product specifically states “matte safe” to avoid adding unwanted shine.
How to Properly Prepare Wheels for Sealant Application
Even the best sealant fails on a poorly prepped surface. This is where 80% of DIY applications go wrong.
Deep Cleaning Decontamination Steps
Start with a dedicated wheel cleaner appropriate for your wheel type. For daily drivers with heavy buildup, use a non-acidic, iron-dissolving formula that turns purple as it reacts with embedded brake dust. Agitate with various brush sizes—lug nut brushes, barrel brushes, and face brushes—to reach every surface. Rinse thoroughly with a pressure washer, aiming for the barrel and behind the spokes where grime hides.
Iron Remover and Clay Bar Treatment
After washing, spray an iron remover liberally across the entire wheel surface. Let it dwell but not dry, then rinse. Follow with a clay bar treatment using plenty of lubricant. You’ll feel the clay grab on contaminated spots—keep working until it glides smoothly. This step removes the invisible rail dust and industrial fallout that washing misses. Skip it, and your sealant bonds to contamination rather than the wheel itself.
Ensuring Completely Dry Surfaces
Water trapped behind spokes or in lug nut wells prevents proper bonding. Use compressed air or a leaf blower to force water out of crevices. Wipe down with a clean microfiber, then let the wheels sit in a dry environment for at least 30 minutes. Applying sealant to even slightly damp surfaces causes streaking and premature failure.
Professional Application Techniques for Lasting Results
Technique separates the weekend warriors from the pros. These methods ensure maximum coverage and durability.
The Two-Towel Method for Even Coverage
Apply sealant to an applicator pad, not directly on the wheel. Work in small sections—roughly one spoke at a time—using overlapping cross-hatch motions. Immediately after application, use a second clean, dry microfiber towel to level the product and remove excess before it flashes. This prevents high spots and ensures a thin, even layer. Thick applications don’t last longer; they just waste product and create removal nightmares.
Curing Time and Layering Strategies
Most sealants skin over in 15-30 minutes but require 1-4 hours to fully cure. Avoid driving during this period—brake dust landing on uncured sealant embeds permanently. For daily drivers wanting extra protection, a second layer can be applied after the first has flashed (typically 1-2 hours). More than two layers provides diminishing returns and increases failure risk.
Spotting and Correcting Application Errors
If you notice streaking or hazing after curing, don’t panic. Apply a small amount of sealant to a microfiber and buff the affected area—this often reactivates the polymers and levels the finish. For stubborn high spots, a fine finishing polish on a foam pad removes them without stripping the entire wheel. Always work in shade and avoid applying in direct sun, which causes uneven flashing.
Common Mistakes That Ruin Wheel Sealant Performance
Daily drivers often sabotage their own efforts through simple oversights.
Applying on Unclean Surfaces
The number one failure mode. That “quick application” after a basic wash leaves behind invisible contamination. Within weeks, the sealant delaminates in patches, creating a splotchy appearance that’s harder to fix than starting over. The extra hour spent on clay bar treatment saves months of frustration.
Ignoring Temperature and Humidity
Applying sealant below 50°F prevents proper polymer cross-linking; above 85°F causes it to flash too quickly, leaving wipe marks. Humidity above 70% extends cure times exponentially and can cause clouding. Check the product specs—most list ideal application conditions. A garage with moderate climate control solves this for year-round application.
Over-application and Streaking Issues
More product doesn’t equal more protection. Excess sealant pools in lug nut wells and around valve stems, creating white residue that’s nearly impossible to remove without solvents. Apply thin, even coats. If the applicator feels wet, you’re using too much. The wheel should look barely damp, not coated in product.
How Weather and Climate Impact Sealant Choice
Your local environment should dictate your sealant selection more than marketing hype.
Hot and Dry Climates
In desert regions, UV degradation and extreme heat cycling are primary concerns. Choose sealants with UV inhibitors and high solid content. Avoid spray sealants that flash instantly in 100°F+ heat. The dry air actually helps curing but accelerates product evaporation in the bottle—buy smaller quantities you’ll use within a year.
Cold and Salty Winter Conditions
For daily drivers in the Salt Belt, chemical resistance trumps all. The sealant must withstand repeated exposure to magnesium chloride and calcium chloride brines that are more corrosive than traditional rock salt. Opt for ceramic-infused or hybrid sealants with documented salt resistance. Apply in late fall before first snow, and consider a mid-winter touch-up spray application.
Humid and Coastal Environments
Salt air and constant moisture demand sealants with strong water repellency and anti-corrosion additives. Look for products specifically marketed as “marine grade” or “coastal formula.” The high humidity means extended cure times—plan for overnight curing before driving. Garaged vehicles still need protection; humidity penetrates garages and condenses on cool wheel surfaces.
Maintenance Schedules for Protected Wheels
Protection isn’t maintenance-free—it’s low maintenance. Establish a rhythm that fits your driving patterns.
Routine Washing Protocols
Wash sealed wheels every 1-2 weeks using the two-bucket method and a pH-neutral shampoo. Avoid aggressive brush attachments that can abrade the sealant. Use a dedicated wheel wash mitt to prevent cross-contamination from body panels. The goal is to remove loose dirt before it builds up, not to scrub aggressively.
Touch-up Application Timing
Even the best sealants wear thin on the front wheels’ inner barrels where brake dust is heaviest. Every 6-8 weeks, apply a light mist of spray sealant to these high-wear areas after washing. This “booster” extends overall protection without requiring full reapplication. Think of it as spot-treating the battlefield.
When to Strip and Reapply
When water stops beading and starts sheeting flatly, or when brake dust begins bonding again, it’s time to strip and reapply. Use a dedicated coating remover or polish to ensure complete removal of old product. Never layer new sealant over failed sealant—it bonds to the failure layer and peels off prematurely. A full strip and reapply takes 2-3 hours but restores like-new performance.
Cost vs Value: Investing Wisely in Wheel Protection
Price per bottle tells only part of the story. Calculate true value based on your usage.
Budget-Friendly Options for Daily Drivers
Quality synthetic polymer sealants cost $15-25 for 8-16 ounces, enough for 6-8 applications on a standard sedan. At 4-month durability, that’s roughly $0.50 per month per wheel. For daily drivers prioritizing function over flash, this category delivers 90% of the protection at 30% of premium prices. The trade-off is more frequent reapplication.
Premium Formulations Worth the Splurge
Ceramic-infused and hybrid sealants running $40-80 per bottle claim 12+ month durability. For daily drivers, this often translates to 6-8 real-world months. The value proposition lies in time saved—one annual application versus three. If your hourly rate exceeds the cost difference, premium options make financial sense. They also excel on high-end wheels where etching risk justifies the investment.
Calculating Cost Per Month of Protection
Divide bottle cost by number of applications, then by months of actual durability (halve claimed durability for daily driver reality). A $60 bottle providing 4 applications at 6 months each equals $2.50 per month. Compare this to the cost of wheel refinishing ($150-300 per wheel) and the math becomes compelling. Protection is always cheaper than restoration.
DIY vs Professional Installation: What Daily Drivers Should Know
The application decision hinges on time, skill, and wheel value.
Time and Skill Requirements
A first-time DIY application on four wheels takes 3-4 hours including prep. With experience, this drops to 90 minutes. Professional application costs $100-200 but includes proper decontamination and often a warranty. For daily drivers with $500 aftermarket wheels, DIY makes sense. For $3,000 forged wheels, professional application is cheap insurance.
Tools and Equipment Needed
DIY requires quality wheel brushes, iron remover, clay bar kit, microfiber towels, applicator pads, and the sealant itself—roughly $80-120 in initial supplies. Professionals use heated pressure washers, steam cleaners, and paint thickness gauges. The gap in equipment shows in prep quality. Daily drivers can achieve 85% of professional results with proper technique; that last 15% requires specialized tools.
Warranty and Guarantee Considerations
Professional applications often include a warranty against premature failure, provided you follow their maintenance schedule. DIY products offer manufacturer warranties against product defects, not application failures. Read the fine print—some warranties require using the brand’s entire ecosystem of cleaners and boosters, which adds hidden costs.
How to Test and Evaluate Sealant Performance Yourself
Don’t trust marketing—verify protection yourself with simple tests.
The Beading Test Explained
After application and full cure, mist water onto the wheel face. Tight, spherical beads that roll off at slight angles indicate excellent hydrophobicity. Flat, irregular beads suggest poor bonding or contamination. Test weekly; when beads become sheeting, protection is waning. This test takes 30 seconds and provides objective performance data.
Sheeting vs Beading: What to Look For
Initial application should produce tight beading. As the sealant cures and weathers, beading may transition to sheeting—where water slides off in flat sheets. This is normal and often indicates the sealant has fully bonded. However, if water begins sticking and wetting the surface (neither beading nor sheeting), protection has failed. Daily drivers should see consistent sheeting for months.
Real-World Brake Dust Challenge
After two weeks of normal commuting, inspect the inner barrel of your front wheels. On a properly sealed wheel, brake dust should appear as loose, brown dust that wipes away with a dry microfiber. If it’s black, bonded, and requires cleaner to remove, your sealant isn’t performing. This is the ultimate daily driver test—real contamination under real conditions.
Compatibility Concerns with Different Wheel Types
One sealant does not fit all. Matching chemistry to substrate prevents disasters.
Painted and Powder-Coated Wheels
These are the most forgiving surfaces. Most sealants bond well to properly cured paint and powder coat. The key is ensuring the coating isn’t failing already—sealing over peeling clear coat traps moisture and accelerates delamination. Test on an inconspicuous area first. For daily drivers, these wheels benefit most from sealant protection due to their vulnerability to chip and etch.
Bare Aluminum and Polished Metal
Unpainted aluminum oxidizes instantly when exposed to air. Sealants for these surfaces must contain anti-corrosion inhibitors and be pH-neutral. Avoid any product with harsh solvents that can etch soft aluminum. Application on polished metal requires obsessive prep—any remaining polish residue prevents bonding. The result should be a crisp, dry shine without oily residue.
Chrome and PVD Finishes
Chrome is hardy but develops micro-pits that trap contamination. Sealants must be chrome-safe (no ammonia or strong acids) and fill these micro-structures. PVD (Physical Vapor Deposition) finishes are thinner and more delicate—use only sealants specifically PVD-approved. The wrong product can discolor these expensive finishes permanently. When in doubt, contact the wheel manufacturer.
Storage and Shelf Life Best Practices
That half-used bottle in your garage is degrading unless stored properly.
Temperature-Controlled Storage
Extreme heat causes polymer separation; freezing ruins emulsions. Store sealants between 50-75°F in their original containers. The garage attic or unheated shed is a death sentence for product longevity. A basement storage cabinet or climate-controlled laundry room extends shelf life from 12 months to 24+ months.
Signs Your Sealant Has Gone Bad
Separation that doesn’t remix after shaking, grainy texture, foul odor, or color change all indicate degradation. Test on glass—if it doesn’t bead water after proper cure, it’s trash. Using expired sealant is false economy; it won’t bond and creates a mess to remove. Mark purchase dates on bottles and rotate stock.
Frequently Asked Questions
How long does wheel sealant really last on a daily driver?
Real-world durability is 3-6 months for polymer sealants and 6-12 months for ceramic-infused formulas. Daily drivers face constant contamination, temperature cycling, and washing that degrade sealants faster than garage-stored vehicles. Expect to reapply polymer sealants seasonally and ceramic-infused options annually for consistent protection.
Can I apply wheel sealant to hot wheels right after driving?
Never. Wheels must be cool to the touch—below 90°F. Applying to hot wheels causes instant flashing, preventing proper bonding and creating permanent streaks. Hot surfaces also cause solvents to evaporate too quickly, leaving polymers unevenly distributed. Always wait at least 2 hours after driving, or wash wheels the evening before morning application.
Will wheel sealant prevent all brake dust buildup?
No sealant eliminates brake dust, but a quality product reduces bonded contamination by 70-85%. You’ll still see dust, but it won’t etch into the finish and rinses off easily. The key is reduced adhesion—dust sits on top of the sealant rather than bonding to the wheel itself. Think repellency, not elimination.
Do I need to remove old sealant before reapplying?
Yes. Layering new sealant over old product leads to delamination. Old sealant must be completely stripped using a dedicated coating remover or light polish. This ensures the new layer bonds directly to the wheel surface rather than a failing intermediate layer. The extra 30 minutes spent stripping saves hours of rework later.
Can I use the same sealant on my wheels and car paint?
While possible, it’s not optimal. Wheel sealants contain higher heat stabilizers and more robust chemical resistance that aren’t necessary for paint. Conversely, paint sealants lack the temperature tolerance wheels require. Using dedicated products for each surface ensures maximum performance where it matters most. The cost difference is minimal compared to the protection benefit.
How soon after applying sealant can I drive my car?
Wait the full manufacturer-recommended cure time—typically 1-4 hours—before driving. While the surface may feel dry to the touch, the polymers haven’t fully cross-linked. Driving too early allows brake dust to embed in the uncured sealant, creating permanent contamination. Overnight curing is ideal for maximum durability.
Are spray sealants as good as paste or liquid versions?
Spray sealants prioritize convenience over longevity. They last 2-4 months versus 4-6+ months for liquids and pastes. For daily drivers, sprays work well as maintenance boosters between full applications but shouldn’t be relied upon as primary protection. They’re perfect for quick touch-ups but lack the solids content for long-term durability.
Will wheel sealant damage my brake components?
Quality wheel sealants are safe for brake rotors, pads, and calipers when applied correctly. Avoid spraying directly onto rotors; instead, apply to an applicator pad and wipe onto wheel surfaces. Any overspray on rotors burns off during first braking with no effect. Never apply sealant to brake pads or inside caliper pistons.
How do I know if my wheels are compatible with a specific sealant?
Test on a small, inconspicuous area like the inner barrel near the valve stem. Apply a dab, let it cure fully, then inspect for discoloration or hazing. Check the manufacturer’s compatibility list for your specific wheel finish. When dealing with exotic finishes like PVD or anodized aluminum, contact the wheel manufacturer directly for approved product recommendations.
Can I wax over wheel sealant for extra protection?
Never layer wax over a sealant. Waxes contain oils and fillers that interfere with the sealant’s polymer structure, reducing durability and causing uneven beading. If you want additional protection, use a compatible sealant booster from the same brand family. Mixing product chemistries almost always diminishes performance rather than enhancing it.