Your utility trailer works as hard as you do, hauling equipment through rain-soaked construction sites, salted winter highways, and down dusty backroads that seem to chew through metal. Yet while most owners religiously maintain their tow vehicle’s paint and undercarriage, that faithful trailer often gets neglected until the telltale orange bloom of rust appears—usually in the worst possible spot. Undercoating isn’t just another item on your maintenance checklist; it’s the difference between a trailer that lasts five years and one that serves you for twenty. Think of it as affordable armor, a protective barrier that stands between your investment and the relentless assault of moisture, road chemicals, and debris. This comprehensive guide walks you through everything you need to know about selecting the right undercoating for your utility trailer, focusing on the materials, application methods, and critical decision factors that separate effective protection from wasted effort.
Why Your Utility Trailer Needs Undercoating
Top 10 Undercoating For Utility Trailers
Detailed Product Reviews
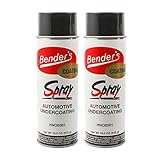
1. Zenex Rubberized Undercoat - Heavy Duty Undercoating for Vehicles | Rubberized Undercoating Spray for Cars, Trucks, and Trailers | Waterproof Rust Prevention | Sound Deadening | 16 oz (2 Count)

Overview: Zenex Rubberized Undercoat delivers professional-grade protection against rust and corrosion in a convenient aerosol format. This two-pack of 16-ounce cans creates a flexible, waterproof barrier ideal for vehicle underbodies, frames, rocker panels, and trailers exposed to harsh conditions. The formulation combines rust prevention with sound-deadening properties, making it a dual-purpose solution for both protection and noise reduction.
What Makes It Stand Out: Unlike basic undercoatings, Zenex offers a paintable, elastic finish that maintains flexibility across temperature extremes without cracking or peeling. The sound-deadening benefit is particularly valuable for truck and SUV owners seeking quieter rides. Being made in the USA adds quality assurance that resonates with professional mechanics and serious DIYers. The product’s ability to resist chipping while providing a smooth, professional-looking finish sets it apart from cheaper alternatives that often become brittle.
Value for Money: At $24.99 for 32 total ounces ($0.78 per ounce), this represents excellent value for a Made-in-USA professional-grade product. Comparable undercoatings from automotive stores typically cost $15-20 per can without the same performance claims or domestic manufacturing. For DIY enthusiasts performing annual rust prevention, this two-pack offers sufficient coverage for a mid-size vehicle’s underbody at half the cost of professional application.
Strengths and Weaknesses: Strengths include superior flexibility, true waterproof protection, effective sound dampening, paintable finish, and domestic manufacturing. The product withstands extreme temperatures and resists cracking better than most competitors. Weaknesses involve strict application requirements: surfaces must be perfectly clean and dry, temperatures above 50°F are mandatory, and proper ventilation is essential. Multiple coats may be needed for optimal protection, increasing project time. Overspray can be problematic without careful masking.
Bottom Line: Zenex Rubberized Undercoat is an outstanding choice for vehicle owners committed to long-term rust prevention. While application demands careful preparation, the durable, flexible protection and noise reduction benefits justify the effort. Highly recommended for DIYers and professionals alike.
2. RecPro Trailer Fender Rubberized Undercoating Spray | Prevent Rust | Buildable & Paintable | Automotive | Black (2 Pack)
Overview: RecPro’s Rubberized Undercoating Spray targets trailer fender protection with a specialized formulation designed for buildable coverage. This two-pack provides a high-grade rubber coating that prevents rust while offering a paintable finish. Specifically marketed for trailer applications, it addresses the unique challenges of fender exposure to road debris and moisture.
What Makes It Stand Out: The “build-able” characteristic is the key differentiator, allowing users to apply multiple layers that cure into a substantial protective barrier. This is particularly valuable for trailer fenders that endure constant punishment from rocks and road salt. The high-quality rubber formulation suggests superior adhesion and durability compared to generic undercoatings. Being explicitly designed for trailer fenders indicates a focused approach to a specific pain point for RV and trailer owners.
Value for Money: At $42.95 for two cans, this positions itself as a premium option compared to general-purpose undercoatings. While pricier than multi-purpose alternatives, the specialized trailer fender formulation and buildable nature may justify the cost for trailer owners seeking maximum protection. The investment makes sense when considering the high replacement cost of damaged trailer fenders, though budget-conscious buyers might find better value in versatile undercoatings.
Strengths and Weaknesses: Strengths include the buildable layering capability, high-grade rubber composition, paintable finish, and trailer-specific design. The product appears formulated for excellent adhesion to metal fenders. Weaknesses stem from limited feature disclosure: no coverage details, drying times, temperature requirements, or sound-deadening claims are provided. The higher price point without transparent specifications may deter some buyers. Unknown manufacturing origin could concern those preferring domestic products.
Bottom Line: This is a solid choice for trailer owners prioritizing maximum fender protection over cost. The buildable formula offers unique advantages, but the premium price demands clearer specifications. Recommended for dedicated trailer maintenance enthusiasts willing to invest in specialized protection.
3. CURT 13386 Class 3 Trailer Hitch, 2-Inch Receiver, Fits Select Ford Explorer, Police Interceptor Utility

Overview: CURT’s 13386 Class 3 Trailer Hitch provides robust towing capability specifically engineered for select Ford Explorer and Police Interceptor Utility models. Rated for 4,000 pounds gross trailer weight and 400 pounds tongue weight, this hitch delivers reliable performance for medium-duty towing applications. The standard 2-inch receiver accommodates various towing accessories.
What Makes It Stand Out: CURT’s rigorous real-world testing at their Detroit facility ensures exceptional reliability and safety. The unique dual-coat finish—combining a rust-resistant liquid A-coat with a durable black powder coat—provides superior corrosion protection that outlasts single-coat competitors. The custom, vehicle-specific design guarantees a factory-like fit without modifications, crucial for modern unibody vehicles. Meeting SAE J684 standards demonstrates serious engineering commitment.
Value for Money: At $168.62, this hitch offers outstanding value compared to dealership options that often exceed $400 plus installation. The premium dual-coat finish and verified testing justify the price over budget hitches that compromise on corrosion protection and safety margins. For Explorer owners planning regular towing, the durability and perfect fit eliminate costly modifications or premature replacement.
Strengths and Weaknesses: Strengths include professional-grade testing, exceptional corrosion resistance, precise vehicle-specific engineering, and solid weight capacities. The dual-coat finish withstands harsh road conditions and UV exposure. Installation is straightforward for those with mechanical experience. Weaknesses include incompatibility with vertically-hanging bike racks, limiting versatility for some users. The vehicle-specific design means zero flexibility for other applications. While installation is “easy,” it still requires proper tools and torque specifications that novices might find challenging.
Bottom Line: An excellent investment for Ford Explorer owners seeking safe, durable towing capability. The superior finish and tested design justify the premium over economy options. Highly recommended for those valuing long-term reliability and perfect fitment.
4. CURT 13386 Class 3 Trailer Hitch, 2-Inch Receiver, Fits Select Ford Explorer, Police Interceptor Utility & 56172 Vehicle-Side Custom 4-Pin Trailer Wiring Harness, Fits Select Ford Explorer

Overview: This CURT bundle combines the proven 13386 Class 3 Trailer Hitch with a vehicle-specific 56172 4-pin wiring harness, delivering a complete towing solution for select Ford Explorer models. The hitch provides 4,000-pound towing capacity while the plug-in harness seamlessly integrates trailer lighting without splicing factory wires.
What Makes It Stand Out: The integrated package eliminates guesswork, ensuring perfect component compatibility. The wiring harness features true plug-and-play installation, connecting directly to factory wiring harnesses rather than requiring wire cutting. This preserves vehicle warranty and maintains electrical system integrity. The included rubber dust cover protects the 4-flat connector from corrosion when not in use—a small but valuable detail often overlooked in separate purchases. Purchasing as a bundle ensures simultaneous delivery and installation.
Value for Money: At $214.40, this bundle saves approximately $20-30 compared to purchasing components separately, while ensuring perfect compatibility. The real value lies in avoiding professional installation costs that can exceed $150 for wiring alone. For DIY installers, the plug-in harness design reduces installation time from hours to minutes, making the modest premium over the hitch alone an exceptional bargain. This is essentially getting the wiring harness at half price.
Strengths and Weaknesses: Strengths include guaranteed component compatibility, plug-in wiring simplicity, factory-fit design, and included dust cover. The harness supports all essential lighting functions without electrical modifications. Weaknesses mirror the standalone hitch: incompatibility with vertical bike racks and vehicle-specific limitations. The wiring harness, while plug-and-play, may still require routing through the vehicle interior that some users find intimidating. No 7-pin option limits heavier trailer compatibility.
Bottom Line: This bundle is the smartest choice for Ford Explorer owners starting their towing setup. The convenience, cost savings, and plug-in wiring justify the investment. Highly recommended for anyone wanting a complete, compatible system without electrical modifications.
5. RecPro Steel Trailer Fenders Tandem Axle 64" x 10" x 16" | 14 Gauge Steel | Teardrop Trailer Fenders (2 Fenders, No Rubberized Undercoating Spray)
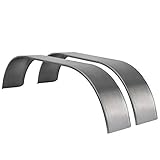
Overview: RecPro’s tandem axle trailer fenders provide robust wheel protection with substantial 14-gauge galvanized steel construction. Measuring 64" x 10" x 16", these fenders cover dual tires on trailers requiring maximum durability. The weld-on design targets serious trailer builders and owners needing fenders that withstand heavy use and rough terrain without the flexing common in thinner alternatives.
What Makes It Stand Out: The 14-gauge steel thickness significantly exceeds typical 16-18 gauge fenders, offering superior impact resistance and structural integrity. Galvanized steel provides baseline corrosion resistance before final finishing. The weld-on application creates a permanent, seamless attachment stronger than bolt-on alternatives that can loosen over time. This industrial-grade approach appeals to custom trailer builders and heavy-duty users frustrated with flimsy OEM fenders that crack under stress.
Value for Money: At $267.95 for the pair, these fenders command a premium over standard replacements but deliver proportionate durability. Equivalent heavy-duty fenders from specialty fabricators often exceed $350 plus shipping. For trailer owners planning long-term ownership or operating in demanding conditions, the investment prevents costly replacements. However, the requirement for welding equipment and finishing work adds hidden costs that budget-conscious buyers must consider.
Strengths and Weaknesses: Strengths include exceptional material thickness, galvanized corrosion protection, generous dimensions for tandem axles, and permanent weld-on strength. The steel forgives welding imperfections better than thinner gauges. Weaknesses include the mandatory weld-on installation, which eliminates DIYers without welding skills. The galvanized finish requires additional treatment or painting to prevent long-term rust, adding labor and material costs. The substantial weight may affect trailer weight calculations. No mounting hardware or instructions are included.
Bottom Line: These fenders are ideal for experienced trailer owners or builders prioritizing durability over convenience. The heavy-duty construction justifies the price, but welding capability is essential. Recommended for custom builds and heavy-duty trailer applications where standard fenders fail.
6. CURT 13386 Class 3 Trailer Hitch, 2-Inch Receiver & 56306 Vehicle-Side Custom RV Blade 7-Pin Trailer Wiring Harness, Fits Select Ford Explorer, Police Interceptor Utility

Overview:
The CURT 13386 Class 3 Trailer Hitch and 56306 Wiring Harness combo provides a complete towing solution for select Ford Explorer and Police Interceptor Utility models. This integrated package delivers a 2-inch receiver hitch with a 4,000-pound weight capacity and a plug-and-play 7-pin RV blade wiring connector, eliminating the guesswork of matching components for safe, legal towing.
What Makes It Stand Out:
This kit’s primary advantage is its vehicle-specific engineering, ensuring perfect fitment without modification. The hitch supports both standard towing (4,000 lbs) and weight distribution setups (up to 5,000 lbs), offering versatility for different trailer types. The wiring harness’s true plug-and-play design requires zero wire cutting or splicing, significantly reducing installation time and potential electrical issues. Both components feature a co-cured liquid and powder coat finish that provides exceptional resistance against rust and UV degradation.
Value for Money:
At $224.77 for the complete package, this represents solid value compared to purchasing hitch and wiring separately. Professional-grade components with a durable finish justify the investment, especially considering the cost of dealership installations. The time saved on wiring installation alone offsets the premium over universal kits.
Strengths and Weaknesses:
Strengths include high weight capacity, true no-splice wiring installation, durable dual-layer coating, and perfect vehicle fitment. Weaknesses involve limited compatibility (only select Ford models), potentially requiring professional installation for those lacking tools or expertise, and the upfront cost being higher than basic universal alternatives.
Bottom Line:
For Ford Explorer or Police Interceptor Utility owners seeking reliable towing capability, this CURT combo delivers professional-quality components with straightforward installation. The vehicle-specific design and durable construction make it a worthwhile investment for safety-conscious towers.
7. Under Gone™ Rust Converting Undercoating, Calcium Sulfonate Formula, Salt & Brine Barrier Protection For Vehicles, Trucks, SUVs, Trailers, Color: Matte Black (1 Gallon)

Overview:
Under Gone™ Rust Converting Undercoating offers professional-grade corrosion protection for vehicles exposed to harsh winter conditions. This calcium sulfonate-based formula doesn’t merely seal rust—it chemically converts it into a stable, protective layer while creating a robust barrier against salt and brine damage that destroys undercarriages.
What Makes It Stand Out:
Unlike traditional undercoatings that simply cover surfaces, this product’s rust-converting technology actively neutralizes corrosion at the molecular level. The calcium sulfonate formula provides superior adhesion and flexibility compared to asphalt-based alternatives. Its passivation protection chemically stabilizes metal surfaces, offering long-term defense beyond physical barriers. The virtually odorless application makes DIY use practical, while the three-step process (clean, rinse with Salts Gone, apply) is straightforward for enthusiasts.
Value for Money:
At $99 per gallon, this professional-grade undercoating delivers exceptional value compared to shop-applied treatments costing $300-500. A single gallon covers most passenger vehicles, and the ability to touch up specific areas extends its economic advantage. For fleet operators or classic car owners, the prevention of costly rust repairs offers substantial long-term savings.
Strengths and Weaknesses:
Strengths include active rust conversion, excellent salt/brine resistance, easy DIY application, low odor, and versatility across vehicle types. Weaknesses require thorough surface preparation for optimal results, the matte black finish may not suit all restoration projects, and reapplication is necessary every few years for continuous protection.
Bottom Line:
Under Gone™ is an outstanding choice for vehicle owners battling corrosion in salt-heavy environments. Its chemical rust conversion and professional-grade protection make it a smart investment for preserving your vehicle’s undercarriage integrity.
Utility trailers face a uniquely harsh existence. Unlike passenger vehicles with sealed body panels and sophisticated drainage systems, trailers expose their frames, crossmembers, and decking supports directly to the elements. Every mile you drive sprays water, salt, and abrasive particles into areas that never see a car wash nozzle. This constant bombardment creates a perfect storm for corrosion, eating away at structural components long before you notice visible damage.
Undercoating acts as your trailer’s first line of defense, creating a waterproof barrier that prevents moisture from contacting bare metal. Beyond simple rust prevention, quality undercoating provides sound dampening, reduces stone chip damage, and makes future cleaning significantly easier. For commercial operators, this protection translates directly to equipment longevity and resale value. For weekend warriors, it means your trailer won’t fail when you’re hauling your ATV to the trails or picking up landscaping supplies. The modest upfront investment consistently outperforms the staggering cost of frame replacement or structural welding repairs.
Understanding Trailer Corrosion: The Hidden Enemy
Corrosion on utility trailers isn’t just surface rust—it’s a structural cancer that often begins in places you can’t see. The real damage happens inside boxed frames, between crossmembers, and along the backside of mounting brackets where moisture becomes trapped. Galvanic corrosion accelerates the process when dissimilar metals (like steel frames and aluminum siding) meet in the presence of an electrolyte such as saltwater.
Road salt represents the most aggressive threat, especially in northern climates where departments of transportation apply brine solutions that can penetrate the smallest crevices. Coastal owners battle salt air and humidity, while those in agricultural regions face ammonia-rich manure and chemical fertilizers that rapidly accelerate oxidation. Even if your trailer lives in a dry climate, condensation from temperature fluctuations creates enough moisture inside frame rails to initiate rust. Understanding these mechanisms helps you appreciate why simply painting the visible areas falls dramatically short of adequate protection.
Types of Undercoating Materials: Pros and Cons
The undercoating market offers several distinct formulations, each engineered for specific protection priorities and application scenarios. No single product dominates every category, which is why understanding the fundamental differences matters more than chasing brand names. The five primary categories include oil-based, rubberized, asphalt-based, wax-based, and polyurethane formulations.
Your choice hinges on multiple factors: climate severity, application method preference, trailer usage intensity, and maintenance commitment. A weekend-use trailer in Arizona demands different protection than a commercial landscaping trailer battling Minnesota winters. Each material brings trade-offs between durability, flexibility, application difficulty, and cost. The following sections dissect these options so you can match the material to your specific situation rather than defaulting to whatever your local auto parts store stocks.
Oil-Based Undercoatings: The Traditional Choice
Oil-based formulations have protected vehicles for decades, relying on petroleum distillates that creep into seams and create a self-healing, moisture-displacing barrier. These products remain popular because they actively migrate into hidden areas after application, reaching spots you can’t physically coat. When minor scratches occur, the surrounding oil flows back into the damaged area, providing continuous protection.
The downsides include annual reapplication requirements and significant mess during installation. Oil-based products never fully dry, remaining tacky and attracting dirt. They’ll drip for days after application, requiring a dedicated application area. However, for owners willing to reapply regularly, oil-based undercoating offers unmatched penetration and remains the gold standard for preserving older trailers with existing surface rust. The product actually displaces moisture from existing corrosion, halting further progression rather than simply sealing it in.
rubberized undercoatings: Flexibility and Impact Resistance
Rubberized undercoatings create a thick, flexible membrane that excels at absorbing impacts from road debris and deadening noise. These products dry to a textured finish that can expand and contract with temperature changes without cracking. For trailers that see heavy off-road use or frequent gravel road travel, this impact absorption prevents the chipping that exposes bare metal.
The critical caveat involves application quality. Poorly applied rubberized coating can trap moisture underneath, accelerating corrosion rather than preventing it. The material must be applied to perfectly clean, dry metal in thin, even coats. Multiple light layers outperform one heavy application. Rubberized products also add measurable weight to your trailer—something to consider for smaller utility models where payload capacity matters. While more durable than oil-based options, rubberized coatings eventually lose flexibility and require removal before reapplication, making maintenance more labor-intensive.
Asphalt-Based Undercoatings: Heavy-Duty Defense
When maximum durability takes priority over appearance, asphalt-based formulations deliver the thickest, most impervious barrier available. These products combine asphalt with rubber polymers to create a rock-hard shell that withstands extreme abrasion and chemical exposure. Commercial trailer operators and heavy equipment haulers often choose this option for its multi-year protection span.
The trade-offs are substantial. Asphalt-based undercoating adds significant weight, creates a rough, black finish that’s nearly impossible to remove, and provides minimal self-healing properties. Once cracked or chipped, moisture penetrates and becomes trapped. Application requires professional equipment and warm weather conditions. The finish amplifies road noise and makes future inspections difficult since you can’t see the metal underneath. For owners prioritizing maximum lifespan over maintenance ease, asphalt remains a viable choice, but most utility trailer owners find the rigidity overkill for their needs.
Wax-Based Undercoatings: The Cleaner Application
Wax-based formulations offer a middle ground between oil and rubberized products, providing decent protection with easier, less messy application. These products dry to a hard, wax-like finish that resists water while remaining somewhat flexible. The biggest advantage lies in DIY-friendliness—most wax-based undercoatings apply with simple spray equipment and clean up with soap and water.
Performance in extreme conditions doesn’t match oil or rubberized options. Wax coatings require more frequent reapplication, typically every 12-18 months, and offer limited self-healing capability. They work best for trailers stored indoors or used primarily in moderate climates. The environmental impact ranks lower than petroleum-based products, making them attractive for eco-conscious owners. However, the protection level reflects the compromise—you’re trading durability for convenience and cleanliness.
Polyurethane Undercoatings: Modern Performance
Polyurethane formulations represent the newest technology, offering exceptional chemical resistance and durability while maintaining flexibility. These two-part coatings create a seamless, waterproof membrane that bonds permanently to properly prepared metal. Professional-grade polyurethane undercoatings can last 5-7 years without reapplication, even under severe conditions.
The barrier to entry includes cost and application complexity. Quality polyurethane products require mixing equipment, specialized spray guns, and careful surface preparation. DIY kits exist but demand strict adherence to temperature and humidity guidelines. The coating’s permanence becomes a double-edged sword—while it won’t wash off or degrade, any future repairs require grinding away the material. For new trailers or those undergoing complete restoration, polyurethane provides the longest-lasting protection available, justifying the higher upfront investment.
Key Features to Evaluate Before Buying
Selecting the right undercoating requires looking beyond marketing claims and understanding the technical specifications that determine real-world performance. These features separate products that truly protect from those that merely look good on the shelf.
Adhesion Properties
Superior adhesion means the difference between a coating that stays put for years and one that peels off after the first season. Look for products that specify “direct-to-metal” application without requiring separate primers. The best formulations use rust-inhibiting pigments that chemically bond to the metal surface. Check for ASTM adhesion test ratings when available, and understand that oil-based products adhere differently than film-forming coatings—they penetrate rather than bond, which works but requires different evaluation criteria.
Flexibility and Crack Resistance
Your trailer frame flexes during loading, unloading, and while navigating uneven terrain. A brittle undercoating cracks under this stress, creating entry points for moisture. Quality rubberized and polyurethane products specify elongation percentages—aim for formulations that can stretch at least 200% without breaking. Asphalt-based products inherently lack this flexibility, which is why they’re better suited for rigid commercial equipment frames than lighter utility trailers that experience more torsional stress.
Salt and Chemical Resistance
In salt-heavy environments, undercoating must withstand constant chemical assault. Products containing barium or zinc compounds provide active corrosion inhibition beyond simple barrier protection. For agricultural or industrial use, check resistance to fertilizers, hydraulic fluid, and diesel fuel. Polyurethane coatings excel here, while oil-based products require more frequent reapplication in chemically aggressive environments.
Drying Time and Curing Process
Application timing affects your entire project schedule. Aerosol rubberized coatings might dry to touch in 30 minutes but require 24 hours to fully cure. Oil-based products never truly “dry,” while polyurethane coatings demand specific temperature ranges for proper chemical curing. Consider your available application window and whether the trailer can remain stationary for the required curing period. Rushing this step guarantees premature failure.
Temperature Range Performance
Your undercoating must perform in your local climate extremes. Products that remain flexible at -20°F may flow off the trailer at 110°F. Conversely, coatings designed for southern heat can crack like glass in northern winters. Check the manufacturer’s specified service temperature range and match it to your regional conditions. This specification proves especially critical for rubberized and asphalt-based products.
Application Methods: DIY vs. Professional
The application method significantly impacts final results and long-term satisfaction. DIY enthusiasts can achieve professional-grade protection, but only by respecting the process and using proper equipment.
Aerosol cans work for small touch-ups but prove inadequate for full trailer coverage. The product volume runs out quickly, and the spray pattern lacks consistency. For DIY application, invest in a quality undercoating gun that attaches to your air compressor—models with adjustable fan patterns and fluid control dramatically improve results. Electric undercoating systems offer cordless convenience but require careful thinning to prevent clogging.
Professional application justifies its cost through experience, equipment, and warranty coverage. Shops use high-volume, low-pressure (HVLP) systems that atomize product into consistent patterns, reaching areas inaccessible to DIY equipment. Many professional applications include warranties ranging from one year to lifetime coverage, contingent on annual inspections. The decision often boils down to time value—if you’ll spend an entire weekend applying and cleaning up, professional pricing might represent better overall value.
Surface Preparation: The Foundation of Success
Undercoating failure almost always traces back to inadequate surface preparation. This step determines 80% of your final result, yet most owners rush through it or skip critical stages entirely. Begin with a thorough pressure washing, focusing on inside frame rails and crossmembers where mud and salt accumulate. Follow with a degreasing wash using a product specifically formulated for automotive undercarriages—household degreasers leave residues that interfere with adhesion.
Rust removal requires mechanical action. Wire brushes, sanding discs, or media blasting remove loose scale, but chemical rust converters provide the best foundation for undercoating by transforming remaining rust into an inert phosphate coating. After rust treatment, wipe all surfaces with a wax-and-grease remover just before application. Any moisture, oil, or contamination left behind creates a void that expands under the coating, eventually causing delamination. For new trailers, don’t assume the factory paint provides adequate protection—most manufacturers apply minimal coatings that undercoating can actually improve upon.
Climate Considerations for Trailer Undercoating
Your geographic location dictates material selection more than any other factor. Owners in the salt belt (Northeast, Great Lakes region, and mountainous areas using de-icing chemicals) need aggressive protection with frequent inspection schedules. Oil-based products require reapplication before each winter season, while polyurethane coatings demand annual touch-ups of chip-prone areas.
Coastal environments introduce salt air that penetrates every crevice, making creeping oil formulations particularly valuable for their ability to reach hidden areas. Southern humidity combined with heat accelerates corrosion through condensation cycles, favoring breathable yet waterproof rubberized coatings. Desert environments present unique challenges—intense UV exposure degrades some undercoatings while extreme temperature swings cause expansion and contraction stress.
Timing your application matters as much as material choice. Apply undercoating during dry weather with temperatures between 60-80°F and low humidity. Avoid application within 48 hours of predicted rain, and never coat a trailer that’s been sitting on damp ground. The metal temperature must match ambient temperature—morning condensation can ruin an otherwise perfect application.
Cost Analysis: Budgeting for Protection
Undercoating costs span from $30 in materials for a DIY oil-based application to over $800 for professional polyurethane coating on a large tandem-axle trailer. Understanding long-term value requires calculating cost per year of protection rather than initial expense. A $200 professional rubberized application lasting three years costs less annually than a $50 DIY job requiring yearly reapplication.
DIY costs include more than just the product. Factor in degreasers, rust converters, protective equipment, spray gun equipment (if you don’t own it), and your time. A full DIY job typically consumes 4-6 hours for preparation and application, plus cleanup. Professional pricing often includes surface preparation, multiple product layers, and warranty coverage that DIY efforts lack.
Commercial operators should calculate downtime costs. A trailer out of service for a DIY weekend represents lost revenue that might exceed professional application costs. For personal-use trailers, the math favors DIY if you value the learning experience and have the time. Consider also the cost of failure—structural rust repair easily exceeds $1,000, making any undercoating investment financially prudent.
Maintenance and Reapplication Strategies
Effective undercoating requires ongoing attention, not a one-and-done mentality. Establish a seasonal inspection routine—spring and fall work well for most climates. Use a flashlight and inspection mirror to check inside frame rails and behind brackets. Look for chips, cracks, or areas where the coating has thinned from abrasion.
Touch-up small damage immediately using the same product type originally applied. Never apply oil-based products over cured rubberized coatings or vice versa. If you discover rust forming under intact coating, you’re dealing with trapped moisture from inadequate surface prep—the affected area requires complete removal, rust treatment, and reapplication.
Reapplication timing varies by product and use. Oil-based coatings need annual refreshing before winter. Rubberized coatings last 2-3 years but require inspection of high-wear areas like fender wells and tongue frames. Polyurethane coatings might last 5+ years but benefit from annual touch-ups of chip-prone zones. When reapplying, never layer new product over failing old coating—complete removal ensures proper adhesion and performance.
Common Mistakes to Avoid
Even quality products fail when applied incorrectly. Learning from others’ mistakes saves you time, money, and frustration while ensuring your trailer receives genuine protection.
Skipping Surface Prep
The temptation to blast a dirty trailer with undercoating and call it done proves irresistible to many, and consistently leads to failure. Undercoating bonds to the surface it contacts—if that surface is rust, dirt, or oil, the coating adheres to those contaminants, not the metal. When the contaminant flakes off, so does your protection. Dedicate at least twice as much time to preparation as to application.
Applying Too Thick or Too Thin
More isn’t better with film-forming coatings. Excessively thick applications crack as they cure, creating stress fractures that channel water directly to the metal. Thin applications fail to provide adequate barrier protection. Follow manufacturer specifications precisely—most recommend 4-6 mils dry film thickness, achieved through multiple light coats rather than one heavy pass.
Ignoring Weather Conditions
Applying undercoating on a humid morning or when rain threatens within 24 hours invites failure. Moisture trapped under the coating causes immediate bubbling and delamination. Temperature affects curing chemistry—too cold and the product won’t flow properly; too hot and it skins over before adhering. Check both ambient and surface temperature against manufacturer specifications.
Choosing Based on Price Alone
The cheapest product rarely provides the best value. Budget undercoatings often contain excessive solvents that shrink dramatically during curing, leaving a paper-thin barrier. They may lack corrosion inhibitors or use lower-grade polymers that crack within months. Mid-priced products from reputable manufacturers typically offer the best performance-to-cost ratio.
Neglecting Hard-to-Reach Areas
The most critical areas to protect are those you can’t easily see—inside frame rails, behind spring hangers, and along the top of crossmembers where moisture collects. These spots corrode first because they’re ignored. Use extension wands for your spray gun and apply coating until it drips from exit holes, ensuring complete coverage. Remove access panels and spare tire mounts to reach hidden surfaces.
Environmental and Safety Considerations
Modern undercoating products balance performance with environmental responsibility, but you must handle all formulations with appropriate caution. Volatile Organic Compounds (VOCs) in solvent-based products contribute to air pollution and pose health risks during application. Always apply undercoating in well-ventilated areas, preferably outdoors, and wear a respirator rated for organic vapors—not just a dust mask.
Disposal presents another challenge. Never pour leftover oil-based products down drains or into soil. Collect drips and overspray using tarps, and dispose of waste materials at hazardous waste collection facilities. Many municipalities classify petroleum-based undercoating as hazardous waste. Water-based and wax formulations offer easier cleanup and lower environmental impact, though they still require responsible disposal.
Consider eco-friendly alternatives if your trailer use doesn’t demand maximum protection. Lanolin-based products (derived from sheep’s wool) provide surprising corrosion resistance with minimal environmental impact, though they require frequent reapplication. Some manufacturers now offer low-VOC rubberized formulations that maintain performance while reducing harmful emissions. Your choice reflects both protection priorities and environmental stewardship.
Frequently Asked Questions
How often should I undercoat my utility trailer?
Oil-based products need annual application before winter. Rubberized coatings typically last 2-3 years depending on use severity. Polyurethane formulations can protect for 5-7 years with annual touch-ups of high-wear areas. Inspect your trailer each spring and fall—reapply when you notice thinning, cracking, or bare metal exposure.
Can I apply undercoating over existing rust?
Yes, but only after proper treatment. Remove loose rust scale with a wire brush, then apply a chemical rust converter that transforms remaining oxidation into an inert phosphate coating. Undercoating directly over active rust without treatment seals in moisture and accelerates corrosion. Oil-based products can be applied over light surface rust after cleaning, as they displace moisture rather than sealing it in.
What’s the best undercoating for salt-exposed trailers?
For extreme salt environments, a two-part polyurethane system provides the longest-lasting protection. For DIY applications in salt-heavy regions, oil-based undercoatings offer excellent performance if reapplied annually. The key is selecting a product with active corrosion inhibitors like zinc or barium compounds, and maintaining a rigorous inspection schedule. No undercoating eliminates the need for regular washing, especially after salt exposure.
Should I undercoat a brand-new trailer?
Absolutely. New trailers often ship with minimal factory rust protection—sometimes just a thin coat of black paint. Undercoating a new trailer before first use prevents rust from ever starting, which is far easier than stopping established corrosion. The ideal window is within the first month of ownership, before road grime and moisture contaminate the frame. This proactive approach maximizes your trailer’s lifespan from day one.
Can I switch undercoating types when reapplying?
Generally no. Oil-based products don’t adhere well to cured rubberized or polyurethane coatings, and film-forming coatings won’t stick to oily residues. If you want to switch types, you must completely remove the old coating through media blasting or chemical stripping—a labor-intensive process. It’s best to commit to one technology long-term or stick with compatible formulations (like reapplying oil-based over existing oil-based).
How much product do I need for a typical 6×12 utility trailer?
A single-axle 6×12 trailer typically requires 1-1.5 gallons of product for complete coverage, including inside frame rails. Tandem-axle models need 2-2.5 gallons. Always purchase 20% more than calculated to ensure adequate coverage of hard-to-reach areas and allow for touch-ups. Running out mid-application forces a trip to the store and risks visible lines where the new batch overlaps partially cured coating.
Is professional undercoating worth the extra cost?
For trailers over $3,000 or those used commercially, professional application typically pays for itself through longer protection intervals, warranty coverage, and proper surface preparation. Professionals use equipment that reaches areas DIY methods can’t access and apply products at optimal thickness. The decision depends on your time value, equipment access, and comfort with the preparation work. Many owners split the difference—professional application initially, then DIY touch-ups thereafter.
What temperature is too cold for undercoating application?
Most products specify a minimum temperature of 50-60°F for both ambient air and metal surface. Some cold-weather formulations work down to 40°F, but curing times extend dramatically. Below these temperatures, the product becomes too viscous to spray properly and won’t cure correctly, remaining tacky and vulnerable to wash-off. Never apply undercoating when temperatures will drop below freezing within 24 hours, as ice formation under the coating guarantees failure.
Can undercoating interfere with trailer inspections or repairs?
Yes, which is why strategic application matters. Avoid coating areas that need regular inspection, such as brake line connections, wiring harnesses, and grease fittings. Professional applicators mask these areas. For structural repairs, thick rubberized or asphalt coatings must be ground away, adding labor cost. Oil-based and thinner wax coatings allow easier access. Consider your trailer’s maintenance needs when selecting a product thickness.
How do I remove old undercoating before reapplication?
Mechanical removal works best for film-forming coatings. Use a heat gun to soften the material, then scrape with putty knives. For large areas, media blasting with plastic or walnut shells removes coating without damaging metal. Chemical strippers exist but create environmental disposal challenges. Oil-based coatings thin with each pressure washing and eventually wear away, requiring less intensive removal. Never apply new coating over cracked, peeling, or contaminated old layers—the adhesion failure will repeat.