Welding might create the backbone of your vehicle’s structural integrity, but here’s the harsh reality: those pristine bead lines are secretly the most vulnerable spots on your entire chassis. Whether you’re restoring a classic muscle car, maintaining a daily driver through brutal winters, or finishing a custom fabrication project, the welds holding everything together face an invisible enemy that never sleeps—corrosion. While most car enthusiasts religiously wax their paint and detail their interiors, weld protection remains one of the most overlooked aspects of comprehensive car care, often until it’s too late and orange cancer has already taken hold.
This deep dive into undercoating for weld sealing isn’t about quick fixes or miracle products. It’s about understanding the science behind weld corrosion, the critical properties that separate effective sealants from glorified paint, and the application techniques that professionals use to guarantee decades of protection. We’ll walk through everything from the microscopic structure of heat-affected zones to regulatory compliance, giving you the authoritative knowledge to make informed decisions—whether you’re rolling up your sleeves or vetting a professional shop.
Top 10 Undercoatings
Detailed Product Reviews
1. Rust-Oleum 248657-6PK Stops Rust Undercoating Spray, 15 oz, Rubberized Black, 6 Pack

Overview: The Rust-Oleum 248657-6PK offers a six-can bundle of rubberized undercoating designed for vehicle undercarriage protection. This standard-grade formula provides essential corrosion defense for cars, trucks, trailers, and RVs, creating a flexible barrier against moisture, salt, and chemical damage. Each 15-ounce can covers approximately 10-12 square feet and features innovative any-angle spray technology for hard-to-reach areas.
What Makes It Stand Out: This bundle stands out with its rapid 30-minute drying time, significantly faster than many competitors. The wide comfort spray tip and any-angle application capability allow for effortless painting, even when spraying upside down—crucial for comprehensive underbody coverage. The six-pack configuration ensures you won’t run out mid-project, making it ideal for treating multiple vehicles or extensive rust-proofing jobs.
Value for Money: At $0.40 per ounce, this represents the most economical option in the lineup, delivering 90 total ounces of product for $35.59. The bulk packaging reduces per-can cost substantially compared to individual purchases, offering savings of approximately 25% per ounce versus single cans. For DIY enthusiasts undertaking complete undercoating projects, this value proposition is compelling.
Strengths and Weaknesses: Strengths include rapid drying, ergonomic spray technology, excellent coverage area, and outstanding bulk pricing. The rubberized finish deadens road noise effectively while providing flexible protection. Weaknesses center on its standard-grade formulation, which may not match the durability of professional-grade alternatives for extreme conditions. Coverage per can is slightly less than pro versions, potentially requiring more product for large vehicles.
Bottom Line: This six-pack delivers exceptional value for budget-conscious DIYers seeking reliable undercarriage protection. While not professional-grade, its fast-drying formula and user-friendly application make it perfect for annual maintenance and moderate climate conditions.
2. Rust-Oleum 248656-6PK Stops Rust Professional Grade Undercoating Spray Paint, 15 oz, Rubberized Black, 6 Pack

Overview: The Rust-Oleum 248656-6PK represents the professional-grade tier of undercoating protection, packaged in a convenient six-can bundle for serious automotive enthusiasts and professionals. This advanced rubberized formula creates a robust shield against corrosion, water intrusion, salt damage, and chemical exposure on bare or primed metal underbodies of vehicles, trailers, and RVs.
What Makes It Stand Out: The professional-grade designation signals enhanced durability and superior adhesion compared to standard formulas. Each can covers 10-15 square feet, offering potentially 25% more coverage than consumer-grade alternatives. The same trusted any-angle spray technology and wide comfort tip ensure professional results, while the rubberized coating provides excellent sound deadening properties for a quieter cabin experience.
Value for Money: Priced at $0.55 per ounce ($49.62 for six 15-oz cans), this product commands a 37.5% premium over the standard version. However, the professional formulation delivers extended protection longevity, potentially reducing reapplication frequency. For those in harsh winter climates or coastal regions, this upfront investment translates to superior long-term value through enhanced corrosion prevention.
Strengths and Weaknesses: Strengths include professional-grade durability, superior coverage per can, excellent sound dampening, and flexible application. The rubberized coating maintains elasticity, preventing cracks and chips. The primary weakness is the longer one-hour drying time, requiring more patience during application. The higher cost may deter casual users, and the six-pack commitment could be excessive for single-vehicle owners.
Bottom Line: This professional-grade six-pack justifies its premium price for those demanding maximum protection. Ideal for harsh environments, fleet maintenance, or enthusiasts wanting commercial-quality results that outlast standard undercoatings.
3. Rust-Oleum 248656 Professional Grade Rubberized Undercoating Spray, 15 oz, Black

Overview: The Rust-Oleum 248656 single-can offering brings professional-grade undercoating protection to consumers without requiring bulk purchase commitment. This 15-ounce can delivers the same superior corrosion-fighting formula as its six-pack counterpart, designed for spot treatments, small projects, or trial applications before investing in larger quantities.
What Makes It Stand Out: This single-can format provides flexibility for DIYers tackling isolated rust spots, partial underbody treatments, or maintaining a single vehicle. The professional-grade formulation ensures you’re applying the same trusted protection used by automotive professionals, with coverage of 10-15 square feet per can. The any-angle spray technology remains a standout feature, enabling access to frame rails and wheel wells without contorting into awkward positions.
Value for Money: At $8.27 per can ($0.55 per ounce), this represents the same per-ounce cost as the professional six-pack but eliminates the $41+ upfront investment. This pay-as-you-go approach is ideal for budget-conscious users or those uncertain about their project scope. While more expensive per ounce than the standard single can, the professional formulation offers enhanced durability that may offset the modest price difference.
Strengths and Weaknesses: Strengths include professional-grade quality without bulk commitment, flexible purchase quantity, superior coverage area, and proven corrosion resistance. The one-hour dry time ensures proper curing. Weaknesses mirror the six-pack version: slower drying than standard formulas and higher cost per ounce than non-professional options. Single-can availability may be limited compared to bundled versions.
Bottom Line: Perfect for targeted applications and first-time users wanting professional results without excess inventory. Purchase this single can for spot rust prevention, touch-ups, or evaluating the professional-grade formula before committing to a multi-pack.
4. 3M 3584 Professional Grade Rubberized Undercoating 6 16oz Cans

Overview: The 3M 3584 Professional Grade Rubberized Undercoating brings the renowned 3M brand reputation to vehicle undercarriage protection in a six-can bundle. Each 16-ounce can delivers a durable, flexible coating engineered to shield against moisture, salt, and environmental factors that cause corrosion on cars, trucks, and recreational vehicles.
What Makes It Stand Out: 3M’s formulation excels in sound dampening, significantly reducing road noise and vibration for a noticeably quieter cabin experience. The slightly larger 16-ounce cans provide more product per unit than standard 15-ounce offerings, while the professional-grade designation ensures reliable performance trusted by automotive professionals. The aerosol spray format is specifically engineered to prevent running and sagging, creating uniform coverage even on complex underbody geometries.
Value for Money: At $0.57 per ounce ($54.43 for six 16-oz cans), this is the premium option in the comparison, costing 42.5% more than Rust-Oleum’s standard bundle. The 3M brand commands this premium through decades of automotive product excellence and consistent quality control. For professionals and brand-loyal enthusiasts, the peace of mind and proven track record justify the additional cost, particularly for high-value vehicles or severe-duty applications.
Strengths and Weaknesses: Strengths include exceptional brand reputation, superior sound deadening, anti-run formulation, and generous 16-ounce can size. The professional-grade protection performs reliably in extreme conditions. Weaknesses center on the highest per-ounce cost and minimal technical differentiation from less expensive professional alternatives. The premium may be unjustified for budget-focused DIYers.
Bottom Line: Choose 3M when brand trust and proven reliability outweigh cost considerations. Ideal for professionals, luxury vehicle owners, or those prioritizing noise reduction alongside corrosion protection. The premium delivers peace of mind.
5. Rust-Oleum 248657 Rubberized Undercoating Spray, 15 oz, Black

Overview: The Rust-Oleum 248657 single-can undercoating provides accessible, fast-drying protection for automotive underbodies without multi-can commitment. This standard-grade 15-ounce can delivers essential corrosion defense against water, salt, and chemicals for cars, trucks, trailers, and RVs, making it ideal for quick touch-ups and small-scale applications.
What Makes It Stand Out: The standout feature remains its rapid 30-minute drying time, allowing for faster project completion compared to professional-grade alternatives. The any-angle spray technology and wide comfort tip ensure user-friendly application, even when accessing difficult underbody areas. This single-can format eliminates waste for those treating small sections or performing annual maintenance on a single vehicle.
Value for Money: At $7.98 per can ($0.53 per ounce), this offers the lowest entry price point while maintaining a reasonable per-ounce cost. It’s significantly more accessible than bulk packages for casual users, though per-ounce cost is 32.5% higher than the six-pack standard version. For spot treatments and minor rust prevention, this represents excellent value without inventory commitment.
Strengths and Weaknesses: Strengths include fastest drying time, lowest single-can price, ergonomic application features, and adequate coverage of 10-12 square feet. The rubberized coating provides decent sound dampening and flexible protection. Weaknesses include standard-grade durability limitations compared to professional formulas, smaller coverage area per can, and higher per-ounce cost versus bulk purchasing. Not ideal for harsh climates requiring maximum protection.
Bottom Line: The perfect entry-level option for quick fixes and annual maintenance. Purchase this single can for spot rust treatment, noise reduction, or testing the product before committing to bulk. Ideal for DIYers in moderate climates with limited project scope.
6. Rust-Oleum Black Undercoating 15 oz. (12 Pack)

Overview: Rust-Oleum’s Black Undercoating comes in a convenient 12-pack of 15-ounce aerosol cans, designed for comprehensive vehicle undercarriage protection. This professional-grade formula creates a durable barrier against moisture, salt, and road debris—the primary culprits of rust and corrosion. Trusted by automotive professionals and DIY enthusiasts alike, this bulk package ensures you have adequate supply for complete vehicle coverage or multiple projects without mid-job supply runs that compromise results.
What Makes It Stand Out: The Rust-Oleum name itself stands out, representing decades of protective coating expertise. The bulk 12-pack configuration is ideal for restoration shops or serious hobbyists tackling multiple vehicles. Unlike single-can purchases, this package eliminates project interruptions and often provides cost savings per ounce. The formula delivers consistent spray patterns and reliable adhesion to clean metal surfaces, creating a uniform black protective layer that resists chipping and weathering through seasonal extremes.
Value for Money: At $0.45 per ounce, this offering sits in the mid-range pricing tier, delivering excellent value through bulk purchasing power. Individual premium undercoatings often exceed $0.60 per ounce, making this 12-pack economically attractive for large-scale applications. The convenience of having ample supply outweighs the higher upfront investment for those with substantial undercoating needs.
Strengths and Weaknesses:
- Strengths: Trusted brand reputation; bulk packaging ideal for large projects; consistent application quality; excellent corrosion resistance; professional-grade durability.
- Weaknesses: Limited product specifications provided; 12-pack may be excessive for single-vehicle DIYers; requires proper surface preparation for optimal results.
Bottom Line: Perfect for restoration shops, fleet maintenance, or dedicated automotive enthusiasts planning multiple undercoating projects. The Rust-Oleum 12-Pack offers reliable protection with the convenience of bulk supply, though casual users may find the quantity overwhelming.
7. 3M Professional Grade Rubberized Undercoating, Corrosion, Water and Salt Spray Resistant, 03584, 16 oz. Aerosol

Overview: 3M’s Professional Grade Rubberized Undercoating represents premium single-can convenience for targeted rust prevention. This 16-ounce aerosol delivers asphalt-based protection specifically engineered to withstand corrosive salt spray, water intrusion, and abrasive road debris. Designed for precision application on wheel wells, quarter panels, fenders, and under-hood areas, it serves as a formidable defense against the elements that compromise vehicle longevity and structural integrity in harsh climates.
What Makes It Stand Out: The asphalt-based formulation provides superior sound deadening properties, noticeably reducing road noise and vibration—an advantage many competitors lack. 3M’s engineering excellence ensures exceptional adhesion to properly prepared surfaces, creating a flexible yet durable rubberized barrier that won’t crack under stress or temperature fluctuations. The professional-grade designation isn’t mere marketing; this product meets stringent performance standards for automotive applications and withstands extreme conditions.
Value for Money: At $0.62 per ounce, this commands a premium price point, yet delivers commensurate quality. For those seeking single-can convenience without compromising performance, the cost is justified by 3M’s reputation and proven results. It’s ideal for touch-ups or single-vehicle applications where purchasing bulk would be wasteful and impractical for storage.
Strengths and Weaknesses:
- Strengths: Superior sound deadening; trusted 3M quality; excellent salt spray resistance; versatile application areas; professional-grade flexibility and durability.
- Weaknesses: Higher per-ounce cost; single-can quantity insufficient for full undercarriage coverage; asphalt base may have stronger odor during application.
Bottom Line: An excellent choice for quality-conscious consumers needing targeted protection or sound dampening. The premium price buys proven 3M performance, making it worth the investment for discerning automotive enthusiasts and professionals alike.
8. HI-TECH 18021 Rubberized Undercoat Spray (12-Pack) – 17oz Aerosol, Paintable Black Finish, Anti-Rust, Sound Dampening, Quick Drying for Car, Driveway & More

Overview: HI-TECH’s 18021 Rubberized Undercoat Spray positions itself as a versatile, professional-grade solution in a substantial 12-pack configuration. Each 17-ounce can delivers a waterproof, rubberized seal that actively shields metal from moisture, salt, and grime while simultaneously reducing cabin noise. The formula’s impressive versatility extends beyond automotive undercarriages to driveway cracks and even tree wound treatment, making it a multi-purpose asset for property maintenance professionals and ambitious DIYers.
What Makes It Stand Out: The paintable black finish distinguishes this product, allowing seamless color customization after application—a feature professionals appreciate for visible areas. Its rapid-drying, high-adhesion formula resists chipping and peeling, while the sound-dampening properties address both protection and passenger comfort. The 12-pack quantity suits high-volume users like detail shops and fleet operators who require consistent results across multiple projects without supply interruptions.
Value for Money: At $0.53 per ounce, HI-TECH balances premium features with reasonable pricing. The professional-grade formulation rivals more expensive brands, while the bulk packaging reduces per-unit cost significantly. For shops handling multiple vehicles or diverse projects, this represents solid middle-ground value that doesn’t sacrifice performance for economy, making it a smart inventory choice.
Strengths and Weaknesses:
- Strengths: Versatile beyond automotive use; paintable finish; excellent sound dampening; fast-drying formula; strong adhesion prevents peeling; substantial 12-pack quantity.
- Weaknesses: Brand recognition lags behind 3M/Rust-Oleum; higher upfront cost; may require multiple coats for maximum protection; limited retail availability.
Bottom Line: Ideal for professional detailers, maintenance shops, and ambitious DIYers seeking versatility. HI-TECH delivers impressive features at a competitive price, though brand-conscious buyers may prefer legacy names. The paintable finish and multi-surface capability make it exceptionally practical for varied applications.
9. Barrier Bond - Rubberized Undercoating Sound Deadener Kit, 28oz 4-Pack, Black Spray, Vehicle Undercoating, with Spray Gun
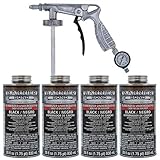
Overview: Barrier Bond’s Sound Deadener Kit provides a complete undercoating solution with its 4-pack of 28-ounce cans and included spray applicator gun. This ready-to-spray system eliminates equipment guesswork, offering immediate professional results for truck undercoating and large vehicle projects. The formulation meets all 50-state VOC compliance standards, ensuring environmental responsibility without sacrificing protective performance against rust and corrosion in any region.
What Makes It Stand Out: The integrated spray gun applicator sets this kit apart, delivering superior control and coverage compared to standard aerosol nozzles. The larger 28-ounce cans reduce replacement frequency during extensive jobs. VOC compliance across all 50 states makes it uniquely accessible for professional shops operating under strict environmental regulations, particularly in California and Northeastern states where such compliance is mandatory and non-negotiable.
Value for Money: At $114.99 for the complete kit, the value proposition centers on convenience and compliance. While per-ounce calculations are less straightforward, the included spray gun—which typically costs $20-40 separately—enhances overall worth. For professionals requiring VOC-compliant solutions, this kit eliminates regulatory concerns while providing proper application equipment, saving both time and potential fines.
Strengths and Weaknesses:
- Strengths: Complete kit with spray gun; 50-state VOC compliant; larger can size reduces interruptions; excellent for truck and large vehicle applications; ready-to-spray convenience.
- Weaknesses: Higher initial investment; may be excessive for small cars or single projects; spray gun requires cleaning and maintenance; limited brand recognition.
Bottom Line: Perfect for professional shops, particularly in regulated states, and owners of trucks or large SUVs. The spray gun and VOC compliance justify the premium, though casual users with smaller vehicles should consider simpler aerosol options. This is a turnkey solution for serious undercoating work.
10. Dupli-Color UC101 Paintable Rubberized Undercoat - 16 oz. - 6 Pack

Overview: Dupli-Color’s UC101 Undercoat leverages the brand’s automotive paint expertise in a practical 6-pack configuration. Each 16-ounce can delivers a paintable rubberized coating specifically formulated for vehicle undercarriages, wheel wells, and other rust-prone areas. As a trusted name in automotive refinishing, Dupli-Color ensures compatibility with subsequent paint layers, allowing seamless integration with vehicle restoration projects where color matching and finish consistency matter significantly.
What Makes It Stand Out: The explicit paintability feature is the primary differentiator, enabling users to apply topcoats without adhesion issues or discoloration. This is crucial for restoration projects where undercarriage components remain visible or require color coding. The six-pack quantity hits the sweet spot for single-vehicle applications with room for touch-ups, avoiding both shortage and excessive leftover material that often accompanies larger bulk purchases.
Value for Money: At $0.46 per ounce, this offering provides excellent mid-tier value from a reputable automotive brand. The six-pack quantity aligns perfectly with typical consumer needs, eliminating waste while ensuring adequate coverage. Compared to premium single cans, the per-ounce savings are substantial without requiring massive bulk purchases that strain budgets and storage space for average enthusiasts.
Strengths and Weaknesses:
- Strengths: Fully paintable finish; trusted automotive brand; ideal quantity for most projects; competitive pricing; good adhesion to clean metal; suitable for restoration work.
- Weaknesses: Limited feature details provided; may require multiple coats for optimal thickness; not explicitly VOC compliant across all states; sound deadening properties not emphasized.
Bottom Line: An excellent value for automotive enthusiasts and restorers who prioritize paint compatibility. The six-pack quantity is practical for most projects, and Dupli-Color’s reputation ensures reliable performance. Ideal for those wanting quality results without professional-shop quantities or premium single-can pricing.
What is Undercoating for Welds and Why Does It Matter?
The Vulnerability of Welded Joints
Welded joints represent a perfect storm of corrosion risk factors. The intense heat from welding fundamentally alters the metal’s crystalline structure, creating what’s known as the heat-affected zone (HAZ). This area behaves differently from the parent metal, often becoming more anodic and eager to surrender electrons to the surrounding environment. When you combine this electrochemical predisposition with microscopic porosity, residual flux contaminants, and the simple fact that welds create crevices where moisture loves to hide, you’ve got a recipe for rapid deterioration. Standard undercoating applied over welds without proper consideration for these unique characteristics is like putting a bandage on a wound that needs stitches—it might look covered, but it’s not truly sealed.
Long-Term Consequences of Neglect
The cost of ignoring weld protection extends far beyond cosmetic concerns. A failed weld due to internal corrosion can compromise structural integrity, leading to MOT failures, safety hazards, and catastrophic repair bills. We’ve seen frame rails on 10-year-old trucks where the welds have rusted so severely that the joints could be separated with a pry bar. The insidious nature of crevice corrosion means damage often progresses unseen until complete failure occurs. Properly sealed welds, conversely, can outlast the surrounding metal, becoming the strongest rather than the weakest link in your vehicle’s armor.
How Welds Differ from Other Metal Surfaces
Heat-Affected Zones (HAZ)
The HAZ extends beyond the visible weld bead, typically 1-3 inches on either side, depending on the welding process and material thickness. This region experiences temperatures high enough to alter metallurgical properties but not high enough to fully re-normalize the structure. The result is a gradient of hardness, residual stress, and altered corrosion potential. Effective undercoating must account for this transition zone, providing consistent protection across materials with different electrochemical behaviors. Some advanced formulations include galvanic inhibitors specifically designed to neutralize the potential difference between HAZ and parent metal.
Porosity and Microscopic Gaps
Even the most skilled welder can’t eliminate microscopic porosity and the inherent gap where two pieces meet. These features create capillary action that wicks moisture deep into the joint, far beyond where surface coatings can reach. Quality weld sealants are formulated with penetration enhancers and lower viscosity to flow into these microscopic voids, displacing moisture and air. Think of it as the difference between painting a sponge and saturating it—the best protection comes from filling the structure, not just coating the surface.
Residual Contaminants from Welding
Welding slag, flux residue, and oxidation scale are chemically active and hygroscopic, meaning they actively attract and hold moisture. These contaminants are also poorly bonded to the substrate, creating a weak interface that topcoats will fail to adhere to. Professional-grade weld sealants are engineered to either dissolve these residues or encapsulate them completely, preventing them from becoming corrosion initiation sites. This is why surface preparation protocols for welds are substantially more rigorous than for general undercoating applications.
Key Properties of Effective Weld Sealants
Corrosion Inhibition Capabilities
Not all corrosion inhibitors are created equal. Look for formulations containing active ingredients like zinc phosphate, barium metaborate, or calcium sulfonate, which provide cathodic protection rather than just barrier properties. These compounds sacrifice themselves to protect the underlying steel, much like galvanizing. The concentration and dispersion of these inhibitors matter—premium products maintain protective levels even after the coating is physically damaged. Passive barrier coatings simply can’t match this self-healing characteristic that active inhibitors provide.
Flexibility and Elongation
Welds experience concentrated stress and flex differently than surrounding metal. A sealant that cures rock-hard will crack at the HAZ boundary within months. You need products with elongation ratings of at least 200-400% at break, allowing them to stretch with metal movement without losing adhesion. This is particularly critical on frames, suspension mounts, and unibody structures where flex is constant. The best weld sealants maintain flexibility across extreme temperature ranges, from -40°F winter brittleness to 300°F summer under-hood heat.
Adhesion Strength Requirements
Adhesion testing for weld sealants goes beyond simple peel tests. Effective products demonstrate cohesive failure rather than adhesive failure—meaning the coating itself tears before it releases from the substrate. Look for specifications mentioning cross-hatch adhesion ratings of 4B or 5B (ASTM D3359) and tensile adhesion values exceeding 300 psi on properly prepared welds. The chemistry matters here: epoxy-modified formulations typically outperform pure asphalt or wax-based products on the complex surface energy profile of welded joints.
Temperature and Chemical Resistance
Weld areas near exhaust components, catalytic converters, or high-performance engine bays see sustained temperatures above 200°F. Standard undercoatings soften and flow at these temperatures, leaving welds exposed. High-temp formulations using silicone-modified polymers or ceramic microspheres maintain integrity up to 500°F or higher. Chemical resistance is equally crucial—road salts, magnesium chloride, and calcium acetate are far more aggressive than old-fashioned sodium chloride. Your sealant should resist these deicers, as well as battery acid, brake fluid, and petroleum products.
Types of Undercoating Materials for Weld Sealing
Asphalt-Based Formulations
Traditional asphalt undercoatings offer excellent moisture barrier properties and sound deadening at low cost. For welds, however, their high solids content and limited penetration make them better as a topcoat than a primary sealant. Modern polymer-modified asphalts incorporate rubber or resin additives that improve flexibility and adhesion. These work best when applied over a penetrating primer specifically designed for welds. The key drawback is temperature sensitivity—they become brittle in cold and tacky in extreme heat, making them less ideal for performance applications.
rubberized undercoatings
Rubberized products (typically butyl rubber or SBR latex-based) provide superior flexibility and impact resistance. Their elastomeric nature allows them to bridge small cracks and maintain seal integrity even when physically damaged. For weld sealing, solvent-based rubberized coatings generally outperform water-based versions in penetration and adhesion, though VOC regulations have limited their availability. These formulations excel on areas subject to stone impingement but may require reinforcement with fiberglass matting on highly stressed joints.
Polyurethane Sealants
Two-component polyurethane coatings represent the premium tier for weld protection. They cure through chemical reaction rather than solvent evaporation, forming a dense, cross-linked polymer network that bonds molecularly to the substrate. These products offer the best combination of penetration, flexibility, and chemical resistance. The downside is complexity—proper mixing ratios, limited pot life, and sensitivity to moisture during curing require careful application. For show-quality restorations or vehicles in extreme environments, polyurethanes are worth the learning curve.
Wax and Paraffin-Based Products
Cavity waxes and paraffin sealants are designed specifically for penetrating into hidden areas, making them uniquely suited for weld seams. These low-viscosity formulations flow like water into crevices, displacing moisture and leaving a waxy, self-healing film. While they lack the durability of paint-like coatings for external surfaces, their ability to reach interior weld areas is unmatched. Professional application often involves injection wands that deliver wax directly into box sections and behind weld flanges where corrosion starts.
Epoxy and Ceramic Reinforced Options
Epoxy-based weld sealants fortified with ceramic microspheres or glass flake offer maximum durability for extreme applications. These create an armor-like barrier that’s highly resistant to abrasion, chemicals, and heat. The ceramic particles align parallel to the surface during application, creating a tortuous path that moisture cannot easily penetrate. While expensive and requiring meticulous surface prep, these are the go-to choice for off-road competition vehicles, marine applications, and areas exposed to constant chemical attack.
Application Methods: Choosing the Right Approach
Spray Application Techniques
Airless spray systems deliver the most uniform coverage on weld seams, with pressures of 2,000-3,000 PSI forcing material into surface irregularities. For optimal penetration, use a 0.019-0.023 inch tip and maintain a 6-8 inch distance, applying in multiple light passes rather than one heavy coat. HVLP (High Volume Low Pressure) systems work for topcoating but lack the penetration force needed for primary weld sealing. Always spray perpendicular to the weld direction on the final pass to ensure complete coverage of the seam line.
Brush and Roller Application
Brush application, while labor-intensive, provides the best control for detailed weld work. Use natural bristle brushes for solvent-based products and synthetic brushes for water-based formulations. The key technique is “stippling”—dabbing the brush vertically into the weld seam to work material into pores and gaps. Rollers speed up large flat areas but cannot adequately address weld contours. A hybrid approach works best: brush the weld seam itself, then roll the surrounding area for efficiency.
Dip and Flow Coating Methods
For removable components or during chassis restoration, dip coating provides complete, uniform coverage. The part is fully immersed, allowing capillary action to draw sealant into every crevice. Flow coating involves pouring sealant over the component while rotating it, achieving similar results with less material waste. Both methods require careful viscosity control and drainage strategies to prevent runs and sags. While impractical for in-place vehicle work, these techniques are gold standards for restoration shops building frames from scratch.
Surface Preparation: The Foundation of Success
Cleaning and Degreasing Protocols
Weld sealant performance is 90% preparation and 10% product. Start with a two-step cleaning process: first, remove oils and greases with a wax-and-grease remover or acetone, using white lint-free cloths and changing them frequently. Second, address welding-specific contaminants like silicone anti-spatter sprays or marking crayons—these require specialized cleaners containing mild abrasives. Never use mineral spirits alone; it leaves a residue that compromises adhesion. For critical applications, finish with a plasma or corona treatment to raise surface energy.
Rust Removal and Profiling
Light surface rust can be treated with phosphoric acid-based rust converters that chemically transform iron oxide into iron phosphate, a stable compound that actually improves adhesion. Heavy scaling requires mechanical removal via wire brushing, needle scaling, or media blasting. The goal isn’t bare metal shine but a clean, active surface with a uniform anchor profile of 1.5-3 mils. Over-polishing creates too smooth a surface; weld sealants need microscopic texture to grip. Always re-clean with solvent after mechanical prep to remove dust and embedded contaminants.
Priming Strategies for Welds
While some weld sealants are self-priming, critical joints benefit from a dedicated penetrating primer. Zinc-rich primers provide cathodic protection and exceptional adhesion, but must be applied thinly to avoid interfering with topcoat flexibility. Epoxy wash primers etch the surface chemically while depositing a corrosion-inhibiting film. The key is compatibility—always verify that your primer and topcoat are chemically compatible, or you’ll face delamination within months. Apply primers within the “application window” after cleaning, typically 30 minutes to 4 hours, before oxidation begins.
Understanding Rust Formation on Welds
The Electrochemical Process Explained
Rust on welds isn’t simple oxidation—it’s an electrochemical cell where the weld metal, HAZ, and parent metal form anodic and cathodic sites. The weld itself, being chemically different, often becomes anodic and sacrifices itself. This process accelerates in the presence of electrolytes like road salt. Crevice corrosion takes this further: inside the weld gap, oxygen becomes depleted, creating a differential aeration cell that aggressively attacks the metal. Effective sealants break this circuit by excluding electrolytes and sometimes incorporating sacrificial pigments that preferentially corrode instead of your weld.
Why Welds Rust Faster Than Base Metal
The metallurgical changes during welding create a more active surface. The rapid cooling traps stresses and creates microscopic galvanic couples. Additionally, weld spatter, slag inclusions, and incomplete fusion provide initiation points. The geometry itself is problematic—sharp angles and crevices concentrate chloride ions and maintain moisture. Studies show welds can corrode 3-5 times faster than adjacent base metal under identical conditions. This is why weld-specific formulations exist; treating welds like general sheet metal is a recipe for premature failure.
Environmental Factors That Impact Weld Longevity
Road Salt and Chemical Deicers
Modern deicing chemicals are far more aggressive than traditional rock salt. Magnesium chloride and calcium chloride are hygroscopic, actively pulling moisture from the air to keep welds wet even in dry conditions. They also lower the freezing point of water, allowing liquid brine to penetrate deeper into crevices at temperatures where pure water would freeze and stop. Your weld sealant must resist these chemicals specifically. Look for products tested against ASTM B117 modified with MgCl₂ or CaCl₂ solutions, not just NaCl.
Humidity and Moisture Intrusion
Relative humidity above 60% provides enough moisture for corrosion to progress, even without liquid water. Welds in humid climates fail from the inside out as moisture condenses within the joint during temperature cycles. Quality sealants have low water vapor transmission rates (WVTR), measured in perms. Aim for products with WVTR below 0.1 perms. For maximum protection in marine or tropical environments, consider dual-layer systems: a penetrating wax base with a high-build topcoat.
Temperature Fluctuations
Thermal cycling causes metal expansion and contraction, stressing the coating-weld interface. In northern climates, welds may see temperature swings from -30°F to 200°F near exhaust components. Each cycle flexes the sealant microscopically. Over time, this leads to cohesive failure if the product lacks adequate elongation. Premium weld sealants are tested through hundreds of thermal cycles per ASTM D6944 to ensure they maintain integrity. This is particularly critical on thin-gauge modern unibody vehicles where panel flex is more pronounced.
Professional vs. DIY Application Considerations
Skill Level and Equipment Requirements
DIY weld sealing is absolutely achievable, but the learning curve is steeper than general undercoating. You’ll need to master surface prep chemistry, understand mixing ratios for two-component products, and develop spray technique for complex geometries. Professional shops use rotisserie setups, media blasting cabinets, and industrial curing ovens that are impractical for home garages. However, with proper research and quality tools (a decent airless sprayer starts around $300), dedicated enthusiasts can achieve 90% of professional results. The key is recognizing when a project exceeds your capability—structural welds on daily drivers might warrant professional application.
Warranty Implications
Many vehicle manufacturers void corrosion warranties if improper undercoating is applied. Ford, for example, specifically prohibits asphalt-based coatings within 12 inches of exhaust components. Aftermarket warranties from restoration shops often require documentation of specific products and application methods. If your vehicle is under factory warranty, consult your dealer before applying anything. For classics and modified vehicles, professional application with documented procedures can actually increase value and insurability by providing a paper trail of proper maintenance.
Time and Labor Investment
Properly sealing welds on a full chassis can consume 40-60 hours when done correctly. Surface prep alone accounts for half this time. DIY saves labor costs ($75-150/hour at professional shops) but requires significant time investment and workspace dedication. The “spray and pray” approach might take a weekend, but proper work—with disassembly, full access, cure times between coats, and reassembly—can stretch to a month of weekends. Be realistic about your timeline. Rushing weld sealing is worse than not doing it at all, as trapped contaminants under a failed coating accelerate hidden corrosion.
Cost Analysis: Investment vs. Long-Term Protection
Material Costs Breakdown
Quality weld sealant materials range from $50 to $200 per gallon, with most vehicles requiring 1-3 gallons for complete coverage. Penetrating primers add $30-60 per quart. Don’t forget cleaners, solvents, PPE, and masking materials, which can total another $100-200. Two-component polyurethanes are the most expensive but offer the lowest cost-per-year of protection when amortized over their 15-20 year lifespan. Budget asphalt-based products might seem attractive at $30/gallon, but their 3-5 year lifespan and higher failure rate make them more expensive long-term.
Labor and Equipment Expenses
Professional weld sealing services typically charge $1,500-4,000 for a complete chassis treatment, depending on vehicle size and condition. This includes media blasting, chemical prep, multiple coats, and warranty. DIY equipment—a quality airless sprayer, compressor, HVLP gun, brushes, and safety gear—represents a $500-800 investment if starting from scratch. However, this equipment serves future projects. The hidden cost is workspace: proper ventilation, containment of overspray, and climate control during curing. Renting a temporary spray booth can add $200-400 but dramatically improves results.
Calculating ROI Through Prevention
Consider this: a rusted frame rail requiring section replacement can easily cost $2,000-5,000. A completely failed chassis on a classic car might render it a parts donor. Proper weld sealing costs 10-20% of that and prevents the problem entirely. For daily drivers in salt states, effective weld protection can extend vehicle life by 5-10 years, representing thousands in deferred replacement costs. The ROI is even higher on collector vehicles, where original structural integrity directly impacts value. Documented professional weld sealing can increase a classic’s value by $5,000-15,000 at auction.
Common Mistakes to Avoid When Sealing Welds
Inadequate Surface Preparation
The number one failure mode is applying sealant over invisible contaminants. Skipping the two-step cleaning process, using contaminated rags, or prepping in high humidity all doom the project. Another critical error is mechanical prep without subsequent solvent cleaning—those microscopic metal particles embed in pores and rust underneath your coating. Always perform a “water break test” after cleaning: spray distilled water on the surface; if it sheets off uniformly, you’re clean. If it beads or separates, contaminants remain.
Incorrect Application Thickness
More is not better. Excessive thickness leads to solvent entrapment, slow curing, and cohesive failure as internal stresses build. Most weld sealants perform optimally at 3-5 mils dry film thickness per coat, with two coats being standard. Applying a single 10-mil coat creates a surface skin while the interior remains uncured and mushy. Conversely, too-thin application provides inadequate barrier protection. Invest in a wet film thickness gauge ($15-30) and measure each pass. The goal is consistent, moderate coverage, not a thick, gloppy mess.
Ignoring Curing Times and Conditions
Weld sealants continue to cure and develop properties for days or weeks after application. Driving the vehicle or exposing it to moisture before minimum cure time (typically 24-72 hours) compromises performance. Temperature and humidity during curing are critical—most products require temperatures above 60°F and humidity below 70% for proper film formation. Forced-air curing with gentle heat (100-120°F) can accelerate this process but requires careful monitoring. Rushing to reassemble or return to service is the fastest way to waste all your prep work.
Maintenance and Inspection Best Practices
Regular Inspection Schedules
Weld sealants aren’t “set and forget.” Implement a semi-annual inspection protocol, focusing on high-stress areas like suspension mounts and steering box reinforcements. Use a borescope to examine interior welds in box sections without drilling access holes. Look for changes in coating appearance—chalking, color change, or loss of gloss indicate UV degradation (on visible welds) or chemical attack. Tap the coating with a small hammer; a dull thud suggests good adhesion, while a hollow sound indicates delamination. Document findings with photos to track changes over time.
Touch-Up Procedures
Catch damage early. Stone chips that expose bare weld metal should be addressed within days, not months. The touch-up process mirrors full application but on a smaller scale: clean the area thoroughly (feathering edges), apply penetrating primer if needed, then build thin coats of sealant, extending each coat 1-2 inches beyond the damage. Never blob material into a chip; it won’t adhere properly. For best results, perform touch-ups in controlled conditions, not during a snowstorm in your driveway. Keep a small kit of your original product for this purpose, as reformulations can cause compatibility issues.
When to Reapply: Knowing the Signs
Even the best weld sealants have finite lifespans. Plan for reapplication every 7-10 years for premium products, 3-5 years for budget options. Warning signs include widespread cracking (especially at HAZ boundaries), loss of flexibility (coatings that feel hard and brittle), and visible rust staining at weld toes. Before reapplying, you must remove the old coating completely—layering new over failed old material is pointless. Chemical strippers formulated for undercoating removal are more effective and less damaging than mechanical grinding on weld joints.
Regulatory and Safety Considerations
VOC Compliance and Environmental Regulations
Volatile Organic Compound (VOC) regulations vary dramatically by state and are becoming stricter. California’s SCAQMD rules limit undercoating VOCs to 340 g/L, while some products contain 600+ g/L. Using non-compliant products can result in fines and creates serious health hazards in enclosed spaces. Water-based technologies have improved significantly but still lag solvent-based products in penetration and cure speed. Always check local regulations before purchasing. Many professional-grade products are restricted to licensed applicators only, requiring you to either become certified or hire a pro.
Personal Protective Equipment Requirements
Weld sealing involves serious chemical hazards beyond simple skin irritation. Isocyanates in two-component polyurethanes can cause permanent respiratory sensitization at concentrations below the odor threshold. You need a NIOSH-approved respirator with organic vapor cartridges and particulate filters—not just a dust mask. Chemical-resistant gloves (nitrile for water-based, butyl rubber for solvent-based), full-face shields, and disposable coveralls are mandatory. Ensure adequate ventilation; a garage with a fan is insufficient. Consider a supplied-air respirator for extended spray sessions. The health risks of cutting corners here are severe and permanent.
Proper Disposal Methods
Waste materials—rags, masking paper, leftover product—are often hazardous waste. Solvent-soaked rags can spontaneously combust; store them in OSHA-approved metal containers with tight-fitting lids. Never pour leftover sealant or cleaning solvents down drains or onto soil. Most municipalities have household hazardous waste collection days, but commercial quantities may require licensed disposal at significant cost. Plan for this expense; a full chassis project can generate 50+ pounds of hazardous waste. Some shops offer waste disposal services for DIYers, typically charging $1-2 per pound.
Performance Testing and What to Look For
Salt Spray Testing Standards
ASTM B117 salt spray testing is the baseline, but it’s not sufficient alone for weld sealants. The test exposes coated panels to a continuous 5% NaCl fog at 95°F. Quality products exceed 1,000 hours without failure, but this doesn’t replicate real-world thermal cycling. Look for products also tested to ASTM G85, which includes cyclic corrosion with salt, humidity, and drying phases that better simulate actual service. For weld-specific performance, ask about testing on actual welded coupons, not just flat sheet metal. The stress concentrations at weld toes are where failures initiate.
Flexibility and Impact Testing
Mandrel bend tests (ASTM D522) measure flexibility by bending coated panels around cylinders of decreasing diameter. For weld work, look for products passing ⅛" mandrel bends without cracking. Impact resistance per ASTM D2794 uses a falling weight to simulate stone impingement; values above 80 inch-pounds indicate good durability. Critically, these tests should be performed after accelerated aging—heat, UV, and chemical exposure—to ensure properties don’t degrade over time. A flexible coating that becomes brittle after six months of under-car heat is worthless.
Real-World Performance Metrics
Lab tests only tell part of the story. Seek out products with documented fleet testing or case studies showing 10+ year performance on actual vehicles in severe environments. Independent testing by organizations like SAE or automotive OEMs carries more weight than manufacturer claims. User forums and restoration communities often provide honest long-term feedback, but filter this through an understanding of application variables. A product that failed for someone who skipped surface prep might be excellent when applied correctly. Look for patterns, not isolated anecdotes.
Making the Final Decision: Your Complete Checklist
Assessing Your Vehicle’s Specific Needs
Start with an honest evaluation: Is this a concourse trailer queen, a daily driver in a salt state, or an off-road rig? Each scenario demands different protection levels. Document all weld locations, paying special attention to factory spot welds that are often poorly protected from the factory. Consider the vehicle’s age—pre-1980s classics used thicker steel that tolerates some corrosion, while modern unibodies fail structurally with minimal section loss. Create a priority list: structural frame welds are non-negotiable, while non-structural body seams might receive lighter protection.
Climate and Usage Pattern Evaluation
Your zip code dictates your corrosion risk. Coastal areas with salt fog require different strategies than inland snow states. Vehicles driven daily in winter experience 10x the corrosion exposure of those stored during salt season. Track your usage: if you wash your vehicle weekly in winter and have heated storage, you can opt for lighter-duty products. If it sits outside and sees road salt 120 days per year, only premium multi-layer systems make sense. Also consider summer exposure—UV radiation degrades many undercoatings, requiring UV-stable topcoats on visible welds.
Budget and Long-Term Planning Considerations
Be realistic about total project cost, including your time value. A $500 DIY material cost might seem cheaper than a $2,500 professional job, but if it consumes 60 hours of your limited free time, the economics shift. Consider staged implementation: seal critical structural welds this year, then address secondary areas next season. This spreads cost and allows you to evaluate product performance before committing to full coverage. Factor in future maintenance—budget products require reapplication, while premium systems are a one-time investment. The cheapest option today is rarely the most economical over a vehicle’s lifetime.
Frequently Asked Questions
1. How long does weld sealant last compared to regular undercoating?
Quality weld-specific sealants last 7-15 years depending on environment and product type, roughly 2-3 times longer than general-purpose undercoatings. The difference lies in penetration depth and active corrosion inhibitors that continue working even after the surface is compromised.
2. Can I apply weld sealant over existing rust, or must I remove it completely?
You must remove active, flaking rust. Light surface oxidation can be treated with phosphoric acid converters, but heavy scale requires mechanical removal. Applying sealant over rust is like painting over mold—it seals in the problem and accelerates hidden deterioration.
3. Are two-component products worth the extra hassle for DIYers?
For critical structural welds, absolutely. The chemical cure creates superior properties that air-dry products can’t match. However, if you’re new to this, practice on scrap metal first. The short pot life and sensitivity to mixing ratios mean mistakes are costly. Consider hiring a pro for the structural stuff and DIY the non-critical areas.
4. What’s the minimum temperature for applying weld sealants?
Most products require ambient and substrate temperatures above 50-60°F for proper cure and adhesion. Some premium formulations work down to 40°F, but curing times extend dramatically. Never apply when temperatures will drop below freezing within 24 hours—the coating can fail to cure completely.
5. How do I inspect welds that are now sealed inside box sections?
Use a borescope with a flexible shaft, inserting it through existing drain holes or small access points you create. Some professionals install removable inspection ports on restorations. Alternatively, tap test the exterior with a small hammer and listen for changes in sound that indicate internal coating failure.
6. Will weld sealant interfere with future welding repairs?
Yes, most sealants contaminate the weld area and must be removed before any repair welding. This is why documentation is crucial—knowing what product was applied helps determine removal methods. Some shops avoid sealing certain areas (like frame horn welds) that are likely repair points. Always inform future welders of coating presence.
7. Can I paint over weld sealant for a cleaner appearance?
Generally yes, but timing and compatibility matter. Most sealants require 7-14 days full cure before topcoating. Use a tie-coat primer specifically designed to bridge undercoating and paint. Test compatibility on a small area first—some sealants contain waxes or oils that cause paint fisheye or delamination.
8. How do I remove old undercoating from welds without damaging them?
Chemical strippers designed for undercoating are safest on welds. Mechanical removal with wire wheels or grinding discs can overheat and weaken the weld or remove too much base metal. For thick buildup, use a heat gun to soften material, then scrape carefully. Always finish with solvent cleaning to remove residue.
9. Are there any welds I should NOT seal?
Avoid sealing welds that are designed as drainage paths or that will be subject to regular re-welding. Some manufacturers leave certain joints unsealed intentionally for corrosion monitoring. Also, never seal welds while they’re still hot from welding—trapped heat creates steam and causes immediate delamination.
10. How does weld sealing affect vehicle weight?
A complete chassis treatment adds 15-30 pounds depending on product and thickness. While this seems negligible, race applications might care. The weight is concentrated low, potentially lowering center of gravity slightly. For most street vehicles, the weight penalty is irrelevant compared to the protection benefit. If weight is critical, use high-solids, low-build products rather than skipping protection.