Your RV or motorhome represents one of the most significant investments you’ll make in your lifetime—often second only to your home. While most owners obsess over interior upgrades, engine maintenance, and exterior waxing, the undercarriage remains a forgotten frontier, silently battling corrosion, road salt, moisture, and debris. This crucial protective layer isn’t just an optional add-on; it’s the difference between a rig that lasts decades and one that succumbs to structural rust before you’ve paid off the loan.
Understanding undercoating technology has evolved far beyond the tarry sprays of the 1980s. Today’s formulations offer sophisticated polymer science, environmentally-conscious chemistry, and application methods that can be tailored to your specific travel lifestyle. Whether you’re a full-time RVer chasing 70-degree weather or a seasonal adventurer storing your motorhome through harsh winters, selecting the right undercoating strategy requires more than a quick trip to the auto parts store. Let’s dive deep into what makes an undercoating system truly effective for the unique demands of recreational vehicles.
Top 10 Undercoatings For Rvs
Detailed Product Reviews
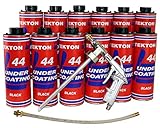
1. Tekton44 Auto Undercoating for Vehicles, Black Undercoating for Cars, Trucks, RVs, Commercial Trucks (8 Cans Only, No Kit)

Overview: Tekton44 delivers professional-grade rust protection in a convenient eight-can package designed for vehicle owners who already own spray equipment. This solvent-based formula creates a flexible, permanently tacky barrier that adheres to metal surfaces on cars, trucks, RVs, and commercial vehicles. The 8-can configuration provides sufficient coverage for a standard passenger vehicle or light truck, making it a practical choice for DIY enthusiasts seeking dealership-quality undercoating without the labor costs.
What Makes It Stand Out: The permanently tacky characteristic distinguishes this product from competitors that fully harden and crack over time. This flexibility proves invaluable in cold climates where road salt and temperature fluctuations wreak havoc on rigid coatings. The formula’s resistance to running or dripping when applied with a spray gun demonstrates its professional-tier viscosity control, reducing waste and ensuring even coverage in hard-to-reach frame rails and wheel wells.
Value for Money: At $0.65 per fluid ounce, this offering sits in the mid-range for professional undercoatings. While the initial $174.90 investment seems substantial, it pales compared to professional application services costing $150-$300 per vehicle. For owners of multiple vehicles or restoration hobbyists, the per-ounce economics become increasingly attractive, especially when amortized across several applications.
Strengths and Weaknesses: Pros: Excellent cold-weather flexibility, versatile application methods (brush, dip, or spray), professional corrosion resistance, no cracking or peeling formula. Cons: Requires existing spray equipment, higher upfront cost for single-vehicle owners, permanently tacky surface may attract dirt if not top-coated, strong odor during application necessitates proper ventilation.
Bottom Line: Tekton44’s 8-can package suits experienced DIYers and multi-vehicle households seeking long-term corrosion protection. The professional formulation justifies its price, but only if you already own application equipment. For single-vehicle owners without tools, consider the complete kit instead.
2. Tekton44 Undercoating for Cars, RVs, Commercial Trucks Black Undercoating Kit (12 Liter Cans + 1 Spray Gun + 1 Spray Wand)
Overview: This comprehensive kit eliminates the guesswork from undercoating application by bundling twelve liters of Tekton44’s premium black coating with a professional-grade spray gun and extension wand. Designed for serious DIYers and small fleet operators, the package provides everything needed to achieve factory-level rust protection in a home garage setting. The inclusion of specialized tools transforms a potentially frustrating task into a streamlined process.
What Makes It Stand Out: The 30-inch spray wand attachment delivers game-changing access to enclosed frame sections, rocker panels, and inner door cavities that remain unreachable with standard spray guns. This tool alone prevents the incomplete coverage that leads to premature rust formation. The high-volume, low-pressure (HVLP) spray gun ensures optimal material transfer with minimal overspray, maximizing the value of each liter while delivering a uniform texture that professional detailers demand.
Value for Money: Priced at $275.00 ($0.68 per ounce), the kit commands a slight premium over cans-only options but includes $80-$120 worth of professional application equipment. The twelve-liter quantity covers three to four passenger vehicles or two heavy-duty trucks, dropping the per-vehicle cost below $70. For first-time users, this eliminates the risk of purchasing incompatible equipment separately.
Strengths and Weaknesses: Pros: Complete turnkey solution, professional spray wand for comprehensive coverage, cost-effective for multiple vehicles, same high-performance formula as standalone cans, reduces material waste through proper atomization. Cons: Highest initial investment in the Tekton44 lineup, may be excessive for single-vehicle owners, requires air compressor (not included), cleanup and maintenance of equipment adds time.
Bottom Line: This kit represents the best value for newcomers to DIY undercoating or those maintaining a small fleet. The included tools pay for themselves after two vehicles, while the professional results rival commercial services costing twice as much.
3. Undercoating In A Can - Black Wax Coating (12) 12oz. Case

Overview: This military-specification wax-based undercoating brings battlefield-proven corrosion protection to civilian vehicles. The twelve-can case provides 144 ounces of MIL-PRF-62218B-approved coating that actively halts existing rust while preventing new oxidation. Unlike rubberized alternatives, this wax formula penetrates existing corrosion, making it ideal for restoring older vehicles with beginning-stage rust issues rather than just protecting pristine surfaces.
What Makes It Stand Out: Military approval signals rigorous testing for extreme conditions, ensuring performance beyond consumer-grade products. The formula’s ability to arrest active rust progression sets it apart from purely preventative coatings, essentially freezing deterioration in place. Its sound-deadening properties deliver secondary benefits, reducing road noise transmission into the cabin by dampening panel vibration—a feature typically requiring separate products.
Value for Money: At $74.18 for the case ($0.51 per ounce), this undercoating dramatically undercuts competitors while offering superior specifications. The claim of lasting four times longer than asphalt-based and rubberized coatings suggests a single application could protect for 8-10 years in moderate climates, translating to pennies per month of protection. For restoration projects, it eliminates the need for separate rust converters and undercoatings.
Strengths and Weaknesses: Pros: MIL-spec certification ensures quality, stops existing rust from spreading, exceptional price-per-ounce value, superior longevity claims, effective sound dampening, self-healing wax properties. Cons: Wax texture may not appeal to those preferring hard-shell finishes, requires heating for optimal flow in cold weather, black color only, no spray equipment included, may require periodic inspection and touch-up in severe environments.
Bottom Line: For budget-conscious buyers prioritizing maximum protection and longevity, this wax coating delivers unmatched value. It’s particularly recommended for northern climate vehicles with developing rust or restoration enthusiasts seeking authentic, proven formulas over marketing hype.
4. Tekton44 Auto Undercoating for Vehicles, Black Undercoating for Cars, Trucks, RVs, Commercial Trucks (12 Cans only)

Overview: This bulk package of twelve Tekton44 cans targets serious automotive enthusiasts, restoration shops, and fleet maintenance operations requiring maximum material at the lowest per-unit cost. Delivering the same professional-grade, permanently flexible formula as smaller quantities, this option eliminates the need for frequent reordering while ensuring consistent batch performance across multiple vehicles or extensive restoration projects spanning months.
What Makes It Stand Out: The $0.64 per-ounce pricing represents the most economical entry point to Tekton44’s technology without sacrificing quality. For restoration professionals, maintaining a consistent product batch reduces variability in texture and curing characteristics—a critical factor when documenting work for clients. The twelve-can quantity perfectly aligns with typical frame-off restoration timelines, providing adequate material for chassis, inner panels, and underbody components without mid-project supply shortages.
Value for Money: At $258.50, the upfront cost delivers immediate savings of approximately $15 compared to purchasing two 8-can packages, while providing 50% more material than the smaller bundle. For commercial operators, the per-vehicle cost drops to under $65 when covering four standard trucks, creating profit margin for mobile undercoating services. The extended shelf life ensures unused cans remain viable for future projects.
Strengths and Weaknesses: Pros: Lowest per-ounce cost in Tekton44 lineup, adequate for 3-4 vehicles, consistent batch quality for professional results, reduces reordering frequency, same excellent cold-weather flexibility and corrosion resistance. Cons: Requires significant storage space, largest initial investment for DIYers, no application equipment, may be excessive for one-time users, permanently tacky finish requires careful handling during application.
Bottom Line: Ideal for restoration shops, multi-vehicle families, or car clubs organizing group purchase and application days. The bulk pricing makes professional-grade protection accessible for fleets, while individual DIYers should verify their long-term needs before committing to this quantity.
5. Gray Sprayable Automotive Undercoating for Cars and Trucks, Buses, RVs, Commerical Vehicles - Rubberized Paintable Under Coating (4 Cans Only)
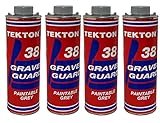
Overview: This gray rubberized undercoating addresses a specific market need: OEM finish duplication and rapid turnaround times. The four-can package provides quick-drying, paintable protection that matches factory gray underbody coatings found on modern European and domestic vehicles. Designed for spot repairs, bumper restoration, and rocker panel protection, it serves as both an anti-corrosion barrier and gravel guard, preventing paint chips from escalating into rust issues.
What Makes It Stand Out: The 2-3 hour dry time dramatically accelerates project completion compared to traditional undercoatings requiring 24-48 hours. This rapid curing enables same-day application and reassembly, crucial for daily drivers or commercial vehicles that cannot afford extended downtime. The rubber-based formula duplicates OEM textures precisely, making it invaluable for collision repair shops aiming for undetectable repairs that pass dealership inspections and maintain factory warranties.
Value for Money: At $90.20 for four cans ($22.55 per can), this product commands a premium reflecting its specialized nature. While the per-ounce cost exceeds black alternatives, its dual-function as both undercoating and gravel guard eliminates separate purchases. For body shops, the time savings on labor costs—enabling two vehicles per day instead of one—justifies the higher material expense through increased throughput and customer satisfaction.
Strengths and Weaknesses: Pros: Authentic gray OEM color match, exceptionally fast drying, excellent gravel impact resistance, paintable surface for top-coating, ideal for visible areas like rocker panels and bumpers, professional-grade texture. Cons: Highest per-can cost, only four cans limits coverage area, rubberized formula may not flex as long as wax-based alternatives, limited color options, requires careful surface prep for paint adhesion.
Bottom Line: Perfect for collision repair professionals, restoration purists matching factory finishes, or owners performing targeted repairs on high-wear areas. The premium price is justified by time savings and OEM authenticity, but it’s overkill for full underbody protection where black coatings suffice.
6. Automotive Undercoating for Cars, RVs, Commercial Vehicles, Trucks, Gray Undercoating Kit (12 Liter Cans + 1 Spray Gun + 1 Wand) Rubberized Paintable Undercoating

Overview: This comprehensive undercoating kit delivers professional-grade protection for vehicles ranging from passenger cars to commercial trucks and RVs. The package includes 12 liters of rubberized grey coating plus a dedicated spray gun and wand, providing all necessary components for complete chassis application. Engineered to replicate OEM finishes, this quick-drying formula creates a multi-layered defense against corrosion, gravel impact, and road noise while remaining fully paintable for seamless integration.
What Makes It Stand Out: The inclusion of professional spray equipment distinguishes this kit from basic aerosol options. The spray gun and wand enable precise, even coverage in deep chassis crevices and wheel wells that canned sprays cannot effectively reach. The rubberized composition provides exceptional sound deadening properties while maintaining flexibility to prevent cracking. Its rapid 2-3 hour curing time minimizes vehicle downtime, and the substantial 12-liter volume ensures comprehensive coverage for large commercial vehicles without mid-project supply shortages.
Value for Money: At $291.50, this kit offers substantial savings compared to professional undercoating services costing $500-$1,000. The reusable spray equipment adds long-term value for future applications or fleet maintenance. While the initial investment exceeds aerosol alternatives, the professional results, equipment inclusion, and bulk quantity justify the premium for serious enthusiasts and commercial operators seeking shop-quality outcomes.
Strengths and Weaknesses: Strengths include complete application system, professional-grade coverage, superior sound dampening, OEM-quality finish, and versatile vehicle compatibility. Weaknesses involve higher upfront cost, requirement for an air compressor (not included), and potential overspray necessitating careful masking. The rubberized formula may trap moisture if applied over existing rust without thorough preparation.
Bottom Line: Ideal for dedicated DIYers and fleet operators demanding professional results. The included equipment and substantial quantity make this a worthwhile investment for comprehensive undercarriage protection that rivals commercial shop applications.
7. Gray Sprayable Automotive Undercoating for Cars and Trucks, Buses, RVs, Commerical Vehicles - Rubberized Paintable Undercoating (12 Cans Only)
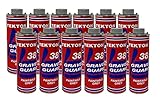
Overview: This bulk package of 12 aerosol cans provides the same high-performance rubberized undercoating as professional kits, without the spray equipment investment. Formulated for diverse vehicles from cars to buses and RVs, this grey coating delivers robust anti-corrosion and anti-gravel protection while significantly reducing road noise. The quick-drying formula creates a durable, paintable finish that matches OEM specifications for factory-quality appearance.
What Makes It Stand Out: The aerosol format eliminates the need for compressors or spray guns, making professional-grade protection accessible to casual DIYers. The 12-can quantity offers ample coverage for multiple vehicles or extensive touch-up work. The “Gravel Guard” formulation specifically targets impact resistance, protecting vulnerable rocker panels and fenders from stone chips. Its paintable surface allows for seamless color matching if desired, maintaining aesthetic integrity.
Value for Money: Priced at $231.00 for 12 cans, this option provides moderate savings over the full kit while preserving material quality. For users who already own spray equipment or prefer aerosol convenience, this represents a targeted investment. However, per-liter cost exceeds bulk liquid coatings, and the absence of equipment reduces overall value for first-time buyers needing comprehensive tools.
Strengths and Weaknesses: Strengths include user-friendly aerosol format, no equipment required, quick drying time, effective sound deadening, and OEM finish replication. Weaknesses are higher material cost per volume, limited reach for deep chassis areas, potential for uneven application, and environmental concerns with aerosol propellants. Cans may deplete faster than anticipated on large vehicles.
Bottom Line: Perfect for experienced DIYers with existing spray gear or those prioritizing convenience over equipment investment. The 12-can supply offers flexibility for multiple projects, though the per-can cost demands efficient application planning.
8. Rustkill Undercoating - 1 U.S. Quart (946 ml)
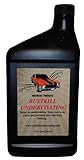
Overview: Rustkill Undercoating employs a fundamentally different oil-based chemistry for corrosion prevention. Unlike traditional rubberized barriers, this quart-sized treatment penetrates existing rust and chemically locks out oxygen to halt corrosion progression. Designed for annual reapplication, it creates a flexible, non-moisture-trapping barrier that actively repels water while protecting a typical vehicle’s entire undercarriage with a single container.
What Makes It Stand Out: The oil-based formula directly addresses rubberized coatings’ primary failure mode—moisture entrapment. By repelling water rather than encapsulating it, this coating prevents hidden rust formation beneath the protective layer itself. The single-quart quantity is precisely calibrated for complete passenger car coverage, eliminating purchase guesswork. Its annual reapplication schedule establishes a proactive maintenance routine ensuring continuous protection rather than relying on a single permanent barrier that may eventually fail.
Value for Money: At $39.95, this is the most budget-conscious option, costing a fraction of rubberized alternatives. The annual reapplication requirement translates to roughly $40-$80 yearly, still significantly less than professional services. For rust-prone regions or older vehicles with existing corrosion, the oil-based formula’s penetrating action offers superior problem-solving value compared to surface-only barriers that require pristine substrate conditions.
Strengths and Weaknesses: Strengths include low cost, rust-penetrating chemistry, moisture-repelling properties, easy brush or spray application, and suitability for treating rusty surfaces. Weaknesses involve frequent reapplication needs, minimal sound deadening capability, non-paintable finish, and potential for dripping in warm weather. The thin oil film doesn’t provide impact protection like thicker rubberized coatings.
Bottom Line: An excellent choice for budget-conscious owners in harsh climates or those treating existing rust. While requiring more frequent application, its chemical approach to corrosion prevention and unbeatable price make it a smart preventative maintenance solution for daily drivers and restoration projects.
Why Undercoating is Critical for Your RV or Motorhome
The undercarriage of your RV faces a perfect storm of corrosion factors that passenger cars simply don’t encounter. Your motorhome’s massive surface area collects more road spray, its extended wheelbase flexes differently across uneven terrain, and its prolonged storage periods create trapped moisture pockets. A quality undercoating acts as a permanent moisture barrier, preventing the electrochemical reaction between steel, oxygen, and water that causes rust. Beyond corrosion, undercoatings dampen road noise, protect hydraulic and electrical lines from stone impacts, and can even improve aerodynamics slightly by creating a smoother underbody surface. For motorhomes, which often have exposed holding tanks, propane lines, and low-hanging suspension components, this protection isn’t cosmetic—it’s structural insurance.
Understanding the Unique Undercarriage Challenges of RVs
RV undercarriages differ fundamentally from standard vehicles. Class A motorhomes ride on heavy-duty commercial chassis with exposed steel frames that can be 30-40 feet long, creating more opportunities for moisture retention. Travel trailers and fifth wheels feature thin-walled steel frames that flex significantly during towing, potentially cracking rigid undercoatings. The presence of holding tanks, exposed waste plumbing, and low-clearance generator compartments means undercoatings must be compatible with plastics and rubber components. Additionally, many RVs sit stationary for months, allowing condensation to form on metal surfaces—a problem daily drivers rarely face. This static storage, combined with inadequate ventilation underneath, accelerates rust formation in ways that traditional automotive undercoatings weren’t designed to address.
Types of Undercoating Materials: A Comprehensive Breakdown
Not all undercoatings are created equal, and each chemical formulation brings distinct advantages and limitations. Understanding these differences is crucial for matching protection to your specific RV type and travel patterns.
Asphalt-Based Undercoatings
These traditional formulations combine asphalt with solvents and adhesive agents to create a thick, tar-like barrier. They excel at sound deadening and provide robust protection against stone chips. However, their rigidity makes them prone to cracking on flexible trailer frames, and they can become brittle in extreme cold. Asphalt-based products typically require 24-48 hours to cure fully and emit strong VOCs during application. They’re best suited for Class A motorhomes with rigid chassis that experience minimal flexing, particularly in warmer climates where temperature swings are moderate.
rubberized undercoatings
Polymer-modified rubberized coatings offer enhanced flexibility compared to asphalt-based options. These formulations incorporate synthetic rubber compounds that remain pliable across a broader temperature range, making them ideal for towable RVs that experience frame flex. Rubberized undercoatings create a textured, slightly tacky finish that continues to self-seal minor abrasions. The downside? They can trap moisture if applied over existing rust, making thorough preparation critical. They also tend to be thicker, which may reduce ground clearance marginally on already-low motorhome components.
Wax-Based and Paraffin Undercoatings
Derived from petroleum waxes, these “soft” undercoatings never fully harden, instead creating a waxy, self-healing layer that repels water effectively. Their key advantage is creep—meaning the coating slowly flows into cracks and crevices over time, maintaining coverage even as the vehicle flexes. This makes them exceptional for complex undercarriages with numerous brackets and welded joints. However, wax-based products can attract dirt and may wash off more quickly in areas with frequent heavy rain or pressure washing. They typically require annual inspection and touch-up, making them a higher-maintenance but highly effective option for coastal or high-humidity environments.
Polyurethane and Polyurea Coatings
These represent the premium tier of undercoating technology. Two-part spray systems create a hard, durable shell that bonds chemically to metal, offering 10+ year protection. Polyurea formulations cure in seconds, allowing for rapid professional application, while polyurethane offers slightly more flexibility. Both provide excellent chemical resistance against road salts, de-icers, and even holding tank leaks. The primary drawback is cost—often 3-4 times more than traditional options—and the need for professional equipment. For high-value diesel pushers or full-time RVs that will see 100,000+ miles, this investment often pays for itself in prevented repairs.
Lanolin-Based (Wool Wax) Undercoatings
A favorite among the vintage RV restoration community, lanolin-based undercoatings use natural wool grease as their primary ingredient. These non-toxic, biodegradable formulations provide excellent corrosion inhibition and are safe to apply over existing light surface rust. They remain slightly tacky and can be renewed easily by spraying additional coats. While not as durable as synthetic polymers for heavy off-road use, their safety profile and ability to penetrate existing corrosion make them ideal for older RVs being brought back to service or for owners prioritizing environmental responsibility.
Key Factors to Consider When Choosing an Undercoating
Selecting the optimal undercoating requires evaluating several interconnected variables specific to your RV lifestyle.
Climate and Environmental Exposure
Your primary travel region dictates everything. The salt-laden air of coastal routes demands hydrophobic wax-based or premium polymer coatings that resist wash-off. Midwest winters with heavy road salt application require thick, durable barriers that withstand constant chemical assault. Desert southwest travel means UV stability and resistance to sandblasting become priorities. Mountainous regions with temperature swings exceeding 40°F in a single day necessitate highly flexible formulations that won’t crack during thermal cycling.
Application Method and DIY vs Professional
DIY spray cans work for touch-ups but lack the volume and pressure to properly coat an RV’s extensive undercarriage. Professional applications use high-volume, low-pressure (HVLP) systems that reach frame rails, cross-members, and behind holding tanks. Consider your mechanical aptitude, available facilities, and the value of your time. A professional job on a 40-foot Class A can cost $800-$2,500 but includes proper prep, uniform coverage, and warranty. DIY might cost $200-$400 in materials but requires jack stands, pressure washers, and 6-8 hours of labor.
Compatibility with Your RV’s Materials
Modern RVs mix steel frames with aluminum siding, plastic holding tanks, rubber propane lines, and composite floor decking. Some undercoatings contain solvents that can degrade ABS plastic tanks or cause rubber to swell. Always verify compatibility with your specific materials. For instance, polyurethane coatings can bond aggressively to surfaces you didn’t intend to coat, making masking critical. Wax-based products are generally the most forgiving across mixed-material undercarriages.
Drying Time and Curing Process
Application timing matters. Asphalt-based products may require 48-72 hours before exposure to rain or road spray. Polyurea coatings cure in under a minute but need 24 hours for full chemical cross-linking. If you’re applying in a home garage, consider overspray drift and ventilation requirements. Some formulations remain tacky for weeks, attracting road debris that can become permanently embedded.
Longevity and Reapplication Intervals
Be realistic about maintenance. A “lifetime” polyurethane coating might last 10 years on a daily driver but only 5-7 years on an RV that sits stationary, allowing moisture to work at edges. Wax-based products need annual inspection and spot treatment. Rubberized coatings typically show wear at flex points after 3-4 years. Budget for touch-ups and understand that no undercoating is truly permanent—especially on a vehicle that experiences the unique stressors of RV life.
The Application Process: What to Expect
Whether professional or DIY, proper application follows a specific sequence that determines final performance.
Preparing Your RV’s Undercarriage
Preparation is 80% of the job’s success. Begin with a thorough pressure washing (3,000+ PSI) to remove existing rust scale, road grime, and previous undercoating flakes. Follow with a degreasing agent to eliminate oil films that prevent adhesion. Inspect welds and rivets for cracks—these must be repaired before coating. Finally, allow 24-48 hours of dry time in a low-humidity environment. Applying over even minimal surface moisture guarantees future rust formation underneath the coating.
Professional Application: Pros and Cons
Professional shops offer climate-controlled bays, lift systems that provide complete undercarriage access, and experienced technicians who know where RVs rust first. They’ll often include a written warranty and can apply premium two-part coatings you can’t purchase retail. The downside? Cost, scheduling constraints, and potential variability in quality between shops. Ask to see previous RV work specifically—automotive undercoating experience doesn’t translate directly to motorhome complexities.
DIY Application: Tips and Best Practices
If tackling this yourself, invest in a quality undercoating gun (not a paint sprayer) with a wand extension for reaching frame rails. Work in sections, starting at the front and moving rearward. Apply two thin coats rather than one thick coat to prevent sagging and ensure proper curing. Mask off brake components, exhaust systems, and any ventilation holes. Most importantly, don’t rush the prep work—DIY failures almost always trace back to inadequate cleaning or damp conditions.
Common Undercoating Mistakes to Avoid
The most frequent error is treating undercoating as a rust “cure” rather than a preventative measure. Never apply any coating over active, flaky rust—it will fail. Another mistake is coating exhaust components, which can cause fumes and create fire hazards. Over-application near suspension pivot points can attract dirt, accelerating wear on bushings. Perhaps most critically, many owners apply undercoating too late, after winter salt has already initiated corrosion. The best time is on a new or recently restored RV, creating a barrier before damage begins.
Cost Analysis: Investment vs. Long-Term Savings
A comprehensive undercoating job represents 0.5-1% of a typical motorhome’s purchase price. Contrast this with the cost of frame repairs, which can easily exceed $5,000 for section replacement. Holding tank straps rusting through can dump 40 gallons of waste unexpectedly. Brake line corrosion creates safety hazards requiring immediate $800+ repairs. When evaluating cost, factor in resale value—a documented undercoating maintenance history can increase trade-in value by $2,000-$4,000 on premium rigs. The math becomes clear: undercoating isn’t an expense, it’s capital preservation.
Environmental and Health Considerations
Modern formulations have reduced VOCs significantly, but proper respiratory protection remains non-negotiable during application. Asphalt-based products can contain polycyclic aromatic hydrocarbons (PAHs)—known carcinogens—requiring careful disposal of contaminated materials. Water-based polymer coatings offer lower toxicity but may sacrifice some durability. Lanolin-based options provide the safest environmental profile, being biodegradable and non-toxic. Consider where you’ll be applying the coating: residential neighborhoods may have restrictions on overspray drift, and commercial shops must comply with EPA air quality regulations.
Maintenance Tips for Undercoated RVs
Your undercoating isn’t a “set and forget” solution. Inspect it quarterly, paying special attention to areas behind wheels where stone impacts concentrate. After any off-road travel or beach camping, rinse the undercarriage to remove abrasive sand and corrosive salt. During winter storage, place a moisture absorber underneath to reduce condensation. If you notice any cracks or chips, clean the area and apply a compatible touch-up product immediately—waiting until spring allows moisture to penetrate and rust to form behind the coating. For wax-based products, an annual light recoat in high-wear areas extends protection significantly.
How to Inspect Your Undercoating for Damage
Use a mechanic’s creeper and bright LED light to examine the entire undercarriage every six months. Look for cracking at frame flex points, peeling around brackets, and thinning on horizontal surfaces. Tap lightly with a rubber mallet—dull sounds indicate solid adhesion, while hollow sounds suggest delamination. Check for “bleeding” rust stains, which signal coating failure. Pay particular attention to the front 10 feet of the RV, which receives the most road debris impact, and around any aftermarket additions like generator mounts or bike rack brackets where drilling may have compromised the coating.
Removing Old Undercoating: When and How
Sometimes starting fresh is necessary. If existing coating is cracked, peeling, or trapping moisture, removal is required. Chemical strippers work but are messy and environmentally problematic. Mechanical removal with a needle scaler or wire wheel is most effective but labor-intensive—a 30-foot RV can require 20+ hours. Heat guns soften some formulations but create fumes and fire risks. Professional media blasting (using plastic beads or walnut shells) offers the fastest, cleanest removal at $800-$1,500 but requires a facility that can handle RV dimensions. Never apply new coating over failed old coating—it will fail faster the second time.
Warranty Implications and Insurance Considerations
Applying undercoating typically doesn’t void manufacturer chassis warranties, but improper application causing damage to sensors or wiring might. Document the process with photos and receipts. Some extended RV warranties specifically exclude rust damage, making undercoating a prerequisite for coverage. Interestingly, some insurance companies offer modest premium reductions for professionally applied undercoatings, viewing them as risk mitigation. Check with your provider. If you finance your RV, some lenders now require undercoating for loans in rust-belt states, similar to how flood insurance works in coastal areas.
Seasonal Timing for Undercoating Application
The optimal window is late spring or early fall when humidity is low and temperatures range between 60-80°F. Avoid summer’s high humidity, which can cause curing issues, and winter’s cold, which prevents proper adhesion. Application should occur at least two weeks before first frost or salt application. For full-timers, plan application during a week-long stay at a campground with full hookups where you can leave the RV stationary for the required curing period. Never apply undercoating within 48 hours of expected rain or when overnight temperatures will drop below 50°F.
Regional Considerations: Best Practices by Geography
Coastal Pacific Northwest travelers need hydrophobic, salt-air resistant coatings with annual touch-ups due to constant moisture. Southwest desert RVers should prioritize UV-stable formulations that won’t crack under intense sun and can withstand sandblasting. Midwest and Northeast owners require maximum salt resistance and should consider thicker, more durable applications with 3-year inspection intervals. Southern humidity demands breathable coatings that don’t trap moisture underneath. Mountain region RVs need extreme temperature flexibility. Consider where you’ll travel most, not where you live—your undercoating must protect against your actual usage patterns.
Frequently Asked Questions
How often should I reapply undercoating to my RV?
Reapplication intervals depend entirely on the formulation and your travel environment. Wax-based products need annual inspection and spot treatment every 1-2 years. Rubberized undercoatings typically require comprehensive evaluation at year 3 and likely reapplication by year 5. Premium polyurethane/polyurea coatings can last 7-10 years on motorhomes but may need touch-ups at flex points after 4-5 years on travel trailers. The key is annual inspection—don’t wait for visible rust to determine timing.
Can I apply undercoating over existing rust?
Only if the rust is light surface oxidation (flash rust). Any scaling, pitting, or flaking rust must be removed completely—undercoating over active rust seals in moisture and accelerates deterioration. Use a wire brush or sandblasting to remove loose rust, then treat remaining oxidation with a rust converter before applying undercoating. Think of undercoating as a preventative measure, not a rust treatment. Severely rusted frames may require professional restoration first.
Will undercoating affect my RV’s ground clearance?
Most quality applications add only 1-2mm of thickness, negligible for clearance. However, over-application near suspension components or over-spray on exhaust systems can create issues. Professional applicators know to avoid these areas. If you DIY, carefully mask brake lines, suspension pivot points, and the exhaust system. The benefit of protected metal far outweighs the negligible clearance loss, especially since undercoating prevents rust that actually reduces structural integrity.
Is DIY undercoating worth the savings for a large motorhome?
For a 35+ foot motorhome, DIY savings diminish when you factor in equipment rental, material waste, and your time. The professional cost of $1,200-$2,500 includes proper lift access, surface prep equipment, and warranty. DIY might save $800 but requires 8-12 hours of labor, a compressor, spray gun, and ideal weather conditions. The break-even point is typically around 25 feet—smaller Class C motorhomes and travel trailers are more DIY-friendly, while larger rigs benefit more from professional application.
What’s the difference between undercoating and rustproofing?
Undercoating creates a physical barrier on the underbody’s exposed surfaces, while rustproofing involves drilling holes into body cavities and injecting oil-based inhibitors into enclosed frame rails and panels. For RVs, undercoating is more critical because the chassis is largely exposed. Some owners combine both—undercoating for the main frame and rustproofing oil for inside box frames and hollow cross-members. This hybrid approach offers maximum protection but requires more maintenance.
Can undercoating damage my RV’s holding tanks or plumbing?
Yes, if you use the wrong product. Solvent-based asphalt and some rubberized coatings can degrade ABS plastic holding tanks and cause rubber gaskets to swell. Always verify compatibility with your tank material. Wax-based and lanolin products are generally safe for all materials. When in doubt, mask tanks completely. Professional RV-specific applicators understand these compatibility issues and use formulations designed for the unique mix of materials found on motorhomes.
How do I know if my new RV needs undercoating immediately?
Most new RVs receive minimal factory undercoating—often just a thin, inconsistent spray for shipping protection, not long-term corrosion resistance. Inspect the undercarriage before delivery; if you see bare metal or thin, uneven coverage, immediate application is wise. The best time is within the first 1,000 miles or before first winter, whichever comes first. Dealership “undercoating packages” are often overpriced and use inferior products—arrange your own application within 30 days of purchase.
Will undercoating help with road noise in my motorhome?
Absolutely. A quality rubberized or asphalt-based undercoating can reduce road noise by 3-5 decibels, a noticeable improvement. The coating dampens vibration in large, flat underbody panels that act as resonators. This benefit is most pronounced in diesel pushers where the engine is rear-mounted and road noise dominates. For maximum sound deadening, focus application on floor pans and wheel wells. However, don’t expect miracles—undercoating complements but doesn’t replace proper floor insulation and wall assembly.
Can I pressure wash an undercoated RV undercarriage?
Yes, but with caveats. Wait at least 30 days after application for full curing. Use a 40-degree nozzle held 12+ inches away, and avoid directing high-pressure spray directly at coating edges or seams. Annual pressure washing is actually beneficial for removing corrosive road salt and debris. Wax-based coatings may require gentler pressure (under 2,000 PSI) and more frequent touch-ups after washing. Polyurethane coatings can handle aggressive cleaning. Always inspect for damage after washing.
Does undercoating affect resale value?
A documented, professional undercoating history can increase resale value by $2,000-$5,000 on premium motorhomes, especially in rust-prone regions. It demonstrates proactive maintenance to potential buyers. Keep receipts and photos of the application. Conversely, a poorly applied DIY job with overspray on components or peeling coating can decrease value, as buyers perceive it as hiding problems. Quality matters more than presence—professional application with maintenance records is a selling point; a sloppy DIY job is a red flag.