Nothing ruins a fresh undercoating job faster than those telltale amber streaks running down your driveway. Beyond the aesthetic nightmare, drips signal wasted product, uneven protection, and potential long-term rust issues in the areas left exposed. Drip prevention isn’t just about keeping your garage floor clean—it’s about ensuring every ounce of protective coating stays where it belongs: bonded to your vehicle’s underbody, fighting corrosion in the hidden battlegrounds of wheel wells, frame rails, and pinch welds.
Whether you’re a weekend warrior prepping a classic car for winter or a daily driver looking to extend your vehicle’s lifespan, understanding what makes an undercoating truly drip-resistant separates amateur applications from professional-grade results. This guide dives deep into the science, application techniques, and critical features that define the best drip-preventing undercoatings—no brand bias, no sponsored recommendations, just hard-won expertise to help you make the smartest choice for your specific needs.
Top 10 Undercoatings
Detailed Product Reviews
1. Rust-Oleum 248657-6PK Stops Rust Undercoating Spray, 15 oz, Rubberized Black, 6 Pack

Overview: This six-pack delivers Rust-Oleum’s standard undercoating formula for DIY automotive protection. The rubberized black coating shields underbodies from water, salt, and chemicals on cars, trucks, and RVs. Each 15-ounce can covers 10-12 square feet with a 30-minute dry time. The any-angle spray tip enables easy application in tight spaces while providing sound-dampening benefits.
What Makes It Stand Out: The bulk six-can format offers exceptional value for multi-vehicle households or fleet maintenance. Its fastest-in-class 30-minute drying time accelerates project completion. The innovative any-angle spray technology with comfort grip allows upside-down application—critical for thorough undercarriage coverage. This combination of speed, ergonomics, and quantity makes it ideal for seasonal rust prevention routines.
Value for Money: At $0.40 per ounce, this represents the lowest cost-per-ounce in the Rust-Oleum lineup. The six-pack structure saves approximately 25% versus individual purchases, making it economical for annual applications. While standard grade, it provides adequate protection for moderate climates, delivering professional-level convenience at DIY pricing.
Strengths and Weaknesses: Strengths: Unbeatable bulk pricing; rapid 30-minute cure time; superior spray tip ergonomics; flexible rubberized finish; trusted brand reliability. Weaknesses: Standard formula less robust than professional grade; smaller coverage area per can; may require more frequent reapplication in harsh winter regions.
Bottom Line: Perfect for budget-conscious DIYers maintaining multiple vehicles in moderate climates. The six-pack offers two to three years of coverage for most users, combining fast application with significant savings. Choose this for routine protection where extreme conditions aren’t a primary concern.
2. Rust-Oleum 248656-6PK Stops Rust Professional Grade Undercoating Spray Paint, 15 oz, Rubberized Black, 6 Pack

Overview: This professional-grade six-pack provides superior undercarriage protection for serious automotive enthusiasts and professionals. The advanced rubberized formula creates a durable barrier against corrosion, water, salt, and chemicals on bare or primed metal surfaces. Each 15-ounce can covers 10-15 square feet with a one-hour dry time. The any-angle spray technology ensures comprehensive coverage in difficult positions.
What Makes It Stand Out: The professional-grade formulation delivers enhanced durability and 25-50% more coverage per can than standard versions. This six-pack offers the same bulk convenience as consumer-grade options but with industrial-strength protection. The wider coverage area reduces the number of cans needed per vehicle, while the trusted Rust-Oleum professional line ensures consistent results for demanding applications.
Value for Money: At $0.55 per ounce, this pro-grade six-pack commands a 37.5% premium over the standard version, justified by superior longevity and coverage. For vehicles in harsh winter climates or coastal areas, the extended protection interval reduces reapplication frequency, ultimately saving time and money. The bulk packaging still offers 15-20% savings versus individual pro cans.
Strengths and Weaknesses: Strengths: Professional-grade durability; maximum coverage per can; bulk savings; trusted professional formulation; excellent for severe conditions. Weaknesses: Slower one-hour dry time; higher upfront investment; overkill for mild climates; requires proper surface prep for optimal adhesion.
Bottom Line: Ideal for professionals and enthusiasts in harsh environments who demand maximum protection. The superior coverage and durability justify the premium price, making it cost-effective for vehicles facing extreme road salt and moisture exposure.
3. Rust-Oleum 248656 Professional Grade Rubberized Undercoating Spray, 15 oz, Black

Overview: This single-can professional-grade option offers maximum protection without bulk commitment. The advanced formula shields underbodies from corrosion, water, salt, and chemicals with the same durability as the six-pack version. Each 15-ounce can covers 10-15 square feet, requiring one hour to dry. The any-angle spray tip enables professional-quality application for single-vehicle projects.
What Makes It Stand Out: The single-can format provides professional-grade performance with minimal investment, perfect for testing or small-scale applications. It delivers the same superior coverage and durability as multi-pack versions, allowing users to evaluate results before committing to bulk purchases. This flexibility makes it ideal for first-time users or those with only one vehicle needing protection.
Value for Money: At $0.55 per ounce, it matches the per-ounce cost of the pro six-pack but lacks volume discounts. For single-vehicle owners, this eliminates waste from unused cans. While pricier than standard single cans, the professional formulation extends reapplication intervals, potentially offering better long-term value for vehicles in moderate-to-severe conditions.
Strengths and Weaknesses: Strengths: Professional durability without bulk purchase; extended protection interval; flexible application; same coverage as six-pack version; low trial cost. Weaknesses: No bulk savings; higher cost per project than six-pack; slower drying than standard grade; requires careful surface preparation.
Bottom Line: Excellent choice for single-vehicle owners wanting professional protection without excess inventory. Try this before investing in a six-pack, or use it for targeted applications where maximum durability is essential. The performance justifies the premium over standard formulas.
4. 3M 3584 Professional Grade Rubberized Undercoating 6 16oz Cans

Overview: This six-pack of 3M professional-grade undercoating delivers premium protection with larger 16-ounce cans. The trusted 3M formulation creates a durable rubberized barrier against moisture, salt, and environmental contaminants. Each can covers extensive area with uniform application that resists running. The professional-grade performance meets the demands of automotive shops and serious DIYers seeking maximum reliability.
What Makes It Stand Out: The 3M brand reputation stands alone, trusted by automotive professionals worldwide. The 16-ounce cans provide 6.7% more product than standard 15-ounce offerings, reducing the total cans needed per project. 3M’s formulation excels in sound dampening, noticeably reducing road noise beyond competitor claims. The six-pack structure ensures consistent batch quality across large projects.
Value for Money: At $0.57 per ounce, this is the premium option, reflecting 3M’s research and development investment. While highest per-ounce cost, the larger can size and superior performance characteristics can reduce total project costs for professionals. For critical applications where failure isn’t an option, the 3M premium delivers peace of mind that justifies the expense.
Strengths and Weaknesses: Strengths: Unmatched brand reputation; larger 16-ounce cans; superior sound dampening; professional shop approval; consistent batch quality. Weaknesses: Highest price point; limited availability; may be overkill for casual DIY use; premium pricing without proportional performance gains in mild climates.
Bottom Line: Choose 3M when brand reputation and maximum reliability are paramount. Ideal for professional shops and owners of high-value vehicles in severe environments. The premium cost is justified for critical applications where proven performance outweighs budget considerations.
5. Rust-Oleum 248657 Rubberized Undercoating Spray, 15 oz, Black

Overview: This single-can standard-grade undercoating provides accessible rust protection for casual DIYers and quick touch-ups. The rubberized formula protects underbodies from water, salt, and chemicals on various vehicles. Each 15-ounce can covers 10-12 square feet with an impressively fast 30-minute dry time. The any-angle spray technology ensures easy application for spot treatments or complete single-vehicle coverage.
What Makes It Stand Out: The fastest drying time in the lineup at 30 minutes enables rapid project completion and same-day vehicle return to service. As the most affordable single-can option, it removes financial barriers for first-time undercoating users. The any-angle spray tip with comfort grip provides professional-application ease without professional-grade pricing, making it ideal for learning proper technique.
Value for Money: At $0.53 per ounce, this single can offers reasonable value without bulk commitment. While costing more per ounce than the six-pack version, it eliminates waste for one-time users. The fast dry time reduces labor and waiting costs, making it economical for small projects. It’s the lowest total investment entry point for Rust-Oleum undercoating protection.
Strengths and Weaknesses: Strengths: Fastest drying time; lowest single-can price; excellent spray tip ergonomics; minimal investment required; perfect for spot repairs. Weaknesses: No bulk discount; standard grade less durable; smaller coverage area; not ideal for harsh climates; requires more frequent reapplication.
Bottom Line: Perfect for beginners, spot treatments, or single-vehicle applications in moderate climates. The 30-minute dry time and low cost make it ideal for quick projects. Use this for annual maintenance or to test undercoating benefits before upgrading to professional-grade formulas.
6. 3M Professional Grade Rubberized Undercoating, Corrosion, Water and Salt Spray Resistant, 03584, 16 oz. Aerosol

Overview: The 3M Professional Grade Rubberized Undercoating offers targeted protection for vehicle undercarriages in a convenient aerosol format. This 16-ounce can delivers asphalt-based coating designed to shield against rust, corrosion, and salt spray damage while providing sound-deadening benefits for a quieter ride.
What Makes It Stand Out: 3M’s reputation for quality adhesives and coatings lends credibility to this professional-grade formula. The sound-deadening properties help reduce road noise, making it dual-purpose. Its salt spray resistance is particularly valuable for vehicles in winter climates where road salt causes accelerated corrosion. The aerosol application ensures even coverage without requiring specialized equipment, perfect for wheel wells, quarter panels, and interior fenders.
Value for Money: At $9.99 per can ($0.62 per ounce), this sits in the mid-range price point. For DIY enthusiasts tackling a single vehicle or touch-up work, the individual can makes sense without committing to bulk purchases. However, professionals or those treating multiple vehicles will find better value in multi-pack options. The 3M brand premium is justified by consistent performance and reliability.
Strengths and Weaknesses: Strengths: Trusted brand reputation; effective corrosion and salt protection; reduces road noise; easy spray-on application; suitable for various vehicle types; excellent for spot treatments and wheel wells.
Weaknesses: Asphalt-based formula may be less flexible than pure rubberized alternatives; single can insufficient for full undercarriage coverage on trucks/SUVs; strong fumes require proper ventilation; not explicitly paintable.
Bottom Line: Ideal for DIYers performing maintenance on personal vehicles or addressing specific rust-prone areas. The 3M name ensures reliable protection, though bulk buyers should consider larger packs. Best suited for smaller cars and touch-up applications rather than complete professional undercoating jobs.
7. Rust-Oleum Black Undercoating 15 oz. (12 Pack)

Overview: This 12-pack of Rust-Oleum Black Undercoating provides substantial quantity for larger automotive protection projects. Each 15-ounce aerosol can delivers the trusted Rust-Oleum performance for undercarriage rust prevention and basic protection needs across multiple vehicles or extensive surface areas.
What Makes It Stand Out: The bulk 12-pack configuration immediately signals this is designed for serious users—whether professional shops or dedicated DIYers with multiple vehicles. Rust-Oleum’s century-long reputation in protective coatings provides confidence in basic rust-fighting capabilities. The quantity ensures consistent product batch performance across extensive projects without color or formula variation.
Value for Money: At $82.08 for 180 total ounces ($0.46 per ounce), this represents excellent bulk value—among the lowest per-ounce costs in this category. For users needing to coat multiple vehicles or maintain a shop inventory, the savings over individual cans are substantial. The 12-pack eliminates repeated trips to retailers and ensures you won’t run out mid-project.
Strengths and Weaknesses: Strengths: Exceptional bulk pricing; trusted brand heritage; consistent aerosol application; cost-effective for high-volume users; reduces per-project cost significantly; readily available brand with proven track record.
Weaknesses: No specified features like paintability, drying time, or advanced rubberization; may lack sound-deadening properties of premium competitors; 12-pack commitment is excessive for single-vehicle owners; basic formulation may not match specialized undercoatings.
Bottom Line: Perfect for automotive shops, restoration businesses, or clubs coordinating group purchases. The value proposition is undeniable for high-volume applications, though feature-conscious buyers may want more product details. Single-vehicle owners should seek smaller quantities despite the higher per-ounce cost.
8. HI-TECH 18021 Rubberized Undercoat Spray (12-Pack) – 17oz Aerosol, Paintable Black Finish, Anti-Rust, Sound Dampening, Quick Drying for Car, Driveway & More

Overview: HI-TECH’s comprehensive undercoating kit delivers a feature-rich formula in a substantial 12-pack configuration. Each 17-ounce can provides paintable, rubberized protection with sound-dampening benefits extending beyond automotive use to driveways, property maintenance, and even tree wound treatment.
What Makes It Stand Out: This product’s versatility is remarkable—suitable for vehicles, driveways, and even tree wound treatment. The paintable black finish allows color customization, while the quick-drying formula enables efficient project completion. Explicit sound-dampening properties and anti-rust protection make it a true multi-tasker. The waterproof rubberized seal formulation provides modern protection standards that won’t crack or peel.
Value for Money: At $123.70 for 204 ounces ($0.53 per ounce), this mid-range pricing reflects its advanced features. While more expensive than basic bulk options, the added capabilities justify the premium. The 12-pack structure serves serious DIYers or small shops. For users needing paintability and sound deadening, the value is compelling compared to buying separate products.
Strengths and Weaknesses: Strengths: Highly versatile applications; paintable finish; sound dampening; fast-drying formula; excellent corrosion protection; larger 17oz cans; rubberized flexibility prevents cracking.
Weaknesses: Higher upfront investment; lesser-known brand may concern some buyers; multi-purpose design may dilute automotive specialization; requires careful surface prep for optimal adhesion.
Bottom Line: An excellent choice for homeowners and DIYers wanting one product for multiple projects. The paintable, quick-drying formula with sound deadening makes it superior to basic undercoatings. Ideal for those treating vehicles while also maintaining property, though brand-conscious professionals may stick with legacy names.
9. Barrier Bond - Rubberized Undercoating Sound Deadener Kit, 28oz 4-Pack, Black Spray, Vehicle Undercoating, with Spray Gun
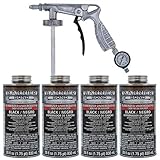
Overview: Barrier Bond offers a complete undercoating solution with this 4-pack kit featuring a dedicated spray gun applicator. The 28-ounce cans provide substantial coverage with professional-grade equipment included, designed for users wanting to achieve shop-quality results without professional installation costs.
What Makes It Stand Out: The included spray gun immediately elevates this from consumer to prosumer grade, ensuring more consistent application than aerosols. 50-state VOC compliance guarantees regulatory adherence for all users. The larger 28-ounce cans reduce changeovers during application. Being paintable and fast-drying adds practical flexibility. The kit approach eliminates guesswork about compatible application equipment.
Value for Money: At $114.99 for 112 ounces, the per-ounce cost is $1.03—premium pricing. However, factoring in the spray gun’s value ($30-50 equivalent) reduces the effective coating cost. For users lacking professional spray equipment, this kit provides essential tools. The convenience of a complete package justifies the higher price point for serious DIYers who would otherwise need to purchase a gun separately.
Strengths and Weaknesses: Strengths: Professional spray gun included; VOC compliant nationwide; large 28oz cans; paintable finish; fast drying; complete kit solution; environmentally responsible formulation.
Weaknesses: Highest per-ounce cost among reviewed products; 4-pack may still be excessive for single small vehicles; unknown brand lacks long-term reputation; spray gun quality may not match professional standalone tools.
Bottom Line: Perfect for serious DIY enthusiasts ready to invest in proper equipment. The spray gun inclusion and VOC compliance make it ideal for conscientious users wanting professional results without hiring a shop. Less suitable for casual one-time users, but excellent value for those planning multiple undercoating projects.
10. Dupli-Color UC101 Paintable Rubberized Undercoat - 16 oz. - 6 Pack

Overview: Dupli-Color delivers a middle-ground solution with this 6-pack of paintable rubberized undercoating. Each 16-ounce aerosol can provides automotive-specific protection with the flexibility of overpainting for customized finishes, backed by a brand synonymous with vehicle refinishing.
What Makes It Stand Out: The Dupli-Color brand carries strong credibility in automotive refinishing, ensuring compatibility with automotive paint systems. The explicit paintable designation distinguishes it from basic undercoatings. The 6-pack quantity hits a sweet spot—more than a single can but less than overwhelming bulk. This suggests confidence in product performance without requiring massive inventory commitment.
Value for Money: At $43.99 for 96 ounces ($0.46 per ounce), this matches the value leader Rust-Oleum’s bulk pricing while offering specialized paintable properties. For users needing 3-4 cans for a project, the 6-pack provides spare capacity without the 12-pack investment. The Dupli-Color premium is essentially free at this pricing tier.
Strengths and Weaknesses: Strengths: Trusted automotive brand; paintable formulation; excellent bulk value; moderate quantity ideal for single-vehicle projects; likely compatible with Dupli-Color paint systems; cost-effective per-ounce pricing.
Weaknesses: Limited feature details provided; may lack advanced sound-dampening claims; aerosol application less efficient than spray gun; black finish may require painting for color matching; unknown drying time and VOC compliance.
Bottom Line: An outstanding balance of brand reputation, specialized features, and value. Perfect for DIY painters wanting to color-match their undercoating. The 6-pack quantity is ideal for most passenger vehicles without creating storage issues. Professionals may want larger packs, but this hits the sweet spot for serious enthusiasts.
Why Drip Prevention Matters in Undercoatings
Drip prevention goes far beyond cosmetic concerns. When undercoating material runs off surfaces before properly curing, it creates thin spots that compromise the entire protective system. These low-film-build areas become vulnerable entry points for moisture, salt, and road debris—the very enemies your undercoating is meant to defeat. Professional detailers know that a drip-free application translates directly to consistent mil thickness across all surfaces, which is the true measure of effective corrosion protection. In commercial settings, drips also represent product waste that eats into profit margins, while DIYers face the frustration of reapplication and cleanup. The physics are simple: gravity pulls on viscous liquids, but the right formulation and technique create surface tension strong enough to hold product in place until it sets.
Understanding Undercoating Types
Not all undercoatings are engineered equally when it comes to resisting gravity. The base chemistry fundamentally determines how a product behaves during application and curing. Each category offers distinct advantages and drip-prevention characteristics that suit different vehicles, climates, and application methods.
Wax-Based Undercoatings
These traditional formulas rely on refined petroleum waxes suspended in solvents. Their key drip-preventing advantage lies in rapid skin formation—within minutes of application, the surface begins to oxidize and thicken, creating a self-supporting film. The best wax-based options feature high melting points (above 180°F) to resist summer softening and subsequent slumping. They excel in moderate climates but require meticulous surface prep since they don’t bond aggressively to existing rust. For drip prevention, look for “non-drip” or “thixotropic” formulations that become fluid under spray pressure but regain viscosity immediately upon contact with the surface.
Rubberized Undercoatings
Polymer-modified asphalt emulsions create a flexible, sound-dampening barrier that’s inherently resistant to running once applied. The rubberized particles interlock as the solvent flashes off, forming a cohesive membrane that clings to vertical surfaces. Premium versions incorporate thixotropic agents that allow smooth spraying while preventing sag on overhead applications. The critical factor is solids content—products exceeding 60% solids by weight demonstrate superior hang characteristics. However, rubberized coatings demand careful temperature management; applied too thick in cold weather, they may skin over while remaining liquid underneath, leading to delayed drips hours later.
Asphalt-Based Undercoatings
The heavy-duty choice for commercial vehicles and harsh environments, asphalt formulations offer exceptional water displacement and self-healing properties. Their high viscosity makes them naturally drip-resistant, but this same characteristic creates application challenges. The best modern asphalt undercoatings cut this viscosity with fast-evaporating solvents that flash off within 30-60 seconds, leaving the thick asphalt film anchored in place. Quality indicators include uniform black color without separation and a smooth, peanut-butter-like consistency that holds its shape when dolloped. Avoid products that feel overly thin or watery—these lack the body needed for vertical surface adhesion.
Polyurethane Undercoatings
The premium tier of corrosion protection, two-part polyurethane systems chemically cure rather than relying on solvent evaporation. This cross-linking reaction begins immediately upon mixing, creating a rapid increase in viscosity that virtually eliminates drips. The key advantage is controlled cure time—formulations designed for underbody use gel within 3-5 minutes, allowing repositioning without running. Single-component moisture-cured polyurethanes offer similar benefits but require humidity to trigger the reaction. While more expensive, their superior adhesion and permanent film build justify the cost for high-value vehicles. The downside? Improper mixing ratios or contaminated surfaces can cause catastrophic failure, including delamination and runs.
Oil-Based Undercoatings
Penetrating oil formulas represent the opposite end of the spectrum—they’re designed to creep and flow into seams and crevices. While this seems counterintuitive for drip prevention, premium oil-based undercoatings achieve balance through careful viscosity grading and slow-evaporating carriers that maintain film integrity. They never fully harden, remaining slightly tacky to continuously repel moisture. For drip control, application must be lighter and more methodical, building up protection through multiple thin coats rather than a single heavy application. These are ideal for restoration projects where complete rust encapsulation is prioritized over building thick protective layers.
Key Features to Look for in Drip-Resistant Formulas
Identifying truly drip-preventive undercoatings requires looking beyond marketing claims to understand the technical specifications that govern real-world performance. These features determine whether your application will result in a uniform protective barrier or a messy, inadequate coating.
Viscosity and Thickness
The Brookfield viscosity rating, measured in centipoise (cPs), tells the real story. Quality drip-resistant undercoatings typically range from 3,000-8,000 cPs at application temperature. Thixotropic formulations are particularly valuable—they thin under shear (spray pressure) but immediately regain structure when at rest. Check the product data sheet for “sag resistance” ratings; reputable manufacturers test this by applying the product to a vertical panel and measuring the maximum wet film thickness before slumping occurs. Premium products achieve 20+ mils without sagging, while economy formulas may fail at 10 mils.
Curing Time and Process
Flash time—the period between application and when the surface becomes tack-free—is critical. Fast-flash solvents (acetone, toluene) evaporate within 1-2 minutes, anchoring the coating before gravity can pull it down. However, excessively fast flash times can cause “dry spray” where particles don’t coalesce properly. The sweet spot is 3-5 minutes to initial set, with full cure occurring over 24-48 hours. Look for products specifying “non-sag cure” or “vertical hold” in their technical documentation. Some advanced formulas incorporate microfibers or cellulosic thickeners that create a structural matrix during cure, physically preventing downward movement.
Temperature Resistance
Your undercoating must resist softening in summer heat (when underbody temperatures can exceed 200°F) and remain flexible in winter cold (down to -40°F in some regions). The softening point, measured by ring-and-ball test, should exceed 200°F for reliable performance. Products with glass transition temperatures (Tg) below -30°F maintain flexibility without becoming brittle. This thermal stability directly impacts drip prevention—a product that softens in heat becomes mobile again, potentially flowing off the vehicle months after application. Premium formulations use high-temperature resins and UV stabilizers to maintain dimensional stability year-round.
Application Methods and Their Impact on Drips
The tools and techniques you employ can either enhance or completely undermine a product’s inherent drip-resistant properties. Even the best formulation will run if applied incorrectly, while proper technique can make moderately drip-resistant products perform admirably.
Professional Spray Application
High-volume, low-pressure (HVLP) systems with 1.8-2.2mm fluid tips provide optimal control for undercoating application. Professionals maintain 6-8 inches of distance and use a cross-hatch pattern, building coverage through multiple light passes rather than one heavy coat. The key is “wet but not running”—each pass should lay down 4-6 mils of wet film. Air pressure matters too: 30-40 PSI at the gun prevents atomization that creates overspray and uneven deposition. Many pros warm the product to 70-80°F before application, which thins it slightly for better flow-out while accelerating flash time. The result is a uniform 15-20 mil dry film that’s drip-free and fully protective.
DIY Aerosol Cans
Aerosol application demands different strategies for drip control. The propellant-driven spray pattern is less precise, so technique becomes paramount. Hold the can 8-10 inches away and keep it moving—never pause on a single spot. Apply in 3-4 light mist coats, allowing 10-15 minutes of flash time between each. The first coat should be a “tack coat” that’s intentionally thin, providing tooth for subsequent layers. Ambient temperature is critical; aerosols perform poorly below 60°F or above 85°F. Invert the can and clear the nozzle after each use to prevent clogging that causes spitting and uneven application. While convenient, aerosols rarely achieve the film build of professional systems, making them better for touch-ups than complete underbody protection.
Brush-On Application
Brushing undercoating seems archaic but offers unparalleled control for complex geometries and spot repairs. Use a natural-bristle brush with flagged tips that hold product without dripping. Load the brush lightly and apply with firm, overlapping strokes in one direction. The brush physically works the coating into seams and creates a textured finish that hides minor imperfections. For drip prevention, brush-on methods excel because you can see exactly how much product you’re applying and where it’s going. The trade-off is time—brush application takes 3-4 times longer than spraying, and achieving uniform thickness requires experience. It’s ideal for frame sections, suspension components, and areas where overspray must be absolutely avoided.
Surface Preparation: The Foundation of Drip-Free Results
The cleanest, most drip-resistant undercoating in the world will fail if applied to a contaminated surface. Proper prep creates the mechanical and chemical bond that keeps product in place during cure. Start with pressure washing at 2,000+ PSI to remove loose scale, dirt, and previous failing coatings. Follow with a degreaser specifically formulated for automotive underbodies—household degreasers often leave residues that interfere with adhesion. For rust conversion, avoid heavy rust converters that create powdery surfaces; instead, use phosphoric acid-based treatments that etch the metal and deposit a stable iron phosphate layer. After treatment, wipe down with wax-and-grease remover using lint-free cloths. The final step is crucial: allow 24 hours of dry time in a low-humidity environment. Trapped moisture under the coating causes bubbling and delamination, which creates channels for future drips as the coating separates from the substrate.
Climate Considerations for Undercoating Selection
Your local environment dictates which drip-preventive characteristics matter most. In salt-belt states (Michigan, New York, Massachusetts), prioritize products with high salt-fog resistance ratings (1,000+ hours) and rapid cure to prevent wash-off from early-season slush. Desert climates demand UV stability and high-temperature resistance—products that soften at 150°F will sag on hot pavement. Coastal regions require formulations that resist hydrolysis from constant humidity; polyurethane systems excel here. Mountainous areas with temperature swings need exceptional flexibility to prevent cracking and subsequent edge lifting that leads to drips. Application timing matters too: aim for 50-70°F ambient temperature with low humidity. Applying undercoating in high humidity extends flash time exponentially, increasing drip risk. In winter, heated garages become essential—cold metal surfaces cause immediate condensation, preventing adhesion.
The Science Behind Drip Formation
Understanding why drips occur helps prevent them. Drip formation follows a predictable pattern: surface tension failure, gravitational flow, and skin formation. When undercoating is applied, it forms a liquid film with internal cohesion. If the shear stress from gravity exceeds the coating’s yield value, flow begins. This is governed by the Herschel-Bulkley equation for non-Newtonian fluids. As the solvent evaporates, viscosity increases exponentially. The critical window is the first 3-5 minutes when the coating is mobile but thickening. High-quality formulations incorporate rheology modifiers—fumed silica, organoclays, or associative thickeners—that create a three-dimensional network. This network provides “structure” that resists flow until chemical or physical curing locks it in place. Temperature gradients exacerbate drips; warm underbody components accelerate solvent loss at the metal interface while the surface remains liquid, creating internal flow currents that manifest as runs.
Common Application Mistakes That Cause Drips
Even experienced DIYers fall prey to these drip-inducing errors. Over-application is the primary culprit—laying down more than 8-10 wet mils in a single pass guarantees runs. Another frequent mistake is inadequate flash time between coats; the second coat re-liquefies the first, creating a heavy, mobile film. Spraying too close (less than 6 inches) concentrates product in a small area, overwhelming the coating’s sag resistance. Conversely, spraying too far (more than 12 inches) causes dry spray that doesn’t adhere properly and can flake off later, creating thin spots that appear as drip marks when the underlying coating shows through. Ignoring ambient temperature is equally damaging—applying in direct sunlight heats the metal surface, causing solvent to boil out and creating bubbles that burst and run. Finally, failing to mask properly leads to overspray on hot exhaust components, where the coating melts and drips onto previously coated areas, ruining the finish.
Professional vs. DIY: Making the Right Choice
The decision between professional application and DIY hinges on equipment, experience, and vehicle value. Professional shops invest $5,000-$15,000 in specialized lifts, spray equipment, and ventilation systems that ensure consistent results. They apply undercoating weekly, developing an intuitive sense for proper film build and flash time. The professional advantage is most pronounced for daily drivers and modern unibody vehicles with complex underbody geometries where complete coverage is difficult to achieve on your back in a driveway. However, DIY application offers control over product selection and thickness. If you choose the DIY route, rent or borrow a quality undercoating gun—cheap siphon-feed guns create uneven patterns and excessive overspray. For restoration projects where you’re applying multiple specialty coatings (rust encapsulator, seam sealer, topcoat), DIY allows you to tailor each layer. The breaking point is typically vehicle value: for cars worth over $30,000, professional application costs 0.5-1% of value and provides warranties that justify the expense.
Cost vs. Performance Analysis
Budget undercoatings ($15-30 per gallon) typically contain 40-50% solids and rely on inexpensive asphalt or wax bases. They require multiple coats to achieve adequate thickness, and their drip resistance is marginal—expect runs if you apply more than 6 mils wet. Mid-tier products ($40-70 per gallon) jump to 55-65% solids and incorporate thixotropic agents, providing reliable sag resistance up to 15 mils. Premium formulations ($80-150 per gallon) exceed 70% solids and use advanced polymer chemistry that essentially eliminates drips when applied correctly. The cost-per-mil analysis reveals the true value: a budget product at 45% solids yields 7.2 dry mils per gallon per coat, while a premium 70% solids product delivers 11.2 dry mils. You’ll need 1.5 coats of budget product to equal one coat of premium, making the price difference less dramatic than it appears. Factor in your time—rework from drips easily doubles application time—and premium products often represent better overall value.
Environmental and Safety Considerations
Modern undercoatings balance performance with environmental responsibility. VOC (Volatile Organic Compound) regulations limit solvent content to 450 grams per liter in most states, with California requiring sub-250 g/l formulations. Low-VOC products achieve drip resistance through water-based carriers or high-solids content rather than fast-evaporating solvents. This extends flash time but reduces environmental impact. From a health perspective, isocyanate-free polyurethanes eliminate respiratory hazards, while soy-based oils offer biodegradable alternatives for penetrating formulations. Proper disposal matters: one gallon of waste undercoating can contaminate thousands of gallons of groundwater. Collect drips and overspray with drop cloths, and cure waste fully before disposal. Many municipalities classify liquid undercoating as hazardous waste requiring special handling. For DIYers, water-based products offer the safest option—cleanup with soap and water, minimal fumes, and no flammability concerns—though they demand longer cure times and are less forgiving of surface moisture.
Maintenance and Reapplication Schedule
Drip prevention doesn’t end after initial cure. Undercoatings are sacrificial barriers that require monitoring and maintenance. Inspect your underbody quarterly, focusing on areas behind wheels and around fasteners where stone impingement is highest. Look for cracking, flaking, or thinning—these are precursors to future drips as the coating loses adhesion. Touch-up any damage immediately using the same product type; incompatible chemistries cause delamination. For wax-based and oil-based products, annual reapplication maintains protection as these formulas slowly wash away. Rubberized and polyurethane coatings typically last 3-5 years but may need spot treatment sooner. The reapplication window is critical: apply new coating before the old layer fails completely, but not so early that you build excessive thickness. More than 40-50 mils total can cause cracking and peeling, which appears as drips when sections detach. Pressure wash the underbody annually to remove salt and debris, but avoid harsh chemicals or aggressive scrubbing that can damage the coating.
Warranty Implications of Undercoating
Before applying any undercoating, understand how it affects your vehicle’s factory corrosion warranty. Most manufacturers prohibit aftermarket undercoating during the warranty period (typically 5-7 years for perforation coverage), arguing that improper application can trap moisture and accelerate rust. Some specifically void warranties if undercoating is applied to brake lines, fuel lines, or heat shields. However, once the factory warranty expires, quality undercoating can extend your vehicle’s life by a decade or more. Professional shops often provide their own warranties—2-5 years against perforation—when they apply the coating. Read the fine print: these warranties usually require annual inspections and prohibit off-road use. For DIY applications, product warranties are limited to replacement of material only, not labor or damage. Document your application with photos and receipts; if a drip-related failure occurs, you’ll need proof of proper prep and application to claim warranty coverage.
Signs Your Undercoating is Failing
Early detection of undercoating failure prevents small problems from becoming major rust issues. Drips are often the first visible symptom, but they’re preceded by more subtle indicators. Surface dulling or whitening suggests UV degradation and loss of flexibility. Micro-cracking, visible as a fine network of lines when you shine a light parallel to the surface, indicates embrittlement and imminent flaking. Soft or tacky areas, especially near exhaust components, show thermal breakdown. Bubbling or blistering signals trapped moisture or application over contamination—these will eventually pop and run. Pay attention to edges: lifting at seams and fasteners is the canary in the coal mine. Once edges fail, water wicks underneath, causing widespread delamination that appears as sheets of coating dripping off. Another telltale sign is color change from black to brown or gray, indicating oxidation and loss of protective properties. Catch these issues early, and you can often spot-treat rather than strip and reapply.
Troubleshooting Drip Issues
When drips happen despite your best efforts, quick action can salvage the job. For fresh drips (less than 30 minutes old), don’t wipe—this spreads the mess. Instead, use a dry brush to lift the drip back onto the surface, then immediately apply a light mist coat to blend it. For partially cured drips (30 minutes to 2 hours), let them skin over, then slice them off with a sharp putty knife and touch up the area. Fully cured drips require sanding with 80-grit paper to feather the edges, cleaning, and reapplication. If you’re experiencing widespread dripping, the problem is systemic: either the product is too thin, the surface is too cold, or you’re applying too heavily. Stop immediately, allow the existing coating to flash off completely (2-4 hours), then switch to lighter passes. In extreme cases, thin the product 10% with recommended reducer to improve flow-out and reduce the heavy buildup that causes runs. Always test your technique on cardboard first—if it drips there, it will drip on your vehicle.
Frequently Asked Questions
1. How long should I wait before driving my car after undercoating to prevent drips?
Wait a minimum of 24 hours before driving, and ideally 48-72 hours for full cure. Driving too soon exposes the uncured coating to wind, road spray, and debris that can cause runs. If you must move the vehicle sooner, keep it under 30 mph for the first 50 miles and avoid wet conditions for a week.
2. Can I apply a second coat if the first coat is already dripping?
No. Adding more product will compound the problem. Allow the first coat to cure completely (24+ hours), then sand down the drips and reapply properly. The underlying issue is likely over-application or low viscosity, which a second coat won’t fix.
3. What’s the ideal temperature for applying drip-resistant undercoating?
The sweet spot is 65-75°F ambient temperature with the vehicle’s metal surface at a similar temperature. Avoid applying when metal is below 60°F or above 85°F. Cold surfaces slow cure and increase drip risk; hot surfaces cause solvent to flash too quickly, creating dry spray that won’t adhere.
4. Are water-based undercoatings as drip-resistant as solvent-based ones?
Modern water-based formulas can match solvent-based performance, but they require longer flash times (20-30 minutes vs. 5 minutes) and are less forgiving of high humidity. Look for water-based products specifically labeled “non-sag” or “vertical hold” and apply in thinner coats.
5. How do I know if I’m applying the right thickness to avoid drips?
Invest in a wet film thickness gauge ($15-30). Aim for 6-8 wet mils per coat, which dries to 3-5 mils depending on solids content. Visual cues help too: the wet film should appear glossy and uniform, not pooled or translucent. If you can see individual spray passes, you’re too thin; if it looks like wet paint running, you’re too heavy.
6. Can undercoating drips damage my driveway or garage floor?
Absolutely. Uncured undercoating contains solvents and oils that penetrate concrete, leaving permanent stains. Always use a heavy-duty drop cloth or plastic sheeting. For asphalt driveways, the solvents can actually soften and damage the pavement. If drips occur, clean immediately with mineral spirits before the product cures.
7. Why does my undercoating drip months after application?
This indicates thermal failure—the product is softening in underbody heat and flowing. It’s caused by using a low-temperature-grade product or applying too thick. The solution is removal and reapplication with a high-temp formula rated for at least 200°F continuous service temperature.
8. Should I undercoat in warm weather to prevent drips?
Not necessarily. While warm weather accelerates cure, excessive heat (above 85°F) causes solvent to evaporate too fast, leading to dry spray and poor adhesion. Moderate temperatures with low humidity provide the best drip prevention. If you must apply in heat, work in the shade and cool the vehicle beforehand.
9. Can I thin undercoating to make it less likely to drip?
Counterintuitively, thinning often increases drip risk because it reduces viscosity and solids content. Only thin if the manufacturer specifically recommends it for your application conditions, and never exceed 10% reducer. Instead of thinning, warm the product slightly to improve flow without sacrificing film build.
10. How do professional shops guarantee drip-free results?
Pros combine multiple strategies: climate-controlled booths, professional HVLP equipment, extensive experience with film build, and often, additives that boost sag resistance. Many also use infrared curing lamps that accelerate skin formation without creating surface bubbles. The result is consistent 15-20 mil dry film thickness with zero runs—something difficult to replicate in a driveway environment.