Your axles are the unsung heroes of your vehicle’s drivetrain, bearing immense loads while spinning at high speeds through the harshest conditions imaginable. Yet most car owners never give them a second thought—until a telltale grinding noise or a failed inspection reveals catastrophic rust damage that could have been prevented for pennies on the dollar. The underside of your vehicle faces a constant barrage of road salt, moisture, debris, and temperature fluctuations that relentlessly attack exposed metal surfaces.
Investing in quality undercoating for your axles isn’t just about aesthetics; it’s about extending component life, maintaining structural integrity, and preserving your vehicle’s resale value. Whether you’re restoring a classic car, maintaining a daily driver, or protecting an off-road rig, understanding the nuances of axle undercoating formulations and application techniques will save you thousands in premature component failure. This comprehensive guide walks you through everything you need to know to make an informed decision without getting lost in marketing hype.
Top 10 Undercoating For Axles
Detailed Product Reviews
1. Undercoating In A Can - Black Wax Coating (12) 12oz. Case

Overview: The Undercoating In A Can Black Wax Coating offers professional-grade rust protection in a convenient 12-can case. This MIL-PRF-62218B-approved formula delivers military-specification corrosion prevention for automotive underbodies, trailers, and equipment. The wax-based coating creates a durable barrier against moisture and salt while providing sound-deadening benefits.
What Makes It Stand Out: This product’s military approval sets it apart from consumer-grade alternatives. The wax formulation actively stops existing rust from spreading while preventing new corrosion, lasting up to four times longer than traditional asphalt or rubberized coatings. Its sound-dampening properties add an extra layer of value, reducing road noise and vibration.
Value for Money: At $74.18 for twelve 12-ounce cans, you’re paying approximately $6.18 per can—a competitive price for MIL-SPEC protection. Considering its 4X longevity claim, this case provides years of coverage for multiple vehicles or large projects. When compared to professional undercoating services costing hundreds of dollars, this DIY solution offers substantial savings.
Strengths and Weaknesses: Strengths include military-grade approval, superior longevity, dual rust prevention and sound deadening, and cost-effective bulk packaging. Weaknesses involve the time-intensive application process for multiple cans, the permanent black finish that may not suit all preferences, and potential overspray concerns requiring careful masking.
Bottom Line: This case is ideal for serious DIY enthusiasts, fleet maintenance, or restoration projects demanding professional-grade protection. The MIL-SPEC approval and extended durability justify the investment for those prioritizing long-term rust prevention.
2. RecPro Steel Trailer Fenders Tandem Axle 64" x 10" x 16" | 14 Gauge Steel | Teardrop Trailer Fenders (2 Fenders, No Rubberized Undercoating Spray)
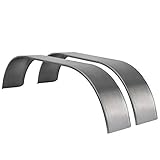
Overview: This pair of RecPro steel trailer fenders provides heavy-duty protection for tandem axle trailers, spanning 64 inches across two wheels. Constructed from robust 14-gauge galvanized steel, these fenders are engineered specifically for weld-on applications, offering superior structural durability compared to standard bolt-on alternatives commonly found in the market.
What Makes It Stand Out: The 14-gauge steel thickness significantly exceeds typical fender specifications, providing exceptional impact resistance and longevity. The galvanized coating offers baseline corrosion protection, while the weld-on design ensures a permanent, custom-fit installation that won’t loosen over time like bolted options.
Value for Money: At $267.95 for the pair, each fender costs approximately $134. While pricier than thinner-gauge alternatives, the superior material thickness prevents replacement costs down the road. For custom trailer builds or heavy-duty applications, this upfront investment eliminates frequent repairs associated with inferior fenders.
Strengths and Weaknesses: Strengths include thick 14-gauge construction, galvanized rust resistance, weld-on durability, and generous 64-inch coverage. Weaknesses are the mandatory weld-only installation requiring professional equipment, lack of pre-applied undercoating, and the necessity for additional rust treatment before use. The raw finish demands immediate painting or coating.
Bottom Line: These fenders excel for custom trailer builders and heavy-duty applications where durability trumps convenience. Budget for professional welding and additional rust-proofing to maximize their lifespan. Not recommended for those seeking simple bolt-on solutions.
3. RecPro Steel Trailer Fenders Tandem Axle 64" x 10" x 16" | 14 Gauge Steel | Teardrop Trailer Fenders (1 Fender, No Rubberized Undercoating Spray)
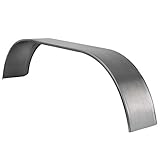
Overview: This single RecPro steel trailer fender matches the quality of its two-pack counterpart, offering heavy-duty protection for one side of a tandem axle trailer. Measuring 64" x 10" x 16", it’s crafted from thick 14-gauge galvanized steel for maximum durability and weld-on installation compatibility with professional results.
What Makes It Stand Out: The individual packaging makes this perfect for single-side replacements or phased trailer builds. You get the same professional-grade 14-gauge thickness and galvanized protection without committing to a pair, allowing precise project matching and budget flexibility for specific repair needs.
Value for Money: Priced at $154.95 for a single unit, it’s approximately 15% more expensive per fender than buying the pair. However, for replacement scenarios or custom single-axle applications, it eliminates unnecessary spending on unneeded components. The cost is justified when you require only one premium fender for a specific repair.
Strengths and Weaknesses: Strengths include identical heavy-duty construction to the twin pack, flexible single-unit purchasing, and thick galvanized steel durability. Weaknesses mirror the pair: weld-only installation complexity, absence of protective undercoating, and mandatory additional rust treatment. The higher per-unit cost is notable for budget-conscious buyers.
Bottom Line: This single fender is ideal for targeted repairs or custom builds needing just one side. Ensure you have welding capabilities and plan for immediate rust-proofing treatment. Purchase the pair if you need both fenders to save money—only buy individually when circumstances demand it.
4. Rustkill Undercoating - 1 U.S. Quart (946 ml)
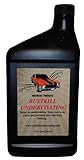
Overview: Rustkill Undercoating provides oil-based rust protection in a convenient quart-sized container. This non-rubberized formula penetrates existing rust and locks out oxygen to halt corrosion progression. Designed for annual reapplication, it offers a breathable alternative to traditional undercoatings that can trap moisture beneath the surface.
What Makes It Stand Out: Unlike rubberized coatings that create sealed pockets, this oil-based solution repels water while allowing trapped moisture to escape, preventing hidden rust formation. Its ability to stop active rust and prevent new corrosion makes it both corrective and preventative. The quart size covers a typical car’s entire underbody completely.
Value for Money: At $39.95 per quart, this product delivers professional-grade protection at a fraction of service center costs. One quart suffices for most vehicles, and the annual reapplication schedule keeps ongoing costs predictable. Compared to rubberized undercoatings requiring less frequent but more expensive application, this offers budget-friendly maintenance.
Strengths and Weaknesses: Strengths include oil-based breathability, active rust-stopping capability, water-repelling properties, and straightforward DIY application. Weaknesses involve the mandatory 1-2 times yearly reapplication commitment, potential messiness during application, and limited coverage for oversized trucks or SUVs requiring multiple quarts.
Bottom Line: Perfect for dedicated DIYers committed to regular vehicle maintenance schedules. The breathable formula outperforms rubberized alternatives in wet climates. Accept the reapplication schedule as routine upkeep, and you’ll achieve excellent long-term rust prevention at minimal cost.
Understanding Axle Undercoating and Why It Matters
The Anatomy of an Axle: Vulnerable Points
Axles contain multiple failure points that manufacturers never intended to face raw environmental exposure. The axle housing itself, typically stamped steel or cast iron, features numerous seams, welds, and mounting points where moisture collects. Ventilation breathers, while necessary for pressure equalization, introduce humid air directly into the differential housing. Axle shafts, universal joints, and mounting flanges create metal-on-metal interfaces that trap contaminants. Even the most robust factory paint fails within years, leaving bare metal vulnerable. Understanding these specific vulnerabilities helps you target protection where it matters most, rather than wasting product on non-critical surfaces.
How Corrosion Destroys Axles Over Time
Corrosion isn’t merely surface rust—it’s an electrochemical process that fundamentally weakens metal structures. When road salt meets water on your axle housing, it creates an electrolyte solution that accelerates oxidation exponentially. This process begins in microscopic pits where factory coatings have chipped, then expands underneath intact paint through a process called filiform corrosion. Inside the axle housing, condensation mixes with hypoid gear oil, creating acidic compounds that etch bearing surfaces and gear teeth. External rust on axle tubes can progress to the point where wall thickness reduces by 30-50%, compromising load-bearing capacity and creating stress risers that initiate catastrophic cracks under torque loads.
Types of Undercoating Formulations
Rubberized Undercoatings: The Flexible Shield
Rubberized formulations create a flexible, sound-dampening barrier that adheres aggressively to clean metal surfaces. These products typically contain asphalt or petroleum resins blended with rubber polymers, resulting in a thick, textured finish that can expand and contract with temperature fluctuations without cracking. The primary advantage lies in impact resistance—flying gravel and road debris that would chip rigid coatings simply embed in the rubberized matrix. However, this flexibility comes at a cost: these coatings can soften in extreme heat and may trap moisture underneath if applied over imperfectly prepared surfaces, making surface prep absolutely critical.
Asphalt-Based Options: Maximum Thickness
Asphalt-based undercoatings deliver the thickest single-coat application, often building 60-120 mils of protection. This category excels at creating a physical barrier that stone chips can’t penetrate, making it ideal for extreme off-road conditions. The heavy-bodied nature allows it to fill minor pits and surface imperfections, creating a smooth, continuous shield. The downside includes longer curing times, potential for sagging on vertical surfaces, and a tendency to become brittle in sub-zero temperatures. Modern formulations often incorporate rubber modifiers to improve cold-weather flexibility, but pure asphalt coatings remain best suited for moderate climates and heavy-duty applications.
Wax-Based Formulations: The Self-Healing Approach
Wax-based undercoatings, often called “creeping” or “self-healing” products, remain permanently pliable and actively flow into scratches and chips. These formulations use lanolin, paraffin, or synthetic waxes blended with corrosion inhibitors that create a hydrophobic barrier. When the coating gets nicked, surrounding material slowly flows back into the void, maintaining protection without intervention. This category performs exceptionally well in marine environments and areas with heavy road salt use. The trade-off includes attracting dirt and dust, requiring more frequent reapplication, and potentially melting off in extreme heat or during pressure washing.
Polyurethane Coatings: Professional-Grade Protection
Two-part polyurethane coatings represent the premium tier, offering chemical resistance, extreme durability, and a factory-like appearance. These formulations cure through chemical reaction rather than solvent evaporation, creating a cross-linked polymer matrix that won’t soften with heat or become brittle with cold. Professional applications can last 8-10 years with proper maintenance. The complexity of mixing and applying these products demands careful technique—incorrect ratios or insufficient mixing results in incomplete curing and premature failure. These coatings also require specialized respirators and ventilation due to isocyanate content, making DIY application challenging for inexperienced users.
Oil-Based Penetrants: The Creeping Protector
Fluid film and other oil-based penetrants work through capillary action, wicking into seams and crevices where traditional coatings can’t reach. These products never fully dry, remaining active and mobile throughout their service life. They excel at protecting internal axle components through breather tube application and provide excellent coverage on complex geometries like steering knuckles and suspension mounts. Annual reapplication is necessary, and the oily residue can attract road grime, creating a messy appearance. However, for vehicles in salt-belt regions, this active protection often outperforms static coatings that eventually crack and fail.
Key Features to Evaluate Before Buying
Durability Metrics: What “Long-Lasting” Really Means
Marketing claims of “long-lasting protection” require scrutiny—what does the manufacturer actually guarantee? Look for specific ASTM test results like B117 salt spray resistance (measured in hours), impact resistance ratings, and elongation percentages that indicate flexibility. A quality product should withstand 1000+ hours of salt spray testing and maintain flexibility below -20°F. Check for real-world warranty terms; some professional-grade products offer 5-10 year warranties when applied by certified installers. Understand that durability varies dramatically by environment—a coating that lasts 5 years in Arizona might fail in 18 months in coastal Maine.
Application Method: Spray, Brush, or Dip?
Your chosen application method significantly impacts results. Aerosol cans offer convenience but produce thin, uneven coverage requiring multiple coats. Quart and gallon containers applied with undercoating guns provide better control and build thickness faster. Brush application ensures maximum penetration into seams but leaves brush marks and requires more labor. Some formulations allow dipping entire axle assemblies, creating flawless coverage but demanding large volumes of product and proper drain-off recovery. Consider your workspace, equipment availability, and desired finish quality when selecting a product format.
Climate-Specific Formulations
One formulation doesn’t suit all environments. Coastal regions demand salt-spray resistance and hydrophobic properties above all else. Desert environments prioritize UV stability and resistance to sandblasting. Northern climates need extreme cold flexibility and resistance to magnesium chloride deicers. Southern states require high-temperature stability to prevent coating softening and sling-off. Some manufacturers offer regional formulations optimized for specific climate zones, while universal products include compromises. Match the product chemistry to your primary operating environment rather than choosing based on universal claims.
Curing Time and Process Requirements
Curing mechanisms vary dramatically between product types. Solvent-based coatings cure through evaporation, requiring 24-72 hours before exposure to water. Two-part polyurethanes cure chemically, reaching handling strength in 4-8 hours but full chemical resistance in 7 days. Wax-based products never fully cure, remaining tacky indefinitely. Asphalt coatings may off-gas solvents for weeks. Understanding these timelines prevents premature failure—washing your vehicle or driving in rain too soon can wash away uncured product, wasting your effort and investment.
Critical Preparation Steps
Cleaning: More Than Just a Quick Rinse
Proper surface preparation separates successful applications from costly failures. Begin with pressure washing at 2000+ PSI to remove loose scale and grime, followed by degreasing with a petroleum-based solvent to eliminate oil films that prevent adhesion. For previously coated axles, use a dedicated undercoating stripper to remove old, failing material—never apply new product over flaking existing coatings. Finally, wipe down with a wax-and-grease remover just before application; even fingerprints contain oils that cause adhesion failure. This three-stage cleaning process consumes 60% of total project time but determines 90% of your results.
Rust Removal: Addressing Existing Damage
Applying undercoating over active rust is like painting over mold—it seals in the problem while hiding it from view. Use a wire wheel or needle scaler to remove all loose scale, then treat remaining surface rust with a phosphoric acid-based rust converter that chemically transforms iron oxide into stable iron phosphate. For pitting corrosion, fill deep crevices with epoxy-based seam sealer before undercoating to prevent moisture pockets. Severely rusted areas with 25%+ metal loss require welding reinforcement plates or professional evaluation; undercoating cannot restore structural integrity to compromised components.
Masking and Protection: Keeping Overspray at Bay
Undercoating overspray creates permanent stains and can contaminate critical surfaces. Remove wheels and brake drums to access axle ends completely. Mask brake backing plates, wheel cylinders, and ABS sensors with heavy-duty aluminum foil and masking tape—plastic sheeting allows seepage. Cover driveshaft U-joints and slip yokes to prevent coating from entering and restricting movement. Protect parking brake cables and hydraulic lines with split loom tubing. Remove differential fill plugs and breather fittings, masking the openings to prevent internal contamination. This meticulous masking adds hours to the job but prevents expensive component replacement.
Application Best Practices
Temperature and Humidity Considerations
Ambient conditions during application dramatically affect curing and adhesion. Most products require substrate temperatures between 60-90°F and relative humidity below 70%. Cold surfaces cause solvent entrapment and poor flow-out, while hot surfaces accelerate drying before proper leveling. In humid conditions, moisture can condense on cold metal surfaces, creating invisible barriers that cause immediate delamination. Use infrared thermometers to verify axle temperature, and consider warming components with a heat gun or shop heater in cold weather. Never apply undercoating outdoors when rain is possible within the manufacturer’s specified cure time.
Layering Techniques for Maximum Coverage
Professional results require strategic layering rather than a single heavy coat. Apply a thin “tack coat” first, allowing it to flash off for 15-30 minutes. This initial layer provides tooth for subsequent coats and penetrates seams more effectively. Follow with 2-3 medium coats, building to the manufacturer’s recommended thickness—typically 80-120 mils for asphalt-based products, 40-60 mils for rubberized coatings. Use overlapping 50% spray patterns and maintain consistent gun distance (8-12 inches). For complex geometries, apply extra material to the top surfaces where water pools, and use a brush to work coating into bolt heads and crevices between spray passes.
Drying and Curing: Patience Pays Off
Rushing the curing process destroys months of protection in minutes. After final application, allow 24-48 hours of undisturbed drying in a clean, dust-free environment. Elevate the axle on stands to prevent contact with the floor. Install a temporary breather extension tube to prevent differential pressure changes from drawing uncured coating into the housing. Avoid driving for at least 72 hours, and postpone pressure washing for 2-4 weeks depending on product specifications. The coating may feel dry to the touch while remaining chemically uncured underneath; respect the full cure schedule for maximum durability.
Maintenance and Long-Term Care
Inspection Schedules: What to Look For
Establish a quarterly inspection routine to catch problems early. Look for cracking, peeling, or blistering that indicates adhesion failure. Check for thin spots where undercoating has worn through, typically on forward-facing surfaces and bottom runs. Use a thickness gauge to measure remaining coating depth in critical areas. Inspect around breather tubes and vent fittings for signs of coating degradation from heat and oil vapor. Pay special attention to areas where rocks have impacted, creating chips that expose bare metal. Early detection allows for spot repairs before corrosion gains a foothold.
Touch-Up Strategies for Worn Areas
Spot repairs extend overall coating life and prevent localized corrosion. Clean damaged areas with a wire brush and solvent wipe, feathering the edges of intact coating. Apply rust converter to any exposed metal, then use a small brush to apply thin coats of matching undercoating, building slightly proud of the surrounding surface. For wax-based products, simply reapply to the entire axle annually—the self-healing nature blends touch-ups seamlessly. With polyurethane coatings, use the manufacturer’s designated touch-up system; mixing small batches of two-part coatings is impractical, so consider keeping a pre-matched repair kit from the original application.
When to Reapply: Timing Your Next Treatment
Don’t wait for visible failure to reapply. Rubberized and asphalt coatings typically require renewal every 3-5 years in moderate climates, 2-3 years in salt-belt regions. Wax-based products need annual reapplication regardless of climate. Polyurethane coatings may last 8-10 years but should be inspected yearly after year 5. Schedule reapplication for early fall, before winter salt application begins. Complete removal of old coating is only necessary when adhesion failure exceeds 30% of the surface area; otherwise, thorough cleaning and scuffing of the existing coating provides an excellent base for renewal.
Common Application Mistakes to Avoid
Inadequate Surface Prep
The number one cause of undercoating failure is cutting corners on preparation. Skipping the degreasing step, applying over loose rust, or failing to remove old flaking coating guarantees premature delamination. Even new axles require preparation—factory preservative oils must be removed, and casting pores should be opened with a Scotch-Brite pad. Remember that undercoating is a protective layer, not a structural one; it cannot compensate for poor substrate condition. Allocate at least half your project timeline to preparation, and never apply coating the same day you clean—the surface must be completely dry.
Applying Too Thick or Too Thin
Both extremes compromise protection. Excessive thickness leads to solvent entrapment, cracking, and sagging, especially on vertical axle tube surfaces. It also wastes expensive product and extends cure times unnecessarily. Conversely, thin applications provide insufficient barrier protection and wear through quickly. Use a wet-film thickness gauge during application to verify you’re building to specification. Multiple thin coats always outperform a single heavy coat, providing better adhesion, fewer defects, and more uniform coverage. Follow the manufacturer’s coverage rates (square feet per gallon) as a guide, adjusting for surface roughness and porosity.
Ignoring Manufacturer Specifications
Every product has specific requirements for surface temperature, humidity, thinning ratios, and recoat windows. Adding universal thinners to a specialized coating disrupts its chemical balance, reducing solids content and compromising durability. Applying a second coat outside the recoat window (typically 4-24 hours) can cause intercoat adhesion failure, where layers delaminate from each other. Using the wrong spray tip size leads to improper atomization and texture. Read the technical data sheet completely before starting, and follow every parameter precisely. These specifications aren’t suggestions—they’re the result of extensive laboratory testing and field validation.
Cost vs. Value Analysis
Understanding Price Tiers
Undercoating products span from $10 aerosol cans to $200+ for professional-grade two-part systems. Economy products typically contain lower solids content, requiring more coats and more frequent reapplication, ultimately costing more over a vehicle’s lifetime. Mid-tier rubberized and asphalt coatings ($40-80 per gallon) offer the best balance for DIY enthusiasts, providing 3-5 year protection with proper application. Premium polyurethane systems justify their higher cost through 8-10 year durability and superior chemical resistance, making them economical for long-term vehicle ownership. Calculate cost per year of protection rather than initial purchase price for accurate comparison.
Professional Application Costs
Professional undercoating services charge $400-800 for complete axle and undercarriage treatment, depending on vehicle size and coating type. This price includes proper preparation, professional equipment, and warranty coverage. While seemingly expensive, professionals use high-volume plural-component spray systems that apply coatings at optimal thickness in a single visit, with proper environmental controls and waste disposal. For vehicles with significant existing rust or complex suspension designs, professional application may be more cost-effective than investing in specialized equipment and chemicals you’ll use only once. Many shops offer free touch-up inspections as part of their service package.
DIY Investment Requirements
DIY axle undercoating requires more than just the coating product. Essential equipment includes a quality undercoating gun ($50-150), compressor capable of 5+ CFM at 90 PSI, jack stands, wire wheels for your drill, rust converter ($30-50), and a gallon of wax-and-grease remover. Factor in disposable coveralls, respirator cartridges, and masking materials. The total initial investment often exceeds $300, making it economical only if you plan to undercoat multiple vehicles or reapply every few years. However, the ability to touch up spots annually and inspect your work regularly provides peace of mind that professional services can’t match.
Environmental and Safety Considerations
VOC Regulations and Compliance
Many high-performance undercoatings contain volatile organic compounds (VOCs) regulated by state and federal authorities. California’s SCAQMD rules limit VOC content to 340 grams per liter for underbody coatings, while less restrictive states allow 450+ g/L. Using non-compliant products in regulated areas can result in significant fines. Water-based formulations offer lower VOC content but typically sacrifice durability and require more frequent reapplication. Always check local regulations before purchasing, and consider low-VOC products even if not required—they’re less hazardous to your health and the environment.
Personal Protective Equipment Requirements
Undercoating application exposes you to solvents, airborne particles, and isocyanates (in polyurethane systems). Minimum PPE includes a NIOSH-approved respirator with organic vapor cartridges and P100 particulate filters, chemical-resistant gloves and coveralls, and eye protection. Polyurethane applications demand supplied-air respirators due to isocyanate hazards, which can cause permanent respiratory damage. Work in well-ventilated areas with exhaust fans creating negative pressure. Keep a bucket of soap and water nearby for immediate skin contact cleanup—solvents strip natural oils, causing dermatitis with repeated exposure.
Disposal and Cleanup Protocols
Never wash undercoating solvents down drains or onto soil. Allow waste thinner and cleaning rags to evaporate in a sealed container, then dispose of solids as hazardous waste per local regulations. Used aerosol cans remain pressurized and require special handling at hazardous waste facilities. Clean spray equipment immediately after use—dried undercoating is nearly impossible to remove from guns and hoses. Store partially used containers upside-down to create an airtight seal at the lid, preventing skin formation. Keep all products away from ignition sources; even “non-flammable” formulations contain combustible solvents that can ignite under certain conditions.
Frequently Asked Questions
How long does axle undercoating typically last before needing reapplication?
Durability depends entirely on product type, climate, and driving conditions. Rubberized and asphalt-based coatings generally provide 3-5 years of protection in moderate climates, but only 2-3 years in heavy salt-use areas. Wax-based formulations require annual reapplication regardless of location. Premium polyurethane systems can last 8-10 years with proper maintenance. The key is establishing an inspection schedule rather than relying on time alone—quarterly checks will reveal wear patterns specific to your driving habits and allow you to touch up before failure occurs.
Can I apply undercoating over existing surface rust, or must I remove it completely?
Never encapsulate active rust. Loose scale must be removed completely using wire wheels or abrasive blasting. Remaining surface rust should be treated with a phosphoric acid-based rust converter that chemically transforms iron oxide into stable iron phosphate. Deep pitting requires epoxy filler to prevent moisture pockets. Undercoating applied over untreated rust will delaminate as oxidation continues underneath, trapping moisture and accelerating damage. The preparation phase should consume at least 60% of your total project time—it’s that critical to long-term success.
What’s the optimal time of year for applying axle undercoating?
Early fall provides ideal conditions: moderate temperatures, low humidity, and timing before winter salt application. Surface temperatures between 60-80°F allow proper curing without accelerating solvent loss. Avoid application when rain is forecast within the product’s cure window (typically 24-72 hours). Spring application is acceptable but less ideal—you’ll miss protection during the harshest corrosion season. Never apply in winter; cold metal prevents adhesion, and immediate exposure to road salt contaminates uncured coating. If you must apply in summer, work in early morning hours before surfaces become too hot.
How much should I expect to pay for professional axle undercoating services?
Professional axle undercoating typically costs $400-800 when included with full undercarriage treatment. Standalone axle service may run $150-300 depending on vehicle type. This price includes proper preparation, professional-grade products, and often a warranty. High-end shops using polyurethane systems may charge $1000+ but provide 8-10 year warranties. While DIY seems cheaper initially, factor in equipment costs and your time. Professional application makes economic sense for single vehicles or when severe rust requires media blasting expertise. Many shops offer free annual inspections, adding value beyond the initial application.
Which performs better on axles: rubberized or wax-based undercoating?
Each excels in different scenarios. Rubberized coatings provide superior impact resistance and sound deadening, making them ideal for daily drivers and off-road vehicles that face gravel bombardment. They build thicker and last longer between applications. Wax-based formulations offer unmatched creep and self-healing properties, actively flowing into chips and seams. They perform exceptionally in salt-belt regions where complete coverage is critical. Wax-based products require annual reapplication but provide more consistent protection during their service life. For maximum protection, some enthusiasts apply a wax-based product first for penetration, then topcoat with rubberized material for durability.
How long must I wait before driving my vehicle after applying undercoating?
Minimum wait time is 24-48 hours for most solvent-based products, but full cure may require 7 days. Driving sooner risks sling-off onto exhaust components (creating smoke and fire hazards) and allows road grime to embed in uncured coating. Polyurethane systems often allow driving after 12-24 hours but won’t reach full chemical resistance for a week. Wax-based products remain permanently soft but can be driven after 24 hours if excess is wiped from suspension components. Always verify specific product cure schedules, and avoid pressure washing or heavy rain for at least 2 weeks regardless of product type.
Will undercoating interfere with my brake components or ABS sensors?
Proper masking prevents interference, but overspray can cause serious issues. Undercoating on brake rotors, drums, or friction surfaces creates hazardous braking performance reduction. Coating inside wheel cylinders or calipers can seize pistons. ABS sensors coated with magnetic material may generate false readings. Always remove brake drums or rotors during application, and mask backing plates completely. Use aluminum foil (not plastic) to seal brake components, as solvents can permeate plastic sheeting. If overspray occurs on friction surfaces, remove it immediately with brake cleaner—never attempt to burn it off through driving.
Can I substitute truck bed liner for axle undercoating?
While both products protect metal, they’re formulated for different environments. Bed liners prioritize abrasion resistance and texture for cargo grip, using rigid polymers that crack when flexed. Axles experience constant vibration and flex, requiring more elastic formulations. Bed liners also lack corrosion inhibitors specifically designed for automotive environments. Some polyurethane undercoatings share chemistry with bed liners but include plasticizers and anti-corrosion additives for automotive use. If you choose a bed liner product, ensure it’s rated for undercarriage use and contains proper corrosion inhibitors—not all do.
What’s the best method for removing old, failing undercoating from axles?
Mechanical removal works best for most coating types. Use a needle scaler for thick asphalt coatings, which shatters the material off in chunks. Wire wheels on angle grinders remove rubberized coatings but generate significant dust—wear proper respirators. For wax-based products, heat guns soften the material for scraper removal. Chemical strippers exist but are messy and environmentally hazardous. Avoid sandblasting unless you can collect all media and waste; it’s overkill and can warp thin axle tubes. After removal, treat the bare metal with rust converter before applying new coating. Expect this process to take 4-6 hours for a typical rear axle assembly.
Does applying aftermarket undercoating void my vehicle’s factory warranty?
Aftermarket undercoating doesn’t automatically void warranties, but improper application can cause denial of related claims. The Magnuson-Moss Warranty Act prohibits manufacturers from denying coverage simply because you applied aftermarket protection. However, if undercoating applied to axle vents causes differential failure, or if coating on ABS sensors triggers brake system faults, those specific repairs may be denied. Never coat factory breather tubes internally, and avoid covering any sensors or wiring connectors. Keep detailed records of products used and application dates. Some dealerships offer undercoating services themselves, eliminating warranty concerns entirely.