tire lettering kits have evolved from a nostalgic nod to classic muscle cars into a full-blown customization movement that’s taking over modern car culture. Whether you’re aiming for that vintage motorsport aesthetic or want to make a bold personal statement, these kits offer an affordable way to transform your vehicle’s presence without permanent modifications. But not all tire lettering solutions are created equal, and choosing the right one requires more than just picking a color that matches your paint.
As car care enthusiasts know, the difference between a professional-looking installation and a peeling, discolored mess comes down to understanding materials, proper preparation, and realistic expectations. This comprehensive guide breaks down everything you need to know about tire lettering kits—from the science behind adhesive compounds to the legal considerations that could impact your daily driver.
Top 10 Tire Lettering Kits
Detailed Product Reviews
1. White tire Paint Marker for Car Tire Lettering - 4 Pack - Permanent Tire Paint Pens with Weatherproof Ink Designed to Last on Car Tires and Many Other Materials
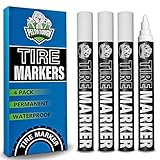
Overview: The White Tire Paint Marker 4-Pack offers an affordable DIY solution for adding custom lettering to your tires. These permanent paint pens feature a specialized weatherproof ink formula designed to withstand harsh driving conditions. Suitable for cars, trucks, bikes, and ATVs, this kit provides enough material for a complete vehicle application with one pen left for future touch-ups.
What Makes It Stand Out: The reversible felt tip design provides exceptional versatility, featuring a fine point for intricate details and tight spaces alongside a broader side for quick coverage. The four-pen packaging is particularly thoughtful—most vehicles require three pens for all four tires, leaving one dedicated for maintenance. The one-year satisfaction guarantee demonstrates the manufacturer’s confidence in the product’s durability.
Value for Money: At $8.99 for four pens ($2.25 each), this represents exceptional value compared to $150+ permanent sticker kits. While paint requires occasional reapplication, the cost-per-application remains minimal. For budget-conscious enthusiasts or those experimenting with tire aesthetics, this offers professional-looking results at a fraction of the premium alternative cost.
Strengths and Weaknesses: Pros: Extremely affordable; reversible tip allows precision and speed; versatile across all tire types; weatherproof formula; includes bonus pen for touch-ups; risk-free guarantee. Cons: Paint may fade faster than rubber decals; requires careful surface preparation; application can be messy for beginners; not truly permanent like molded lettering.
Bottom Line: This paint marker kit delivers impressive results for casual enthusiasts and budget-minded drivers. While not as durable as premium sticker kits, the combination of affordability, ease of use, and guaranteed satisfaction makes it an excellent entry point into tire customization. Perfect for weekend projects and show cars.
2. Tire Stickers - Create Your Own Custom Tire Lettering Add-On Accessory - DIY/Easy/Glue & 2oz Touch-Up Cleaner - Custom Sizing/White (Pack of 8)

Overview: This custom tire lettering add-on accessory from Tire Stickers lets you create personalized white lettering for your vehicle. The kit includes DIY application materials, specialized glue, and a 2-ounce touch-up cleaner. Designed for enthusiasts seeking a unique aesthetic, this premium solution transforms ordinary tires into custom statements without replacing the entire tire.
What Makes It Stand Out: The ability to create completely custom lettering sets this apart from pre-designed kits. Unlike generic options, you can personalize text, sizing, and messaging to match your vehicle’s personality. The inclusion of professional-grade adhesive and specialized cleaner ensures proper installation and maintenance, reflecting Tire Stickers’ expertise in permanent tire modification.
Value for Money: At $154.99, this sits at the premium end of tire customization. While significantly more expensive than paint markers, the professional-grade rubber decals offer superior longevity and a raised, three-dimensional appearance that paint cannot replicate. For serious enthusiasts wanting bespoke branding, the investment delivers authentic motorsport aesthetics.
Strengths and Weaknesses: Pros: Fully customizable design; professional rubber construction; includes specialized glue and cleaner; authentic raised-letter appearance; permanent application. Cons: Premium pricing; complex multi-step application; limited feature details provided; requires patience and precision; potential waste if measurements are incorrect.
Bottom Line: This custom kit is ideal for dedicated automotive enthusiasts prioritizing personalization and durability over cost. The professional finish justifies the price for show vehicles and performance builds. However, the complexity and expense make it less suitable for casual users or first-time experimenters.
3. Tire Stickers - FleXement Tire Lettering Application Adhesive Glue - 20gm

Overview: The FleXement Tire Lettering Adhesive is a specialized glue engineered specifically for applying rubber tire decals. This 20-gram tube provides sufficient adhesive for eight 1.25-inch tire stickers, designed to create permanent bonds with rubber surfaces under extreme temperature fluctuations and harsh driving conditions.
What Makes It Stand Out: As the officially recommended adhesive for Tire Stickers products, this formula is uniquely engineered for radial tire rubber, functioning similarly to a tire patch. Its ability to withstand extreme hot and cold temperatures ensures decals remain secure through track days, daily commuting, and seasonal weather changes—something standard adhesives cannot guarantee.
Value for Money: Priced at $16.99 ($24.27 per ounce), this specialized adhesive commands a premium over generic alternatives. However, the temperature-resistant formulation and precise compatibility with tire decals justify the cost. Considering a botched application from inferior glue could ruin $150+ sticker kits, this insurance policy proves worthwhile for serious installations.
Strengths and Weaknesses: Pros: Specifically formulated for tire rubber; extreme temperature resistance; strong permanent bond; trusted brand compatibility; adequate quantity for multiple decals. Cons: Brand-specific limitation; relatively expensive per ounce; requires careful application; not reusable once opened; limited to 1.25-inch decal size reference.
Bottom Line: This adhesive is essential for anyone installing Tire Stickers’ permanent lettering kits. While pricey, its specialized formulation prevents decal failure and protects your larger investment. Don’t risk premium decals with hardware store glue—this purpose-built solution ensures professional, lasting results that survive real-world driving conditions.
4. Tire Stickers Dodge // Tire Lettering Kit - Genuine USA Made DIY Permanent Tire Lettering with Glue & 2oz Touch-Up Cleaner / 19-21 Inch Wheels / 1.25 Inches/White / 8 Pack

Overview: The Tire Stickers Dodge kit delivers authentic OEM-style permanent tire lettering specifically designed for Dodge enthusiasts. This comprehensive DIY package includes pre-formed white rubber decals sized for 19-21 inch wheels, specialized FleXement glue, a 2-ounce touch-up cleaner, and application accessories for professional results that enhance your vehicle’s aggressive styling.
What Makes It Stand Out: This kit offers brand-specific authenticity that generic lettering cannot match. The precisely sized 1.25-inch letters are engineered to complement Dodge’s aggressive styling, creating a factory-custom appearance. The inclusion of professional-grade adhesive and cleaner, combined with pre-curved transfer film, ensures even novice users achieve aligned, bubble-free installation.
Value for Money: At $154.99, this premium kit matches other brand-specific offerings from Tire Stickers. While substantially more expensive than paint alternatives, the three-dimensional rubber construction provides unmatched durability and authentic motorsport aesthetics. For Dodge owners seeking factory-quality appearance, the investment eliminates guesswork and delivers guaranteed compatibility.
Strengths and Weaknesses: Pros: Perfectly sized for Dodge vehicles; authentic raised-rubber construction; complete application kit included; professional-grade materials; permanent weatherproof design. Cons: Brand-specific appeal limits versatility; premium pricing; requires meticulous surface preparation; permanent commitment; potential sizing issues with non-standard tire brands.
Bottom Line: This Dodge-specific kit is the definitive choice for Mopar enthusiasts wanting authentic, permanent tire branding. The professional finish and perfect fitment justify the premium cost for dedicated owners. However, casual users or those with multiple vehicle brands may prefer universal options for greater flexibility.
5. Tire Stickers Chevrolet Racing - DIY Permanent Rubber Tire Lettering Kit with Glue & 2oz Bottle Touch-Up Cleaner / 19-21 Inch Wheels / 1.25 Inches/White/Red / 8 Pack

Overview: The Chevrolet Racing tire lettering kit provides a premium DIY solution for adding authentic motorsport branding to your tires. This comprehensive package includes high-quality raised rubber letters in white and red, pre-spaced on curved transfer film, FleXement adhesive, gloves, instructions, and 2-ounce touch-up cleaner—everything needed for professional installation on 19-21 inch wheels.
What Makes It Stand Out: The racing-specific Chevrolet branding delivers an aggressive, track-ready aesthetic that paint markers cannot replicate. Each letter is pre-attached to transparent transfer film, ensuring perfect spacing and alignment during application. Developed by enthusiasts and supported by tire manufacturers, this genuine Tire Stickers product promises durability without fading or browning under extreme conditions.
Value for Money: At $154.99, this kit represents a significant investment, but includes all necessary components for permanent installation. Unlike piecing together individual elements, this package eliminates compatibility concerns. The made-in-USA quality and one-inch sizing that fits most tire dimensions provide versatility across Chevrolet models, justifying the premium for serious enthusiasts.
Strengths and Weaknesses: Pros: Authentic racing aesthetics; pre-spaced letters ensure alignment; complete installation kit; extreme condition durability; made in USA; trusted brand quality. Cons: Premium price point; permanent application requires commitment; brand-specific design; monthly maintenance recommended; complex installation process.
Bottom Line: This Chevrolet Racing kit is the ultimate choice for Bowtie enthusiasts seeking authentic, durable tire branding. The professional raised-rubber construction and complete package justify the investment for show cars and performance vehicles. While application demands patience, the stunning results and longevity make it worth the effort for dedicated Chevy fans.
6. SELEAD Tire Marker White Red - 8 Pack Paint Pens for Car Tires Lettering, Premium Professional Oil Based Ink, Waterproof Quick Drying Non-Fading Permanent Markers

Overview: The SELEAD Tire Marker set offers an accessible entry point into tire customization through eight oil-based paint pens designed for rubber surfaces. This budget-friendly alternative to permanent decals allows car enthusiasts to hand-letter tire sidewalls with white or red accents. The aluminum construction and 3mm medium tips provide a practical tool for DIY detailing without commitment to permanent modifications.
What Makes It Stand Out: Unlike permanent rubber decals, these markers deliver flexibility for experimentation and easy correction. The premium oil-based formulation resists water, UV degradation, and temperature fluctuations, maintaining visibility through regular car washes. The aluminum shell prevents premature drying, extending the 5ml ink capacity’s lifespan. Beyond tires, the versatile markers function on metal, wood, plastic, and glass, making them a multi-purpose garage staple. The eight-pack quantity accommodates mistakes and creative exploration across multiple vehicles or surfaces.
Value for Money: At $15.99, this set dramatically undercuts permanent lettering kits by over 85%, making tire customization accessible to budget-conscious enthusiasts. While requiring periodic touch-ups every few months, the cost-per-application remains negligible compared to $100+ decal kits. The multi-surface versatility eliminates need for separate markers, delivering exceptional utility for casual users not seeking lifelong commitment to a single design.
Strengths and Weaknesses: Pros: Extremely affordable; easy application without specialized tools; waterproof and UV-resistant; aluminum prevents drying; works on diverse materials; forgiving for beginners. Cons: Requires reapplication every 2-4 months; hand-lettered appearance less crisp than molded decals; inconsistent coverage on heavily textured tires; cannot achieve raised 3D effect; improper sealing causes tip drying.
Bottom Line: These markers serve casual enthusiasts and beginners perfectly, offering low-risk tire customization at an unbeatable price. Accept the maintenance trade-off for creative freedom and affordability.
7. Tire Stickers Dodge // Tire Lettering Kit - Genuine USA Made DIY Permanent Tire Lettering with Glue & 2oz Touch-Up Cleaner / 19-21 Inch Wheels / 1.00 Inches/White / 4 Pack
Overview: This official Tire Stickers kit delivers permanent raised rubber lettering for Dodge enthusiasts seeking factory-quality aesthetics. The comprehensive package includes pre-spaced decals, specialized FleXement adhesive, application gloves, detailed instructions, and touch-up cleaner for 19-21 inch wheels. Each 1.00-inch white letter attaches via transparent transfer film, ensuring precise alignment and professional results without professional installation costs.
What Makes It Stand Out: Genuine raised rubber construction distinguishes this from painted alternatives, creating authentic depth and texture that mimics OEM tire branding. The FleXement glue forms a chemical bond similar to tire patches, surviving extreme driving conditions, track days, and daily abuse. Pre-spaced letters on curved transfer film eliminate frustrating individual placement, while the included cleaner addresses installation errors. USA manufacturing ensures consistent quality control and material integrity.
Value for Money: At $109.99, the kit commands premium pricing but delivers permanent results that eliminate recurring costs. Compared to $15-30 marker sets requiring quarterly reapplication, this investment pays for itself within two years for committed users. Professional installation would cost $200-400, making DIY approach economical. The durability and authentic appearance justify the expense for show cars and dedicated builds.
Strengths and Weaknesses: Pros: Permanent, weatherproof solution; authentic raised rubber appearance; complete application kit included; pre-spaced for easy alignment; survives track use; USA-made quality. Cons: Labor-intensive 1-2 hour installation; expensive initial investment; sizing specific to 19-21" wheels; difficult removal if design preferences change; requires meticulous surface preparation.
Bottom Line: For Dodge owners demanding permanent, show-quality results, this kit justifies its premium price through durability and authentic aesthetics. Commit to the installation process for professional-grade customization.
8. Tire Stickers Dodge // Tire Lettering Kit - Genuine USA Made DIY Permanent Tire Lettering with Glue & 2oz Touch-Up Cleaner / 19-21 Inch Wheels / 1.50 Inches/White / 8 Pack
Overview: This upsized Tire Stickers kit provides larger 1.50-inch raised rubber letters for Dodge enthusiasts wanting maximum visual impact on 19-21 inch wheels. The eight-pack configuration supplies enough decals for all four tires’ sidewalls, doubling the coverage of standard kits. Like its smaller sibling, this USA-made package includes FleXement adhesive, application gloves, instructions, and touch-up cleaner, but scales everything for bolder presentation.
What Makes It Stand Out: The 50% size increase over standard 1.00-inch letters creates dramatic visibility from greater distances, essential for show vehicles and aggressive builds. Eight decals allow comprehensive branding on both inner and outer sidewalls or provide spares for installation errors. The same professional-grade raised rubber construction and tire-patch-strength adhesive ensure this larger format maintains durability despite increased wind resistance and road debris exposure.
Value for Money: Priced at $149.99 ($18.75 per count), the kit commands a 36% premium over the 1.00-inch version but delivers proportionally larger letters and double the quantity. For builds requiring maximum sidewall presence, the cost-per-square-inch remains reasonable compared to custom alternatives. The eight-pack value becomes apparent when lettering all four tires completely, eliminating need for separate purchases.
Strengths and Weaknesses: Pros: Superior visibility and impact; comprehensive eight-pack coverage; same permanent durability; pre-spaced alignment system; professional raised-rubber aesthetics. Cons: Highest price point in category; may appear oversized on conservative builds; increased material vulnerability to curb damage; labor-intensive application multiplied across eight sections; requires flawless surface prep for large format.
Bottom Line: Choose this kit for show-stopping presence and complete tire coverage. The investment matches its ambition—perfect for builds where subtlety isn’t the goal.
9. Tire Stickers Nitto Tire Lettering - DIY Permanent Glue On Rubber Decals for Tires with Glue & 2oz Bottle Touch-Up Cleaner / 19-21 Inch Wheels / 1.00 Inches/White / 8 Pack

Overview: This Nitto-branded Tire Stickers kit enables authentic manufacturer-style lettering for owners of Nitto tires, delivering eight permanent 1.00-inch white rubber decals for 19-21 inch wheels. The package includes the same professional-grade FleXement adhesive, touch-up cleaner, gloves, and instructions found in Dodge-branded kits, but features official Nitto logos and typography. This authenticity transforms aftermarket tires into showroom-fresh appearances.
What Makes It Stand Out: Official licensing ensures accurate font reproduction and brand-correct styling that generic kits cannot replicate. The eight-pack configuration letters all four tires’ inner and outer sidewalls, doubling the visual impact. Tire Stickers’ proven raised-rubber construction and patch-quality adhesive guarantee durability identical to OEM applications seen on performance vehicles. The pre-curved transfer film accommodates tire curvature perfectly, preventing bubbling or misalignment.
Value for Money: At $154.99 ($19.37 per count), this kit carries the highest per-unit cost in the category, reflecting official branding rights and eight-piece quantity. While 50% more expensive than four-pack Dodge kits, the value emerges for Nitto purists seeking authenticity. Replicating this through tire replacement would cost hundreds more, making it economical for brand loyalty.
Strengths and Weaknesses: Pros: Official Nitto branding; authentic typography; comprehensive eight-pack coverage; permanent durability; professional-grade materials; pre-spaced for accuracy. Cons: Premium pricing for brand licensing; limited appeal to non-Nitto owners; same labor-intensive installation; sizing restricted to 19-21" wheels; removal damages decals.
Bottom Line: Essential for Nitto tire owners prioritizing brand authenticity. The premium validates official licensing and complete coverage—accept no substitutes for genuine representation.
10. Tire Stickers Toyo Tires Tire Lettering Add-On Car Accessory - DIY Kit with Glue & 2oz Touch-Up Cleaner / 14-16 Inch Wheels / 1.25 Inches/White / 4 Pack

Overview: This Toyo Tires-specific kit scales Tire Stickers’ permanent lettering system for compact vehicles with 14-16 inch wheels, featuring four 1.25-inch white rubber decals. Specially proportioned for smaller sidewalls, the kit includes FleXement adhesive, touch-up cleaner, gloves, and instructions. The sizing prevents overwhelming diminutive tire profiles while maintaining brand authenticity for Toyo tire owners.
What Makes It Stand Out: Proportional sizing addresses a market gap—most kits target 18"+ wheels, leaving compact car enthusiasts with ill-fitting options. The 1.25-inch height balances visibility and scale for smaller performance vehicles and daily drivers. Official Toyo branding ensures factory-correct appearance, while the same raised-rubber construction and chemical adhesive provide durability scaled appropriately for lighter vehicles’ operating conditions.
Value for Money: At $109.99 for four decals, pricing aligns with larger-wheel kits despite specialized sizing. The value proposition centers on proper fitment rather than quantity—incorrectly sized generic kits would appear disproportionate and unprofessional. For compact car owners, this targeted solution eliminates trial-and-error sizing, justifying the premium through guaranteed compatibility.
Strengths and Weaknesses: Pros: Perfectly proportioned for 14-16" wheels; official Toyo branding; permanent durability; professional-grade adhesive; pre-spaced application system; prevents oversized appearance. Cons: Limited to specific wheel size range; only four pieces (single tire set); same installation complexity; premium price for smaller quantity; brand-specific only.
Bottom Line: Compact car owners with Toyo tires finally have a properly sized solution. The premium purchases perfect proportions and authenticity—critical for smaller wheel applications where scale matters most.
What Are Tire Lettering Kits and Why Are They Trending?
Tire lettering kits are specialized decals or bonded rubber appliqués designed to adhere to your tire’s sidewall, creating the iconic raised-letter look that was once reserved for high-performance racing tires. Originally, these markings were molded directly into the rubber during manufacturing—a feature found on legendary tires like the Goodyear Polyglas and BF Goodrich Radial T/A. Today’s aftermarket solutions democratize this aesthetic, allowing any vehicle owner to achieve the look without buying specific tire models.
The resurgence in popularity stems from several factors. Social media car culture has amplified visual modifications, while modern adhesive technologies have made installations more durable than ever. Additionally, the rise of restomod builds and track-day culture has created demand for authentic motorsport details. Unlike traditional white wall tires, lettering kits offer precise customization of fonts, colors, and content, making them a versatile tool for personal branding or brand sponsorship displays.
Types of Tire Lettering Kits: Decals vs. Permanent Solutions
Understanding the fundamental categories is your first step toward making an informed decision. The market primarily offers two distinct approaches, each with its own installation process, longevity, and price point.
Peel-and-Stick Decal Systems
These are the most common and accessible options, featuring thin, flexible stickers made from specialized vinyl or rubber compounds. They work similarly to traditional decals but are engineered to withstand tire flexing and road debris. Most kits use pressure-sensitive adhesives that activate upon application, requiring no heat or special equipment. They’re ideal for DIY enthusiasts and those who like to change their look seasonally.
Heat-Activated Bonding Systems
Professional-grade kits often employ a heat-activated adhesive that essentially vulcanizes the lettering to the tire sidewall. This creates a semi-permanent bond that can last for years but typically requires careful application with a heat gun and roller tool. Some advanced systems even use two-part adhesives that chemically bond the rubber lettering to the tire, creating a seamless appearance that mimics factory-molded text.
Material Matters: Understanding Rubber Compound Quality
The composition of your tire lettering kit determines everything from flexibility to fade resistance. Premium kits use actual rubber compounds rather than simple vinyl, allowing the lettering to expand and contract with your tire’s natural movement. This elasticity prevents cracking and edge lift—two of the most common failure points.
Look for materials described as “UV-stabilized” or “automotive-grade EPDM rubber.” These formulations resist ozone degradation and maintain their color integrity even after months of sun exposure. Cheaper vinyl alternatives might look identical on day one but can turn brittle within weeks, especially in climates with extreme temperature fluctuations. The thickness also matters; lettering that’s too thin won’t provide the raised, three-dimensional look, while excessively thick material may interfere with tire flex and create stress points.
Size and Fitment: Getting the Perfect Proportions
Nothing screams amateur installation like disproportionate lettering that overwhelms or disappears against your tire sidewall. Proper sizing requires understanding your tire’s aspect ratio and overall diameter, not just the rim size. A 225/45R17 tire has vastly different sidewall real estate compared to a 225/75R15, even though both fit 17-inch and 15-inch wheels respectively.
Measuring Your Sidewall Space
Use a flexible measuring tape to determine the flat area between the tire’s shoulder ribs and the rim flange. This measurement tells you the maximum height your lettering can achieve without wrapping into curved surfaces that cause adhesion problems. Most quality manufacturers provide sizing charts based on tire specifications rather than universal measurements. Pay attention to letter height, which typically ranges from 0.5 inches for subtle OEM-style markings to 1.5 inches for aggressive show-car looks.
Color Options and Finishes: Beyond Basic White
While classic white remains the most popular choice, modern manufacturing has opened a spectrum of possibilities. Metallic finishes like chrome and gold have gained traction in the stance and show car scenes, while fluorescent colors appeal to motorsport enthusiasts who want maximum visibility at track events. Some manufacturers even offer color-matching services to coordinate with your vehicle’s paint code.
Finish Textures and Their Implications
Gloss finishes provide that wet-look shine but can highlight imperfections and tend to yellow faster under UV exposure. Matte finishes offer a more understated, factory appearance and generally hide dirt better. Textured finishes, which simulate the grain of molded tire text, provide the most authentic look but can be challenging to clean. Consider your maintenance commitment when selecting a finish—glossy white letters on a daily driver require weekly attention to maintain their pop.
Installation Methods: Peel-and-Stick vs. Heat-Activated
Your chosen installation method directly impacts durability, appearance, and whether you’ll need professional help. Each approach demands specific conditions and tools for optimal results.
The Peel-and-Stick Process
This method requires meticulous surface preparation. The tire must be thoroughly cleaned with a degreasing agent—not just soap and water—to remove mold release agents and silicone-based tire dressings. After cleaning, a tack solution is often applied to allow repositioning before final adhesion. The key is working in small sections, using a roller tool to eliminate air pockets and ensure uniform pressure. Ambient temperature should be between 65-85°F; too cold and the adhesive won’t flow, too hot and it sets before you can position correctly.
Heat-Activated Professional Installation
This process demands more skill but rewards with superior longevity. After cleaning and priming, the lettering is positioned and tacked in place. A heat gun set to a specific temperature (usually indicated by the manufacturer) softens both the tire surface and the lettering’s adhesive layer. As it cools, a roller tool is used to create a mechanical bond. Some systems require curing time where the vehicle shouldn’t be driven for 24-48 hours. The benefit is a bond that can withstand power washing and harsh track conditions.
Durability Factors: What Makes a Kit Last?
Longevity isn’t just about adhesive strength—it’s a combination of material science and proper installation. Edge sealing is perhaps the most critical factor. Quality kits include a separate edge sealant or have inherently sealed edges that prevent moisture and dirt from infiltrating underneath. This is where most budget kits fail; the edges begin to lift after the first rainstorm, creating a snowball effect of peeling.
The letter construction itself matters. Multi-layered lettering with a base adhesion layer, color layer, and protective topcoat will outlast single-layer alternatives. Flexibility testing is another indicator—bend the lettering 180 degrees; if it cracks or shows a white stress line, it won’t survive the constant flexing of a tire sidewall. Some premium kits even incorporate Kevlar strands for tear resistance, though this is overkill for street applications.
Weather Resistance: Performance in Extreme Conditions
Your local climate should heavily influence your purchasing decision. Tire lettering in Phoenix faces different challenges than in Minneapolis. UV radiation is the primary enemy, breaking down polymers and causing colors to fade. In desert environments, temperatures exceeding 120°F on hot asphalt can soften adhesives to the point of failure. Conversely, northern climates introduce road salt and magnesium chloride, which can corrode adhesives and cause chemical breakdown.
Seasonal Considerations
If you live in an area with harsh winters, consider whether you’ll run the lettering year-round. Some adhesives become brittle in sub-freezing temperatures and may crack when the tire flexes over potholes. Water ingress is another concern—repeated freeze-thaw cycles can expand underneath the lettering, forcing it off the tire. Premium kits designed for all-weather use typically have a operating temperature range listed in their specifications; match this to your regional extremes.
Maintenance and Cleaning: Preserving Your Investment
Proper care can double the lifespan of your tire lettering, yet most owners sabotage their investment with improper cleaning techniques. The first rule: never apply tire shine or silicone-based dressings over the lettering. These products contain solvents that attack the adhesive and cause yellowing. Instead, use water-based tire dressings applied carefully with a small brush, avoiding the lettering entirely.
Cleaning Protocols
Use a dedicated tire cleaner that’s pH-neutral and free of harsh chemicals. Apply with a soft-bristled brush, working from the lettering outward to avoid lifting edges. For stubborn brake dust, a dedicated iron remover is safe if you rinse immediately. Pressure washing is acceptable if you maintain a 12-inch distance and avoid direct spray at the letter edges. Inspect monthly for edge lift or cracking; catching issues early allows for spot repairs with adhesive promoter before total failure occurs.
Removal and Replacement: Planning for the Long Term
Even the best tire lettering isn’t permanent. Planning for eventual removal prevents tire damage and makes the process significantly easier. Most quality kits are designed to last 2-5 years depending on conditions, after which adhesive breakdown makes replacement advisable rather than optional.
Safe Removal Techniques
Never pull lettering off dry—this can strip the tire’s outer rubber layer. Instead, use a heat gun to warm the lettering to approximately 150°F, which softens the adhesive. Peel slowly at a 45-degree angle, applying heat as you go. Adhesive residue can be removed with a citrus-based adhesive remover and a plastic razor blade. Avoid petroleum-based solvents, which can degrade the tire rubber itself. Once clean, the tire must be thoroughly decontaminated before new lettering installation; residual old adhesive will prevent proper bonding.
Cost Considerations: Budget vs. Premium Options
Price ranges vary dramatically—from $20 budget packs on auction sites to $200+ professional-grade kits. Understanding what you’re paying for helps avoid disappointment. At the entry level, you’re typically getting thin vinyl decals with standard adhesives and limited color options. These might last a season on a garage-kept show car but will disappoint on a daily driver.
What Premium Pricing Delivers
Mid-range kits ($60-$120) offer rubber compounds, better UV stabilizers, and more precise fitment. This is the sweet spot for most enthusiasts. Premium kits justify their cost through custom sizing, color-matching services, and advanced adhesives that include primer systems. They also often come with installation tools and edge sealant. Consider the total cost of ownership—a $150 kit that lasts four years is cheaper than replacing a $40 kit annually, not to mention the labor savings.
Legal Considerations: DOT Regulations and Street Legality
Before committing to tire lettering, understand that regulations vary by jurisdiction. The Department of Transportation requires certain information to remain visible on the tire sidewall: DOT code, size designation, load index, and speed rating. Your lettering cannot obscure this required information, which limits placement options.
State and Local Ordinances
Some states have specific visibility laws regarding tire modifications. For example, certain jurisdictions prohibit any tire modifications that could be considered “distracting” to other drivers, which could theoretically include reflective or metallic finishes. Commercial vehicles face stricter regulations—adding brand logos might require commercial registration or violate company vehicle policies. Always check local laws, especially if your lettering includes profanity or controversial content, as this has led to fix-it tickets in some municipalities.
Customization Options: Fonts, Logos, and Personal Branding
Beyond pre-made kits, many manufacturers offer custom design services. This is particularly valuable for sponsored vehicles or businesses using company cars as marketing tools. You can replicate OEM tire branding for restorations or create completely original designs. The process typically involves submitting vector artwork and tire specifications for a quote.
Design Constraints and Considerations
Extremely fine details or script fonts may not translate well to the textured surface of a tire sidewall. Letters should be at least 0.25 inches wide to ensure proper adhesion and visibility. Multi-color designs are possible but increase cost and complexity, as each color requires separate registration during manufacturing. Some companies offer domed or 3D-effect lettering by layering materials, though this adds weight and can affect tire balance at high speeds—a consideration for track use.
Common Installation Mistakes and How to Avoid Them
Even quality kits fail when installed incorrectly. The most frequent error is inadequate surface preparation. Tires ship with mold release agents that repel adhesives, and these residues can persist even after multiple washes. Use a dedicated tire prep solution or isopropyl alcohol to ensure a contaminant-free surface.
Alignment and Positioning Errors
Eyeballing the placement leads to crooked lettering that becomes obvious as the wheel rotates. Create a template using painter’s tape to mark the baseline before removing the decal backing. Another critical mistake is stretching the material during application. Tire lettering should be applied with zero tension; stretching causes the material to contract back to its original shape, lifting edges. Work in a temperature-controlled environment and take your time—rushing the job accounts for 90% of installation failures.
Expert Tips for Achieving Professional Results
Professionals achieve showroom-quality results through techniques that aren’t always included in instruction sheets. One key trick is to let the tire and lettering acclimate to the same temperature for at least 24 hours before installation. This prevents differential expansion that can cause misalignment. Another pro move is to inflate the tire to its maximum PSI before application, which stretches the sidewall and provides a flatter working surface.
Advanced Application Strategies
Use a slip solution (water with a few drops of baby shampoo) for the initial positioning. This allows you to slide the lettering into perfect alignment before squeegeeing out the solution and activating the adhesive. For permanent kits, apply a thin layer of tire primer to the sidewall before installation—this creates a chemical bond that dramatically improves longevity. Finally, after installation, avoid driving for at least 24 hours and keep the vehicle out of direct sunlight during the curing period. This patience pays dividends in durability.
Frequently Asked Questions
How long do tire lettering kits typically last? Quality rubber-based kits last 2-5 years with proper care, while budget vinyl options may show wear within 6-12 months. Lifespan depends on climate, driving habits, and maintenance. Daily drivers in harsh sun should expect 2-3 years, whereas garage-kept show cars can see 5+ years of pristine appearance.
Can I install tire lettering myself or do I need a professional? Peel-and-stick kits are very DIY-friendly with patience and proper preparation. Heat-activated permanent systems benefit from professional installation due to the precision required with temperature control and timing. If you’re comfortable with detailed work and have a clean workspace, DIY is absolutely achievable for most kits.
Will tire lettering void my tire warranty? Generally, no—tire manufacturers cannot void warranties for cosmetic modifications unless the lettering directly causes a failure. However, if you damage the tire during installation or removal, that damage wouldn’t be covered. Always document your installation process and keep the original tire information visible as required by DOT regulations.
Can I wash my car normally with tire lettering installed? Yes, but avoid automatic car washes with spinning brushes that can catch letter edges. Touchless washes are safe, and hand washing is ideal. Never spray directly at the lettering with a pressure washer closer than 12 inches, and skip silicone-based tire shines entirely as they degrade adhesives.
Do tire lettering kits work on all tire brands and models? Most kits are designed for standard sidewall profiles, but extreme performance tires with very short sidewalls or heavily textured surfaces can present challenges. Low-profile tires (below a 40 aspect ratio) have minimal flat surface area, making adhesion difficult. Always check manufacturer fitment guides for your specific tire size and brand.
How do I choose the right size lettering for my tires? Measure the flat area of your sidewall between the shoulder tread and rim flange. Lettering should occupy about 60-70% of this height for proper proportions. Most manufacturers provide sizing charts based on tire aspect ratios—use these rather than guessing. When in doubt, slightly smaller is better than too large.
Are white tire letters more difficult to keep clean? White shows brake dust and road grime more readily than darker colors, requiring weekly cleaning to maintain brightness. However, modern materials resist staining better than vintage whitewalls. Using a dedicated tire cleaner and avoiding dressings that contain petroleum solvents will keep them looking fresh with minimal extra effort.
Can tire lettering be removed without damaging the tire? Absolutely, when done correctly. Use controlled heat (150-180°F) to soften the adhesive and peel slowly at a 45-degree angle. Never pull cold lettering or use razor blades on the tire surface. Adhesive residue can be removed with citrus-based cleaners. The tire may show slight shadowing where the lettering blocked UV exposure, but this fades over time.
Do tire lettering kits affect tire performance or safety? Properly installed lettering adds negligible weight (typically under 2 ounces per tire) and doesn’t affect balance or performance. The key is ensuring letters don’t extend into the tire’s flex zones or cover required DOT information. Poorly installed lettering that lifts can create a minor imbalance, which is why edge adhesion is critical.
What’s the difference between permanent and temporary tire lettering? Temporary kits use pressure-sensitive adhesives that can be removed relatively easily and are designed for 1-2 year use. Permanent systems chemically bond with the tire rubber through heat activation or vulcanization, creating a 3-5 year bond that withstands racing conditions and harsh weather. The choice depends on your commitment to the look and driving intensity.