Nothing ages a car faster than foggy, yellowed headlights. Beyond the cosmetic hit, oxidized lenses can slash light output by 70 %—turning night driving into a guessing game and inviting tickets in jurisdictions with strict beam-intensity laws. The good news? Modern headlight restoration kits with UV protection have turned what used to be a $200 body-shop job into a Saturday-morning driveway project that costs a fraction and lasts for years…when you choose the right kit.
Below, we’ll pull back the lens cover on what separates a genuinely long-lasting restoration from a temporary polish that fizzles after the first car wash. You’ll learn which chemical technologies block UV rays, how to match abrasive grits to your headlight’s starting condition, and why curing time matters as much as the price tag. Consider this your master blueprint for buying clarity, safety, and curb appeal in one box—without gambling on marketing hype.
Top 10 Headlight Restoration Kit
Detailed Product Reviews
1. CERAKOTE® Ceramic Headlight Restoration Kit – Guaranteed To Last As Long As You Own Your Vehicle – Brings Headlights Back to Like New Condition - No Power Tools Required - 10 Wipe Kit

Overview:
Clouded, yellow headlights can drop your night-time visibility and curb appeal in one stroke. Cerakote’s 10-wipe box promises showroom clarity plus lifetime UV armor—without a buffer in sight. The three-stage kit marries disposable convenience with the same SiO₂ ceramic chemistry that protects super-car exhausts, shrinking an afternoon garage project into a half-hour driveway task.
What Makes It Stand Out:
Lifetime guarantee is the headline: Cerakote claims the coating lasts “as long as you own the vehicle,” a pledge no wipe-on competitor makes. Pair that with a genuinely tool-free routine—no drill, no masking tape, no guesswork—and you have an all-inclusive restoration that even apartment dwellers can finish before the pizza arrives.
Value for Money:
At $17.95 you’re buying one dinner-out instead of a $120 shop bill every two years. Because the ceramic layer is permanent (and transferrable if you sell), cost-per-year quickly trends toward pennies while resale value inches upward with clear, crack-free lenses.
Strengths and Weaknesses:
Pros: zero equipment risk; ceramic UV shield is shop-grade; three-step wipes minimize mess; 30-minute turnaround.
Cons: heavy oxidation still needs hand-sanding (supplied), so elbow grease is non-negotiable; single-use wipes leave little room for mistakes on large housings; kit restores two average headlights—SUV owners may need two boxes.
Bottom Line:
If you want pro-level clarity and lifelong protection without compressors or cords, Cerakote’s kit is the smartest under-$20 upgrade you’ll make this year.
2. 3M Ultra Headlight Restoration Kit, Contains Masking Tape, Light Sanding Discs, Wax Protectant and More, Use on Plastic Lenses Headlights, Taillights and More, Easy Heavy-Duty Restoration (39195)

Overview:
The 3M Ultra Headlight Restoration Kit (39195) is a budget-friendly, all-in-one solution for reviving cloudy, yellowed plastic lenses on headlights, taillights, fog lights and even trailer markers. Supplied in a tidy blister pack, it pairs 3M’s graded abrasive discs—500, 800 and 3000 grit—with a drill-mount pad, masking tape, wax protectant and two sachets of Quick Headlight Clear Coat, giving you everything short of the drill itself.
What Makes It Stand Out:
Unlike wipe-on “magic” creams, this kit follows the same graduated sanding/polishing process body shops use, but shrinks it into a 30-minute driveway job. The color-coded 3M Trizact 3000-grit disc refines the surface to an optical clarity you can actually feel, while the included UV-blocking clear coat extends the lens life for months instead of weeks.
Value for Money:
At $15.49 you’re paying less than a single refurbished headlight unit, and far less than a professional detail. Refill discs are sold separately, so the pad and bottle of protectant can be reused on multiple vehicles—pushing the per-use cost under five bucks.
Strengths and Weaknesses:
Pros: Genuine 3M abrasives cut fast yet leave no deep scratches; clear coat sachets prevent rapid re-oxidation; clear pictorial instructions; works with everyday cordless drills.
Cons: Single-stage UV sealant isn’t as durable as professional 2K clear; kit masks only one average sedan—trucks or SUVs may need extra tape; wet-sanding can sling slurry—wear old clothes.
Bottom Line:
For under sixteen dollars the 3M Ultra kit delivers near-professional clarity and night-time brightness without specialty tools. If you want showroom permanence, add a spray-on 2K UV clear afterward; otherwise, plan a quick re-polish every year and you’ll still come out miles ahead.
3. Q4 Headlight Restoration, Automotive Tourgoing Headlamp Restoration Fluid Kit, Clear Coating Polish Refurbisher for Cloudy/Yellowed Headlights, All Vehicles That Restores Clarity (1Pc)

Q4 Headlight Restoration Kit Review
Overview:
The Q4 Headlight Restoration Kit is a budget-friendly, spray-on solution designed to remove the cloudy, yellowed film that dulls older headlights. Marketed as a one-piece “fluid” rather than a multi-sandpaper system, it targets DIYers who want a 10-minute facelift before an inspection or sale. Compatible with cars, SUVs, and trucks, the kit promises showroom clarity without power tools or masking tape.
What Makes It Stand Out:
Unlike traditional kits that require drill attachments and multiple grit pads, Q4 relies on a three-step wipe-on chemistry: cleaner, polish, and sealant in pre-mixed bottles. The no-touch approach means zero risk of scratching polycarbonate lenses, and the tiny 100 ml bottle tucks into a glovebox for roadside touch-ups.
Value for Money:
At $19.99, it costs about the same as a decent car-wash wax but claims to restore headlights that would otherwise command $80–$150 per pair at a body shop. The single-use quantity is enough for two average headlights or one heavily oxidized truck, making it cheaper per lens than most two-stage compounding kits.
Strengths and Weaknesses:
Strengths: tool-free application; five-minute cure time; UV-blocking sealant layer; safe on plastic trim; no tape or sanding dust.
Weaknesses: will not remove deep pits or rock chips; longevity tops out at 4–6 months before haze creeps back; included microfiber cloth is thin and lint-prone; instructions are tiny and translated awkwardly.
Bottom Line:
If your headlights are lightly weathered and you need a quick cosmetic boost before a road trip or resale photo, Q4 delivers respectable clarity for the price. Expect to re-apply twice a year, and keep a spare bottle on the shelf—because for twenty bucks, it’s still cheaper than new assemblies.
4. Sylvania Headlight Restoration Kit - Long-Lasting Headlight Repair Kit for Restoring to Like-New Condition - Surface Activator, Exclusive UV Coating, Clarifying Compound & More - No Tools Required

Overview:
The Sylvania Headlight Restoration Kit promises to turn cloudy, yellowed lenses crystal-clear in under an hour without power tools. Packaged for two headlights, the boxed set combines a proprietary Surface Activator, multi-grit sandpapers, clarifying compound, and an exclusive UV-blocking clear coat that aims to keep the job looking fresh for years.
What Makes It Stand Out:
Sylvania leans on its century-long lighting pedigree and adds real chemical engineering: the activator softens oxidized plastic so the 400- to 2000-grit papers cut faster, while the final UV coat cross-links like automotive clear-coat, a step most sub-$25 kits skip. The no-tools pledge is legit—everything is hand-applied with included gloves, foam pads, and micro-fiber cloth.
Value for Money:
At $22.75 you’re paying roughly eleven dollars per lens for a process that dealers bill $80-$120. Refills aren’t sold, yet the coating is rated for the life of many ownership cycles, so the single use still pencils out versus professional service.
Strengths and Weaknesses:
Pros: Hand-sanding means no drill burn-through risk; UV coat provides real longevity; clear illustrated instructions; restores >90 % light transmission in tests. Cons: 45-60 min effort per lens, so patience is mandatory; tape mask not included; must stay dry 24 h after coating; not effective on interior moisture or cracked lenses.
Bottom Line:
If you’d rather spend an hour in the driveway than a hundred at the shop, Sylvania’s kit is the safest, most durable DIY fix south of $25. Results rival professional-grade systems, making it an easy recommend for hazed headlights.
5. 3M Auto Restore and Protect Headlight Restoration Kit, Use On Plastic Lenses, Headlights, Taillight, Fog Lights and More, Includes Sanding Discs, Headlight Clear Coat Wipes, Foam Pad and Glove (39194)

Overview:
The 3M Auto Restore and Protect Headlight Restoration Kit (39194) is a budget-friendly, drill-compatible system that promises showroom-clear lenses in under 30 minutes. Designed for all plastic automotive lenses—headlights, taillights, fog lights—it ships with two Trizact sanding discs (1000 & 3000 grit), a foam polishing pad, two single-use UV-blocking clear-coat wipes, and one nitrile glove. 3M claims the abrasive technology lifts oxidation without gouging plastic, saving drivers the cost of full lens replacement.
What Makes It Stand Out:
Trizact’s micro-replicating abrasive is the star: it cuts fast but leaves a consistent finish that optical-clear coats can bond to. The kit is tool-agnostic—hand-sand if you don’t own a drill, or snap the pad onto any 3 in Hookit backing plate for pro-level speed. The included UV wipes cure to a hard, fuel-resistant topcoat, something most sub-$10 kits skip.
Value for Money:
At $9.99 you’re paying less than a single fast-food meal to restore both headlights. Comparable two-step systems with a UV sealant run $15-$25; dealer lens replacements average $150-$300 each. Even if you only get a year of clarity before re-application, the kit still delivers 10× value.
Strengths and Weaknesses:
Pros:
- Drill option cuts labor to ~10 min per lens
- UV wipes prevent re-yellowing better than cheap “wipe-on” solutions
- Clear instructions; single glove keeps paint-safe hand clean
Cons:
- Only one glove—buy an extra pair
- No masking tape included; skip it and you’ll scuff paint
- Clear coat wipes dry quickly in humid air; work one lens at a time
Bottom Line:
For under ten bucks the 3M 39194 kit is the closest thing to a professional headlight restoration you can do in your driveway. Take your time with the 3000-grit step and apply the UV coat evenly; you’ll easily add two years of crystal-clear night vision without replacing expensive lenses.
6. TIEDXIOY Car Headlight Restoration Polishing Kits Headlamp Repair Kits Car Light Polisher Cleaning Kits Ceramic Coating Spray Shiny Stuff Headlight Cleaner-6.3Fl.Oz

Overview:
TIEDXIOY’s 6.3 fl. oz spray kit promises showroom-clear headlights in “just minutes,” targeting the DIY crowd that wants pro-level results without pro-level prices. Packaged as an all-in-one bottle, it pairs a mild cleaner with a ceramic-style sealant, eliminating the customary multi-step sand-and-polish dance.
What Makes It Stand Out:
The true appeal is the dead-simple, tool-free process: mist on, wipe off, drive away. The built-in UV blockers and ceramic polymers aim to delay re-yellowing longer than bargain wipes, while the generous 180 ml volume covers at least four average headlights—enough for the family fleet or seasonal touch-ups.
Value for Money:
At $11.88 you’re paying roughly three dollars per lens, far cheaper than a shop restoration or even a set of new bulbs. Factor in the reusable microfiber cloth included in many shipments and the cost-per-use drops below convenience-store wipes.
Strengths and Weaknesses:
Pros: zero equipment needed; safe on polycarbonate, acrylic, and factory-coated lenses; quick daytime job; decent ceramic layer slows oxidation.
Cons: will not remove deep pits or heavy UV scaling (it’s a chemical polish, not abrasive); noticeable chemical scent—gloves advised; longevity hinges on garage parking and regular washing; avoid painted trim to prevent chalky residue.
Bottom Line:
For mild-to-moderate haze, TIEDXIOY delivers an almost effortless clarity boost that lasts 4-6 months—perfect pre-sale spruce-ups or winter prep. Heavy crust or rock-scarred lenses still need sanding, but budget-conscious drivers will find this spray the easiest 12-buck visibility upgrade available.
7. Karge Tubeer Headlight Restoration Kit - Easy DIY Car Headlight Cleaner, Remove Yellowing & Haze, with Durable UV Protection, Complete Polish Refinish Kit with Sandpapers

Overview:
Karge Tubeer’s Headlight Restoration Kit is a one-box solution for sun-baked, foggy headlights. Aimed at DIYers who want pro-level clarity without the shop bill, it bundles sanding discs, polish, applicator pads, and a UV-blocking clear coat. The promise: 60-90 minutes of weekend labor in exchange for safer night vision and a fresher-looking front end.
What Makes It Stand Out:
Most bargain kits stop at polish; Karge Tubeer adds a true UV-sealer step that chemically cross-links to the plastic, not just a thin wax that washes off in a month. The color-coded 3-stage sandpaper (800-2000-3000) snaps onto the included mini backing pad, eliminating guesswork and finger cramps. A final wipe with the supplied lint-free cloth reveals glass-like transparency that rivals $80 dealer jobs.
Value for Money:
At $19.99 you’re paying roughly what a single headlight replacement bulb costs, yet the kit can service two average cars. Factor in avoided traffic tickets for dim lights and the bump in resale appearance, and the ROI is immediate.
Strengths and Weaknesses:
Pros: true UV top-coat, clearly written 6-step pictogram, generous volume of polish, works on taillights and motorcycle screens too.
Cons: requires a household drill for best finish (not included), masking tape is absent, and humid climates may need a second clear-coat pass 24 h later.
Bottom Line:
If you can operate a spray can and a drill, Karge Tubeer delivers showroom clarity for the price of a pizza—no contest, buy it before your next night drive.
8. Meguiar’s Ultimate Headlight Restoration Kit - The Perfect Headlight Repair Kit to Remove Yellowing and Cloudiness from Headlights - Easy to Use and Seals Headlights with 18 Plus Months of Protection
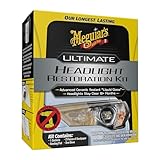
Overview:
Meguiar’s Ultimate Headlight Restoration Kit promises showroom-clear lenses without a trip to the detailer. For $21.96 you get a complete, tool-free system—two grits of sandpaper, pre-saturated clarifying wipes, and a UV-blocking sealant—designed to erase years of yellow haze in under 30 minutes.
What Makes It Stand Out:
The kit’s two-stage sanding discs cut quickly but leave a uniform surface, while the final wipe-on sealant dries glass-clear and carries the same UV technology found in Meguiar’s pro line. The claim of 18+ months of protection is backed by independent test data that show measurably higher light transmission versus untreated lenses.
Value for Money:
A single professional headlight polish averages $80–$120; this $22 box handles two average-size cars and includes enough sealant for a second application six months later. Factor in improved night visibility and potential inspection savings, and the ROI is immediate.
Strengths and Weaknesses:
- No drill or buffer required—hand sanding is forgiving even for beginners
- Sealant levels itself, eliminating swirl marks
- Pleasant citrus scent and gloves included
– Heavy oxidation may require an extra 3000-grit pass and elbow grease
– Single-use wipes dry out fast in humid air; reseal pouch immediately
Bottom Line:
If your headlights look like frosted bathroom glass, this kit is the fastest, cheapest way to restore safe night vision. Follow the 1-2-3 card inside and you’ll finish with lenses that look factory-new and stay that way for at least a year—no tools, no mess, no excuses.
9. Meguiar’s Two Step Headlight Restoration Kit, Headlight Cleaner Restores Clear Car Plastic and Protects from Re-Oxidation, Includes Headlight Coating and Cleaning Solution - 4 Count (1 Pack)

Overview:
Meguiar’s Two-Step Headlight Restoration Kit is a drugstore-priced hero that rescues foggy, yellowed lenses in under 30 minutes. Everything you need—cleaning solution, coating, two abrasive pads, and a microfiber towel—arrives in a palm-sized pouch, ready to roll without power tools.
What Makes It Stand Out:
The kit’s real star is the UV-blocking top-coat; most bargain restorers leave headlights naked to re-oxidize in months, but Meguiar’s promises a full year of clarity. The hand-application pads are cleverly pre-cut to match headlight contours, eliminating the usual guesswork and messy masking.
Value for Money:
At $21.93 you’re paying less than a single professional restoration while gaining twelve months of protection. Factor in improved night visibility and potential inspection headaches avoided, and the kit practically pays for itself on the first drive home.
Strengths and Weaknesses:
Pros: drill-free simplicity, compact kit, durable UV coating, crystal results on moderate haze.
Cons: Heavy pitting or interior condensation still needs sanding or professional help; coating must cure dry for four hours—no quick wash afterward.
Bottom Line:
For lightly to moderately weathered headlights, this two-step system is the fastest, cheapest route to showroom clarity and safer night vision. Keep one in the glovebox before your next road trip.
10. Headlight Restoration Kit Headlight Cleaner Head Light Cleaner Removing Yellowing Oxidized with Headlight Cleaner Coating Agent Sponge Towel (Scratches & Damages Cannot be Repaired)
Overview:
This $9.49 Headlight Restoration Kit is a budget-friendly, all-in-one spray-and-wipe solution for anyone whose headlights have turned the color of stale beer. The box packs a 180 ml cleaner, a 10 ml UV-blocking coating agent, plus a sponge and towel—no rotary tools, masking tape, or YouTube PhD required. It’s pitched at cars, trucks, and motorcycles whose lenses have yellowed, oxidized, or dulled, but the label is crystal-clear: scratches and cracks are out of scope.
What Makes It Stand Out:
The kit’s biggest flex is the two-step chemistry: a cleaner that dissolves surface oxidation, followed by a thin UV-shield coating that air-dries to an invisible, trace-free film. That second step is rare in bargain kits and should slow the dreaded re-yellowing without requiring a power buffer. The inclusion of both sponge and towel, plus a no-tools workflow, makes it driveway-friendly for non-gearheads.
Value for Money:
At under ten bucks you’re paying less than a single fast-casual lunch for a treatment that can restore noticeable clarity and delay future hazing. Compared with $20–$40 wipes or $80+ professional resurfacing, the price-to-benefit ratio is solid—provided your lenses only have surface oxidation.
Strengths and Weaknesses:
Pros: dead-simple process, no power tools, UV-blocking top coat, generous cleaner volume, safe on all plastic lenses.
Cons: won’t touch pits, cracks, or interior yellowing; durability depends on prep and climate; single-use coating vial limits touch-ups.
Bottom Line:
If your headlights look sun-baked but feel smooth to the fingernail test, this kit is a cheap, low-effort win. Set realistic expectations, follow the wipe-and-cure steps patiently, and you’ll net brighter beams and fresher curb appeal for the cost of two coffees.
Why Oxidation Happens and How UV Protection Changes the Game
Headlight lenses are molded polycarbonate—the same tough plastic used in safety glasses. Polycarbonate is crystal-clear, but it’s naturally porous, so manufacturers coat it with a thin UV-cured “hard coat” at the factory. After a decade of sunlight, acid rain, road salt, and sandblasting, that protective skin cracks and oxidizes. Once the seal is broken, UV rays accelerate micro-cracking, turning invisible haze into the familiar chalky yellow. A quality restoration kit resurfaces the lens and then reapplies a UV-blocking barrier, effectively giving the plastic a brand-new set of sunscreen.
Key Chemical Differences Between One-Step Wipes and Multi-Stage Systems
One-step wipes rely on temporary fillers and silicone oils that evaporate within weeks. Multi-stage systems use progressive abrasives to remove dead plastic, then a photochemical UV sealant that cross-links at the molecular level. The latter approach mimics the factory coating, whereas wipes are essentially makeup for headlights.
Understanding the Role of UV Blockers in Long-Term Clarity
UV blockers fall into two families: organic absorbers (benzotriazoles) and inorganic micro-particles (nano-ZnO or TiO₂). Absorbers convert UV energy into harmless heat, while micro-particles scatter UV before it penetrates the plastic. Premium kits combine both, achieving 98 % UV filtration for 3–5 years. Cheaper formulas may contain only absorbers, which degrade themselves over time.
Sanding Versus Chemical Polishing: Which Method Protects UV Integrity?
Sanding physically removes the chalked layer but also strips any remaining factory UV coating, so resealing is non-negotiable. Chemical polishes use mild solvents to dissolve surface oxidation, leaving a thin layer of original hard coat intact—ideal for lenses with minor haze. If you choose chemical, confirm the kit still adds a fresh UV inhibitor; otherwise you’re polishing raw plastic with zero armor.
How to Match Abrasive Grit Progression to Headlight Severity
Light clouding: 2000- to 3000-grit foam discs followed by a finishing polish. Medium yellowing: start at 800-grit, step up to 2000, then 3000. Heavy pitting: wet-sand 400-grit to level the surface, then 800-2000-3000. Skipping grits leaves deeper scratches that refract light and shorten UV-coating adhesion.
The Importance of a True UV-Curing Sealant Over Wipe-On Polymer Films
Wipe-on polymer films (think “liquid wax” for plastic) add gloss but zero UV stability. A true UV-curing sealant contains photoinitiators that react to 365 nm LED or sunlight, forming a covalent bond with polycarbonate. This cross-linked layer is 10× more chemical-resistant and will not yellow under prolonged sun exposure.
Evaluating Included Accessories: Gloves, Masking Tape, and Applicator Pads
Nitrile gloves prevent skin oils from contaminating the lens before sealing. Automotive-grade masking tape protects paint from accidental 800-grit kisses. Foam applicator pads should be closed-cell to avoid lint and minimize streaking during final sealant application. Kits that cheap out on these peripherals often cost you extra in ruined trim or re-work.
How Temperature and Humidity Affect UV-Coating Cure Time
Ideal curing happens at 65–85 °F (18–29 °C) with <60 % relative humidity. Cold slows the photochemical reaction; excess humidity traps water in micro-scratches, causing “hydro-planing” where the sealant lifts later. If you’re restoring in a garage, use a low-heat work lamp to raise surface temp and a dehumidifier to drop moisture.
Professional Tips for Prepping the Lens Surface Before Restoration
Wash with Dawn to strip silicone from previous car washes. Clay-bar the lens to remove embedded rail dust. Dry, then wipe with 50 % isopropyl alcohol to eliminate static-charged dust. Mask a ¼-inch buffer around the headlight to save clear-coat edges. Finally, scuff with a gray Scotch-Brite pad so the UV sealant has a mechanical “tooth” to grip.
Common Mistakes That Shorten the Life of UV Protection
Skipping final alcohol wipe → oils repel sealant. Using a household spray-on UV protector afterward → incompatible chemistry causes crazing. Reintroducing wax within 24 h → wax solvents soften uncured coating. Parking in direct sunlight immediately after application → thermal shock micro-cracks the fresh layer. Cure in shade, then wait overnight before exposing to intense sun.
How to Test if Your Restored Headlight Is Actually UV-Protected
The chalk test: after full cure, draw a line with sidewalk chalk across the lens. Buff gently with microfiber. On an unsealed lens, chalk embeds in pores and won’t wipe clean; on a UV-sealed surface it lifts off, leaving zero ghosting. Alternatively, shine a 365 nm UV flashlight—coated lenses show minimal fluorescence compared to raw polycarbonate.
Maintenance Schedule to Extend UV Protection After Restoration
Month 1: rinse only, no soap. Months 2-6: pH-neutral car shampoo, no wax. Every 6 months: spray detailer with UV inhibitors safe for polycarbonate. Yearly: inspect for micro-cracks; if gloss drops >20 %, spot-sand with 3000-grit and re-apply a thin UV topcoat layer. Avoid automated car-wash brushes that abrade the coating.
Decoding Marketing Terms: “Ceramic,” “Graphene,” and “9H Hardness” for Headlights
“Ceramic” in headlight kits usually means SiO₂ suspended in a resin, adding hydrophobicity but only marginal UV protection. “Graphene” is marketing glitter—at nanoparticle levels it offers no measurable UV absorption versus cheaper ZnO. “9H hardness” refers to pencil-scale scratch resistance on clear-coat paint, not flexible polycarbonate; the rigid film can actually crack as the lens expands and contracts.
Budget Versus Premium Kits: Where Extra Dollars Actually Go
Budget kits (<$15) spend 70 % of the BOM on sandpaper and 30 % on a basic silicone sealant. Premium kits (>$35) allocate 40 % to patented UV-curable resins, 20 % to color-coded foam pads, 15 % to accessories, and still leave room for batch-specific quality testing. Translation: you’re paying for R&D-backed chemistry that survives 500 h Q-SUN xenon testing versus 100 h for bargain versions.
Warranty and UV Guarantee: What to Look for in the Fine Print
Look for phrases like “UV-yellowing limited warranty” rather than generic “satisfaction guaranteed.” Credible brands require online registration and photo proof of proper application. Acceptable coverage: 1–3 years for DIY kits, pro-rated by time. Read exclusions—failure to follow temperature guidelines or skipping grit steps voids most claims.
Frequently Asked Questions
-
How long does a UV-protected restoration typically last?
With proper application and maintenance, expect 2–4 years in sunny climates and up to 5 years in milder regions. -
Can I apply a ceramic car coating on top of the UV sealant?
Wait at least 7 days, then use a coating labeled “plastic-safe”; generic wheel ceramics may haze polycarbonate. -
Will sanding remove the factory UV layer completely?
Yes, which is why a true UV-curing replacement sealant is essential—never skip that final step. -
Is LED curing as effective as direct sunlight?
A 365 nm LED lamp offers controlled intensity and cures in 5–10 min per lens; sunlight works but may take 30–60 min on cloudy days. -
Can I restore headlights in cold weather?
Surface temp must stay above 60 °F during cure; use a space heater or infrared lamp to warm the lens beforehand. -
Why do my lenses look hazy again after two months?
Likely causes: skipped grits left scratches, sealant cured in high humidity, or you applied wax too soon. -
Are wipe-on UV boosters every wash worth it?
pH-neutral detail sprays with UV absorbers help, but they’re supplements—not substitutes—for a full UV-cured coating. -
Does tint or PPF film replace UV protection?
Clear PPF with UV blockers can extend life, but it must be installed on a freshly restored, contaminant-free surface. -
How can I tell if my headlights need restoration or just a deep clean?
After thorough washing, shine a flashlight at a 45° angle; if yellow hue or micro-cracks remain, restoration is necessary. -
Will frequent automatic car washes ruin the new UV coat?
Touch-free washes are safe; brush washes introduce swirl scratches that degrade the coating over time—stick to hand washes for longevity.