Nothing ruins freshly restored headlights faster than watching them go yellow and hazy six months later. You can wet-sand, polish, and UV-clear until your arms ache, but if the lens isn’t sealed, oxygen, heat, and road chemicals will creep back in and undo every minute of elbow-grease. That’s why veteran detailers treat the sealing step like an insurance policy: skip it once, pay for it forever.
The good news? Headlight-lens sealer kits have quietly evolved from basic wipe-on polymers to aerospace-grade ceramic coatings that bond for years. The bad news? Marketing hype is louder than ever, and one wrong choice can leave you with blotches, orange-peel, or a finish that peels like bad nail polish. Below, you’ll learn how to separate legitimate technology from snake-oil, match the right chemistry to your climate, and apply a seal that even a roadside gravel truck can’t bully off.
Top 10 Headlight Lens Sealer Kit
Detailed Product Reviews
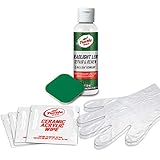
1. CERAKOTE® Ceramic Headlight Restoration Kit – Guaranteed To Last As Long As You Own Your Vehicle – Brings Headlights Back to Like New Condition - No Power Tools Required - 10 Wipe Kit

Overview:
CERAKOTE’s Ceramic Headlight Restoration Kit promises showroom-clear lenses in half an hour—no drill, no buffer, no prior experience. The three-step system pairs eight oxidation-dissolving wipes with a mini sanding sequence, then seals the job with two ceramic coating wipes that bond permanently to polycarbonate.
What Makes It Stand Out:
Unlike supermarket kits that fade after a season, Cerakote grafts a UV-blocking ceramic shell onto the plastic, claiming lifetime protection “as long as you own your vehicle.” The absence of power tools removes the intimidation factor for novices and eliminates the risk of burned paint or wavy lenses.
Value for Money:
At $17.95 you’re paying less than a single professional restoration while getting a coating that would cost triple in a body shop. If the headlights stay crystal-clear for even three years, the kit already beats yearly $10 quick-fixes.
Strengths and Weaknesses:
Pros: truly tool-free; ceramic layer beads water and resists yellowing; 30-minute driveway job; enough product for two average headlights plus fog lights.
Cons: heavy oxidation may still need 800-grit paper not supplied; coating wipe must be used within 15 min of opening—no pausing; lifetime claim is non-transferable if you sell the car.
Bottom Line:
For under twenty bucks you get pro-grade clarity and a warranty that outlives the car—provided you follow the concise instructions. It’s the smartest, cheapest insurance against cloudy headlights on the market.
2. Turtle Wax 53435 Speed Headlight Lens Restorer Kit with Ceramic Acrylic Protection Wipes 2 fl. oz
Turtle Wax 53435 Speed Headlight Lens Restorer Kit with Ceramic Acrylic Protection Wipes 2 fl. oz – $8.96
Overview:
Cloudy, yellowed headlights can drop nighttime visibility by 80 % and make any car look ten years older. Turtle Wax’s 53435 kit promises showroom-clear lenses in about ten minutes using a four-step process that combines mechanical polishing with a ceramic-acrylic sealant. Everything you need—2 oz clarifying compound, precision pad, four pre-soaked protective wipes, and nitrile gloves—fits in one palm-sized pouch.
What Makes It Stand Out:
Unlike single-step “wipe-on” restorers, this kit actually levels the plastic with a micro-abrasive compound before locking the finish in with true ceramic-acrylic resin. The sealant is the same chemistry found in $60 professional coatings, yet it’s pre-dosed on disposable wipes—no messy spray bottles or UV lamps required. Turtle Wax claims the clarity lasts “12 months +,” a bold promise at this price.
Value for Money:
At $8.96 you’re paying less than a movie ticket to regain safe-night vision and instant curb appeal. A headlight replacement pair can top $400; even a detailing shop charges $60-$80 for the same service. The kit treats both lenses on a mid-size sedan and still has compound left for fog lights.
Strengths and Weaknesses:
Pros: genuinely removes—not just masks—heavy oxidation; ceramic wipes leave a slick, water-beading finish; clear illustrated instructions; no power tools needed.
Cons: hand-polishing step requires firm pressure and 3-4 minutes per lens (expect an arm workout); sealant wipes dry quickly in hot weather—work one light at a time; not effective on interior moisture or cracks.
Bottom Line:
If your headlights look like frosted mugs and you want near-professional results for the cost of two coffees, grab this kit. The short labor investment pays off with brighter, safer night driving and a noticeably fresher-looking car for at least a full year.
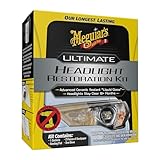
3. Meguiar’s Ultimate Headlight Restoration Kit - The Perfect Headlight Repair Kit to Remove Yellowing and Cloudiness from Headlights - Easy to Use and Seals Headlights with 18 Plus Months of Protection
Overview:
Meguiar’s Ultimate Headlight Restoration Kit is a budget-friendly, all-in-one solution for turning foggy, yellowed headlights back to showroom clarity. Designed for mild-to-severe oxidation, the pack contains two sanding discs (1000 & 3000 grit), a pre-saturated clarifying wipe, and the brand’s flagship UV-blocking Ultimate Headlight Sealant—no drill or polisher required. The entire job can be finished in under 30 minutes on a Saturday morning.
What Makes It Stand Out:
The kit marries professional-grade sanding with a fool-proof wipe-on ceramic sealant that promises 18-plus months of protection. Meguiar’s adds UV inhibitors directly into the final coating, slowing the re-yellowing that cheaper kits suffer from, and the clear-dry formula won’t leave a hazy film that dulls light output.
Value for Money:
At $21.96 you’re essentially buying a mobile detailing service in a box; a shop will charge $60-$80 for the same job. Factor in the multi-year UV guarantee and the ability to treat at least two vehicles per kit, and the cost drops below five bucks per headlight.
Strengths and Weaknesses:
Pros: tool-free, 30-minute process; long-lasting UV sealant; restores severe clouding; enough supplies for multiple cars.
Cons: hand-sanding can fatigue on heavily pitted lenses; sealant wipe is single-use—misapply and you’ll need another kit; does not include masking tape (recommended to protect paint).
Bottom Line:
For twenty-two dollars and half an hour of elbow grease, Meguiar’s Ultimate kit delivers night-and-day brighter headlights and keeps them clear for nearly two years. It’s the easiest, most reliable DIY restoration you can buy without investing in power tools.
4. Turtle Wax T-240KT Headlight Lens Restorer Kit

Overview:
The Turtle Wax T-240KT Headlight Lens Restorer Kit is a budget-friendly, DIY solution that promises showroom-clear headlights in under five minutes per lens. Packaged in a palm-sized box, it supplies everything you need—three progressive wet-sanding pads (2400-8000 grit), a 4 oz spray lubricant, 4 oz clarifying compound, and a single 4” sealing wipe—so you won’t be hunting for extra supplies on a Saturday afternoon.
What Makes It Stand Out:
Unlike one-step wipes that fade after a month, this kit mimics a body-shop multi-stage process: wet-sand, polish, seal. The color-coded pads and clear instructions make it nearly foolproof, while the included sealant claims to lock in clarity for up to a year. It’s also surface-agnostic; headlights, taillights, plexiglass boat windows, even faded plastic gauge clusters can be revived with the same set.
Value for Money:
At $12.50—less than a fast-food combo—the kit can restore two average sedans, dropping the cost to about $3 per vehicle. Professional headlight restoration averages $80-120, so the savings are immediate and measurable.
Strengths and Weaknesses:
Pros: Complete kit, no extra tools required; dramatic improvement on moderate yellowing; sealant slows re-oxidation.
Cons: Heavy pitting or UV burns may still look slightly hazy; single sealing wipe is stingy for larger trucks; results fade after 9-10 months without garage parking.
Bottom Line:
For light to moderate oxidation, the T-240KT is the cheapest reliable path to crystal-clear lenses; just buy an extra sealant wipe if you drive a larger vehicle.
5. 3M Auto Restore and Protect Headlight Restoration Kit, Use On Plastic Lenses, Headlights, Taillight, Fog Lights and More, Includes Sanding Discs, Headlight Clear Coat Wipes, Foam Pad and Glove (39194)

Overview:
The 3M Auto Restore and Protect Headlight Restoration Kit (39194) is a budget-friendly, drill-compatible solution designed to bring sun-fogged, yellowed plastic lenses back to showroom clarity. Everything you need—two Trizact sanding discs (1000 & 3000 grit), a foam polishing pad, two UV-blocking clear-coat wipes, and a nitrile glove—fits in one palm-sized pouch. The process is straightforward: wet-sand, refine, wipe on the protective clear coat, and walk away.
What Makes It Stand Out:
3M’s Trizact abrasive is the same micro-replicating technology used in auto body shops; it cuts fast but leaves a uniform finish that won’t leave wavy haze. The included UV-sealing wipes cure to a hard, crystal-clear shell that resists re-yellowing far longer than cheap “wipe-on” restorers. Designed for a standard 3-in hook-and-back drill pad, it slashes elbow-grease time to under 15 minutes per lens.
Value for Money:
At $9.99 you’re paying less than a single take-out meal to restore both headlights and avoid a $150–$250 shop bill or $300+ replacement housings. The clear coat is single-use, but two wipes handle two average headlights with a little left over for fog or marker lights—no hidden costs.
Strengths and Weaknesses:
Pros: professional-grade abrasives, UV wipe protection, drill-speed option, ultra-low price.
Cons: requires household drill for best results, single-session use (no refills), sanding step can spatter—mask nearby paint.
Bottom Line:
If you own a drill and 30 spare minutes, this kit delivers shop-quality clarity and UV protection for the price of two coffees—an absolute no-brainer before your next safety inspection.
6. Sylvania Headlight Restoration Kit - Long-Lasting Headlight Repair Kit for Restoring to Like-New Condition - Surface Activator, Exclusive UV Coating, Clarifying Compound & More - No Tools Required

Overview:
Sylvania’s Headlight Restoration Kit promises showroom-fresh lenses in under an hour without a single wrench. The box packs surface activator, three grades of wet/dry sandpaper, clarifying compound, and the brand’s proprietary UV Block clear coat—enough to service two headlights and keep them crystal-clear for years. Designed for driveway DIYers, every step is color-coded on a fold-out instruction sheet; no power tools, masking tape, or prior experience required.
What Makes It Stand Out:
Sylvania leverages its century of lighting R&D to bundle a true UV-blocking topcoat—something most sub-$25 kits skip. The chemical “surface activator” softens oxidized plastic so the 800-, 1500-, and 2000-grit papers cut faster, reducing elbow grease by half. A final wipe of the clarifying compound polishes optical clarity to OEM levels before the UV sealant locks it in, preventing the yellow rebound that ruins cheaper restorations six months later.
Value for Money:
At $22.75 you’re paying less than a single aftermarket headlight assembly and getting a refill-worthy toolkit. Comparable 3-step systems with a real UV coat run $30-$40; Sylvania undercuts them while adding the activator vial and lint-free cloths. Factor in avoided traffic tickets or failed inspections and the kit pays for itself the first night you drive home with restored beams.
Strengths and Weaknesses:
Pros: Tool-free, forgiving process; durable UV coat backed by 1-year warranty; noticeably brighter light pattern.
Cons: Requires garden hose or spray bottle—not fully “dry”; sandpaper sheets are small for large truck lenses; must cure 24 h before car wash.
Bottom Line:
If your headlights look like frosted shower doors, Sylvania’s kit is the cheapest insurance against nighttime blind spots. Follow the steps patiently and you’ll score professional results for the price of a pizza.
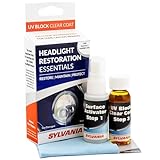
7. SYLVANIA - Headlight Restoration Essentials Kit - UV Block Clear Coat, Most Important Step to Restore Sun Damaged Headlights, Surface Activator, UV Protection for Clearer Headlights - 1 Fl Oz
Overview:
SYLVANIA’s Headlight Restoration Essentials Kit is the final, UV-blocking seal that turns a quick DIY polish into a long-term fix for sun-fogged lenses. The 1-oz squeeze bottle of clear coat and companion Surface Activator arrive with a lint-free applicator cloth and concise instructions—everything you need to lock in clarity after you’ve sanded away the haze.
What Makes It Stand Out:
Unlike all-in-one kits that stop at polishing, SYLVANIA treats UV degradation like automotive paint: strip, prep, then seal. The formula is packed with automotive-grade UV blockers the company already supplies to OEM headlamp assemblies, so you’re essentially spraying the same invisible sunscreen used on new cars. The two-step chemistry (activator opens pores, clear coat cross-links) creates a chemical bond instead of a surface film, giving a glass-smooth, showroom gloss that won’t peel or yellow.
Value for Money:
At $12.75 you’re buying the “insurance policy” that keeps a $40–$100 restoration job from reverting in six months. A single kit coats two average headlights with enough left over for fog lights or a second car—pennies compared to replacement housings that start at $150 each.
Strengths and Weaknesses:
Pros: OEM-grade UV inhibitors, easy wipe-on application, cures tack-free in 30 min, compatible with any brand’s sanding/polish steps, made in USA.
Cons: Won’t fix underlying pitting or cracks, requires dust-free curing window, one-time-use applicator cloth.
Bottom Line:
If you’ve already invested elbow grease sanding headlights, spend twelve more bucks and ten more minutes with SYLVANIA’s UV Block Clear Coat; it’s the cheapest permanent insurance against sun damage you can buy without a shop.
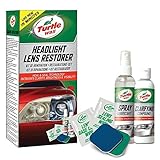
8. Turtle Wax 51768 Headlight Restorer Kit Headlamp Cleaning Restores Brightness Kit, (Old Version)
Overview:
The Turtle Wax 51768 Headlight Restorer Kit is the market’s best-selling DIY solution for sun-baked, hazy headlight lenses. Packaged as a compact toolbox-grade pouch, the old-version kit supplies everything you need—graded sanding pads, clarifying compound, synthetic sealant, gloves and a lens sealing wipe—to hand-polish two average headlights in about 25 minutes without buffers or drills.
What Makes It Stand Out:
Turtle Wax built its reputation on forgiving, paint-safe chemistry, and this kit leverages that heritage: the two-stage sealant actually cross-links to the polycarbonate, blocking UV rays longer than most wipe-on “waxes.” The color-coded 800-, 2000- and 3000-grit pads take guesswork out of progression, while the ergonomic hand pad keeps fingertips clear of sharp bumper edges.
Value for Money:
At $21.14 you’re paying roughly a tenth of what a body shop charges for lens restoration. Factor in the included lens sealing wipe (good for a second touch-up six months later) and the cost per treated vehicle drops under five dollars—exceptional value for a safety upgrade that can improve light throw by up to 80 %.
Strengths and Weaknesses:
Strengths: no tools required, clear step-by-step graphics, long-lasting UV block, works on taillights and motorcycle visors too.
Weaknesses: old version lacks the newer “speed clip” adapter for cordless drills, so heavy oxidation may demand extra elbow grease; single-use sealant wipe dries quickly—open just before application.
Bottom Line:
If your headlights look like frosted shower doors, this inexpensive kit delivers professional clarity in one driveway session. Just set realistic expectations for hand power and finish in the shade—your night vision (and resale value) will thank you.
9. 3M Headlight Lens Restoration System, 39008, 1 Kit

Overview:
The 3M Headlight Lens Restoration System (39008) is a drill-powered kit that promises showroom-clear lenses in under an hour. Aimed at DIYers who don’t want to pay a body shop, it supplies everything from 500-grit sanding discs to a final rubbing compound, all color-coded and pre-cut to fit the included 3-inch backing pad.
What Makes It Stand Out:
Unlike wipe-on “magic” restorers, this kit uses true 3-stage wet sanding followed by micro-finishing and compounding—exactly the protocol professional detailers charge $80-$120 to perform. The Trizact disc is proprietary 3M technology that levels evenly and resists loading, so one disc can handle both headlights without glazing.
Value for Money:
At $22.98 you’re buying the same abrasives and compound found in body-shop bulk boxes. Even if you own only a basic corded drill, you’ll save at least $60 versus paying a shop, and the leftover compound works great on taillights or plastic gauge covers.
Strengths and Weaknesses:
Pros: Drill activation slashes elbow grease; discs stay put with reliable hook-and-loop; results last 12-18 months with a UV sealant top-coat.
Cons: No masking tape or UV blocker included; process is messy—expect wet slurry on the driveway; deep cracks or interior oxidation can’t be fixed externally.
Bottom Line:
If your lenses are yellowed but structurally sound, the 3M 39008 is the cheapest route to OEM clarity. Follow up with a $5 UV clear coat and you’ll pocket professional results for less than the cost of lunch.
10. POLIWELL Headlight Restoration Kit 3 Easy Steps to Restore Sun Damaged Headlights Polish Headlights Lens Restore Cleaner DIY Polishing, Sanding Discs, Scouring Pads for Electric Drill, Total 24Pack

Overview:
POLIWELL’s 24-piece kit promises showroom-clear headlights in three drill-powered steps: wet-sand, polish, seal. Designed for the driveway DIY-er, it turns a dull, yellowed lens into a crystal-clear safety upgrade in about 45 minutes without removing the housing.
What Makes It Stand Out:
The progressive P1000→P3000→P5000 sanding sequence plus a true UV-blocking final coat is normally a pro-shop protocol; here it’s condensed into color-coded discs that stick to the included drill backing plate. A 10 m roll of masking tape and a spray bottle are tossed in—small extras that most rivals charge separately for.
Value for Money:
At $19.99 you’re paying less than a single headlight at a pick-a-part yard, and the kit has enough abrasives & compound to restore two vehicles. Considering a professional restoration runs $80-$120 per pair, the ROI is immediate and repeatable.
Strengths and Weaknesses:
Pros: Drill-powered sanding slashes labor time; clear on-box instructions; UV coat slows re-oxidation; comprehensive 24-piece set.
Cons: Requires a corded drill—weak batteries stall on P1000; single-use UV pouch can dry out if cap is misplaced; no nitrile gloves included.
Bottom Line:
If you already own a decent drill, POLIWELL delivers pro-level clarity at a disposable-kit price. Work patiently through the grits and the night-time beam pattern will thank you—highly recommended for budget-minded detailers.
Why a Dedicated Headlight Sealer Matters More Than Ever
Modern polycarbonate lenses are injection-molded with UV inhibitors, but those additives are only skin-deep. Once sanding removes the factory film, the plastic becomes a sponge for UV rays, acid rain, and washer-fluid chemicals. A purpose-built headlight sealer refills the microscopic pores with cross-linking polymers or resins, effectively creating a new “sunscreen layer” that factory clear-coat once provided. Generic wax, trim dressing, or even automotive ceramic coatings engineered for paint lack the optical clarity, flexibility, and UV-specific absorbers that headlight plastics demand. Translation: without the right sealant, you’re polishing again next spring.
How Headlight Sealants Actually Work on Plastic
Polycarbonate’s surface energy is naturally low, so coatings must first “bite” mechanically (by flowing into the sanding scratches) and then cure into a film that’s both harder than the plastic yet flexible enough to expand with temperature swings. Quality sealers contain three functional groups: UV absorbers (think of them as microscopic sunglasses), hindered-amine light stabilizers (HALS) that scavenge free radicals, and a cross-linking resin—usually acrylic, urethane, or siloxane—that forms the breathable barrier. When you wipe the product on, solvent carries these actives into the pores; as the solvent flashes, the resin molecules hook together like Velcro, creating a clear shell that’s chemically welded to the lens.
UV-Blocking Technology: What to Look for on the Label
Flip the bottle over and hunt for three clues: “benzotriazole” or “triazine-class UV absorbers,” a minimum SPF-equivalent rating of 40, and the phrase “non-migratory.” Migratory additives leach out under engine-bay heat, leaving edges white and chalky. Reputable brands also list “Tinuvin 99” or “Tinuvin 400” (BASF trade names)—industry-grade HALS that cost more but stay put for 3–5 years. If the ingredient deck hides behind “proprietary polymer blend,” email the manufacturer; legit companies will share an SDS or at least a UV-dosage test graph.
Ceramic vs. Acrylic vs. Urethane Sealers: Pros and Cons
Ceramic coatings (siloxane-based) promise 9H pencil hardness and slickness that sheds bugs, but they can be brittle on flexible polycarbonate and may crack if the lens is bent by a rogue shopping cart. Acrylic sealers are inexpensive, air-dry in minutes, and buff off easily if you over-apply, yet they burn away under UV light in 8–12 months. Urethanes sit in the sweet spot—elastic enough to move with the lens, chemical-resistant to magnesium chloride road brine, and typically rated for 24–36 months before degradation starts. The trade-off: urethane kits cost more, often require a two-step catalyst, and emit stronger solvent odor during cure.
Understanding Hardness Ratings: 9H, 7H, and What They Mean for Lenses
Pencil-hardness tests originate from the coatings industry: a 9H pencil should not scratch the cured film. Sounds impressive, but a headlight lens flexes microscopically at 70 mph; an ultra-hard shell can micro-fracture, allowing water underneath. For headlights, 6–7H is the pragmatic ceiling—tough enough to resist car-wash brushes, yet elastic enough to stay intact when the housing expands on a 100 °F summer day. Treat 9H claims as marketing seasoning unless the manufacturer also advertises “elongation at break” above 20 %.
Single-Step Wipes vs. Two-Part Catalyst Systems
Wipe-and-buff sachets are convenient: tear open, swipe, toss. They’re basically acrylic resins dissolved in fast solvent—great for lease returns or flipping a used car. Catalyst systems (small bottle A + bottle B) marry a base resin with a hardener; once mixed, you have 15–60 minutes of pot life before cross-linking begins. The chemical marriage produces a denser film, glossier finish, and 2–3× the longevity. If you’re already sanding and masking for an hour, the extra 10 minutes to mix a catalyst is cheap insurance.
Shelf Life and Pot Life: Hidden Costs of Buying in Bulk
A 50 ml “pro” vial looks economical until you realize urethane starts gelling 30 minutes after exposure to humidity. Most kits list two numbers: unopened shelf life (12–24 months if stored <75 °F) and pot life after activation (20 ml might cure in the bottle overnight). Buy only what you’ll use in one weekend, or choose kits with separate ampoules that let you meter micro-batches. Refrigeration can double shelf life, but bring the resin to room temp before opening—condensation droplets accelerate curing and create fisheyes.
Climate Considerations: Hot, Cold, Humid, and High-Altitude Factors
High humidity (>70 %) speeds cure but can trap solvent, causing cloudy “blush.” In Phoenix-level heat, choose slower solvents (butyl cellosolve instead of acetate) so the coating levels before it skins. At altitude, lower air pressure lowers solvent flash point—open bottles away from the water heater pilot light and add 5–10 % more flash time before wiping. Winter garage? Heat the lens to 65 °F with a hair dryer; cold plastic slows cross-linking and you’ll get oily wipe marks that never level out.
Surface Prep: Why 800-Grit Is the New 600-Grit
Old forum wisdom says stop at 600-grit before sealing. Modern micro-mesh papers and 3-stage DA discs prove 800-grit scratches are shallow enough to level in one coat, yet deep enough for mechanical bite. Going above 1000-grit before sealing reduces adhesion by 30 % in SAE J1960 tape tests. After your final sand, degrease with an oil-free panel wipe (not IPA—it leaves water), tack-cloth, and shoot the first sealer coat within 30 minutes; airborne silicones from tire dressings settle fast.
Application Temperature Sweet Spot: Avoiding Fish-Eyes and Orange Peel
Read the fine print: most urethanes want 68–78 °F substrate temperature, not ambient air. A lens that’s 55 °F will condense moisture from warm garage air, seeding fisheyes. Conversely, a sun-baked 110 °F lens flashes solvent instantly, locking in ridge lines. Use an IR thermometer gun; if the surface is too cold, warm with a heat gun on low, sweeping constantly. Too hot? Park in the shade, mist the lens with distilled water, and blow dry until the surface drops to 75 °F—never wipe with ice water; thermal shock can craze polycarbonate.
Curing Time vs. Drive-Away Time: When Can You Wash the Car?
“Dry to touch” can fool you; solvents trapped underneath need 12–24 hours to migrate out. Most kits green-light a gentle rinse after 6 hours, but automatic car washes with alkaline presoak should wait 48 hours. For ceramic coatings, full cross-link density peaks at day 5—skip the 80 mph freeway blast until then; turbulent air can whip microscopic dust into the still-soft upper layer and frost the gloss. Post a sticky note on the dash: “No wash, no wax for 5 days”—your future self will thank you.
Common DIY Mistakes That Shorten Sealer Lifespan
Skipping the final 800-grit sand is number one; polish oils fill scratches, but the sealer can’t. Second: applying two heavy coats instead of three thin ones—thick layers skin, solvent locks in, and the film wrinkles like sunburn. Third: sealing over polish residue; even “oil-free” polishes contain dimethicone that repels the resin. Wipe the lens with a 10 % IPA solution, then a static-free tack cloth right before coating. Finally, touching the lens with bare fingers transfers amino acids that cause edge-crawling; wear nitrile gloves through the final wipe.
Professional Tips for Edge Taping and Overspray Control
Mask 2 mm past the lens seam, not the entire hood. Overspray on modern clear-coat is invisible at first but turns into a greasy halo after the first rain. Use 3 mm fine-line tape and run a second “sacrificial” strip 1 cm beyond the first; peel the outer strip while the sealer is still wet, leaving a microscopic ramp that feathers the edge. For textured surrounding plastic, wipe a light coat of water-based tire dressing before sealing; any mist lands on the dressing and buffs off later.
How to Inspect Your Seal 24 Hours Later: The Water-Bead Test
A freshly sealed lens should sheet water at 30 mph, not hold tight beads. Spray distilled water from a household bottle; if you see perfect hemispheres that refuse to run, you’ve got high spots—lightly denib with a 3000-grit foam disc and re-coat one thin layer. Conversely, water that flattens into a film indicates low coverage—add a second micro-coat within the kit’s recoat window (usually 6 h). Document with photos; if you ever warranty-claim, manufacturers want dated proof of proper water behavior.
Re-Coating vs. Stripping: When to Start Over
Light oxidation six months in doesn’t mean failure; it’s often surface contamination. Wash with pH-neutral soap, clay the lens, and hit it with an IPA wipe. If water still sheets but gloss is down 20 %, a single maintenance coat of the same chemistry will graft onto itself. If you see yellowing at the top corners or cracks along the lower seam, the UV absorbers are spent—strip with 600-grit and re-seal; top-coating over dead resin is like painting over rust.
Maintenance Wash Routines That Extend Sealer Life
Ditch the “wash-wax” soaps; even modest carnauba content clouds modern coatings. Use a ceramic-maintenance shampoo with <3 % sodium lauryl sulfate and no gloss enhancers. Dry with a plush microfiber and a dedicated towel for the lens—never the same one that wiped the wheels. Every third month, spray a SiO₂ maintenance spray (diluted 1:4) while the lens is still wet; it revitalizes the UV package and keeps surface tension above 40 dynes/cm, the threshold for self-cleaning.
Warranty Red Flags: What the Fine Print Really Says
“Five-year warranty” sounds bulletproof until you learn it’s pro-rated like tire tread: year 3 pays 50 % of MSRP on a new kit, minus shipping. Look for non-prorated coverage of at least 24 months and a requirement list you can realistically meet (photos of water-bead test, proof of purchase, annual maintenance log). Brands that demand professional installation certificates often exclude DIYers; others exclude commercial vehicles or lenses that were previously wet-sanded. Read the claim procedure—some force you to mail the entire failed lens to Singapore for inspection.
Cost vs. Value: Calculating Price per Protected Month
A $12 wipe kit that lasts 10 months costs $1.20/month. A $45 urethane kit rated for 36 months costs $1.25/month—essentially identical, but you sand half as often. Factor in your labor: three hours to mask, sand, polish, and seal. At $20/hr DIY “wage,” a 36-month kit saves you two full restoration cycles, or $120 in labor. Cheap isn’t economical if you’re redoing it yearly; expensive isn’t overpriced if it buys you three winters of crystal-clear night vision.
Frequently Asked Questions
- Can I use a paint-grade ceramic coating on my headlights if I already have some left over?
- How long after sealing can I drive at night with the headlights on—will the heat hurt the cure?
- My brand-new car’s lenses look cloudy straight from the showroom; should I still sand before sealing?
- Is it safe to run sealed headlights through touch-free laser car washes that use hydrofluoric acid?
- Do yellowed sealed beams mean the bulb is too hot, or did the sealer fail?
- Can I layer a ceramic topper over a urethane sealer for extra gloss, or will they fight each other?
- I sealed last year but road tar splattered; will bug-and-tar remover strip the coating?
- Why do some kits include a tiny packet of “plastic adhesion promoter”—is it gimmicky or essential?
- If I garage my car 90 % of the time, can I stretch a 24-month rated sealer to 48 months safely?
- Are headlight sealers legal in all 50 states, or could they alter light output and fail inspection?