There’s nothing quite as frustrating as glancing up at your car’s ceiling and seeing fabric dangling like a deflated balloon. A sagging headliner isn’t just an eyesore—it can obstruct your vision, create a safety hazard, and significantly diminish your vehicle’s interior appeal. While many drivers assume a full replacement is their only option, the right adhesive can restore your headliner to factory-fresh condition for a fraction of the cost and effort.
But here’s the catch: not all adhesives are created equal, and choosing the wrong one can lead to an even bigger mess. The automotive environment is brutal on adhesives, with extreme temperature swings, constant UV exposure, and moisture creating a perfect storm for bond failure. This comprehensive guide will walk you through everything you need to know about selecting and using the perfect headliner adhesive, ensuring your repair stands the test of time.
Top 10 car headliner adhesive
Detailed Product Reviews
1. 3M Headliner & Fabric Adhesive, 18.1 oz. Aerosol Can

Overview: The 3M Headliner & Fabric Adhesive delivers a purpose-built solution for automotive interior repairs in a substantial 18.1-ounce aerosol can. Engineered specifically for vehicle headliners, this professional-grade formula addresses the unique challenges of bonding fabric to automotive substrates while maintaining flexibility.
What Makes It Stand Out: This product’s automotive-specific formulation sets it apart from general-purpose adhesives. The adjustable nozzle provides precise control over spray pattern and volume, reducing waste and overspray on intricate headliner surfaces. Its clear-drying property ensures invisible repairs that won’t discolor light-colored fabrics, while the 30-60 minute drying window offers adequate working time without excessive waiting.
Value for Money: At $17.44 ($0.96 per ounce), this adhesive represents solid value for a specialized automotive product. The large can size handles multiple repairs or entire headliner replacements, and the four-can case option benefits professional shops. Compared to professional reupholstery services costing hundreds, this DIY solution pays for itself with a single use.
Strengths and Weaknesses: Strengths include 3M’s trusted brand reputation, generous volume, purpose-built automotive chemistry, and adjustable application control. Weaknesses involve aerosol limitations—potential overspray and ventilation requirements. The drying time, while reasonable, exceeds some fast-cure competitors, and temperature resistance may not match premium heavy-duty alternatives.
Bottom Line: For DIY enthusiasts tackling sagging headliners, this 3M adhesive offers reliable performance with brand-backed confidence. It’s ideal for those prioritizing proven automotive formulations over general-purpose options, though users in extreme climates should verify temperature specifications meet their needs.
2. 3M Super 77 Multi-Surface Spray Adhesive, 7.35 oz., Low VOC, Quick Bond, Fast Drying, Clear Finish for Foil, Foam, Paper, Metal, Plastic, Fabric, and Cardboard (77-10-NAT)

Overview: The 3M Super 77 Multi-Surface Spray Adhesive positions itself as a versatile, low-VOC bonding solution for light-duty applications. This 7.35-ounce can targets crafters and DIYers needing quick, repositionable adhesion across diverse materials.
What Makes It Stand Out: Its exceptional versatility stands out—bonding everything from foil to fabric with a fast-drying, clear finish. The 2-3 minute repositioning window is a key feature, allowing precise alignment before permanent bonding occurs. The low VOC formulation addresses health concerns, making it suitable for indoor use with proper ventilation.
Value for Money: At $9.99, this adhesive offers an affordable entry point for occasional users. However, the small can size and light-duty designation limit its value for automotive headliner repairs. While cheap upfront, potential reapplication costs could accumulate if the bond fails under automotive heat and weight stress.
Strengths and Weaknesses: Strengths include rapid bonding, material versatility, user-friendly repositioning, and environmental consciousness. Major weaknesses for headliner use include insufficient temperature resistance for automotive interiors, small volume limiting coverage, and light-duty formulation that may not support heavy headliner fabric long-term. It’s simply not engineered for vehicular environments.
Bottom Line: This product excels for crafts and school projects but falls short for automotive headliner repair. Despite the trusted 3M name, its light-duty classification and lack of automotive-specific temperature resistance make it a risky choice for vehicle interiors. Choose this for scrapbooking, not for fixing your car’s ceiling.
3. Headliner Repair Glue, Car Headliner Adhesive with Rubber Seam Roller Headliner Repair Kit,Upholstery Glue with Brush for Automotive interiors, Fabric, Leather (4.23oz)

Overview: This comprehensive headliner repair kit provides a complete DIY solution beyond just adhesive. The 4.23-ounce bottle comes bundled with a professional-grade rubber seam roller and protective gloves, targeting users seeking professional results without shop prices.
What Makes It Stand Out: The all-in-one kit approach eliminates guesswork—everything needed for bubble-free application arrives together. The engineered solid wood handle roller with flexible rubber head actively minimizes air pockets, while the extreme temperature range (-40°C to 120°C) ensures year-round reliability. Its non-toxic, odorless, non-flammable formula uniquely prioritizes interior safety.
Value for Money: At $16.99, the kit delivers strong value by including application tools worth $10+ separately. Coverage of 100 square feet handles most sedan headliners, and the safety-conscious formulation justifies the premium over basic adhesives. For DIYers lacking specialized tools, this represents significant savings.
Strengths and Weaknesses: Strengths include the complete toolset, exceptional temperature resistance, waterproof performance, and safe interior-use chemistry. The brush applicator and roller combination ensures professional finishes. Weaknesses center on the lesser-known brand reputation compared to 3M or Permatex, and the smaller volume may require multiple kits for larger vehicles like SUVs or trucks.
Bottom Line: This kit excels for safety-conscious DIYers wanting professional tools and results. The non-toxic formula and included roller make it ideal for first-time repairs, though brand-loyal buyers might hesitate. For most passenger vehicles, this offers the best combination of performance, safety, and application control.
4. Headliner Repair Glue, Car Headliner Adhesive with Brush, Car Roof Liner Fabric Adhesive, Upholstery Glue for Cars,Headliner Repair Kit, Suitable for Automotive interiors, Fabric, Leather

Overview: This brush-on headliner adhesive offers a streamlined, eco-conscious approach to interior automotive repairs. The 4.23-ounce bottle features an integrated brush applicator, targeting users who prefer precision over spray application for controlled, mess-free bonding.
What Makes It Stand Out: Its VOC-free, non-toxic formulation prioritizes environmental and health safety without sacrificing performance. The impressive temperature resistance (-40°C to 120°C) matches premium competitors, while the waterproof seal ensures durability through car washes and humidity. The built-in brush design eliminates separate tools and reduces waste.
Value for Money: At $13.99, this adhesive undercuts kit versions while delivering similar chemical performance. The brush applicator adds convenience value, though the lack of a roller tool may compromise finish quality for novices. For small to medium repairs where precision matters, it offers excellent cost-effectiveness.
Strengths and Weaknesses: Strengths include eco-friendly chemistry, extreme temperature resilience, permanent waterproof bonding, and intuitive brush application. The extended cure times (5-10 hours initial, 12-24 hours full) require patience but ensure strong bonds. Weaknesses involve the absence of a roller for bubble prevention, unknown brand longevity, and potential application inconsistency compared to spray or roller methods.
Bottom Line: Ideal for environmentally conscious users and those with chemical sensitivities, this adhesive delivers solid performance at a competitive price. The brush applicator suits detail-oriented DIYers, but prepare for longer cure times. For quick repairs or large areas, consider alternatives with faster setting or included roller tools.
5. Permatex 27828 Body Shop Heavy Duty Headliner Adhesive, High-Strength Spray Adhesive, Repair Detached Or Loose Interior Parts, Dries Clear, Aerosol Can, 16.75 Oz
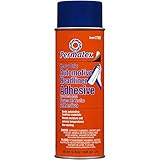
Overview: Permatex brings professional body shop credentials to the DIY market with this heavy-duty headliner adhesive. The substantial 16.75-ounce aerosol can delivers industrial-strength bonding specifically engineered for demanding automotive interior applications.
What Makes It Stand Out: Professional-grade holding power and exceptional temperature resistance (up to 170°F/77°C) distinguish this adhesive from consumer-grade options. The water-resistant formula maintains integrity through extreme weather, while the high-strength chemistry supports not just headliners but also carpets, trunk linings, and door panels. The clear-drying property ensures OEM-quality appearance.
Value for Money: At $21.00 ($1.25 per ounce), this commands a premium but delivers professional results. For hot climates or heavy fabrics, the superior temperature rating prevents summer sagging failures that cheaper alternatives risk. One can handles multiple vehicles, amortizing the cost across several repairs.
Strengths and Weaknesses: Strengths include unmatched temperature resistance, proven brand reputation in automotive aftermarket, large volume, versatile interior applications, and professional-strength bonding. Weaknesses involve the highest price per ounce, inevitable aerosol overspray requiring careful masking, and likely strong fumes necessitating excellent ventilation. The professional formulation may be overkill for minor repairs.
Bottom Line: For those refusing to compromise on durability, especially in hot climates, Permatex delivers professional-grade performance worth the premium. It’s the top choice for long-term repairs on heavy headliners or high-temperature vehicles. Budget-conscious users with mild climates may find adequate alternatives, but this sets the durability standard.
6. 100 ML Headliner Repair Glue - Quick Repair, Strong Adhesive, Easy to Use - Multifunctional for Car Roof Fabric, Headliner & Inside Roof Cloth (1PCS)

Overview: This 100ml headliner repair glue positions itself as a versatile, fast-acting solution for automotive interior repairs. Designed specifically for car roof fabric and headliner reattachment, it promises quick bonding with waterproof and heat-resistant properties suitable for various materials beyond just automotive applications.
What Makes It Stand Out: The product emphasizes its universal bonding capability, claiming to work on leather, fabric, sponge, canvas, and even wallpaper. Its fast-bonding agent formulation ensures impermeability after curing while maintaining toughness and flexibility. The waterproof and non-flammable properties make it particularly appealing for automotive use where temperature fluctuations are extreme.
Value for Money: At $8.99 for 100ml, this glue sits in the budget-friendly category. While it lacks premium features like an integrated brush or explicit temperature ratings, the price point makes it accessible for DIY enthusiasts tackling occasional repairs. Comparable products often retail for $10-15, making this an economical choice for small to medium projects.
Strengths and Weaknesses: Strengths include versatile material compatibility, quick bonding action, heat resistance, and waterproof formulation. The non-flammable nature adds safety. Weaknesses are the absence of an application brush, vague curing time specifications, and potentially inconsistent quality control typical of budget adhesives. The generic branding may also raise questions about long-term durability.
Bottom Line: This headliner glue is a solid budget option for quick fixes and small repairs. While it may not match premium brands for longevity or ease of application, its affordability and versatility make it worth considering for DIY car owners willing to apply it carefully with their own tools.
7. Headliner Repair Glue (100ml) - Strong Car Roof Liner Adhesive, Flexible Upholstery Glue for Cars, with Brush, Suitable for Automotive interiors, Leather, Fabric (100ml)

Overview: This 100ml headliner repair glue distinguishes itself with an integrated brush applicator and a formulation designed for flexibility. Marketed as a professional-grade automotive interior adhesive, it promises strong bonding while maintaining the original feel of fabrics after curing, making it ideal for car roof liners and upholstery projects.
What Makes It Stand Out: The built-in brush cap provides mess-free application without needing separate tools. Its unique formula cures transparent and odorless while preserving fabric flexibility—unlike cheaper adhesives that turn stiff and brittle. The product explicitly mentions excellent temperature resistance and provides clear curing times (5-10 hours initial, 12-24 hours complete), which adds confidence for users.
Value for Money: Priced at $11.99 ($3.40/ounce), this glue commands a premium over budget alternatives but justifies it with the included brush and flexible cure technology. The after-sales service promise adds value, offering replacements for damaged or unsatisfactory products. For those prioritizing application convenience and professional results, the extra cost is worthwhile.
Strengths and Weaknesses: Strengths include the integrated brush, flexible non-brittle cure, transparent finish, waterproof/heat-resistant properties, and responsive customer service. The clear curing timeline helps with project planning. Weaknesses are the relatively high price per volume and the lengthy initial curing period of 5-10 hours, which may inconvenience users seeking faster results.
Bottom Line: This headliner glue is an excellent mid-range choice for discerning DIYers and automotive enthusiasts. The brush applicator and flexible cure formula make it worth the modest premium, delivering professional-looking repairs that maintain fabric integrity over time.
8. Car Headliner Repair Adhesive, Upholstery & Roof Liner Quick Repair Glue, Professional Automotive Interior Fix Glue Kits, Strong Bond for Automotive interiors, Fabric, Leather (1)

Overview: Marketed as a professional automotive interior fix kit, this headliner adhesive offers a no-frills approach to roof liner repairs. The product emphasizes its quick-bonding capability and unique formula designed for leather and fabric applications, promising high transparency and strong adhesion across all seasons.
What Makes It Stand Out: This glue claims a “unique formula” that remains transparent and odorless after curing, differentiating it from low-quality alternatives that may yellow or emit fumes. Its high elasticity prevents hardening or cracking over time, ensuring long-term durability. The versatility extends beyond automotive use to household items like sofas and even creative applications such as patching jeans.
Value for Money: At $7.99, this is among the most affordable options in the headliner repair category. While the exact volume isn’t specified in the title, the single-unit packaging suggests a standard 100ml size. The competitive pricing makes it attractive for budget-conscious consumers, though the lack of an included brush means additional tool costs.
Strengths and Weaknesses: Strengths include the low price point, strong initial adhesion, heat and water resistance, non-flammable formulation, and versatile application range. The transparent, odorless cure is another plus. Weaknesses are the absence of an applicator brush, ambiguous volume specification, and potentially weaker brand recognition which may affect quality consistency. The curing time (5-10 hours initial) is also lengthy.
Bottom Line: This is a cost-effective solution for straightforward headliner repairs. While it requires your own application tools and patience during curing, its affordability and reliable bonding performance make it a smart choice for DIYers on a tight budget.
9. Headliner Repair Glue, Car Headliner Adhesive with Brush, Car Roof Liner Fabric Adhesive, Upholstery Glue for Cars,Headliner Repair Kit, Suitable for Automotive interiors, Fabric, Leather,150ml

Overview: This 150ml headliner repair kit positions itself as a premium, eco-conscious solution for automotive interior repairs. With an integrated brush applicator and impressive temperature resistance specifications, it targets users seeking professional-grade results with safety considerations for enclosed vehicle environments.
What Makes It Stand Out: The exceptional temperature range (-40°C to 120°C) far exceeds typical competitors, ensuring performance in extreme climates. Its non-toxic, VOC-free, and eco-friendly formulation makes it safe for use around children and pets—a rare feature in chemical adhesives. The built-in brush and explicit waterproof sealing claims add practical value for long-lasting repairs.
Value for Money: At $14.99 for 150ml, this glue offers the highest absolute price but reasonable per-milliliter cost given its advanced features. The eco-friendly formula and extreme temperature tolerance justify the premium over budget options. For those in harsh climates or with health sensitivities, the investment pays dividends in safety and durability.
Strengths and Weaknesses: Strengths include the impressive temperature resistance, non-toxic eco-friendly formula, integrated brush, 100% waterproof seal, and larger 150ml volume. The professional results claim and clear curing timeline inspire confidence. Weaknesses are the highest price point in this comparison and potential overkill for minor repairs or mild climates. Availability may be more limited than mainstream brands.
Bottom Line: This is the top-tier choice for quality-conscious consumers prioritizing safety and extreme performance. The eco-friendly formulation and superior temperature resistance make it ideal for families and vehicles in demanding environments, justifying its premium price.
10. YAMVXIC 200 ML Headliner Repair Glue, Car Roof Liner Quick Repair Adhesive, Car Roof Fabric Glue with Brush

Overview: YAMVXIC’s 200ml headliner repair glue offers the largest volume in its price class, positioning itself as a value-driven solution for extensive automotive interior repairs. The product promises professional-grade adhesion with a unique formula designed for leather, fabric, sponge, canvas, and various automotive surfaces while maintaining flexibility after curing.
What Makes It Stand Out: The exceptional 200ml volume at a budget price point provides unmatched quantity for large projects or multiple repairs. The included brush cap adds convenience typically reserved for premium products. Its unique leather and iron adhesive formula claims to be transparent, odorless, and superior to low-quality alternatives, while maintaining high elasticity to prevent cracking over time.
Value for Money: At $8.99 for 200ml ($4.50/fl oz), this represents outstanding value—effectively doubling the volume of standard 100ml competitors at similar or lower prices. The included brush eliminates extra tool costs. For users with multiple vehicles or extensive upholstery work, the bulk sizing offers significant savings over buying multiple smaller tubes.
Strengths and Weaknesses: Strengths include the generous 200ml volume, low price, integrated brush, heat and water resistance, non-flammable formulation, and versatile application range. The transparent, flexible cure is ideal for visible repairs. Weaknesses include lesser-known brand reputation, potentially inconsistent quality control, and vague temperature resistance specifications compared to premium competitors. The large tube may dry out if not sealed properly.
Bottom Line: This is the value champion for DIYers tackling big projects or multiple repairs. The combination of generous volume, included brush, and rock-bottom pricing makes it hard to beat, though quality-conscious buyers may prefer established brands for critical repairs.
Understanding Car Headliner Adhesive Failure
Before diving into solutions, it’s crucial to understand why headliners fail in the first place. The typical headliner consists of multiple layers: a foam backing, fabric, and a substrate board. Factory adhesives degrade over time due to thermal cycling—repeated expansion and contraction from temperature changes. This process breaks down the foam layer itself, causing the fabric to separate. Simply spraying new glue on top of old, deteriorated foam often leads to temporary fixes that fail within months. The key is addressing the root cause, not just the symptoms.
Why Choosing the Right Adhesive Matters
Your car’s interior can reach temperatures exceeding 160°F on a summer day and drop below freezing in winter. Standard craft glue or all-purpose spray adhesive simply cannot withstand these extremes. The wrong adhesive will either dry too brittle, crack under flexing, or melt in high heat, creating a sticky, dripping mess. A quality automotive headliner adhesive is engineered specifically to maintain flexibility while providing a tenacious bond that resists environmental stressors unique to vehicle interiors.
Types of car headliner adhesives
Solvent-Based Spray Adhesives
These traditional powerhouses use volatile organic compounds (VOCs) to create aggressive bonds. They dry quickly and offer excellent initial tack, making them popular for professional installations. However, they require careful application due to strong fumes and potential for overspray. The chemical composition allows them to penetrate porous surfaces effectively, creating a durable bond that resists moisture. When using these, proper ventilation isn’t just recommended—it’s essential for your health and safety.
Water-Based Spray Adhesives
Environmentally conscious DIYers often gravitate toward water-based formulas. These low-VOC alternatives have improved dramatically in recent years, offering respectable bond strength with minimal odor. They clean up easily with soap and water and are less likely to damage sensitive materials. The trade-off is longer drying times and potentially less heat resistance compared to their solvent-based counterparts. For vehicles parked in moderate climates, these can be an excellent compromise.
Contact Cement Adhesives
Contact cement creates bonds when both surfaces are coated and allowed to become tacky before joining. This two-surface application provides exceptional strength and is ideal for larger headliner sections where you need instant, permanent adhesion. The technique requires precision—you get one shot at positioning. Once the surfaces touch, they bond immediately, making this option better suited for experienced DIYers or those working with assistance.
Heavy-Duty Construction Adhesives
Some automotive enthusiasts swear by construction-grade adhesives, particularly polyurethane-based formulas. These offer incredible gap-filling properties and bond strength that can last decades. However, their rigidity can be a double-edged sword. Headliners need to flex slightly with temperature changes and vehicle movement. Too rigid an adhesive can cause the substrate board to crack or create visible lines where the fabric doesn’t conform perfectly to curves.
Specialty Headliner Adhesives
These are formulations designed explicitly for automotive headliner repair. They typically combine the best attributes of other types: heat resistance, flexibility, and compatibility with automotive fabrics and foams. Many include UV inhibitors to prevent sun degradation and are tested against automotive industry standards for fogging and VOC emissions. While often pricier than general-purpose adhesives, they eliminate guesswork for critical applications.
Key Features to Look for in a Quality Headliner Adhesive
Heat Resistance Rating
Always check the temperature rating on the product specifications. A quality automotive adhesive should withstand at least 180°F continuously, with temporary resistance up to 200°F or higher. Look for products tested to ASTM D-4498 standards or those specifically mentioning “automotive grade” heat resistance. The rating should account for both the adhesive’s melting point and its ability to maintain flexibility at temperature extremes.
Moisture and Humidity Resistance
Your headliner faces moisture from multiple sources: humidity, condensation, and potential leaks. An adhesive with poor moisture resistance will soften and release over time. Look for products labeled as “water-resistant” or “waterproof” with specific mention of automotive applications. Some advanced formulas include mold and mildew inhibitors, which prevent the unsightly black spots that can develop when moisture gets trapped between layers.
Bond Strength and Flexibility
The ideal adhesive creates a strong bond while remaining pliable. This is measured in pounds per square inch (PSI) of tensile strength and elongation percentage. For headliners, you want an adhesive that can stretch at least 200% without breaking. This flexibility allows the fabric to move with the substrate without delaminating. Too strong and rigid, and the foam backing may tear; too weak, and it won’t hold.
Drying Time and Workability
Consider your skill level and working environment. Fast-drying adhesives (tack time under 30 seconds) are efficient but unforgiving. Slower formulas (5-10 minute tack time) allow for repositioning and smoothing out wrinkles. Temperature and humidity significantly affect drying times, so check the manufacturer’s recommended application conditions. Some adhesives offer a “pressure-sensitive” window where they remain repositionable for several minutes before creating a permanent bond.
Surface Preparation: The Foundation of a Lasting Repair
Success with headliner adhesive is 90% preparation and 10% application. Begin by carefully removing the headliner board from the vehicle—this typically involves unscrewing visors, handles, and dome lights. Once removed, peel away all loose fabric and degraded foam. Use a stiff brush or scraper to remove every trace of old adhesive and crumbling foam until you reach the solid substrate. Wipe the surface with isopropyl alcohol to remove oils and residues. For severely deteriorated foam, consider applying a thin layer of fabric-backed foam to create a new bonding surface.
Step-by-Step Application Guide
Start by testing your adhesive on a small, inconspicuous area to ensure compatibility. Work in sections no larger than 2-3 square feet to prevent the adhesive from drying before you position the fabric. Apply a light, even coat to both the substrate and fabric backing, holding the can 6-8 inches away. Allow the adhesive to become tacky according to manufacturer instructions—this is crucial; applying too early or too late compromises the bond. Carefully lay the fabric onto the substrate, starting from the center and working outward. Use a soft roller or your hand wrapped in a clean cloth to smooth the fabric, working out air bubbles and wrinkles with firm, even pressure.
Common Application Mistakes to Avoid
The number one mistake is insufficient surface preparation. Skipping the cleaning step guarantees premature failure. Another critical error is applying adhesive too thickly—more isn’t better. Thick layers take longer to dry and can bleed through fabric, creating visible dark spots. Avoid working in direct sunlight or extreme temperatures, which cause uneven drying. Never rush the tack time; impatience leads to weak bonds. Finally, don’t stretch the fabric excessively during application; it will contract as the adhesive dries, creating puckers and wrinkles.
Safety Considerations When Working with Adhesives
Solvent-based adhesives release harmful VOCs that can cause dizziness, respiratory irritation, and long-term health effects. Always work in a well-ventilated area—outdoors is ideal. Wear a NIOSH-approved respirator with organic vapor cartridges, not just a dust mask. Safety goggles protect your eyes from overspray and splashes. Nitrile gloves prevent skin absorption of chemicals and keep oils from your hands off the surfaces. Keep a fire extinguisher nearby; solvent fumes are highly flammable. Allow the adhesive to fully cure with windows down before driving, especially in hot weather when fumes can intensify.
Professional vs. DIY Headliner Repair
Professional upholstery shops have access to commercial-grade adhesives and pneumatic spray equipment that create finer, more consistent coats. They can also steam-stretch fabrics for a factory-tight finish and have experience with complex headliners that include sunroof openings or molded shapes. However, professional repair costs $200-$400 or more. DIY repair costs $20-$50 in materials but requires patience, attention to detail, and acceptance of potentially less-than-perfect results. Your decision should factor in the vehicle’s value, your skill level, and your tolerance for imperfections.
Cost Analysis: Is It Worth Doing Yourself?
A quality automotive headliner adhesive costs between $15 and $30 per can, with most headliners requiring 1-2 cans. Add $10-$20 for cleaning supplies, rollers, and protective equipment. Compare this to $250-$500 for professional replacement. The DIY approach saves significant money but invests your time—expect 4-6 hours for a complete job, including removal, prep, application, and reinstallation. For daily drivers or older vehicles, DIY makes economic sense. For luxury cars, show vehicles, or complex headliners with integrated electronics, professional installation often justifies the expense.
Environmental Factors Affecting Adhesive Performance
Your local climate plays a huge role in adhesive selection. Desert dwellers need maximum heat resistance and UV protection. Coastal residents should prioritize moisture and salt-air corrosion resistance. Cold climate drivers need adhesives that remain flexible in sub-zero temperatures without becoming brittle. Garage-kept vehicles face less extreme cycling and can use less robust formulas. Consider your vehicle’s interior color, too—dark interiors absorb more heat, stressing adhesives more severely than light-colored interiors.
Troubleshooting Common Headliner Issues
If bubbles appear after application, they can sometimes be punctured with a fine needle and pressed flat if caught early. Persistent sagging in corners often indicates insufficient adhesive or failure to clean properly in those areas. Fabric that’s too tight can pull away at edges; this requires carefully peeling back and re-stretching. If the substrate board itself is warped or cracked, adhesive alone won’t solve the problem—you may need to reinforce it with fiberglass mesh and resin first. Always address underlying issues like water leaks before repairing, or the new headliner will fail just as quickly.
How Long Should a Headliner Repair Last?
With proper surface preparation and a quality automotive-grade adhesive, a DIY repair should last 5-10 years, matching the original factory installation lifespan. Professional repairs using commercial equipment and materials often last 10-15 years. The key variable is the condition of the substrate board and remaining foam backing. If the foam is completely deteriorated, even the best adhesive is bonding to a crumbling layer. In such cases, applying new foam backing or opting for a complete headliner board replacement extends longevity significantly.
Maintaining Your Newly Repaired Headliner
Extend your repair’s life by addressing root causes. Use sunshades to reduce interior temperatures and UV exposure. Fix any water leaks from sunroof drains or door seals promptly. Clean the headliner gently with a soft brush attachment on your vacuum; avoid wet cleaning that can seep through fabric and weaken the adhesive bond. Park in shade or garages when possible. Periodically inspect edges and around fixtures for early signs of separation, addressing small issues before they become major problems.
Frequently Asked Questions
What’s the difference between headliner adhesive and regular spray adhesive?
Automotive headliner adhesives are specifically formulated to withstand extreme temperature fluctuations, UV exposure, and moisture that occur in vehicle interiors. Regular spray adhesives lack the heat resistance and flexibility needed, typically failing within months when exposed to summer heat. Headliner adhesives also resist fogging and won’t release harmful chemicals that can stain or damage automotive fabrics.
Can I repair my headliner without removing it from the car?
While possible for small localized repairs, it’s not recommended for full-headliner sagging. In-car repairs limit your ability to properly clean the substrate, apply even adhesive coats, and stretch the fabric correctly. The results are often temporary and aesthetically disappointing. Removing the headliner board allows for proper preparation and application that ensures longevity.
How many cans of adhesive do I need for a standard sedan?
Most standard sedans require one to two 16-20 ounce cans of spray adhesive. Larger vehicles like SUVs or trucks with panoramic sunroofs may need three cans. It’s better to have slightly too much than too little, as running out mid-project can create visible seams. Check the coverage area on the can—most cover 50-70 square feet in a single coat, but headliner work requires two coats (one on each surface).
Will headliner adhesive work on other interior fabrics?
Yes, quality headliner adhesives work well on door panels, pillar covers, and other interior fabric applications. However, test compatibility first, especially on vinyl or leather-like materials. Some adhesives can cause discoloration or stiffness. For plastic components, ensure the adhesive won’t attack or melt the substrate. Always follow manufacturer recommendations for material compatibility.
Why does my headliner keep sagging even after using adhesive?
Persistent sagging usually indicates one of three issues: inadequate surface preparation (old foam residue remains), using a non-automotive adhesive, or a deteriorated substrate board. The foam backing may be so degraded that it’s powdery, preventing any adhesive from creating a lasting bond. In such cases, you need to apply new foam backing or replace the entire headliner board.
How long should I let the adhesive dry before reinstalling the headliner?
Most headliner adhesives reach 80% strength within 24 hours, but full cure takes 48-72 hours. Wait at least 24 hours before handling the headliner board to reinstall it. After reinstallation, avoid extreme temperatures for another 48 hours if possible. Rushing this process is the most common cause of premature failure, as the adhesive hasn’t developed its full heat-resistant properties.
Can I use a heat gun to speed up drying?
Absolutely not. Applying direct heat can cause the adhesive to skin over too quickly, trapping solvents underneath and creating a weak bond. It can also shrink the fabric unevenly and create wrinkles. Let the adhesive dry naturally according to manufacturer specifications. If you need faster drying, work in smaller sections rather than accelerating the process artificially.
What temperature is too cold to apply headliner adhesive?
Most aerosol adhesives require ambient temperatures between 60°F and 80°F for proper application. Below 55°F, the adhesive won’t atomize correctly, resulting in uneven coverage and poor bonding. The substrate and fabric should also be at room temperature. If working in a cold garage, use a space heater to warm the area for several hours before starting, but never apply adhesive directly to a heated surface.
Is it normal for the adhesive to bleed through the fabric?
No, this indicates you’ve applied the adhesive too heavily or the fabric is too porous. Quality headliner fabric has a backing that prevents bleed-through when used correctly. If you experience this, you’re likely using too much product. Apply lighter, multiple coats rather than one heavy coat. If bleed-through persists, the fabric may be incompatible with spray adhesives and require a different application method.
Can I re-glue a headliner that has water stains or mildew?
You must address stains and mildew before applying adhesive, or they’ll continue to spread and weaken the bond. Clean mildew with a mixture of water and white vinegar, then let dry completely. For water stains, determine and fix the leak source first. Severely stained or mildewed fabric should be replaced, as the organic material will continue to decompose and cause adhesion failure regardless of the glue used.