Your vehicle’s undercarriage faces a relentless assault from road salt, moisture, gravel, and chemical deicers. While modern manufacturing has improved factory rust protection, the truth is that most vehicles still leave the assembly line with minimal defense against the elements. This is where asphalt-based undercoating emerges as a time-tested champion of automotive preservation. Far from being an outdated technology, today’s advanced formulations combine old-world durability with modern chemical engineering to create a protective barrier that can add years of life to your daily driver, weekend warrior, or classic investment.
Choosing the right asphalt-based undercoating isn’t just about grabbing the first can you see at the auto parts store. The market is flooded with options that vary wildly in composition, performance, and application requirements. Whether you’re a DIY enthusiast ready to crawl under your car or a discerning customer seeking professional application, understanding what separates exceptional products from mediocre ones will save you money, time, and potentially heartbreaking rust repairs down the road. Let’s dive deep into everything you need to know to make an informed decision.
Top 10 Asphalt-based Undercoating
Detailed Product Reviews
1. Bondo 737 Heavy Duty Rubberized Undercoating Spray – 18 oz Aerosol, 5-Pack, Textured Finish, Chip and Abrasion Resistant, Non-Paintable, Asphalt-Based
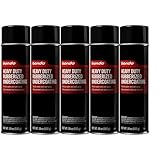
Overview: Bondo 737 delivers professional-grade undercarriage protection in a convenient five-pack configuration. This asphalt-based rubberized coating creates a durable barrier against rust, chips, and weathering for vehicles and various outdoor surfaces. Each 18-ounce aerosol can covers wheel wells, undercarriages, and even non-automotive applications like gutters and posts with a distinctive textured finish.
What Makes It Stand Out: The single-coat application sets this product apart, preventing drips and sagging while delivering consistent coverage. The five-pack offering provides exceptional value for comprehensive projects, allowing you to treat an entire vehicle plus have spare cans for touch-ups. Its versatility extends beyond automotive use to tree wound sealing and roof protection, making it a multi-purpose solution. The textured finish provides both aesthetic appeal and enhanced protective qualities.
Value for Money: At $89.99 for five cans (approximately $18 per unit), this package undercuts professional undercoating services significantly. A single shop treatment can cost $150-300, making this DIY alternative highly economical for enthusiasts. The bulk packaging eliminates multiple store trips and ensures consistent product batch performance across your entire project.
Strengths and Weaknesses: Strengths: Exceptional chip and abrasion resistance; excellent sound-deadening properties; true single-coat coverage; versatile application beyond vehicles; professional textured appearance; prevents exterior rust effectively.
Weaknesses: Non-paintable formula limits customization options; strong asphalt odor during application; requires meticulous surface prep for adhesion; aerosol format may struggle with heavy rust scale; overspray can be difficult to remove.
Bottom Line: For DIY mechanics seeking comprehensive undercarriage protection without professional shop prices, the Bondo 737 five-pack is an outstanding investment. Its durability and versatility justify the cost, though the non-paintable nature requires careful planning for visible areas.
2. Henry Black Asphalt Rubber-Based Driveway Crack Repair 1 gal.

Overview: Henry’s Black Asphalt Crack Repair offers a straightforward solution for maintaining asphalt driveways and parking areas. This ready-to-use, rubberized asphalt emulsion comes in a one-gallon container designed for direct application without mixing or special equipment. It effectively seals cracks up to half an inch wide, preventing water infiltration and subsequent freeze-thaw damage.
What Makes It Stand Out: The material’s exceptional flexibility distinguishes it from rigid crack fillers, allowing it to expand and contract with temperature fluctuations without cracking. Its direct-from-container application eliminates preparation time, while the formula’s resistance to high temperatures ensures it won’t soften or track during hot summer months. The product creates a watertight, weather-resistant seal that extends driveway lifespan significantly.
Value for Money: Priced at $74.49 per gallon, this professional-grade repair material covers approximately 250-300 linear feet of half-inch cracks, making it substantially cheaper than hiring asphalt contractors. While premium compared to basic cold-pour fillers, its durability and single-application effectiveness reduce long-term maintenance costs. The gallon size suits medium to large driveways with multiple cracks.
Strengths and Weaknesses: Strengths: Ready-to-use convenience; superior flexibility prevents re-cracking; excellent water and weather resistance; withstands high temperatures; creates tight, durable seal; cost-effective for extensive repairs.
Weaknesses: Limited to asphalt surfaces only; ineffective for cracks wider than 1/2 inch; black color may not match faded asphalt; requires clean, dry conditions for application; not suitable for concrete or masonry repairs.
Bottom Line: Henry’s Black Asphalt Crack Repair is an excellent choice for homeowners with asphalt driveways needing reliable, long-lasting crack sealing. Its professional formulation justifies the price premium over budget alternatives, though proper crack preparation remains essential for optimal results.
3. KBS UnderCoat Aerosol Solvent-Based Asphalt

Overview: KBS UnderCoat provides targeted protection for vehicle underbodies through a solvent-based asphalt formula in a convenient aerosol format. Designed for wheel wells, frames, floor pans, and quarter panels, this product creates a tough yet flexible matte black coating that adheres strongly to metal and painted surfaces while delivering sound-dampening benefits and corrosion resistance.
What Makes It Stand Out: Unlike many competitors, KBS UnderCoat remains paintable after curing, offering crucial flexibility for restoration projects requiring topcoat color matching. Its excellent adhesion properties prevent delamination even under extreme vibration and road salt exposure. The solvent-based formulation penetrates minor rust and creates a moisture-proof barrier more effectively than water-based alternatives, while the matte finish provides a professional OEM appearance.
Value for Money: At $37.57 per aerosol can, KBS positions itself as a premium single-can option. While more expensive per ounce than bulk alternatives, its paintable characteristic eliminates the cost of separate primers or removal if color customization is needed. For spot repairs or partial restorations, this targeted approach prevents waste, though full undercarriage jobs may require multiple cans.
Strengths and Weaknesses: Strengths: Paintable surface allows color customization; superior adhesion to metal and paint; excellent road salt and corrosion resistance; tough yet flexible film; effective sound deadening; professional matte black finish.
Weaknesses: Higher cost per can versus bulk packs; solvent-based formula produces strong fumes requiring ventilation; may need multiple coats for heavy protection; surface preparation critical for adhesion; not ideal for large-scale applications.
Bottom Line: KBS UnderCoat excels for automotive restorers needing a paintable undercoating solution. Its superior adhesion and flexibility justify the premium price for specialized applications, though budget-conscious buyers tackling full vehicles should compare multi-can packages.
What Is Asphalt-Based Undercoating and Why Does It Matter?
The Science Behind Asphalt Protection
Asphalt-based undercoating utilizes bitumen—a naturally occurring hydrocarbon derived from petroleum refining—as its primary protective agent. This viscous, waterproof material creates an impermeable membrane that physically blocks moisture and oxygen from reaching metal surfaces. Unlike paint or sealants that merely sit on top, quality asphalt formulations bond at a molecular level with clean metal, creating a self-healing barrier that remains pliable even in extreme temperatures. This flexibility is crucial; as your vehicle’s frame flexes over bumps and through temperature cycles, the coating moves with the metal rather than cracking and exposing vulnerable areas.
How It Differs from Other Undercoating Types
While rubberized, wax-based, and polymer coatings each have their place, asphalt formulations offer unique advantages in specific scenarios. Rubberized coatings excel at sound deadening but can become brittle and trap moisture if compromised. Wax-based products provide easy application but wash away relatively quickly. Asphalt strikes the optimal balance between durability, cost-effectiveness, and longevity. It doesn’t just coat the surface—it saturates minor rust crevices and creates a thick, resilient shield that withstands abrasion from road debris far better than thinner alternatives.
Key Benefits of Choosing Asphalt-Based Formulations
Superior Rust and Corrosion Prevention
The primary advantage lies in asphalt’s exceptional water displacement properties. Once cured, these coatings maintain a hydrophobic barrier that repels liquid water while also resisting water vapor transmission. This dual-action protection is critical because rust requires both moisture and oxygen to form. Premium formulations include corrosion inhibitors that actively neutralize oxidation, essentially putting existing surface rust into suspended animation while preventing new formation.
Sound Dampening Properties
Beyond rust protection, asphalt’s dense composition dramatically reduces road noise transmission into the cabin. The material’s viscoelastic nature absorbs vibrations from tire roar, gravel impact, and wind turbulence. Many users report a noticeable reduction in interior decibel levels after application, particularly on older vehicles where factory sound deadening has deteriorated. This acoustic benefit transforms the driving experience, especially in trucks and SUVs that see significant highway miles.
Cost-Effectiveness for Long-Term Protection
When evaluated on a cost-per-year basis, quality asphalt undercoating delivers exceptional value. A single proper application can provide 5-7 years of protection in moderate climates, compared to 1-3 years for thinner alternatives. This longevity means fewer reapplications, less labor, and ultimately lower total ownership costs. For vehicles you plan to keep beyond the warranty period, the upfront investment pays dividends in preserved resale value and avoided repair bills.
Understanding the Composition: What’s Really in the Can?
Bitumen Content and Quality Grades
Not all asphalt is created equal. The bitumen content percentage directly correlates with protection level—premium products contain 60-70% solids, while budget options may dilute this to 40% or less. Look for terms like “oxidized bitumen” or “blown asphalt,” which indicate a refined, more elastic grade. The manufacturing process matters: air-blown bitumen undergoes controlled oxidation that increases its softening point, making it more resistant to heat sagging in summer months.
Additives That Enhance Performance
Modern formulations aren’t just raw asphalt. Corrosion inhibitors like zinc phosphate or barium metaborate actively fight oxidation. Fibrous reinforcements (often cellulose or mineral fibers) improve tensile strength and crack resistance. Tackifiers enhance adhesion to vertical surfaces and prevent dripping during application. Some advanced products include rust converters that chemically transform iron oxide into stable compounds, allowing application over light surface rust without complete removal.
Solvent vs. Water-Based Carriers
Traditional solvent-based products use mineral spirits or xylene to thin the asphalt for application. These cure faster and penetrate rust better but carry stronger fumes and environmental concerns. Water-based formulas have evolved significantly, offering lower VOC emissions and easier cleanup, though they typically require longer cure times and more meticulous surface preparation. Your choice here often depends on local regulations and whether you’re working in a ventilated professional shop versus a residential garage.
Critical Features to Evaluate Before Buying
Viscosity and Coverage Rate
Product viscosity—measured in Krebs Units (KU)—determines both application method and coverage area. Thinner products (around 70-80 KU) spray easily through standard undercoating guns but may require multiple coats. Thicker formulations (90-100+ KU) provide single-coat coverage but demand professional-grade equipment. Always calculate true coverage based on recommended wet film thickness, typically 15-25 mils. A product claiming “100 square feet per gallon” might only achieve that at a useless thinness; real-world application often yields 60-75 square feet per gallon for adequate protection.
Drying Time and Curing Process
Understanding the difference between “dry to touch” and fully cured is critical. Most asphalt undercoatings dry to the touch within 2-6 hours, but full cure—when maximum hardness and adhesion develop—takes 7-14 days depending on temperature and humidity. During this curing window, the coating remains vulnerable to rain, car washes, and road spray. Premium formulations include accelerators that reduce cure time without compromising flexibility. Consider your local weather forecast and vehicle usage before application.
Temperature Application Range
Every product specifies minimum and maximum application temperatures, typically 50-90°F. Below this range, the coating won’t flow properly or adhere correctly. Above it, solvents evaporate too quickly, causing bubbling and poor film formation. Some advanced cold-weather formulas can be applied down to 35°F using special solvent blends, but these cost more and require careful technique. Always check the product data sheet, not just the marketing claims on the can.
Flexibility and Crack Resistance
A coating that cracks in winter defeats its purpose. Look for products specifying “non-drying” or “permanently flexible” characteristics. The binder’s glass transition temperature (Tg) indicates when it becomes brittle; quality formulations maintain flexibility well below 0°F. Fibrous reinforcements significantly improve crack resistance, especially on high-stress areas like frame rails and suspension mounting points that experience constant flexing.
Application Methods: Professional vs. DIY
Spray Equipment Requirements
For DIY application, you’ll need more than a rattle can. A quality undercoating gun with a 1.8-2.2mm nozzle and a compressor delivering 5-7 CFM at 90 PSI is the minimum. Siphon-feed guns work for small areas, but pressure-feed systems provide consistent coverage without constant refilling. Professional shops use airless spray systems that apply 1-2 gallons per minute, ensuring even distribution in hard-to-reach cavities. The equipment investment for serious DIYers runs $200-400, but proper tools make the difference between a protective coating and a messy waste of time.
Brush and Roller Techniques
While spraying dominates large areas, brushing remains essential for detail work. Use natural bristle brushes for solvent-based products—synthetic bristles can dissolve. Rollers with 3/4-inch nap work well for flat surfaces like floor pans. The key is working the material into seams, welds, and rust pits where spray alone won’t penetrate. Many professionals spray first, then immediately brush to ensure complete coverage, a technique called “spray and back-brush.”
Professional Application: What to Expect
Professional shops charge $800-1,500 for complete undercoating, but this includes expertise you can’t replicate at home. They use lift-mounted wands to reach inside frame rails, rocker panels, and door bottoms. Most include thorough pressure washing, rust treatment, and cavity wax injection in the package. Ask if they use “two-stage” application—first a rust converter, then the asphalt coating, followed by cavity wax. This comprehensive approach justifies the cost, especially for high-value vehicles or severe climates.
Surface Preparation: The Foundation of Success
Cleaning and Degreasing Protocols
Asphalt won’t bond to dirty metal, period. Pressure wash the undercarriage at 2,000+ PSI, keeping the nozzle 6-8 inches from the surface to avoid forcing water into sealed areas. Follow with a degreaser specifically formulated for undercarriages—engine degreasers often leave residues that interfere with adhesion. For vehicles in salt-heavy regions, use a salt-neutralizing wash containing chelating agents that break down chloride bonds. Rinse thoroughly and allow 24-48 hours of dry time; residual moisture is the enemy of adhesion.
Rust Treatment and Conversion
Light surface rust (flash rust) can be coated over after wire brushing, but scale rust requires aggressive treatment. Use a needle scaler or grinder with wire wheels to remove loose rust, then apply a rust converter containing phosphoric or tannic acid. These products chemically transform iron oxide into iron phosphate, a stable compound that actually improves coating adhesion. Never coat over flaking rust—it will continue expanding underneath, eventually popping the coating off in sheets. For severe rust, consider professional sandblasting first.
Masking and Protection Strategies
Overspray is permanent and ruins brake components, exhaust sensors, and rubber bushings. Remove wheels for complete access and cover brake rotors, calipers, and ABS sensors with aluminum foil—it’s heat-resistant and conforms to complex shapes. Mask off exhaust systems with high-temperature tape; asphalt coating on a hot exhaust creates smoke and fire hazards. Protect rubber boots and seals with petroleum jelly, which prevents coating adhesion but washes off easily afterward. Take photos before masking to ensure you remove all protective materials—forgetting a foil-wrapped sensor causes real problems.
Climate Considerations: Matching Product to Environment
Cold Weather Performance Factors
In northern climates, salt exposure and freeze-thaw cycles demand maximum durability. Look for products with high solids content (65%+) that resist being washed away by spring slush. Anti-sag additives prevent summer softening and winter drip. Consider formulations with self-healing properties that flow slightly when warmed by engine heat, sealing minor stone chips automatically. For extreme cold, products with rubberized modifiers maintain flexibility below -20°F without cracking.
Hot Climate and UV Stability
Southern and desert climates present opposite challenges: intense UV exposure and undercarriage temperatures exceeding 200°F. Standard asphalt can soften and flow, collecting dirt and sand that abrades the coating. Premium desert formulations use oxidized bitumen with softening points above 220°F and include UV stabilizers that prevent breakdown. Light-colored topcoats or aluminum-flake additives reflect heat, reducing substrate temperature by 30-40°F and extending coating life significantly.
Salt and Coastal Exposure Challenges
Coastal salt air and ocean spray create aggressive corrosion conditions that accelerate rust 5-10 times faster than inland environments. Here, asphalt undercoating needs reinforcement. Look for products with high zinc content (zinc-rich primers) that provide sacrificial protection—zinc corrodes before steel does. Some formulations include hygroscopic salts that actively repel moisture. Annual inspections become critical; what lasts five years inland might need reapplication every two years on the coast.
Longevity and Durability: What to Realistically Expect
Typical Lifespan Under Various Conditions
In ideal conditions—garaged vehicle, moderate climate, highway driving—a quality asphalt undercoating lasts 7-10 years. Real-world expectations should be shorter: 5-7 years in moderate climates with seasonal salt, 3-5 years in heavy salt regions, and 2-4 years in coastal areas. The critical factor isn’t just time but coating thickness remaining. Measure with a wet film gauge during application; anything less than 15 mils dry won’t provide long-term protection. Reapply when thickness drops below 8-10 mils, typically at the 5-year mark for daily drivers.
Signs It’s Time for Reapplication
Visual inspection reveals the story. Look for thinning in high-wash areas behind wheels and along rocker panels. Check for cracking in flex zones near suspension mounts. Use a screwdriver to gently probe seams—if you expose bare metal or the coating flakes off, you’ve waited too long. Whitish, chalky appearance indicates UV breakdown. Blistering or bubbling signals trapped moisture underneath, requiring complete removal and reapplication. Set calendar reminders for annual undercarriage inspections each spring.
Warranty and Guarantee Considerations
Product warranties range from “satisfaction guaranteed” to 10-year limited coverage. Read the fine print carefully—most require professional application, documented annual inspections, and specific maintenance protocols. A warranty that covers “material replacement only” is nearly worthless; you want coverage that includes labor for reapplication if the product fails. Better yet, focus on the product’s technical data sheet specs rather than marketing promises. A coating with proven salt spray resistance (ASTM B117) and flexibility testing (ASTM D522) is more reliable than any warranty claim.
Environmental and Safety Considerations
VOC Regulations and Compliance
Volatile Organic Compound (VOC) regulations vary dramatically by state. California and the Northeast have strict limits (usually 250-340 g/L), while other regions allow higher levels. Using non-compliant products can result in fines and environmental damage. Water-based formulations typically meet the strictest standards but may sacrifice some performance. Many manufacturers offer “compliant” versions of popular products—always verify the VOC content on the specific can you purchase, as formulas differ by region. Keep purchase receipts; compliance officers can request proof.
Proper Ventilation During Application
Solvent fumes are heavier than air and can accumulate in garages, creating explosion risks and health hazards. Use fans to create cross-ventilation, pulling fresh air in and exhausting fumes outside. A respirator with organic vapor cartridges is non-negotiable—dust masks provide zero protection. For professional-grade products, supplied-air respirators may be warranted. Never smoke or create sparks during application; the vapor-to-air ratio in an enclosed garage can reach explosive levels surprisingly quickly. Application outdoors is ideal, but if you must use a garage, keep doors open and use explosion-proof ventilation fans.
Disposal and Cleanup Best Practices
Leftover asphalt undercoating is hazardous waste—never pour it down drains or toss cans in regular trash. Cured material is generally inert, but liquid residue requires proper disposal at a household hazardous waste facility. Clean tools immediately after use; dried asphalt is nearly impossible to remove. For solvent-based products, use mineral spirits for cleanup, then dispose of the contaminated solvent properly. Water-based formulas clean with soap and water but require thorough rinsing to prevent drain clogs. Store partially used cans upside down; this creates an airtight seal that prevents skinning and extends shelf life to 2-3 years.
Common Mistakes That Compromise Protection
Inadequate Surface Prep Pitfalls
The number one failure mode is poor preparation. Skipping the degreasing step is like painting over wax—the coating never bonds. Another killer is insufficient dry time after washing. Even if the surface looks dry, water hides in seams and welds. Use a moisture meter or wait a full 48 hours in low humidity. Applying over paint flakes or loose undercoating is equally disastrous; the new layer simply pulls the old material off. When in doubt, strip it back to stable substrate, even if that means more work upfront.
Applying Too Thick or Too Thin
More isn’t better. Excessive thickness leads to sagging, cracking, and wasted material. A single heavy coat (over 30 mils wet) cures improperly, trapping solvents that later outgas and create bubbles. Conversely, thin coats under 10 mils dry provide inadequate protection and wash away quickly. The sweet spot is 15-25 mils wet, applied in two light passes if needed. Use a wet film thickness gauge religiously—it’s a $15 tool that saves hundreds in rework. Remember that coverage rates on cans assume ideal conditions; reduce them by 20% for real-world application.
Ignoring Temperature Guidelines
Applying at 45°F because you’re impatient guarantees failure. The coating won’t flow into seams, adhesion suffers, and cure time extends to weeks. Conversely, applying at 95°F in direct sunlight causes solvents to flash off before the material levels, leaving a textured, weak film. The substrate temperature matters more than air temperature—metal in direct sun can be 30°F hotter than ambient. Use infrared thermometers to verify surface temps are within spec. When conditions are marginal, wait. The coating will be on your vehicle for years; a day’s delay is insignificant.
Cost Analysis: Budgeting for Quality Protection
Price vs. Performance Balance
Budget products ($20-30 per gallon) contain more solvents and fillers, requiring more coats and more frequent reapplication. Mid-range options ($40-60 per gallon) offer the best balance for most users, with 60-65% solids and proven additives. Premium formulations ($70-100+ per gallon) justify their cost through extended durability and specialized performance. Calculate cost per mil of thickness: a $80 gallon applied at 20 mils covering 60 sq ft costs $1.33 per square foot per application cycle. A $30 gallon requiring three coats and reapplication twice as often actually costs more long-term.
Hidden Costs to Factor In
The product cost is just the beginning. Factor in degreaser ($15), rust converter ($25), masking materials ($20), spray gun and compressor access ($100+ if buying), and protective equipment ($50). Professional application includes these in the quoted price. DIY also costs time—expect 6-10 hours for a thorough job on a truck, including prep and cleanup. If you value your time at even $25/hour, a $1,200 professional job becomes competitive. Also consider redo costs: improper DIY application that fails within a year means paying for removal and reapplication.
ROI Over Vehicle Lifetime
For a $30,000 vehicle you plan to keep 10 years, spending $1,000 on professional undercoating represents 3.3% of the vehicle’s value. If it prevents even one major rust repair ($2,000-5,000 for frame section replacement), the ROI is 200-500%. Beyond repair costs, preserved undercarriages maintain resale value—dealers deduct $1,000-3,000 for rust on trade-ins. For classic cars, undercoating can be the difference between a $50,000 show car and a parts donor. The math is simple: protection costs pennies compared to restoration dollars.
Maintenance Tips for Coated Undercarriages
Regular Inspection Schedule
Mark your calendar for a seasonal undercarriage inspection every spring and fall. Use a bright LED flashlight and inspection mirror to check hidden areas. Focus on wheel wells, frame rails, and any location where water collects. Look for thinning, cracking, or damage from road debris. Pay special attention to areas behind tires where sandblasting effect is worst. Photograph problem areas to track progression. Catching issues early allows for spot repairs rather than complete reapplication.
Cleaning Without Damaging the Coating
Pressure washing is safe if done correctly. Keep pressure under 1,500 PSI and maintain 12-inch distance. Avoid zero-degree nozzles that can cut through the coating. Use gentle, car-wash soap—degreasers strip away protective oils in the asphalt. For salt removal, use undercarriage-specific salt neutralizers that won’t harm the coating. Never use wire brushes or abrasive pads on coated surfaces. If you must remove buildup, use soft brushes and plastic scrapers. Annual gentle cleaning extends coating life by removing abrasive grit.
Touch-Up Strategies
Keep leftover product for repairs. Clean the area thoroughly with mineral spirits, feather the edges of the existing coating with sandpaper, and apply thin coats with a brush. For small chips, use a disposable brush to dab material into the defect, building slightly higher than surrounding area. The coating self-levels as it cures. For larger damaged areas (over 2 inches), apply rust converter first, then build up in 10-15 mil increments, allowing 24 hours between coats. Don’t wait for damage to spread—address chips immediately after winter or off-road excursions.
Professional Insights: What Detailers Wish You Knew
Red Flags in Product Marketing
Beware of “permanent” or “lifetime” claims—nothing lasts forever under a vehicle. Products promising “one-coat application” often achieve this by being too thin to be effective. “Rubberized asphalt” blends sometimes contain minimal actual rubber; check the technical data sheet for specific content percentages. “Fast-dry” formulations may sacrifice long-term flexibility. The biggest red flag is lack of technical data—reputable manufacturers provide ASTM test results, VOC content, and detailed application specs. If the marketing focuses on hype rather than data, walk away.
The Truth About “Lifetime” Claims
Lifetime warranties typically cover the lifetime of the coating, not the vehicle—and that lifetime might be defined as 5-7 years in the fine print. These warranties often require annual inspections at authorized dealers ($100+ each) and immediate repair of any damage (at your cost) to remain valid. Read the exclusions: most don’t cover damage from off-road use, accidents, or improper maintenance. Instead of chasing warranty promises, invest in a product with proven performance characteristics and reapply on a realistic schedule. Your vehicle’s actual protection matters more than paper promises.
Seasonal Application Timing
The best time to apply is late spring or early fall. Spring application follows winter salt exposure but precedes summer heat and humidity. Fall application provides fresh protection before winter’s assault. Avoid summer’s peak heat (causes premature drying) and winter’s cold (prevents curing). Professional shops often have climate-controlled bays, but they still schedule heavy undercoating work during moderate seasons. Plan your project when daytime highs are 65-75°F with low humidity and no rain forecast for 48 hours. This window ensures optimal adhesion and cure.
Compatibility with Modern Vehicle Materials
Impact on Sensors and Electronics
Modern vehicles have numerous sensors on or near the undercarriage: ABS, wheel speed, ride height, and ADAS components. Asphalt coating on sensor faces blocks signals and triggers fault codes. Never coat sensor housings, wiring connectors, or magnet-based sensors. Mask these areas meticulously. Some advanced coatings claim “sensor-safe” status, but this refers to cured material not interfering with signals—during application, overspray can still cause issues. After coating, use a scan tool to verify all systems function correctly before considering the job complete.
Rubber and Plastic Component Safety
Asphalt solvents can swell and degrade rubber bushings, seals, and boots. Modern formulations are more compatible than old-school products, but caution remains essential. Avoid coating rubber exhaust hangers, suspension bushings, and steering rack boots. If accidental contact occurs, wipe immediately with mineral spirits—once cured, removal damages the rubber. For vehicles with extensive plastic underbody panels, verify the coating won’t interfere with panel clips or cause warping. Some plastics are soluble in asphalt solvents; test in an inconspicuous area first.
Compatibility with Existing Coatings
Never apply asphalt over incompatible existing coatings. Wax-based undercoatings must be completely removed—otherwise, the asphalt’s solvents soften the wax, causing both layers to fail. Rubberized coatings may be compatible if fully cured and lightly scuffed, but test adhesion first. Factory cosmoline or rustproofing should be cleaned but not necessarily removed; asphalt often adheres well to these petroleum-based protectants. When in doubt, strip to bare metal. The short-term labor savings of coating over unknown material pale compared to the cost of complete system failure.
Making Your Final Decision: A Buyer’s Checklist
Questions to Ask Your Retailer
Before purchasing, ask: “What’s the solids content by volume?” If they can’t answer, don’t buy. Request the technical data sheet and review ASTM test results. Ask about shelf life and storage requirements—some products separate irreversibly after one winter in an unheated garage. Inquire about batch consistency; reputable manufacturers maintain tight quality control. For professional application, ask for references from customers with similar vehicles and climate conditions. A shop should show you examples of their prep work and explain their process in detail.
Reading Between the Lines of Product Specs
Focus on test data over marketing copy. Salt spray resistance (ASTM B117) should exceed 1,000 hours for premium products. Flexibility testing (ASTM D522, 1/8" mandrel bend) should show no cracking. Impact resistance (ASTM D2794) indicates stone chip performance. VOC content should match your local regulations exactly—lower isn’t always better if it compromises performance. Coverage rates are always optimistic; plan to buy 20% more than calculated. The best products provide clear, quantitative specs rather than vague “excellent performance” claims.
Frequently Asked Questions
1. How long does asphalt-based undercoating typically last on a daily driver?
In moderate climates with seasonal road salt, expect 5-7 years of effective protection before needing reapplication. Heavy salt regions may require attention every 3-4 years, while coastal environments might need reapplication every 2-3 years. Lifespan depends on coating thickness, application quality, and maintenance habits. Annual inspections help maximize longevity.
2. Can I apply asphalt undercoating over existing rust?
Light surface rust (flash rust) can be coated after wire brushing and cleaning. However, scale rust or flaking oxidation must be removed completely, as it continues expanding underneath and will cause coating failure. Always apply a rust converter to stabilized rust before coating. For severe rust, professional sandblasting is recommended.
3. Is asphalt undercoating safe for all vehicle types?
Most vehicles benefit, but some require special consideration. Electric vehicles have sensitive battery cooling systems and high-voltage cables that must remain uncoated. Exotic cars with aluminum or carbon fiber monocoques need manufacturer-approved products. Always consult your vehicle manual and avoid coating heat shields, sensors, or moving components.
4. What’s the ideal temperature for applying asphalt undercoating?
Apply when ambient and surface temperatures are between 60-80°F with humidity below 60%. Avoid application in direct sunlight or when rain is forecast within 48 hours. Substrate temperature is critical—metal in direct sun can be 30°F hotter than air temperature, causing premature drying and poor adhesion.
5. How does asphalt undercoating compare to rubberized alternatives?
Asphalt offers superior long-term durability and moisture resistance, while rubberized excels at sound deadening and remains more flexible. Asphalt is more cost-effective for rust prevention, but rubberized can be easier to apply. Many professionals use asphalt for main undercarriage protection and rubberized for wheel wells where noise reduction is prioritized.
6. Can I paint over asphalt undercoating if I want a cleaner appearance?
Technically yes, but it’s not recommended. Most paints don’t adhere well to asphalt’s oily surface without specialized primers. The paint film is also much thinner and cracks as the flexible asphalt moves underneath. If appearance matters, consider a black topcoat specifically designed for asphalt undercoating, or choose a product that cures to a uniform black finish.
7. How much product do I need for a full-size truck or SUV?
Plan on 2-3 gallons for complete coverage, including inside frame rails and rocker panels. A mid-size car typically needs 1.5-2 gallons. Always buy 20% more than calculated coverage to account for overspray, absorption into rust, and touch-ups. It’s better to have leftover product for future repairs than to run short mid-project.
8. Will asphalt undercoating void my vehicle’s warranty?
Factory warranties cover manufacturing defects, not corrosion from external applications. However, coating-related damage to sensors or components could be contested. Document the application process with photos showing masked sensors and protected components. Some dealerships offer undercoating services—using their service maintains warranty relationships, though their products may not be the highest quality.
9. How do I remove asphalt undercoating if I need to make repairs?
Removal is labor-intensive. Use a heat gun to soften the material, then scrape with putty knives. Chemical strippers designed for undercoating work but are messy and toxic. For large areas, media blasting with plastic or walnut shells removes coating without damaging metal. Always wear respiratory protection during removal, as old undercoating may contain hazardous materials.
10. Is DIY application worth the savings compared to professional service?
For mechanically inclined owners with proper tools and a suitable workspace, DIY saves 50-70% of professional costs. However, the learning curve is steep, and mistakes are expensive to fix. Professional application includes equipment, expertise, and warranties that justify the cost for many owners. Consider DIY if you enjoy the process and have a vehicle with easy undercarriage access; choose professional service for complex vehicles or if you lack proper ventilation and equipment.