That mirror-smooth, liquid-glass finish you see rolling out of car shows doesn’t happen by accident. It’s the holy grail of car care—a “wet look” so deep and lustrous, it appears the paint is still flowing. While ceramic coatings get most of the glory these days, traditional and modern waxes remain the secret weapon for achieving that jaw-dropping, reflective gloss that turns heads at stoplights.
But here’s the truth: not all waxes are created equal, and chasing the wet look without understanding the fundamentals is like trying to paint a masterpiece with a broom. The difference between a decent shine and that dripping-wet appearance comes down to chemistry, technique, and knowing exactly what features matter most. Let’s dive into everything you need to know to make an informed decision and transform your vehicle’s finish into a liquid mirror.
Top 10 Wet Look Car Wax
Detailed Product Reviews
1. Chemical Guys Butter Wet Wax - Deep Wet Shine Car Wax for Cars, Trucks, SUVs, RVs, and More, Easy On/Off Liquid Formula, Banana Scent - 16 oz

Overview: Chemical Guys Butter Wet Wax is a premium liquid car wax designed to deliver a show-stopping deep wet shine with minimal effort. This 16-ounce formula combines carnauba-based protection with an innovative easy-spread consistency that appeals to both weekend warriors and detailing enthusiasts. The signature banana scent transforms a mundane chore into an aromatic experience, making it a standout in the crowded car care market.
What Makes It Stand Out: The tropical banana fragrance is more than a gimmick—it makes extended waxing sessions genuinely enjoyable. The buttery smooth liquid formula glides across paintwork effortlessly, requiring minimal elbow grease during both application and removal. It achieves that coveted deep, liquid-looking gloss that makes paint appear miles deep, particularly striking on metallic and dark colors. The versatility across clear coats, single-stage paint, and even glass surfaces adds exceptional utility.
Value for Money: At $19.97 for 16 ounces, this wax sits in the sweet spot between budget sprays and premium pastes. You’re paying for the user experience as much as the protection. While not the cheapest option, the ease of use reduces product waste and application time, effectively lowering the cost-per-use compared to fussier competitors. It competes directly with waxes costing $25-30 while delivering comparable shine.
Strengths and Weaknesses: Strengths include effortless application/removal, delightful scent, impressive depth of shine, and safe multi-surface formula. Weaknesses involve slightly shorter durability than synthetic sealants (typically 4-6 weeks), and the banana scent may not appeal to purists seeking a traditional detailing experience. Liquid format requires careful shaking before use.
Bottom Line: Butter Wet Wax excels for enthusiasts prioritizing application enjoyment and stunning aesthetics over marathon durability. It’s perfect for show cars and garage queens needing frequent pampering, delivering professional-grade results without professional-level effort.
2. Turtle Wax Hybrid Solutions Ceramic Wet Wax, Spray on Car Wax for 1-Step High Gloss Shine and Ceramic Coating Protection for Paint, Wheels,Glass and More, Extreme Water Beading, 26 oz (Pack of 1)

Overview: Turtle Wax Hybrid Solutions Ceramic Wet Wax revolutionizes the traditional waxing process by eliminating the drying step entirely. This 26-ounce spray is engineered for application on wet, freshly washed vehicles, combining ceramic-infused protection with unmatched convenience. The formula targets time-pressed car owners who refuse to compromise on modern ceramic technology and hydrophobic performance.
What Makes It Stand Out: The revolutionary “wax-as-you-dry” approach cuts detailing time in half while delivering genuine ceramic protection. Simply spray onto wet surfaces and towel dry—the wax bonds instantly, creating extreme water beading that rivals traditional ceramic coatings. The hydrophobic polymers actively repel water, accelerating drying and preventing water spots. Its multi-surface compatibility means one product handles paint, glass, chrome, and wheels seamlessly.
Value for Money: At just $13 for 26 ounces, this represents exceptional value—approximately 50 cents per ounce. It’s the most cost-effective ceramic-infused option available, democratizing advanced protection technology for budget-conscious consumers. The time savings alone justify the investment, reducing a multi-hour process to minutes.
Strengths and Weaknesses: Strengths include lightning-fast application, impressive water beading, UV protection, streak-free finish, and incredible affordability. Weaknesses involve shorter longevity than dedicated ceramic coatings (typically 3-4 weeks), and the wet-application method requires technique to avoid missed spots. May not provide the same depth as traditional paste waxes.
Bottom Line: This is the ultimate convenience product for weekly maintenance washes. It delivers 80% of ceramic coating benefits at 10% of the cost and effort, making it ideal for daily drivers and busy households wanting maximum protection with minimum time investment.
3. GYEON Wet Coat 500ml - Hydrophobic Ceramic Spray Coating for Cars - High Gloss Solutions for Your Car Paint Wheels and Glass - Spray On Rinse Off Easy DIY Use Formula

Overview: GYEON Wet Coat represents professional-grade ceramic technology packaged for DIY enthusiasts. This 500ml spray coating delivers instant hydrophobic properties and high gloss through an ingeniously simple spray-on, rinse-off application. Designed primarily as a ceramic coating maintenance product, it stands alone as a formidable standalone protectant that produces dramatic water beading within seconds of application.
What Makes It Stand Out: The extreme simplicity of spray-and-rinse application eliminates traditional buffing entirely, reducing the risk of marring paint. It generates immediate, dramatic water beading that exceeds most conventional waxes and spray sealants. As a “topper” for existing ceramic coatings, it revitalizes protection and extends coating life significantly. The professional-grade SiO2 formula provides genuine ceramic benefits without complicated installation requirements.
Value for Money: At $24.99 for 500ml, Wet Coat commands a premium price but delivers professional results. While more expensive than consumer-grade waxes, it’s substantially cheaper than professional ceramic coating services. The concentrated formula requires minimal product per application, with one bottle treating 15-20 vehicles, driving the per-use cost below $1.50.
Strengths and Weaknesses: Strengths include unbelievably easy application, extreme hydrophobicity, professional-grade formula, versatility across all exterior surfaces, and coating maintenance capabilities. Weaknesses involve higher upfront cost, requires immediate rinsing (can’t linger), and over-application causes streaking that demands correction. Not ideal for uncoated, neglected paint needing heavy correction.
Bottom Line: GYEON Wet Coat is the maintenance weapon of choice for ceramic-coated vehicles and the secret weapon for enthusiasts wanting pro-level water behavior without pro-level effort. It redefines simplicity while delivering legitimate ceramic performance.
4. Meguiar’s G7716 Gold Class Carnauba Quik Wax, Special Blend for Richness and Shine, Clear Coat Safe Meguiar’s Quik Wax, Spray that Leaves Lasting Results without Residue, 16 Oz Containe

Overview: Meguiar’s Gold Class Carnauba Quik Wax distills the rich, warm glow of premium carnauba into a hassle-free spray format. This 16-ounce bottle delivers the brand’s legendary Gold Class protection with unprecedented convenience, targeting traditionalists who value natural wax properties but demand modern ease-of-use. The formula specifically addresses common spray wax complaints by eliminating white residue on trim.
What Makes It Stand Out: The premium carnauba blend achieves that distinctive warm, deep glow synthetic waxes struggle to replicate, particularly on darker paints. Its sun-friendly application allows use in direct sunlight without streaking or caking—a rare capability among spray waxes. The zero-residue formula prevents the dreaded white haze on plastic trim and rubber seals, saving cleanup time. Meguiar’s reputation for consistent quality ensures predictable, reliable results.
Value for Money: At $9.54 for 16 ounces, this represents outstanding value from a trusted premium brand. It’s the most affordable option among name-brand waxes, delivering genuine carnauba protection at drugstore prices. The spray format minimizes waste, and the ability to work in sunlight maximizes usability, effectively increasing value through versatility.
Strengths and Weaknesses: Strengths include authentic carnauba shine, trim-safe formula, sun-friendly application, brand reliability, and unbeatable price. Weaknesses involve typical carnauba longevity limitations (2-3 weeks), less water beading than ceramic alternatives, and spray application may not satisfy purists seeking the ritual of paste waxing.
Bottom Line: Gold Class Quik Wax is the smart choice for budget-conscious enthusiasts wanting legitimate carnauba protection without traditional paste wax effort. It’s perfect for quick touch-ups and maintaining that warm, natural glow between major detailing sessions.
5. Chemical Guys WAC80716 Hybrid V7 Optical Select High Gloss Liquid Wax
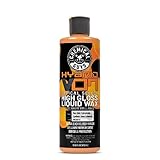
Overview: Chemical Guys Hybrid V7 Optical Select represents the pinnacle of modern wax technology, fusing premium carnauba, synthetic sealants, and optical gloss enhancers into a single high-performance liquid. This formula targets serious enthusiasts who refuse to compromise between show-car aesthetics and robust environmental protection. The V7 designation signals its position as a flagship product in Chemical Guys’ hybrid lineup.
What Makes It Stand Out: The optical select gloss enhancers create a crystalline, almost three-dimensional depth that makes paint appear illuminated from within. Its hybrid composition delivers carnauba’s warmth with synthetic polymers’ durability, achieving 3-4 months of protection rather than weeks. Comprehensive protection against UV rays, water spots, bird droppings, and industrial fallout makes it a true all-in-one solution. The formula works beautifully on paint, polished metals, glass, and clear plastics.
Value for Money: At $29.99, Hybrid V7 commands premium pricing but delivers premium longevity. When amortized over its 3-4 month protection span, the monthly cost drops below $10—competitive with monthly reapplication of cheaper waxes. You’re investing in extended protection and reduced maintenance frequency, saving time and effort long-term.
Strengths and Weaknesses: Strengths include exceptional gloss enhancement, extended durability, comprehensive contaminant protection, multi-surface versatility, and professional-grade results. Weaknesses involve the highest price point in this comparison, requires more careful application than spray alternatives, and the liquid format demands thorough shaking and precise dispensing.
Bottom Line: Hybrid V7 is the definitive choice for perfectionists seeking maximum visual impact and protection longevity. It bridges the gap between traditional waxes and ceramic coatings, delivering near-professional results for dedicated DIYers who view car care as passion, not chore.
6. Chemical Guys Spray Wax Blazin’ Banana - Carnauba Car Wax Spray for High Gloss Shine and Protection, Safe for Cars, Trucks, SUVs, RVs, and More - 16 oz

Overview: Chemical Guys Blazin’ Banana Spray Wax delivers carnauba-based protection through an innovative spray-and-wipe formula. This 16-ounce bottle promises professional-grade gloss without the labor-intensive process of traditional waxing, making it ideal for maintaining your vehicle’s finish between full details. The tropical banana scent adds a unique sensory experience to your car care routine.
What Makes It Stand Out: The distinctive banana fragrance sets this apart from chemical-smelling competitors while premium carnauba creates a hydrophobic barrier that enhances paint depth. Its universal compatibility with clear coats, single-stage paint, metallic finishes, and gel coats makes it incredibly versatile for multi-vehicle households. The zero-cure-time application means you can achieve a mirror-like finish in minutes without waiting.
Value for Money: At $14.97 for 16 ounces, this spray wax positions itself in the mid-range category. It offers better protection than budget alternatives while costing significantly less than professional-grade paste waxes. The time saved versus traditional waxing methods translates to real value for busy car owners who want regular maintenance without weekend-long commitments.
Strengths and Weaknesses: Strengths include lightning-fast application, impressive gloss enhancement, pleasant scent, and safe formulation for all exterior surfaces. Weaknesses involve shorter durability compared to paste waxes (typically 2-4 weeks) and the fragrance may not appeal to everyone. It also requires a perfectly clean surface to avoid sealing in contaminants.
Bottom Line: Perfect for enthusiasts seeking quick, effective maintenance between full details. The banana scent and ease of use make regular waxing enjoyable rather than chore-like, though dedicated protection requires periodic reapplication.
7. Meguiar’s Gold Class Carnauba Plus Premium Liquid Wax Kit, Car Detailing Kit with a Pure Carnauba Wax Blend and a Foam Applicator Pad for Keeping Glossy Paint Protected Like a Pro, 16 Oz Bottle

Overview: Meguiar’s Gold Class Carnauba Plus Premium Liquid Wax Kit represents the brand’s flagship consumer wax, combining pure carnauba with advanced polymers in a user-friendly package. The included foam applicator pad and 16-ounce bottle provide everything needed for professional-level protection and gloss on any glossy paint finish.
What Makes It Stand Out: The carnauba-polymer hybrid formula delivers richer shine and deeper gloss than pure carnauba alone, while maintaining the warmth traditionalists love. Its versatility shines through dual application methods—hand application for precision or dual-action polisher for efficiency. The enhanced formula creates sharp, clear reflections that rival more expensive boutique waxes.
Value for Money: At $18.99 for the complete kit, this offers exceptional value. Comparable professional liquid waxes often cost $25-35 without accessories. The foam applicator alone saves a $5-7 separate purchase. When factoring in the durable 2-3 month protection span, the cost-per-month is lower than frequent spray wax applications.
Strengths and Weaknesses: Strengths include outstanding gloss enhancement, safe formulation for all clear coats, smooth application and removal, and professional results achievable by beginners. Weaknesses include longer application time versus spray waxes, potential for streaking in high humidity, and the liquid format can be messy if over-applied. It also lacks the scent novelty some users enjoy.
Bottom Line: An outstanding choice for serious enthusiasts wanting durable protection without professional pricing. The kit format and forgiving formula make it ideal for those transitioning from spray waxes to more substantial protection.
8. Meguiar’s A1624 Quik Wax - Easy-to-Use Spray Wax for Gloss, Shine & Protection - Wet or Dry Use, 24 Oz.
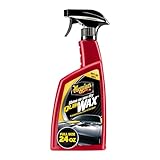
Overview: Meguiar’s A1624 Quik Wax redefines convenience in paint protection with its innovative wet-or-dry application capability. This 24-ounce spray wax delivers deep gloss and protection through a simple spray-and-wipe process that works on freshly washed vehicles or dry paint, eliminating timing constraints from your detailing routine.
What Makes It Stand Out: The ability to apply on wet surfaces immediately after rinsing saves significant time and eliminates the drying step required by traditional waxes. Its plastic-trim-safe formula won’t leave unsightly white residue on bumpers or molding, a common complaint with competing products. Full-sun application tolerance provides flexibility for mobile detailers or those without shade.
Value for Money: At $7.01 for 24 ounces, this represents exceptional budget value—costing less per ounce than most competitors while offering unique application versatility. It’s an ideal entry product for new detailers or a cost-effective maintenance solution for fleet vehicles where perfection isn’t paramount but protection is necessary.
Strengths and Weaknesses: Strengths include unbeatable convenience, trim-safe formulation, sun-friendly application, and generous quantity. Weaknesses involve shorter protection duration (typically 1-2 weeks), thinner barrier versus paste waxes, and reduced water beading compared to polymer or ceramic alternatives. The spray nozzle can sometimes dispense unevenly if not held correctly.
Bottom Line: Best suited as a quick detailer or maintenance booster rather than primary protection. Its wet-application feature makes it perfect for time-pressed owners who want some protection after every wash without adding significant effort.
9. Turtle Wax Hybrid Solutions Ceramic Spray Coating, High Shine Car Wax, Offers Durable Paint Protection, Extreme Water Beading Action, Safe for Glass, Wheels, Trim and More, 16 oz (Pack of 1)
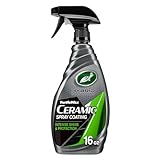
Overview: Turtle Wax Hybrid Solutions Ceramic Spray Coating bridges the gap between traditional wax and professional ceramic coatings, offering advanced polymer technology in a consumer-friendly spray format. This 16-ounce bottle creates a durable shield against UV rays and contaminants while delivering extreme water beading that rivals professional applications.
What Makes It Stand Out: The ceramic-infused formula forms a molecular bond with paint, providing months of protection versus weeks from carnauba-based products. Its extreme hydrophobicity creates instant water beading that reduces drying time and prevents water spots. Multi-surface compatibility allows safe application on glass, wheels, and trim—uncommon versatility at this price point.
Value for Money: At $14.99, it competes directly with premium spray waxes while offering ceramic-grade durability. Professional ceramic coatings cost $500-2000, making this an accessible entry point. The extended protection period means fewer applications annually, saving both product cost and labor time compared to monthly waxing routines.
Strengths and Weaknesses: Strengths include impressive durability (3-6 months), outstanding water repellency, versatile surface compatibility, and sun-tolerant application. Weaknesses require thorough surface prep (clay bar recommended) for optimal bonding, it’s not suitable for soft convertible tops, and overspray on glass can cause temporary visibility issues if not buffed properly.
Bottom Line: An excellent gateway into ceramic protection without professional installation costs. Ideal for moderately experienced detailers willing to invest in proper prep for long-lasting, impressive results that outperform traditional waxes.
10. Meguiar’s M716 Mirror Glaze Show Car Glaze, Exceptional Polish Restores a Deep Wet Shine - 16 Oz Bottle (Packaging May Vary)

Overview: Meguiar’s M716 Mirror Glaze Show Car Glaze is a professional-grade polish designed for concours-level finish enhancement rather than protection. This 16-ounce bottle contains a body-shop-safe formula that restores dazzling depth and wet shine to all glossy paint finishes without the whitening effect common with some compounds.
What Makes It Stand Out: As a top-performing hand-applied glaze, it delivers exceptional clarity and depth that rivals machine-polishing results. The non-whitening formula dries completely clear, making it safe for complex curves and body lines where residue removal is difficult. Its versatility across hand, DA polisher, and rotary buffer applications provides professional flexibility.
Value for Money: At $17.72 ($1.11/oz), it’s priced competitively for a specialty show car product. While it doesn’t provide protection—requiring a follow-up wax or sealant—its ability to eliminate fine swirl marks and enhance gloss before events justifies the cost for show participants. For daily drivers, the value proposition is weaker without protective qualities.
Strengths and Weaknesses: Strengths include outstanding gloss enhancement, body-shop safe formulation, clear drying for easy removal, and professional-grade results via hand application. Weaknesses involve zero protective properties, requires follow-up with sealant, not designed for heavy defect removal, and the liquid format can be easy to over-apply on hot surfaces.
Bottom Line: Perfect for show car preparation or pre-sale detailing where maximum visual impact is paramount. Not recommended as a standalone solution for daily drivers who need protective benefits. Pair with a quality sealant for the ultimate combination of beauty and protection.
What Exactly Is a “Wet Look” Finish?
The term “wet look” describes a paint finish so glossy and reflective that it mimics the appearance of a freshly washed, water-beading surface. This effect creates visual depth, making the paint seem thicker and more three-dimensional than it actually is. Unlike a standard glossy finish that simply reflects light, a true wet look refracts light in multiple layers, creating that characteristic liquid appearance where you can almost see “into” the paint.
The Science Behind That Liquid Depth
Achieving a wet look relies on creating a perfectly smooth, optically clear layer over your paint’s clear coat. When light hits this surface, it encounters minimal microscopic texture to scatter it. Instead, the light waves penetrate slightly into the wax layer, reflect off the clear coat beneath, and return through the wax with minimal distortion. This phenomenon, called specular reflection, is what creates that deep, “looking into water” effect. The wax essentially acts as a magnifying glass for your paint’s clarity.
How Wet Look Waxes Differ From Traditional Waxes
Standard carnauba waxes prioritize warmth and richness, often leaving a slightly softer, more natural glow. Wet look formulations, by contrast, are engineered for maximum reflectivity and clarity. They typically incorporate synthetic polymers that cure harder and smoother than pure carnauba, along with specialized gloss enhancers that fill microscopic imperfections more effectively. The result is a more glass-like, almost artificial-looking shine that prioritizes depth over warmth.
Key Ingredients That Create the Wet Look Effect
Understanding what goes into your wax helps you separate marketing hype from genuine performance. The ingredient list reveals whether a product can truly deliver that dripping-wet appearance or just promises it.
Synthetic Polymers vs Natural Carnauba
Modern wet look waxes blend Brazilian carnauba with synthetic polymers like PTFE (Teflon) or advanced acrylic resins. Carnauba provides warmth and depth, while synthetics create a harder, more reflective shell. The ratio matters: products with 40% or more synthetic content typically deliver a more intense wet look, while those above 70% carnauba often produce a softer, warmer glow. For maximum liquid effect, look for formulations listing “synthetic polymers” or “polymer sealants” near the top of the ingredient deck.
The Role of Oils and Gloss Enhancers
High-quality wet look waxes contain specialized oils that temporarily fill minor swirls and scratches, creating a smoother optical path for light. These aren’t the cheap petroleum distillates found in bargain products—rather, they’re engineered silicones or amino-functional silicones that bond with the paint surface. The key is their refractive index, which matches closely with automotive clear coat, making the wax layer virtually invisible while enhancing what’s beneath.
Understanding Carrier Agents and Solvents
The solvents that keep wax in liquid or paste form dramatically affect application and final appearance. Fast-evaporating solvents like isopropyl alcohol can cause streaking if you work too slowly, while slower carriers like mineral spirits give you more working time but may trap oils near the surface. Premium wet look waxes use proprietary solvent blends that flash off at just the right rate, leaving behind a perfectly level layer of solids.
Types of Products That Deliver a Wet Look
Not all wet look products come in the same form factor. Each type offers distinct advantages and trade-offs that affect your results and maintenance routine.
Paste Waxes: The Classic Approach
Paste waxes remain the gold standard for enthusiasts chasing maximum depth. Their high solid content—often 70-80% active ingredients—means you’re depositing more protective material per application. The concentration of carnauba and polymers in a quality paste creates a denser, more optically pure layer. However, they demand more elbow grease and proper technique; a poorly applied paste wax can look worse than a well-applied liquid.
Liquid Waxes: Modern Convenience
Liquid formulations suspend wax particles in a carrier fluid, making them significantly easier to spread thin and even. This thinness is actually an advantage for the wet look—you want the minimal effective dose. Liquids typically contain 30-50% active ingredients and are ideal for large panels where maintaining a wet edge is crucial. The trade-off is slightly less longevity compared to pastes, though modern polymer-enhanced liquids have closed this gap considerably.
Spray Waxes: Quick Enhancement
Spray waxes aren’t primary protection for serious wet look chasers, but they’re invaluable as “toppers.” Applied over a base layer of paste or liquid wax, they add a final gloss boost and extend the hydrophobic properties. Look for sprays specifically labeled as “gloss enhancers” rather than standalone waxes—these contain minimal cleaning agents and maximum gloss polymers that won’t interfere with your base layer.
Hybrid Ceramic-Wax Formulations
The newest category combines SiO2 (silicon dioxide) ceramic technology with traditional wax chemistry. These products cure to form a semi-permanent glass-like layer while retaining the warm depth of carnauba. They offer 3-6 months of durability and produce a wet look that rivals true ceramic coatings at a fraction of the cost and application complexity. The key is their ability to create a harder, more reflective surface that maintains flexibility.
Essential Features to Evaluate Before Buying
With hundreds of products claiming wet look capabilities, focus on these measurable attributes rather than flashy marketing.
Gloss Intensity Levels
Manufacturers rarely quantify gloss, but you can infer it from the product’s polymer content and claimed durability. Waxes advertising “maximum synthetic polymers” or “ceramic infusion” typically produce higher gloss readings on a gloss meter—often 90+ GU (gloss units) compared to 70-80 GU for standard waxes. Look for terminology like “extreme gloss,” “mirror finish,” or “liquid depth” rather than generic “shine” claims.
Durability and Longevity Expectations
A true wet look wax should maintain its appearance for 6-8 weeks minimum. Check for claims of “3+ month durability” with polymer-enhanced formulas. Be realistic: pure carnauba might last 3-4 weeks but delivers unmatched warmth, while hybrid ceramics can push 4-6 months but feel more synthetic. Your maintenance routine and climate dramatically affect these numbers—garaged vehicles in mild climates see 50% longer life than daily drivers in harsh sun.
Application Difficulty Rating
Be honest about your skill level and patience. Paste waxes rate 7/10 for difficulty—they require perfect technique but reward you with maximum results. Liquid polymer waxes rate 4/10 and are forgiving of minor mistakes. Hybrid ceramics rate 6/10; they’re sensitive to humidity and temperature during application but flash off predictably. Spray toppers are 2/10—almost impossible to mess up.
Curing Time Requirements
Curing time—the period before buffing—directly impacts final appearance. Fast-curing waxes (5-10 minutes) are convenient but can haze if over-applied. Slow-curing formulas (20-30 minutes) allow solvents to fully evaporate, creating a denser final layer but demanding perfect environmental conditions. For wet look results, aim for products with 15-20 minute cure times; this sweet spot allows proper flashing without risking contamination.
UV Protection Ratings
The wet look is worthless if your paint degrades underneath. Quality waxes should specify their UV inhibition—look for “UV blockers” or “UV absorbers” in the ingredient list. While waxes can’t match ceramic coatings (which often claim 95%+ UV rejection), premium formulations should provide 70-80% UV protection for 6-8 weeks. This is critical for dark colors where UV damage shows first.
Surface Preparation: The Non-Negotiable Foundation
Applying premium wax to unprepared paint is like building a house on sand. The wet look demands a near-perfect substrate.
Paint Decontamination Steps
Start with a thorough wash using a pH-neutral shampoo. Follow with a chemical decontamination spray (iron remover) to dissolve embedded brake dust and rail particles. Then perform mechanical decontamination with a clay bar or clay mitt using ample lubrication. This two-step process removes contaminants you can’t see but that scatter light, killing the wet look before you start. Skip this, and you’re sealing imperfections under your wax.
The Importance of Paint Correction
The wet look amplifies everything—including swirls and scratches. For true liquid depth, your paint needs to be at least 90% defect-free. This typically requires a one-step polish with a light cutting pad and finishing polish. You’re not seeking perfection; you’re aiming to remove the micro-marring that prevents light from penetrating cleanly. Even brand-new cars benefit from this step—dealer prep often installs more swirls than you’d expect.
Why You Can’t Skip the Prep Work
Wax doesn’t fill significant defects; it highlights them. A swirl-filled surface under high-gloss wax looks like a topographical map under glass. The wet look requires smoothness at the microscopic level. Invest 2-3 hours in proper prep, or you’re wasting expensive product and effort. This is the step that separates show-car results from disappointing weekend projects.
Professional Application Techniques
Technique matters as much as product quality. These methods separate amateur attempts from professional results.
The Thin Layer Philosophy
The wet look comes from a perfectly level, microscopically thin layer. Apply wax so thinly that you question whether you’ve used enough. With paste, this means a light swipe of the applicator that covers just the pad’s edge. With liquid, two pea-sized drops per 2’x2’ section. Thick layers create haze, trap solvents, and cause uneven curing. Remember: you can always add a second layer, but you can’t easily remove an over-applied first layer.
Cross-Hatch Application Method
Apply wax in overlapping vertical strokes, then immediately follow with horizontal strokes in the same section. This cross-hatch pattern ensures even coverage and prevents missed spots that show as dull patches. Work in 2’x2’ sections on horizontal panels and 1’x1’ sections on vertical surfaces. The technique forces you to slow down and maintain consistency—critical for uniform gloss.
Temperature and Humidity Considerations
Apply wax when ambient temperature is 60-75°F with humidity below 60%. Too hot, and solvents flash instantly, causing streaks. Too cold, and the wax won’t spread thin or cure properly. In high humidity, wax takes longer to cure and can trap moisture, creating a milky haze. Work in a garage if possible; if outdoors, choose an overcast day and keep the car in shade throughout the process.
Panel-by-Panel Strategy
Never apply wax to the entire vehicle at once. Work one panel at a time, applying and buffing before moving to the next. This prevents the wax from curing too long (becoming difficult to remove) or not long enough (leaving oily residue). Start with the roof and work down, completing each panel fully before proceeding. This method also helps you maintain consistent pressure and technique across the entire vehicle.
Common Application Mistakes That Ruin the Wet Look
Even premium wax fails when applied incorrectly. Avoid these pitfalls that destroy depth and clarity.
Over-Application Issues
Most enthusiasts use 3-5 times more product than necessary. Excess wax doesn’t bond properly and creates a cloudy, greasy film that masks the wet look. If your buffing towel loads up with heavy residue, you’re applying too much. A proper application should leave almost nothing on the towel—just a light haze. Over-application also accelerates dust attraction and reduces durability by creating a soft, unstable layer.
Buffing Too Soon or Too Late
Timing is everything. Buff too soon, and you smear uncured wax, leaving oily streaks that never fully clear. Buff too late, and the wax hardens excessively, requiring aggressive buffing that installs micro-scratches. The sweet spot is when the wax hazes evenly with a light, chalky appearance. Test by gently swiping a finger across the haze—if it wipes clean without smearing, it’s ready. This usually occurs at 15-20 minutes with quality products.
Working in Direct Sunlight
Sunlight heats panels unevenly, causing wax to cure at different rates across a single panel. The result is a patchy, streaked finish with varying gloss levels. Even if the ambient temperature is perfect, direct sun can raise panel temperatures to 120°F+, flash-drying solvents and locking in application marks. Always work in shade, and if a panel warms during application, cool it with a damp microfiber before proceeding.
Contaminated Applicator Pads
Using a dirty applicator is like waxing with sandpaper. Even invisible dust particles on your pad create micro-scratches that scatter light and kill depth. Wash applicators after every use in hot water with mild detergent, then air dry. Store them in sealed plastic bags between uses. For critical applications, consider using single-use foam applicators. The same rule applies to buffing towels—never use a towel that’s been dropped on the ground, even if it looks clean.
Maintenance Protocols for Lasting Gloss
The wet look degrades without proper maintenance. These practices preserve that liquid depth for weeks, not days.
Washing Techniques That Preserve Wax
Use the two-bucket method with grit guards, a pH-neutral shampoo, and a premium microfiber wash mitt. Avoid dish soaps or “wash and wax” products—they strip or interfere with your base layer. Wash weekly to prevent contamination buildup. Use straight-line motions, not circles, to avoid installing swirls. The goal is to clean without creating new defects that scatter light and dull the finish.
Topper Products and Gloss Boosters
Every 2-3 washes, apply a spray wax or quick detailer specifically designed as a wax topper. These products contain compatible polymers that bond with your base wax, refreshing the hydrophobic properties and adding a gloss kick. Avoid silicone-heavy sprays—they can create a greasy film that masks the true depth. Look for “ceramic boost” or “polymer sealant” sprays that complement rather than compete with your wax.
Drying Methods to Avoid Micro-Marring
Never use a chamois or water blade—they drag contaminants across the surface. Instead, use a plush microfiber drying towel with a patting or very light swiping motion. Better yet, use a forced-air dryer (like a leaf blower dedicated to car care) to blow water off without contact. Any towel contact risks installing fine scratches that destroy the wet look’s perfection.
Reapplication Schedules
Even the best wet look wax degrades. Plan to reapply every 6-8 weeks for daily drivers, or every 10-12 weeks for garage-kept weekend cars. Don’t wait until the beading stops—that’s too late. Instead, monitor gloss in direct sunlight. When you notice the depth diminishing or water sheeting instead of beading, it’s time to strip and reapply. Consistent timing prevents buildup and maintains peak appearance.
Environmental Factors Affecting Performance
Your local climate and storage situation dramatically impact wax performance and longevity.
Climate and Weather Considerations
Hot, sunny climates accelerate UV degradation and cause wax to break down faster—expect 30-40% reduced durability. Coastal areas with salt air demand waxes with strong chemical resistance. Cold climates pose application challenges but actually preserve wax longer once cured. Rainy regions benefit from waxes with extreme hydrophobic properties that maintain beading through constant moisture exposure.
Storage Conditions Impact
A garage-kept car maintains wax integrity 2-3 times longer than one parked outdoors. UV exposure is the primary degradation factor, but temperature fluctuations also cause wax to expand and contract, eventually leading to micro-cracking. If garage storage isn’t possible, consider a quality car cover with a soft inner liner. Just ensure the cover is completely clean, or you’re grinding dirt into your perfect finish.
Seasonal Application Timing
Spring and fall offer ideal application conditions—moderate temperatures and lower humidity. Summer applications require early morning or evening work to avoid heat. Winter applications are possible in heated garages but avoid applying if temperatures will drop below freezing within 24 hours. Some enthusiasts apply a durable polymer wax before winter, then top with a high-gloss carnauba in spring for the best of both worlds.
Cost vs Performance Analysis
Price doesn’t always correlate with wet look performance, but understanding the value equation helps you spend wisely.
Budget-Friendly Options Reality Check
Sub-$20 waxes can deliver impressive gloss, but typically sacrifice longevity and UV protection. They often rely on high oil content for initial shine that fades within 2-3 weeks. These are excellent for learning technique or for cars you don’t plan to keep long-term. Just don’t expect 3-month durability or extreme depth. The cost-per-month often ends up higher due to frequent reapplication.
Premium Tier Investment Justification
Waxes in the $40-80 range typically contain higher-grade polymers, purer carnauba, and more sophisticated solvent systems. They deliver measurably better gloss (5-10 gloss units higher on standardized tests) and last 2-3 times longer than budget options. For enthusiasts seeking show-car results, this tier offers the best balance of performance and value. The initial sting is offset by less frequent application and better protection.
Cost-Per-Month Calculations
Calculate true value by dividing price by expected months of performance. A $60 wax lasting 4 months costs $15/month. A $15 wax lasting 3 weeks costs $21/month. Factor in your time value—applying wax takes 2-3 hours. Premium products that last longer reduce your time investment significantly. For daily drivers, durability often trumps initial cost.
Professional vs. DIY Application
Knowing when to call in a pro versus tackling it yourself can save money and ensure results.
When to Hire a Detailer
Consider professional application if your paint requires significant correction, you own a high-value vehicle, or you lack the time and space for proper prep. A professional detailer with a paint depth gauge and rotary polisher can achieve a level of paint perfection that’s nearly impossible at home. Expect to pay $200-500 for full paint correction and wax application—a worthwhile investment for show cars or vehicles you plan to keep long-term.
Essential Tools for Home Application
Minimum required: dual-action polisher for paint correction, quality clay bar, two buckets with grit guards, microfiber wash mitt, foam applicators, plush microfiber buffing towels (at least 10), and a forced-air dryer. Optional but recommended: paint depth gauge, LED inspection light, and infrared thermometer to monitor panel temperatures. Quality tools cost $300-500 initially but last years and pay for themselves after 2-3 professional detailing sessions.
Learning Curve Expectations
Expect your first wet look application to take 4-6 hours including prep. Your third attempt should clock in under 3 hours. The learning curve is steep but short—most enthusiasts achieve professional-level results by their fifth application. The key is developing a feel for thin application and perfect timing. Document your process: take photos under consistent lighting to track improvement and identify mistakes.
Troubleshooting Common Wet Look Problems
Even experienced detailers encounter issues. Knowing how to fix them saves time and prevents stripping and starting over.
Streaking and Hazing Issues
If buffing reveals streaks, you likely applied too thickly or buffed too soon. Don’t panic—wait 30 minutes for the wax to fully harden, then rebuff with a clean, dry microfiber using light pressure. If streaks persist, mist a quick detailer spray onto the towel (not the paint) and buff again. This provides just enough lubrication to level the wax without removing it. For severe cases, apply a tiny amount of fresh wax over the streaked area and rebuff immediately.
Uneven Gloss Patches
Patchy gloss indicates inconsistent application thickness or curing time differences. The fix: apply a thin “binder” coat of wax over the entire panel, wait only 5 minutes, then buff the entire panel uniformly. This melts and redistributes the underlying wax, creating a consistent layer. Work in smaller sections next time to maintain even timing. If patches persist after this treatment, you may need to strip the wax and reapply.
Wax Failure Prematurely
If your wet look fades within 2 weeks, several culprits exist: insufficient paint prep left contaminants that prevented bonding, over-application created a soft layer that washed away, or you used an incompatible topper that degraded the base wax. The solution is stripping with an isopropyl alcohol solution (1:1 with water) and starting fresh with proper prep. Also evaluate your wash products—any shampoo with wax will interfere with your base layer.
Safety and Environmental Considerations
Responsible car care means protecting yourself and the environment while chasing that perfect gloss.
VOC Regulations and Compliance
Many high-performance waxes contain volatile organic compounds (VOCs) that contribute to air pollution and health issues. California and several other states have strict VOC limits (typically 12-15% by weight). Check product labels for VOC compliance, especially when ordering online from out-of-state suppliers. Low-VOC formulas perform nearly as well while reducing environmental impact and indoor air pollution if you work in a garage.
Skin and Respiratory Protection
Always wear nitrile gloves—wax solvents strip natural oils from skin and can cause dermatitis with repeated exposure. Work in a well-ventilated area; even “low odor” products release fumes during curing. For extended sessions or when using products with strong solvents, consider a half-face respirator with organic vapor cartridges. Your lungs and skin will thank you after decades of detailing.
Proper Disposal Methods
Never pour leftover wax or solvents down drains. Allow liquid wax to evaporate in a container, then dispose of solids in regular trash. Soiled applicators and towels should be washed separately from household laundry—wax residue can contaminate other clothes and clog washing machine filters. Use a microfiber-specific detergent and air dry to prevent melting synthetic fibers in your dryer.
Wet Look Wax vs Alternative Products
Understanding how wax compares to modern alternatives helps you choose the right product for your goals.
Sealants: The Synthetic Competitor
Pure polymer sealants offer 6-12 month durability and excellent gloss but lack the warmth and depth of carnauba blends. They create a more “sterile,” glass-like appearance. For the wet look, sealants excel on silver, white, and light metallics where clarity trumps warmth. On dark colors, they can appear somewhat flat compared to wax. Some enthusiasts apply a sealant base layer for durability, then top with a thin carnauba wax for depth—the best of both worlds.
Ceramic Coatings: The Long-Term Solution
Ceramic coatings provide 2-5 years of protection and extreme gloss, but at 10-20x the cost of wax and requiring professional application for best results. They create a harder, more chemical-resistant layer but can look somewhat “artificial” compared to the living depth of quality wax. For daily drivers kept 3+ years, ceramics make economic sense. For enthusiasts who enjoy the ritual of waxing or own multiple vehicles, traditional wax remains more satisfying and flexible.
Glazes: The Temporary Filler
Glazes are purely cosmetic—they contain no protective polymers and wash off in 1-2 washes. They use heavy oils to fill swirls and create instant gloss, making them popular before car shows. However, they interfere with wax bonding and can cause staining if left too long. Use glazes only as a last resort when you need immediate improvement without time for proper correction, and always strip them completely before applying real wax.
Frequently Asked Questions
How long does a true wet look wax application typically last on a daily driver?
Expect 6-8 weeks of peak gloss with noticeable degradation by week 10. Daily drivers face constant UV exposure, road grime, and washing that gradually erode the wax layer. Garage-kept weekend cars can maintain the wet look for 12-16 weeks. Monitor beading behavior: when water stops beading and starts sheeting, protection has diminished significantly even if some gloss remains.
Can I layer different wax brands to enhance the wet look effect?
Generally, no. Different wax formulations use incompatible solvents or polymers that can cause lifting, streaking, or reduced durability. Stick with one product per application cycle. If you want to layer, use products from the same manufacturer designed to work together—typically a polymer sealant base with a carnauba topper. Never layer a wax over a ceramic coating unless specifically designed as a ceramic topper.
Does paint color affect how noticeable the wet look appearance is?
Absolutely. Dark colors (black, dark blue, charcoal) show the wet look most dramatically because they reflect more light contrast. Metallics and pearls can appear even deeper due to flake reflection through the wax layer. Light colors (silver, white, champagne) benefit less visually but still gain protection and easier cleaning. The wet look is most impressive on black—it’s the benchmark color for evaluating true depth.
What’s the difference between “wet look” and “mirror finish” marketing claims?
“Wet look” emphasizes depth and liquid appearance—you see into the paint. “Mirror finish” focuses on reflectivity and clarity—you see perfect reflections. The best products deliver both, but marketing often conflates the terms. True wet look requires both high gloss (90+ GU) and high distinctness of image (DOI) where reflections are sharp and clear. Read reviews that specifically mention depth versus just shine.
How do I know if my paint is properly prepped for a wet look wax?
After washing and claying, spray water on the panel. It should sheet off almost completely, leaving minimal beading. This indicates a clean surface free of oils and contaminants. Wipe your hand across the dry panel—it should feel completely smooth, not drag or catch. Finally, inspect under LED light at a low angle; you should see minimal swirls and no embedded particles. If you see significant defects, you need paint correction first.
Can I apply wet look wax over a ceramic coating?
Only if using a ceramic-specific topper designed for this purpose. Standard waxes won’t bond properly to SiO2-based coatings and can reduce the coating’s hydrophobic properties. Some manufacturers offer “ceramic waxes” that contain SiO2 and are formulated to adhere to ceramic surfaces while adding gloss. These are essentially spray sealants, not traditional waxes, and maintain rather than replace ceramic protection.
Why does my wet look wax leave white residue on plastic trim?
The wax contains oils and polymers that migrate into porous plastic, creating a difficult-to-remove white stain. Always mask trim with painter’s tape before application. If you get residue, remove it immediately with a dedicated plastic trim cleaner—don’t let it cure. For prevention, apply a trim dressing before waxing; the oils create a barrier that prevents wax adhesion. Some modern waxes claim “trim safe” formulation, but tape remains the foolproof method.
How does temperature during application affect the final gloss level?
Temperature affects solvent evaporation rate and wax viscosity. Too hot (above 80°F), and solvents flash too fast, causing streaking and poor leveling. Too cold (below 50°F), and wax becomes difficult to spread thin and may not cure properly. The sweet spot of 65-75°F allows the wax to flow smoothly, level perfectly, and cure uniformly, maximizing gloss. Use an infrared thermometer to check actual panel temperature, not just ambient air.
Is machine application better than hand application for wet look waxes?
For paint correction, absolutely—machines achieve levelness impossible by hand. For wax application, hand application is superior for the wet look. Machines apply wax too thickly and can’t achieve the feather-light pressure needed for the thinnest possible layer. Hand application with a quality foam pad gives you tactile feedback and precise control over coverage. Machines are useful only for spreading sealants or ceramic coatings where thickness is less critical.
What’s the single biggest mistake beginners make when chasing the wet look?
Impossible to pick just one, but the combination of inadequate prep and over-application destroys 90% of attempts. Beginners think more wax equals more shine, when the opposite is true. They also underestimate how clean the paint must be. The wet look is 70% preparation, 20% product quality, and 10% technique. Focus your energy on perfect paint correction and applying the thinnest possible layer, and you’ll surpass 95% of DIY results immediately.