Your side-by-side isn’t just a weekend toy—it’s an investment that faces some of the most brutal conditions imaginable. Every time you blast through mud bogs, crawl over rocky trails, or navigate salted winter roads, you’re exposing its undercarriage to a cocktail of corrosive elements that can transform steel into rust in record time. Undercoating isn’t merely an optional upgrade; it’s essential armor that can mean the difference between a machine that lasts a decade and one that becomes a money pit of frame repairs.
But here’s the reality: not all undercoatings are created equal, and the “best” choice depends on your specific riding style, climate, and maintenance philosophy. Whether you’re a trail warrior battling mountain terrain or a rancher using your UTV for daily work, understanding the nuances of undercoating technology will help you make an informed decision that protects your investment for years to come.
Top 10 Undercoating For Side-by-sides
Detailed Product Reviews
1. Undercoating In A Can - Black Wax Coating (12) 12oz. Case

Overview: The Undercoating In A Can Black Wax Coating delivers professional-grade rust protection in a convenient 12-pack case. This MIL-PRF-62218B approved formula provides a military-specification solution for preventing and stopping corrosion on vehicles, trailers, and equipment. Each 12-ounce can applies a durable wax-based barrier that penetrates existing rust while creating a protective shield against moisture and road salt.
What Makes It Stand Out: Military-grade approval sets this apart from consumer-grade sprays. The wax-based composition offers superior adhesion and flexibility compared to rubberized or asphalt coatings, claiming four times the lifespan. Beyond rust prevention, it provides noticeable sound deadening, reducing road noise and vibration. The formula actively halts existing rust progression rather than merely covering it, making it ideal for restoration projects and preventative maintenance on daily drivers alike.
Value for Money: At $74.18 for twelve cans ($6.18 per unit), this undercoating costs significantly less than professional shop applications ($150-$300). Each can covers approximately 10-15 square feet, making the case sufficient for a complete vehicle undercarriage with multiple coats. When compared to cheaper hardware store alternatives that require annual reapplication, the extended durability translates to substantial long-term savings and reduced labor.
Strengths and Weaknesses: Strengths include professional-grade formulation, multi-functional benefits (rust prevention + sound deadening), and exceptional longevity. The military specification ensures consistent quality. Weaknesses involve aerosol application limitations on large surfaces, requiring extensive prep work (cleaning, degreasing), and potential overspray concerns. Temperature and humidity affect curing, demanding careful planning.
Bottom Line: For DIY enthusiasts and professionals seeking long-term undercarriage protection, this case offers outstanding value. The military approval and extended durability justify the premium over budget options. Highly recommended for vehicles in rust-belt regions or anyone performing restoration work.
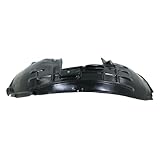
2. Wheel Splash Shield OEM Plastic Liner for Honda CR-V EX-L/LX 2007-2009 (HO1251110) - Front Passenger Side Undercoating Protection with Factory Specs

Overview: This Wheel Splash Shield restores factory-level protection for 2007-2009 Honda CR-V models. Positioned on the front passenger side, this plastic liner shields critical components from water, salt, and road debris that cause premature corrosion and damage. As an OEM-spec replacement, it maintains the original engineering integrity designed specifically for the CR-V’s wheel well architecture.
What Makes It Stand Out: Precision fitment for CR-V EX/EX-L/LX trims ensures hassle-free installation without modification. The part number cross-reference (HO1251110, 74100SXSA00, 12819913) verifies exact factory specifications, matching the original liner’s mounting points and contour. This eliminates the guesswork common with universal-fit alternatives that often require drilling or trimming, potentially compromising protection.
Value for Money: At $49.99, this liner costs 30-50% less than dealership parts departments while delivering identical specifications. Considering professional installation adds $50-$100 in labor, DIY replacement offers substantial savings. The durable plastic construction provides years of protection, preventing far more expensive repairs to inner fenders, wiring harnesses, and suspension components from debris damage and moisture intrusion.
Strengths and Weaknesses: Strengths include exact OEM dimensions, verified part numbers, and straightforward bolt-on installation using original hardware. The material resists typical road chemicals and UV degradation. Weaknesses involve plastic brittleness in extreme cold, potential for cracking on severe impacts, and the single-side packaging requiring separate driver-side purchase. Aftermarket alternatives exist at lower prices but often compromise fit and thickness.
Bottom Line: For CR-V owners needing authentic replacement parts, this liner offers dealership quality without the premium price. The precise fitment justifies the cost over cheaper universal options. Recommended for maintaining factory protection levels and simplifying installation.
3. Wheel Splash Shield OEM Plastic Liner for Honda CR-V EX-L/LX 2007-2009 (HO1251110) - Front Passenger Side Undercoating Protection with Factory Specs
Overview: Protect your 2007-2009 Honda CR-V’s undercarriage with this front passenger-side Wheel Splash Shield. This OEM-style liner acts as a critical barrier against the destructive combination of road salt, water spray, and gravel that accelerates rust in wheel wells. Designed specifically for CR-V EX/EX-L/LX models, it maintains the vehicle’s original protective geometry.
What Makes It Stand Out: The part’s specificity to 2007-2009 CR-V models ensures every mounting hole and contour aligns perfectly with factory attachment points. Unlike generic liners that need adaptation, this plug-and-play design uses existing hardware and requires no special tools. The comprehensive part number compatibility (HO1251110, 74100SXSA00, 12819913) provides verification against your original component for absolute certainty before purchase.
Value for Money: Priced at $49.99, this shield offers a middle ground between expensive dealer parts ($80+) and flimsy universal options under $30. The investment pays dividends by protecting suspension components, brake lines, and electrical connections from debris impact and chemical exposure. For vehicles in harsh climates, replacing a damaged liner prevents costly corrosion repairs that can exceed $500, making this a prudent preventative measure.
Strengths and Weaknesses: Key strengths are the authentic fit that restores factory appearance and protection, durable polymer construction that withstands typical road hazards, and clear part number documentation. Weaknesses include single-side availability necessitating a separate driver-side purchase, plastic material vulnerable to cracking from severe impacts, and limited color options if aesthetics matter. The price may exceed budget alternatives but reflects quality assurance.
Bottom Line: This liner excels for CR-V owners prioritizing correct fit and long-term protection. The OEM specifications ensure proper coverage without gaps that plague universal parts. A smart investment for maintaining your vehicle’s corrosion defense system.
4. OEM Style Wheel Liner Front Left Driver Side for Audi Q5 2009-2017 & SQ5 2014-2017 - Plastic Fender Splash Guard, Undercoating Protection 8R0821171K AU1248122
Overview: This OEM-style Wheel Liner provides front driver-side protection for Audi Q5 (2009-2017) and SQ5 (2014-2017) models. Acting as a crucial splash guard, it prevents abrasive road debris, water, and winter chemicals from damaging the inner fender, electrical components, and luxury vehicle finishes. The plastic construction replicates factory design specifications for these premium SUVs.
What Makes It Stand Out: Exceptional fitment breadth covers nine model years of Q5 and four years of SQ5, simplifying inventory and ensuring broad compatibility. The easy installation design emphasizes factory-style mounting points that align with original hardware locations. Multiple part number references (8R0821171K, AU1248122, 14912196, 8R0821171F, AU1248143) allow comprehensive cross-checking against your original liner for verification.
Value for Money: At $62.99, this liner presents significant savings over Audi dealership parts typically priced $90-$140. For a luxury vehicle segment where maintenance costs run high, this cost reduction matters. Protecting the Q5/SQ5’s sophisticated suspension electronics and painted surfaces from debris damage justifies the investment, preventing repair bills that easily surpass $1,000 for corrosion or impact damage in the wheel well area.
Strengths and Weaknesses: Strengths include extensive model year coverage, driver-side specific design, and straightforward installation that most owners can complete in 15 minutes. The material offers adequate resistance to common road chemicals. Weaknesses involve “OEM style” rather than genuine OEM certification, plastic that may be slightly thinner than factory originals, and potential variability in mounting hole precision. Always verify against your specific VIN.
Bottom Line: An excellent cost-saving alternative to dealership parts for Audi Q5/SQ5 owners. The broad compatibility and easy installation make it accessible for DIY maintenance. Verify part numbers against your specific model year before ordering to ensure perfect fitment.
5. OEM Style Wheel Liner Front Left Driver Side for Audi Q5 2009-2017 & SQ5 2014-2017 - Plastic Fender Splash Guard, Undercoating Protection 8R0821171K AU1248122
Overview: Maintain your Audi Q5 or SQ5’s undercarriage integrity with this front driver-side Wheel Liner. This plastic fender splash guard delivers factory-spec protection for 2009-2017 Q5 and 2014-2017 SQ5 models, shielding expensive components from road debris and moisture. The design preserves the clean appearance and protective function expected in premium European vehicles.
What Makes It Stand Out: The part’s versatility across multiple Audi platforms demonstrates thoughtful engineering compatibility. Installation simplicity stands as a primary feature—designed for bolt-on replacement using basic hand tools without vehicle modification. The extensive part number list (8R0821171K, AU1248122, 14912196, 8R0821171F, AU1248143) enables precise matching against your removed component, eliminating uncertainty in parts ordering.
Value for Money: Priced at $62.99, this liner substantially undercuts dealer parts counter pricing while delivering comparable fit and function. For Audi owners, protecting wheel well components like ABS sensors, air suspension lines, and premium audio wiring from debris strikes represents cheap insurance. The cost of replacing a damaged sensor or repairing corrosion on a luxury vehicle can quickly exceed $500, making this preventative part a financially sound choice despite the premium over economy alternatives.
Strengths and Weaknesses: Major strengths are the precise driver-side configuration, broad model coverage, and installation ease that saves $75-$125 in shop labor. The material adequately deflects typical road hazards. Weaknesses include the “OEM style” designation indicating aftermarket origin, potential minor fitment variations requiring adjustment, and plastic construction that may not match genuine Audi part longevity in extreme conditions. Quality control can vary between production batches.
Bottom Line: A practical solution for Audi Q5/SQ5 owners seeking dealer-equivalent protection without the premium price. The installation advantage makes it ideal for DIY enthusiasts wanting to maintain their luxury vehicle’s defenses. Confirm your production date and part number to guarantee compatibility.
6. OEM Style Wheel Liner Front Left Driver Side for Audi Q5 2009-2017 & SQ5 2014-2017 - Plastic Fender Splash Guard, Undercoating Protection 8R0821171K AU1248122
Overview: The OEM Style Wheel Liner for Audi Q5 and SQ5 models is a direct replacement splash guard designed for the front left/driver side. Engineered to fit 2009-2017 Q5 and 2014-2017 SQ5 vehicles, this plastic fender liner protects your wheel well from road debris, water spray, and corrosion. It serves as an essential barrier between your tires and the engine compartment, preventing dirt and moisture from damaging sensitive components. The part comes with multiple cross-reference numbers including 8R0821171K and AU1248122, ensuring broad compatibility across model years.
What Makes It Stand Out: This wheel liner distinguishes itself through its precise OEM-style fitment and extensive part number compatibility. Unlike universal liners that require modification, this component is molded specifically for Audi’s chassis specifications. The manufacturer emphasizes easy installation, making it accessible for DIY mechanics. The undercoating protection feature adds an extra layer of defense against rust and corrosion, particularly valuable for vehicles in harsh climates. Its design replicates factory mounting points exactly, eliminating the need for drilling or custom fabrication.
Value for Money: At $72.99, this aftermarket liner costs significantly less than dealership parts, which often exceed $150 for a single side. For Audi owners facing damaged or missing liners, this represents substantial savings while maintaining factory appearance and function. The plastic construction keeps costs down while providing adequate protection for daily driving conditions. Considering professional installation can add $50-100 in labor, the DIY-friendly design further enhances its value proposition for budget-conscious owners.
Strengths and Weaknesses: Strengths include exact OEM fitment, multiple part number compatibility, straightforward installation, and cost savings over dealership pricing. The undercoating protection is a thoughtful addition for longevity. However, weaknesses include potentially thinner plastic than genuine OEM parts, questionable long-term durability under extreme conditions, and the fact that only one side is included. Aftermarket quality control may vary between batches, and the material might not match the original’s impact resistance.
Bottom Line: This wheel liner is an excellent choice for Audi Q5/SQ5 owners needing a straightforward, cost-effective replacement. It’s ideal for restoring protection on older vehicles without breaking the bank. While it may not match OEM durability, the fitment accuracy and significant savings make it a smart purchase for daily drivers. Verify your specific part number before ordering and consider replacing both sides simultaneously for uniform protection.
7. Rustkill Undercoating - 1 U.S. Quart (946 ml)
Overview: Rustkill Undercoating is an oil-based rust prevention treatment designed to protect your vehicle’s underside from corrosion. This 1-quart (946 ml) container provides sufficient coverage for a typical car’s underbody, creating a protective barrier that locks out oxygen and moisture. Unlike traditional undercoatings, this formula actively stops existing rust while preventing new oxidation from forming. The product is specifically engineered for DIY application, offering professional-grade protection without the premium cost of shop services.
What Makes It Stand Out: The distinguishing feature of Rustkill is its oil-based composition that repels water rather than trapping it like rubberized coatings. This breathable approach prevents moisture accumulation, which is the primary cause of rust. The formula stays exactly where sprayed, creating a persistent protective film that doesn’t wash off easily. It directly addresses existing rust by cutting off oxygen supply, halting corrosion in its tracks. The product’s effectiveness in preventing new rust formation makes it particularly valuable for vehicles in salt-heavy winter regions.
Value for Money: At $39.95 per quart, Rustkill delivers exceptional value compared to professional undercoating services that cost $150-300. One quart covers an entire vehicle, and with reapplication needed only 1-2 times annually, the yearly investment remains under $80. This makes it highly economical for long-term rust prevention. The DIY nature eliminates labor costs, and the oil-based formula provides superior protection compared to many budget rubberized alternatives that can actually accelerate rust by trapping moisture.
Strengths and Weaknesses: Key strengths include the oil-based formula that won’t trap moisture, ability to stop active rust, water-repelling properties, and cost-effectiveness. The coverage quantity is generous for the price. However, weaknesses include the need for frequent reapplication, messy application process requiring proper preparation and safety equipment, potential dripping during curing, and it’s not a permanent one-time solution. The annual maintenance requirement demands commitment from the vehicle owner.
Bottom Line: Rustkill Undercoating is highly recommended for vehicle owners in rust-prone regions seeking an effective, affordable DIY solution. It’s particularly valuable for aging vehicles where rust prevention is critical. While the reapplication schedule requires dedication, the oil-based chemistry’s superiority over rubberized alternatives justifies the effort. Invest in proper application tools and follow safety guidelines for best results.
Why Your Side-by-Side Needs Undercoating Protection
Side-by-sides operate in environments that would make a standard vehicle cry for mercy. Unlike highway cars that enjoy smooth pavement and occasional rain, your UTV faces direct, repeated assault from abrasive debris, standing water, and chemical contaminants. The undercarriage takes the brunt of this abuse—frame rails, A-arms, suspension components, and drivetrain parts are constantly bombarded.
Manufacturers typically apply only minimal factory rust protection, often just a thin layer of paint that chips away after a few aggressive rides. Once that barrier is compromised, moisture seeps into bare metal, starting a corrosion process that accelerates exponentially. Undercoating creates a sacrificial barrier that absorbs impacts, repels water, and prevents oxygen from reaching the metal surface—effectively stopping rust before it starts.
Understanding the Threats: What You’re Protecting Against
Corrosion and Rust: The Silent Killers
Rust is an electrochemical reaction that requires three elements: iron, oxygen, and water. Your side-by-side’s steel frame provides the iron in abundance, while trail riding supplies endless water and oxygen. Add road salt, calcium chloride, or saltwater from coastal riding, and you’ve created a perfect storm for rapid oxidation. Modern undercoatings interrupt this reaction by forming an impermeable barrier that keeps moisture and oxygen separated from metal surfaces.
Abrasion Damage from Terrain
Rocks, gravel, and sand act like sandblasting media at speed, stripping away factory paint and creating micro-scratches where rust can gain a foothold. Quality undercoatings contain flexible polymers that absorb impact energy and self-heal minor scratches, maintaining continuous protection even after harsh encounters with trail debris.
Chemical Exposure: Salt, Mud, and More
Agricultural chemicals, fertilizer runoff, and de-icing salts don’t just cause rust—they actively accelerate it through chemical reactions. These compounds lower the pH of moisture on your frame, creating an even more corrosive environment. Premium undercoatings resist chemical degradation and prevent these substances from reaching the metal substrate.
Types of Undercoating Formulations
rubberized undercoatings
Rubberized formulas create a thick, flexible coating that excels at sound dampening and impact resistance. These products typically contain asphalt or synthetic rubber suspended in a solvent carrier. Once cured, they remain pliable even in cold temperatures, making them ideal for riders who frequent rocky terrain. However, their thickness can make inspection difficult, and they may trap moisture if applied over existing rust.
Asphalt-Based Undercoatings
The traditional choice for heavy-duty applications, asphalt-based coatings offer excellent water resistance and durability. They’re typically the most affordable option and provide robust protection against stone chips. The trade-off is a rigid finish that can crack over time with frame flex, and they tend to be messy during application with strong solvent odors.
Wax and Paraffin-Based Undercoatings
These penetrating formulas creep into seams and crevices where rust often starts. They remain somewhat soft and self-healing, making them excellent for hard-to-reach areas and for vehicles that see frequent pressure washing. The downside is they require more frequent reapplication and can attract dirt if over-applied, creating a mud-magnet effect on the undercarriage.
Polyurethane and Polyurea Coatings
The premium tier of undercoating technology, these two-component systems cure to an extremely durable, chip-resistant finish. They offer superior chemical resistance, excellent adhesion, and maintain flexibility without sagging. Professional application is recommended due to precise mixing requirements, and they represent the highest cost option—but deliver unmatched longevity for serious enthusiasts.
Oil-Based Rust Inhibitors
Fluid Film and similar oil-based products work through capillary action, actively displacing moisture and creeping into hidden areas. They’re the go-to choice for existing rust prevention, as they don’t trap moisture underneath. These require annual reapplication but make future maintenance easy since they don’t form a hard shell that must be removed for touch-ups.
Key Performance Features to Evaluate
Penetration and Creep Capability
The best undercoatings don’t just sit on the surface—they actively migrate into lap joints, weld seams, and boxed sections where rust begins. Look for products that advertise “creeping” or “self-healing” properties. This characteristic is measured by how far the coating travels from the application point into hidden areas, with premium formulas reaching 2-3 inches into seams.
Flexibility and Elongation Properties
Your side-by-side’s frame flexes during aggressive riding. An undercoating that can’t stretch will crack and peel, creating entry points for moisture. Elongation percentage tells you how far a coating can stretch before breaking—quality products exceed 200% elongation. This is critical for long-travel suspension systems and high-performance machines that experience significant chassis flex.
Drying Time and Curing Process
Fast-dry formulas might seem convenient, but rapid solvent evaporation can compromise adhesion and film thickness. Understand the difference between “dry to touch” and fully cured. Most quality undercoatings achieve initial dryness in 1-4 hours but require 24-72 hours for complete chemical curing. Temperature and humidity dramatically affect this timeline, with ideal application conditions between 60-80°F and low humidity.
Sound Dampening Qualities
A secondary benefit of thick undercoatings is reduced road noise and vibration. Rubberized and asphalt-based products excel here, potentially decreasing cabin noise by 3-7 decibels. If you use your side-by-side for long trail rides or work applications, this acoustic insulation improves operator comfort and reduces fatigue.
Heat Resistance Specifications
Your UTV’s exhaust system, catalytic converter, and engine generate intense heat near the undercarriage. Verify the undercoating’s heat rating—quality products withstand continuous temperatures of 300-400°F without sagging, smoking, or emitting odors. This is non-negotiable for turbocharged models or machines with modified exhaust systems.
Application Methods: Choosing Your Approach
Professional Spray Systems
Professional shops use high-volume, low-pressure (HVLP) spray equipment with heated lines and specialized tips that atomize thick undercoatings into a uniform, textured finish. This method ensures consistent mil thickness (typically 3-5 mils dry film thickness) and reaches areas impossible to access with DIY methods. Professionals also have proper ventilation and waste disposal systems for VOC compliance.
DIY Aerosol Cans
Aerosol cans offer convenience for touch-ups and small areas but present challenges for full underbody coverage. The propellant-to-product ratio means higher cost per ounce, and the spray pattern lacks the volume for adequate build thickness. However, they’re invaluable for maintenance between major applications, especially for spot-treating scraped areas after hard rides.
DIY Spray Gun Application
Investing in an undercoating spray gun (typically $30-80) connected to your air compressor provides professional-grade results at home. These guns have large nozzles (1.8-2.5mm) and heavy-duty construction to handle viscous materials. Success depends on having a compressor delivering 5-7 CFM at 90 PSI consistently. This method offers the best balance of cost and quality for serious DIY enthusiasts.
Brush and Roll Methods
While labor-intensive, brushing undercoating onto specific areas allows maximum control and penetration into seams. This approach works well for frame sections, A-arms, and other accessible components. Use natural bristle brushes for oil-based products and disposable foam brushes for quick cleanup. Rolling is generally ineffective for undercarriage work due to the complex geometry and overhead application.
Surface Preparation: The Foundation of Success
Cleaning Requirements
The number one cause of undercoating failure is inadequate cleaning. Your undercarriage must be free of dirt, oil, grease, and loose rust. Pressure washing alone isn’t sufficient—use a degreaser or automotive detergent with a brush to agitate surfaces. For heavily contaminated frames, consider media blasting or power wire brushing to create a clean profile. The surface should be dry to the touch but can have minimal flash rust (orange surface rust) that most quality undercoatings will encapsulate and inhibit.
Rust Treatment Protocols
Never apply undercoating over flaky, scaly rust. Use a wire wheel or sandpaper to remove loose oxidation down to solid metal. For pitted areas, apply a rust converter that chemically transforms remaining rust into a stable, paintable surface. Allow converters to fully react (typically 24 hours) before undercoating application. For severe rust, consider POR-15 or similar encapsulating primers as an intermediate step.
Masking and Protection Steps
Protect brake rotors, calipers, brake lines, and exhaust components with heavy-duty aluminum foil and masking tape—it’s heat-resistant and conforms to complex shapes. Cover suspension seals, zerk fittings, and any rubber bushings with petroleum jelly or specialized masking products. Remove or thoroughly mask the entire drivetrain including CV boots, as undercoating can cause premature deterioration of these components.
Critical Buying Criteria Beyond the Formula
VOC Compliance and Environmental Impact
Volatile Organic Compounds (VOCs) affect both health and environmental regulations. Many states have strict VOC limits (typically 250-450 g/L) for automotive coatings. Water-based formulas offer low-VOC alternatives but may sacrifice some performance. Always check local regulations and product SDS sheets. For garage application, ensure adequate ventilation (minimum 4-6 air changes per hour) and use organic vapor respirators.
Coverage Rate and Value Calculation
Coverage claims vary wildly—from 25 to 60 square feet per gallon. Calculate your side-by-side’s underbody area (roughly 80-120 sq ft for most UTVs) and factor in two coats. A $50 gallon that covers 60 sq ft is better value than a $30 gallon covering 25 sq ft. Consider waste factor too—20-30% of product is lost to overspray and material left in equipment.
Color and Finish Options
While black dominates the market, some manufacturers offer gray, tan, or even clear formulas. Color choice affects heat absorption—black coatings run 10-15°F hotter in direct sun, which can accelerate cure but may increase cabin heat. Texture varies from smooth (easier to clean) to heavily textured (better chip resistance). Match the finish to your cleaning habits and terrain type.
Shelf Life and Storage Requirements
Two-part polyurethanes have limited pot life once mixed (30 minutes to 4 hours), while single-component products may last 2-5 years unopened. Store products between 60-80°F—freezing ruins most water-based formulas, while extreme heat can cause skinning in cans. Buy quantities you’ll use within a year to ensure optimal performance.
Warranty and Manufacturer Support
Reputable manufacturers offer technical support hotlines and detailed application guides. Some provide limited warranties against rust-through when their product is professionally applied according to specifications. Understand that these warranties typically require documented annual inspections and touch-ups, and exclude damage from accidents or improper maintenance.
DIY vs. Professional Application: Making the Right Choice
Cost-Benefit Analysis
Professional undercoating runs $400-800 for a side-by-side, while DIY materials cost $80-200. However, factor in equipment costs ($100-300 for a quality spray setup), your time (6-12 hours for proper prep and application), and the learning curve. For a new machine you’ll keep 5+ years, professional application often provides better long-term value. For older machines or budget builds, DIY delivers adequate protection at lower cost.
Equipment Investment Requirements
Beyond the spray gun, you’ll need a compressor with sufficient CFM, jack stands or a lift, proper lighting, safety equipment (respirator, goggles, coveralls), and cleaning supplies. The total investment for a proper DIY setup approaches $500. If you already own a capable compressor and enjoy detailing work, the incremental cost is minimal. If not, professional application becomes more attractive.
Skill Level and Learning Curve
Undercoating isn’t rocket science, but technique matters. Maintaining proper distance (6-8 inches), overlapping passes by 50%, and achieving uniform thickness requires practice. Beginners often apply too thin (inadequate protection) or too thick (runs, sags, and wasted product). Watch manufacturer videos, practice on scrap metal, and start with less visible areas to build confidence.
Seasonal Timing and Application Conditions
Ideal Temperature and Humidity Ranges
Most undercoatings apply best between 65-75°F with relative humidity below 60%. Cold temperatures slow curing and increase viscosity, making application difficult. High humidity can cause blush (a hazy finish) in some formulas. Early fall often provides ideal conditions—warm days, cool nights, and low humidity before winter salt season begins.
Off-Season Preparation Strategy
The best time to undercoat is during the off-season when your machine is clean and dry. Apply in early fall before winter corrosion begins, or in spring after thorough cleaning. Never apply over existing mud or moisture. For year-round riders, schedule application during a dry spell and allow 48-72 hours of cure time before hitting wet trails.
Maintenance and Reapplication Schedule
Inspection Intervals
Inspect your undercoating every 30 days of riding or quarterly at minimum. Look for chips, scrapes, and thin spots using a bright LED light. Pay special attention to frame areas near wheels and suspension mounting points that see maximum debris impact. Catching damage early allows for simple touch-ups rather than complete reapplication.
Touch-Up Procedures
Clean damaged areas with brake cleaner or denatured alcohol, scuff with fine sandpaper, and apply new material extending 2-3 inches beyond the damage. For oil-based products, simply spray or brush over cleaned areas. For hard coatings, feather the edges to prevent lifting. Keep a small supply of your original product for this purpose—matching formulas later can be difficult.
Signs You Need a Fresh Coat
When you see widespread cracking, flaking, or areas where the coating has worn through to bare metal, it’s time for a complete reapplication. For hard coatings, this typically occurs after 3-5 years of hard use. Oil-based products need annual refreshment. Don’t wait for rust to appear—by then, you’re already behind the corrosion curve.
Common Mistakes That Compromise Protection
Inadequate Surface Prep
The temptation to spray over a dirty undercarriage is strong, but it’s the fastest path to failure. Undercoating bonds to contaminants, not metal, and will peel off in sheets. Spend 80% of your time on prep and 20% on application. A properly prepared surface can make even a budget undercoating perform admirably.
Applying Too Thick or Too Thin
Too thin (less than 3 mils dry) provides insufficient protection. Too thick (over 10 mils) leads to runs, sags, and extended cure times that attract dirt. Use a wet film thickness gauge during application to verify 5-7 mils wet, which cures to 3-5 mils dry. Multiple thin coats always outperform one heavy coat.
Ignoring Hard-to-Reach Areas
The inside of boxed frame sections, behind crossmembers, and inside A-arm cavities are where rust starts first but is seen last. Use extension wands for spray guns and take time to hit these areas from multiple angles. A coating that doesn’t reach these hidden zones is only doing half its job.
Compatibility Considerations
Plastic and Rubber Component Safety
Many undercoatings contain solvents that attack plastic and rubber. Keep product away from CV boots, suspension bushings, brake lines, and plastic skid plates. If overspray occurs, wipe immediately with mineral spirits. Some modern formulas are specifically labeled “plastic-safe” and use gentler carriers—worth seeking out if your machine has extensive composite components.
Electrical System Protection
Avoid coating electrical connections, grounds, and wiring harnesses. Undercoating can wick into connectors and cause resistance or complete circuit failure. If you must coat near electrical components, mask them thoroughly and use dielectric grease on connections before masking as an extra precaution.
Exhaust and Heat Shield Proximity
Maintain a 6-8 inch buffer from exhaust components unless using a high-temp rated product. Even heat-resistant coatings can discolor or emit odors when heated. Consider using a separate high-temp paint (rated to 1200°F+) on heat shields and nearby frame sections for a complete, safe solution.
Understanding Performance Certifications
ASTM Standards
Look for products tested to ASTM B117 (salt spray) and ASTM D1654 (scab corrosion) standards. These laboratory tests provide objective performance data. A product that withstands 1000+ hours of salt spray testing offers commercial-grade protection. Be wary of vague “tested tough” claims without specific standard references.
Salt Spray Test Results
Salt spray testing accelerates corrosion by exposing coated panels to a continuous salt fog. For side-by-side applications, look for products exceeding 500 hours—this translates to several years of real-world protection. Premium offerings often exceed 1000 hours. Understand that these tests are performed on ideal lab panels, not real undercarriages, so use them as a comparative tool rather than an absolute guarantee.
Real-World Field Testing
Manufacturer field testing in actual off-road conditions provides the most relevant performance data. Look for case studies or testimonials from fleet operators, agricultural users, or racing teams who log heavy hours in harsh environments. These real-world results often reveal how a product performs when applied by regular users, not lab technicians.
Frequently Asked Questions
How long does undercoating last on a side-by-side?
Lifespan varies dramatically by product type and usage. Hard rubberized or polyurethane coatings typically last 3-5 years under normal trail use. Oil-based fluid films need annual reapplication. If you ride in saltwater or heavy road salt conditions, reduce these timelines by 30-50%. Inspect regularly and touch up as needed rather than relying on a set schedule.
Can I apply undercoating over existing rust?
Light surface rust (flash rust) is acceptable and will be encapsulated by most quality undercoatings. However, scaly, flaking rust must be removed down to solid metal first. Applying over heavy rust traps moisture and accelerates hidden corrosion. Always stabilize remaining rust with a converter before coating, and never coat over rust holes or severely pitted metal expecting a miracle.
Will undercoating void my manufacturer’s warranty?
Generally no, but check your specific warranty terms. Most manufacturers only warranty against defects in factory materials and workmanship—undercoating is considered owner maintenance. However, damage caused by improper application (clogged breathers, coated sensors) wouldn’t be covered. Keep undercoating away from factory stickers and VIN plates to avoid documentation issues.
How soon after application can I ride?
Dry to touch typically occurs in 2-6 hours, but full cure takes 24-72 hours depending on product and conditions. You can drive carefully on dry pavement after 12-24 hours, but avoid water, mud, and heavy dust until fully cured. Oil-based products never fully “cure” and can remain tacky for weeks—this is normal and actually helps them self-heal, but avoid pressure washing for at least a week.
Is undercoating worth it on a brand new side-by-side?
Absolutely. The best time to undercoat is when the machine is new and corrosion-free. You’re locking in that pristine condition and preventing rust from ever starting. The factory paint is minimal protection at best. Think of it as insurance—spending $200-500 now prevents $2000+ in frame repairs later. Many manufacturers apply only a light e-coating that fails quickly in real off-road conditions.
Can I undercoat myself in my driveway?
Yes, with proper preparation and realistic expectations. You’ll need a calm day with low wind, temperatures between 65-75°F, and a way to elevate the vehicle safely. Cover your driveway with heavy plastic sheeting, wear full protective equipment, and accept that some overspray will occur. The bigger challenge is proper prep—most driveways lack the drainage and cleaning facilities for thorough undercarriage washing.
What’s the difference between undercoating and bedliner?
While both are protective coatings, they’re formulated for different jobs. Bedliners prioritize extreme abrasion resistance and texture for cargo grip, using harder, less flexible polymers. Undercoatings prioritize flexibility, moisture resistance, and creep into seams. Using bedliner as undercoating often leads to cracking from frame flex and inadequate moisture sealing. Some hybrid products exist, but choose a product specifically marketed for underbody use.
How do I remove old undercoating?
Mechanical removal works best—heat guns soften material for scraping, followed by wire wheels or abrasive discs. Chemical strippers exist but are messy and environmentally hazardous. For small areas, a pneumatic needle scaler works wonders. Expect this to be a day-long, miserable job. This is why choosing a quality product initially matters—you want to avoid removal for as long as possible.
Will undercoating add significant weight to my machine?
A complete undercoating job adds 15-25 pounds depending on product and coverage area. This is negligible for a 1500+ pound UTV and has no measurable impact on performance. The weight is distributed low on the chassis, potentially lowering your center of gravity slightly. Don’t let weight concerns prevent you from protecting your investment.
Can I wax or ceramic coat over undercoating?
No—undercoating is designed as the final protective layer on underbody components. Wax and ceramic coatings are for painted exterior surfaces where appearance matters. Applying them over undercoating wastes product and provides no additional benefit. Focus your detailing efforts on the body panels and leave the undercoating to do its job unadorned.