Your enclosed trailer is more than just a metal box on wheels—it’s a significant investment that protects your gear, tools, or cargo from the elements. But while you’re busy waxing the exterior and checking tire pressure, there’s a silent threat attacking from below. Road salt, moisture, gravel, and chemical de-icers wage a constant war on your trailer’s undercarriage, turning solid steel into flaky rust. The right undercoating doesn’t just slow this process; it creates an impenetrable shield that can double your trailer’s lifespan.
In the world of car care, we obsess over paint protection films and ceramic coatings for our daily drivers, yet we often neglect the workhorse that hauls our most valuable equipment. This comprehensive guide will walk you through everything you need to know about selecting the perfect undercoating for your enclosed trailer—no brand bias, no sponsored recommendations, just pure technical expertise to help you make an informed decision.
Top 10 Undercoating For Enclosed Trailers
Detailed Product Reviews
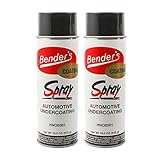
1. Zenex Rubberized Undercoat - Heavy Duty Undercoating for Vehicles | Rubberized Undercoating Spray for Cars, Trucks, and Trailers | Waterproof Rust Prevention | Sound Deadening | 16 oz (2 Count)

Overview: Zenex Rubberized Undercoat delivers professional-grade protection in a convenient DIY-friendly aerosol package. This two-pack of 16-ounce cans creates a flexible, waterproof barrier designed specifically for underbodies, frames, rocker panels, and trailers exposed to harsh conditions. Formulated to resist chipping, cracking, and peeling, it provides long-lasting rust and corrosion prevention while offering the added benefit of sound deadening for a quieter ride.
What Makes It Stand Out: The dual-action formula distinguishes itself by combining robust rust protection with genuine noise reduction capabilities—rare in consumer-grade undercoatings. Its paintable, elastic black finish maintains flexibility across extreme temperature swings, ensuring durability in seasonal abuse. The product’s American manufacturing pedigree appeals to professionals and enthusiasts seeking reliable, consistent quality. Clear application instructions and the trusted reputation among auto shops and fleet operators further elevate its standing.
Value for Money: At $24.99 for 32 total ounces ($0.78 per ounce), this offering significantly undercuts professional undercoating services while delivering comparable results. The two-can pack provides sufficient coverage for a standard passenger vehicle’s underbody or multiple touch-up projects. Compared to cheaper alternatives that crack or peel prematurely, Zenex’s longevity makes it a cost-effective investment for vehicle preservation.
Strengths and Weaknesses: Pros: Excellent waterproofing and flexibility; genuine sound deadening properties; paintable finish; made in USA; trusted by professionals; straightforward application.
Cons: Requires meticulous surface preparation; minimum 50°F application temperature limits seasonal use; multiple coats necessary for optimal protection; potential overspray issues without careful masking.
Bottom Line: Zenex Rubberized Undercoat is an exceptional choice for DIYers and professionals seeking affordable, durable underbody protection. Its sound-dampening bonus and proven flexibility make it ideal for trucks, SUVs, and trailers in rust-prone regions.
2. RecPro Trailer Fender Rubberized Undercoating Spray | Prevent Rust | Buildable & Paintable | Automotive | Black (2 Pack)
Overview: RecPro’s rubberized undercoating spray targets trailer owners seeking robust rust prevention for fenders and undercarriage components. This two-pack delivers a high-grade rubber formulation designed to be buildable and paintable, allowing users to apply multiple coats for enhanced protection. While marketed specifically for trailer fenders, its automotive-grade composition suits various metal surfaces requiring flexible, durable shielding.
What Makes It Stand Out: The “buildable” nature sets this apart, enabling progressive layering to achieve desired thickness—particularly valuable for high-wear areas like trailer fenders. Its high-quality rubber base suggests superior adhesion and flexibility compared to asphalt-based competitors. The paintable finish allows color customization to match existing trailer aesthetics, while the focus on trailer applications indicates specialized formulation for towing stresses and debris impact.
Value for Money: Priced at $42.95 for the two-pack, this product positions itself in the premium tier. While exact can size isn’t specified in the features, the cost suggests larger volumes or superior formulation compared to budget alternatives. For trailer owners prioritizing fender protection—a notoriously rust-prone area—the buildable characteristic may reduce long-term maintenance costs by extending reapplication intervals.
Strengths and Weaknesses: Pros: Buildable for customizable thickness; high-grade rubber composition; paintable finish; trailer-specific design; premium formulation.
Cons: No explicit sound deadening claims; lacks detailed application guidance; unspecified can size and coverage; potentially overpriced compared to general-purpose undercoatings; requires self-preparation for comprehensive protection.
Bottom Line: Ideal for trailer enthusiasts wanting targeted, layered protection on fenders and wear-prone areas. The buildable formula justifies its premium price for those needing more than basic undercoating, though specification transparency could be improved.
3. RecPro Steel Trailer Fenders Tandem Axle 64" x 10" x 16" | 14 Gauge Steel | Teardrop Trailer Fenders (2 Fenders, No Rubberized Undercoating Spray)
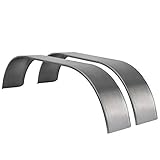
Overview: These RecPro tandem axle trailer fenders provide heavy-duty wheel coverage for dual-axle trailers, measuring 64 inches long by 10 inches high and 16 inches deep. Constructed from robust 14-gauge galvanized steel, they offer superior thickness and durability compared to standard fenders. Designed for weld-on installation, they serve as a solid foundation for custom trailer builds or replacement projects.
What Makes It Stand Out: The 14-gauge steel construction significantly exceeds typical 16-20 gauge fender thickness, providing exceptional impact resistance against road debris and enhanced structural integrity for welding. Galvanization offers baseline corrosion resistance before additional treatments. The teardrop profile and precise tandem-axle dimensions ensure proper wheel clearance and professional aesthetics. The weld-on design creates a permanent, seamless attachment stronger than bolt-on alternatives.
Value for Money: At $267.95 for the pair, these fenders represent a mid-range investment justified by material thickness and durability. While cheaper stamped steel options exist, the 14-gauge construction prevents the denting and warping common with thinner metals, reducing replacement frequency. The galvanized finish adds value, though final painting remains necessary for long-term rust prevention.
Strengths and Weaknesses: Pros: Heavy-duty 14-gauge thickness; galvanized for rust resistance; weld-on strength; ideal tandem-axle dimensions; superior durability.
Cons: Requires welding skills and equipment; NOT pre-coated—will rust if left untreated; heavier than aluminum alternatives; no mounting hardware included; mandatory additional painting/coating expense.
Bottom Line: Perfect for builders and owners prioritizing durability over convenience. These fenders demand welding capability and immediate coating but reward users with unmatched longevity. Pair with a quality rubberized undercoating for a comprehensive, long-lasting solution.
Why Undercoating Matters for Enclosed Trailers
Enclosed trailers face unique challenges compared to open trailers or vehicle undercarriages. Their boxed design creates trapped moisture, while limited ventilation turns minor leaks into major corrosion zones. The floor structure, typically wood or composite decking over steel framing, becomes a breeding ground for rust when moisture seeps through screw holes and seams. Unlike vehicles that get regular washing and visual inspections, trailer undersides are often “out of sight, out of mind” until catastrophic failure occurs. A quality undercoating acts as your trailer’s immune system, actively repelling water, resisting chemical attacks, and absorbing impact from road debris before damage occurs.
Understanding Trailer Corrosion: The Science Behind Rust
Corrosion isn’t just oxidation—it’s an electrochemical process that accelerates in the presence of electrolytes like road salt. Your trailer’s steel frame becomes an anode and cathode, with moisture completing the circuit that literally eats away metal. Enclosed trailers are particularly vulnerable because they experience extreme temperature fluctuations, causing condensation to form on interior surfaces that then drips onto the frame. This cyclical wet-dry pattern is more destructive than constant moisture because it concentrates corrosive salts and creates micro-fractures in protective coatings.
How Moisture and Road Salt Attack Your Trailer
Road salt (sodium chloride) lowers water’s freezing point, keeping it liquid at temperatures where it would normally freeze. This liquid brine penetrates every crack, seam, and screw hole, wicking up to six inches through capillary action. Once inside, it doesn’t just rust the surface—it creates deep pitting that weakens structural integrity. Calcium chloride and magnesium chloride, increasingly popular de-icing agents, are hygroscopic, meaning they actively pull moisture from the air and remain active even in “dry” conditions. Your trailer essentially becomes a salt lick that never dries out.
The Hidden Damage of UV Exposure
While UV rays don’t directly cause rust, they degrade the protective coatings and sealants that keep moisture out. The underside of your trailer receives reflected UV from pavement, which breaks down rubber components, dries out sealants, and causes undercoating materials to become brittle and crack. This creates entry points for moisture while giving you a false sense of security—your coating looks intact from a distance but has become a patchwork of microscopic failure points.
Types of Undercoating Materials: A Deep Dive
Not all undercoatings are created equal, and the material you choose determines longevity, application method, and protection level. Each formulation represents a different approach to the same problem: creating a durable, flexible barrier between metal and environment.
rubberized undercoatings: Pros and Cons
Rubberized undercoatings create a thick, impact-absorbent layer that deadens sound and resists gravel spray. They typically consist of asphalt or petroleum-based resins blended with rubber polymers, creating a flexible membrane that can stretch with metal expansion and contraction. The primary advantage is their self-healing properties—minor scratches tend to close up rather than propagate. However, they can trap moisture if applied over rust, and their petroleum base means they’re vulnerable to degradation from petroleum-based road contaminants. They also add the most weight, which matters for payload-conscious users.
Polyurethane-Based Solutions: Durability Explained
Polyurethane undercoatings form a hard, chemically resistant shell that bonds molecularly to properly prepared surfaces. These two-part systems create a cross-linked polymer network that’s impervious to water, chemicals, and UV radiation. Unlike rubberized coatings that remain somewhat soft, polyurethanes cure to a tough, abrasion-resistant finish that can withstand pressure washing and harsh environments. The downside? They’re less forgiving during application—surface prep must be perfect, and they don’t self-heal from impacts. They’re also typically more expensive and require precise mixing ratios.
Wax and Paraffin-Based Coatings: Traditional Approaches
These old-school formulas use petroleum waxes and paraffins to create a hydrophobic barrier that actively repels water. They penetrate seams and crevices, providing excellent cavity protection. Their self-healing properties are unmatched—scratches and minor damage literally flow back together as the wax warms. However, they wash off over time, especially in wet climates, and require annual reapplication. They’re best suited for dry climates or as a supplemental treatment inside frame rails and enclosed spaces where other coatings can’t reach.
Asphalt-Based Undercoatings: Heavy-Duty Protection
Asphalt-based products offer the thickest, most durable barrier for extreme environments. They combine asphalt resins with fibers and fillers to create a rock-hard shield that withstands serious abuse from off-road use and heavy debris. These coatings excel on trailer floors and wheel wells where impact resistance is paramount. The trade-off is flexibility—asphalt becomes brittle in cold weather and can crack, allowing moisture intrusion. They’re also the heaviest option and can emit strong odors for weeks after application.
Ceramic and Nano-Coating Technologies: The New Frontier
Emerging ceramic-infused undercoatings use silicon dioxide (SiO2) nanoparticles to create a glass-like molecular barrier that’s only microns thick yet incredibly hard. These coatings offer superior chemical resistance and heat dissipation, preventing the temperature differentials that cause condensation. They’re lightweight and don’t alter the trailer’s appearance. The catch? They require absolutely pristine surface preparation, are unforgiving of application errors, and offer minimal impact absorption. They’re also the most expensive per square foot and haven’t been field-tested as long as traditional options.
Key Factors to Consider Before You Buy
Choosing the right undercoating requires honest assessment of your specific situation. A coating perfect for a trailer in Arizona would fail miserably in Maine, and what works for a weekend toy hauler might not suit a commercial contractor’s daily workhorse.
Climate Considerations: Matching Products to Your Environment
Your local climate dictates everything. Coastal areas with salt air require chemically resistant polyurethane or ceramic coatings that won’t break down from airborne chlorides. Northern states with heavy road salt need thick, self-healing barriers that can withstand constant brine exposure. Dry, desert climates allow for wax-based systems that won’t wash away, while humid regions demand moisture-cured polyurethanes that actively resist water vapor transmission. Consider not just where you live, but where you travel—your coating must perform in the worst conditions you’ll encounter.
Application Method: DIY vs. Professional Installation
DIY application saves money but introduces risk. Professional installers offer warranties, proper equipment, and experience that ensures correct mil thickness and coverage. However, they may use generic products rather than specialized trailer formulations. DIY gives you control over product selection and allows meticulous attention to detail, but requires equipment rental, proper ventilation, and accepts all liability for failures. Consider your skill level, available time, and the trailer’s value when deciding.
Curing Time and Temperature Requirements
Every undercoating has specific curing parameters that affect when you can use your trailer. Rubberized coatings might be dry to touch in hours but require 7-14 days to fully cure. Polyurethanes often need specific temperature ranges (typically 60-90°F) and humidity levels to cross-link properly. Asphalt-based products can take weeks to stop off-gassing. If you need your trailer back in service quickly, factor in curing time. Applying in wrong conditions results in soft, tacky coatings that trap debris and fail prematurely.
Compatibility with Trailer Materials
Modern enclosed trailers use mixed materials—steel frames, aluminum skin, galvanized cross-members, and wood or composite flooring. Each material expands and contracts differently, requiring flexible coatings that won’t delaminate. Aluminum requires coatings free of certain metals that cause galvanic corrosion. Wood decking needs breathable protection that won’t trap moisture and cause rot. Some coatings contain solvents that attack certain plastics or degrade wiring insulation. Always verify compatibility with your specific trailer construction.
Surface Preparation: The Foundation of Success
The world’s best undercoating will fail if applied over contaminated surfaces. Preparation is 80% of the job and determines 100% of the results. This isn’t a quick wash and spray operation—it’s a meticulous process that can take an entire day for a single trailer.
Cleaning Protocols: Beyond Basic Washing
Start with a pressure washer capable of at least 3,000 PSI to remove loose scale and grime, but don’t stop there. Follow with a degreasing agent specifically formulated for automotive undercarriages—household degreasers leave residues that interfere with adhesion. Use a wire brush or needle scaler on all welds, seams, and bolt heads where rust hides. For trailers previously coated, complete removal of old, failing coating is mandatory; spot-applying over old material creates ledges where moisture pools. Finish with a solvent wipe using the manufacturer-recommended product to remove final contaminants.
Dealing with Existing Rust: Conversion vs. Removal
Light surface rust (less than 5% coverage) can be treated with phosphoric acid-based converters that chemically transform iron oxide into iron phosphate, a stable, paintable surface. Heavy rust requires mechanical removal via sanding, grinding, or media blasting. Never encapsulate flaking rust—it will continue expanding underneath, pushing off your new coating. For pitted areas, consider welding in new metal; undercoating can’t restore structural integrity. After rust treatment, apply a rust-inhibitive primer compatible with your chosen undercoating system.
Masking and Protection: Keeping Overspray at Bay
Undercoating overspray is nearly impossible to remove once cured. Remove wheels and brake assemblies if possible, or mask them completely with heavy-duty plastic and tape. Cover suspension components, wiring harnesses, and any moving parts. Don’t forget the trailer interior—overspray can drift up through floor seams. Use 3M automotive masking tape and paper, not newspaper, which allows bleed-through. Spend extra time on masking; it’s far easier than cleaning up mistakes later.
Application Techniques for Professional Results
Proper application technique separates five-year protection from fifteen-year protection. It’s not just about pointing a spray gun and pulling the trigger—it’s understanding fluid dynamics, material behavior, and environmental control.
Spray Equipment: HVLP vs. Airless Systems
High Volume Low Pressure (HVLP) systems offer superior control and transfer efficiency, reducing waste and overspray. They’re ideal for detailed work around seams and brackets. Airless systems deliver material at much higher pressure, allowing thicker application in fewer coats but with less control and more bounce-back. For DIY, HVLP is more forgiving. Professionals often use airless for speed on large flat areas. Whichever you choose, ensure the tip size matches your coating’s viscosity—too small and you’ll clog constantly; too large and you’ll waste material.
Achieving Proper Coverage: Mil Thickness Explained
Undercoating thickness is measured in mils (thousandths of an inch). Too thin and you have inadequate protection; too thick and you risk cracking, solvent entrapment, and wasted money. Most products specify 8-15 mils dry film thickness per coat, with two coats recommended for trailers. Use a wet film thickness gauge during application to verify coverage. The first coat should be a “tack coat”—thin enough to penetrate seams and provide a bonding layer. The second coat builds thickness. Don’t apply the second coat until the first reaches “thumbprint” stage (firm but still slightly tacky).
Common Application Mistakes to Avoid
Applying in direct sunlight causes solvents to flash off too quickly, creating a skin that traps solvents underneath, leading to soft spots and eventual delamination. Spraying too close (less than 6 inches) creates runs and orange peel texture that trap debris. Too far away (more than 12 inches) causes dry spray that won’t bond. Neglecting to back-brush seams and edges with a brush ensures material penetrates properly. Most importantly, don’t rush between coats—applying the second coat too soon dissolves the first, creating a single uneven layer rather than two distinct, bonded coats.
Longevity and Performance Expectations
Understanding realistic lifespan helps you plan maintenance and budget for reapplication. No undercoating lasts forever, but some come remarkably close with proper care.
How Long Should Undercoating Last?
Quality rubberized undercoatings typically last 3-5 years in harsh environments, 5-7 years in moderate climates. Polyurethane systems can achieve 7-10 years if properly applied. Wax-based coatings need annual inspection and touch-up, with complete reapplication every 2-3 years. Asphalt-based coatings last 5-8 years but may need spot repairs where cracking occurs. Ceramic coatings are too new for definitive data but show promise for 10+ year lifespans. These timelines assume proper application and normal use—commercial trailers in constant service may see 30% shorter lifespans.
Signs Your Undercoating Needs Reapplication
Inspect your trailer underside quarterly. Look for whitening or chalking, indicating UV degradation. Tap the coating with a screwdriver handle—hollow sounds suggest delamination. Check seams and edges for cracking or peeling. If water no longer beads on the surface, the hydrophobic properties have failed. Surface rust bleeding through indicates the coating has been compromised. Don’t wait for visible rust; by then, you’re already behind the corrosion curve.
Seasonal Maintenance Tips
Spring: Pressure wash underside to remove winter salt buildup, using a fan tip held at least 12 inches away to avoid damaging coating. Summer: Inspect for damage from heat expansion and repair cracks immediately. Fall: Apply a wax-based touch-up to seams before winter sets in. Winter: Avoid parking on snow piles where melting creates constant moisture exposure. After any off-road use, rinse mud from wheel wells promptly—mud holds moisture against the coating and accelerates wear.
Cost Analysis: Investment vs. Protection Value
Undercoating represents significant upfront cost, but frame replacement or trailer failure costs far more. Understanding the true value requires looking beyond the price tag.
Breaking Down Price Points by Material Type
DIY rubberized undercoating typically runs $150-300 in materials for a 20-foot trailer. Professional application of the same material costs $400-800. Polyurethane systems jump to $300-500 DIY, $800-1,500 professionally installed. Ceramic coatings start at $500 DIY and can exceed $2,000 professionally. Wax-based systems are cheapest at $50-100 DIY but require frequent reapplication. Remember, the most expensive coating you apply once is cheaper than the cheapest coating you have to reapply three times.
Hidden Costs to Factor Into Your Budget
Surface preparation supplies (degreasers, solvents, brushes) add $50-100. Equipment rental (sprayer, compressor) runs $75-150 per day if you don’t own them. Your time has value—proper DIY application takes 8-12 hours including prep. Professional installation might require dropping off your trailer for 2-3 days, costing you rental expenses or lost income. Some coatings require specialized primers at $30-50 per quart. And if you make mistakes, removal and reapplication can double your costs.
Environmental and Health Considerations
Modern undercoatings have evolved beyond the toxic soup of decades past, but environmental responsibility remains crucial for both personal safety and regulatory compliance.
VOC Regulations: What You Need to Know
Volatile Organic Compounds (VOCs) are regulated at state and federal levels. Many traditional undercoatings exceed 500 grams per liter VOC content, now illegal in California and several northeastern states. Low-VOC formulations (under 250 g/L) perform equally well but require longer cure times. Water-based undercoatings offer sub-100 g/L VOC but may lack the durability of solvent-based systems. Check your local regulations before purchasing—using non-compliant products can result in fines and will void any manufacturer warranty if you’re in a restricted area.
Proper Ventilation and Safety Equipment
Even low-VOC products require excellent ventilation. Work outdoors or in a spray booth with forced air exchange. Wear a NIOSH-approved respirator with organic vapor cartridges—not just a dust mask. Chemical-resistant gloves and coveralls protect skin from solvents that absorb through pores. Safety glasses with side shields are mandatory; overspray in eyes can cause permanent damage. Keep a fire extinguisher rated for chemical fires nearby—solvent vapors are heavier than air and can travel to ignition sources. Dispose of rags properly; spontaneous combustion is a real risk with oil-soaked materials.
Warranty Implications: Reading the Fine Print
That lifetime warranty sounds great until you read the exclusions. Understanding warranty language protects you from false expectations and helps you choose products that stand behind their claims.
Manufacturer Warranties on Undercoating Products
Most warranties cover product defects, not application errors or subsequent rust formation. They typically require professional installation by certified applicators to remain valid. Some offer pro-rated refunds based on years of service, but require documentation of annual inspections. Read the fine print for specific exclusions—many void coverage if the trailer is used commercially, off-road, or in coastal environments. The best warranties cover both material and labor for repair, but these are rare and expensive.
How Undercoating Affects Your Trailer Warranty
Trailer manufacturers sometimes void structural warranties if undercoating is applied incorrectly. Why? Trapped moisture accelerates failure, and they can claim your coating caused the rust. Some manufacturers offer their own undercoating services and will only honor warranties if you use their approved product and installer. Before coating a new trailer, check your purchase agreement. On used trailers, undercoating can actually preserve remaining warranty by preventing further deterioration—just document the condition thoroughly before application.
Professional Installation: What to Look For
Not all shops understand trailer undercoating nuances. A shop that excels at cars may lack equipment to lift and properly access a trailer’s underside.
Certifications and Experience
Look for applicators certified by major coating manufacturers—this ensures they’ve completed training on proper techniques. Ask specifically about trailer experience; the flat, wide surfaces and unique seam patterns differ from passenger vehicles. A quality shop will have a dedicated bay with drive-over pits or lifts specifically for trailers, not just two-post car lifts. Request to see examples of their work, particularly how they handle seams and edges. Check online reviews focusing on longevity—anyone can make a coating look good on day one.
Questions to Ask Your Installer
“What’s your process for seam treatment?” If they don’t mention back-brushing or multiple thin coats, keep looking. “Do you remove old undercoating completely?” Spot-coating over failure points guarantees future problems. “What mil thickness do you apply, and how do you verify it?” Professionals use wet film gauges. “What’s your warranty, and what does it specifically cover?” Get it in writing. “Can you provide references from trailer owners three years post-application?” This reveals real-world performance.
DIY Application: A Realistic Assessment
The satisfaction of doing it yourself is undeniable, but trailer undercoating poses unique challenges that test even experienced DIYers. Honest self-assessment prevents costly mistakes.
Essential Tools and Equipment
Beyond the spray gun, you’ll need a 5+ HP compressor delivering 15+ CFM at 90 PSI for continuous spraying. A quality respirator system costs $150-300—don’t skimp here. LED work lights on wheeled stands illuminate the underside without casting shadows. A rolling creeper saves your back during the hours of prep work. Invest in professional-grade masking tape and paper; the cheap stuff fails. A wet film thickness gauge ($20) ensures proper coverage. Finally, a parts washer or at least several gallons of mineral spirits keeps your gun clean between coats.
Step-by-Step Process Overview
Day 1: Pressure wash, degrease, and mechanically remove rust. This takes 4-6 hours. Let dry completely overnight with fans circulating air. Day 2: Mask and prime in the morning. Apply first tack coat, focusing on seams and edges. Wait 2-4 hours for tack coat to set. Apply second build coat, working in sections to maintain wet edges. Back-brush all seams immediately after spraying. Clean equipment thoroughly. Day 3-14: Allow curing with trailer elevated on jack stands in well-ventilated area. Don’t rush this—the coating may feel dry but remains vulnerable to damage until fully cured.
When DIY Makes Sense (and When It Doesn’t)
DIY is viable if you own proper equipment, have a suitable workspace, possess patience for meticulous prep, and your trailer is relatively new with minimal rust. It’s cost-effective for multiple trailers, as you can coat several with one batch of materials. However, professional installation is justified for trailers with extensive rust damage, commercial-use trailers where downtime costs money, or if you lack proper ventilation and safety equipment. Also consider your physical ability—hours spent on your back under a trailer is harder than it looks.
Frequently Asked Questions
How often should I undercoat my enclosed trailer?
For commercial trailers in salt-heavy regions, inspect annually and expect touch-ups every 2-3 years with complete reapplication every 5 years. Recreational trailers in moderate climates can go 5-7 years between full applications. Wax-based systems need annual inspection and spot treatment. The key is proactive maintenance—don’t wait for rust to appear. Establish a baseline inspection schedule based on your specific product and usage patterns.
Can I undercoat a trailer with existing rust?
Light surface rust can be converted and coated after proper treatment with phosphoric acid-based converters. However, heavy scaling rust, flaking, or pitting requires complete mechanical removal down to bare metal. Encapsulating active rust is like painting over mold—it continues growing underneath and will eventually destroy your coating and frame. Be honest about rust severity; sometimes professional sandblasting is the only viable option.
What’s the difference between undercoating and rustproofing?
Undercoating creates a physical barrier on exposed surfaces, focusing on impact resistance and moisture exclusion. Rustproofing uses thin, penetrating oils or waxes that creep into hidden cavities inside frame rails and enclosed spaces. For complete protection, trailers need both: undercoating for exterior surfaces and rustproofing for interior voids. Many modern products combine both properties, but traditional approaches treat them as separate processes.
Will undercoating add significant weight to my trailer?
A typical two-coat application adds 40-80 pounds to a 20-foot enclosed trailer. Rubberized and asphalt-based coatings add the most weight (3-5 pounds per gallon applied), while ceramic and wax-based add the least (under 1 pound per gallon). For most trailers, this is negligible compared to payload capacity. However, if you’re weight-conscious (racing trailers, aircraft transport), consider polyurethane or ceramic systems that provide protection at minimal weight.
Can I paint over undercoating?
Most undercoatings aren’t designed to be topcoated and will reject paint due to their flexible, textured nature. If you want a color-matched underside, use a paintable undercoating specifically formulated for topcoating, or apply a compatible primer first. Standard practice is to mask off areas you want to remain paintable before undercoating. Never paint over asphalt-based coatings—they’ll bleed through and ruin your paint job.
How long does undercoating take to dry?
Dry to touch times range from 30 minutes (fast-cure polyurethanes) to 24 hours (asphalt-based). However, “dry” doesn’t mean “cured.” Most coatings reach 80% cure in 72 hours but require 7-14 days for full hardness and chemical resistance. During this period, avoid water exposure, heavy use, or stacking cargo inside. Curing slows dramatically below 60°F—some products won’t cure at all below 50°F, remaining tacky indefinitely.
Is undercoating worth it for trailers in dry climates?
Even in arid regions, undercoating provides value beyond rust prevention. It protects against gravel impact, reduces road noise, prevents UV degradation of wiring and hoses, and seals out dust that can hold moisture against metal. Desert trailers face unique challenges: extreme temperature swings cause condensation, and flash floods create sudden moisture exposure. A quality undercoating also preserves resale value, as buyers from wetter climates will pay premium for protected trailers.
Can I wash my trailer after undercoating?
Wait at least 72 hours before any washing, and then only use gentle pressure (under 1,500 PSI) with a wide fan tip. Avoid harsh chemicals or degreasers for the first 30 days. Even after full cure, maintain a safe distance when pressure washing—high-pressure water can penetrate seams and compromise the coating’s edge adhesion. Regular washing actually extends coating life by removing salt and chemical buildup before they can degrade the material.
What’s the best time of year to apply undercoating?
Late spring or early fall offer ideal conditions: moderate temperatures (65-80°F), moderate humidity (40-60%), and minimal precipitation. Spring application cleanses winter salt exposure, while fall application provides fresh protection before de-icing season. Avoid summer’s intense heat, which causes solvents to flash too quickly, and winter’s cold, which prevents proper curing. Check the extended forecast—you need 3-5 consecutive dry days with temperatures within the product’s specified range.
Does undercoating affect trailer inspections?
Commercial DOT inspections require visible access to frame rails and structural components. Over-application that obscures these areas can cause inspection failures. Apply undercoating thinly on frame rails and avoid coating over inspection stickers or placards. Some states prohibit undercoating on certain commercial trailer types until after initial inspection. Always verify local regulations before applying, and keep detailed photos of the bare frame for documentation purposes.