Restoring a classic car or tackling undercarriage rust prevention requires dealing with old, cracked undercoating that’s doing more harm than good. Whether you’re preparing for a full frame-off restoration or simply addressing failing factory undercoating, choosing the right chemical remover can mean the difference between a smooth project and a weekend of frustration. The market offers dozens of formulations, each promising to dissolve that stubborn rubberized barrier, but not all solutions are created equal for your specific vehicle, climate, or restoration goals.
This comprehensive guide cuts through the marketing noise to equip you with the knowledge to select the perfect undercoating removal chemical for your project. We’ll explore the science behind these powerful formulations, break down the critical features that separate amateur products from professional-grade solutions, and walk you through everything from safety protocols to environmental considerations. By understanding what makes these chemicals tick, you’ll save time, protect your vehicle’s surfaces, and achieve results that would make any restoration shop proud.
Top 10 undercoating removal chemicals
Detailed Product Reviews
1. U. S. Chemical and Plastics 51333 Rubb. Undercoating
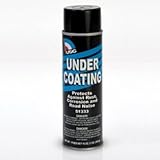
Overview: U.S. Chemical and Plastics offers this rubberized undercoating spray designed to protect vehicle undercarriages from rust, corrosion, and road debris. Marketed as a “New” formulation, this product aims to provide a durable, flexible barrier that deadens sound while shielding exposed metal surfaces. Ideal for automotive enthusiasts and DIY mechanics looking to extend their vehicle’s lifespan.
What Makes It Stand Out: The rubberized composition creates a textured, waterproof seal that remains flexible even in extreme temperatures, preventing cracks and peeling. The brand’s reputation in automotive chemicals lends credibility, while the aerosol application ensures even coverage in hard-to-reach areas. This undercoating bonds effectively to clean metal and existing factory coatings, making it suitable for touch-ups or complete underbody restoration projects.
Value for Money: At $18.17 ($1.02 per ounce), this represents mid-range pricing for automotive undercoatings. Assuming standard 16-18 oz can size, one unit covers approximately 8-10 square feet with two coats. For complete sedan underbody protection, expect to purchase 2-3 cans. Compared to professional shop applications costing $150-$300, DIY treatment offers substantial savings, though results depend heavily on surface preparation and application technique.
Strengths and Weaknesses:
- Strengths: Trusted manufacturer heritage; flexible rubberized finish; sound-dampening properties; straightforward spray application; effective moisture barrier.
- Weaknesses: Minimal product information provided; requires extensive prep work; may need multiple cans for full coverage; “New” status means limited long-term performance reviews.
Bottom Line: A solid choice for budget-conscious car owners comfortable with DIY automotive maintenance. Best for touch-ups and annual reapplication rather than comprehensive restoration. Ensure thorough surface cleaning and rust treatment before application for optimal results.
2. Rust Converter & Metal Primer -Removes Rust, Encapsulates & Protects, Works as Undercoating and Paint, Long-Lasting inhibitor for Cars, Trucks, Metal Surfaces(35 oz)
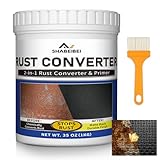
Overview: This all-in-one rust converter and metal primer delivers professional-grade corrosion treatment in a convenient 35-ounce container. Designed to chemically transform rust into a stable, paintable surface, it serves as both a rust encapsulator and protective primer for automotive frames, railings, and industrial equipment. The water-based formula offers a low-odor, eco-conscious alternative to harsh chemical treatments.
What Makes It Stand Out: The dual-action formula eliminates rust while simultaneously priming the surface, saving time and money on separate products. Its brush-on application provides precise control without requiring expensive spray equipment. The flat black finish doubles as a base coat, and the automotive-grade durability ensures it withstands harsh road conditions. Being water-based makes it safe for indoor use and reduces environmental impact compared to solvent-based competitors.
Value for Money: At $24.99 for 35 ounces, this converter costs approximately $0.71 per ounce—excellent value compared to purchasing separate rust removers and primers. One container covers roughly 50-75 square feet, making it economical for frame rails, wheel wells, and smaller projects. While slightly pricier than basic converters, the primer-included formula eliminates the need for secondary products, ultimately reducing total project costs.
Strengths and Weaknesses:
- Strengths: All-in-one solution saves time; eco-friendly water-based formula; brush application ensures thorough coverage; excellent adhesion to rusty metal; versatile for automotive and household use.
- Weaknesses: Brush-on method is labor-intensive for large areas; flat black finish may not suit all topcoat colors; requires 24-hour cure time; not ideal for heavily pitted or flaking rust without prior mechanical removal.
Bottom Line: An exceptional value for DIYers tackling moderate rust issues. Perfect for frame restoration, trailer repairs, and preventative maintenance. Invest in proper surface prep and allow adequate curing for lasting protection that rivals professional treatments.
Understanding Undercoating and Why Removal Matters
Undercoating serves as your vehicle’s first line of defense against road salt, moisture, and debris, but over time, this protective layer becomes a liability. Old undercoating traps moisture against metal surfaces, creating the perfect environment for rust to flourish beneath what appears to be protection. When it begins to crack, peel, or bubble, it’s no longer shielding your vehicle—it’s actively destroying it.
Removal becomes essential before applying fresh protection or addressing existing corrosion. Mechanical removal alone often proves insufficient, as undercoating bonds tenaciously to metal contours, seams, and crevices. Chemical removers penetrate these bonds, softening the material so it can be scraped away without damaging the substrate or spending countless hours with heat guns and wire wheels.
Types of Undercoating Materials You’ll Encounter
Before selecting a chemical remover, identify what you’re dealing with. Factory undercoating from the 1970s-1990s typically consists of asphalt-based compounds mixed with rubber polymers, creating a thick, tar-like barrier. Aftermarket products vary widely, from wax-based formulations to modern polyurethane elastomers. Some restorers encounter bedliner material mistakenly used as undercoating—a completely different chemical challenge.
Rubberized undercoating presents the most common removal scenario, characterized by its flexibility and black, textured appearance. Asphalt-based products turn brittle with age and often flake off in chunks, while wax-based undercoating remains somewhat pliable but breaks down chemically over time. Each type responds differently to various chemical agents, making identification crucial for product selection.
How Chemical Removers Work: The Science Behind the Solution
Undercoating removal chemicals operate through three primary mechanisms: solvent penetration, chemical breakdown, and polymer chain disruption. Solvent-based formulas dissolve the binding agents that hold the rubber and asphalt particles together, essentially liquefying the coating from within. This process works similarly to how paint thinner breaks down paint, but requires more aggressive chemistry due to undercoating’s robust composition.
Advanced formulations contain specialized surfactants that reduce surface tension, allowing the chemical to wick into microscopic pores and seams. Once penetrated, active ingredients attack the polymer chains, breaking long molecular bonds into shorter, weaker segments. This transformation turns a tough, elastic membrane into a soft, gooey substance that loses its adhesion to the metal substrate. The most effective products maintain this softened state long enough for thorough removal without evaporating too quickly.
Key Factors to Consider When Choosing an Undercoating Remover
Surface Compatibility
Your vehicle’s undercarriage contains multiple materials beyond steel: aluminum suspension components, rubber bushings, plastic fuel lines, and sometimes brass or copper fittings. A chemical that’s safe on steel might corrode aluminum or swell rubber components. Always verify compatibility with your specific vehicle’s materials. Professional-grade removers often include corrosion inhibitors that protect bare metal after the undercoating dissolves, preventing flash rust during the removal process.
Chemical Composition and Strength
Potency varies dramatically between products. Heavy-duty solvent-based removers tackle decades-old factory undercoating but require extensive ventilation and safety precautions. Citrus-based alternatives offer moderate strength with improved safety profiles but may need multiple applications. Consider your project’s scale—removing undercoating from a single wheel well demands different firepower than stripping an entire vintage truck frame.
Application Method
Gel formulations cling to vertical surfaces and overhead areas, preventing drips and ensuring extended contact time. Liquid solutions penetrate thick buildup more effectively but require containment to prevent runoff. Aerosol cans provide convenience for small touch-up areas but prove cost-prohibitive for large projects. Your workspace layout and the areas needing treatment should dictate your preferred application method.
Dwell Time Requirements
Dwell time—the period the chemical must remain active to soften undercoating—ranges from 15 minutes to several hours. Fast-acting formulas might seem appealing, but they often require multiple applications on thick buildup. Products with longer dwell times typically penetrate more thoroughly, reducing total application cycles. Factor this into your project timeline, especially when working in unheated garages where chemical reactions slow considerably.
Environmental Impact
VOC (Volatile Organic Compound) content affects both environmental footprint and your health. Low-VOC formulations meet stricter California Air Resources Board (CARB) standards and produce fewer harmful fumes. Water-based technologies continue advancing, offering respectable performance with minimal environmental impact. Consider local disposal regulations, as some municipalities classify spent chemical and dissolved undercoating as hazardous waste.
The Main Categories of Undercoating Removal Chemicals
Solvent-Based Removers
These traditional powerhouses use petroleum distillates, ketones, or aromatic hydrocarbons to aggressively dissolve undercoating. They work fastest on rubberized and asphalt-based products, often showing results within 30 minutes. However, they emit strong fumes requiring respirators and forced ventilation. Most are highly flammable, eliminating any chance of working near pilot lights or using power tools that could create sparks. The upside? They rarely require more than one or two applications, even on thick, decades-old buildup.
Citrus-Based Biodegradable Options
Derived from d-limonene (orange peel oil), these formulas offer a middle ground between effectiveness and safety. They maintain relatively low toxicity while still packing enough punch to break down most undercoating types. The citrus scent masks chemical odors but don’t be fooled—you still need proper ventilation. These products typically require longer dwell times and may need reapplication on stubborn areas, but they clean up with soap and water and pose minimal environmental risk.
Caustic-Based Formulations
Containing strong alkaline agents like sodium hydroxide, these removers chemically break down organic components in undercoating through saponification. They excel on wax-based undercoating and certain polymer formulations but pose significant risks to aluminum and galvanized surfaces. The high pH can cause irreversible etching if left too long, making them suitable only for bare steel applications. Their advantage lies in water rinsability and low flammability, but safety gear becomes absolutely critical.
Soy-Based Eco-Friendly Solutions
The newest category leverages methyl soyate and other soy derivatives to create surprisingly effective, ultra-low VOC removers. These products biodegrade completely and offer excellent safety profiles, making them ideal for DIY enthusiasts working in residential garages. While slower-acting than solvent-based options, they compensate with superior penetration on thick buildup. Many professional restorers now use soy-based products for overall projects, reserving harsh chemicals only for spot-treatment of stubborn areas.
Gel vs Liquid Formulations
Gel formulations incorporate thickeners that transform the active chemicals into a clingy paste, perfect for undercarriage work where gravity works against you. They maintain 100% contact with the surface and allow precise application around components you want to protect. Liquid formulas spread faster and penetrate thick layers more efficiently but require tarps or collection trays to catch drips. Some manufacturers offer both versions of the same chemical formula, letting you choose based on application area.
Essential Safety Equipment and Precautions
Chemical undercoating removal demands respect and proper protective gear. A NIOSH-approved respirator with organic vapor cartridges becomes non-negotiable when working with solvent-based products—dust masks offer zero protection against chemical fumes. Chemical-resistant nitrile gloves must extend past your wrists, and splash-proof goggles should seal around your eyes, not just sit loosely.
Wear long sleeves and pants made from natural fibers (cotton or denim) that won’t melt to your skin if splashed with chemicals. Keep a fire extinguisher rated for chemical fires within arm’s reach, and ensure your workspace maintains continuous airflow. Never work alone; chemical exposure can cause dizziness or disorientation unexpectedly. Establish a buddy system or at minimum, inform someone of your project timeline.
Preparing Your Vehicle for Chemical Application
Preparation determines 80% of your success. Begin by pressure washing the undercarriage to remove loose dirt and road grime—this prevents the chemical from wasting energy on surface contamination. Allow the vehicle to dry completely, as water dilutes most removers and impedes penetration. Mask off rubber components, brake lines, and any aluminum parts using heavy-duty aluminum foil and painter’s tape; foil conforms to complex shapes better than plastic.
Elevate the vehicle securely on jack stands, providing enough clearance to work comfortably underneath. Remove wheels for better access to wheel wells and suspension components. Cover your garage floor with heavy-duty plastic sheeting, overlapping seams by at least 12 inches. Position drip pans strategically to collect spent chemical and dissolved undercoating, simplifying cleanup and disposal.
Step-by-Step Application Process
Start with a test patch in an inconspicuous area to verify compatibility and effectiveness. Apply the remover using a cheap paintbrush with natural bristles (synthetic bristles may dissolve) or a pump-up sprayer for liquids. Work in sections roughly 3x3 feet to prevent the chemical from drying before you can remove the undercoating. Apply a generous, even coat—skimping reduces effectiveness and wastes time.
Allow the product to dwell according to manufacturer specifications, checking periodically by gently scraping with a plastic putty knife. When the undercoating turns soft and tar-like, it’s ready for removal. Use a dedicated undercoating removal tool or stiff putty knife to scrape away the softened material, working from the center outward. Avoid metal scrapers that can gouge the substrate. For stubborn areas, reapply fresh chemical rather than forcing the issue.
Temperature and Weather Considerations
Chemical reactions double in speed for every 18°F increase in temperature. Ideal working conditions range from 65-85°F—too cold and the product becomes sluggish; too hot and it evaporates before penetrating. Humidity affects water-based formulas more than solvent types, potentially extending dwell times. Never apply chemical removers in direct sunlight, which causes uneven heating and premature drying.
Winter garage warriors must provide supplemental heat, but avoid open-flame heaters that create ignition hazards. Instead, use electric radiant heaters positioned safely away from the vehicle. Cold metal surfaces condense moisture, so pre-warm the undercarriage with a heat gun on low setting before application. This simple step dramatically improves penetration on thick, brittle undercoating.
Working with Different Vehicle Surfaces
Bare steel frames tolerate the strongest chemicals but flash-rust within hours of exposure. Choose products with built-in corrosion inhibitors or be prepared to treat the surface immediately after removal. Aluminum differential housings and suspension arms demand pH-neutral formulas—caustic removers cause irreversible whitening and pitting. If overspray occurs, neutralize immediately with a weak acid solution (vinegar water) and rinse thoroughly.
Factory-coated surfaces like powder-coated control arms or painted subframes require gentler approaches. Test first, and consider masking these areas entirely. Rubber bushings swell and degrade when exposed to solvents; replace them after undercoating removal if chemical contact occurs. Plastic fuel and brake lines generally withstand short chemical exposure but should be protected when possible.
Disposal and Environmental Responsibility
Spent chemical and dissolved undercoating constitute hazardous waste in most jurisdictions. Never pour leftovers down drains or onto bare ground. Collect all residue in sealed metal containers, clearly labeled with contents. Contact your local household hazardous waste facility for disposal guidelines—many accept automotive chemicals free of charge.
Consider the product’s entire lifecycle. Soy-based and citrus formulas often qualify for less stringent disposal requirements, saving money and environmental impact. Keep detailed records of quantities used and disposed of, especially for professional shops facing EPA oversight. Some facilities offer recycling programs for certain solvent types, distilling them for reuse. This option costs more upfront but demonstrates environmental stewardship.
Cost Analysis: What to Expect
Budget approximately $0.50 to $2.00 per square foot of undercarriage surface, depending on product choice and undercoating thickness. A typical sedan requires 2-4 gallons of remover, while truck frames might need 6-8 gallons. Solvent-based products cost more per gallon but require less material overall. Factor in ancillary supplies: brushes, scrapers, disposal containers, and protective gear add another $50-100 to the project.
DIY removal saves $800-2,000 compared to professional services, but time investment matters. A professional shop completes a full undercoating removal in 4-8 hours using heated pressure washers and industrial chemicals. DIY projects typically span 2-3 weekends. Weigh your time value against cost savings—sometimes hiring professionals for the initial heavy removal, then finishing detail work yourself, offers the best balance.
Common Mistakes to Avoid
Rushing the dwell time ranks as the number one error. Impatience leads to incomplete softening, forcing aggressive scraping that damages metal surfaces. Second, using insufficient product quantity—undercoating removal isn’t the place to economize. Thin applications dry before penetrating thick buildup, requiring more total product than a single generous coat would have used.
Neglecting neutralization steps creates long-term problems. Most chemicals leave residues that interfere with new undercoating adhesion or promote corrosion. Always wash the stripped surface with a recommended neutralizer or degreaser, then rinse thoroughly with water. Finally, failing to address rust immediately after removal allows oxidation to progress rapidly. Have your rust treatment plan ready before you start stripping.
Professional vs DIY: Making the Right Choice
Professional shops justify their costs through expertise, equipment, and waste disposal efficiency. They use heated, pressurized systems that apply chemical and remove undercoating simultaneously, cutting time by 70%. Their commercial-grade products aren’t available to consumers and work faster on severe cases. Consider professionals when dealing with rare vehicles, extensive rust, or when local regulations make DIY disposal problematic.
DIY makes sense for enthusiasts comfortable with chemicals, possessing adequate ventilation, and working on vehicles where perfection isn’t paramount. The learning curve is manageable, and the cost savings are substantial. Start with small, accessible areas to build confidence before tackling the entire undercarriage. Many enthusiasts find satisfaction in the hands-on process and gain intimate knowledge of their vehicle’s condition.
Post-Removal Surface Preparation
Once the undercoating is gone, immediate action prevents new rust formation. Wash the entire undercarriage with a quality degreaser to remove chemical residue, then rinse with water and dry thoroughly using compressed air. Inspect every inch for rust pits, scale, and corrosion. Light surface rust requires wire brushing or media blasting, while deep pitting may need professional repair.
Apply a rust converter or phosphoric acid treatment to any remaining oxidation, following product instructions precisely. After drying, wipe down with wax and grease remover before priming. Use an epoxy primer for bare metal surfaces—it provides superior adhesion and corrosion resistance compared to etch primers. Only after proper priming should you consider new undercoating application. Skipping these steps virtually guarantees premature failure of your new protective layer.
Frequently Asked Questions
How long should I expect the chemical removal process to take on a full-size truck?
A full-size truck frame typically requires 6-10 hours of active work spread over 2-3 days, accounting for dwell times and section-by-section processing. Thick, factory-applied undercoating may need multiple applications, adding another day to the timeline. Plan for a full weekend plus a few weekday evenings for proper execution.
Can I use aircraft paint stripper for undercoating removal?
While aircraft stripper aggressively attacks undercoating, it’s formulated for aluminum aircraft skins and can be excessively harsh on steel automotive frames. It lacks the corrosion inhibitors found in dedicated undercoating removers, often causing flash rust within hours. Stick with automotive-specific products designed for your vehicle’s materials.
What’s the best way to handle chemical runoff in my driveway?
Never perform this work on a driveway without containment. Use heavy-duty plastic sheeting extending at least 5 feet beyond the vehicle perimeter, with absorbent mats at edges to catch drips. For liquid formulas, build a temporary berm using sandbags to channel runoff into collection pans. Many municipalities prohibit this work on impervious surfaces, so check local ordinances first.
Will chemical removers damage my brake lines and fuel system?
Modern brake lines and fuel system components generally withstand short-term chemical exposure, but why risk it? Always mask these components with aluminum foil and tape. If accidental contact occurs, wipe immediately with a clean rag and rinse with water or brake parts cleaner. Inspect rubber hoses afterward for swelling or softening, replacing any that show degradation.
How do I know when the undercoating is ready to scrape off?
Perform the “thumbnail test”—when you can press your thumbnail into the undercoating and it leaves an indentation without springing back, it’s ready. The material should appear darker and wet-looking. If it still feels rubbery or only softens in spots, reapply chemical and wait longer. Patience here prevents surface damage and reduces total work time.
Can I neutralize solvent-based removers with water?
Most solvent-based products don’t require traditional neutralization since they evaporate completely. However, they leave oily residues that must be removed with a degreaser before painting. Water-based and caustic formulas absolutely need acid neutralization followed by thorough rinsing. Always follow the specific product’s cleanup instructions to avoid adhesion failures.
Is it normal for the chemical to turn the undercoating into a sticky mess?
Yes, this indicates the product is working correctly. The chemical breaks polymer bonds, transforming solid undercoating into a viscous, tar-like substance. This sticky consistency actually makes removal easier, as it clings to your scraper rather than falling into hard-to-reach crevices. If it becomes too fluid, you’re likely using excessive chemical or waiting too long.
What temperature is too cold for effective chemical removal?
Most products specify minimum temperatures of 50-60°F for effective action. Below this threshold, chemical reactions slow dramatically, and the undercoating itself becomes less permeable. If you must work in colder conditions, use infrared heaters to warm the metal surface to at least 65°F before application. Never apply chemical to frosted or ice-cold surfaces.
Can I reuse the scraper for bodywork after undercoating removal?
Dedicated undercoating removal tools become contaminated with chemical residue and dissolved rubber that transfers to other surfaces. Keep a separate set of scrapers exclusively for undercoating work. The same applies to brushes—natural bristles absorb chemicals and continue off-gassing fumes long after use. Label these tools clearly to prevent cross-contamination.
How soon after removal can I apply new undercoating?
Wait until the surface is completely dry, rust-treated, and primed—typically 24-48 hours after final rinsing and neutralization. Applying new undercoating over damp metal or chemical residue guarantees failure. Use a moisture meter to verify the metal is below 15% humidity. For best results, apply primer first, then undercoating within the primer’s recoat window for optimal adhesion.