Your vehicle’s undercarriage battles a silent war every single day. Salt-strewn winter roads, gravel-pocked highways, and moisture-laden air wage a relentless assault on exposed metal, turning sturdy frames into corroded Swiss cheese. While factory coatings offer initial protection, they degrade over time, leaving your investment vulnerable to the single biggest threat to longevity: rust. This is where a professional-grade undercoating kit with spray gun becomes your secret weapon—not just a purchase, but an investment in your vehicle’s future.
Taking the DIY route isn’t just about saving money (though you’ll keep hundreds of dollars in your pocket). It’s about gaining intimate knowledge of your vehicle’s vulnerable points, customizing protection for your specific driving conditions, and developing a skill set that pays dividends across every vehicle you’ll own. Whether you’re protecting a brand-new truck or breathing life into a classic restoration, understanding what makes an undercoating kit truly effective separates the enthusiasts from the amateurs.
Top 10 Undercoating Kit
Detailed Product Reviews
1. Rust-Oleum 248657-6PK Stops Rust Undercoating Spray, 15 oz, Rubberized Black, 6 Pack

Overview: This 6-pack of Rust-Oleum undercoating spray offers a convenient aerosol solution for protecting vehicle underbodies. Designed for bare or primed metal surfaces on cars, trucks, trailers, and RVs, each 15-ounce can provides a rubberized barrier against corrosion, water, salt, and chemical damage. The formula dries to the touch in just 30 minutes and covers 10-12 square feet per can, making it suitable for quick weekend projects.
What Makes It Stand Out: The any-angle spray technology with a wide comfort tip allows application in hard-to-reach areas, even upside down—a game-changer for DIY undercarriage work. The rubberized coating not only prevents rust but also provides sound deadening benefits, reducing road noise and protecting components from debris impact. This dual-functionality adds significant value beyond basic rust protection.
Value for Money: At $35.59 for six cans ($0.40 per ounce), this pack offers excellent value for budget-conscious consumers. Compared to professional shop applications costing hundreds, this DIY solution covers approximately 60-72 square feet total—enough for a standard car underbody. The convenience of pre-mixed aerosol eliminates equipment costs and cleanup time, making it ideal for occasional users who don’t want to invest in spray equipment.
Strengths and Weaknesses: Strengths include user-friendly application, fast drying time, versatile angle spraying, and effective sound dampening. The 6-pack quantity suits most passenger vehicles. Weaknesses include limited coverage per can requiring multiple purchases for larger vehicles, aerosol overspray potential, and less durability than professional-grade options. Cold weather application may affect performance, and proper surface prep is critical for adhesion.
Bottom Line: Perfect for DIY enthusiasts seeking an affordable, straightforward undercoating solution. While not professional-grade, it delivers reliable protection for daily drivers in moderate climates. Buy an extra pack for trucks or SUVs to ensure complete coverage.
2. InoKraft Undercoating Spray Gun with Suction Feed Cup, 360° & Straight Spray Hoses, for Truck Bed Liner Coating, Rubberized Undercoat, Rust Proofing

Overview: The InoKraft Undercoating Spray Gun is a professional-style suction-feed system designed for serious DIYers and automotive enthusiasts. This versatile tool handles thick rubberized undercoatings and truck bed liners without dilution, offering 60% increased flow rate for high-volume applications while maintaining precision for detailed work. The complete kit includes pressure regulator, 360° and straight spray wands, and cleaning accessories.
What Makes It Stand Out: The innovative 360° spray extension wand reaches deep into frame rails, wheel wells, and hidden cavities that aerosol cans simply cannot access. Adjustable nozzles with hand-operable threads allow on-the-fly flow control without crawling out from under the vehicle. The snap-lock suction cup prevents leaks even when tilted, addressing a common frustration with conventional spray guns and ensuring clean, efficient operation.
Value for Money: At $49.99, this kit delivers exceptional value compared to professional pneumatic guns costing $100+. The included accessories—pressure regulator, two wands, and cleaning brush—eliminate separate purchases. For vehicle owners planning multiple applications or maintaining a fleet, this tool pays for itself after just two uses versus aerosol cans. The efficiency gains and professional finish quality make it a smart long-term investment.
Strengths and Weaknesses: Strengths include superior reach, adjustable flow control, anti-leak design, and versatility across coating types. The tool dramatically reduces application time and improves coverage uniformity. Weaknesses include requiring an air compressor (not included), a steeper learning curve for beginners, and needing separate material purchase. The suction feed may struggle with extremely viscous materials, and cleanup is more involved than disposable aerosols.
Bottom Line: An excellent choice for committed DIYers and semi-professional users. If you own a compressor and plan multiple undercoating jobs, this tool offers professional capabilities at a fraction of commercial equipment costs. Beginners should watch tutorial videos before first use.
3. Barrier Bond - Rubberized Undercoating Sound Deadener Kit, 28oz 4-Pack, Black Spray, Vehicle Undercoating, with Spray Gun
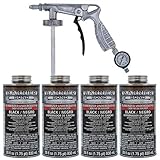
Overview: The Barrier Bond kit provides a complete undercoating solution in a convenient 4-pack configuration with an included spray applicator gun. Each 28-ounce can contains a ready-to-spray, fast-drying rubberized formula that effectively deadens sound while protecting against corrosion. The system is designed for users wanting professional results without investing in separate spray equipment, covering multiple vehicles or large projects.
What Makes It Stand Out: This kit’s 50-state VOC compliance ensures legal use nationwide, making it ideal for mobile mechanics and users in regulated markets like California. The paintable formula accepts most topcoats, allowing color customization or additional protection layers. The integrated spray gun design bridges the gap between aerosol convenience and professional equipment performance, offering better control and coverage than standard spray cans.
Value for Money: At $114.99 for 112 total ounces plus an applicator gun, the kit positions itself in the mid-range market. While pricier than basic aerosols, the included spray gun and larger can size provide better value than buying equivalent aerosol quantities. For users needing 3-4 vehicle applications, it eliminates equipment rental costs and delivers more consistent results than manual spraying, justifying the premium.
Strengths and Weaknesses: Strengths include complete kit convenience, environmental compliance, paintable finish, fast drying, and superior spray control over aerosols. The larger cans reduce waste and refilling frequency. Weaknesses include higher upfront cost, limited availability compared to major brands, and potential gun cleaning complexity. The 28-ounce size may be awkward for tight spaces, and replacement guns could be proprietary.
Bottom Line: Ideal for users wanting aerosol simplicity with improved performance. The VOC compliance and included applicator make it perfect for regulated states or those applying multiple coats across several vehicles. Consider your project scope before purchasing.
4. Tekton44 Undercoating for Vehicles, Automotive Black Undercoating Kit (8 Liter Cans + 1 Spray Gun + 1 Spray Wand)

Overview: The Tekton44 Undercoating Kit is a professional-grade solution featuring eight liters of premium coating and a complete spray system. Designed for automotive applications, this high-performance formula provides exceptional corrosion resistance while remaining permanently tacky to maintain flexibility in extreme cold. The kit includes a spray gun and wand, offering versatile application methods including brushing, dipping, or spraying for comprehensive coverage.
What Makes It Stand Out: The massive 8-liter volume delivers enough material for multiple vehicles or fleet applications, making it uniquely suited for professional shops or serious enthusiasts. The permanently tacky characteristic ensures the coating never fully hardens, preventing cracks and peels while allowing self-healing of minor abrasions. Its non-run, non-drip formulation when sprayed ensures clean application without messy cleanup or wasted material.
Value for Money: At $218.90 ($0.81 per fluid ounce), this kit commands a premium price but delivers professional-grade results and volume. For comparison, equivalent aerosol coverage would cost significantly more and require dozens of cans. Professional shop undercoating services charge $150-$300 per vehicle, making this kit economical for users treating three or more vehicles. The included spray equipment adds substantial value for those lacking professional tools.
Strengths and Weaknesses: Strengths include huge coverage capacity, superior cold-weather flexibility, professional-grade corrosion protection, multiple application methods, and included spray system. The non-drip formula reduces waste and cleanup time. Weaknesses include the highest price point, requiring significant storage space, and being overkill for single-vehicle applications. The permanently tacky surface may attract dirt and requires careful application to avoid unwanted adhesion.
Bottom Line: Best suited for professional technicians, restoration shops, or owners of multiple vehicles in harsh climates. The investment pays dividends for large projects, but casual DIYers should opt for smaller kits. Superior performance justifies the cost for serious applications.
5. Rust-Oleum 248656-6PK Stops Rust Professional Grade Undercoating Spray Paint, 15 oz, Rubberized Black, 6 Pack

Overview: Rust-Oleum’s Professional Grade Undercoating Spray elevates the standard formula with enhanced corrosion protection for demanding applications. This 6-pack of 15-ounce cans is engineered for bare or primed metal underbodies on vehicles, trailers, and RVs. The professional-grade formulation delivers superior resistance to water, salt, and chemicals while providing sound deadening benefits. Dries to the touch in one hour with extended coverage of 10-15 square feet per can.
What Makes It Stand Out: The professional-grade designation signifies a more robust binder system and higher solids content than consumer versions, creating a denser, more durable protective layer. This enhanced formulation is specifically designed for vehicles operating in harsh coastal or winter salt environments where standard undercoatings may fail prematurely. The wide comfort spray tip and any-angle technology maintain user-friendliness while delivering professional results.
Value for Money: At $49.62 for six cans ($0.55 per ounce), this professional version costs 37% more than the standard Rust-Oleum undercoating. However, the increased coverage per can (up to 15 sq ft vs 12 sq ft) and superior protection justify the premium for vehicles in corrosive environments. For daily drivers in moderate climates, the standard version suffices, but this professional grade offers peace of mind for long-term protection investments.
Strengths and Weaknesses: Strengths include enhanced corrosion resistance, professional-grade durability, extended coverage per can, any-angle spray capability, and trusted Rust-Oleum brand reliability. The sound deadening remains effective. Weaknesses include longer drying time (1 hour vs 30 minutes), higher cost per ounce, and aerosol application limitations for complex geometries. Multiple cans are still required for full coverage, and the finish may be slightly rougher than spray-gun applications.
Bottom Line: Worth the premium for vehicles in salt-heavy environments or for owners keeping cars long-term. DIYers in mild climates can save with the standard version, but this offers superior protection where it matters most. A smart upgrade for winter-beater vehicles.
6. U-POL Raptor Black Urethane Spray-On Truck Bed Liner Kit, Protective Paint with Spray Gun, for Tailgates & Trucks, Vehicle Undercoating, 4 Quart Kit

Overview: The U-POL Raptor Black Urethane Spray-On Truck Bed Liner Kit delivers professional-grade protection through its two-part 2K urethane system. Designed for 6-8 foot truck beds, this comprehensive package includes four 750ml base bottles, hardener, and a dedicated spray gun, offering DIY enthusiasts a cost-effective alternative to shop-applied liners that typically cost $500-800.
What Makes It Stand Out: Unlike basic aerosol undercoatings, Raptor’s two-component system chemically cures to form a flexible, impact-resistant barrier that withstands extreme temperatures while reducing road noise and vibration. The included spray gun ensures proper application, while the tintable, UV-resistant formula prevents fading. Its versatility extends beyond truck beds to trailers, boats, and undercarriages, bonding securely to OEM paint or self-etching primer.
Value for Money: At $142.88, this kit represents exceptional value. Professional spray-in bed liner services charge 4-5 times more for similar coverage. The DIY approach saves labor costs while delivering comparable durability and aesthetics. For truck owners seeking long-term protection without premium shop prices, this kit hits the sweet spot between quality and affordability.
Strengths and Weaknesses: Strengths include superior durability, UV resistance, noise dampening, and comprehensive kit contents. The rapid-drying formula enables multiple coats within an hour. Weaknesses include the requirement for a compressor delivering 8 CFM at 50-60 PSI, potential overspray concerns, and the need for careful mixing. Surface preparation is critical for optimal adhesion.
Bottom Line: Perfect for hands-on truck owners with access to an air compressor, the U-POL Raptor kit delivers professional results at a fraction of shop costs. The two-part urethane system provides durable, long-lasting protection that justifies the investment.
7. Fluid Film Black Non-Aerosol, Long Lasting Corrosion, Penetrant & Lubricant, Anti-Rust Coating, Protects All Metals in Marine and Undercoating in Automotive & Snow-Handling Vehicles, 1 Gallon
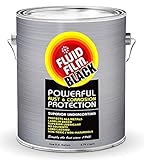
Overview: Fluid Film Black is a unique wool-wax based corrosion inhibitor that provides long-lasting protection for vehicle undercarriages, marine equipment, and industrial applications. This one-gallon non-aerosol formula offers a safer alternative to solvent-based coatings, using naturally derived ingredients to create a self-healing barrier against rust and salt damage.
What Makes It Stand Out: Unlike hardening undercoatings, Fluid Film remains active and creeping, continuously migrating into seams and crevices where rust originates. The non-toxic, non-flammable formulation makes it safer for home use, while its lubricating properties protect moving components. It restores a rich black appearance to faded chassis components and can be applied over existing light rust to halt further oxidation.
Value for Money: At $57.41 per gallon, Fluid Film positions itself as a mid-range solution. While cheaper than two-part urethane systems, it requires annual reapplication in harsh climates. The cost balances out when considering its versatility for home, garden, and automotive use, eliminating the need for multiple specialized products.
Strengths and Weaknesses: Strengths include excellent penetration, non-toxic formula, versatility across applications, and effectiveness in marine environments. It stops rust migration and lubricates simultaneously. Weaknesses include its tacky finish that attracts dirt and dust, messy application process, and need for regular reapplication. The coating never fully hardens, which may not suit all users.
Bottom Line: Ideal for vehicles in salt-heavy regions, Fluid Film excels as a maintenance coating for undercarriages. Its unique wool-wax formula provides superior corrosion protection, though the tacky finish and reapplication schedule make it best suited for dedicated enthusiasts who prioritize rust prevention over aesthetics.
8. Rust-Oleum Black Undercoating 15 oz. (12 Pack)

Overview: The Rust-Oleum Black Undercoating 12-pack provides a convenient aerosol solution for protecting vehicle undercarriages from corrosion and moisture. This budget-friendly option from a trusted brand offers 180 ounces of fast-drying coating suitable for cars, trucks, and recreational vehicles requiring basic underbody protection.
What Makes It Stand Out: Rust-Oleum’s widespread availability and brand recognition give DIYers confidence in product reliability. The aerosol format eliminates need for specialized equipment, making it accessible to casual users. The 12-can bulk packaging ensures sufficient coverage for complete undercarriage applications or multiple touch-up projects, while the quick-dry formula allows efficient layering.
Value for Money: At $81.48 for twelve 15-ounce cans ($0.45 per ounce), this represents one of the most economical undercoating options. The per-ounce cost significantly undercuts professional-grade products, making it attractive for budget-conscious consumers. While requiring more cans than concentrated systems, the no-equipment-needed approach saves additional investment.
Strengths and Weaknesses: Strengths include ease of application, brand trustworthiness, quick drying time, and excellent value for occasional use. The aerosol format provides uniform coverage when applied correctly. Weaknesses include thinner coating buildup requiring multiple cans, inferior durability compared to two-part systems, and potential for uneven application by novices. Overspray and fume management require careful attention.
Bottom Line: This Rust-Oleum 12-pack serves as a solid entry-level undercoating solution for DIYers seeking basic protection without equipment investment. While not as robust as premium alternatives, it delivers adequate corrosion defense for daily drivers in moderate climates when applied properly.
9. Gal NH Oil Undercoating, Pro Undercoating Gun, 2 Wands, 3 Quart Bottle, 50 Plugs

Overview: The NH Oil Undercoating Kit targets serious DIY enthusiasts and semi-professional users with a comprehensive oil-based corrosion protection system. This premium package includes a professional-grade undercoating gun, two wands for various application angles, a three-quart bottle of oil formula, and 50 application plugs, providing everything needed for thorough undercarriage treatment.
What Makes It Stand Out: The inclusion of professional application equipment distinguishes this kit from consumer-grade aerosols. The specialized spray gun and wands enable precise delivery into frame rails, rocker panels, and other critical rust-prone areas that aerosols cannot effectively reach. The oil-based formula penetrates deeply, displacing moisture and creating a lasting protective film.
Value for Money: At $174.95, this kit commands a premium price but includes tools that cost $100+ separately. For users planning multiple vehicle applications or seeking professional results without shop fees, the investment pays for itself after two uses. The reusable equipment provides ongoing value beyond the initial product consumption.
Strengths and Weaknesses: Strengths include professional-grade application tools, superior penetration into hidden cavities, comprehensive kit contents, and effective moisture displacement. The system treats areas competitors miss. Weaknesses include the high initial cost, potential for oil dripping post-application, steeper learning curve, and limited product information provided. Oil-based formulas may require more frequent reapplication than hardened coatings.
Bottom Line: This NH Oil kit suits dedicated automotive enthusiasts and those maintaining multiple vehicles. The professional equipment justifies the premium price for users committed to thorough rust prevention. While overkill for casual users, it delivers unmatched access to critical rust zones.
10. 3M 3584 Professional Grade Rubberized Undercoating 6 16oz Cans

Overview: 3M’s Professional Grade Rubberized Undercoating provides trusted brand protection through a six-pack of 16-ounce aerosol cans. This formulation creates a durable, rubberized barrier that shields undercarriages from moisture, salt, and environmental damage while simultaneously reducing road noise through vibration dampening.
What Makes It Stand Out: 3M’s reputation for professional-grade automotive products ensures reliability and performance. The rubberized formula remains flexible after curing, resisting cracks and chips better than asphalt-based alternatives. Its sound-dampening properties provide a quieter cabin experience, while the professional-grade adhesion ensures long-lasting protection across various substrates and conditions.
Value for Money: Priced at $53.99 for six cans (96 ounces at $0.56 per ounce), this offering balances brand quality with reasonable cost. While slightly higher per-ounce than budget competitors, the 3M name and proven performance justify the modest premium. The six-can quantity suits single-vehicle undercoating with minimal waste.
Strengths and Weaknesses: Strengths include excellent brand reputation, effective noise reduction, flexible rubberized finish, uniform aerosol application, and reliable corrosion protection. The professional-grade formulation delivers consistent results. Weaknesses include fewer cans than competing multi-packs, potential for rubberized layer to crack over time if improperly applied, and critical dependence on surface preparation. The total coverage area may be insufficient for larger trucks.
Bottom Line: 3M’s rubberized undercoating represents a reliable middle-ground option for DIYers prioritizing both corrosion protection and noise reduction. The trusted brand name and proven performance make it a smart choice for daily drivers and enthusiasts wanting professional results without shop prices.
Understanding Undercoating: Why Your Vehicle Needs Protection
Rust doesn’t announce its arrival—it infiltrates. The chemical reaction between iron, oxygen, and water begins the moment moisture contacts bare metal, accelerating dramatically when road salt enters the equation. Modern vehicles use galvanized steel and advanced coatings, but these defenses aren’t impenetrable. Stone chips, manufacturing gaps, and age-related degradation create entry points for moisture that spread like cancer beneath the surface.
Geography dictates your undercoating strategy. Coastal regions bombard undercarriages with salt air and humidity year-round. Northern climates introduce magnesium chloride and calcium chloride treatments that are exponentially more corrosive than traditional rock salt. Even desert environments pose threats from abrasive dust and monsoon seasons. A quality undercoating kit provides a renewable barrier tailored to your specific environmental battlefield.
What Is an Undercoating Kit with Spray Gun?
An undercoating kit is a comprehensive system designed to apply protective coating to your vehicle’s undercarriage. Unlike rattle-can approaches that offer limited coverage and inconsistent thickness, professional kits include a dedicated spray gun engineered for thick, viscous materials. The spray gun is the linchpin—its ability to atomize heavy coatings and deliver them into frame rails, inside rocker panels, and across suspension components determines the entire operation’s success.
These kits typically bundle the coating material, application equipment, and essential accessories into one package. However, “kit” can be misleading. The most effective setups often involve carefully selected components that work synergistically rather than pre-packaged boxes with compromised components. Understanding each element’s role helps you build a system that matches professional shop results.
Key Benefits of DIY Undercoating
The financial advantage is immediate. Professional undercoating services range from $150 for basic applications to over $800 for comprehensive treatments with premium materials. A quality DIY kit represents a one-time investment of $200-400 that protects multiple vehicles over several years. Your break-even point comes after the first application.
Beyond economics, DIY application offers unmatched customization. You control material thickness in high-risk areas like wheel wells and frame horns. You can target specific vulnerabilities on your vehicle—perhaps extra protection on tow hitch mounting points or double-coating suspension brackets. This tailored approach addresses your vehicle’s actual needs rather than a shop’s one-size-fits-all conveyor belt process.
Types of Undercoating Materials Explained
Petroleum-Based Coatings
These traditional formulas combine oil, tar, and solvents to create a self-healing barrier that remains slightly pliable. They excel at creeping into seams and displacing moisture but require reapplication every 1-2 years. Their main drawback is environmental sensitivity—they can wash off in extreme conditions and may not adhere well to heavily rusted surfaces without extensive prep.
Rubberized Undercoatings
Polymer-enhanced formulas create a durable, flexible membrane that deadens road noise while protecting against impact damage. They typically last 3-5 years and provide excellent abrasion resistance. However, they can trap moisture if applied over existing rust, making proper preparation non-negotiable. They’re ideal for newer vehicles with minimal corrosion.
Asphalt-Based Coatings
The heavy-duty choice for severe environments, these coatings form a rock-hard barrier that’s nearly impervious to salt and chemicals. Commonly used on commercial vehicles, they last 5+ years but sacrifice flexibility. Application requires careful technique to avoid cracking on flexing components. They’re overkill for daily drivers but perfect for plow trucks and off-road rigs.
Wax-Based and Water-Based Formulations
Emerging eco-friendly options offer surprising performance with easier cleanup and lower VOC emissions. Wax-based coatings flow like liquid wax into cavities and harden into a protective shell. Water-based products use advanced polymer technology to create durable barriers without harsh solvents. Both represent the future of undercoating but may require more frequent reapplication in extreme conditions.
Essential Components of a Quality Undercoating Kit
The Coating Material Itself
Volume matters more than you think. A compact car requires 1-2 gallons, while a full-size truck needs 3-4 gallons for comprehensive coverage. Kits advertising “one size fits all” often leave you short. Look for materials with high solid content—this indicates less solvent and more actual protective material after curing.
Spray Gun Types and Configurations
Your gun must handle materials with viscosities up to 100 seconds in a Zahn cup (roughly the consistency of heavy cream). Siphon-feed guns work well for beginners, while pressure-feed systems offer superior control for experienced users. The gun’s fluid tip and needle size directly impact material flow—1.8mm to 2.5mm is the sweet spot for most undercoatings.
Hoses, Connectors, and Regulators
A 25-foot minimum air hose provides mobility around the vehicle without moving the compressor. Quick-connect fittings should be industrial-grade ( industrial “M” style) to prevent air leaks that reduce gun performance. An inline moisture trap and pressure regulator at the gun handle give you real-time control over atomization and flow.
Safety and Preparation Materials
Professional results start with professional prep. Quality kits include or recommend degreasers, rust converters, wire brushes, and masking materials. Respirator requirements are non-negotiable—organic vapor cartridges are mandatory, not dust masks. Nitrile gloves, safety glasses, and disposable coveralls protect against skin contact and overspray.
The Spray Gun: Your Most Critical Tool
HVLP vs Conventional Spray Technology
High Volume Low Pressure (HVLP) guns transfer more material to the surface with less overspray, making them ideal for undercoating. They operate at 10 PSI at the air cap, requiring 15-25 CFM from your compressor. Conventional guns work at higher pressures but waste 40-60% of material as overspray. For undercarriage work where material thickness matters, HVLP’s efficiency justifies its higher air demand.
Nozzle Size and Material Compatibility
The nozzle/needle assembly determines how thick a material you can spray. Undercoating requires larger openings than automotive paint. A 2.0mm setup handles most rubberized coatings, while 2.3mm or 2.5mm tackles asphalt-based materials. Some guns include multiple fluid tips, offering versatility across different coating types as your needs evolve.
Cleaning and Maintenance Protocols
Undercoating materials cure hard and fast. Immediate cleaning with appropriate thinner prevents costly clogs. Disassemble the gun completely—remove the fluid tip, needle, and air cap. Soak metal parts in mineral spirits, use pipe cleaners for passages, and lubricate the needle packing before reassembly. A $200 spray gun becomes a $200 paperweight without proper maintenance.
Compressor Requirements: What You Need to Know
CFM and PSI Specifications
Your compressor is the engine driving the entire system. Undercoating guns demand 12-25 CFM at 90 PSI. That 6-gallon pancake compressor might run a nailer, but it will stall an undercoating gun mid-spray, resulting in uneven application and material waste. Calculate your needs based on the gun’s requirements, then add 20% for duty cycle and efficiency losses.
Tank Size and Duty Cycle Considerations
A 30-gallon tank minimum provides reserve air for continuous spraying. More important is the duty cycle rating—continuous-duty compressors (100% duty cycle) run workshops, while intermittent units (50-75% duty cycle) require cooling periods that disrupt your workflow. Oil-lubricated compressors run cooler and quieter for extended sessions.
Oil-Lubricated vs Oil-Free Compressors
Oil-lubricated compressors deliver cleaner, cooler air and last significantly longer. The trade-off is maintenance and potential oil carryover that contaminates coatings. Install a coalescing filter at the compressor outlet and a second filter at the gun to eliminate this risk. Oil-free compressors are maintenance-free but run hotter and noisier, making them less suitable for prolonged undercoating sessions.
Preparation: The Foundation of a Successful Application
Undercarriage Cleaning Protocol
Power washing alone is insufficient. Degrease with a citrus-based or solvent degreaser, then use a pressure washer with a rotating nozzle to blast scale and loose rust. For heavily corroded surfaces, media blasting with crushed glass or soda provides the ideal profile. The goal is bare metal or stable, converted rust—nothing in between.
Rust Treatment Strategy
Convert remaining rust with phosphoric acid-based converters that chemically transform iron oxide into iron phosphate, a stable, paintable surface. Apply two coats, allowing full conversion between applications. For perforation or severe pitting, wire brush to remove loose material, then use epoxy-based patching compounds before undercoating. Skipping this step is like painting over termite damage.
Masking and Protection Techniques
Masking isn’t just for painted surfaces. Cover brake rotors, calipers, exhaust components (especially oxygen sensors), and any rubber bushings with heavy-duty aluminum foil and tape. Overspray on these components causes brake contamination, sensor failure, and premature rubber degradation. Remove wheels for complete wheel well access—this isn’t the time for shortcuts.
Application Techniques for Professional Results
Proper Spraying Distance and Angle
Hold the gun 6-8 inches from the surface, perpendicular to the panel. Too close creates runs and uneven buildup; too far wastes material as overspray. Work in overlapping passes with 50% pattern overlap, moving systematically from front to rear. This ensures uniform thickness without thin spots that become rust incubators.
Layering Strategy for Maximum Protection
Apply 2-3 thin coats rather than one thick coat. Heavy applications trap solvents, leading to cracking and poor adhesion. Each 3-5 mil wet coat should flash off for 15-30 minutes before the next. This builds a flexible, durable barrier that withstands flexing and impact. Pay special attention to inside frame rails—use a spray wand extension to reach 24+ inches into cavities.
Hard-to-Reach Areas and Cavity Access
Factory drain holes provide access to rocker panels and frame sections. Use a flexible wand with a 360-degree tip to coat interior surfaces where rust starts. For enclosed spaces, apply until coating seeps from adjacent holes—this confirms complete coverage. Missing these hidden areas is the most common reason undercoating fails prematurely.
Drying and Curing Times
Environmental conditions dramatically affect cure times. At 70°F and 50% humidity, most coatings are tack-free in 2-4 hours and fully cured in 24-48 hours. Cold or humid conditions extend this exponentially. Avoid driving through water for at least a week—water accelerates cure but can wash away uncured material from high-impact areas like wheel wells.
Common Mistakes and How to Avoid Them
Inadequate Surface Preparation
The number one failure mode is poor prep. Rushing the cleaning phase leaves contaminants that prevent adhesion. A simple test: after cleaning, wipe the surface with a white cloth dampened with thinner. Any gray or black residue means you’re not done. Proper prep takes 3-4 hours for a typical vehicle—budget this time or waste your entire effort.
Wrong Environmental Conditions
Applying undercoating below 50°F or above 85°F invites disaster. Cold temperatures prevent flow and adhesion; excessive heat causes solvent popping and premature skinning. Humidity above 70% slows cure and can cause blushing. Check the material’s technical data sheet—it’s not just fine print, it’s the recipe for success.
Incorrect Material Thickness
Too thin provides insufficient protection; too thick cracks and peels. Use a wet film thickness gauge to verify 3-5 mils per coat. Experienced applicators develop a feel for proper coverage—when the coating obscures surface details but doesn’t obscure them completely, you’re in the zone. Remember, you can always add another coat; removing excess is nearly impossible.
Neglecting Equipment Maintenance
Failing to clean your spray gun immediately after use is a $200 mistake. Undercoating materials contain solids that cure rock-hard within hours. Even “gun wash” thinners struggle to dissolve cured material. Develop a cleaning ritual: disassemble, soak, brush, blow dry, lubricate, reassemble. Your future self will thank you when the gun sprays perfectly next season.
Safety Considerations You Can’t Ignore
Respiratory Protection Requirements
Undercoating solvents are neurotoxic and carcinogenic. A NIOSH-approved respirator with organic vapor cartridges is mandatory—dust masks provide zero protection. Change cartridges based on manufacturer recommendations, typically every 40 hours of use. If you can smell solvents, your seal is compromised or cartridges are exhausted. Your lungs don’t get a second chance.
Skin and Eye Protection
Nitrile gloves (not latex) prevent skin absorption of solvents and chemicals. Undercoating sticks to skin and requires harsh solvents for removal—avoid the problem entirely. Safety glasses with side shields protect against ricocheting particles during prep and overspray during application. Full-face shields offer superior protection when spraying overhead sections.
Ventilation and Fire Safety
Work in well-ventilated areas with active exhaust fans exchanging air every 3-5 minutes. Undercoating solvents are heavier than air and accumulate in low areas, creating explosive atmospheres. Eliminate all ignition sources—pilot lights, electric heaters with open elements, and smoking. Keep a Class B fire extinguisher (for flammable liquids) within arm’s reach. The unthinkable happens to the unprepared.
Maintenance and Touch-Up Strategies
Inspection Schedule
Inspect your undercoating every six months, focusing on wheel wells, frame sections behind tires, and areas near exhaust components. Look for cracking, peeling, or thin spots where metal shows through. Catching failures early allows simple touch-ups rather than complete reapplication. Use a flashlight and inspection mirror—what you can’t see will hurt you.
Touch-Up Techniques
Clean the affected area thoroughly, feathering edges of intact coating with a wire brush. Apply rust converter to any exposed metal, then spray new material extending 2-3 inches beyond the repair. Blend the edges to prevent a “patch” appearance and future peeling. For small areas, aerosol undercoating cans work, but spray gun application provides seamless integration.
When to Reapply Completely
Plan for full reapplication every 3-5 years for rubberized coatings, sooner for petroleum-based products. Signs it’s time: widespread cracking, coating that’s brittle to the touch, or visible rust breakthrough in multiple areas. Don’t layer new coating over failing old coating—strip it completely and start fresh. The prep work is the same, but the results last twice as long.
Cost Analysis: DIY vs Professional Undercoating
Initial Investment Breakdown
A complete DIY setup runs $300-500: $150-250 for a quality spray gun and accessories, $100-200 for coating materials, and $50-100 for safety gear and prep supplies. This seems steep compared to a $200 professional job until you realize this equipment protects 5-10 vehicles over its lifespan. Amortized cost per vehicle: $30-100.
Long-Term Savings Calculation
Professional undercoating at $250 every three years costs $1,750 over a 21-year vehicle lifespan. DIY materials cost $50 per application, totaling $350. The $1,400 savings covers your equipment investment multiple times over. Factor in the ability to touch up annually for $15 versus $75 shop minimums, and the economics become undeniable.
Hidden Costs and Considerations
Factor in your time (6-8 hours for first-timers, 3-4 hours once experienced), disposal fees for waste materials, and potential equipment replacement. Compressor costs if you don’t own one add $200-500. However, a compressor serves countless other automotive tasks, making it a workshop investment rather than a single-purpose expense.
Environmental Factors and Seasonal Timing
Optimal Application Seasons
Late spring and early fall offer ideal conditions: moderate temperatures, moderate humidity, and minimal precipitation. Summer’s heat accelerates cure but increases overspray drying before it hits the surface. Winter application is possible in heated garages but introduces ventilation challenges. Plan your project when you can control the environment, not fight it.
Temperature and Humidity Ranges
The sweet spot: 60-75°F ambient temperature with 40-60% relative humidity. Read the product’s technical data sheet—some modern water-based coatings tolerate 50°F minimum, while solvent-based products need 60°F for proper flow. Use infrared thermometers to check substrate temperature; metal surfaces can be 10-15°F cooler than air temperature in shade.
Indoor vs Outdoor Application
Indoor application in a garage offers environmental control but demands explosion-proof ventilation. Outdoor application provides unlimited airflow but exposes you to wind-blown contaminants and temperature fluctuations. The compromise: a carport or temporary shelter that blocks wind while allowing airflow. Never apply under direct sunlight—the coating skins before it flows, creating a wrinkled, weak finish.
Frequently Asked Questions
How long does a typical undercoating kit last before it needs replacement? A quality spray gun lasts decades with proper maintenance, while coating materials typically have a 2-3 year shelf life unopened. Once opened, use within 6-12 months as solvents evaporate and solids settle. Store materials in climate-controlled environments—freezing ruins most formulations permanently.
Can I use my automotive paint spray gun for undercoating? Standard paint guns have smaller fluid passages (1.3-1.4mm) designed for thin materials. Undercoating will clog them instantly and potentially damage internal components. Even if you manage to spray, you’ll lack the volume for proper coverage. Invest in a dedicated undercoating gun with 2.0mm+ nozzle—it’s cheaper than replacing a $400 paint gun.
What’s the minimum compressor size I can get away with? Technically, a 20-gallon compressor delivering 10 CFM at 90 PSI can work with an HVLP gun, but you’ll wait constantly for it to recover. A 30-gallon, 15+ CFM unit is the practical minimum for continuous work. Remember, compressor ratings are often optimistic—add 20% to manufacturer CFM claims for real-world performance.
How do I know if my vehicle is too rusted for undercoating to help? If you can poke through metal with a screwdriver, undercoating is a band-aid on a mortal wound. Undercoating preserves good metal; it doesn’t restore structural integrity. Focus on vehicles with surface rust or minimal pitting. Severely rusted frames need professional repair or replacement—coating them just hides the problem until catastrophic failure.
Is rubberized or petroleum-based undercoating better for winter salt protection? Rubberized coatings provide superior long-term protection (3-5 years) and better impact resistance against ice chunks. Petroleum-based products offer self-healing properties and better seam penetration but require annual reapplication in severe salt environments. For set-it-and-forget-it winter protection, rubberized wins. For maximum creep and coverage, petroleum-based excels.
Can I apply undercoating over existing factory undercoating? Only if the factory coating is perfectly intact and well-adhered. Test by scraping with a putty knife—if anything flakes or peels, remove it completely. Layering over failing coating creates a ticking time bomb. When in doubt, strip it. The extra prep day prevents complete failure in two years.
How soon after undercoating can I drive my vehicle? Light driving is safe after 24 hours, but avoid water exposure for 7 days minimum. Full cure takes 30 days to reach maximum hardness and chemical resistance. During the first week, avoid aggressive off-roading or driving through deep water. The coating is protecting, but hasn’t reached full strength.
What’s the difference between undercoating and rustproofing? Undercoating creates a visible protective barrier on the undercarriage, focusing on abrasion and moisture protection. Rustproofing involves injecting waxy, corrosion-inhibiting compounds into enclosed cavities (doors, frame rails, rockers) using specialized wands. The best protection combines both: undercoat the underside, rustproof the cavities. Many kits include cavity injection wands for this reason.
Do I need to remove my spare tire and interior trim for complete protection? Absolutely. The spare tire area is a rust hotspot—remove the tire and coat the well completely. Interior trim removal allows access to inner rocker panels and rear wheel wells. Water enters these areas through window seals and vent holes, making them prime rust locations. The extra hour of trim removal prevents rust you won’t see until it’s too late.
Can undercoating improve road noise reduction? Rubberized undercoatings reduce road noise by 3-7 decibels, noticeably quieting cabin noise from tire roar and gravel impact. The effect is most pronounced on vehicles with minimal factory sound deadening. Don’t expect miracles—it’s not a full soundproofing solution, but it’s a welcome side benefit that makes highway driving more pleasant while protecting your investment.