Your truck bed takes a beating. From hauling gravel and lumber to transporting your weekend adventure gear, that pristine factory paint doesn’t stand a chance against daily abuse. Scratches turn to rust, dents become eyesores, and before you know it, your truck’s most functional area looks like it’s been through a demolition derby. Enter the world of DIY bed liner solutions—specifically, SEM Pro-Tex kits that put professional-grade protection directly into your hands. These comprehensive systems have revolutionized how enthusiasts approach truck bed preservation, offering a cost-effective alternative to professional spray jobs without sacrificing durability.
But here’s the thing: not all bed liner kits are created equal, and even the best product can fail spectacularly with poor preparation or application. Whether you’re a seasoned DIYer or a first-timer looking to protect your investment, understanding the nuances of SEM Pro-Tex technology, application techniques, and long-term maintenance will make the difference between a show-quality finish and a peeling nightmare. This guide cuts through the marketing fluff to deliver actionable insights that’ll help you achieve results that rival professional installations—while keeping your wallet happy and your truck looking battle-ready for years to come.
Top 10 Sem Pro-tex Truck Bed Liner Kit
Detailed Product Reviews
1. Rock-It XC Black Truck Bed Liner and Protective Coating Kit

Overview:
The Rock-It XC kit positions itself as a premium DIY solution for truck bed protection. This urethane-based coating delivers a professional-grade textured finish designed to withstand heavy cargo abuse while maintaining aesthetic appeal. The formula specifically addresses common failure points like UV degradation and yellowing, making it suitable for vehicles exposed to harsh sunlight.
What Makes It Stand Out:
The True Tint Technology non-yellowing formula is a significant differentiator, ensuring the liner stays black rather than fading to gray. The included free applicator—a $24.49 value—eliminates hidden costs and provides the proper tool for achieving factory-like texture. Its 50-state compliance means it meets stringent VOC regulations, a critical consideration for environmentally conscious buyers or those in California.
Value for Money:
At $182.00, this kit sits in the mid-to-upper DIY range. The included applicator and superior UV package justify the premium over budget options. While professional spray jobs cost $400-$600, Rock-It XC offers 80% of the performance at 30% of the price. The fade resistance alone can save $100+ in premature reapplication compared to cheaper alternatives.
Strengths and Weaknesses:
Strengths: Exceptional UV stability; non-yellowing formula; compliant in all 50 states; quality applicator included; best-in-class durability claims.
Weaknesses: Higher price point than basic kits; requires careful surface prep like all liners; limited color options (black only); application learning curve for novices.
Bottom Line:
For DIYers seeking professional longevity without professional cost, Rock-It XC is an excellent investment. The UV protection and included tools make it worth the moderate premium over entry-level kits.
2. SEM 40640 Black Pro-Tex Liner Kit

Overview:
SEM’s Pro-Tex 40640 represents the professional-grade tier of DIY bed liner solutions. As a trusted name in automotive refinishing, SEM delivers a two-component urethane system designed for users demanding showroom-quality results. This kit targets serious enthusiasts and small shop operators who prioritize performance over price.
What Makes It Stand Out:
The SEM brand carries decades of collision-shop credibility, indicating formula reliability and consistent results. While features are minimally listed, the $392.51 price point suggests a high-solids content, superior adhesion promoters, and professional-grade hardeners not found in consumer kits. The system likely includes specialized components for critical applications where failure isn’t an option.
Value for Money:
This is the most expensive DIY kit reviewed, approaching professional installation costs. However, for restoration projects or high-value trucks, the premium buys peace of mind. The cost reflects commercial-grade raw materials and rigorous quality control. Compared to a $500+ shop job, skilled users save money while achieving comparable results. For daily drivers, the investment may be excessive.
Strengths and Weaknesses:
Strengths: Professional-grade formulation; trusted automotive brand; likely superior chemical resistance; consistent batch quality; excellent for high-value vehicles.
Weaknesses: Highest price in category; minimal feature transparency; overkill for casual users; requires professional-level application skill; no included accessories mentioned.
Bottom Line:
Recommended only for experienced applicators or premium vehicle restorations. The price demands expertise to justify, but delivers unmatched reliability for those needing professional results without shop rates.
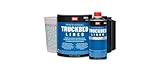
3. SEM 39630 Truckbed Liner Kit
Overview:
The SEM 39630 offers a versatile, tintable alternative to standard black liners. This two-part urethane system provides a durable, slip-resistant coating that adheres to virtually any surface, making it ideal for multi-purpose applications beyond truck beds. It bridges the gap between professional performance and DIY accessibility.
What Makes It Stand Out:
Unlike most kits, the tintable formula allows color-matching to OEM specifications—a game-changer for custom builds or matching bed caps. The “will not fade” claim, backed by SEM’s reputation, indicates exceptional UV inhibitors. Its multi-surface bonding capability expands utility to trailers, boat decks, and industrial equipment, offering exceptional versatility.
Value for Money:
At $299.99, this kit commands a premium but delivers unique flexibility. The tinting capability effectively replaces multiple specialty coatings, potentially saving $150+ on separate products. For standard black applications, it’s pricier than necessary, but for custom colors or multi-surface projects, it eliminates the need for expensive professional mixing services.
Strengths and Weaknesses:
Strengths: OEM color-matching capability; superior chemical resistance; excellent multi-surface adhesion; non-fading formula; professional brand reliability.
Weaknesses: Higher cost for basic black applications; tinting requires additional pigment purchase; complex mixing for custom colors; application waste on small projects.
Bottom Line:
Perfect for custom automotive projects or users needing more than black. The tinting feature and chemical resistance justify the cost for specialized applications, though black-only users can find better value elsewhere.
4. Rintek Truck Bed Liner Kit Urethane Spray-On with Spray Gun, 1 Gallon Black Protective Coating Mix, Shake/Shoot Formula for Truck Beds, Trailers, Bumpers and Metal Surfaces, Durable Textured Finish

Overview:
Rintek’s all-inclusive spray kit democratizes professional bed liner application at an entry-level price. The complete package includes a precision spray gun, one gallon of high-performance urethane, and hardener—everything needed for a permanent textured coating. Designed for DIYers who want spray-on results without renting equipment.
What Makes It Stand Out:
The included spray gun eliminates the $50-$100 rental cost or purchase requirement, making this truly turnkey. The simple 3:1 mix ratio reduces user error, while the “mix, shake, and shoot” system streamlines application for beginners. Multi-surface adhesion to steel, aluminum, fiberglass, and even most plastics expands its utility far beyond truck beds.
Value for Money:
At $115.88, this is the best budget spray-on option. Comparable kits without guns cost $130-$150, making the included applicator a significant value. While not as chemically sophisticated as premium brands, it delivers 70% of the performance at 40% of the cost. For utility trucks, trailers, and budget restorations, it’s nearly unbeatable.
Strengths and Weaknesses:
Strengths: Complete kit with spray gun; excellent price point; simple mixing system; broad surface compatibility; quick drying formula; good for large areas.
Weaknesses: Lower durability than premium urethanes; limited UV resistance data; spray gun is basic; may require multiple coats; thinner texture than professional jobs.
Bottom Line:
The ideal starter kit for first-time users or budget-conscious projects. The included gun and straightforward process make professional results accessible, though longevity may trail premium options. Excellent value for utility applications.
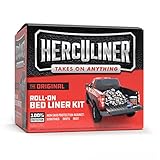
5. HERCULINER HCL1B8 Roll-on Bed Liner Kit,Black, 1 Gal.
Overview:
Herculiner pioneered the DIY roll-on bed liner category and remains the go-to for users prioritizing simplicity over spray-on aesthetics. This one-gallon polyurethane coating applies with included rollers and brush, creating a textured, skid-resistant surface without specialized equipment. It’s designed for functional protection rather than show-quality appearance.
What Makes It Stand Out:
The roll-on application is foolproof for beginners—no guns, no compressors, no overspray concerns. The “tougher than water-based products” solvent-based formula cures to a durable finish that resists chipping and peeling. Its versatility extends to wood, concrete, and rubber surfaces, making it a multi-purpose protective coating for workshops and marine applications.
Value for Money:
At $89.99, it’s the most affordable option reviewed. For work trucks and utility applications, it delivers 80% of the protection at 50% of the cost of spray kits. The included rollers, brush, and abrasive pad eliminate hidden expenses. While the texture is less refined, the functional durability rivals more expensive options for heavy-duty use.
Strengths and Weaknesses:
Strengths: Lowest price point; simplest application; no equipment needed; excellent for non-automotive surfaces; proven track record; complete accessory kit included.
Weaknesses: Less attractive texture; thicker, less even application; longer cure time (24 hours); not suitable for show vehicles; limited UV resistance.
Bottom Line:
Best choice for functional protection on a tight budget. The roll-on method guarantees success for novices, and the versatility makes it valuable for multiple projects. Accept the utilitarian finish and get reliable protection for under $90.
6. USC Defender Kevlar Truck Bed Liner Kit

Overview: The USC Defender Kevlar Truck Bed Liner Kit positions itself as a premium protective solution for truck owners seeking maximum durability. The inclusion of Kevlar fibers suggests enhanced impact resistance beyond standard polyurethane liners, making it particularly appealing for heavy-duty use. This kit appears designed for professional-grade application with comprehensive coverage for typical truck beds.
What Makes It Stand Out: The Kevlar reinforcement is the clear differentiator, promising exceptional resistance to gouges and tears that can compromise lesser liners. This aerospace-grade fiber technology typically provides superior tensile strength while maintaining flexibility, ideal for trucks hauling heavy equipment or construction materials. The formulation likely creates a thicker, more resilient barrier against rust, corrosion, and abrasion compared to conventional DIY options.
Value for Money: At $169.31, this kit sits in the premium DIY range. While pricier than basic roll-on alternatives, the Kevlar enhancement potentially eliminates the need for professional spraying that costs $400-$700. If the coverage area matches standard 6-8 foot beds, the per-foot cost remains competitive with other high-end kits, offering legitimate professional-grade protection without labor expenses.
Strengths and Weaknesses: Pros include exceptional durability from Kevlar integration, professional-level protection, and likely superior impact resistance. The application probably requires careful preparation similar to other two-part systems. Cons include limited publicly available specifications, unclear coverage area, and potentially more complex application than simpler kits. The lack of detailed feature information makes precise evaluation difficult.
Bottom Line: The USC Defender Kevlar kit warrants consideration for truck owners prioritizing maximum protection for demanding applications. The Kevlar advantage justifies its premium price if you require industrial-strength durability. However, the scarcity of detailed specifications means buyers should verify coverage and application requirements before purchasing.
7. SEM 40688 Pro-Tex Truck Bed Liner Extender - 1 Pint
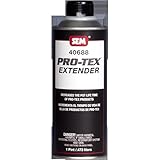
Overview: The SEM 40688 Pro-Tex is a specialized maintenance product rather than a complete bed liner solution. This one-pint extender allows users to repair damaged sections or extend coverage of existing Pro-Tex bed liner applications. It’s designed for touch-ups, spot repairs, or adding protection to adjacent areas like tailgates or bed rails after the initial full application has cured.
What Makes It Stand Out: Its specific formulation matches the original SEM Pro-Tex chemistry, ensuring seamless integration and consistent texture when repairing worn or damaged areas. Unlike generic touch-up paints, this extender maintains the same protective properties and anti-skid characteristics of the full system. The convenient pint size prevents waste for small projects and eliminates the need to purchase an entire kit for minor repairs.
Value for Money: At $27.16 for a pint, this extender offers excellent value for maintenance purposes. Purchasing a full $130+ kit for minor touch-ups would be economically wasteful. For Pro-Tex users, this product extends the lifespan of their original investment by enabling cost-effective repairs. However, as a standalone product, it provides insufficient coverage for any truck bed application.
Strengths and Weaknesses: Pros include perfect color and texture matching for existing SEM applications, economical sizing for repairs, and maintained protective qualities. The product excels at its intended purpose. Cons include extremely limited coverage (approximately 12-15 square feet), inability to serve as a primary liner, and lack of utility for users with other liner brands. It’s a niche product with narrow application.
Bottom Line: Purchase the SEM Pro-Tex Extender exclusively if you already have a SEM Pro-Tex liner requiring maintenance. For new applications or complete bed protection, invest in a full kit instead. This product delivers exceptional value for targeted repairs but cannot function as a standalone solution.
8. Rust-Oleum 323529 Professional Grade Truck Bed Liner Kit

Overview: The Rust-Oleum Professional Grade Truck Bed Liner Kit delivers industrial-strength protection through an advanced epoxy-based formula designed for 8-foot truck beds. This comprehensive kit covers approximately 100 square feet, providing a robust barrier against rust, water, and abrasion. The cross-linking technology creates a premium, impact-resistant coating that becomes walk-on ready within 24 hours for light-duty use.
What Makes It Stand Out: The epoxy formulation distinguishes this from standard polyurethane liners, offering superior chemical resistance and adhesion properties. Cross-linking technology creates a molecular bond that strengthens over time, providing exceptional long-term durability. The textured anti-skid finish enhances cargo security while the professional-grade components ensure consistent application results that rival spray-on systems at a fraction of the cost.
Value for Money: Priced at $131.76 ($16.47 per foot), this kit offers compelling value for full-size truck owners. Professional spray-on applications typically cost $400-$700, making this DIY alternative highly economical. The 100 square foot coverage efficiently handles standard beds with material to spare for tailgates or wheel wells. Considering the epoxy-based durability advantage, the price represents a smart investment for long-term protection.
Strengths and Weaknesses: Pros include superior epoxy chemistry, excellent coverage area, rapid 24-hour curing time, professional-grade results, and versatile application to other surfaces. The anti-skid texture adds functional value. Cons include more complex preparation than basic roll-on products, potential odor during application, and requirement for precise mixing. Some users may find the epoxy formulation less flexible than urethane alternatives in extreme temperature fluctuations.
Bottom Line: The Rust-Oleum Professional Grade Kit excels for owners seeking spray-on quality without professional pricing. Its epoxy-based durability makes it ideal for trucks exposed to chemicals or heavy cargo. If you prioritize longevity and professional results, this kit delivers exceptional value and performance.
9. U-POL Raptor Black Urethane Spray-On Truck Bed Liner Kit, Protective Paint with Spray Gun, for Tailgates & Trucks, Vehicle Undercoating, 4 Quart Kit

Overview: The U-POL Raptor Kit represents a professional-grade urethane coating system that brings spray-on bed liner technology to the DIY enthusiast. This comprehensive 4-quart kit includes everything needed to protect a 6-8 foot truck bed: four 750ml bottles of black base, one liter of hardener, and a specialized spray gun. The 2K urethane formulation creates a flexible, impact-resistant barrier that reduces road noise while resisting stains, scratches, and UV degradation.
What Makes It Stand Out: The included spray gun and two-component urethane chemistry deliver authentic professional results unattainable with roll-on alternatives. The rapid-drying formula allows multiple coats within an hour, accelerating project completion. Its UV-resistant properties prevent fading, while the flexible nature accommodates temperature extremes without cracking. The system bonds directly to OEM paint and self-etching primer, ensuring superior adhesion.
Value for Money: At $142.98, this kit provides genuine professional-grade materials at approximately one-third the cost of commercial spray-on services. The inclusion of a quality spray gun eliminates equipment rental expenses. Covering 6-8 foot beds comprehensively, the per-foot cost remains competitive with premium roll-on kits while delivering superior finish quality and durability that justifies the investment.
Strengths and Weaknesses: Pros include professional spray application, rapid curing, exceptional durability, UV resistance, noise reduction properties, and complete kit convenience. The flexible urethane outperforms rigid coatings in harsh climates. Cons include requirement for an 8 CFM air compressor at 50-60 PSI, steeper learning curve for spray technique, and overspray management needs. The two-part mixing demands careful measurement.
Bottom Line: The U-POL Raptor Kit is ideal for serious DIYers with compressor access seeking professional spray-on results. The urethane chemistry and included spray gun create a durable, attractive finish that rivals commercial applications. Invest in this kit if you value premium protection and have the equipment and skills to maximize its potential.
10. Raptor Roll-On Bed Liner Kit, Truck Bed Liners, Long-Lasting Protection, Black, 1 Gallon

Overview: The Raptor Roll-On Bed Liner Kit offers a simplified approach to truck bed protection, delivering the trusted Raptor durability in a user-friendly, ready-to-use formula. This one-gallon kit covers approximately 65 square feet with two coats, making it ideal for 6-foot truck beds. The black textured coating creates an anti-skid surface that guards against impact, scratches, rust, and chemical spills while maintaining color vibrancy through harsh outdoor exposure.
What Makes It Stand Out: The roll-on application eliminates the complexity and equipment requirements of spray systems, making professional-grade protection accessible to novice users. The ready-to-use formula requires no mixing or special tools beyond basic rollers and brushes. This accessibility democratizes quality bed liner application while maintaining Raptor’s reputation for toughness and resilience in demanding environments.
Value for Money: At $89.99, this kit represents exceptional value for budget-conscious truck owners. It’s significantly less expensive than spray kits or professional services while delivering comparable chemical protection and durability. The coverage area aligns perfectly with smaller truck beds, minimizing waste. For users prioritizing function over flawless aesthetics, this kit maximizes protection per dollar spent.
Strengths and Weaknesses: Pros include straightforward application, no specialized equipment needed, excellent chemical and rust resistance, non-fading color technology, and strong brand reputation. The anti-skid finish enhances safety. Cons include less uniform texture compared to spray applications, longer drying times between coats, and potential for roller marks if applied improperly. Coverage is limited to smaller beds without purchasing additional material.
Bottom Line: The Raptor Roll-On Kit is perfect for first-time users and value-focused buyers seeking reliable protection without complexity. While the finish may lack spray-on refinement, the durability and ease of application make it an outstanding choice for practical truck owners. Choose this kit for hassle-free, effective bed protection on a budget.
Understanding SEM Pro-Tex Technology and Its Advantages
SEM Pro-Tex represents a polyurethane-based coating system engineered specifically for high-impact automotive applications. Unlike basic rubberized undercoatings, these formulations create a cross-linked molecular bond that cures into a flexible yet incredibly tough protective shell. The technology incorporates aliphatic compounds that resist UV degradation—a critical feature that prevents the chalking and fading that plagues lesser products after a few seasons in the sun.
What truly sets this category apart is the two-component catalyzed chemistry. When you mix the resin with the activator, you’re initiating a chemical reaction that continues long after the material feels dry to the touch. This creates a finish that won’t soften in summer heat or become brittle during winter freezes. For truck owners in extreme climates, this thermal stability translates to year-round protection that maintains its impact absorption properties whether you’re hauling in Arizona summers or Minnesota winters.
DIY Kit vs. Professional Installation: A Comprehensive Comparison
The professional spray-on bed liner industry has done an excellent job convincing truck owners that their proprietary equipment and booth-controlled environments are essential for quality results. While there’s no denying that experienced technicians produce exceptional work, modern DIY kits have closed the gap considerably—especially when you understand what you’re doing.
Cost represents the most obvious differentiator. Professional installations typically run between $500 and $1,000 depending on your region and truck size. A comprehensive SEM Pro-Tex kit, meanwhile, generally costs one-third to half that amount. But the savings extend beyond the initial price tag. DIY application means you control the schedule, can touch up damage immediately without another shop visit, and develop the skills to coat other vehicles or equipment in your stable.
The real trade-off comes down to equipment and environment. Shops use high-pressure, heated plural-component spray systems that atomize material for ultra-smooth finishes. Your DIY kit relies on simpler application methods, but with proper technique, you can achieve 90% of the professional aesthetic at a fraction of the cost. The key is recognizing that preparation accounts for 80% of the final result regardless of who applies it.
Essential Features to Look for in Quality Bed Liner Kits
When evaluating SEM Pro-Tex kits, several non-negotiable features separate premium formulations from budget disappointments. First, examine the solids content by volume. Quality kits contain 60-70% solids, meaning less material evaporates during curing and you build actual thickness with each coat. Low-solids products might seem easier to spray but require additional coats and ultimately provide inferior protection.
Second, investigate the pot life—the working time after mixing components. Premium kits offer 45-60 minutes before the material begins to set up in the cup. This window is crucial for beginners who need to work methodically without rushing. Shorter pot lives create panic-induced mistakes and wasted material.
Third, look for built-in flexibility modifiers. The best formulations include plasticizers that allow the cured liner to elongate 200-300% without tearing. This flexibility prevents cracking when heavy loads impact the bed or when the truck frame flexes off-road. Check technical data sheets for elongation-at-break specifications—anything above 150% indicates a quality formulation.
Coverage Area Calculations: Getting the Right Kit Size
Nothing derails a bed liner project faster than running out of material mid-application. Coverage claims on packaging can be misleading because they assume ideal conditions on perfectly smooth surfaces. Your truck bed is anything but smooth, with ribs, corrugations, and stake pockets that increase surface area by 30-40%.
Start by calculating your bed’s square footage: length × width. A standard 6.5-foot bed measures roughly 50 square feet. However, you must factor in the bed walls, tailgate face, and any areas you plan to coat. Most full-size trucks require coating 80-100 square feet total. Then add the texture multiplier—aggressive textures require 20% more material than smooth applications.
Kit sizing typically follows three categories: small (up to 30 sq ft for touch-ups), medium (60-80 sq ft for compact trucks), and large (100+ sq ft for full-size long beds). When in doubt, size up. Having extra material for touch-ups, the underside of bed caps, or even rocker panels is infinitely better than watching your final coat dry with bare spots remaining.
Texture and Finish Options: Matching Your Needs and Style
The texture you choose dramatically impacts both aesthetics and functionality. SEM Pro-Tex systems offer versatility through application technique rather than separate product lines. By adjusting spray pressure, distance, and material viscosity, you can create finishes ranging from smooth satin to aggressive non-slip texture.
Smooth finishes excel for owners who frequently slide heavy items in and out of the bed. The reduced friction protects both cargo and the liner itself from abrasion. However, smooth surfaces become slippery when wet and show scratches more readily. They’re also more challenging to apply uniformly without professional equipment.
Aggressive textures provide superior grip for standing in the bed and prevent cargo from shifting during transport. The peaks and valleys in the coating create a self-cleaning effect as water drains through the texture. The downside? Cleaning dried mud from deep textures requires more effort, and the rough surface can scuff delicate cargo.
The sweet spot for most truck owners is a medium texture—often called “orange peel” or “eggshell.” This finish offers enough grip for safety while remaining cleanable and cargo-friendly. Achieving this consistency requires practice on cardboard before touching your truck, but the results justify the learning curve.
UV Resistance: Protecting Against Sun Damage and Fading
Sunlight is the silent killer of truck bed liners. UV radiation breaks down polymer chains, causing color fade, surface chalking, and eventual brittleness. This degradation isn’t merely cosmetic—compromised UV resistance leads to cracking and delamination within 2-3 years in sunny climates.
Quality SEM Pro-Tex formulations incorporate aliphatic urethane chemistry, which inherently resists UV attack. Aromatic systems, while cheaper and tougher initially, turn yellow and chalk within months of sun exposure. The difference is molecular: aliphatic compounds contain stable ring structures that don’t break down under UV bombardment.
For maximum protection, consider kits with built-in UV stabilizers and absorbers. These additives work like sunscreen for your liner, sacrificing themselves to protect the underlying polymer. Even with these protections, applying a UV-specific clear coat over colored liners adds another defense layer. This is especially critical for non-black colors, which show fading more dramatically.
Chemical Resistance: Standing Up to Real-World Abuse
Your truck bed encounters more than just physical impacts. Gasoline, diesel, motor oil, hydraulic fluid, battery acid, and organic solvents from mulch or compost all wage chemical warfare on protective coatings. A liner that can’t resist these attacks will soften, swell, or peel when you need it most.
Test data matters here. Quality SEM Pro-Tex kits resist common automotive chemicals for 24-72 hours without noticeable degradation. This doesn’t mean you should let spills sit indefinitely, but it provides a safety window for cleanup. Pay particular attention to resistance against xylene and MEK—common solvents in automotive products that dissolve lesser coatings.
The cross-link density of the cured polymer determines chemical resistance. Higher cross-linking creates a tighter molecular mesh that blocks chemical penetration. Two-component catalyzed systems achieve this naturally, but the degree varies by formulation. For heavy chemical exposure (think: contractor trucks), consider adding a chemical-resistant topcoat specifically designed for industrial applications.
The Science of Proper Surface Preparation
Preparation is where DIY projects succeed or fail, yet it’s the most rushed step. The bond between liner and metal depends entirely on creating a mechanically and chemically receptive surface. This means removing not just dirt, but also factory waxes, rust inhibitors, and oxidation layers that prevent adhesion.
Start with a thorough degreasing using a wax-and-grease remover—not just soap and water. Follow with 180-grit sandpaper across every surface you plan to coat. This creates the microscopic scratches that give the liner “teeth” to grip. For previously painted beds or those with factory coatings, step up to 80-grit to ensure you’re cutting through to bare metal or a stable substrate.
Rust treatment is non-negotiable. Even flash rusting that occurs during sanding must be addressed with a phosphoric acid-based metal prep solution. These products convert iron oxide to iron phosphate, creating a stable, paintable surface. Skipping this step means encapsulating rust, which continues spreading beneath your beautiful new liner until it bubbles and peels.
Required Tools and Equipment Checklist
While SEM Pro-Tex kits include the coating material and basic instructions, achieving professional results demands additional tools. Your shopping list should include: a quality respirator with organic vapor cartridges (not just a dust mask), nitrile gloves rated for chemical resistance, safety glasses, and painter’s coveralls.
For application, invest in a dedicated texture spray gun if your kit doesn’t include one. These guns feature larger fluid nozzles (1.8-2.2mm) and adjustable fan patterns that accommodate thick bed liner material. Cheap guns clog constantly and produce uneven textures. A quality gun pays for itself in reduced frustration and material waste.
Beyond spraying, you’ll need masking supplies: 3M automotive masking tape, plastic sheeting, and paper to protect your truck’s exterior. A die grinder with wire wheels speeds rust removal, while a DA sander ensures uniform substrate prep. Finally, grab a roll of 30-grit abrasive discs—these create the ideal texture for maximum adhesion on large flat areas.
Professional Application Techniques for DIYers
The difference between amateur and professional results often comes down to technique, not equipment. Start by practicing your spray pattern on cardboard or scrap metal. You’re aiming for a 50% overlap on each pass, maintaining a consistent 12-16 inch distance from the surface. Move parallel to the bed floor, not in arcs, to avoid uneven buildup.
Apply material in thin, multiple coats rather than one heavy coat. The first coat should be a light “tack” coat that just covers the surface—this prevents runs and creates a foundation for subsequent layers. Wait 10-15 minutes between coats for solvent flash-off. Your second and third coats build thickness, while a final light coat ensures uniform texture and color.
Temperature dramatically affects flow and cure. Ideal application occurs between 65-75°F with humidity below 60%. In cooler conditions, material thickens and won’t atomize properly. In excessive heat, solvents flash too quickly, creating a textured “orange peel” before the material can level. Use a non-contact infrared thermometer to monitor substrate temperature—it should match ambient conditions within 5°F.
Curing Times and Post-Application Best Practices
Patience during curing separates durable liners from premature failures. While the surface may feel dry within 2-4 hours, the chemical cross-linking process continues for 5-7 days. During this window, the liner remains vulnerable to chemical attack and physical damage. Avoid loading cargo for at least 72 hours, and keep the truck out of rain or dew during the first 24 hours.
Heat accelerates curing. If possible, move the truck into direct sunlight after the initial tack-free stage (4-6 hours). The infrared energy penetrates the coating, driving the chemical reaction to completion faster. In winter conditions, consider using space heaters to maintain 70°F in the garage for the first 48 hours.
Post-cure inspection is critical. Run your hand across the surface feeling for thin spots or missed areas. The liner should have uniform texture and thickness. Use a flashlight at a low angle to highlight imperfections. Touch-ups are easiest within 24 hours of the final coat—after that, you’ll need to sand and re-coat entire sections for proper adhesion.
Common Mistakes That Ruin Bed Liner Applications
Even experienced painters make errors when working with bed liner materials. The number one mistake is insufficient material buildup. Many DIYers stop at one or two coats, achieving only 10-15 mils of thickness. Quality applications require 40-60 mils (about the thickness of a dime) for proper impact protection. This means 3-4 coats minimum.
Overspray contamination ranks second. That fine mist of atomized liner material travels surprising distances, landing on windows, paint, and trim where it bonds permanently. Always mask beyond what seems necessary—cover at least 12 inches of exterior paint around the bed rails. Use a spray shelter or create a temporary booth with plastic sheeting to contain overspray.
Third is ignoring pot life. Once mixed, the material begins curing in the cup. Pushing beyond the recommended working time results in thick, stringy material that clogs guns and creates cobweb-like textures. Mix only what you can apply in 30-40 minutes. It’s better to mix small batches frequently than to waste a large batch that cures before you can spray it.
Maintenance and Cleaning Guidelines
A properly applied SEM Pro-Tex liner is low-maintenance, not no-maintenance. Regular cleaning prevents chemical buildup and extends service life. Use a pressure washer with a fan tip—not a pinpoint nozzle that could theoretically damage the texture. Keep pressure below 2,000 PSI and maintain a 12-inch distance.
For stubborn stains, avoid harsh solvents. Instead, use a degreasing detergent and a stiff-bristle brush. The texture will naturally hide minor staining, but oil and hydraulic fluid should be cleaned within 24 hours to prevent long-term discoloration. For organic stains from leaves or mulch, a diluted bleach solution (10:1 water-to-bleach) works wonders without harming the liner.
Inspect your liner quarterly for damage. Pay special attention to high-impact zones like the bulkhead and tailgate face. Small chips can be touched up by cleaning the area, scuffing with 180-grit paper, and applying a thin coat of fresh material. Addressing damage early prevents rust from gaining a foothold beneath the liner.
Budget Breakdown: True Cost of DIY vs. Pro Installation
The sticker price of a SEM Pro-Tex kit tells only part of the financial story. A premium kit runs $150-$250, but add another $100-$150 for essential tools and supplies if you’re starting from scratch. Even then, you’re looking at $300-$400 total investment versus $600-$1,000 for professional installation.
Factor in your time: preparation takes 4-6 hours, application another 3-4 hours, and cleanup 1 hour. That’s a full day invested. But consider the hidden costs of professional work—shop scheduling, dropping off your truck, and potential downtime. For many owners, the convenience of working on their own schedule justifies the time investment.
Long-term economics favor DIY for multiple vehicles. Once you’ve invested in quality spray equipment and mastered the technique, subsequent applications cost only the kit itself. Many enthusiasts pool resources, buying materials in bulk to coat several trucks over a weekend. The learning curve pays dividends across your entire fleet.
Warranty and Manufacturer Support Evaluation
Warranty coverage varies dramatically between manufacturers. Premium SEM Pro-Tex kits typically offer 3-5 year warranties against cracking, peeling, and fading—provided you follow their preparation and application instructions precisely. This is crucial: deviate from their specs and you’ve voided the warranty.
Read the fine print regarding substrate coverage. Most warranties only apply to properly prepared bare metal or original factory coatings. If you’re applying over a previous bed liner or unknown paint, coverage may be limited or excluded entirely. Document your process with photos showing each preparation step. In warranty claims, this documentation proves you followed procedures.
Manufacturer support quality matters as much as warranty length. Look for companies offering technical hotlines staffed by actual chemists or experienced applicators, not just customer service reps reading scripts. The best manufacturers provide detailed technical data sheets (TDS) and safety data sheets (SDS) that specify exact performance parameters and application parameters.
Environmental Conditions and Application Timing
Weather can make or break your application. Ideal conditions are 70°F and 50% humidity with light wind. Temperatures below 60°F slow curing and prevent proper cross-linking. Above 85°F, solvents flash too quickly, causing texture inconsistencies and potential dry spray that won’t bond.
Humidity affects solvent evaporation and cure rate. High humidity (above 70%) extends drying times and can cause blush—a cloudy appearance in the finish. Low humidity (below 30%) accelerates flashing, making it difficult to maintain a wet edge. Check the dew point: if it’s within 5°F of ambient temperature, moisture will condense on your fresh liner, causing defects.
Wind is your enemy outdoors. Even a 5 mph breeze carries overspray to unwanted areas and can cause material to skin over before it lands. If you must work outside, create a windbreak with tarps and spray early morning or late afternoon when winds are calm. Better yet, rent a temporary spray shelter or borrow a garage for the day.
Comparing Application Methods: Spray, Roll, and Brush
While spray application delivers the most uniform texture and professional appearance, rolling and brushing remain viable options for specific situations. Rolling works exceptionally well for bed floors and tailgates—flat areas where texture consistency is easier to maintain. Use a high-density foam roller with a 3/8-inch nap and work in small sections, maintaining a wet edge.
Brushing excels for touch-ups and hard-to-reach areas like stake pockets and corners. Use a high-quality natural bristle brush and apply with a cross-hatch pattern—vertical strokes followed by horizontal strokes—to eliminate brush marks and ensure even coverage. Never brush large areas; the texture will never match sprayed sections.
Hybrid approaches often yield the best DIY results. Spray the bulk of the bed for uniform texture, then use a brush or roller for areas where overspray is problematic or where the spray gun can’t reach. The key is working quickly while the material is still wet enough to blend. Keep a brush damp with thinner to smooth transitions between application methods.
Frequently Asked Questions
How long does a SEM Pro-Tex bed liner typically last before needing reapplication?
With proper application and maintenance, a quality SEM Pro-Tex liner delivers 7-10 years of service life in moderate climates. Harsh environments with extreme UV exposure or chemical contamination may require touch-ups at 5-7 years. The liner doesn’t “wear out” uniformly—high-impact zones like the bulkhead and tailgate show degradation first. Annual inspections let you address these areas before widespread failure occurs.
Can I apply SEM Pro-Tex over an existing bed liner or damaged surface?
Application over intact, well-adhered factory coatings is acceptable with proper scuffing. However, applying over existing aftermarket liners is risky. These surfaces often contain silicones or incompatible polymers that prevent bonding. For damaged surfaces, remove all loose material and feather-edge surrounding areas with 80-grit paper. Exposed rust must be treated with phosphoric acid-based converters. When in doubt, strip to bare metal—it’s the only guarantee of adhesion.
What’s the realistic drying time before I can use my truck normally?
While the liner feels dry to the touch in 4-6 hours, chemical curing continues for 7 days. Light use is possible after 48 hours, but avoid placing heavy objects or dragging cargo across the surface for a full week. Chemical resistance develops gradually; wait at least 72 hours before exposing the liner to gasoline, oil, or solvents. For maximum durability, keep the truck in a warm, dry environment during the first week.
How does SEM Pro-Tex compare to other popular DIY bed liner brands?
SEM Pro-Tex formulations emphasize UV stability and flexibility, making them ideal for trucks exposed to harsh sunlight and temperature swings. They typically offer higher solids content than budget brands, meaning you build thickness faster. The primary differentiator is the two-component catalyzed chemistry, which provides superior chemical resistance compared to single-component moisture-cure products. Application characteristics are similar across premium brands, but SEM’s technical support and documentation are particularly comprehensive.
Can I repair a damaged section without recoating the entire bed?
Yes, but blending is challenging. Clean the damaged area thoroughly and scuff with 180-grit paper, extending 2-3 inches beyond the damage. Apply thin coats feathering into the surrounding texture. The repair will be noticeable up close but functional. For best aesthetics, mask a defined area (like a bed section between ribs) and recoat that entire zone. This creates a deliberate pattern that looks intentional rather than patchy.
What safety equipment is absolutely essential during application?
At minimum, you need a NIOSH-approved respirator with organic vapor cartridges and particulate filters—not just a dust mask. Nitrile gloves rated for chemical resistance protect against skin absorption, while safety glasses with side shields prevent eye contact. Long sleeves and disposable coveralls protect your skin from overspray that causes dermatitis. Work in a well-ventilated area; isocyanates in the hardener can cause respiratory sensitization with repeated exposure.
How do temperature and humidity affect the final finish quality?
Temperature below 60°F prevents proper cross-linking, resulting in a soft, tacky finish that never fully cures. Temperatures above 85°F cause solvents to evaporate too quickly, creating a rough, dry-spray texture with poor adhesion. Humidity above 70% extends cure time and can cause blush—a cloudy, milky appearance in the finish. Ideal conditions are 65-75°F with 40-60% relative humidity. Use a hygrometer and thermometer to monitor conditions throughout application.
Is it possible to achieve a smooth, glossy finish rather than textured?
While SEM Pro-Tex is formulated for textured applications, you can achieve a smoother finish by thinning the material 10-15% with the manufacturer’s recommended reducer and applying multiple thin coats. However, this reduces impact resistance and defeats the purpose of a bed liner. For a glossy smooth look, consider applying the standard texture, then topcoating with a polyurethane clear coat after full cure. This provides the best of both worlds—durability underneath and aesthetics on top.
How much material waste should I anticipate during application?
Plan for 10-15% material loss through overspray, gun purging, and mixing. This means a kit rated for 100 square feet effectively covers 85-90 square feet in real-world conditions. Inexperienced users waste more through improper gun adjustment and excessive overlap. Practice on cardboard to dial in your spray pattern before touching the truck. Mix small batches initially; you can always mix more, but you can’t salvage material that cures in the cup.
Can SEM Pro-Tex be used on surfaces other than truck beds?
Absolutely. The same properties that protect truck beds make it ideal for rocker panels, lower door sections, trailer interiors, utility vehicle beds, and even garage floors. The key is surface preparation and realistic expectations about appearance. On vertical surfaces, expect more texture variation due to gravity. For garage floors, add anti-skid aggregate to the final coat. Always test adhesion on a small, inconspicuous area first, especially on plastics or composites that may require special primers.