Your vehicle’s paintwork faces a daily assault from UV rays, acid rain, industrial fallout, and road grime that can transform a showroom finish into a dull, oxidized surface in just a few seasons. While regular washing helps, it’s akin to rinsing off sunscreen at the beach—you’re removing contaminants but not building lasting protection. This is where automotive paint sealants step in as your vehicle’s invisible armor, creating a sacrificial barrier that locks in gloss while locking out damage.
Unlike traditional carnauba waxes that melt away after a few washes, modern sealants leverage advanced polymer chemistry to deliver months—even years—of protection. But with countless formulations flooding the market, each promising “maximum protection,” how do you separate genuine innovation from marketing hype? This comprehensive guide cuts through the noise, equipping you with the knowledge to evaluate sealants like a professional detailer and make informed decisions based on your vehicle’s needs, your climate, and your maintenance habits.
Top 10 Sealants
Detailed Product Reviews
1. Flex Seal, 14 oz, Clear, Stop Leaks Instantly, Transparent Waterproof Rubber Spray On Sealant Coating, Perfect for Gutters, Wood, RV, Campers, Roof Repair, Skylights, Windows, and More

Overview: Flex Seal Clear Spray delivers a unique approach to sealing leaks with its aerosol application. This 14-ounce can promises instant leak stoppage through a transparent, rubberized coating that adheres to gutters, wood, RVs, roofs, and various surfaces. The spray-on format allows for quick coverage of cracks and holes without requiring specialized tools, making it accessible for emergency repairs and general maintenance.
What Makes It Stand Out: The aerosol delivery system sets it apart from traditional tube sealants, seeping into hard-to-reach cracks effortlessly. Its transparent finish remains paintable once cured, while maintaining flexibility across extreme temperatures—resisting sagging in summer heat and preventing cracks in winter cold. The ability to apply on wet or dry surfaces adds critical versatility for emergency repairs when conditions aren’t ideal.
Value for Money: At $14.87 ($1.06 per ounce), it competes well with conventional sealants when factoring in convenience. The 14-ounce quantity handles multiple small projects or one substantial repair, eliminating the need for caulking guns or additional tools. For DIYers seeking quick, tool-free solutions, the time savings justify the moderate price point, especially when addressing hard-to-reach areas.
Strengths and Weaknesses: Pros include effortless spray application, exceptional temperature resistance, wet/dry surface compatibility, and paintable transparent finish. Cons involve potential overspray requiring masking, need for adequate ventilation, less precision than tube applicators, and possible multiple coat requirements for deeper cracks. The rubberized coating may not suit all aesthetic preferences.
Bottom Line: Flex Seal excels for rapid, tool-free repairs on irregular surfaces and emergency situations. While not replacing precision caulk work, it’s invaluable for homeowners needing a versatile, grab-and-go sealing solution that performs reliably across seasons.
2. GE Advanced Silicone Caulk for Kitchen & Bathroom, Clear, 2.8 fl oz Tube, 1 Pack - 100% Waterproof Silicone Sealant, 5X Stronger Adhesion, Shrink & Crack Proof

Overview: GE Advanced Silicone Caulk provides targeted waterproofing for kitchen and bathroom applications. This 2.8-ounce tube delivers a 100% silicone formula designed for areas facing constant water exposure, offering professional-grade protection in a compact size that prevents waste for small-scale projects.
What Makes It Stand Out: The 30-minute water-ready feature dramatically accelerates project completion, while the 5X stronger adhesion claim ensures lasting bonds. Its shrink-proof and crack-proof formulation withstands temperature fluctuations without failing. The 100% silicone composition guarantees ultimate flexibility and durability, maintaining a watertight seal even in steamy bathroom conditions.
Value for Money: At $6.17 ($0.51 per count), this represents exceptional value for small-scale projects. The modest tube size prevents waste when repairing sink edges, shower corners, or backsplash gaps. Compared to larger cartridges that dry out between uses, this format ensures fresh product for occasional repairs, saving money long-term for infrequent DIYers.
Strengths and Weaknesses: Pros include rapid curing time, superior adhesion, permanent flexibility, true 100% silicone formulation, and broad material compatibility including metals, plastics, and tile. Cons comprise the small 2.8-ounce capacity limiting larger projects, requirement for a caulk gun, strong odor during curing, and potential waste for users needing frequent applications.
Bottom Line: This GE silicone is perfect for targeted bathroom and kitchen touch-ups. The fast cure time and reliable performance make it ideal for homeowners tackling intermittent sealing tasks without committing to bulk quantities that may expire before use.
3. Miracle Sealants 511 Impregnator Advanced Penetrating Sealer for Countertops, Stone, Tile & Grout, Quart
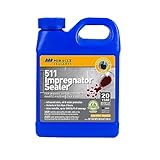
Overview: Miracle Sealants 511 Impregnator delivers professional-grade protection for porous surfaces. This quart-sized penetrating sealer safeguards countertops, stone, tile, and grout through advanced impregnating technology that creates invisible barriers against moisture and stains while preserving natural appearance.
What Makes It Stand Out: The SCS Certified Indoor Advantage Gold certification distinguishes it for health-conscious consumers, ensuring minimal VOC emissions. Its food-safe formulation permits use on kitchen surfaces without contamination concerns. The penetrating action works below the surface rather than creating a topical film, providing superior coverage per quart while maintaining the substrate’s natural look and breathability.
Value for Money: At $29.99 ($0.94 per fluid ounce), the initial investment appears steep but proves economical for large areas. A single quart can cover up to 1,000 square feet depending on porosity, translating to pennies per square foot. For stone countertops or extensive tile work, professional application would cost substantially more, making DIY treatment highly cost-effective.
Strengths and Weaknesses: Pros include indoor air quality certification, food-safe composition, interior/exterior versatility, weather resistance, and exceptional coverage rates. Cons involve the higher upfront cost, requirement for careful application and buffing, periodic reapplication needs every 1-3 years, and specificity to porous materials rather than general sealing tasks.
Bottom Line: For protecting natural stone and grout, Miracle Sealants 511 is worth every penny. The health certifications and professional results make it a wise investment for premium surfaces where longevity and safety matter most, particularly in kitchens and bathrooms.
4. Permatex 80050 Clear RTV Silicone Adhesive Sealant, 3 oz

Overview: Permatex 80050 Clear RTV Silicone Adhesive Sealant offers professional versatility in a compact 3-ounce tube. This general-purpose sealant handles automotive, household, and hobbyist applications with a sensor-safe formula that bonds and seals multiple materials effectively while resisting vibration and weather extremes.
What Makes It Stand Out: The extreme temperature range from -75°F to 400°F sets it apart for demanding environments. Its sensor-safe designation means it won’t interfere with electronic components, expanding its utility for automotive sensor repairs and electrical protection. The professional-grade formulation delivers flexibility while resisting water, weather, and vibration across diverse applications.
Value for Money: At $5.84 ($1.95 per ounce), this represents remarkable professional quality at a DIY price point. The 3-ounce size suits small repairs without waste, while the performance rivals industrial products costing significantly more. For automotive enthusiasts and hobbyists, the specialized features deliver outstanding ROI, particularly for high-heat or electronic applications.
Strengths and Weaknesses: Pros include extreme temperature tolerance, sensor-safe formulation, waterproof flexibility, multi-material adhesion, and vibration resistance. Cons feature the small tube size limiting project scope, requirement for a caulk gun, unsuitability for engine gasket applications (despite high temp rating), and potential curing issues on contaminated surfaces requiring thorough cleaning.
Bottom Line: Permatex RTV excels for automotive and electronic applications where temperature extremes matter. Its professional formulation and unbeatable price make it essential for DIY mechanics and hobbyists needing reliable, specialized performance beyond what standard household sealants offer.
5. Flex Caulk, Waterproof & Weatherproof Hybrid Polymer Sealant, Strong, Paintable, Indoor, Outdoor, Bath, Shower, Sink, Window, Baseboards, Door, RV, Roof, Wood, Auto & Marine, Clear, 6.6 oz, 1-Pack

Overview: Flex Caulk revolutionizes sealant application with its hybrid polymer formulation and tool-free design. This 6.6-ounce cartridge eliminates the traditional caulk gun requirement, offering convenience for indoor and outdoor sealing projects from bathrooms to RV roofs, making it accessible to users without specialized equipment.
What Makes It Stand Out: The adjustable trigger flow nozzle provides precise control without additional tools, while the Snap & Save cap prevents drying between uses—addressing the most common caulk waste issue. The advanced hybrid polymer combines silicone’s flexibility with polyurethane’s adhesion strength, creating a paintable, waterproof, and weatherproof seal that performs across diverse materials and conditions.
Value for Money: At $19.87 ($3.01 per fluid ounce), the premium pricing reflects convenience rather than volume. For occasional users who lack a caulk gun, it eliminates a $10-15 tool purchase. The resealable cap ensures zero waste, potentially saving money over traditional tubes that harden after single use, making it cost-effective for infrequent repairs.
Strengths and Weaknesses: Pros include tool-free application, adjustable flow control, resealable cap, hybrid polymer performance, and versatile indoor/outdoor use. Cons involve high per-ounce cost, limited 6.6-ounce capacity for large projects, and newer product with less long-term performance data compared to established brands with decades of track records.
Bottom Line: Flex Caulk is ideal for occasional DIYers prioritizing convenience over cost. The innovative applicator and waste-free design justify the premium for homeowners needing a grab-and-go solution without investing in specialized tools they’ll rarely use.
6. Gorilla Waterproof Caulk & Seal Silicone Sealant, 10oz Cartridge (Pack of 1) - White Caulking Sealant for Kitchen, Window, Bath, Marine, Door and More

Overview: The Gorilla Waterproof Caulk & Seal in white delivers professional-grade sealing performance for homeowners and contractors alike. This 10-ounce cartridge provides a versatile solution for kitchens, bathrooms, windows, marine applications, and doors. Formulated with 100% silicone, it creates a durable, waterproof barrier that withstands indoor and outdoor conditions once fully cured.
What Makes It Stand Out: The 30-minute water exposure readiness sets this product apart from conventional caulks that often require 24-48 hours. This rapid curing time minimizes project delays and allows for faster completion. The “Gorilla tough” formulation lives up to its name with exceptional mold and mildew resistance, plus it maintains its integrity without yellowing, shrinking, or cracking over time. Its all-purpose design works in any weather condition after curing, making it truly versatile.
Value for Money: At $7.02 for 10 ounces ($0.70 per ounce), this caulk offers excellent value for a premium brand. The price point is competitive with mid-tier sealants while delivering superior performance characteristics. Considering its longevity and durability, you’re investing in a product that won’t need frequent reapplication, saving money long-term compared to cheaper alternatives that fail prematurely.
Strengths and Weaknesses: Strengths include rapid 30-minute water readiness, excellent mold resistance, permanent flexibility, and true all-weather performance. The white finish provides a clean, classic look for most applications. Weaknesses include the requirement for a caulk gun, which adds to initial tool investment for DIYers. The white color may not suit every aesthetic, particularly with natural stone or wood finishes where a clear option would be preferable.
Bottom Line: This white silicone sealant is an outstanding choice for most standard caulking projects. Its fast curing time and durable formulation make it ideal for both quick fixes and long-term installations. Recommended for anyone needing reliable, professional results.
7. Gorilla Waterproof Caulk & Seal Silicone Sealant, 10oz Cartridge (Pack of 1) - Clear Caulking Sealant for Kitchen, Window, Bath, Marine, Door and More
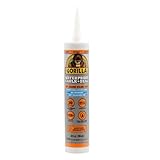
Overview: The clear version of Gorilla’s flagship caulk offers the same robust performance as its white counterpart while providing an invisible seal that blends seamlessly with any surface. This 10-ounce cartridge delivers 100% silicone protection for kitchens, bathrooms, windows, marine applications, and doors where appearance matters as much as functionality.
What Makes It Stand Out: The crystal-clear formulation maintains transparency permanently without yellowing—a common failure point in lesser clear caulks. Like its white sibling, it achieves water exposure readiness in just 30 minutes, dramatically reducing project downtime. The mold and mildew resistance ensures long-lasting clarity in high-moisture environments like showers and tubs where discoloration typically occurs.
Value for Money: Priced at $9.84 ($0.98 per fluid ounce), the clear variant commands a premium over the white version, which is standard industry practice. While 40% more expensive, the aesthetic benefits for visible joints on natural materials, glass, or metal justify the cost. For applications where appearance is critical, this upcharge represents good value compared to re-caulking with an inferior product later.
Strengths and Weaknesses: Major strengths include the non-yellowing clear formula, rapid curing, superior flexibility, and comprehensive mold resistance. It adheres well to most common building materials. The primary weakness is the higher price point compared to white caulk. Additionally, it requires a caulk gun for application, and the clear finish can highlight application imperfections if not tooled carefully.
Bottom Line: Choose this clear sealant when aesthetics are paramount. The premium price is justified by its lasting clarity and performance. Perfect for visible seams on varied surfaces where white would be obtrusive.
8. Gorilla Waterproof Patch & Seal Rubberized Sealant Spray, Crystal Clear, 14 Ounce (Pack of 1) - Seals Out Water, Air, and Moisture

Overview: This innovative spray-on sealant diverges from traditional caulk tubes, offering a rubberized coating that conforms to any shape. The 14-ounce aerosol can applies a flexible, waterproof membrane ideal for irregular surfaces, large areas, and emergency repairs on roofs, gutters, skylights, flashing, chimneys, and RVs.
What Makes It Stand Out: The spray application eliminates the learning curve associated with caulk guns and tooling. Its self-leveling property ensures even coverage over gaps and cracks without manual smoothing. The rubberized coating remains flexible across temperature extremes and resists UV degradation. Uniquely, it’s paintable with both latex and oil-based paints (when primed), offering finishing versatility rare in silicone products.
Value for Money: At $14.94 for 14 ounces, the per-ounce cost is higher than cartridge caulk, but the application speed and convenience offset this for suitable projects. For sealing large, irregular areas like corrugated roofing or gutter seams, the time saved makes it economically sensible. However, for precise joint work, the waste from overspray reduces its cost-effectiveness.
Strengths and Weaknesses: Strengths include effortless application, excellent flexibility, UV resistance, and paintability. It’s ideal for hard-to-reach areas and emergency repairs. Weaknesses include limited precision, potential overspray mess, and unsuitability for fine finish work like bathroom tile joints. The aerosol format also means you can’t save partial cans indefinitely.
Bottom Line: Best suited for specific applications where spray convenience outweighs precision needs. Excellent for roofing, gutter maintenance, and outdoor repairs. Not a replacement for traditional caulk in finished interior spaces.
9. Gorilla 100% Silicone Caulk, Waterproof Sealant, 2.8oz Squeeze Tube (Pack of 2) – Clear -10 Year Mold Resistant Kitchen, Window, Bath, Marine, Door and More
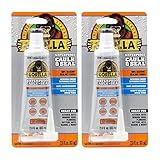
Overview: This twin-pack of squeeze tubes delivers Gorilla’s trusted silicone sealant in a convenient, tool-free format. Each 2.8-ounce tube is perfect for small-scale projects, touch-ups, and DIYers who don’t own a caulk gun. The clear formulation provides versatile application across countless surfaces including windows, doors, fixtures, countertops, sinks, showers, and marine environments.
What Makes It Stand Out: The squeeze tube design democratizes professional sealing, allowing anyone to achieve precise application without equipment investment. The 10-year mold resistance guarantee exceeds many competitors, promising a decade of pristine performance. Like larger cartridges, it achieves water exposure readiness in 30 minutes and maintains permanent flexibility without yellowing, shrinking, or cracking.
Value for Money: At $12.68 for two tubes (5.6 ounces total), the per-ounce cost is significantly higher than cartridge versions. However, the convenience factor and elimination of caulk gun purchase ($5-15) make it cost-effective for occasional users. The two-pack format allows multiple small projects or keeps a spare handy. For renters and DIY novices, this represents accessible quality.
Strengths and Weaknesses: Strengths include portability, no-tool application, precise control for small joints, and the same durability as larger versions. The 10-year mold guarantee provides exceptional peace of mind. Weaknesses include limited volume for large projects, higher per-ounce cost, and hand fatigue during extended application compared to gun-triggered dispensing.
Bottom Line: Perfect for small jobs, quick repairs, and users without caulk guns. The convenience justifies the premium price for occasional use. Keep a pack in your home maintenance kit for emergency leaks and touch-ups.
10. GE All Purpose Silicone Caulk, Clear, 10 fl oz Cartridge, 1 Pack - 100% Waterproof Silicone Sealant, Stronger Adhesion, Freeze & Sun Proof

Overview: GE’s entry into the all-purpose silicone market provides a formidable alternative to Gorilla products. This 10-fluid-ounce clear cartridge delivers 100% waterproof protection with enhanced adhesion properties. Designed for both exterior and interior applications, it withstands harsh weather conditions including freezing temperatures and direct sunlight.
What Makes It Stand Out: The “Same-Day Rain-Ready” feature in just 12 hours is impressive, though slower than Gorilla’s 30-minute claim. GE emphasizes “Stronger Adhesion” specifically, making it ideal for challenging surfaces. Its broad material compatibility includes metals, woods, glass, drywall, plaster, granite, cultured marble, ceramic tile, natural stone, cement board, composites, and more—one of the most comprehensive lists available.
Value for Money: At $8.01 for 10 ounces, this caulk is priced competitively between Gorilla’s white and clear cartridges. The GE brand carries decades of sealant expertise, offering comparable quality at a mid-range price point. For professionals who prioritize proven adhesion over ultra-fast curing, this represents solid value.
Strengths and Weaknesses: Strengths include excellent adhesion, comprehensive material compatibility, freeze/sun resistance, and reliable same-day rain readiness. The clear formula resists yellowing. Weaknesses include the 12-hour wait time versus Gorilla’s 30 minutes, which matters for time-sensitive projects. Like other cartridges, it requires a caulk gun, and the GE brand may have less “tough” marketing appeal than Gorilla.
Bottom Line: A dependable, professional-grade alternative to Gorilla with slightly different performance priorities. Choose GE when adhesion confidence on varied substrates is your primary concern. The 12-hour cure time is reasonable for most projects.
Understanding Automotive Paint Sealants
What Are Paint Sealants?
Paint sealants are synthetic polymer-based protective coatings designed to bond with your vehicle’s clear coat at a molecular level. Think of them as liquid plastic that cross-links and hardens into a durable, transparent shield. Unlike organic waxes derived from natural carnauba, sealants are engineered in laboratories to provide consistent performance across extreme temperature ranges, resist chemical degradation, and maintain hydrophobic properties for extended periods.
The active ingredients typically include acrylic resins, amino-functional silicones, and cross-linking polymers that create a three-dimensional matrix on your paint surface. This matrix doesn’t just sit on top—it forms a semi-permanent attachment that requires mechanical abrasion or chemical strippers to remove, ensuring your protection won’t wash away with the next rainstorm.
How Sealants Differ from Waxes and Ceramic Coatings
The detailing world often blurs these lines, but the distinctions are critical for setting realistic expectations. Carnauba waxes excel at delivering warm, deep gloss and are incredibly forgiving during application, but their organic nature makes them vulnerable to heat, detergents, and environmental pollutants. Most waxes degrade within 4-6 weeks, making them high-maintenance options for daily drivers.
Ceramic coatings represent the premium tier—true nanotechnology that forms a semi-permanent, crystalline layer measured in microns. They offer 2-5 years of protection but demand meticulous surface preparation, controlled application environments, and professional installation for optimal results. The margin for error is razor-thin.
Sealants occupy the sweet spot: synthetic durability approaching ceramics with application forgiveness closer to waxes. They’re the workhorse choice for enthusiasts who want 6-12 months of robust protection without the complexity or cost of ceramic coatings. Many modern “hybrid” sealants even incorporate SiO2 (silicon dioxide) to bridge this gap further.
The Science Behind Molecular Bonding
Premium sealants don’t just dry on your paint—they chemically bond through a process called cross-linking. When applied, the polymers remain fluid enough to flow into microscopic pits and pores in your clear coat. As solvents evaporate, polymer chains link together, creating a covalent bond with the paint surface. This isn’t a physical grip but a chemical marriage that explains why properly applied sealants resist pressure washing and harsh detergents.
The bonding process is temperature and humidity-dependent, which is why application instructions specify optimal conditions. Too cold, and the polymers won’t have enough energy to cross-link effectively. Too humid, and moisture can interfere with the bonding sites, leading to premature failure or uneven curing.
Why Your Vehicle Needs Professional-Grade Protection
Environmental Contaminant Defense
Your daily commute exposes your paint to a cocktail of contaminants that etch, stain, and embed themselves in the clear coat. Brake dust contains metallic particles that oxidize and rust, creating orange specks that bond permanently. Industrial fallout—microscopic iron particles from rail transport and factories—embeds itself and expands as it rusts, causing microscopic craters.
Tree sap and bird droppings contain uric acid and organic compounds that start eating through clear coat within hours, especially when baked by the sun. Road salt in winter months is hygroscopic, drawing moisture and accelerating corrosion. A quality sealant creates a chemically resistant barrier, giving you a critical window to remove these contaminants before they cause permanent damage.
UV Radiation and Oxidation Prevention
Ultraviolet radiation is paint’s silent killer, breaking down the chemical bonds in clear coat through photodegradation. This process causes the resin in your paint to dry out, leading to oxidation that appears as chalky, faded patches. Premium sealants contain UV inhibitors and stabilizers that absorb or reflect harmful radiation before it reaches your paint.
Think of it as sunscreen for your car, but instead of washing off, it remains active for months. The polymer matrix itself is UV-stable, meaning it won’t yellow or degrade with sun exposure. This is particularly crucial for dark-colored vehicles, where UV damage is more visible and progresses faster due to heat absorption.
Hydrophobic Performance Benefits
The water-beading effect isn’t just visually satisfying—it’s functional protection. Hydrophobic surfaces cause water to bead tightly, reducing the surface area contact between water and paint. This means fewer water spots, as mineral-laden drying droplets can’t spread and evaporate in thin films that leave deposits.
More importantly, hydrophobicity creates a self-cleaning effect. Rainwater sheets off carrying loose dirt, while the reduced surface tension makes it harder for mud and grime to stick. During washing, contaminants release easier, reducing the need for aggressive scrubbing that induces swirl marks. Premium sealants maintain contact angles above 110 degrees, creating that coveted tight beading that signals healthy protection.
Key Formulation Technologies to Look For
Polymer-Based Sealants
The backbone of traditional sealants, acrylic and polymer resins offer excellent gloss and 6-12 month durability. Look for formulations advertising “cross-linking polymers” or “acrylic copolymers.” These create flexible yet durable films that expand and contract with temperature changes without cracking.
The best polymer sealants use a blend of high and low molecular weight polymers. High-weight polymers provide hardness and durability, while low-weight polymers ensure flow and leveling during application, preventing high spots and streaking. Some advanced formulas incorporate fluoropolymers for enhanced chemical resistance, particularly against acidic contaminants.
Ceramic-Infused Hybrid Sealants
These represent the cutting edge, blending polymer resins with ceramic nanoparticles (typically SiO2). The ceramic component adds hardness and extreme hydrophobicity, while the polymer base maintains application forgiveness. You get ceramic-like performance—12-18 month durability—with wipe-on, wipe-off simplicity.
The key is the concentration of ceramic content. Marketing often obscures this, but look for terms like “ceramic resin hybrid” or “SiO2-enhanced polymer.” True hybrids will feel slicker during application and require slightly more cure time than pure polymer sealants. They also tend to leave a more crystalline, glass-like finish rather than the warm glow of pure polymers.
SiO2 vs. TiO2: Which Additive Matters?
Silicon dioxide (SiO2) is the star of modern protection, creating the same chemistry as glass. It forms a hard, slick surface with extreme water repellency. Titanium dioxide (TiO2) is less common but offers superior UV protection and self-cleaning photocatalytic properties—it actually breaks down organic contaminants when exposed to UV light.
Some premium sealants combine both: SiO2 for hardness and hydrophobicity, TiO2 for UV defense and self-cleaning. If you park outdoors constantly, TiO2-enhanced formulas provide an extra layer of defense. For maximum water behavior, prioritize SiO2 content. Understanding this distinction helps you match the sealant to your specific environmental challenges.
Application Methods Demystified
Wipe-On, Wipe-Off Traditional Application
The classic method involves applying thin, overlapping strokes with a foam applicator, allowing a brief flash time, then buffing off residue with a microfiber towel. This technique works with most polymer sealants and offers the best control over film thickness. The key is working in small sections—typically 2x2 feet—and using minimal product.
Apply in cross-hatch patterns to ensure even coverage, and use a high-quality, edgeless microfiber for removal to prevent marring. Temperature is critical: work in 60-75°F with low humidity. Too hot, and the sealant flashes instantly, becoming difficult to remove. Too cold, and it won’t spread or bond properly.
Spray-and-Wipe Convenience
Spray sealants have revolutionized maintenance, offering 2-3 month protection with 10-minute application times. These are typically polymer-based with fast-flashing solvents. They’re perfect for topping existing protection or as standalone solutions for leased vehicles or daily drivers where perfection isn’t paramount.
The technique is straightforward: mist onto a panel, spread with a microfiber towel, flip to a dry side and buff. The danger lies in overspray onto glass and trim, which can cause staining. Always mask off surrounding areas and work in well-ventilated spaces. These are maintenance products, not primary protection for show cars.
Wipe-On, Walk-Away Formulas
The newest category, these sealants require no buffing. You apply a thin layer, and any residue evaporates or self-levels within 30-60 minutes. They’re incredibly user-friendly but demand perfect conditions—any dust or pollen landing on the wet film becomes permanently embedded.
These formulas typically contain slower-evaporating solvents and specialized polymers that flow after application. They’re excellent for complex surfaces like grilles and emblems where buffing is difficult. However, they’re less forgiving of overapplication, which can lead to hazy, difficult-to-remove spots if the film is too thick.
Machine Application Techniques
For professional results, dual-action polishers can apply sealants more uniformly than hand application. Use a soft finishing pad at low speed (speed 3-4) to spread the sealant in overlapping passes. This method ensures ultra-thin, even coverage and works the product into the paint more effectively.
The technique requires experience—too much pressure or speed generates heat that can cause premature flashing. Always prime the pad with a few dots of product, work in small sections, and follow immediately with a microfiber towel to remove residue. This method cuts application time in half on large vehicles while improving bonding.
Surface Preparation: The Non-Negotiable Foundation
Decontamination: Clay Bar vs. Chemical
Skipping decontamination is like painting over rust—your sealant will bond to contaminants, not paint, and fail prematurely. Mechanical decontamination with a clay bar removes embedded particles but risks marring the finish. Use fine-grade clay with ample lubricant on well-washed paint, working in straight lines with light pressure.
Chemical decontamination uses iron removers and tar dissolvers that chemically react with contaminants, causing them to release without physical contact. This is safer for paint but requires multiple products and dwell times. The professional approach combines both: chemical treatment first to dissolve the majority, followed by light claying to remove remaining particles. This ensures a surgically clean surface for maximum bonding.
Paint Correction Considerations
Sealants enhance what’s underneath—they don’t hide defects. Applying a sealant over swirl marks locks them in under a hard layer, making future correction more difficult. For vehicles with moderate to heavy swirling, paint correction is essential before sealing.
Use a dual-action polisher with a correcting compound and medium-cut pad to remove 80-90% of defects, then follow with a fine polish to restore gloss. Even new cars benefit from a single-stage polish to remove dealership washing damage. The goal is a defect-free surface because sealants magnify both perfection and flaws under their glossy, reflective layer.
Panel Wipe Protocols for Maximum Bonding
After correction, polishing oils and residues must be removed or they’ll interfere with bonding. Isopropyl alcohol (IPA) diluted 1:1 with distilled water is the traditional panel wipe, but it can be harsh on fresh paint and leaves behind water spots.
Modern panel prep sprays use specialized surfactants that dissolve oils without affecting the paint. Spray onto a microfiber towel, not directly on paint, and wipe in straight lines with a fresh side for each panel. The surface should feel squeaky clean and slightly grabby, indicating the sealant will have pristine bonding sites. This step can double your sealant’s effective lifespan.
Durability Factors That Determine Longevity
Climate Impact on Performance
Sealants in Arizona face different challenges than those in Seattle. High UV, intense heat, and low humidity accelerate solvent evaporation and polymer degradation. In these climates, ceramic-infused sealants with high SiO2 content outperform pure polymers, as the ceramic component is inherently UV-stable and heat-resistant.
Conversely, humid climates with frequent rain demand sealants with exceptional hydrophobicity and anti-water-spotting properties. The constant moisture can cause some polymers to soften or swell, reducing durability. Coastal areas add salt air to the equation, requiring sealants with superior chemical resistance. Always choose formulations engineered for your regional challenges—manufacturer testing data often specifies climate performance.
Storage Conditions: Garage vs. Street Parking
A garage-kept vehicle might see sealant durability double compared to a car parked on the street. Indoor storage shields against UV degradation, acid rain, bird droppings, and temperature extremes that stress the polymer film. For garage-kept cars, you can prioritize gloss and application ease over maximum UV resistance.
Street-parked vehicles need the toughest formulations available—think ceramic hybrids with high solid content. The constant exposure means you’re fighting a 24/7 battle against contaminants. Reapplication schedules should be halved, and maintenance becomes critical. Consider supplemental protection like car covers during extreme weather events to extend sealant life.
Maintenance Wash Routines
Your washing technique can make or break sealant longevity. Touchless washes are gentlest but may use harsh detergents that strip protection. Hand washing with pH-neutral, sealant-safe shampoo is ideal, using the two-bucket method with grit guards to prevent swirl induction.
Wash frequency matters more than you think. Weekly washes prevent contaminant buildup that can etch through the sealant. But washing daily is overkill and introduces unnecessary abrasion. Find the sweet spot—typically every 1-2 weeks for daily drivers. Always use dedicated wash mitts, never sponges, and dry with blotting motions using plush microfiber towels to preserve the sealant’s integrity.
Maintenance Strategies for Extended Protection
Proper Washing Methods
The first wash after sealing is critical—wait the full cure time (typically 24-48 hours) before any water contact. When you do wash, use the “foam cannon” method: pre-soak with thick foam to encapsulate dirt, allowing it to slide off with minimal contact. This reduces mechanical abrasion that slowly wears down the sealant film.
Use the three-towel technique: one for washing, one for rinsing, one for drying. The drying towel should be a dedicated, ultra-plush microfiber used only for final wipe-downs. Avoid waffle-weave towels on fresh sealants—they can be too aggressive. Instead, use deep-pile plush towels that absorb water through capillary action rather than rubbing.
Sealant Booster Products
Booster sprays are diluted sealants designed to rejuvenate existing protection. Applied every 4-6 weeks after washing, they deposit a thin layer of fresh polymers that bond to the underlying sealant, extending life by 2-3 months. They’re not replacements for reapplication but excellent maintenance tools.
The key is applying to a wet surface after rinsing but before drying. The water acts as a carrier, helping the booster spread thinly and evenly. Mist one panel at a time, spread with a damp microfiber, then dry as usual. This “wet application” method prevents streaking and ensures the booster integrates with the existing sealant rather than sitting on top.
When to Reapply: Reading the Signs
Don’t rely on time alone—learn to read your paint. The water beading test is your best indicator: when beads become large and flat, losing their tight, spherical shape, protection is waning. Another sign is increased dirt adhesion; if your car gets visibly dirty faster, the hydrophobic layer is failing.
Perform a “sheet test” monthly: after washing, flood a horizontal panel with water. It should sheet off in a uniform layer. If you see water breaking into rivulets or clinging in patches, it’s time to reapply. For ceramic hybrids, also watch for a loss of slickness when you run your hand over the paint—properly sealed surfaces should feel like glass.
Common Application Pitfalls
Overapplication Issues
More is not better with sealants. Thick layers don’t bond properly—the surface cures while the underlying product remains liquid, leading to a gummy, difficult-to-remove residue. Overapplication also wastes product and can cause hazing, especially on dark colors where uneven thickness creates visible high spots.
The correct amount is a pea-sized drop per 2x2 foot section. You should barely see the product on the paint—a thin, translucent film is ideal. If you’re seeing white, opaque layers, you’ve applied far too much. Remember, sealants work by bonding, not by building thickness. A single molecule layer is sufficient; anything beyond that is excess waiting to be buffed off.
Temperature and Humidity Effects
Applying sealants in direct sunlight is the fastest path to failure. Panel temperatures above 85°F cause instant flashing, preventing proper leveling and bonding. The product cures before it can cross-link, resulting in a weak, patchy layer that washes off in weeks. Always work in shade or indoors with controlled climate.
Humidity above 70% slows solvent evaporation, keeping the sealant workable for too long and attracting dust. It can also cause water contamination if condensation forms on the surface. Conversely, humidity below 30% causes solvents to evaporate too quickly, reducing working time and potentially trapping application marks. The sweet spot is 40-60% relative humidity, with surface temperatures between 60-75°F.
Cross-Contamination from Towels
That towel you used to remove sealant residue? It’s now contaminated with cured polymers that can scratch paint during the next use. Never reuse towels without washing, and never use the same towel for multiple steps. Dedicated towels for application, removal, and final buffing are essential.
Wash sealant towels separately from wash mitts and drying towels. Use a microfiber-specific detergent free of fabric softeners and optical brighteners. Hot water (120-140°F) helps dissolve polymer residues. Inspect towels before reuse—if they feel stiff or have visible residue, they’re ready for the trash, not your paint.
Professional vs. DIY: Making the Right Choice
Benefits of Professional Installation
Professional detailers bring controlled environments—dust-free bays with consistent temperature and humidity. They possess paint thickness gauges to assess correction needs safely, and experience that prevents costly mistakes. Many professional-grade sealants aren’t available to consumers, offering 18-24 month durability with warranties.
The real value is in the prep work. Professionals perform multi-stage decontamination, precise paint correction, and surgical panel prep that most DIYers skip. This foundation work can double the effective life of the sealant. For high-value vehicles or those needing significant correction, professional application often costs less than fixing DIY mistakes.
Achieving Pro Results in Your Driveway
DIY success hinges on patience and preparation. Invest in proper lighting—LED work lights reveal defects and ensure even application. Create a clean workspace; even a leaf blower can remove dust from your work area before starting. Work methodically, one panel at a time, with a checklist to ensure no steps are skipped.
The biggest DIY advantage is familiarity with your vehicle. You know its history, problem areas, and how you’ll maintain it. With quality consumer-grade sealants now rivaling professional products, the gap has narrowed. Your results can match pros if you match their preparation discipline and follow cure times religiously.
Cost-Benefit Analysis
Professional application ranges from $300-800 depending on prep work, while DIY costs $50-150 in products and supplies. The break-even point comes at about two applications—by your third DIY job, you’ve saved money. However, factor in your time and the learning curve. First-time applications take 4-6 hours; experienced detailers can complete the process in 2-3 hours.
Consider your vehicle’s value. A $50,000 car deserves professional protection, while a daily driver with 100,000 miles is perfect for DIY practice. Many enthusiasts hybridize the approach: professional correction and initial sealant application, then DIY maintenance with booster products and eventual reapplication.
Environmental and Safety Considerations
VOC Regulations and Compliance
Volatile Organic Compounds (VOCs) in sealants contribute to smog and have health implications. California’s CARB regulations have driven formulation changes, reducing VOC content from 70% to under 25% in many products. These low-VOC formulas are safer but may require adjusted application techniques—they flash faster and need thinner application.
Always check local regulations, especially if you’re a professional. Some jurisdictions require VOC-compliant products for commercial use. The trade-off is minimal for consumers; modern low-VOC sealants perform equally well while being safer to breathe and less environmentally damaging.
Eco-Friendly Options
Water-based sealants represent the greenest choice, using water as the primary carrier instead of petroleum solvents. They’re virtually odorless, non-flammable, and safe for use around landscaping. The downside is longer cure times—up to 72 hours for full hardness—and reduced durability in harsh climates, typically 3-6 months.
Some brands now offer biodegradable polymer sealants derived from plant-based sources. While not as durable as synthetic polymers, they provide 4-8 months of protection with minimal environmental impact. They’re ideal for eco-conscious owners of garage-kept vehicles in moderate climates where extreme durability isn’t paramount.
Safe Handling Practices
Even low-VOC sealants contain chemicals requiring respect. Always wear nitrile gloves—prolonged skin contact can cause sensitization. Work in well-ventilated areas; while modern sealants are safer, concentrated vapors can cause dizziness. Eye protection is essential—spray sealants can mist unexpectedly.
Keep sealants away from ignition sources. While flash points have increased, they’re still flammable. Store in climate-controlled spaces; extreme heat can cause containers to pressurize and rupture. Never smoke while applying sealants, and wash hands thoroughly before eating or touching your face.
Seasonal Application Timing
Optimal Application Windows
Spring and fall offer the ideal conditions—moderate temperatures, moderate humidity, and minimal pollen. Spring application protects against summer UV and insect season, while fall application shields against winter salt and road grime. Avoid application during pollen season; airborne particles will embed in the curing film.
Many enthusiasts schedule applications around Daylight Saving Time changes—easy to remember and aligns with seasonal transitions. This creates a biannual routine that keeps protection fresh year-round. For ceramic hybrids applied in spring, a booster in fall extends protection through winter without full reapplication.
Winter Protection Strategies
Winter demands maximum durability. Apply your strongest ceramic-infused sealant in late fall, after thorough decontamination to remove summer bugs and tar. Focus on lower panels and behind wheels where salt spray concentrates. Consider adding a dedicated wheel sealant to these areas, as they face the harshest exposure.
Post-winter, inspect for damage immediately after the last frost. Salt residue continues corroding even after roads dry. A maintenance wash with salt-neutralizing shampoo helps, but plan to reapply sealant by late spring. Winter is so harsh that even 12-month sealants often need replacement after 6-7 months of exposure.
Summer Heat Considerations
High temperatures accelerate cure times but reduce working windows. Apply sealants in early morning or evening when panels are cool to the touch. Work in smaller sections—12x12 inches instead of 24x24—to manage faster flashing. Keep towels in the shade; hot towels can cause instant curing on contact.
Consider using a sealant specifically formulated for hot climates. These have slower-evaporating solvents and higher temperature activation thresholds. They’re designed to remain workable at 80-85°F panel temperatures, giving you the control needed for flawless application despite the heat.
Troubleshooting and Problem Solving
High Spot Removal Techniques
High spots—areas where sealant applied too thickly cure with a hazy, oily appearance—are the most common DIY issue. If caught within the cure window (typically first 2-4 hours), apply a fresh dot of sealant to the spot and immediately buff with a clean microfiber. The fresh solvent re-liquefies the high spot, allowing even distribution.
For cured high spots (after 24+ hours), you’ll need light polishing. Use a finishing polish and soft foam pad on a dual-action polisher at low speed. Make 2-3 light passes to level the area, then reapply sealant to that section. Prevention is easier: apply thinner layers and use cross-hatch patterns to ensure even distribution.
Premature Failure Diagnosis
If your sealant fails within weeks, contamination is the culprit. Oils from quick detailers, silicone from tire dressings, or wax residue can interfere with bonding. Strip the failed sealant using an all-purpose cleaner at 10:1 dilution, re-decontaminate with IPA wipe, and reapply.
Another cause is applying over fresh paint. Body shop clear coat needs 30-90 days to fully outgas solvents. Sealing too early traps these solvents, causing the clear coat to soften and the sealant to delaminate. Always confirm paint cure time with the body shop before sealing fresh repairs.
Compatibility Issues with Other Products
Layering products requires understanding chemistry. Most sealants bond poorly over waxes—apply sealant to bare paint only. However, sealants can be topped with waxes for added gloss, though this reduces durability. Ceramic coatings can be topped with sealants as maintenance, but never apply a coating over a sealant.
Test compatibility on a small, inconspicuous area first. Apply the new product, let cure for 24 hours, then perform the tape test: press painter’s tape firmly onto the surface and rip it off. If the new product peels off with the tape, it’s not bonding properly. This simple test prevents widespread application disasters.
Future Innovations in Protection Technology
Graphene-Enhanced Formulations
Graphene—a single layer of carbon atoms arranged in a hexagonal lattice—is making its way into premium sealants. It adds incredible strength, heat dissipation, and anti-static properties. Graphene-infused sealants claim 2-3 year durability with enhanced gloss and water behavior. Early adopters report reduced water spotting due to graphene’s conductivity preventing mineral adhesion.
The technology is still emerging, and premium pricing reflects this. Real-world testing shows durability improvements of 20-30% over ceramic hybrids, but application requires even more meticulous prep. As production costs decrease, graphene may become the new standard, offering ceramic-coating performance with sealant application ease.
Self-Healing Sealants
Imagine scratches that disappear with heat or sunlight. Self-healing sealants contain shape-memory polymers that flow back into place when activated. Minor wash marring and light scratches literally heal themselves during a sunny day parked outside. The technology uses microencapsulated healing agents or dynamic covalent bonds that reform after disruption.
Current formulations only heal micro-scratches—deep swirls still require correction—but this represents a paradigm shift. The polymers remain slightly flexible after curing, allowing movement without cracking. Durability currently matches premium ceramic hybrids, but the added cost is justified for perfectionists who park in public lots where door dings and brush contact are inevitable.
Smart Polymer Developments
Researchers are developing polymers that respond to environmental stimuli. pH-responsive sealants could tighten their matrix in acidic rain, increasing protection when needed most. Temperature-responsive versions might become more hydrophobic in rain and more oleophobic in hot, dusty conditions.
While still laboratory concepts, these “smart” sealants could revolutionize protection by adapting to threats in real-time. The detailing market is watching closely, as this technology could bridge the gap between permanent coatings and temporary sealants, offering the best of both worlds.
Frequently Asked Questions
How long should I wait before washing my car after applying a sealant?
Wait a minimum of 24 hours for polymer sealants and 48-72 hours for ceramic hybrids. This allows the polymer chains to fully cross-link and achieve maximum hardness. If you must drive during this period, avoid rain and puddles. The sealant is vulnerable to water spots and detergent contamination until fully cured.
Can I apply sealant over existing wax or ceramic coating?
Never apply sealant over wax—the wax prevents chemical bonding, causing the sealant to sit on top and wash off quickly. Over ceramic coatings, use only maintenance boosters specifically designed for ceramics; standard sealants may not bond properly and can create a hazy appearance. Always strip old wax with a pre-wax cleaner before sealing.
What’s the difference between a sealant and a “sealant wax hybrid”?
Marketing terminology often confuses these. True hybrids contain both synthetic polymers and natural carnauba wax in emulsion. They offer improved gloss over pure sealants but sacrifice 20-30% durability. Pure sealants use 100% synthetic polymers for maximum longevity. Read ingredient lists; if carnauba appears, it’s a hybrid, not a pure sealant.
How do I know if my sealant is still protecting my paint?
Perform the water beading test monthly. On a clean, dry panel, mist water and observe the bead shape. Tight, spherical beads indicate healthy protection. Flat, irregular beads signal degradation. Also, run your hand over the paint; a slick, smooth feel means the sealant is active. If it feels grabby or textured, it’s time to reapply.
Can I apply sealant in direct sunlight if I work quickly?
No. Direct sunlight causes immediate solvent flash, preventing proper leveling and bonding. The result is a streaky, uneven layer that fails prematurely. Even working quickly can’t compensate for panel temperatures exceeding 100°F. Always work in shade or indoors. If shade isn’t available, wait for evening or early morning when panels are cool.
How many layers of sealant should I apply for maximum protection?
One properly applied layer is optimal. Multiple layers don’t stack protection linearly—the second layer struggles to bond to the already-sealed surface. Some professionals apply a base layer, wait 24 hours, then add a second thin layer to ensure complete coverage, but this offers marginal benefits. Focus on perfecting one layer rather than adding multiple coats.
Will a sealant protect against rock chips and scratches?
Sealants protect against chemical and UV damage but offer minimal physical protection. They might reduce micro-marring from light brush contact due to their slickness, but they won’t prevent rock chips or key scratches. For physical protection, consider paint protection film (PPF) underneath the sealant. Some detailers apply sealant over PPF for the best of both worlds.
How do I remove old sealant before reapplication?
For polymer sealants, use an all-purpose cleaner at 4:1 dilution or a dedicated pre-wax cleaner. Apply with a microfiber towel, let dwell for 1-2 minutes, then agitate and rinse. For ceramic hybrids, you may need a light polishing with a finishing polish to mechanically remove the layer. Always finish with an IPA wipe to ensure a clean bonding surface.
Can I use a sealant on my windshield and windows?
Most paint sealants can be applied to glass and work excellently, creating water-repellent surfaces that improve visibility. However, they may cause wiper chatter and don’t last as long on glass due to vertical exposure and wiper abrasion. Dedicated glass sealants are formulated for better adhesion and clarity. If using paint sealant on glass, apply ultra-thin and buff thoroughly to prevent smearing.
What’s the shelf life of an unopened sealant?
Most sealants remain viable for 2-3 years unopened if stored between 50-75°F. Extreme heat or freezing can cause polymer separation or degradation. Once opened, use within 12 months—exposure to air introduces moisture and contaminants that reduce effectiveness. If the product separates and won’t remix after shaking, or smells rancid, it’s expired. Always date your bottles when opened.