Foggy, yellowed headlights aren’t just an eyesore—they’re a serious safety hazard that reduces nighttime visibility by up to 80%. While traditional hand-polishing methods can eat up your entire Saturday, drill-activated headlight restoration kits have revolutionized DIY car care, delivering professional-grade results in under an hour. If you’re tired of squinting through hazy lenses or paying hefty shop fees, mastering the art of drill-based restoration might be the most valuable skill you add to your automotive maintenance arsenal this year.
Why Headlight Restoration Matters for Your Vehicle’s Safety and Appearance
Top 10 Headlight Restoration Kit With Drill Attachment
Detailed Product Reviews
1. 3M Ultra Headlight Restoration Kit, Contains Masking Tape, Light Sanding Discs, Wax Protectant and More, Use on Plastic Lenses Headlights, Taillights and More, Easy Heavy-Duty Restoration (39195)

Overview: The 3M Ultra Headlight Restoration Kit (39195) delivers professional-grade results through a systematic multi-stage sanding and refinishing process. This comprehensive kit includes a disc pad holder, six 500-grit gold sanding discs, four 800-grit white finishing discs, one 3000-grit Trizact refining disc, and two Quick Headlight Clear Coat wipes. Designed for plastic lenses including headlights, taillights, and fog lights, it leverages 3M’s proprietary abrasive technology to eliminate yellowing and oxidation without compromising the lens surface integrity.
What Makes It Stand Out: 3M’s engineered abrasive progression ensures safe material removal while preserving lens clarity. The kit offers flexibility—you can complete the restoration by hand or accelerate the process with a standard household drill. The inclusion of professional-grade masking tape and wax protectant demonstrates attention to detail that prevents collateral damage during restoration.
Value for Money: At $14.50, this kit represents exceptional value, costing less than a single professional headlight restoration service while delivering comparable results. The comprehensive component selection eliminates the need for additional purchases, and the 3M brand heritage ensures reliable performance.
Strengths and Weaknesses: Strengths: Trusted brand reputation, scientifically-engineered abrasive progression, versatile application methods, comprehensive components, protective finishing system. Weaknesses: Multi-step process requires patience, optimal results need a drill, limited to two complete restorations per kit.
Bottom Line: The 3M Ultra kit is ideal for DIY enthusiasts seeking professional results with a trusted brand. While it demands more effort than wipe-based systems, the superior finish and durability justify the additional labor.
2. CERAKOTE® Ceramic Headlight Restoration Kit – Guaranteed To Last As Long As You Own Your Vehicle – Brings Headlights Back to Like New Condition - No Power Tools Required - 10 Wipe Kit

Overview: The CERAKOTE Ceramic Headlight Restoration Kit distinguishes itself with a lifetime protection guarantee through advanced ceramic coating technology. This 10-wipe system comprises eight Step 1 Oxidation Removing Wipes, one Step 2 Sanding Kit, and two Step 3 Ceramic Coating Wipes. The 30-minute, three-step process chemically bonds a UV-resistant ceramic layer to headlights without requiring any power tools, making it accessible to all skill levels.
What Makes It Stand Out: The standout feature is the “lasts as long as you own your vehicle” guarantee, made possible by CERAKOTE’s industry-leading ceramic technology that forms a permanent chemical bond. Unlike traditional sealants, this ceramic coating provides superior UV protection and chemical resistance. The tool-free design eliminates risks of paint damage or lens burning from improper drill use, ensuring safe application.
Value for Money: Priced at $17.95, the kit commands a premium over basic systems, but the lifetime protection promise delivers unmatched long-term value. When amortized over years of ownership, it costs mere pennies monthly compared to repeated applications of inferior products or professional services.
Strengths and Weaknesses: Strengths: Lifetime durability guarantee, advanced ceramic technology, no power tools required, simplified three-step process, superior UV protection, safe for novices. Weaknesses: Higher initial cost, may struggle with severely pitted or scratched lenses, limited material for multiple vehicles.
Bottom Line: Perfect for vehicle owners prioritizing longevity over initial cost. The CERAKOTE kit eliminates the need for recurring headlight maintenance, making it the most cost-effective solution for long-term vehicle ownership.
3. POLIWELL Headlight Restoration Kit 3 Easy Steps to Restore Sun Damaged Headlights Polish Headlights Lens Restore Cleaner DIY Polishing, Sanding Discs, Scouring Pads for Electric Drill, Total 24Pack

Overview: The POLIWELL Headlight Restoration Kit offers a comprehensive 24-piece system designed for drill-assisted restoration of heavily damaged headlights. This professional-grade kit includes P1000, P3000, and P5000 sanding discs, foam polishing pads, compound, UV block coat, and all necessary accessories. The three-step process—wet sanding, polishing, and sealing—effectively eliminates heavy yellowing, oxidation, and cloudiness while providing enough material for approximately two complete lens restorations, making it economical for multi-vehicle households.
What Makes It Stand Out: The exceptional grit progression from P1000 to P5000 ensures meticulous surface refinement that surpasses most competitors. The inclusion of ultra-fine 5000-grit discs produces a mirror finish before polishing, reducing polishing time and improving final clarity. The kit’s comprehensive nature includes a spray bottle and 10 meters of masking tape, eliminating supplementary purchases and ensuring professional results.
Value for Money: At $19.99, this is the most expensive kit reviewed, but the 24 components and capacity for multiple restorations justify the premium. The professional-caliber results rival $100+ services, delivering substantial savings for DIY users willing to invest time and effort.
Strengths and Weaknesses: Strengths: Comprehensive 24-piece set, superior grit progression, enough material for two vehicles, professional-quality results, includes all accessories. Weaknesses: Highest price point, requires drill for optimal results, more complex process for beginners, potential overkill for lightly oxidized lenses.
Bottom Line: Ideal for automotive enthusiasts seeking professional-grade results and those tackling severely deteriorated headlights. The investment pays dividends through superior finish quality and multiple restoration capacity.
4. Mothers NuLens Headlight Renewal Kit — Quickly Restores & Maintains Clarity on All Headlight Types – Includes PowerPlastic 4Lights Polish, 8 oz. with Protective, Oxidation-Inhibiting Polymers (07251)

Overview: The Mothers NuLens Headlight Renewal Kit provides a streamlined approach to headlight restoration using the brand’s proprietary PowerPlastic 4Lights Polish. This eight-ounce bottle of polishing compound contains oxidation-inhibiting polymers that clean yellowing, stains, and hairline scratches while depositing a protective layer. The kit includes a 3-inch backing plate, Powerball 4Lights polishing tool, restoration discs, and the signature polish for a complete single-step solution designed for all smooth plastic and acrylic headlights.
What Makes It Stand Out: The integrated Powerball polishing tool attaches to any drill and delivers consistent, swirl-free results with minimal effort. The polish’s unique formulation combines cutting, cleaning, and protecting agents in one application, significantly reducing restoration time compared to multi-stage systems. Mothers’ reputation for quality automotive care products ensures reliable performance across various plastic lens types and delivers crystal clarity.
Value for Money: At $17.71, the kit offers solid mid-range value, particularly considering the inclusion of the Powerball tool. While not the cheapest option, the time-saving single-step polish and protective polymers deliver good return on investment for users valuing efficiency.
Strengths and Weaknesses: Strengths: Includes Powerball polishing tool, time-saving single-step polish, trusted brand reputation, protective polymer layer, effective on moderate oxidation, user-friendly design. Weaknesses: May require additional sanding for severe damage, packaging variations cause component uncertainty, less comprehensive than premium kits, limited to moderate restoration needs.
Bottom Line: The Mothers NuLens kit excels for users seeking a balance between convenience and quality. It’s perfect for moderately oxidized headlights where time efficiency matters, though heavily damaged lenses may need supplementary sanding.
5. Rain-X 610153 Headlight Restoration Kit - Car Light Lens Cleaner/Restorer with Sanding & Polishing Drill Attachments & Sealant Wipe, Removes Scratches & Oxidation- All in 1 Long Lasting Formula

Overview: The Rain-X 610153 Headlight Restoration Kit delivers professional-grade results through a comprehensive sanding and polishing system. This kit includes sanding and polishing drill attachments, sealant wipes, and Rain-X’s proprietary restoration formula designed to remove scratches and oxidation. The all-in-one system promises long-lasting clarity with its protective sealant that shields against weather damage and road grime, making it ideal for enhancing night driving visibility and safety.
What Makes It Stand Out: Rain-X leverages its expertise in water-repellent technology to create a sealant that provides extended protection beyond typical restoration kits. The included drill attachments ensure consistent, professional-quality results that surpass hand-sanding methods while reducing effort. The kit’s focus on safety through improved visibility aligns with Rain-X’s brand promise of clearer driving conditions in all weather.
Value for Money: At $19.29, this kit sits at the premium end of DIY options but costs significantly less than professional services that often exceed $100. The long-lasting formula reduces reapplication frequency, offering excellent long-term value for safety-conscious drivers who prioritize visibility.
Strengths and Weaknesses: Strengths: Professional-grade results, trusted Rain-X brand, protective sealant technology, enhanced visibility focus, easy DIY solution, drill attachments included, weather-resistant coating. Weaknesses: Higher price point, requires drill for best results, may be overkill for light oxidation, limited material for multiple vehicles.
Bottom Line: The Rain-X kit is perfect for drivers prioritizing safety and longevity. It delivers consistent, professional results that justify the premium price, especially for those seeking extended protection in harsh weather conditions.
6. 133 PCS Sanding Disc Drill Polishing Kit Sanding Attachment, 3 Inch Wet Dry Headlight Restoration Kit, Hook and Loop Sandpaper Buffing Pads with Rotary Tools for Car Wood Metal Glass Resin Expoxy

Overview: This comprehensive 133-piece kit converts any standard drill into a professional-grade polishing system for headlights and countless other surfaces. Featuring an exceptional grit range from aggressive 60-grit to mirror-finish 10000-grit, it handles complete restoration cycles from heavy oxidation removal to final polishing. The 3-inch hook-and-loop design supports wet and dry applications across automotive, woodworking, metal, glass, and resin projects, making it a versatile workshop addition.
What Makes It Stand Out: The extreme 60-10000 grit range is virtually unmatched, offering ultra-fine finishing discs rarely found in consumer kits. Upgraded backing pads accommodate both 1/4" and 1/8" shanks, ensuring universal rotary tool compatibility. Clearly marked grit sizes prevent costly mistakes, while the vibration-dampening interface foam extends both disc life and user comfort during prolonged sessions. The washable imitation wool pad provides professional buffing results without recurring costs.
Value for Money: At $21.99, this kit delivers remarkable economy. Purchasing equivalent silicon carbide discs and buffing pads individually would exceed $40. The reusable components and multi-surface capability effectively provide a complete sanding-to-polishing system for less than a single professional detailing service. For DIYers tackling diverse projects, the cost-per-use ratio is exceptional.
Strengths and Weaknesses: Strengths include unparalleled grit variety, robust silicon carbide construction, superior backing pad compatibility, and true multi-material versatility. The hook-and-loop adhesion remains secure even during wet sanding. Weaknesses involve potential overwhelm for beginners confronted with 133 pieces, and the mandatory drill requirement excludes non-power tool users. The comprehensive scope may exceed casual one-time needs.
Bottom Line: Ideal for serious DIY enthusiasts and professionals demanding a complete, multi-surface solution. If you own a drill and regularly restore various materials, this kit’s extraordinary grit selection and durable construction make it an unbeatable choice for achieving flawless, professional finishes across countless applications.
7. Meguiar’s Ultimate Headlight Restoration Kit - The Perfect Headlight Repair Kit to Remove Yellowing and Cloudiness from Headlights - Easy to Use and Seals Headlights with 18 Plus Months of Protection
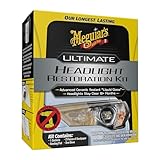
Overview: Meguiar’s Ultimate Kit delivers professional-caliber headlight restoration without requiring power tools. This specialized automotive system employs a two-stage sanding process using 1000 and 3000 grit discs, followed by a proprietary UV sealant that maintains clarity for over 18 months. Engineered specifically for clear plastic headlights, it systematically eliminates mild to severe yellowing and oxidation while restoring optical clarity and night-driving safety.
What Makes It Stand Out: The Ultimate Headlight Sealant with advanced UV protection sets this kit apart, providing lasting results that outlast most competitors by months. Pre-saturated application wipes eliminate guesswork and ensure uniform coverage. Meguiar’s century-long automotive care heritage guarantees a formulation that prevents re-oxidation far more effectively than standard kits. The no-tools design democratizes professional results for any skill level.
Value for Money: Priced at $22.56, this kit offers substantial savings versus professional restoration services ($75-$150). While marginally more expensive than basic kits, the 18+ month protection period delivers superior long-term value. You’re investing in durability rather than temporary cosmetic improvement, making it economically prudent over your vehicle’s ownership period.
Strengths and Weaknesses: Strengths include the long-lasting UV sealant, trusted brand reputation, straightforward tool-free process, and professional-grade results. The pre-saturated wipes minimize mess and application errors. Weaknesses are its single-purpose design—headlights only—with minimal sanding disc inclusion. Severely deteriorated lenses may require additional discs. The chemical sealant demands careful application in controlled environmental conditions.
Bottom Line: An excellent choice for vehicle owners prioritizing longevity and simplicity. If you want professional results without power tool investment and appreciate paying slightly more for proven UV protection, this kit delivers outstanding value and durable clarity that justifies every penny.
8. 78Pcs Headlight Restoration Kit,3 Inch Drill Polishing Kit, Wet Dry Sandpaper Drill Sanding Attachment with Buffing Pads for Car Polish,Resin Polish Rotary Tools Attachment (3 Inch 78Pcs)

Overview: This 78-piece drill polishing kit provides an affordable entry into power-tool-based restoration. The set includes 56 sanding discs spanning 120 to 5000 grit, complemented by various sponge and wool buffing pads that mount via M10 drill adapter. Supporting wet and dry applications, it transitions from aggressive material removal to fine polishing. The color-coded sponge pads indicate different cutting levels, simplifying the progression for automotive, resin, wood, and metal surfaces.
What Makes It Stand Out: The kit’s primary distinction is its aggressive pricing combined with comprehensive component variety. Color-coded sponges (wavy and flat profiles) adapt to different contours and polishing stages, a thoughtful feature rarely seen at this price point. The M10 adapter ensures broad rotary tool compatibility, while the self-adhesive backing provides secure attachment despite the budget positioning.
Value for Money: At $14.88, this represents the most economical drill-attachment kit available. Premium brands charge $20+ for fewer components, making this ideal for occasional DIYers seeking professional tools without premium investment. The washable pads extend lifespan, delivering an impressive cost-per-use ratio for budget-conscious users tackling multiple projects.
Strengths and Weaknesses: Strengths include exceptional affordability, adequate grit range, drill compatibility, and multi-surface versatility. The quantity suffices for numerous projects. Weaknesses involve lower-grade materials that wear faster under heavy use compared to premium brands. The silicon carbide discs are functional but not industrial-grade. Backing plate adhesion may be less robust than premium hook-and-loop systems, and limited documentation could challenge absolute beginners.
Bottom Line: A compelling value for cost-conscious DIYers comfortable with power tools. If you seek an affordable way to restore headlights and handle occasional polishing tasks, this kit provides essential components without financial strain, though professionals requiring maximum durability should consider higher-tier options.
9. Sylvania Headlight Restoration Kit - Long-Lasting Headlight Repair Kit for Restoring to Like-New Condition - Surface Activator, Exclusive UV Coating, Clarifying Compound & More - No Tools Required

Overview: Sylvania’s kit leverages over 100 years of lighting expertise to deliver a chemical-based headlight restoration requiring zero power tools. This all-in-one system includes surface activator, premium sandpaper, clarifying compound, and an exclusive UV block clear coat. Engineered to restore like-new clarity while improving night-driving visibility, it eliminates haze and yellowing through a scientifically formulated process that maximizes light output restoration rather than merely cosmetic improvement.
What Makes It Stand Out: The exclusive UV block clear coat provides superior long-term protection against re-oxidation. Sylvania’s surface activator chemically prepares the lens for optimal coating adhesion—a critical step most competitors omit. The brand’s lighting heritage ensures the formulation specifically targets optical clarity, making it unique among general-purpose kits. The complete chemical system approach eliminates mechanical complexity.
Value for Money: At $22.75, this kit positions as a premium chemical solution. While pricier than basic manual kits, it costs significantly less than professional services. For users without drills, it eliminates $30+ tool investment, making it economical for one-time use. The UV coating extends reapplication intervals, improving long-term value.
Strengths and Weaknesses: Strengths include the no-tools requirement, trusted century-old brand reputation, comprehensive chemical system, and effective UV protection. The process remains straightforward for beginners with clear step-by-step progression. Weaknesses involve limited sanding disc quantity for severely oxidized lenses. The chemical approach may not achieve the glassy finish possible with multi-stage mechanical polishing. Results are highly dependent on proper application conditions—temperature and humidity critically affect curing.
Bottom Line: Perfect for beginners seeking simple, effective restoration without tool investment. If your headlights show moderate oxidation and you value a trusted brand with proven UV protection technology, this kit delivers reliable results with minimal learning curve and respectable durability.
10. 3M Auto Restore and Protect Headlight Restoration Kit, Use On Plastic Lenses, Headlights, Taillight, Fog Lights and More, Includes Sanding Discs, Headlight Clear Coat Wipes, Foam Pad and Glove (39194)

Overview: The 3M Auto Restore and Protect Kit offers streamlined headlight restoration from the abrasives industry leader. This minimalist package includes two Trizact refining discs (1000 and 3000 grit), clear coat wipes, a foam pad, and glove. Designed specifically for plastic lenses—headlights, taillights, fog lights—it employs 3M’s proprietary abrasive technology to remove yellowing without damaging surfaces. The kit focuses on essential components that deliver consistent results with minimal complexity.
What Makes It Stand Out: 3M’s Trizact technology provides uniform, predictable cutting action that produces professional results with less effort. The kit’s simplicity eliminates overwhelming choices—just effective essentials from a premium brand. At its price point, it makes advanced 3M technology accessible to everyone. The included clear coat wipes seal and protect the restored surface, completing the restoration cycle.
Value for Money: At $9.83, this kit offers exceptional value from an industry leader. It’s the most affordable entry to 3M’s proven restoration technology. For mildly to moderately cloudy headlights, it provides complete restoration at a fraction of professional service costs ($75+). The minimal component count reduces waste for single-project users while maintaining quality.
Strengths and Weaknesses: Strengths include trusted 3M quality, effective Trizact abrasive technology, lowest price in the category, and straightforward process. The foam pad with Hookit attachment ensures secure disc placement. Weaknesses are the minimal disc count—only two sanding discs may prove insufficient for heavily oxidized lenses. The single foam pad limits polishing options, and UV protection claims aren’t as robustly documented as premium competitors. Severe cases require additional disc purchases.
Bottom Line: Excellent for budget-conscious users with mildly cloudy headlights seeking a quick, reliable fix from a trusted brand. If you want proven 3M quality without complexity and don’t require extensive multi-surface capabilities, this kit delivers dependable results at an unbeatable price for light to moderate restoration needs.
Your headlights face constant assault from UV rays, road debris, chemicals, and extreme temperatures. That cloudy appearance isn’t just dirt—it’s polycarbonate lens degradation that scatters light instead of projecting it where you need it most. Professional restoration services typically cost between $75-$150 per vehicle, but a quality drill-activated kit pays for itself after the first use. Beyond safety, restoring clarity can instantly modernize your car’s appearance, boosting resale value and eliminating that “neglected vehicle” look that turns away potential buyers.
Understanding Drill-Activated Headlight Restoration Kits
Drill-activated systems transform your ordinary power drill into a precision polishing machine. Unlike manual kits that rely on elbow grease, these attachments harness rotational speed to cut through oxidation layers efficiently and uniformly. The key lies in specialized backing plates and polishing heads designed to work at specific RPM ranges, creating a consistent finish that’s nearly impossible to achieve by hand. Most kits include progressive sanding discs, polishing pads, compounds, and protective coatings—all engineered to work synergistically with your drill’s power.
How Drill Attachments Transform the Restoration Process
The magic happens through controlled abrasion and thermal polishing. At proper speeds, the drill attachment generates enough friction to soften and level the polycarbonate surface without melting it. This mechanical advantage reduces restoration time from 2-3 hours to 30-45 minutes while minimizing the risk of uneven pressure that causes swirl marks and hot spots. The orbital motion of most backing plates mimics professional dual-action polishers, giving you shop-quality results without the $200+ equipment investment.
The Science Behind UV Damage and Oxidation
Polycarbonate headlights come factory-coated with a UV-resistant hard layer. Once this coating fails after 3-7 years of sun exposure, the raw plastic oxidizes rapidly. The yellowing occurs when UV radiation breaks down polymer chains, creating microscopic cracks that trap contaminants. Drill-based restoration works by physically removing this damaged layer—typically 5-10 microns deep—and preparing the surface for a new protective coating that bonds at a molecular level.
Key Advantages of Using a Drill-Based System
Speed and consistency top the list of benefits. A drill running at 1,500 RPM completes in 30 seconds what might take 5 minutes of manual sanding. This efficiency reduces fatigue and ensures you maintain proper technique throughout the job. Drill systems also provide uniform pressure distribution, preventing the “digging” that often occurs when hand-sanding corners and edges. For vehicles with severe oxidation, the power advantage means you can tackle heavy damage without resorting to overly aggressive grits that create deeper scratches.
Essential Components Every Quality Kit Should Include
A comprehensive kit should contain at least three grits of sanding discs (typically 800, 1000, and 2000), a foam polishing pad, wool compounding pad, microfiber finishing pad, cutting compound, polish, and a UV-resistant sealant. Premium kits add detail brushes for cleaning crevices, masking tape to protect paint, and spray bottles for wet sanding. The backing plate must feature a universal 1/4-inch shank that fits standard drills and include a hook-and-loop system for quick pad changes. Beware of budget kits that skimp on sanding discs—you’ll need 2-3 per headlight for severely damaged lenses.
Grit Progression: The Foundation of Professional Results
Jumping straight to fine grits is the fastest way to waste time and achieve mediocre results. Proper grit progression removes deep damage systematically while minimizing the total thickness of plastic removed. Each successive grit eliminates the scratches from the previous stage, gradually refining the surface until it’s ready for polishing. Skipping grits leaves deeper grooves that become visible under sunlight, creating a wavy appearance that looks worse than the original haze.
Understanding Sandpaper Grit Numbers and Their Purpose
Start with 800-grit for heavy yellowing and pitting—this aggressive paper cuts quickly but leaves noticeable scratches. Move to 1000-grit to remove 800-grit marks, then 2000-grit to create a uniformly matte surface. Some professional-grade kits include 3000-grit for an extra refinement step. The key is spending adequate time with each grit; two minutes per headlight per grit is typical. Always use wet/dry sandpaper with plenty of water to prevent clogging and reduce heat buildup that can melt the lens edges.
Wet vs. Dry Sanding: Which Method Works Best?
Wet sanding is non-negotiable for headlight restoration. Water acts as a lubricant, carrying away plastic particles and preventing them from embedding in the sandpaper. This extends disc life and produces a smoother finish. Dry sanding generates excessive heat and creates airborne plastic dust that’s harmful to breathe. Fill your spray bottle with clean water and keep the surface constantly wet. Some enthusiasts add a drop of dish soap to break surface tension, but plain water works perfectly for most applications.
Polishing Pads: Foam, Wool, and Microfiber Options
Foam pads provide the safest cutting action for beginners, with open-cell structures that distribute compound evenly. Wool pads cut more aggressively and generate higher temperatures, making them ideal for severely damaged lenses but requiring careful speed control. Microfiber pads offer the finest finish, perfect for the final polishing stage before sealant application. Your kit should include at least two pad types—typically foam for compounding and microfiber for finishing. Always clean pads between uses; dried compound residue becomes abrasive and creates new scratches.
Choosing the Right Polishing Compound
Compounds contain diminishing abrasives that break down into finer particles as you work. A quality compound starts aggressive enough to remove 2000-grit sanding marks but finishes to a near-clear state. Avoid all-in-one products that claim to sand, polish, and seal—they compromise at every step. Water-based compounds are easier to clean and less likely to stain trim, while solvent-based versions cut faster but require more careful application. The ideal compound works with minimal product—a dime-sized amount per headlight prevents buildup and reduces cleanup time.
UV Sealant: Your First Line of Defense Against Future Damage
Polishing removes the factory UV coating, leaving raw polycarbonate vulnerable to rapid re-oxidation. A proper UV sealant isn’t just wax—it’s a cross-linking polymer that chemically bonds to the plastic, creating a semi-permanent barrier. Look for sealants that cure with UV light (sunlight activation) and promise 12-24 months of protection. Application requires a spotless surface; any polishing residue prevents bonding. Apply in thin, overlapping strokes and avoid touching the lens for 24 hours while it fully cures. Some premium kits include ceramic-infused sealants that last 2-3 years with proper maintenance.
Drill Compatibility and Speed Settings
Most kits work with any standard 3/8-inch or 1/2-inch drill, but variable speed control is essential. Single-speed drills lack the finesse needed for polishing stages and can easily burn through plastic. Your drill should offer at least 0-2,500 RPM range. Check the chuck capacity—some compact drills require an adapter for the 1/4-inch shank. For cordless drills, ensure you have at least 18V of power; weaker models may stall under pressure, creating uneven spots.
RPM Recommendations for Each Restoration Stage
Sand at 1,000-1,500 RPM using light pressure—let the abrasive do the work. For compounding, reduce speed to 800-1,200 RPM to prevent sling and maintain control. Final polishing shines best at 600-1,000 RPM, allowing the compound to break down properly without generating excess heat. Always start the drill before contacting the lens and keep it moving continuously. Dwelling in one spot for even three seconds can create a low spot that’s nearly impossible to fix.
Corded vs. Cordless Drills: Pros and Cons
Corded drills provide unlimited runtime and consistent power, crucial when working on multiple vehicles. However, the cord creates a tripping hazard and limits mobility around the car. Modern 20V lithium-ion cordless drills offer ample power for 2-3 headlight pairs per charge, with the freedom to work anywhere. The downside? Battery voltage drops as charge depletes, potentially causing inconsistent results on the final headlight. For best results, use a cordless drill with a fresh battery or have a backup charged and ready.
Professional vs. DIY Results: Setting Realistic Expectations
A drill-activated kit can achieve 90-95% of professional results when used correctly. The 5% difference lies in experience—pros know exactly how long to spend on each grit and can “read” the lens surface for hidden damage. However, DIY restoration offers something shops can’t: the ability to address minor haze annually before it becomes severe. Most shops won’t perform light maintenance polishing, but you can touch up your headlights in 15 minutes once you’ve mastered the technique. The key is understanding that perfection isn’t the goal—dramatic improvement with lasting protection is.
Common Mistakes That Ruin Headlight Restoration
The number one error is inadequate surface preparation. Failing to clean bugs, tar, and wax from the lens edges contaminates your sandpaper and creates circular scratches. Another critical mistake is using too much pressure—let the tool’s weight do the work. Excessive force flexes the lens, creating uneven surfaces and potentially cracking mounting tabs. Skipping the final sealant step is like washing your car in the rain; the clarity will vanish within weeks. Finally, working in direct sunlight causes compounds to dry too quickly and sealants to cure unevenly. Always work in shade or a garage with good lighting.
Time Investment: What to Expect From Start to Finish
Your first restoration will take 45-60 minutes as you learn the rhythm of grit changes and pad swapping. With experience, you’ll complete both headlights in 30 minutes. Budget 10 minutes for masking and cleaning, 15 minutes for sanding (5 minutes per grit), 8 minutes for compounding, 5 minutes for polishing, and 5 minutes for sealant application. Add 24 hours of cure time before exposing the lens to rain or car washes. This time investment is still less than driving to and from a professional shop, making it practical for busy schedules.
Cost Analysis: Kit Price vs. Professional Service
Quality drill-activated kits range from $25-$45 and include enough materials for 2-3 complete restorations. That’s $8-$15 per use versus $75-$150 for professional service. Even if you only restore your own vehicle once, the kit pays for itself. Factor in neighbor’s cars, family vehicles, and potential side income, and the value proposition becomes undeniable. Professional-grade replacement lenses cost $200-$600 each, making restoration a financial no-brainer for vehicles older than five years.
Maintenance Tips to Extend Your Results
Wash headlights with pH-neutral car shampoo only—harsh wheel acids strip sealants within days. Apply a spray sealant every 3 months as a booster; these take 2 minutes per headlight and add a sacrificial layer. Park facing away from direct sunlight when possible, and consider a UV-resistant car cover for vehicles stored outdoors. Avoid automated car washes with abrasive brushes; touchless washes are gentler on fresh sealants. If you notice water no longer beads on the lens surface, it’s time for a light polish and reseal—don’t wait for yellowing to return.
Environmental Factors That Affect Longevity
Vehicles in Arizona or Florida may need annual restoration due to intense UV exposure, while Pacific Northwest cars can go 2-3 years between full treatments. Road salt and magnesium chloride used for de-icing are incredibly corrosive to unprotected lenses—if you drive in winter conditions, consider applying a ceramic coating over your standard sealant. Coastal areas with salt air accelerate oxidation, requiring more frequent maintenance. Garaged vehicles maintain clarity 3x longer than those parked on the street, making your parking situation a key factor in scheduling touch-ups.
Troubleshooting Common Restoration Issues
If yellowing returns within weeks, your sealant didn’t bond—likely due to insufficient cleaning or applying too thickly. Wavy appearance means you skipped grits or applied uneven pressure; re-sand with 1000-grit to level the surface. Swirl marks indicate contaminated pads or dried compound; switch to fresh pads and work at lower RPMs. If the lens looks clear indoors but hazy in sunlight, you’ve created microscopic scratches that need finer polishing. In this case, use a 3000-grit disc followed by a microfiber pad with finishing polish.
Frequently Asked Questions
How long do drill-activated restoration results typically last?
With proper UV sealant application and maintenance, results last 12-24 months in moderate climates. Harsh sun exposure may reduce this to 8-12 months, while garaged vehicles can maintain clarity for 2-3 years. Monthly application of a spray sealant booster extends protection significantly.
Can I use a drill-activated kit on tinted or colored headlights?
No. These kits are designed exclusively for clear polycarbonate lenses. Tinted covers, HID projector lenses, and glass headlights require different techniques. Using abrasive sanding on these surfaces will cause irreversible damage.
What happens if my drill doesn’t have variable speed control?
Single-speed drills risk melting the lens and creating uneven surfaces. If variable speed isn’t an option, purchase a plug-in router speed control adapter for $15-$20. This device regulates power to your drill, effectively creating variable speed capability.
Is it normal for the lens to look worse after sanding?
Absolutely. After 800-grit sanding, your headlights will appear milky white and heavily scratched. This is expected—each successive grit removes those marks. Don’t panic; the clarity emerges during the polishing stage, not sanding.
Can I restore headlights without removing them from the vehicle?
Yes, and most kits are designed for on-car restoration. Use masking tape to protect surrounding paint and plastic trim. However, removing the headlight assembly allows you to sand and polish the entire lens, including edges that are difficult to reach when mounted.
How do I know when it’s time to replace rather than restore headlights?
If sanding reveals deep cracks, moisture inside the lens, or if the damage penetrates through the entire plastic thickness, replacement is necessary. Also, if the lens has been previously restored multiple times, you may have removed too much material, making replacement the safer option.
Will restoration fix moisture condensation inside my headlights?
No. Drill-activated restoration only addresses exterior surface damage. Interior condensation indicates failed seals and requires headlight disassembly, drying, and resealing with butyl rubber sealant. Attempting to drill vent holes is a temporary fix that often worsens the problem.
Can I use metal polish or toothpaste instead of included compounds?
While these household items contain mild abrasives, they lack the diminishing grit technology and lubricants necessary for polycarbonate. They’ll create a temporary shine that fails within weeks and may contain chemicals that further degrade the plastic. Always use products specifically formulated for headlights.
What’s the difference between a sealant and a ceramic coating for headlights?
Standard sealants are polymer-based and last 1-2 years. Ceramic coatings create a harder, more chemical-resistant layer lasting 2-4 years but require more precise application. Many enthusiasts apply a ceramic coating over a base sealant for maximum durability.
How soon after restoration can I wash my car or drive in rain?
Wait a minimum of 24 hours before any water exposure. The UV sealant needs time to cross-link and bond to the plastic. For ceramic coatings, the cure time extends to 48-72 hours. Avoid car washes and heavy rain during this period to prevent sealant failure and premature hazing.