That yellowed, foggy look on your headlights isn’t just an eyesore—it’s a serious safety hazard that reduces visibility by up to 80% during nighttime driving. If you’ve found yourself squinting through a dim glow on dark roads or flashing your high beams more often than usual, degraded headlights are likely the culprit. The good news? You don’t need to replace those expensive headlight assemblies to restore crystal-clear clarity.
Headlight polishing has evolved from a backyard hack into a sophisticated car care discipline, with modern formulations that can make decade-old lenses look factory-fresh. But not all polishes are created equal, and choosing the wrong product can mean the difference between a lasting restoration and a temporary fix that clouds over in weeks. This comprehensive guide walks you through everything you need to know about selecting the perfect headlight polish for your specific situation, understanding the science behind the process, and achieving professional-grade results that actually last.
Top 10 Headlight Polish
Detailed Product Reviews
1. CERAKOTE® Ceramic Headlight Restoration Kit – Guaranteed To Last As Long As You Own Your Vehicle – Brings Headlights Back to Like New Condition - No Power Tools Required - 10 Wipe Kit

Overview:
The Cerakote Ceramic Headlight Restoration Kit represents a breakthrough in headlight restoration technology, offering a permanent ceramic coating solution that promises to last as long as you own your vehicle. This comprehensive 10-wipe kit tackles severe oxidation through a three-step process designed for maximum durability and UV protection without requiring any power tools.
What Makes It Stand Out:
The standout feature is the genuine ceramic coating that chemically bonds to headlight lenses, creating a permanent protective barrier unlike traditional sealants that degrade over time. The kit’s tool-free design eliminates risks of paint damage or lens burning from drills, while the three-step approach—oxidation remover wipes, sanding kit, and ceramic coating wipes—ensures thorough restoration even for heavily degraded headlights.
Value for Money:
At $17.95, Cerakote commands a premium over basic $10-15 kits, but delivers superior long-term value. The “lifetime” protection eliminates repeat purchases and applications, saving money and time. Compared to professional restoration services costing $75-150, this DIY kit offers comparable permanent results at a fraction of the price.
Strengths and Weaknesses:
Pros: Permanent ceramic bonding technology; lifetime UV protection guarantee; no power tools needed; comprehensive three-step system; prevents future yellowing
Cons: Higher upfront cost than basic polishes; 30-minute application requires more effort; single-use kit covers only two headlights
Bottom Line:
Perfect for discerning vehicle owners seeking a permanent, professional-grade solution. The ceramic technology and lifetime guarantee justify the investment, making it the best choice for long-term headlight clarity.
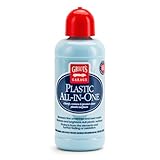
2. Griot’s Garage Plastic All-in-One, Polish, Restore, and Protect Vehicle Lights, Gauges, B-Pillars, Windscreens and More, Ceramic Infused Protection, 16oz, 10872
Overview:
Griot’s Garage Plastic All-in-One delivers a versatile, ceramic-infused solution for restoring clarity to various plastic surfaces beyond just headlights. This 16-ounce bottle combines polishing compounds with SiO2 ceramic protection to rejuvenate yellowed, oxidized plastics throughout your vehicle.
What Makes It Stand Out:
The formula’s versatility across interior and exterior plastics sets it apart—working on B-pillars, gauges, convertible windows, and motorcycle windscreens in addition to headlights. The SiO2 ceramic, resin, and silane polymer blend creates a durable protective layer that actively repels water and dirt, making future cleaning effortless. Its compatibility with both hand application and machine polishers offers flexibility for different project scales.
Value for Money:
At $21.99 for 16 ounces, this product costs more per bottle than competitors, but its multi-surface capability provides exceptional value. One product replaces separate headlight restorers, plastic polishes, and protectants, potentially saving $40-60 in specialized products. The ceramic infusion extends reapplication intervals, reducing long-term consumption.
Strengths and Weaknesses:
Pros: Multi-surface versatility; genuine SiO2 ceramic protection; works by hand or polisher; large 16oz quantity; makes future cleaning easier
Cons: Higher price point; may require polisher for best results; not a permanent solution; less aggressive on severely oxidized lenses
Bottom Line:
An excellent choice for enthusiasts wanting one product for all vehicle plastics. While pricier upfront, its versatility and ceramic protection make it a smart investment for comprehensive plastic care.
3. 3M Ultra Headlight Restoration Kit, Contains Masking Tape, Light Sanding Discs, Wax Protectant and More, Use on Plastic Lenses Headlights, Taillights and More, Easy Heavy-Duty Restoration (39195)

Overview:
The 3M Ultra Headlight Restoration Kit leverages professional-grade abrasive technology to deliver heavy-duty restoration for severely damaged headlights. This comprehensive kit includes sanding discs ranging from 500 to 3000 grit, plus protectant, making it ideal for tackling deep yellowing and surface damage.
What Makes It Stand Out:
The kit’s professional-level sanding system using 3M’s proprietary abrasive technology removes oxidation without damaging the underlying plastic. The progressive grit system—from 500-grit gold discs to 3000-grit Trizact—ensures a flawless finish. Unlike wipe-on solutions, this kit physically removes degraded plastic layers, making it effective for the worst cases of headlight deterioration.
Value for Money:
At $14.50, this kit offers tremendous value for severe restoration needs. It includes everything needed: pad holder, multiple sanding discs, and protectant. While requiring a drill, it delivers results comparable to $100+ professional services. For heavily oxidized headlights, it’s more cost-effective than buying separate sandpaper and compounds.
Strengths and Weaknesses:
Pros: Professional-grade sanding system; effective on severely damaged lenses; comprehensive kit contents; trusted 3M brand quality; permanent physical restoration
Cons: Requires power drill; more complex process; risk of paint damage if masking is inadequate; single-use kit
Bottom Line:
Best suited for tackling heavily oxidized or severely yellowed headlights where wipe-on products fail. The professional approach demands more effort but delivers unmatched results for damaged lenses.
4. Formula 1 Headlight Restorer & Sealant – One Step Polish to Clean & Renew Yellowed Headlights, Windscreens, or Exterior Plastics (8 oz.)

Overview:
Formula 1 Headlight Restorer & Sealant offers a streamlined, one-step solution for mildly to moderately oxidized headlights. This 8-ounce bottle combines cleaning and sealing agents to quickly renew clarity without sanding or masking, making it ideal for quick maintenance and light restoration.
What Makes It Stand Out:
The simplicity of a true one-step process sets this apart—no sanding, taping, or power tools required. Just apply with a microfiber towel in circular motions. Its versatility extends beyond headlights to brake lights, helmet visors, motorcycle windscreens, and marine windows. The formula simultaneously cleans, polishes, and seals in one application, saving significant time.
Value for Money:
At $9.99 ($1.25/fl oz), this is one of the most affordable options available. For vehicles with mild oxidation, it delivers excellent results at a fraction of the cost of multi-step kits. However, severely yellowed headlights may require professional service anyway, making this best for maintenance rather than heavy restoration.
Strengths and Weaknesses:
Pros: Extremely easy one-step application; very affordable; versatile across many plastics; no tools or masking needed; quick results
Cons: Limited effectiveness on severe oxidation; shorter protection duration; may require frequent reapplication; smaller 8oz size
Bottom Line:
Perfect for budget-conscious users dealing with mild oxidation or seeking preventive maintenance. While not for severe cases, its ease of use and low cost make it ideal for regular upkeep.
5. Chemical Guys Headlight Restore and Protect - Cleans, Restores Clarity, and Protects Headlights from Future Fading, Safe for Cars, Trucks, SUVs, Motorcycles, RVs, and More - 16 oz

Overview:
Chemical Guys Headlight Restore and Protect provides a balanced all-in-one formula that cleans, restores clarity, and protects headlights from future fading. This 16-ounce bottle targets yellowing, oxidation, and haze while leaving a durable protective barrier suitable for cars, trucks, motorcycles, and RVs.
What Makes It Stand Out:
The formula’s versatility across all vehicle types and OEM/aftermarket lenses makes it exceptionally flexible. It removes surface oxidation, light scratches, and embedded dirt while simultaneously depositing a protective barrier. The option for hand or machine application accommodates both casual users and detailing enthusiasts, delivering professional results without specialized equipment.
Value for Money:
At $19.99 ($1.25/fl oz), this product sits in the mid-range price point but offers generous 16-ounce quantity. The all-in-one approach eliminates buying separate cleaners and sealants, providing good value per ounce. It balances affordability with professional-grade results, making it more cost-effective than $15 kits requiring frequent repurchase.
Strengths and Weaknesses:
Pros: Large 16oz quantity; all-in-one formula; safe for all vehicle types; hand or machine application; long-lasting protection
Cons: May struggle with severe oxidation; requires more effort than true one-step products; mid-range pricing; protection not permanent
Bottom Line:
A solid middle-ground choice offering professional results with user-friendly application. The generous size and versatility make it ideal for multi-vehicle households or regular maintenance schedules.
6. Meguiar’s Ultimate Polish – High-Gloss Polish for a Show Car Shine – Permanently Removes Light Swirls to Produce a Deep, Wet Reflection with a High Gloss Shine - Easy to Use, 16 Oz

Overview:
Meguiar’s Ultimate Polish serves as a critical pre-waxing glaze that elevates your vehicle’s finish to show-car standards. This 16-ounce formulation specifically targets light swirl marks and towel-induced imperfections while infusing paint with rich conditioning oils. Designed for all glossy paint systems including modern clear coats, it creates a wet-look reflection that dramatically enhances depth, particularly on darker vehicles where clarity and richness matter most.
What Makes It Stand Out:
The product’s unique dual-action capability as both a corrective polish and preparatory glaze sets it apart. Unlike standard polishes, it deposits conditioning oils that amplify color saturation and gloss before wax sealing. Its versatility shines through multiple application methods—effective by hand for casual users but optimized for dual-action polishers like Meguiar’s MT300, delivering professional results without risking paint damage.
Value for Money:
At $9.67 ($0.60 per ounce), this represents exceptional value in the premium car care segment. A single bottle provides numerous applications, substantially undercutting professional detailing costs. When compared to purchasing separate polish and glaze products, this two-in-one solution delivers compounded savings and streamlined workflow.
Strengths and Weaknesses:
Strengths include safe, gentle swirl removal; remarkable depth enhancement on dark paints; broad compatibility with all glossy finishes; flexible application options; and trusted brand heritage. Weaknesses involve requiring subsequent wax application for protection; inability to correct deeper defects; and labor-intensive hand application versus machine alternatives.
Bottom Line:
A top-tier choice for enthusiasts pursuing concours-level gloss. It bridges the gap between consumer and professional products, delivering outstanding aesthetic improvements at a DIY price point, provided users follow through with proper wax protection.
7. Mothers PowerPlastic 4Lights Plastic Polish, 8 oz. — Ultra-Fine Polish Cleans, Clarifies & Removes Oxidation from Plastics & Headlights, UV Shield Prevents Oxidation & Yellowing (08808)

Overview:
This specialized 8-ounce polish targets oxidation and clarity issues on automotive plastics. Formulated for headlights, taillights, convertible windows, and other plastic surfaces, it combines ultra-fine polishing agents with protective polymers to restore transparency while preventing future degradation.
What Makes It Stand Out:
The integration of UV shields and oxidation-inhibiting polymers directly into the polishing formula provides immediate restoration and long-term protection in one step. Unlike general-purpose polishes, this product specifically addresses the unique challenges of automotive plastics—yellowing, clouding, and surface scratching—while remaining safe for both rigid and flexible substrates.
Value for Money:
Priced at $11.99 ($1.50 per ounce), it commands a premium over generic plastic polishes but delivers specialized protection that justifies the cost. Regular application prevents costly lens replacements, which can exceed hundreds of dollars. The concentrated formula requires minimal product per application, extending the bottle’s lifespan.
Strengths and Weaknesses:
Strengths include targeted plastic-specific formulation; built-in UV protection; versatility across hard and flexible plastics; quick application process; and preventative maintenance benefits. Weaknesses are its limited scope (not for paint); higher per-ounce cost; may require multiple applications for severely oxidized lenses; and lacks mechanical abrasion for deep restoration.
Bottom Line:
An excellent maintenance solution for preserving plastic clarity. Best suited for moderately oxidized lenses and preventative care rather than heavy restoration. For severely degraded plastics, pair with a sanding kit first, then maintain results with this protective polish.
8. 3M Auto Restore and Protect Headlight Restoration Kit, Use On Plastic Lenses, Headlights, Taillight, Fog Lights and More, Includes Sanding Discs, Headlight Clear Coat Wipes, Foam Pad and Glove (39194)

Overview:
This comprehensive restoration kit provides a complete solution for severely degraded plastic lenses. The package includes 1000-grit and 3000-grit Trizact refining discs, two Quick Headlight Clear Coat wipes, a foam pad with Hookit attachment, and a disposable glove—everything needed for professional-grade restoration using either manual or drill-assisted methods.
What Makes It Stand Out:
3M’s proprietary Trizact abrasive technology delivers consistent, controlled cutting action that removes heavy oxidation and yellowing without damaging the underlying plastic. The inclusion of clear coat wipes provides a durable protective layer that seals the restored surface, preventing rapid re-oxidation—a critical step many competitors omit. The optional drill compatibility dramatically reduces labor while achieving uniform results.
Value for Money:
At $9.83, this kit offers remarkable value, potentially saving $100-$200 per lens compared to replacement costs. The complete inclusion of sanding discs, protective coating, and application tools eliminates additional purchases. While requiring more effort than premium kits, it delivers comparable results at a fraction of the price.
Strengths and Weaknesses:
Strengths include professional-grade 3M abrasive technology; complete kit with protective clear coat; versatile manual or drill application; effective on severe oxidation; and substantial cost savings versus replacement. Weaknesses involve multi-step complexity intimidating novices; requiring a drill for optimal efficiency; limited to one or two vehicles per kit; and potential for uneven application without careful technique.
Bottom Line:
The ideal choice for DIYers tackling heavily oxidized headlights. It demands patience and attention to detail but rewards users with professional-quality clarity and durable protection. For best results, use with a variable-speed drill and follow instructions meticulously.
9. Mothers NuLens Headlight Renewal Kit — Quickly Restores & Maintains Clarity on All Headlight Types – Includes PowerPlastic 4Lights Polish, 8 oz. with Protective, Oxidation-Inhibiting Polymers (07251)

Overview:
Mothers’ comprehensive renewal kit combines mechanical and chemical restoration for all headlight types. The package includes a 3-inch backing plate, Powerball 4Lights polishing tool, restoration discs, and 8 ounces of PowerPlastic polish—creating a complete system designed to restore crystal clarity while providing ongoing protection through oxidation-inhibiting polymers.
What Makes It Stand Out:
The integrated Powerball polishing tool attaches to standard drills, delivering consistent, swirl-free results across curved lens surfaces. This mechanical advantage, combined with the included restoration discs, allows single-step removal of yellowing, stains, and hairline scratches while simultaneously applying a protective polymer layer—streamlining what typically requires separate products.
Value for Money:
At $17.71, this kit positions itself as a mid-range complete solution. While pricier than basic kits, it includes specialized tools and protective polish that justify the premium. The reusable Powerball tool and substantial 8-ounce polish bottle provide ongoing maintenance capability, offering better long-term value than single-use alternatives.
Strengths and Weaknesses:
Strengths include complete tool-inclusive system; drill-powered efficiency; protective polymer coating; large polish quantity; and versatility across all smooth plastic headlights. Weaknesses are higher initial investment; requiring a drill for intended use; potential tool durability concerns with heavy use; and overkill for lightly oxidized lenses where polish alone would suffice.
Bottom Line:
A superior all-in-one solution for moderately to severely oxidized headlights. The Powerball tool dramatically improves results and reduces effort, making it worth the premium for those seeking professional outcomes. Ideal for multi-vehicle households or regular maintenance schedules.
10. Rain-X 800001810 Headlight Restorer - 5 fl oz.

Overview:
Rain-X offers a budget-friendly 5-ounce solution for improving headlight clarity through a multi-step chemical process. This restorer specifically targets haze and discoloration on plastic lenses, leveraging Rain-X’s expertise in visibility enhancement to improve both appearance and light output for safer nighttime driving.
What Makes It Stand Out:
The multi-stage application process provides deeper cleaning than single-step products, utilizing a chemical approach rather than abrasive sanding. This makes it particularly suitable for DIYers uncomfortable with power tools or sanding techniques. The Rain-X brand association suggests reliable water-beading technology may complement the restoration, though the primary focus remains clarity improvement.
Value for Money:
At $9.07 for 5 ounces, this represents an accessible entry point into headlight restoration. While not the cheapest per-ounce option, its chemical-only approach eliminates the need for additional tools or equipment, creating true cost efficiency for users seeking minimal investment. Results, however, may not match mechanical restoration methods for severe cases.
Strengths and Weaknesses:
Strengths include tool-free simplicity; low cost of entry; trusted brand reputation; improves visibility; and safe for novices. Weaknesses involve limited effectiveness on severe oxidation; labor-intensive multi-step process; smaller volume for price; temporary results requiring frequent reapplication; and inability to remove deep scratches or heavy yellowing.
Bottom Line:
Best suited for lightly to moderately hazed headlights and maintenance touch-ups. While convenient and affordable, it cannot replace mechanical restoration for severely damaged lenses. Consider this a good starting point for beginners or as a maintenance product following initial heavy restoration with a more aggressive kit.
Why Headlight Polishing Matters More Than You Think
Cloudy headlights create a dangerous ripple effect that extends far beyond mere appearance. When your lenses oxidize, they scatter light rather than projecting it onto the road, creating glare for oncoming drivers while leaving you with dangerously short visibility range. Most drivers don’t realize their headlights have degraded gradually over years—until a near-miss incident or failed vehicle inspection forces them to take action.
Beyond safety, there’s a significant financial angle. Restored headlights can boost your vehicle’s resale value by hundreds of dollars, while neglected ones signal overall maintenance indifference to potential buyers. Insurance companies increasingly note headlight condition in accident assessments, and some states now include lens clarity in mandatory safety inspections. Proper headlight care isn’t vanity; it’s responsible vehicle ownership.
Understanding Headlight Degradation: The Science Behind the Cloudiness
Modern headlights aren’t glass—they’re polycarbonate plastic, chosen for its impact resistance and design flexibility. However, this material is porous and vulnerable to UV radiation, which breaks down the factory-applied protective coating within 3-5 years. Once this barrier fails, the exposed plastic undergoes photochemical degradation, creating microscopic cracks and pits that trap moisture, road salt, and environmental pollutants.
The yellowing effect comes from polymer chain scission, where UV rays literally break the molecular bonds in the plastic. Oxidation follows, creating a chalky surface layer that diffuses light. Understanding this process is crucial because effective polishing must do more than just smooth the surface—it needs to remove the damaged polymer layer and provide new UV protection to prevent rapid re-degradation.
Key Features to Look for in a Quality Headlight Polish
The market is flooded with products promising miraculous results, but discerning car enthusiasts know what separates genuine restoration from temporary cosmetic fixes. A premium headlight polish should contain graduated abrasives that work efficiently without creating new scratches. Look for formulations that explicitly mention diminishing abrasives, which break down into smaller particles as you work, creating a progressively finer finish.
UV inhibitors are non-negotiable. The best polishes incorporate chemical UV absorbers or hindered amine light stabilizers (HALS) that bond to the lens surface. Application clarity matters too—products that dry to a hazy film before buffing often provide better visual feedback than those that remain wet and messy. Consider the curing mechanism as well; some polishes chemically bond to the plastic, while others rely on physical adhesion.
The Different Types of Headlight Polishing Products
Headlight restoration involves a spectrum of products, each serving distinct purposes in the rejuvenation process. Understanding these categories prevents costly mismatches between your expectations and the product’s capabilities. The main families include heavy-cut compounds for severely damaged lenses, medium polishes for general restoration, fine finishing polishes for refinement, and protective sealants for longevity.
Each type uses different active ingredients and application protocols. Heavy compounds often rely on aluminum oxide or silicon carbide abrasives, while finishing polishes might use gentler cerium oxide or specialized chemical agents. The key is matching the product’s aggression level to your lens condition—using a heavy compound on lightly oxidized lenses is overkill that wastes product and time.
Abrasive Polishes vs. Chemical Polishes
Abrasive polishes physically remove the damaged plastic layer through mechanical action, using compounds similar to those in paint correction but formulated for polycarbonate’s softer nature. These are essential for moderate to severe oxidation where material removal is necessary. They require elbow grease or machine assistance but provide the most dramatic transformations.
Chemical polishes work through surface-active agents that dissolve and lift oxidation without significant material removal. They’re ideal for maintenance or light fogging but can’t address deep pitting or heavy yellowing. Some advanced formulas combine both approaches, using chemical softening to enhance abrasive efficiency. Your choice depends entirely on the severity of degradation—don’t expect a chemical polish to fix ten years of sun damage.
All-in-One Kits vs. Standalone Polishes
All-in-one kits bundle polishes, sandpaper, applicators, and protective coatings into a convenient package, appealing to DIYers who want everything in one box. They simplify decision-making and ensure product compatibility, which is valuable for beginners. However, kits often include generic-grade components to hit price points, and you may waste money on tools you already own.
Standalone polishes offer superior quality and customization for discerning users. You can select premium abrasives, professional-grade UV sealants, and quality microfiber pads that outperform kit components. This approach requires more research but rewards you with better results and the flexibility to tackle future projects with leftover materials. Consider your skill level, existing tool inventory, and desired outcome quality when deciding.
The Role of UV Protection in Headlight Restoration
Polishing without UV protection is like painting a car without clear coat—the results will be short-lived and disappointing. Every effective restoration must conclude with a robust UV barrier, either integrated into the polish itself or applied as a separate coating. The sun’s UV intensity has increased significantly over the past decade, making this step more critical than ever.
Quality UV protectants fall into two categories: temporary solutions like synthetic polymer sealants that last 3-6 months, and semi-permanent ceramic or acrylic coatings that can endure 1-2 years. The best products create a sacrificial layer that absorbs UV radiation before it reaches the plastic, similar to how sunscreen protects skin. This layer gradually degrades instead of your headlight, requiring periodic reapplication to maintain effectiveness.
Application Methods: What to Consider Before Buying
Your chosen application method dramatically influences both results and user experience. Hand application using foam or microfiber pads offers control and accessibility but demands significant physical effort and time. Machine polishing with a dual-action or rotary polisher delivers faster, more consistent results but requires equipment investment and skill development.
Consider the product’s viscosity and working time. Thin, runny polishes can be messy when applied by hand but spread easily with a machine. Thick, paste-like formulas offer better control during manual application but may clog machine pads. Some advanced polishes change consistency as they work, starting creamy and drying to a dust that buffs away cleanly. Always check manufacturer recommendations—using a machine on a hand-only product can cause splattering and uneven results.
Hand Application vs. Machine Polishing
Hand polishing connects you intimately with the restoration process, allowing you to feel the lens surface transform beneath your fingertips. It’s meditative and requires minimal investment—just quality pads and patience. However, achieving uniform pressure and complete coverage is challenging, and severe oxidation might demand hours of repetitive motion that leads to fatigue and inconsistent results.
Machine polishing revolutionizes the experience, using orbital or rotary motion to work polishes more efficiently than human hands ever could. A dual-action polisher removes the physical burden while delivering professional-grade results in a fraction of the time. The learning curve is gentler than most assume, and the versatility extends to paint correction and other detailing tasks. For anyone planning multiple restorations, the investment quickly pays for itself in saved time and superior outcomes.
Time Investment: How Long Should the Process Take?
Realistic time budgeting separates successful restorations from rushed disasters. A basic polish on lightly oxidized headlights might take 30-45 minutes per lens by hand, including preparation and protection. Moderate oxidation requiring multi-stage correction can consume 1.5-2 hours per headlight, while severely degraded lenses might demand half a day of careful work.
Machine polishing typically cuts these times by 50-70%, but you must factor in equipment setup, pad cleaning, and the learning curve. Multi-step systems with separate compounding, polishing, and sealing stages naturally take longer than all-in-one products. Always add 30% more time than you think you need—rushing leads to missed spots, incomplete protection application, and disappointing durability. The best restorations are methodical, not fast.
Durability: How Long Will Results Last?
Durability is the ultimate measure of restoration success, and it varies wildly based on product quality, application thoroughness, and environmental exposure. A basic polish without dedicated UV protection might begin failing within 2-3 months, while a comprehensive restoration with premium sealant can maintain clarity for 18-24 months. Garage-kept vehicles in mild climates see dramatically longer results than daily drivers in Arizona or Florida.
The key factors influencing longevity include: complete removal of old UV coating, thorough surface preparation, adequate polish residue removal, uniform protective coating application, and proper curing time. Even the best products fail prematurely if applied over contaminated surfaces or insufficient coating thickness. Regular maintenance washing with pH-neutral shampoo and periodic application of spray sealants can extend results by 30-50%.
Safety Considerations When Working with Polishing Compounds
headlight polishes contain chemicals that demand respect and proper precautions. Many compounds use volatile solvents that require adequate ventilation—never work in enclosed spaces without exhaust fans. Nitrile gloves are essential; the abrasives and chemicals can cause skin irritation and dryness, while UV inhibitors may have unknown long-term dermal effects.
Eye protection is non-negotiable. Spinning pads can fling abrasive particles at high velocity, and many polishes contain fine dust that becomes airborne during buffing. A quality respirator or at minimum a dust mask prevents inhalation of silica or polymer particles that could irritate lungs. Keep a bottle of eye wash solution nearby, and always read the Safety Data Sheet (SDS) for your specific product—some contain chemicals that react with water or require special disposal methods.
Cost vs. Value: Understanding Price Points
Headlight polish prices range from $5 bargain bin tubes to $50 professional-grade formulations, and understanding this spectrum prevents both false economy and unnecessary extravagance. Budget polishes often omit UV inhibitors or use coarse, inconsistent abrasives that create more problems than they solve. They’re suitable for emergency fixes or vehicles nearing end-of-life but represent poor value for daily drivers.
Mid-range products ($15-$30) typically offer the sweet spot for enthusiasts, providing quality abrasives, integrated UV protection, and good working characteristics. Premium polishes justify their higher cost through advanced chemistry, longer durability, and concentrated formulas that require less product per application. Factor in hidden costs like sandpaper, masking tape, applicators, and protective coatings when budgeting—a $15 polish that requires $20 in additional supplies offers less value than a $35 all-inclusive kit.
Common Mistakes to Avoid During Headlight Polishing
The path to crystal-clear headlights is littered with well-intentioned errors that compromise results. Skipping the initial deep cleaning phase is perhaps the most frequent mistake—polishing over embedded bug residue or tree sap grinds contaminants into the lens, creating new scratches. Always decontaminate with a dedicated plastic cleaner or isopropyl alcohol before touching abrasives to the surface.
Another critical error is inadequate masking. Overspray from polish inevitably finds its way onto paint and trim, where it can stain or require aggressive removal. Use quality automotive masking tape and plastic sheeting to protect adjacent surfaces. Many DIYers also apply too much pressure, overheating the polycarbonate and creating microscopic warping that shows up as distortion. Let the abrasive do the work—moderate pressure and patience yield superior results to aggressive grinding.
Maintenance Tips to Prolong Your Headlight Clarity
Restoration is only half the battle; maintenance determines how long your efforts last. Establish a monthly cleaning routine using a pH-neutral car shampoo and soft microfiber mitt—never use household glass cleaners containing ammonia, which attacks polycarbonate and degrades UV coatings. Apply a spray sealant every 60-90 days as a sacrificial layer that takes environmental abuse instead of your restored surface.
Parking strategy significantly impacts longevity. Whenever possible, face your vehicle away from direct sunlight during peak UV hours (10 AM to 4 PM). Consider using a breathable car cover for extended outdoor parking, but avoid plastic tarps that trap moisture and heat. For garage-kept vehicles, position them away from windows that admit UV rays. Annual inspection with a light polishing touch-up can catch early oxidation before it becomes severe, maintaining clarity indefinitely.
When to Polish vs. When to Replace Your Headlights
Not every cloudy headlight deserves restoration. If the lens has deep cracks penetrating through the plastic, polishing can’t repair structural integrity and moisture will continue seeping in. Severe pitting from road debris that creates a sandblasted texture may require removing too much material to achieve smoothness, risking lens thickness and optical clarity. In these cases, replacement is the prudent choice.
Water intrusion is another deal-breaker. If you see condensation inside the lens assembly, the seal has failed and internal corrosion is already occurring. Polishing the exterior won’t restore reflector functionality or prevent ongoing damage. Cost analysis also matters—if professional restoration quotes approach half the price of new aftermarket assemblies, replacement often provides better long-term value, especially on high-mileage vehicles where other components may soon fail.
Professional vs. DIY: Making the Right Choice for Your Situation
The DIY route offers satisfaction, cost savings, and the flexibility to work at your own pace. It’s ideal for enthusiasts who already own polishing equipment and enjoy the process. However, the learning curve is real—your first restoration might take twice as long as anticipated and yield imperfect results. DIY makes economic sense for multiple vehicles or when you value the skill acquisition.
Professional restoration services justify their $75-$150 per vehicle pricing through experience, commercial-grade products, and equipment that delivers consistent results in under an hour. They also assume liability if something goes wrong—a cracked lens or paint damage becomes their problem, not yours. Consider professional help for luxury vehicles with complex headlight designs, severely damaged lenses requiring wet-sanding expertise, or simply when your time is more valuable than the service cost. Many detailers offer maintenance packages that keep headlights clear year-round for a fraction of the initial restoration price.
Frequently Asked Questions
How often should I polish my headlights?
With proper UV protection and maintenance, a quality restoration should last 12-24 months before requiring more than a light polish touch-up. Vehicles in harsh climates or parked outdoors daily may need attention every 8-12 months. The key is monitoring clarity monthly and addressing early haze before it becomes severe oxidation.
Can I use regular car polish on my headlights?
Automotive paint polishes are formulated for much harder clear coats and lack the chemical composition to properly bond with polycarbonate. They may provide temporary gloss but won’t effectively remove heavy oxidation or provide adequate UV protection. Always use products specifically designed for plastic lens restoration to ensure compatibility and durability.
What’s the difference between headlight polish and headlight restoration kits?
Polish is a single component that smooths and refines the lens surface, while restoration kits typically include multiple products (cleaner, sandpaper, polish, UV sealant) and tools for a complete process. Kits offer convenience for beginners, whereas standalone polishes provide flexibility and often higher quality for experienced users who already have complementary products.
Will polishing remove deep scratches from headlights?
Polishing can remove light surface scratches but cannot fix deep gouges that penetrate significantly into the plastic. Severe damage may require starting with 600-800 grit wet sanding before progressing through finer grits and polish. If scratches are too deep, replacement becomes the only option for perfect clarity.
How long does headlight polishing take?
A basic hand polish on lightly oxidized lenses takes 30-45 minutes per headlight. Multi-stage restoration with machine polishing on severely degraded lenses can take 1.5-2 hours per lens. Always budget extra time for preparation, masking, and proper curing of protective coatings.
Is machine polishing better than hand polishing?
Machine polishing delivers superior results in less time with less physical effort. It maintains consistent speed and pressure while generating the heat necessary for some polishes to work effectively. However, hand polishing offers more control for delicate areas and requires no equipment investment. For severe oxidation, machine polishing is strongly recommended.
Can I polish headlights in cold weather?
Temperatures below 60°F (15°C) slow chemical reactions in polishes and protective coatings, extending cure times and potentially compromising bond strength. Most products perform optimally between 65-75°F. If you must work in cold conditions, use a heated garage and allow extra time for each step to fully activate and cure.
Why do my headlights get cloudy again after polishing?
Rapid re-clouding almost always indicates inadequate UV protection application or failure to completely remove old, degraded factory coating. The underlying plastic continues degrading without a proper barrier. Ensure you’re applying a dedicated UV sealant after polishing, not just relying on polish with “UV protection”—the concentration is rarely sufficient alone.
Are headlight polishing chemicals dangerous?
Most modern polishes are relatively safe when used as directed, but they contain fine abrasives and solvents that require precautions. Always wear nitrile gloves and eye protection, work in ventilated areas, and avoid inhaling dust. Check the SDS for specific hazards—some contain crystalline silica or isocyanates that demand respiratory protection.
Can I wax my headlights after polishing?
Traditional carnauba wax provides minimal UV protection and melts at temperatures headlights regularly reach. Instead, use synthetic polymer sealants or ceramic coatings specifically formulated for polycarbonate. These create a harder, more heat-resistant barrier with significantly better UV blocking properties than conventional automotive waxes.