Driving through a torrential downpour with obscured side mirrors isn’t just frustrating—it’s a legitimate safety hazard that affects millions of drivers daily. While most car enthusiasts religiously wax their paint and condition their leather, side mirrors remain the forgotten soldiers of automotive visibility, left to fend against water spots, road grime, and UV degradation without proper protection. The difference between a well-sealed mirror and an untreated one during heavy rain is stark: crystal-clear visibility versus a blurry, distorted mess that forces you to roll down windows just to change lanes safely.
Modern glass sealant technology has evolved far beyond simple rain-repellent sprays. Today’s formulations offer multi-layered protection that not only beads water with remarkable efficiency but also guards against oxidation, prevents desilvering, and resists contamination from environmental pollutants. Whether you’re a weekend warrior who details your own vehicles or simply someone who values clear visibility in all conditions, understanding what makes an exceptional mirror sealant—and how to apply it correctly—transforms this overlooked maintenance task into a critical safety upgrade. This comprehensive guide breaks down everything you need to know about selecting and applying the optimal glass sealant for your side mirrors, ensuring you make an informed decision based on performance characteristics rather than marketing hype.
Top 10 Glass Sealant For Side Mirrors
Detailed Product Reviews
1. C.R. Laurence S209 CRL Aerosol Mirror Edge Sealant

Overview: The C.R. Laurence S209 is a specialized aerosol sealant designed for protecting exposed mirror edges after cutting, sanding, or beveling. This professional-grade product forms a clear protective barrier that prevents the unsightly blackening effect caused by moisture infiltration into the silver backing. Ideal for glaziers, frame shops, and DIY enthusiasts working with custom-cut mirrors.
What Makes It Stand Out: The aerosol delivery system sets this product apart from brush-on alternatives, providing faster, more uniform coverage on mirror edges. Its specialized formula specifically targets the chemical reaction between moisture and mirror backing, effectively extending the lifespan of cut mirrors. The clear finish maintains the mirror’s aesthetic appeal while providing invisible protection.
Value for Money: At $24.19 per can, this sealant represents a sound investment compared to the cost of replacing discolored mirrors or professional re-edging services. A single can treats numerous mirrors, making it economical for regular users. However, occasional DIYers may find the price steep for one-time projects.
Strengths and Weaknesses: Pros include effortless spray application, professional-quality results, and effective moisture barrier properties. The aerosol format ensures even coating without brush marks. Cons involve significant shipping restrictions to California and Europe, limiting accessibility. The aerosol format may also have environmental concerns and requires proper ventilation during use.
Bottom Line: This specialized sealant is essential for anyone regularly cutting mirrors. While shipping limitations and price may deter casual users, its effectiveness in preventing edge deterioration justifies the cost for professionals and serious DIYers. Consider local alternatives if you reside in restricted areas.
2. Polyurethane Windshield Adhesive with Fast Curing Formula - High Bond Strength Window Sealant Compound - Easy to Apply Automotive Glass Glue - Windshield Sealant Black - Vehicle & RV Polyurethane Glue

Overview: This professional-grade polyurethane adhesive delivers high-strength bonding for automotive glass applications. Designed for windshield replacement and stationary glass attachment, the single-component formula cures rapidly while meeting manufacturer safety standards. The kit includes nitrile gloves and an application tip, catering to both professional mechanics and ambitious DIYers.
What Makes It Stand Out: The medium viscosity, non-sag formulation provides superior control during application, preventing messy bleeding and ensuring clean joints. Its rapid curing capability minimizes vehicle downtime, while the comprehensive kit approach eliminates separate accessory purchases. The versatility across vehicles—from convertibles to RVs—makes it exceptionally accommodating.
Value for Money: At $13.99, this adhesive offers excellent value, including both the urethane compound and essential accessories. Comparable professional products often cost significantly more without added convenience items. The single-cartridge quantity balances affordability with sufficient material for a standard windshield replacement.
Strengths and Weaknesses: Strengths include impressive bond strength meeting OEM specifications, easy caulking-gun application, weather-resistant properties, and the included gloves and precision tip. The fast-cure formula accelerates project completion. Weaknesses involve potential waste for small repairs, as the cartridge contains more material than needed for minor fixes. Once opened, shelf life becomes limited.
Bottom Line: This windshield adhesive provides professional results at a DIY-friendly price. The complete kit and user-friendly formulation make it ideal for full windshield replacements. For minor chip repairs, consider smaller alternatives, but for major automotive glass work, this product delivers exceptional value and performance.
3. Strong Glass Glue, 30g Clear Glue for Repair, Fast-Cure Rearview Mirror Adhesive, Glass Crack Repair Solution for Quick Repair Mirrors, Jewelry, Crystal, Trophies and DIY Artwork

Overview: Balldanlu’s specialized glass adhesive offers a professional-quality solution for repairing mirrors, jewelry, crystal, trophies, and decorative glass items. This 30g formula creates permanent bonds without clamping, delivering crystal-clear results that resist yellowing, heat, cold, and humidity. The precision applicator enables accurate placement in narrow cracks.
What Makes It Stand Out: Unlike generic super glues, this formulation remains stable under environmental stress, preventing the shrinking and cracking common with standard adhesives. The low-odor formula allows comfortable indoor use, while the fast-drying clear finish ensures invisible repairs on tinted, colored, or clear glass surfaces. The precision nozzle eliminates wasteful messes.
Value for Money: Priced at $8.99 for 30g, this specialty adhesive costs more than generic alternatives but justifies the premium through superior durability and clarity. For repairing valuable items like antiques or jewelry, the investment prevents costly replacements. The small tube size matches typical repair quantities, minimizing waste.
Strengths and Weaknesses: Pros include exceptional clarity, rapid curing, low odor, precise application control, and versatility across glass types. The heat and humidity resistance ensures longevity. Cons involve limited quantity for larger projects and unsuitability for structural automotive glass applications. The small size may require multiple purchases for extensive repairs.
Bottom Line: This glass glue excels for delicate repairs where appearance matters. While not for windshield replacement, it’s perfect for household glassware, crafts, and treasured items. The clear finish and reliable bond make it worth the modest premium over generic options for quality-conscious users.
4. FOLLOWIN Ceramic Coating for Car Side Mirror,Glass Coating,Water Beading Technology,Advanced Water Repellent for Backup Camera,Outdoor Security Camera,Motorcycle Mirror

Overview: FOLLOWIN’s SiO2 ceramic coating provides specialized water-repellent protection for automotive side mirrors, backup cameras, and motorcycle mirrors. Using advanced water-beading technology, this 50ml formula creates an invisible barrier that causes rainwater to bounce off, maintaining clear visibility during inclement weather. Each application covers approximately 3-5ml per mirror.
What Makes It Stand Out: Unlike generic ceramic coatings designed for paint, this formula is specifically engineered for glass mirror surfaces, optimizing adhesion and performance. The economical concentration allows treatment of 5-6 vehicles per bottle, making it cost-effective for multiple cars. The spray application simplifies the typically complex ceramic coating process.
Value for Money: At $13.56, treating 5-6 vehicles translates to roughly $2.25 per vehicle—exceptional value compared to professional hydrophobic treatments. The improved safety and visibility during rain provide tangible benefits that far exceed the minimal investment, especially for drivers in wet climates.
Strengths and Weaknesses: Strengths include effective water beading, easy spray application, long-lasting protection, and versatility across mirrors and camera lenses. The two-hour cure time is reasonable. Weaknesses involve application sensitivity—surfaces must be perfectly clean, and the coating cannot be wiped after curing, requiring careful maintenance. Reapplication is necessary if accidentally removed.
Bottom Line: This specialized coating offers an affordable, effective solution for improving mirror visibility in rain. While application requires attention to detail, the performance benefits and economical per-use cost make it worthwhile for safety-conscious drivers. Perfect for DIY enthusiasts seeking professional-grade water repellency.
5. Mirror Glass Replacement + Silicone Adhesive for 1996-1999 Toyota 4Runner Driver Side (1997 1998 96 97 98 99)
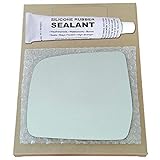
Overview: This replacement kit provides a driver-side mirror glass specifically designed for 1996-1999 Toyota 4Runners. The package includes automotive-grade silicone adhesive and step-by-step instructions for straightforward installation. Measuring 8 1/8 inches diagonally, this high-quality glass meets or exceeds OEM specifications without the premium dealership price.
What Makes It Stand Out: The vehicle-specific design ensures perfect fitment, eliminating guesswork common with universal replacements. The included automotive-grade silicone adhesive offers superior bonding compared to standard double-sided tape, providing better heat transfer for heated mirrors and maximum adhesion under harsh conditions. The comprehensive approach bundles everything needed for installation.
Value for Money: At $24.95, this kit costs significantly less than replacing the entire mirror assembly, which can exceed $200. The DIY-friendly installation saves labor costs, while the quality glass ensures durable performance. For 4Runner owners, this targeted solution addresses the common problem of cracked glass without unnecessary component replacement.
Strengths and Weaknesses: Pros include exact vehicle fitment, high-quality glass, superior silicone adhesive, clear instructions, and substantial cost savings. The solution is practical and efficient. Cons involve the lack of a plastic backing plate, requiring careful installation, and extremely limited compatibility—only fitting specific 4Runner model years. Buyers must verify measurements and shape before ordering.
Bottom Line: This replacement glass offers an unbeatable value proposition for 1996-1999 4Runner owners with damaged mirrors. While vehicle-specific limitations narrow its audience, those with compatible trucks will find this an economical, high-quality alternative to expensive OEM assemblies. Verify fitment carefully before purchasing.
6. Griot’s Garage Glass Sealant Coating for Cars, Trucks, SUVs, and More, for Water Spots, 11033, 8oz

Overview: Griot’s Garage Glass Sealant is an 8-ounce hydrophobic coating designed to repel water from automotive glass surfaces. At $12.49, this sealant creates a protective barrier that significantly improves visibility during inclement weather by causing water to bead and roll off your windshield.
What Makes It Stand Out: The simplicity of application sets this product apart—just wipe on, let dry, and buff off without any specialized tools. It works in all weather conditions, from torrential rain to snow and sleet, while also helping extend wiper blade life by reducing friction and preventing ice buildup. The formula creates a slick surface that allows wipers to glide effortlessly.
Value for Money: Priced at $1.56 per ounce, this sealant offers excellent value compared to professional treatments that can cost $50-100. It competes directly with Rain-X but provides longer-lasting protection, typically enduring 3-6 months per application. For the cost of a car wash, you get multiple applications that enhance safety and reduce wiper wear.
Strengths and Weaknesses: Pros include effortless DIY application, universal compatibility with all vehicle glass, and genuine safety improvements in poor weather. The hydrophobic effect noticeably reduces reliance on wipers at highway speeds. Cons involve the need for thorough surface preparation and reapplication every few months. Some users report streaking if not buffed properly, and it won’t fix existing chips or cracks.
Bottom Line: This is a worthwhile investment for any driver prioritizing safety and visibility. The straightforward application process and proven performance make it an essential addition to your car care arsenal, especially for those in rainy climates.
7. Polyurethane Windshield Adhesive, Fast Curing & Ultra-Bond Windshield Sealant, Heat-Stable Auto Glass Glue for Car, Truck, Side Window, Convertible, Windshield Repair Kit with Tool, 10.5 oz (Black)
Overview: This 10.5-ounce polyurethane windshield adhesive provides professional-grade bonding for permanent auto glass installation at a DIY-friendly $12.99 price point. Specifically engineered for windshield fixation, it prevents glass loosening and water leakage while withstanding extreme impacts.
What Makes It Stand Out: The no-primer-required formula eliminates complex surface preparation, making it accessible for non-professionals. It cures quickly while maintaining flexibility for 30+ years, resisting UV degradation, extreme temperatures, and harsh weather without cracking or losing adhesion. The included gloves and applicator tip create a complete kit.
Value for Money: At $1.24 per ounce, this adhesive costs a fraction of professional windshield replacement ($200-400). It delivers OEM-grade performance that meets safety standards, making it ideal for DIY repairs on side windows, sunroofs, and backlights. The fast-curing properties minimize vehicle downtime significantly.
Strengths and Weaknesses: Pros include exceptional all-weather durability, high-impact resistance, and versatile application on cars, trucks, and RVs. The non-sag formula works perfectly on vertical surfaces. Cons are the permanent black color that may be visible on some installations, single-use packaging waste, and the learning curve for first-time users. Proper application requires a steady hand and clean surfaces.
Bottom Line: For confident DIYers tackling auto glass replacement, this adhesive offers professional results without the labor costs. The all-in-one kit and proven durability make it a smart choice for serious automotive repairs.
8. Clear Liquid Glass Glue 30g, Fast-Dry Glass Adhesive for Rearview Mirror, Acrylic, Crystal, Craft & DIY, with Anti-Clog Cap

Overview: This 30-gram clear glass glue provides a fast-drying adhesive solution for delicate glass repairs and craft projects. At $6.99, it specializes in creating invisible bonds between glass surfaces, from crystal figurines to rearview mirrors and aquarium seals.
What Makes It Stand Out: The anti-clogging cap design ensures longevity and reusability, preventing the glue from drying out between uses. It sets in just 15 seconds and fully cures within 24 hours without requiring clamps. Three specialized precision applicators allow surgical accuracy for intricate repairs on jewelry, vases, and phone screens.
Value for Money: While small in quantity, this specialized glue saves money by repairing expensive glass items rather than replacing them. It outperforms generic super glues on glass-to-glass applications, providing weatherproof, long-lasting bonds that withstand temperature swings and moisture. For craft enthusiasts, it eliminates the need for multiple specialized adhesives.
Strengths and Weaknesses: Pros include crystal-clear finishes, rapid setting time, and excellent performance on non-porous surfaces. The weatherproof formula works for both indoor and outdoor applications. Cons involve the limited 30-gram quantity for larger projects, lack of structural strength for load-bearing repairs, and potential brittleness over time on flexible materials.
Bottom Line: Perfect for hobbyists and homeowners needing precise, invisible glass repairs. The anti-clog design and specialized applicators make it superior to standard super glues for delicate glasswork, though it’s best suited for small to medium-sized fixes.
9. ClenyMagi 2-Pack Fast Curing Glass Glue, Super Glue for Glass, Acrylic, Mirror and More, Clear, Waterproof, Heat-Resistant

Overview: This two-pack glass glue kit delivers double the value for $9.99, providing clear, waterproof adhesive for glass, acrylic, mirrors, and crafts. Each tube comes with precision applicators designed for detailed work in hard-to-reach areas.
What Makes It Stand Out: The value proposition is immediate—two tubes with droppers and a precision tip enable multiple projects without repurchasing. It withstands extreme temperatures from -40℃ to 150℃, making it suitable for both household repairs and industrial applications. The formulation creates superior glass-to-glass bonds while remaining versatile enough for crystals and decorative items.
Value for Money: At $11.33 per ounce, the two-pack structure offers significant savings over single-tube purchases. It replaces multiple specialized adhesives, handling everything from photo frames to aquarium seals and jewelry repairs. The included precision tools eliminate the need for separate applicator purchases, adding to the overall value.
Strengths and Weaknesses: Pros include excellent temperature resistance, the convenience of a two-pack for ongoing projects, and precision application tools that reduce waste. The waterproof seal performs reliably in wet environments. Cons involve relatively small individual tube sizes and the 24-hour full cure time requiring patience. The glue may not bond as effectively to plastics or metals without proper surface preparation.
Bottom Line: An exceptional choice for DIY enthusiasts who frequently work with glass and acrylic. The two-pack format and professional-grade temperature resistance make it a versatile, cost-effective addition to any home repair kit.
10. [2 Pack] Polyurethane Windshield Adhesive with Fast Curing Formula - High Bond Strength Window Sealant Compound - Easy Automotive Glass Glue - Windshield Sealant Black - Vehicle & RV Polyurethane Glue
![[2 Pack] Polyurethane Windshield Adhesive with Fast Curing Formula - High Bond Strength Window Sealant Compound - Easy Automotive Glass Glue - Windshield Sealant Black - Vehicle & RV Polyurethane Glue](https://m.media-amazon.com/images/I/41fTPJHL4qL._SL160_.jpg)
Overview: This two-pack polyurethane windshield adhesive provides professional-grade bonding strength for automotive glass replacement at $27.99. Designed to meet manufacturer specifications for windshield installation, it delivers a permanent, secure hold for cars, trucks, RVs, and convertibles.
What Makes It Stand Out: The kit includes everything needed for professional results: two 10.5-ounce cartridges, nitrile gloves, and application tips. The medium-viscosity, non-sag formula loads into any standard caulking gun, providing enhanced control without bleeding. It cures rapidly while maintaining flexibility and meets OEM strength requirements for safety-critical windshield bonds.
Value for Money: While pricier than single tubes, the two-pack structure saves money for multiple vehicle repairs or professional mechanics. At approximately $13 per cartridge, it costs 70-80% less than professional installation while delivering equivalent performance. The complete kit eliminates additional supply purchases.
Strengths and Weaknesses: Pros include OEM-grade strength, versatile application on all auto glass types, and the convenience of a complete two-pack kit. The non-sag properties ensure clean vertical applications. Cons involve the higher upfront investment, requirement of a caulking gun, and permanent black color that may not suit all aesthetic preferences. Storage life can be limited once opened.
Bottom Line: Ideal for automotive professionals or serious DIYers managing multiple vehicles. The OEM-spec performance and comprehensive kit justify the premium price, delivering peace of mind for safety-critical glass installations.
Why Your Side Mirrors Deserve Premium Glass Sealant Protection
Side mirrors face unique challenges that your windshield or rear window never encounter. They protrude into the airflow, catching every raindrop, bug splatter, and piece of road debris at highway speeds. Their convex shape creates complex surface tension issues, and they’re constantly bombarded with UV radiation from multiple angles. Unlike your main glass surfaces that benefit from wipers and washer fluid, mirrors rely entirely on passive protection. A premium sealant creates a sacrificial barrier that actively repels contaminants while maintaining optical clarity. The microscopic layer fills in the glass’s inherent surface imperfections, creating a smoother surface that water, dirt, and oils struggle to adhere to. This isn’t just about convenience—it’s about maintaining the mirror’s reflective integrity over years of exposure.
Understanding the Science Behind Glass Sealant Technology
Hydrophobic vs Oleophobic Properties: What Matters Most for Mirrors
When evaluating sealants, you’ll encounter two critical performance metrics: hydrophobicity (water-repelling) and oleophobicity (oil-repelling). For side mirrors, the ideal formulation balances both properties aggressively. Hydrophobic action causes water to bead and roll off at speeds as low as 30 mph, but oleophobic resistance prevents the stubborn oily film that accumulates from exhaust particulates and road tar. The most advanced products achieve contact angles exceeding 110 degrees for water and 70 degrees for oils, creating a surface so slick that contaminants literally bounce off. This dual-action protection proves especially valuable in urban environments where mirrors collect a greasy residue that water alone can’t remove.
The Chemistry of Adhesion: Why Mirror Glass is Different
Automotive mirror glass undergoes a silvering process that creates a reflective coating on the back surface, making the front glass chemically different from standard automotive glass. This manufacturing difference affects how sealants bond. Premium formulations contain silane coupling agents that form covalent bonds with the glass’s silica matrix, creating a semi-permanent attachment that withstands repeated washing and environmental stress. Cheaper products rely on weaker physical adhesion that deteriorates within weeks. The molecular structure matters too—linear siloxane chains provide flexibility for temperature fluctuations, while branched polymers offer denser protection but can crack under thermal cycling.
Key Performance Features to Evaluate Before Buying
Water Beading Angle: The 90-Degree Benchmark
The water contact angle serves as the most objective measure of hydrophobic performance. A quality mirror sealant should maintain a contact angle above 90 degrees after initial curing, with premium formulations exceeding 110 degrees. This measurement determines how readily water evacuates the surface. At 90 degrees, water forms hemispherical beads that require significant wind force to move. At 110+ degrees, beads become nearly spherical and roll off with minimal airflow. Be wary of manufacturers who advertise initial angles without specifying performance after 30 days of UV exposure—degradation tells the real story.
UV Resistance and Preventing Mirror Desilvering
Ultraviolet radiation attacks mirrors on two fronts: it degrades the sealant itself and accelerates desilvering—the black edge creep that destroys mirror reflectivity from the outside in. Advanced sealants incorporate UV stabilizers and hindered amine light stabilizers (HALS) that sacrificially absorb radiation before it reaches the glass surface. Look for products that specifically mention “UV400 protection” or “broad-spectrum UV inhibitors.” These formulations maintain their hydrophobic properties for 6+ months while simultaneously shielding the mirror’s reflective backing from the UV-induced oxidation that causes those unsightly black edges.
Temperature Range Tolerance: From Desert Heat to Arctic Cold
Your side mirrors experience extreme temperature swings—from sub-zero winter mornings to scorching summer afternoons where black mirror housings absorb enough heat to fry an egg. A robust sealant must maintain its protective properties across at least a 120-degree Celsius range (-20°C to 100°C). Premium products undergo thermal cycling tests that simulate years of expansion and contraction without cracking or delaminating. Pay attention to glass transition temperature (Tg) specifications in technical data sheets; sealants with Tg below -30°C remain flexible in extreme cold, preventing the micro-fractures that compromise protection.
Types of Glass Sealants: Pros and Cons for Automotive Mirrors
Ceramic-Infused Sealants: The Premium Choice
Ceramic-infused glass sealants leverage silicon dioxide (SiO2) nanoparticles suspended in a resin carrier to create a crystalline protective layer. These formulations offer the hardest, most durable protection available, typically lasting 12-24 months on side mirrors. The nanoparticles fill microscopic pits in the glass, creating a surface smoother than the glass itself. However, this premium performance demands precise application—improper leveling leaves visible high spots that require machine polishing to remove. Ceramic sealants also require longer curing times, often 12-24 hours, during which the vehicle must remain dry and dust-free.
Silicone-Based Formulations: The Traditional Approach
Silicone-based sealants represent the tried-and-true technology that’s protected glass for decades. These products create a flexible, slick film that repels water effectively for 3-6 months. Their primary advantage lies in forgiveness—application errors rarely cause permanent issues, and they cure quickly, often within 1-2 hours. The downside? Silicone films attract dust and can smear under wiper contact (though this rarely affects mirrors). They also degrade faster under UV exposure, requiring more frequent reapplication. For budget-conscious enthusiasts who don’t mind seasonal touch-ups, silicone remains a viable option.
Graphene-Enhanced Coatings: Next-Generation Protection
The newest entrants in the sealant market incorporate graphene oxide platelets that create an electrically conductive barrier with extraordinary water-repelling properties. Graphene-enhanced products claim contact angles exceeding 120 degrees and durability extending beyond 24 months. The material’s thermal conductivity helps dissipate heat, reducing thermal stress on the sealant layer. However, this technology commands premium pricing, and independent long-term testing remains limited compared to ceramic alternatives. The application process mirrors ceramic products in complexity, requiring careful surface preparation and controlled curing environments.
Application Mastery: Step-by-Step Process for Mirror Perfection
Surface Preparation: The Make-or-Break First Step
Success with any sealant begins with surgically clean glass. Start by washing mirrors with a dedicated glass cleaner containing no surfactants or conditioners. Follow with an isopropyl alcohol wipe-down using a 50/50 distilled water solution and premium microfiber cloths. For neglected mirrors, clay barring removes embedded contamination that washing misses. The final step involves a chemical decontamination using an iron fallout remover—yes, mirrors collect iron particles from brake dust just like paint. This three-stage process ensures the sealant bonds directly to glass silica rather than contamination layers.
Curing Time Considerations: Patience Pays Dividends
Curing represents the chemical process where sealants cross-link and develop full hardness. Rushing this stage compromises durability and performance. Temperature and humidity dramatically affect cure rates—ideal conditions sit at 20-25°C with 50% relative humidity. Ceramic sealants require 12-24 hours before water exposure, while silicone products need only 1-2 hours. Graphene coatings demand the longest cure times, often 48 hours for full cross-linking. During curing, avoid garage doors opening and closing (dust), temperature fluctuations, and any contact with the treated surface. A small fan set to low speed improves airflow without creating dust storms.
Common Application Mistakes That Ruin Performance
Over-application stands as the most frequent error—more product doesn’t equal more protection. Excess sealant creates a thick layer that cures unevenly, leading to high spots and reduced clarity. Applying in direct sunlight causes flash curing, where the solvent evaporates too quickly, preventing proper leveling. Using cheap microfiber applicators leaves lint embedded in the coating. Perhaps most critically, failing to remove all residue before final curing creates a hazy film that requires machine polishing to correct. Work in small sections, use quality applicators, and maintain adequate lighting to catch missed spots during the leveling stage.
Maintenance Protocols to Extend Sealant Lifespan
Even the best sealants require maintenance to reach their advertised longevity. Wash mirrors weekly using a pH-neutral shampoo and soft microfiber mitt. Avoid aggressive brush car washes—their harsh chemicals and mechanical action strip sealants prematurely. Every 4-6 weeks, apply a sealant-specific booster spray that replenishes the hydrophobic top layer. These boosters contain the same active ingredients at lower concentrations, extending performance without full reapplication. Never use glass cleaners containing ammonia or alcohol on sealed mirrors; these solvents dissolve the protective layer. Instead, use dedicated sealant-safe cleaners or simply water and a microfiber towel.
Cost-Benefit Analysis: Budget vs Premium Options
Budget silicone sealants typically cost $10-20 per application and last 3-6 months, requiring two applications annually. Premium ceramic or graphene products run $50-100 but protect for 12-24 months. Over a three-year period, budget options cost $60-120 with six applications versus $50-100 with one application for premium products. Factor in your time value—each application requires 30-45 minutes of labor. Premium products also provide superior UV protection, potentially extending mirror life and preventing $200+ replacement costs. For daily drivers in harsh climates, premium options deliver clear value. For garage-kept weekend cars, budget solutions suffice.
DIY Enthusiast vs Professional Application: Making the Right Choice
Professional application costs $100-200 for all mirrors but includes paint correction, proper curing environment control, and warranty backing. DIY costs $50-100 in materials but risks application errors that require professional correction. Consider professional installation if your mirrors show heavy swirling, scratches, or desilvering—technicians can polish glass optically clear before sealing. DIY makes sense for enthusiasts with basic detailing experience who own a garage space with controlled environment. The learning curve for ceramic and graphene products is steep; first-timers should practice on an old mirror or glass pane before tackling their vehicle.
Seasonal Application Strategies for Optimal Results
Spring and fall offer ideal application windows—moderate temperatures and lower humidity create perfect curing conditions. Summer applications demand early morning or evening timing to avoid heat and direct sun. Winter applications require heated garage space maintained above 15°C; never apply sealants outdoors below 10°C as curing stalls completely. In regions with harsh winters, apply a fresh sealant layer in late autumn to protect against road salt and de-icing chemicals. Coastal areas benefit from spring application before humidity peaks, preventing salt air contamination during curing. Plan applications at least 48 hours before predicted rain to ensure full cure.
Compatibility Concerns: Mirror Materials and Existing Coatings
Modern mirrors aren’t just glass—heated mirrors contain embedded electrical elements, and some luxury vehicles feature electrochromic (auto-dimming) glass with specialized coatings. Test sealants on a small corner first; ceramic and graphene products can interfere with electrochromic function if they penetrate edges. Mirrors previously treated with silicone-based products require complete stripping before applying ceramic sealants—the two chemistries repel each other, causing delamination. Use a silicone remover or polish with a mild abrasive before switching technologies. Never apply sealants over existing wax or polymer sealants; these create a release layer that prevents bonding.
Troubleshooting: When Your Sealant Underperforms
If water stops beading within weeks, contamination is the culprit. Iron particles, tree sap, or industrial fallout embed in the sealant, masking its hydrophobic properties. Decontaminate with iron remover and clay bar, then apply a booster spray. Hazing or streaking indicates incomplete leveling—wipe with a damp microfiber and re-level immediately. If the sealant peels or flakes, the surface wasn’t clean enough during application; strip completely and restart preparation. Poor beading on mirror edges suggests inadequate coverage—edges require extra attention as they’re most exposed to water intrusion. For persistent issues, check expiration dates; most sealants lose potency 12-18 months after opening.
Performance Testing Methods: How to Verify Your Sealant Works
Don’t trust manufacturer claims—test performance yourself. The spray bottle test: mist water onto the treated mirror and observe bead shape and roll-off angle. Premium sealants produce tight beads that roll off when you tilt the mirror 30 degrees. The contamination test: wipe a finger across the dry mirror; a properly sealed surface feels slick, not tacky. For quantitative measurement, use a contact angle goniometer app on your smartphone—though not lab-accurate, it provides comparative data. The real-world test matters most: drive in light rain at 40 mph; water should evacuate completely from the mirror’s viewing area within seconds.
Environmental Impact and Eco-Friendly Formulations
Traditional sealants contain volatile organic compounds (VOCs) that evaporate during application, contributing to air pollution. Eco-friendly formulations use water-based carriers and biodegradable surfactants, reducing environmental impact without sacrificing performance. These green products often carry Green Seal or EPA Safer Choice certifications. Application technique affects environmental impact too—wipe excess product onto applicator pads rather than washing it down drains. Dispose of used microfiber towels properly; many sealants contain silicones that don’t break down in wastewater treatment. For the environmentally conscious, concentrate longevity over frequent reapplication reduces overall chemical usage.
Frequently Asked Questions
How long does a quality glass sealant actually last on side mirrors?
Real-world longevity depends on climate, washing frequency, and product quality. Premium ceramic-based sealants typically maintain effective hydrophobic properties for 12-18 months on side mirrors, while graphene-enhanced formulations can extend to 24 months. Silicone-based options generally require reapplication every 3-4 months. However, mirrors on daily drivers in harsh environments may see performance drop 20-30% sooner. Regular maintenance with booster sprays can extend any sealant’s effective life by 40-50%.
Can I use windshield rain repellent products on my side mirrors?
While chemically similar, windshield products are formulated for flat, vertical surfaces and often contain additives for wiper compatibility that can cause smearing on convex mirrors. Mirror-specific sealants account for the complex curvature and different airflow patterns. Using windshield products won’t damage mirrors but typically results in shorter durability—expect 50-60% of the advertised performance. For best results, invest in formulations specifically designed for mirror geometry.
Will glass sealants interfere with my heated mirrors’ function?
Quality sealants won’t impede heating elements as they bond only to the front glass surface. However, avoid applying sealant to mirror edges where heating element connections may be exposed. Test by activating heated mirrors 24 hours after application; if you notice uneven heating patterns or cold spots, the sealant may be too thick. Ceramic and graphene products are safe for heated mirrors when applied correctly in thin, even layers.
What’s the ideal temperature range for applying mirror sealants?
The sweet spot sits between 18-24°C (65-75°F) with moderate humidity around 50%. Most products specify a workable range of 10-30°C, but performance suffers at extremes. Below 10°C, curing slows dramatically and may stall completely. Above 30°C, solvents flash off too quickly, preventing proper leveling. Professional detailers maintain climate-controlled spaces for this reason. If you must apply outside ideal conditions, adjust technique—work smaller sections faster in heat, and allow triple the cure time in cold.
How do I remove old sealant before applying a new layer?
Complete removal requires mechanical and chemical action. Start with a glass polish containing mild abrasives to physically remove the old layer. Follow with an isopropyl alcohol wipe-down (70% concentration) to dissolve residual oils. For stubborn ceramic coatings, use a specialized coating remover or a clay bar with heavy-duty lubricant. The final test: water should sheet evenly across the glass rather than bead before you apply new sealant. Any remaining old product creates bonding issues.
Can glass sealants fix existing mirror desilvering or black edges?
Sealants prevent further desilvering but cannot reverse existing damage. The black edge creep results from moisture and oxygen penetrating the mirror’s edge seal, oxidizing the silver backing. Applying sealant to damaged areas slows progression by blocking additional moisture intrusion. For mirrors with significant desilvering, replacement is the only true fix. Consider sealant application on new mirrors as cheap insurance against a $200+ replacement cost.
Are there any mirrors I shouldn’t seal?
Avoid sealing mirrors with existing physical damage—deep scratches or chips allow sealant to penetrate the glass matrix, potentially worsening visibility. Electrochromic (auto-dimming) mirrors require caution; test a small corner first as some ceramic sealants can interfere with the electrochromic layer’s responsiveness. Vintage mirrors with deteriorating original silvering should be restored before sealing. Finally, never seal mirrors with condensation inside the glass—this indicates seal failure that needs replacement, not coating.
How thick should the sealant layer be on side mirrors?
Thinner is unequivocally better. The optimal layer measures just 2-5 microns—roughly 1/20th the thickness of a human hair. Apply just enough product to create a slight haze, then level thoroughly until the surface looks clear. Over-application doesn’t increase protection but creates curing problems and potential high spots. Remember, you’re filling microscopic imperfections, not building a visible layer. If you can see the sealant after leveling, you’ve applied too much.
Do I need to seal the mirror housing plastic as well?
While not necessary for visibility, sealing plastic mirror housings provides aesthetic benefits and makes cleaning easier. However, use a dedicated plastic sealant rather than glass product—glass sealants don’t bond well to plastic and can create a splotchy appearance. Some all-in-one formulations work on both surfaces, but specialized products for each material always deliver superior results. The housing typically needs resealing annually, matching your paint protection schedule.
What causes sealant failure on just the lower mirror edge?
The lower edge bears the brunt of water, dirt, and salt accumulation, experiencing 3-4 times more contamination than the upper portion. Gravity pulls everything downward, creating a concentration zone. Additionally, many drivers angle mirrors slightly downward, exposing this edge to direct airflow and debris impact. Apply extra product to the lower third of the mirror during application, and clean this area more frequently. Some enthusiasts apply a sacrificial layer of spray sealant to the lower edge monthly as a sacrificial barrier, preserving the base coat underneath.