That hazy film on your windshield isn’t just annoying—it’s a genuine safety hazard. Every morning when the sun hits those micro-scratches and water spots at just the wrong angle, you’re essentially driving through a fog of diffused light that your wipers can’t touch. Most car owners obsess over paint perfection while their glass gradually transforms into an optically compromised barrier that distorts vision and amplifies glare. The good news? Restoring crystal-clear clarity doesn’t require replacing expensive glass panels. The right glass polish, proper technique, and a bit of patience can transform that tired, etched windshield into a pristine viewing portal that rivals factory freshness.
Understanding the nuances of automotive glass polishing separates enthusiasts who achieve showroom results from those who create expensive problems. This comprehensive guide walks you through everything you need to know about selecting and using glass polishes effectively—without the brand bias or marketing fluff. Whether you’re battling years of hard water spots, fine wiper scratches, or the subtle haze that develops from environmental contamination, you’ll learn how to evaluate your specific situation and choose the appropriate restoration approach.
Top 10 Glass Polish
Detailed Product Reviews
1. Griot’s Garage Fine Glass Polish, Car Window, Windshield Polishing Cleaner for Automotive and Home, Removes Stains and Water Spots, 11017, 16 oz

Overview: Griot’s Garage Fine Glass Polish is a versatile 16-ounce liquid solution designed for both automotive and household glass restoration. This polish targets mild water spots, stains, and grime on windshields, sunroofs, side windows, and even shower doors. Formulated to be gentle yet effective, it restores optical clarity without harsh abrasives, making it suitable for regular maintenance applications.
What Makes It Stand Out: The product’s dual-purpose nature sets it apart—it’s equally effective on car windows and home glass surfaces. It uniquely claims to extend wiper blade life by creating a smoother glass surface that reduces friction and wear. The liquid formula works with cotton polishing pads and is optimized for use with dual-action random orbital polishers, though it can be applied by hand for smaller areas.
Value for Money: At $1.75 per fluid ounce, this polish sits in the mid-range price bracket. The 16-ounce bottle provides ample product for multiple applications across various surfaces. The versatility alone justifies the cost, essentially giving you two products in one. Compared to buying separate auto and household glass cleaners, plus considering the wiper longevity benefit, it offers solid long-term value.
Strengths and Weaknesses: Strengths include exceptional versatility, gentle formulation safe for regular use, wiper life extension, and straightforward application. The liquid consistency spreads evenly and works efficiently with machine application. Weaknesses are its limitation to mild imperfections only—deep scratches and heavily etched water spots require stronger compounds. Optimal results demand specific pads and potentially a polisher, adding to initial investment.
Bottom Line: Griot’s Garage Fine Glass Polish excels as a maintenance and light restoration solution. It’s ideal for DIY enthusiasts seeking a multi-surface product that delivers consistent, safe results. While not suited for heavy correction, it’s perfect for preserving glass clarity and extending wiper performance.
2. 3D Glass Polish – Cerium Oxide Glass Scratch Remover for Car Windows – Restores Clarity & Removes Wiper Marks, Swirls, Water Spots - 16oz

Overview: 3D Glass Polish is a professional-grade cerium oxide-based formula packaged in a 16-ounce bottle, engineered specifically for automotive glass correction. It tackles stubborn wiper marks, etched water spots, fine scratches, and swirl marks that diminish visibility. Designed for enthusiasts who demand pro-level results, this polish restores optical clarity to windshields, windows, and mirrors with minimal effort.
What Makes It Stand Out: The high-concentration cerium oxide formula delivers serious cutting power while maintaining extended workability. Its long open time allows for maximum efficiency during application, preventing premature drying and reducing product waste. The polish serves as an essential prep step for ceramic or hydrophobic coatings, creating an impeccably smooth surface that enhances coating adhesion and longevity. It goes on smooth and wipes off clean without heavy scrubbing.
Value for Money: At $2.06 per ounce, this is a premium-priced product positioned for serious enthusiasts and professionals. The price reflects its professional-grade formulation and efficiency—minimal product yields maximum results. Compared to hiring professional glass restoration services or buying multiple inferior products, it offers excellent return on investment for those who regularly maintain vehicles.
Strengths and Weaknesses: Strengths include exceptional effectiveness on stubborn imperfections, professional-level results, coating preparation capabilities, and user-friendly application requiring minimal physical effort. The extended work time is a major advantage for large surfaces. Weaknesses include the higher price point and the requirement for a rotary polisher with felt pads to achieve optimal results, which represents additional equipment costs. It may be overkill for users only needing light cleaning.
Bottom Line: 3D Glass Polish is an outstanding choice for automotive enthusiasts and professional detailers needing heavy-duty glass correction. If you’re prepping for coatings or dealing with significant wiper marks and water spots, this professional formula delivers flawless results that justify its premium price.
3. Cerium Oxide Glass Polishing Kit - Remove Scratches, Water Spots & Restore Clarity | Windshield Scratch Remover with Polish & Sealant | Complete DIY Kit
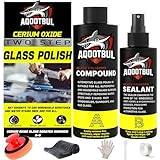
Overview: This comprehensive DIY kit provides everything needed to restore automotive and household glass, priced at $25.99 for the complete package. It centers around a professional-grade cerium oxide polishing compound that removes etched water stains, wiper marks, fine scratches, and swirl marks. The kit includes polish, protective sealant, a manual polishing tool, microfiber cloth, gloves, scraper, and protective tape—eliminating the need for separate purchases.
What Makes It Stand Out: True all-in-one convenience distinguishes this kit. The inclusion of a manual polishing tool makes it accessible to users without rotary polishers, while the three-step process (Clean → Polish → Seal) simplifies restoration for beginners. The protective sealant adds hydrophobic properties that repel water, bird droppings, and road grime for up to six months, providing ongoing protection after polishing.
Value for Money: Representing exceptional value, this kit bundles all necessary components for under $26. Purchasing items separately would easily exceed $40-50. The manual tool eliminates the need for expensive power equipment, making professional results accessible to budget-conscious DIYers. The added sealant extends value by protecting your work long-term.
Strengths and Weaknesses: Strengths include complete component inclusion, beginner-friendly design, manual tool for controlled application, and integrated sealant for lasting protection. The cerium oxide formula delivers professional cutting power safely. Weaknesses involve the manual tool’s labor-intensive nature on large surfaces like windshields, which can cause fatigue. The polish quantity isn’t explicitly stated, potentially limiting multiple large projects. Advanced users may find the manual tool slower than machine alternatives.
Bottom Line: This kit is the perfect entry point for beginners seeking a complete, hassle-free glass restoration solution. It removes guesswork and extra purchases while delivering professional results. Though labor-intensive for large jobs, it’s unbeatable for convenience and comprehensive value.
4. SONAX PROFILINE GlassPolish (250 ml) - removes slight scratches, blinding and etching from car windows made from glass. Silicone free | Item No. 02731410

Overview: SONAX PROFILINE GlassPolish is a German-engineered, silicone-free formula packaged in a compact 250ml (8.45 oz) bottle, designed for professional automotive glass restoration. This polish effectively removes slight scratches, blinding (hazing), and chemical etching from car windows, restoring optical clarity without leaving silicone residues that could interfere with subsequent treatments.
What Makes It Stand Out: The “passion for cars—made in Germany” heritage signals premium engineering and quality control. Being silicone-free makes it ideal for professional detailers who need a pristine surface for coatings, sealants, or adhesives. The formulation is specifically designed for rotary application at 1000 rpm with a felt pad, providing precise, professional-grade correction power in a controlled, low-speed application.
Value for Money: At $2.71 per fluid ounce, this is the highest per-ounce cost among reviewed products. However, the premium reflects German manufacturing quality and professional-grade concentration. The smaller 250ml size keeps initial investment manageable while providing enough product for several concentrated applications. For professionals prioritizing quality over quantity, the price aligns with performance expectations.
Strengths and Weaknesses: Strengths include exceptional German quality, silicone-free formulation crucial for coating prep, professional-grade results on slight imperfections, and brand reputation. The product delivers consistent, reliable performance trusted by European detailers. Weaknesses are the small bottle size limiting large projects, highest per-ounce cost, and requirement for a rotary polisher with specific speed settings and felt pads, creating barrier to entry for casual users.
Bottom Line: SONAX PROFILINE is a premium professional’s choice that justifies its higher cost through German engineering and silicone-free purity. Best suited for experienced detailers and coating preparation specialists who demand the highest quality and understand the value of residue-free results.
5. Invisible Glass 91411 Glass Stripper – Hard Water Spot Remover – Strips Coatings, Waxes, Oils & Road Film – Preps Windshields for Rain Repellent & Ceramic Coating – 4 Fl Oz

Overview: Invisible Glass Glass Stripper is a specialized 4-ounce prep solution manufactured in the USA, designed to strip contaminants from glass surfaces rather than polish them. It removes waxes, silicones, oils, tar, sap, road film, and hard water spots (non-etched) to restore glass to its original condition. This product serves as the crucial prep step before applying rain repellents or ceramic coatings.
What Makes It Stand Out: Its singular focus on surface preparation sets it apart from true polishes. The formula deep cleans by dissolving bonded contaminants that normal cleaners can’t remove, ensuring coatings achieve maximum adhesion. Being proudly made in the USA with satisfaction guarantee demonstrates quality commitment. It specifically addresses the common problem of coating failure due to improper surface prep, making it an essential first step in glass protection systems.
Value for Money: At $2.75 per ounce, the unit price is high, but the 4-ounce size keeps the initial purchase affordable at $10.99. As a specialized prep product, it’s not meant for bulk use but for targeted application. Its value lies in preventing costly coating failures and ensuring expensive repellents work effectively. For users investing in ceramic coatings, this small additional cost protects their main investment.
Strengths and Weaknesses: Strengths include excellent contaminant removal, critical coating prep capability, USA manufacturing, satisfaction guarantee, and affordable entry price. It effectively restores clarity by removing old coatings and grime. Weaknesses are the very small quantity limiting multiple uses, inability to remove etched-in water spots or scratches (it’s not a polish), and the need for follow-up with actual polish or coating for complete results.
Bottom Line: Invisible Glass Stripper is an essential but specialized tool for anyone applying glass coatings. It performs one job exceptionally well—surface preparation. Don’t mistake it for a scratch remover; use it as the foundation step before polishing or coating to ensure maximum performance and longevity of your primary glass treatment.
6. Glass Polish 1.7oz (50ml) GP-PRO Glass Polishing Compound for Professional Polishing of All Glass Surfaces - 2.3 microns

Overview: The GP-PRO Glass Polish is a professional-grade cerium oxide compound designed for the final stage of glass restoration. This 1.7-ounce tube contains a precisely formulated 2.3-micron polishing agent that targets imperfections on all glass surfaces, including tempered and laminated varieties. It’s engineered for users who need serious glass correction capabilities beyond what consumer products offer.
What Makes It Stand Out: This compound’s professional-grade formulation uses optimized cerium oxide to deliver results typically seen in commercial glass shops. The 2.3-micron particle size strikes an ideal balance between cutting power and finish quality, making it perfect for removing fine sanding marks, hairline scratches, and stubborn surface stains that lighter polishes can’t touch. Its versatility across mirrors, automotive glass, and architectural applications sets it apart from single-purpose products.
Value for Money: At $11.95 for 1.7 ounces ($7.07 per fluid ounce), this sits in the mid-range for specialty compounds. While the quantity seems modest, professional-grade cerium oxide concentrates are inherently expensive. For DIY enthusiasts tackling multiple projects, the cost per use remains reasonable compared to hiring professional services, which can run hundreds of dollars.
Strengths and Weaknesses: Pros include true professional formulation, effective multi-surface performance, and excellent finishing capability. Cons involve the small volume limiting large projects and the requirement for a multi-stage process (needing prior sanding for deeper scratches). The learning curve may challenge beginners.
Bottom Line: Ideal for serious DIYers and professionals seeking authentic glass restoration results. For minor household scratches, consider a less aggressive option, but for proper glass correction, this delivers professional-grade performance that justifies its price.
7. BAGOT Car Glass polishing Compound for waterless Cleaning are Suitable for Cars Houses Glass and kitchenware… Restore The Original Luster and Transparency

Overview: BAGOT’s Car Glass Polishing Compound positions itself as a versatile, waterless solution for restoring clarity to automotive and household glass. This formulation combines polishing agents with protective coating technology, promising to remove water spots, minor scratches, and oil films while leaving behind a durable, UV-resistant layer that maintains transparency for months.
What Makes It Stand Out: The integrated protective coating distinguishes this from pure polishes, effectively combining two steps into one. Its professional-grade grinding formula targets oxidation and water stains with minimal effort, while the claimed multi-year longevity per bottle adds convenience. The product’s versatility extends beyond vehicles to kitchenware and marine applications, making it a true multi-surface solution.
Value for Money: At $19.90, the price reflects its dual-action capability. While the exact volume isn’t specified, the claim of “several years” of use suggests substantial quantity. The inclusion of protective coating technology typically found in separate products priced $15-25 alone makes this economically attractive for comprehensive glass care.
Strengths and Weaknesses: Pros include the protective coating feature, broad surface compatibility, and straightforward application process. The waterless cleaning claim is questionable for heavily soiled surfaces, and the kitchenware application seems mismatched with automotive-grade chemicals. The vague quantity description and potentially exaggerated longevity claims raise transparency concerns.
Bottom Line: Well-suited for car owners wanting protection alongside polishing. The coating benefit justifies the premium over basic compounds. However, professionals may prefer dedicated products for each step, and users should verify suitability for household applications before use.
8. 3.3 fl oz (100 ml) Cerium Oxide Glass Polishing Solution - For removing: oil films, water spots, swirls, water stains, windshield wiper marks, minor scratches & effectively cleaning glass surfaces.

Overview: This Cerium Oxide Glass Polishing Solution offers a high-tech approach to glass restoration with its 40% concentrated formula and nano-particle suspension technology. The 3.3-ounce bottle contains water-based, environmentally friendly polishing agents designed to tackle oil films, water spots, wiper marks, and minor scratches across various glass types and even non-glass surfaces like acrylic and stainless steel.
What Makes It Stand Out: The 0.3-micron particle size achieves true mirror-grade finishes without swirl marks, surpassing traditional compounds. Its 40% cerium oxide concentration delivers aggressive cutting power while the water-based formula ensures zero residue and easy cleanup. The advanced suspension technology prevents settling, maintaining consistent performance throughout application—a common issue with lesser products.
Value for Money: Without price information, assessment relies on feature set. Comparable high-concentration nano-polishes typically retail for $20-30, suggesting strong value if priced competitively. The multi-material capability effectively replaces several specialized products, offering potential cost savings for users with diverse restoration needs.
Strengths and Weaknesses: Pros include exceptional cutting efficiency, ultra-fine finish quality, environmental friendliness, and remarkable versatility across glass, acrylic, and metal. The concentration may be excessive for light household cleaning, and the technical nature might intimidate casual users. Lack of pricing data complicates purchasing decisions.
Bottom Line: An impressive technical formulation ideal for professionals and demanding enthusiasts. If priced reasonably, it represents excellent value for those needing superior results across multiple materials. Casual users with minor scratches should consider milder alternatives, but for serious restoration, this is a top-tier contender.
9. Adam’s Glass Polish

Overview: Adam’s Glass Polish comes from a reputable brand in automotive care, offering a straightforward solution for achieving clear, protected glass surfaces. While feature details are minimal, the product promises ease of use and effective glass protection, aligning with Adam’s reputation for quality car care products that deliver reliable results without complexity.
What Makes It Stand Out: The Adam’s brand name itself provides confidence, known for producing effective, user-friendly automotive detailing products. The “Vertailize solution” (likely a typographical error for “versatile” or a specific formulation term) suggests adaptability across glass applications. Its simplicity appeals to users overwhelmed by complex multi-step systems.
Value for Money: At $13.59, this sits in the affordable mid-range for specialty glass care. Adam’s products typically offer professional results at enthusiast prices, and this polish likely follows that pattern. The price reflects brand reliability rather than cutting-edge technology, making it a safe investment for those prioritizing proven performance over experimental formulations.
Strengths and Weaknesses: Pros include trusted brand heritage, straightforward application, and likely compatibility with other Adam’s products. The sparse feature description and unclear “Vertailize” terminology create uncertainty about capabilities. It may lack the aggressive cutting power of cerium oxide compounds for deeper imperfections, focusing instead on maintenance and light correction.
Bottom Line: A dependable choice for regular glass maintenance and light polishing needs. Perfect for Adam’s brand loyalists and those wanting proven performance without experimentation. For heavy scratch removal, look elsewhere, but for routine clarity restoration and protection, this is a solid, trustworthy option.
10. E.J. Wheaton Glass Wax, Polishes and Protects Windows, Mirrors and Metal Surfaces, Dries Chalk White, Easy to Apply and to Remove, Made in USA
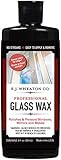
Overview: E.J. Wheaton Glass Wax represents a traditional approach to glass and metal care, offering a classic polishing wax that applies pink and dries to a chalk white finish for easy removal. This Made in USA product focuses on protection and light polishing, keeping surfaces cleaner longer through a protective barrier that repels contaminants.
What Makes It Stand Out: The distinctive color-changing application provides visual feedback, ensuring complete coverage and preventing missed spots—a practical feature missing from clear polishes. Its exceptional ease of removal, even after extended drying or sun exposure, eliminates the common frustration of hardened, difficult-to-remove waxes. The multi-surface formulation works on windows, mirrors, and metal, offering household versatility.
Value for Money: At $14.99 for 8 ounces ($1.87 per ounce), this offers excellent value compared to liquid polishes. The wax format provides extended coverage per ounce, and the protective qualities reduce cleaning frequency, delivering long-term savings. The Made in USA quality at this price point adds patriotic appeal without premium cost.
Strengths and Weaknesses: Pros include outstanding ease of use, visual application cues, excellent value per ounce, and reliable protection. As a wax rather than abrasive compound, it won’t remove significant scratches or etching—it’s protective and beautifying, not restorative. The chalky residue requires thorough buffing, and it may not suit those seeking pure polishing performance.
Bottom Line: Perfect for maintenance and protection rather than restoration. Ideal for homeowners wanting to keep glass and metal surfaces pristine with minimal effort. Don’t expect it to eliminate scratches, but for preserving clarity and easing future cleaning, this traditional wax delivers exceptional value and user-friendly performance.
Understanding Glass Damage and Why Polishing Works
Automotive glass faces a unique assault course of environmental contaminants, mechanical abrasion, and chemical etching that paint surfaces never encounter. Road debris kicked up at highway speeds, acidic bird droppings baked in the sun, abrasive wiper blades dragging across dust-coated windshields, and mineral-laden water from sprinklers all conspire to degrade optical clarity. Unlike paint defects that sit on top of the surface, many glass imperfections are physically carved into the material itself.
Types of Glass Imperfections
Surface-level contamination includes water spots, tree sap, and traffic film that bond to the glass. These respond well to chemical treatments but can become physically embedded over time. Micro-scratches from wiper blades, dust, and improper cleaning techniques create a hazy appearance when they accumulate in a uniform pattern. More severe damage includes wiper blade chatter marks, pitting from road debris impacts, and chemical etching from acid rain or industrial fallout that actually dissolves microscopic layers of glass. Understanding which type you’re dealing with determines whether a light polish will suffice or if you need a more aggressive approach.
How Polishing Restores Optical Clarity
Glass polishing works through controlled abrasion—essentially using progressively finer particles to level the surface back to a uniform plane. When light hits scratched glass, it scatters in multiple directions instead of passing through cleanly. By removing a microscopic layer of damaged material and creating a smoother surface, polish restores the glass’s ability to transmit light without distortion. The process is similar to sanding wood, but at a scale measured in microns. A quality polish not only removes defects but also leaves behind a surface that’s more resistant to future contamination.
The Science Behind Glass Polishes
Automotive glass is significantly harder than clear coat paint, rating about 5.5 to 6.5 on the Mohs hardness scale compared to paint’s 3 to 4. This hardness differential means glass polishes require different abrasive technologies than paint correction compounds. The most effective formulations use engineered abrasives that maintain their cutting ability while breaking down into finer particles during use—a process called “diminishing abrasives.”
Understanding pH Levels and Chemical Reactions
The chemical composition of glass polishes matters as much as their mechanical abrasives. Many premium formulations incorporate mild acids or bases that help dissolve mineral deposits and organic contaminants while the abrasives work on physical defects. A slightly acidic pH (around 5.5-6.0) effectively breaks down calcium and magnesium deposits from hard water spots without attacking the glass itself. Conversely, alkaline cleaners (pH 8.0-9.0) excel at cutting through oily residues and organic matter. The key is balance—too aggressive chemically can cause more etching, while too mild reduces effectiveness.
Types of Glass Polishes for Automotive Use
Not all glass polishes are created equal, and understanding the three primary categories helps you match the product to your specific damage level. Each type employs different active ingredients and is formulated for distinct applications, from light maintenance to heavy restoration.
Cerium Oxide-Based Formulas
Cerium oxide represents the gold standard for glass polishing, prized for its unique chemical and physical properties. This rare earth oxide creates a chemical-mechanical polishing action that actually forms a temporary chemical bond with the silicon dioxide in glass, allowing for more efficient material removal with less aggressive scratching. Cerium oxide polishes excel at removing fine scratches, water spots, and light etching while leaving an exceptionally clear finish. They typically require more working time but produce superior optical clarity, making them ideal for windshields where distortion-free vision is paramount.
Aluminum Oxide Compounds
Aluminum oxide offers a more aggressive cutting action for moderate to severe glass defects. These formulations use precisely graded aluminum oxide particles that maintain their size longer during polishing, providing consistent cutting power. They’re particularly effective for deeper wiper marks, pitting, and pronounced etching. However, their aggressive nature demands more skill to avoid creating visible distortion, especially on curved windshields. Aluminum oxide polishes often require a follow-up with a finer polish to eliminate any micro-marring they might leave behind.
Hybrid and Polymer-Enhanced Options
Modern hybrid polishes combine mechanical abrasives with polymer fillers and chemical cleaners, offering a multi-action approach in a single product. These formulations are designed for enthusiasts who want significant defect removal with reduced risk. The polymers can temporarily fill extremely fine scratches while the abrasives remove more significant defects, providing immediate visual improvement. While purists argue that true correction requires complete removal rather than filling, these products deliver impressive results for maintenance polishing and moderate restoration.
Key Ingredients That Make a Difference
Beyond the primary abrasives, several supporting ingredients separate mediocre polishes from exceptional ones. Lubricating agents prevent the polish from drying too quickly, especially important during machine polishing where heat builds up. High-quality lubricants extend working time and prevent abrasive particles from clumping and creating new scratches. Suspension agents keep abrasives evenly distributed throughout the product, ensuring consistent performance from the first drop to the last.
Look for formulations containing glycerin or propylene glycol as lubricants—these provide extended working time without leaving oily residues. Some advanced polishes incorporate optical clarifiers that chemically react with the glass surface to enhance light transmission. UV inhibitors, while more commonly associated with paint protection, can be beneficial in glass polishes for vehicles frequently parked outdoors, as they help prevent future degradation from sun exposure.
Abrasive Levels: Matching the Polish to the Damage
Selecting the appropriate abrasive level is perhaps the most critical decision in glass polishing. Using too aggressive a polish on minor defects wastes product and risks unnecessary glass removal, while too mild a polish on severe damage leads to frustration and wasted effort. The key is honest assessment of your glass condition.
Light Polishes for Maintenance and Minor Hazing
Light polishes contain extremely fine abrasives (typically 1-3 microns) and are designed for regular maintenance or removing light haze and fresh water spots. They work slowly but safely, removing minimal glass material while restoring optical clarity. These are ideal for vehicles with relatively new glass showing early signs of contamination or minor wiper marks. Light polishes can be used every 6-12 months as preventive maintenance, keeping glass in optimal condition before defects become severe.
Medium-Cut Compounds for Water Spots and Light Scratches
Medium-cut polishes strike the balance between effectiveness and safety, using abrasives in the 3-8 micron range. They effectively remove moderate water spot etching, light wiper scratches, and general environmental hazing without significant risk of creating distortion. This category represents the sweet spot for most DIY enthusiasts tackling their first glass correction project. They require moderate pressure and 2-4 passes to achieve full correction but deliver dramatic improvements in clarity and glare reduction.
Heavy-Cut Solutions for Severe Etching and Deep Marks
Reserved for severely neglected or damaged glass, heavy-cut polishes employ abrasives from 8-15 microns and are designed for professional use or experienced enthusiasts. They can remove deep wiper chatter marks, significant pitting, and severe acid rain etching. However, their aggressive cutting requires careful technique, constant monitoring, and is typically followed by medium then light polishing to refine the finish. On modern laminated windshields, heavy cutting risks removing too much of the outer glass layer, potentially compromising strength and creating optical distortion in curved areas.
Application Methods: Hand vs. Machine Polishing
Your chosen application method dramatically impacts both results and risk level. Each approach has distinct advantages and appropriate use cases depending on the damage severity, glass location, and your skill level.
Hand Polishing: When and How
Hand polishing offers maximum control and is ideal for spot treatments, light maintenance, and working on vertical surfaces like side windows. Using a dense foam applicator pad or microfiber cloth, apply moderate pressure in overlapping circular motions. The technique requires patience—expect to spend 10-15 minutes per square foot for noticeable results. Hand polishing eliminates the risk of heat buildup and is inherently safer for beginners, but it cannot match the cutting efficiency of machine application for moderate to severe defects. For best results, work in small sections and maintain consistent pressure throughout the process.
Machine Polishing: Dual-Action vs. Rotary
Machine polishing transforms glass correction from tedious to efficient, but introduces new variables. Dual-action (DA) polishers provide the safest entry point, with their orbital motion preventing concentrated heat buildup and reducing the risk of holograms or distortion. Use a DA with a specialized glass polishing pad at speeds between 3,000-4,500 OPM for optimal results. Rotary polishers cut faster and more aggressively, making them suitable for severe damage on flat glass areas, but their direct-drive action concentrates heat and requires expert technique to avoid creating swirls and distortion. Never exceed 1,200 RPM on glass, and keep the pad moving constantly to prevent thermal stress fractures.
Essential Tools and Accessories for the Job
Success with glass polishing depends as much on supporting tools as the polish itself. Invest in quality microfiber towels with a minimum 300 GSM weight and no fabric softener residues—cheap towels shed lint and introduce new scratches. Dedicated glass polishing pads feature denser foam than paint pads, preventing polish absorption and maintaining consistent cutting action. For machine polishing, use 3-4 inch pads for windshields to maintain proper contact on curved surfaces, and 5-6 inch pads for flat rear windows.
A spray bottle with distilled water helps keep the polish workable during extended sessions. Professional-grade masking tape (3/4 inch width) protects rubber seals and trim from polish residue and abrasive contamination. A bright LED inspection light is non-negotiable—glass defects are nearly invisible in ambient light but glaringly obvious under proper illumination. Finally, a quality clay bar or synthetic clay mitt used before polishing removes bonded contaminants, preventing them from being ground deeper during the polishing process.
Step-by-Step Guide to Polishing Automotive Glass
Approaching glass polishing methodically ensures consistent, safe results. Rushing the process or skipping steps leads to subpar outcomes or potential damage. This systematic approach works for both hand and machine application.
Phase 1: Surface Preparation
Begin with a thorough wash using a dedicated automotive glass cleaner—never household glass cleaners containing ammonia, which can damage window tint and rubber seals. Dry the glass completely, then clay the surface using plenty of lubricant to remove bonded contaminants. Mask off all rubber trim, plastic cowls, and paint edges with automotive masking tape. Inspect the glass under bright LED light, marking severe defects with painter’s tape on the interior side. This preparation phase determines 70% of your final result.
Phase 2: The Polishing Process
Apply a quarter-sized amount of polish to your pad or applicator. For machine polishing, spread the polish at low speed before increasing to working speed. Work in 2x2 foot sections using overlapping passes—first vertically, then horizontally, then diagonally. Maintain consistent pressure: light for finishing polishes, moderate for medium-cut, firm for heavy-cut compounds. Keep the pad flat and never tilt it on edges, which concentrates pressure and creates hot spots. Check your progress every 60 seconds by wiping a small area clean and inspecting under light. Continue until defects disappear and the surface feels uniformly smooth.
Phase 3: Final Inspection and Cleanup
After polishing, remove all residue with a clean, high-quality microfiber towel. Inspect the glass from multiple angles using both direct and oblique lighting. Run your bare hand across the surface—it should feel perfectly smooth with no catch on remaining defects. If imperfections persist, repeat the process with the same or a finer polish. Once satisfied, remove all masking tape and clean the glass one final time with a dedicated glass cleaner. Apply a glass sealant or coating to protect your work and make future cleaning easier.
Common Mistakes That Ruin Your Results
Even experienced detailers make critical errors when polishing glass. Using too much product saturates pads and reduces cutting efficiency—start with less and add as needed. Applying excessive pressure, especially with rotary polishers, generates heat that can crack glass or delaminate windshields. Working on contaminated surfaces grinds dirt deeper, creating worse scratches than you started with. Perhaps most common is insufficient working time—glass polishing requires patience, and stopping too early leaves partially corrected defects that appear as inconsistent hazing.
Another frequent error is using paint polishing pads on glass. Paint pads are too soft and absorb glass polish rather than working it effectively. Conversely, using glass pads on paint causes severe scratching. Never mix pads between surfaces. Finally, neglecting to clean pads during extended sessions loads them with spent abrasive and glass dust, which then acts like sandpaper, creating new fine scratches across the entire surface.
Evaluating Your Polishing Success
True glass correction success isn’t just about removing visible scratches—it’s about restoring optical clarity without introducing distortion or compromising safety. After polishing, test visibility during different lighting conditions. Drive toward the setting sun and observe glare patterns—properly polished glass shows minimal halo effects around light sources. At night, oncoming headlights should appear crisp, not starbursting excessively.
Perform the “water beading test”—spray water on the glass and observe how it sheets off. Properly polished glass without protection should sheet fairly evenly. If water beads in irregular patterns, you may have left micro-marring or residue. The ultimate test is the “disappearance test”—with the car parked, have someone walk slowly away from you. At what distance does their outline become indistinct? On truly clear glass, you should see crisp definition at 100+ feet. If distant objects appear hazy, further refinement is needed.
Maintaining Crystal-Clear Glass Long-Term
Polishing restores clarity, but maintenance preserves it. Establish a weekly cleaning routine using a pH-neutral automotive glass cleaner and a dedicated microfiber towel—never use the same towels you use on paint or interior surfaces. Apply a hydrophobic glass coating every 3-6 months; these products create a sacrificial layer that repels water, dirt, and contaminants, making the glass easier to clean and reducing future etching.
Park strategically to minimize environmental exposure—avoid parking under trees where bird droppings and sap fall, and position your car so morning dew and sprinkler water evaporate quickly. Treat your windshield with the same care you give your paint: never wipe dusty glass with dry towels, always use proper wash techniques, and address contamination immediately rather than letting it bake on. Consider installing quality wiper blades and replacing them every six months to prevent the abrasive wear that causes most windshield hazing.
When to Polish vs. When to Replace the Glass
Knowing when polishing is no longer viable saves time, money, and potential safety risks. Deep pitting from road debris, especially on the driver’s side of the windshield, often cannot be fully corrected without creating visible distortion. If you can feel a scratch with your fingernail catching significantly, it’s likely too deep for safe polishing. Windshields with extensive sandblasting damage from highway driving have lost too much material overall—polishing would thin the glass dangerously.
Replace glass showing stress cracks, chips larger than a quarter, or cracks extending to the edge—these compromise structural integrity beyond what polishing can address. Modern ADAS-equipped vehicles present another consideration: excessive polishing around camera mounting areas can affect calibration. If your vehicle has forward-facing cameras, consult the manufacturer’s specifications for maximum allowable glass removal in those zones. When in doubt, have a professional auto glass technician assess whether replacement is the wiser choice.
Professional vs. DIY Glass Polishing
The decision between professional services and DIY depends on multiple factors beyond just cost. Professional glass polishers use specialized equipment like vertical polishing stations and water-fed systems that control dust and heat more effectively than consumer tools. They also possess the experience to recognize when glass is too far gone for safe correction.
Skill Level and Learning Curve
DIY glass polishing requires less artistic skill than paint correction but more technical precision. The learning curve involves understanding pressure control, speed management, and defect assessment. Most enthusiasts can achieve excellent results on side and rear windows within their first attempt, but windshields—especially curved modern designs—demand more practice. One significant error on a windshield can create permanent optical distortion affecting daily driving. If your vehicle has complex glass curvature or ADAS systems, professional polishing may be worth the premium.
Equipment Costs and ROI
Entry-level DIY glass polishing requires a $50-100 investment in polish, pads, and basic tools if you already own a dual-action polisher. Professional-grade glass polishing kits with specialized pads and multiple polish grades run $150-250. Professional services typically charge $75-150 per window, with windshields commanding $200-400 depending on damage severity. If you own multiple vehicles or plan to maintain your car long-term, DIY equipment pays for itself after 2-3 polishing sessions. However, factor in the value of your time—a professional can complete a full vehicle in 2-3 hours, while DIY might consume an entire weekend.
Environmental and Safety Considerations
Glass polishing generates fine silica dust that poses respiratory hazards. Always work in a well-ventilated area and wear a quality N95 or P100 respirator, not just a dust mask. The dust is also abrasive—keep it away from your car’s paint by covering adjacent panels with plastic sheeting. If using cerium oxide powders, mix them carefully to avoid creating airborne dust.
Dispose of used polish and polishing pads responsibly. Many glass polishes contain heavy metal compounds that shouldn’t enter storm drains. Wipe excess product with paper towels and dispose of them in sealed bags rather than rinsing them down the driveway. Consider water-fed polishing systems that capture runoff for proper disposal. From a safety standpoint, never polish glass that’s extremely hot or cold—thermal shock combined with mechanical stress can cause cracking. Ideal ambient temperature is 60-80°F with moderate humidity.
Cost-Benefit Analysis: Investing in Clarity
Evaluating whether glass polishing is worth the investment requires looking beyond the immediate cost. A professional windshield replacement runs $300-1,200 depending on the vehicle and features like heating elements or ADAS calibration. Quality polishing preserves the original factory glass, which often has superior optical properties and perfect fit compared to aftermarket replacements.
Improved visibility directly impacts safety—reducing glare and improving night vision can prevent accidents. There’s also the aesthetic factor: crystal-clear glass makes a car look years newer, impacting resale value. For a typical daily driver, investing $150 in quality polishing supplies and spending a Saturday afternoon can yield 2-4 years of improved clarity before needing touch-ups. On collector or high-value vehicles, maintaining original glass is crucial for authenticity and value preservation. The intangible benefit of driving with perfectly clear glass—reduced eye strain, enhanced driving enjoyment, and pride in your vehicle’s appearance—often outweighs the monetary investment.
Frequently Asked Questions
Can I use regular car polish on my windshield?
No, automotive paint polishes are formulated for much softer clear coat and lack the hardness and cutting ability to affect glass. Using paint polish on glass simply wastes time and product—it won’t remove scratches or etching. Worse, some paint polishes contain oils and fillers that can smear on glass, creating a greasy film that’s difficult to remove and actually reduces clarity. Always use products specifically engineered for automotive glass, which contain appropriate abrasives and chemical cleaners for silicon dioxide surfaces.
How often should I polish my car’s glass?
For daily drivers in moderate climates, a full glass polish every 12-18 months maintains optimal clarity. Vehicles in harsh environments—coastal areas with salt spray, regions with hard water, or areas with heavy industrial pollution—benefit from polishing every 8-12 months. However, light maintenance polishing with fine abrasives can be performed every 6 months to prevent defects from accumulating. The key is monitoring your glass condition: when you notice increased glare, wiper streaks that won’t clean off, or reduced visibility in challenging light conditions, it’s time to polish. Over-polishing thins the glass unnecessarily, so strike a balance based on actual need rather than a rigid schedule.
Will polishing remove deep scratches from my windshield?
Polishing can only safely remove scratches that haven’t penetrated beyond the outer 10% of the glass thickness. If you can catch your fingernail significantly in a scratch, it’s likely too deep for safe removal. Deep scratches create stress risers in the glass, and removing enough material to level them weakens the windshield structurally. For scratches deeper than 0.1mm, replacement is the safer option. Professional glass technicians can sometimes repair deep scratches using specialized resin injection, but DIY polishing will either be ineffective or create visible distortion. Always err on the side of safety with windshield damage.
Is machine polishing safe for tempered side windows?
Tempered side windows are more robust than laminated windshields in some ways but more sensitive in others. Their heat treatment makes them stronger against impacts but more prone to thermal stress cracking. When machine polishing tempered glass, use lower speeds (under 3,000 OPM on a DA) and avoid concentrating heat in one area. The good news is that side windows are flat, making them easier to polish without creating distortion. Always test your technique on a small, inconspicuous area like the bottom corner of a rear side window. If you notice any rainbow patterns developing (indicating stress), stop immediately and switch to hand polishing.
Can glass polishing fix wiper blade streaks?
Wiper blade streaks fall into two categories: rubber residue on the surface, which cleaning removes, and physical scratches from worn blades, which require polishing. If streaks remain after thorough cleaning with a glass-safe degreaser, you’re dealing with micro-scratches. Light wiper haze responds well to medium-cut polishes, while deeper chatter marks from damaged blades may need heavy-cut compounds followed by refinement. The real solution is replacing wiper blades every 6 months and never running them on a dry, dirty windshield. Polishing removes the symptoms, but new blades prevent the disease.
What’s the difference between glass polish and glass cleaner?
Glass cleaners are maintenance products that dissolve and remove surface contaminants like dirt, oil, and fingerprints—they contain no abrasives and cannot correct physical defects. Glass polishes contain engineered abrasives that physically remove a microscopic layer of glass to level out scratches and etching. Think of cleaner as washing your face versus polish as microdermabrasion. Using polish when you only need cleaner wastes product and unnecessarily removes glass. Conversely, using cleaner when you need polish leaves defects untouched. Always start with the least aggressive solution: clean, then decontaminate, then assess whether polishing is necessary.
Do I need to clay bar before polishing glass?
Absolutely. Claying is non-negotiable before glass polishing. Any bonded contaminants—rail dust, industrial fallout, tree sap, or overspray—will be ground into the glass by your polishing pad, creating far worse scratching than you started with. Claying removes these particles safely before mechanical abrasion begins. Use a fine-grade clay bar with plenty of lubricant, working in small sections until the surface feels completely smooth. The “plastic bag test” works brilliantly: put your hand in a plastic bag and run it over the clean glass. You’ll feel every remaining particle as a distinct bump. Only when the glass feels perfectly smooth is it ready for polishing.
Can I polish glass in direct sunlight?
Direct sunlight creates multiple problems for glass polishing. The glass becomes hot, causing polish to dry almost instantly and creating a sticky, difficult-to-remove residue. Thermal expansion from heat also makes the glass more susceptible to cracking under mechanical stress. Additionally, hot polish can cake onto rubber trim, becoming nearly impossible to clean off without solvents that damage the rubber. Always polish in shade or indoors with ambient temperatures between 60-80°F. If you must work outside, choose an overcast day or create shade with a canopy. Your results will be dramatically better and your risk of problems significantly lower.
Will polishing damage my window tint?
Window tint films reside on the interior surface of glass, while polishing occurs on the exterior, so direct damage is impossible. However, two risks exist: chemical migration and heat transfer. Some aggressive polish solvents can evaporate and potentially affect tint adhesive if the vehicle isn’t properly ventilated during polishing. More concerning is heat buildup from machine polishing—excessive exterior heat can transfer through the glass and stress tint film, especially on rear windows with defroster elements. Keep polisher speeds moderate and avoid prolonged heat buildup in one area. If your vehicle has fresh tint (less than 30 days old), wait for full adhesive curing before any exterior polishing.
How long do polishing results typically last?
With proper maintenance, glass polishing results last 12-24 months on daily drivers. The key is establishing protective habits: apply a quality glass sealant or coating immediately after polishing, clean glass weekly with proper techniques, and address contamination promptly before it etches. Vehicles kept in garages and cleaned regularly may see results last 2-3 years. However, if you continue bad habits—wiping dusty glass, letting hard water dry on surfaces, or running worn wiper blades—defects can return within 6 months. The durability of polishing directly correlates with how well you protect the corrected surface. Think of polishing as resetting the glass to factory condition; your maintenance routine determines how long it stays that way.