That pristine windshield you remember from the showroom floor has gradually developed a hazy, iridescent film that no amount of washing seems to fix. You’re not imagining things—acid rain etching has claimed another victim. This invisible menace doesn’t just dull your car’s appearance; it creates microscopic pits in the glass that scatter light, reducing visibility during critical driving moments. While many enthusiasts obsess over paint correction, automotive glass restoration remains one of the most overlooked aspects of comprehensive car care. The right glass polish doesn’t just clean; it physically levels the surface, restoring optical clarity and protecting your investment from further environmental assault.
Understanding how to select and apply the proper glass polish for acid rain damage is a skill that separates weekend warriors from true detailing professionals. This guide dives deep into the science, techniques, and critical decision-making factors that will help you make informed choices about glass restoration—without getting lost in marketing hype or manufacturer-specific claims.
Top 10 Glass Polish For Acid Rain Etching
Detailed Product Reviews
1. 2 Oz (57 g) 99% Cerium Oxide Glass Polishing Powder (9-15 Microns) Can Remove All Minor Scratches from Glass, Clean Oil Films and Water Stains from Glass, and Restore Clarity and Transparency.

Overview: This 2oz container of 99% pure cerium oxide powder represents the raw material professionals use for glass restoration. With an extremely fine 9-15 micron particle size, it can tackle scratches, oil films, and water stains on everything from car windshields to optical lenses and crystal crafts. Unlike pre-mixed solutions, this powder requires manual mixing with water to create a polishing slurry.
What Makes It Stand Out: The pure powder format offers maximum versatility and customization. You control the concentration and consistency for each specific application, whether removing minor wiper marks from automotive glass or restoring clarity to delicate microscope lenses. The multi-surface compatibility is exceptional—equally effective on tempered shower doors, aquarium glass, oven doors, and decorative crystals. The fine micron rating ensures you won’t create new scratches while removing old ones.
Value for Money: At $3.00 per ounce, this is the most cost-effective way to obtain professional-grade cerium oxide. Pre-mixed polishes often cost 2-3 times more per ounce. However, the 2oz quantity limits you to smaller projects. For occasional use or targeted repairs, it’s unbeatable. For large-scale restoration, you’ll need multiple containers, which diminishes the value proposition.
Strengths and Weaknesses: Strengths include professional-purity material, exceptional versatility, fine scratch removal capability, and low cost-per-ounce. Weaknesses involve the messy mixing process, steep learning curve for proper slurry consistency, small container size, and requirement for separate polishing pads and tools.
Bottom Line: Ideal for experienced DIYers who want professional materials without paying for convenience. Perfect for small, precise restoration jobs across multiple surface types. Skip if you prefer ready-to-use solutions or need to polish large surface areas.
2. 3D Glass Polish – Cerium Oxide Glass Scratch Remover for Car Windows – Restores Clarity & Removes Wiper Marks, Swirls, Water Spots - 16oz

Overview: The 3D Glass Polish is a premium cerium oxide-based liquid formula engineered specifically for automotive glass restoration. This 16oz bottle delivers professional-grade results against wiper marks, water spots, fine scratches, and swirl marks. Designed for enthusiasts, it promises maximum clarity with minimal elbow grease when used with a rotary polisher and felt pad.
What Makes It Stand Out: This polish excels with its extended open time, giving you longer workability before drying—critical for achieving uniform results on large windshields. It’s specifically formulated as the perfect prep step for ceramic coatings, removing imperfections that would interfere with bonding. The liquid consistency eliminates the guesswork of mixing powders while delivering concentrated cerium oxide exactly where needed for optimal results.
Value for Money: At $2.06 per fluid ounce, it strikes a balance between convenience and cost. While more expensive upfront than powder, you save time and avoid waste from improper mixing. Compared to professional detailing services, one bottle pays for itself with a single windshield restoration. The 16oz size handles multiple vehicles, making it economical for car enthusiasts.
Strengths and Weaknesses: Strengths include ready-to-use convenience, extended work time, coating-prep capability, professional results, and good coverage. Weaknesses are the higher initial cost versus powder, requirement for a rotary polisher for best results, and limited effectiveness on deep scratches.
Bottom Line: A top-tier choice for automotive enthusiasts seeking professional results without powder mess. The extended work time and coating compatibility justify the premium. Best paired with a rotary polisher; skip for severe glass damage.
3. GLASS POLISH 5” (125mm) PRO Glass Scratch Removal Kit for Professional Glass Polishing, Removes Scratches, Graffiti, Water Damage, and Acid Etching, Restores Original Condition - GP25022

Overview: The GLASS POLISH GP25022 is a comprehensive professional restoration system centered around a 5" pad designed for rotary polishers with 5/8"-11 threads. This complete kit represents a total solution for serious glass restoration, addressing everything from light scratches to severe acid etching and welder splatter across windscreens, tempered glass, and mirrors.
What Makes It Stand Out: Unlike standalone compounds or pads, this is a purpose-built system engineered for professional use. The pad’s construction and accompanying materials work synergistically to resurface glass to factory-like clarity. It’s specifically designed to handle the most challenging damage that consumer products can’t touch, including graffiti and deep acid etching that would otherwise require glass replacement.
Value for Money: At $75.95, this is a significant investment, but it’s priced fairly for professional equipment. Comparable industrial systems cost $100-150. For detailing businesses or serious DIYers tackling multiple restorations, it pays for itself quickly. For one-time use, it’s overkill. The value emerges through durability and results that eliminate costly replacement.
Strengths and Weaknesses: Strengths include professional-grade results, comprehensive system approach, heavy-duty damage capability, versatility across glass types, and time efficiency. Weaknesses involve high upfront cost, requirement for a compatible rotary polisher, steep learning curve, and being excessive for minor household scratches.
Bottom Line: The ultimate solution for professionals and committed enthusiasts dealing with severe glass damage. Worth every penny if you have the supporting equipment and regular need. Overkill for casual users with only light scratches.
4. CARPRO Glass Polishing Pad - Polish Glass Scratches Etching, Correct and Clean Damaged Windshield & Window Glass - 5" (1 Pack)

Overview: The CARPRO Glass Polishing Pad is a specialized 5" glass-cutting tool constructed from high-strength rayon Lenzing fibers. With a hardness rating of 1600kpa and 3/16" thickness, this white pad features hook/loop backing for rotary polisher attachment. It’s specifically engineered for moderate to severely damaged glass where visible scratches and etching require aggressive yet controlled correction.
What Makes It Stand Out: This pad’s rayon fiber composition is uniquely suited for glass polishing—hard enough to cut effectively yet stable enough to minimize heat buildup that can cause cracking. The precise 5 1/8" diameter ensures full contact on flat surfaces, while the minimal thickness provides excellent feedback and control. Unlike foam or wool pads, this won’t disintegrate under the rigorous demands of glass polishing.
Value for Money: At $9.97, it’s an affordable entry point into professional glass polishing, but remember it’s just the pad. When paired with quality cerium oxide compound, it delivers results rivaling $50+ combined kits. The durability justifies the cost over cheaper generic alternatives that wear out quickly. However, requiring a separate compound adds $15-30 to the total investment.
Strengths and Weaknesses: Strengths include specialized glass-cutting design, durable rayon construction, minimal heat generation, stable cutting action, and professional-grade durability. Weaknesses are that it’s pad-only (no compound), limited to rotary polishers, and specifically designed for moderate-to-severe damage—not light polishing tasks.
Bottom Line: An essential, high-quality component for anyone serious about glass restoration with rotary tools. Excellent value and performance, but only buy if you already have or plan to purchase compatible cerium oxide compound and a polisher.
5. Griot’s Garage Fine Glass Polish, Car Window, Windshield Polishing Cleaner for Automotive and Home, Removes Stains and Water Spots, 11017, 16 oz

Overview: Griot’s Garage Fine Glass Polish offers a gentle yet effective 16oz liquid formula designed for both automotive and household glass maintenance. This versatile cleaner removes mild water spots, stains, and light scratches from windshields, shower doors, patio glass, and more. It works optimally with cotton pads and random orbital polishers, making it accessible to beginners while delivering professional-looking results.
What Makes It Stand Out: Its dual-purpose formulation stands apart from automotive-only products. The polish actively extends wiper blade life by creating a smoother glass surface, adding practical value beyond aesthetics. The gentle composition allows regular use without risking glass damage, while still effectively removing light buildup that household cleaners can’t touch. It’s specifically balanced for random orbital polishers, which are safer for novices than aggressive rotary tools.
Value for Money: At $1.75 per ounce, this is the most economical liquid polish reviewed. The 16oz bottle handles numerous applications across multiple vehicles and household surfaces. For general maintenance rather than heavy restoration, it outperforms pricier competitors. The wiper-life extension adds hidden savings, making it exceptional value for regular upkeep and preventative care.
Strengths and Weaknesses: Strengths include best-in-class price per ounce, versatile auto/home use, beginner-friendly application, wiper life extension, and safe gentle formula. Weaknesses involve limited effectiveness on deep scratches, requirement for specific cotton pads, and being too mild for severe restoration needs.
Bottom Line: The perfect entry-level polish for maintenance and light restoration across automotive and household glass. Unbeatable value for regular upkeep. Choose a more aggressive product for deep scratches, but for preventing and addressing minor issues consistently, this is top-tier.
6. Stained Glass Finishing Compound - Glass Polishing Compound, for Stained Glass, Polish & Protect - Glass Polish - Professional Polishing of Stained Glass Surfaces - Brightens Clarity & Vision - 7.1oz

Overview: The Stained Glass Finishing Compound is a specialized polish crafted for artisans who demand gallery-quality results. This 7.1-ounce bottle contains a premium blend designed specifically for stained glass artworks, delivering a mirror-like finish that enhances both color vibrancy and structural clarity while protecting delicate solder work.
What Makes It Stand Out: Formulated with 100% pure Brazilian carnauba wax and fine polishing agents, this compound offers professional-grade protection that hobbyist products simply can’t match. It uniquely treats raw solder and patina-treated seams, creating a durable barrier against oxidation while brightening the entire glass surface. The product’s specialized focus on stained glass artistry sets it apart from general-purpose glass cleaners.
Value for Money: At $12.99, this compound represents excellent value for serious crafters. Considering the cost of materials and time invested in stained glass projects, this final finishing step is a modest expense that dramatically elevates the final piece’s appearance and longevity. Comparable art-finishing products often cost significantly more per ounce.
Strengths and Weaknesses: Strengths include professional mirror finish, long-term protection for solder seams, versatile application on glass, brass, and copper, and trusted expertise from a specialized manufacturer. Weaknesses involve its niche application—not suitable for automotive or household windows—and the requirement for careful buffing that may challenge beginners unfamiliar with polishing techniques.
Bottom Line: This is an essential investment for stained glass artists seeking professional results. The carnauba wax formulation provides lasting protection and breathtaking clarity that justifies every penny for your artistic creations.
7. E.J. Wheaton Glass Wax, Polishes and Protects Windows, Mirrors and Metal Surfaces, Dries Chalk White, Easy to Apply and to Remove, Made in USA
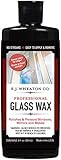
Overview: E.J. Wheaton Glass Wax delivers old-school cleaning power with modern convenience. This American-made formula polishes and protects windows, mirrors, and metal surfaces, creating a protective barrier that repels dust and fingerprints while leaving behind a brilliant shine that lasts for weeks.
What Makes It Stand Out: The distinctive chalk-white drying pattern makes application visualization effortless, ensuring complete coverage without missed spots. Its remarkable ease of removal—even after extended periods or direct sunlight exposure—sets it apart from traditional waxes that harden stubbornly. The multi-surface compatibility extends beyond glass to metal fixtures, increasing its household utility.
Value for Money: Priced at $14.99 ($1.87 per fluid ounce), this product offers solid value for household maintenance. The generous quantity covers numerous applications across multiple surfaces, making it more economical than specialized single-purpose cleaners. Made in USA quality assurance adds perceived value and reliability for discerning consumers.
Strengths and Weaknesses: Strengths include straightforward hand application, visual application cues, effective multi-surface protection, and reliable domestic manufacturing. Weaknesses comprise the chalky residue during drying that may concern some users, and it’s not formulated for automotive glass restoration or removing existing scratches, limiting its restoration capabilities.
Bottom Line: Ideal for homeowners wanting clean, protected windows and mirrors with minimal effort. The easy removal and visual feedback make it user-friendly for routine household maintenance tasks and regular upkeep.
8. GLASS POLISH DIY 3” Windshield Polishing Kit for Car Glass Restoration, Remove Wiper Blade Damage, Fine Scratches, Haziness, and Water Spots, Restore Glass Clarity and Shine - GP21005

Overview: The GLASS POLISH DIY Windshield Polishing Kit is a comprehensive solution for automotive glass restoration. Designed for use with a standard electric drill, this kit effectively removes wiper blade damage, fine scratches, haziness, and water spots that compromise visibility and driving safety. Everything needed for restoration is included in one convenient package.
What Makes It Stand Out: The included universal drill attachment transforms your power drill into a professional glass polishing tool, dramatically reducing manual labor time while ensuring consistent results. This kit specifically targets fine scratches you can barely feel with a fingernail, making it perfect for rejuvenating weathered windshields rather than just superficial cleaning.
Value for Money: At $24.95, this kit delivers exceptional value compared to professional glass restoration services that can cost hundreds of dollars. The reusable components and drill integration provide ongoing utility for multiple vehicles or projects, making it a smart long-term investment for car enthusiasts and committed DIYers who maintain their own vehicles.
Strengths and Weaknesses: Strengths include efficient defect removal, drill-powered operation for consistency, restoration of optical clarity, and improvement of driving safety. Weaknesses involve limitation to fine scratches only—deeper damage requires more aggressive kits—and the necessity of owning a drill, which may exclude some users from taking full advantage of the system.
Bottom Line: A must-have for car owners battling windshield haze and wiper marks. The drill-powered efficiency and professional results make this kit worth every dollar for maintaining clear, safe visibility on the road.
9. Glass Polish 50ml Cerium Oxide Glass Polishing Solution for Removing Oil Film, Water Spots, Eddies, Glass Water Stains, Wiper Marks on The Glass Surface, Restoring clearity

Overview: This Glass Polish Cerium Oxide Solution offers professional-grade glass restoration in a convenient 50ml bottle. Formulated with over 40% high-quality cerium oxide, it effectively removes oil films, water spots, wiper marks, and light scratches from various glass surfaces without leaving residue or haze behind that can impair vision.
What Makes It Stand Out: The ultra-fine 0.3-micron particle size ensures scratch-free polishing that achieves mirror-like clarity without swirl patterns. Unlike powdered compounds requiring messy mixing, this pre-mixed ready-to-use solution eliminates preparation guesswork and ensures consistent results. The included friction pad provides immediate application capability right out of the package for user convenience.
Value for Money: At just $9.99, this represents outstanding value for a high-concentration cerium oxide formula. Professional glass shops typically charge premium prices for similar compounds. The ready-to-use convenience saves time and prevents waste from improper mixing, stretching the modest investment further for multiple small projects around the home or garage.
Strengths and Weaknesses: Strengths include high cerium oxide concentration, ultra-fine non-damaging particles, versatile applications from automotive to household glass, ready-to-use convenience, and included application pad. Weaknesses involve the small 50ml quantity that may require multiple bottles for large projects, and limited effectiveness on deeper scratches beyond surface-level imperfections that need professional attention.
Bottom Line: An exceptional budget-friendly option for achieving professional glass clarity. Perfect for detailers and homeowners tackling multiple glass surfaces with precision and ease without breaking the bank.
10. Adam’s Glass Polish

Overview: Adam’s Glass Polish positions itself as a straightforward solution for automotive glass care. Marketed under a recognizable brand in car detailing, this polish aims to clarify and protect glass surfaces with minimal complexity for everyday vehicle owners who prioritize convenience and trusted brand names.
What Makes It Stand Out: The brand’s reputation in automotive detailing lends credibility to this formulation. While feature details are sparse, the “Vertailize solution” (likely a specialized clarifying agent) suggests a focus on restoring optical clarity. The emphasis on ease of use appeals to casual detailers intimidated by professional-grade compounds or multi-step processes that require expertise.
Value for Money: At $14.44, this mid-range priced polish sits between budget options and professional kits. For buyers trusting the Adam’s brand ecosystem, this represents a safe purchase that integrates with their existing line of car care products. However, the vague description makes direct performance comparison difficult against more transparently documented competitors with clear specifications.
Strengths and Weaknesses: Strengths include brand recognition, purported ease of application, and likely compatibility with other Adam’s products. Weaknesses center on the severely limited feature description, unclear whether it removes scratches or simply cleans, unknown ingredients, and no mention of included applicators or specific use cases that would justify the price point over alternatives.
Bottom Line: Only recommended for existing Adam’s brand loyalists. Others should opt for more transparently documented products where performance claims and ingredients are clearly specified before purchasing to ensure it meets their specific glass restoration needs.
Understanding Acid Rain Etching: What It Is and Why It Matters
The Science Behind Acid Rain
Acid rain forms when sulfur dioxide and nitrogen oxides—released from industrial processes, vehicle emissions, and power generation—react with atmospheric moisture. The resulting precipitation carries a pH level far below neutral, typically ranging from 4.0 to 4.5. When this acidic water evaporates from your vehicle’s glass surface, it doesn’t just leave behind mineral deposits like ordinary hard water. Instead, it actively corrodes the silica-based structure of automotive glass, creating permanent microscopic craters that extend beyond the surface level.
These pits aren’t uniform; they create a textured landscape that refracts light in multiple directions. That’s why etched glass appears cloudy despite feeling smooth to the touch. The damage compounds over time as subsequent rain events fill these tiny valleys with more acidic solution, deepening the etching with each cycle.
How Etching Differs from Surface Contamination
Many car owners mistake etching for stubborn water spots or surface contamination. Here’s the critical distinction: water spots sit on top of the glass and respond to chemical removers or mild acids. Etching has physically removed material from the glass itself. No amount of chemical cleaning will level these microscopic valleys. This is why abrasive polishing becomes necessary—it mechanically removes a thin layer of surrounding glass to create a flat surface again.
The difference matters because using the wrong approach wastes time and money. You can’t dissolve away what’s no longer there. Recognizing true etching early prevents you from chasing your tail with ineffective water spot treatments when you actually need mechanical restoration.
How Glass Polish Works to Combat Acid Rain Damage
The Mechanical Action of Polishing
Glass polish functions as an extremely fine-grit sanding system suspended in a lubricating carrier. When worked against the surface with appropriate pressure and motion, the abrasive particles systematically shave down the high points of your glass—the peaks surrounding the etched valleys. This process continues until the surface becomes uniformly level, restoring optical clarity by eliminating the light-scattering topography.
Think of it like leveling a wooden floor with deep scratches. You don’t fill the scratches; you sand the entire surface down to the deepest scratch’s bottom. Quality glass polishes use carefully graded abrasive particles that break down progressively, starting with enough cut to tackle damage while finishing with a polish that leaves a flawless, distortion-free surface.
Chemical Restoration Properties
Beyond mechanical abrasion, premium glass polishes incorporate chemical agents that help restore the glass’s surface chemistry. Cerium oxide, the most effective compound, not only provides gentle abrasive action but also chemically reacts with silica to create a smoother, more hydrophobic surface. This dual-action approach means you’re not just grinding away damage—you’re actively improving the glass’s resistance to future environmental attack.
The chemical component also helps suspend removed glass particles, preventing them from creating new micro-scratches during the polishing process. This is crucial for achieving true clarity rather than just exchanging one form of haze for another.
Key Ingredients to Look for in Effective Glass Polishes
Cerium Oxide: The Gold Standard
Cerium oxide has dominated glass polishing for decades, and for good reason. This rare earth compound offers the ideal balance of cutting ability and finishing quality. Unlike harder abrasives that can create sub-surface damage, cerium oxide particles work at a molecular level, gradually wearing away glass without leaving behind their own scratch pattern. The material’s unique crystalline structure allows it to maintain its effectiveness while breaking down into progressively finer particles.
When evaluating polishes, look for those that list cerium oxide as a primary ingredient rather than hiding it in a proprietary blend. The concentration matters—higher-quality formulations contain 30-50% cerium oxide by weight, providing genuine restoration power rather than token amounts for marketing purposes.
Aluminum Oxide and Other Abrasives
While cerium oxide excels at fine polishing, some damage requires more aggressive initial cutting. Aluminum oxide provides this heavier cutting action, available in various micron sizes to match etching severity. However, it’s a double-edged sword. Too coarse, and you risk creating visible distortion; too fine, and you’ll spend hours achieving minimal results.
Diamond powder represents the premium heavy-cut option, offering predictable cutting rates and excellent durability. However, it’s expensive and typically reserved for professional-grade compounds designed for severe etching. For most enthusiasts, a well-formulated aluminum oxide compound followed by a cerium oxide finish provides the best balance of results and safety.
Lubricating Agents and Carriers
The liquid or cream base carrying the abrasive particles dramatically impacts working time, residue removal, and final results. Quality carriers use water-based formulas with added lubricants that prevent the polish from drying too quickly—especially critical when working under shop lights that generate heat. Silicone-free formulations are essential; any silicone residue will interfere with subsequent protective coatings and create smearing issues.
Look for carriers that suspend particles evenly without settling. Separation indicates poor formulation and leads to inconsistent results. The best polishes maintain a creamy consistency that spreads thinly and evenly, maximizing abrasive contact while minimizing product waste.
Abrasive Levels: Matching Polish to Etching Severity
Light Etching: Fine Abrasives
Light etching appears as a subtle haze visible only in direct sunlight or when the windshield fogs slightly. At this stage, you’re dealing with surface micro-pitting that hasn’t penetrated deeply into the glass. Fine cerium oxide polishes with particle sizes under 1 micron provide the ideal solution. These formulations remove minimal glass while effectively leveling the shallow damage.
The key advantage of addressing light etching early is speed. A fine polish applied by hand can often restore clarity in 20-30 minutes per window, making this a practical maintenance task rather than a major project. Think of it as paint correction for glass—regular light polishing prevents the need for aggressive restoration later.
Moderate Damage: Medium-Cut Compounds
Moderate etching shows visible cloudiness even on overcast days and may slightly distort oncoming headlights at night. This level of damage requires medium-cut compounds with particle sizes ranging from 1-3 microns. These formulations remove more material, reaching the bottom of deeper pits while still allowing for a refined finish.
When using medium-cut compounds, always follow with a fine finishing polish. The initial compound restores clarity but may leave a slightly hazy finish that requires refinement. Skipping the finishing step results in acceptable but not excellent results—like stopping paint correction at the compounding stage without polishing.
Severe Cases: Heavy-Cut Options
Severe etching creates obvious visual distortion and feels rough to the touch. At this stage, you’re dealing with damage that may have penetrated 10-20 microns into the glass surface. Heavy-cut compounds with aluminum oxide or diamond powder particles sized 3-5 microns become necessary. These aggressive formulations require machine application and careful technique to avoid creating optical distortion.
Before attempting heavy-cut polishing, honestly assess whether replacement makes more sense. Deep restoration removes significant glass, potentially weakening the windshield and creating visible distortion if not performed perfectly. When in doubt, consult a professional who can measure glass thickness and evaluate structural integrity.
Liquid vs. Cream vs. Powder: Which Formulation Works Best?
Liquid Polishes: Convenience and Spreadability
Liquid glass polishes offer the easiest application, spreading thinly and evenly across large surfaces like windshields. Their low viscosity makes them ideal for machine application, as they resist drying and flinging during high-speed polishing. However, this convenience comes at a cost—liquid polishes typically contain lower abrasive concentrations and may require multiple applications for moderate damage.
The primary advantage lies in their forgiving nature. Beginners find liquids easier to work with because they provide longer working times and more visible lubrication. For maintenance polishing of lightly etched glass, liquids provide an excellent balance of convenience and effectiveness.
Cream Compounds: Balanced Performance
Cream formulations represent the middle ground, offering higher abrasive loads than liquids while maintaining easier application than powders. Their toothpaste-like consistency clings to vertical surfaces, reducing waste and ensuring consistent abrasive contact. Most professional-grade glass polishes use cream bases because they allow precise control over application thickness.
Creams excel in hand-polishing applications, staying where you put them and providing visual feedback through color change as abrasives break down. For moderate etching addressed with dual-action machines, creams deliver consistent results without the mess of powders or the multiple passes required by liquids.
Powdered Formulas: Maximum Control
Powdered glass polish provides ultimate control over cutting power and working characteristics. By mixing the powder with water or a dedicated carrier liquid, you adjust concentration to match specific damage levels. Professional detailers appreciate this flexibility, creating heavy pastes for deep damage or thin slurries for final finishing.
The downside? Powdered polishes demand experience. Mixing ratios significantly impact results, and inconsistent mixing leads to uneven polishing. They also require careful cleanup, as dried powder residue can scratch glass if not thoroughly removed. Reserve powders for experienced users tackling varied damage across multiple vehicles.
Manual Application vs. Machine Polishing: Pros and Cons
Hand Polishing Techniques
Hand polishing works effectively for light etching and spot treatment of localized damage. Using a microfiber applicator pad or dedicated glass polishing pad, work the polish in overlapping circular motions with firm, consistent pressure. The key is maintaining pad cleanliness—fold to a fresh section frequently to prevent reintroducing removed glass particles.
The primary limitation is physical endurance. Polishing an entire windshield by hand requires significant time and effort, often taking 45-60 minutes for a single window. However, hand polishing offers unparalleled control on curved surfaces and eliminates the risk of machine-induced heat buildup. For convertible rear windows or heavily contoured glass, hand polishing often produces superior results.
Machine Polishing: DA vs. Rotary
Dual-action (DA) polishers revolutionized glass restoration for enthusiasts. The random orbital motion prevents holograms and distortion while providing consistent cutting power. For most acid rain etching, a DA polisher with a glass-specific foam or wool pad delivers professional results with minimal risk. Set speeds between 3,000-4,500 OPM for optimal abrasive action without generating excessive heat.
Rotary polishers offer maximum cutting power for severe damage but demand expert technique. The direct-drive rotation generates significant heat and can quickly create visible swirls or distortion if the pad isn’t kept perfectly flat. Reserve rotary polishing for extreme cases after gaining extensive experience on practice glass. Always use water misting to control temperature and prevent glass fracture.
Essential Features to Consider When Choosing a Glass Polish
VOC Compliance and Environmental Impact
Modern automotive chemicals face increasing regulatory scrutiny, and glass polishes are no exception. Volatile Organic Compounds (VOCs) contribute to air pollution and pose health risks during application. Quality manufacturers now offer VOC-compliant formulations that maintain performance while reducing environmental impact. These water-based formulas clean up easily with water instead of harsh solvents.
Beyond legal compliance, consider the polish’s overall environmental footprint. Biodegradable carriers and recyclable packaging demonstrate a manufacturer’s commitment to sustainable car care. As enthusiasts, we have a responsibility to minimize our hobby’s environmental impact without sacrificing results.
Versatility on Different Glass Types
Your vehicle contains multiple glass types—laminated windshield glass, tempered side windows, and potentially coated glass with factory hydrophobic treatments. A versatile polish works effectively across all these surfaces without damaging specialized coatings. Some premium polishes even restore functionality to degraded hydrophobic coatings while removing etching.
Check manufacturer specifications regarding compatibility with tinted windows and aftermarket coatings. The last thing you want is a polish that strips your expensive ceramic coating or damages window tint adhesives. Universal compatibility simplifies your detailing arsenal, reducing the number of specialized products cluttering your workspace.
Residue and Cleanup Characteristics
Nothing frustrates like spending hours polishing only to face another hour removing stubborn polish residue from trim, seals, and glass edges. Quality polishes wipe away cleanly with minimal effort, leaving no haze that requires repeated cleaning. Look for formulations that specify “easy wipe-off” or “minimal residue” in their descriptions.
This feature becomes especially important when polishing near window seals and body trim. Polishes that dry to a powdery residue typically clean up faster than those that cure to a sticky film. Consider keeping a bottle of quick detailer spray and fresh microfibers handy for immediate residue removal during the polishing process.
Safety Considerations and Protective Gear
Respiratory Protection
Glass polishing generates fine silica dust as the abrasive removes glass material. Even with wet polishing methods, airborne particles pose a significant respiratory hazard. Always wear a NIOSH-approved N95 or P100 respirator when machine polishing glass. The seemingly minor exposure during a single project accumulates over years of car care activities.
Disposable respirators suffice for occasional use, but dedicated enthusiasts should invest in a half-face respirator with replaceable filters. These offer superior comfort and protection, especially important during extended polishing sessions. Never rely on basic dust masks—they provide inadequate filtration for microscopic glass particles.
Skin and Eye Safety
Cerium oxide and aluminum oxide abrasives act as desiccants, drawing moisture from skin and causing irritation or dermatitis with repeated exposure. Chemical-resistant nitrile gloves protect your hands while maintaining dexterity for precise polishing control. Avoid latex gloves, which degrade quickly when exposed to polishing slurry.
Eye protection is non-negotiable. Polishing generates high-velocity particles that easily bypass regular glasses. Use sealed safety goggles that meet ANSI Z87.1 standards. A stray particle in your eye can cause corneal abrasion, turning a detailing project into an emergency room visit. Keep emergency eyewash solution readily accessible in your workspace.
Working in Ventilated Spaces
Even with respiratory protection, adequate ventilation remains essential. Polishing generates heat and potentially harmful vapors from carrier chemicals. Work in a well-ventilated garage with doors open and fans circulating air away from your breathing zone. Avoid polishing in completely enclosed spaces where particle concentrations can reach hazardous levels.
Consider using a shop vacuum with HEPA filtration positioned near the polishing area to capture airborne particles at the source. This significantly reduces cleanup and minimizes exposure for anyone else in the vicinity. Professional detailers often build simple downdraft tables or use portable ventilation units for this purpose.
The Role of Water Spot Removers vs. True Glass Polish
Understanding the Limitations of Water Spot Removers
Water spot removers typically contain mild acids or chelating agents designed to dissolve mineral deposits on top of the glass surface. They work wonderfully on fresh contamination but cannot address physical material loss from etching. Many car owners waste money and effort applying increasingly aggressive water spot removers to etched glass, achieving only marginal improvement.
The chemical approach has merit as a first step—always attempt chemical removal before resorting to mechanical polishing. If after two applications of a quality water spot remover the haze remains, you’ve confirmed etching rather than surface deposits. At this point, continuing with chemicals risks damaging window seals and trim without providing meaningful results.
When Polish Becomes Necessary
Polishing becomes necessary when you can feel the damage with a plastic razor blade or microfiber cloth. Drag a blade lightly across the glass; if it catches in microscopic pits, etching exists. Another test involves fogging the glass with your breath—etched areas retain condensation differently than intact glass, creating visible patterns.
Don’t rush to polish at the first sign of haze. But once you’ve confirmed true etching, delay only allows damage to worsen. Acid rain etching is progressive; each subsequent exposure deepens existing pits. Timely polishing removes less material and achieves better results than waiting until visibility becomes dangerously compromised.
Preparing Your Vehicle’s Glass Before Polishing
Deep Cleaning Decontamination
Never polish over contaminated glass. Road film, oils, and silicone residues interfere with abrasive action and can cause severe scratching. Start with a dedicated glass cleaner containing no silicone or wax. Follow with an isopropyl alcohol wipe-down using a 50/50 IPA and water solution to remove any remaining residues.
Pay special attention to the windshield’s interior surface. Off-gassing from vinyl and plastic interior components creates a film that complicates polishing. Clean both sides of the glass thoroughly, even if etching appears only on the exterior. This prevents cross-contamination during the polishing process.
Clay Bar Treatment for Glass
Automotive clay bars effectively remove embedded contaminants that chemical cleaners miss. Use a fine-grade clay bar with plenty of lubricant on wet glass. The clay glides across the surface, pulling out industrial fallout, tree sap, and other particles that would otherwise get caught in your polishing pad.
Work in small sections, kneading the clay frequently to expose clean surfaces. You’ll feel the clay grab initially, then glide smoothly as contamination is removed. This step takes only 10-15 minutes for all windows but dramatically improves polishing results and pad longevity.
Masking and Protecting Surrounding Areas
Polish residue embeds in textured trim and rubber seals, creating unsightly white stains that are nearly impossible to remove completely. Use 1-inch automotive masking tape to protect window seals, body trim, and windshield wipers. For textured plastic trim, apply a thin layer of petroleum jelly as an additional barrier.
Don’t skip masking to save time. The 15 minutes spent protecting surrounding surfaces saves hours of cleanup and prevents permanent staining of expensive trim pieces. Remove masking immediately after polishing before residue dries and adheres to the tape edges.
Step-by-Step Guide to Polishing Acid Rain Etched Glass
Gathering Your Supplies
Assemble everything before starting: glass polish (appropriate cut level), polishing pads (foam or wool), machine or hand applicator, microfiber towels, spray bottle with water, masking tape, respirator, safety goggles, and nitrile gloves. Having supplies within reach prevents interruptions that let polish dry on the glass.
Use a dedicated glass polishing pad, not the same foam you use for paint correction. Glass polishing generates more heat and requires firmer, more durable foam. Keep multiple pads on hand—switch to a fresh pad when the current one becomes saturated with polish and glass particles.
The Polishing Process
Start with a test spot in an inconspicuous area, like the bottom corner of the windshield. Apply three small dots of polish to the pad, then spread across a 2x2 foot section at low speed. Increase speed to the recommended range and work the polish using overlapping passes in a cross-hatch pattern (horizontal, then vertical).
Keep the pad flat and maintain consistent pressure—approximately 5-10 pounds for DA machines. Mist lightly with water if the polish begins to dry or dust excessively. Work each section for 3-5 minutes, then wipe clean with a microfiber to inspect progress. Repeat if haze remains, but know when to step up to a more aggressive compound rather than over-working a fine polish.
Final Inspection and Cleanup
After polishing, remove all residue using a clean, damp microfiber. Follow with a 70% isopropyl alcohol wipe to remove any remaining polishing oils. Inspect the glass from multiple angles, using a bright LED light to reveal any remaining haze or swirl marks.
Perform a final cleaning with your regular glass cleaner to ensure perfect clarity. Consider applying a glass sealant or ceramic coating within 24 hours to protect the freshly polished surface. The newly leveled glass provides an ideal bonding surface for protective products.
Common Mistakes to Avoid When Polishing Automotive Glass
Using Too Much Pressure
Enthusiasm often translates to excessive pressure, which generates heat and risks creating distortion. Let the abrasives do the work. With proper polish and pad selection, moderate pressure achieves better results than bearing down aggressively. Excessive pressure also causes pad deformation, leading to uneven polishing and swirl marks.
Monitor pad temperature by touch—if it’s too hot to hold comfortably, you’re pressing too hard or working too fast. Glass conducts heat differently than paint, and thermal shock can cause cracking, especially on chipped or previously damaged glass.
Working in Direct Sunlight
Direct sun heats glass unevenly, causing polish to dry instantly and creating severe streaking. The temperature differential between sunlit and shaded areas leads to inconsistent polishing results and potential thermal stress. Always work in shade or a garage where you control the environment.
If you must work outside, choose an overcast day or create shade with a portable canopy. The ideal ambient temperature ranges from 60-75°F. Colder temperatures slow polish breakdown; hotter temperatures cause premature drying. Both extremes compromise results.
Skipping the Test Spot
Every glass surface is different. Factory coatings, previous treatments, and variations in glass composition affect how polish performs. Skipping the test spot risks discovering too late that your chosen polish is too aggressive, creating visible swirls across the entire windshield.
Test spots reveal the optimal polish, pad, pressure, and speed combination for your specific situation. They also confirm that your chosen approach effectively removes etching without causing additional damage. The five minutes spent testing saves potentially hours of correcting mistakes.
How to Maintain Your Glass After Polishing
Protective Coatings and Sealants
Freshly polished glass offers the perfect substrate for protective treatments. Glass ceramic coatings bond molecularly with the silica surface, creating a hydrophobic barrier that resists acid rain, mineral deposits, and environmental contamination. These coatings last 6-12 months on daily drivers and up to two years on garage-kept vehicles.
Alternatively, traditional glass sealants provide easier application with shorter durability (2-3 months). They offer excellent beading and sheeting properties, making future cleaning easier and providing some protection against mild acid rain. Apply within 24 hours of polishing for maximum bonding.
Regular Maintenance Routines
Establish a weekly glass maintenance routine using a pH-neutral glass cleaner and a dedicated microfiber towel. Avoid ammonia-based cleaners, which degrade window tint and can interfere with protective coatings. A quick wipe-down prevents mineral deposits from building up and reduces the frequency of full polishing sessions.
Every three months, apply a maintenance spray to boost your protective coating’s performance. These spray-on, wipe-off products rejuvenate water beading and fill minor surface imperfections before they develop into etching. Think of it as a quick detailer specifically formulated for glass.
Parking Strategies to Minimize Future Damage
Where you park significantly impacts glass deterioration. Whenever possible, garage your vehicle, especially during seasons with high acid rain frequency. If garage parking isn’t available, avoid parking under trees where sap and organic acids compound rain damage.
Consider using a quality car cover during extended parking periods. Modern breathable covers prevent moisture trapping while blocking direct rain contact. For daily drivers, windshield sun shades provide some protection against both UV damage and direct rain contact when parked outdoors.
When to Seek Professional Help for Severe Etching
Assessing Irreversible Damage
Some etching exceeds reasonable DIY restoration limits. If you can catch your fingernail in the pits or see obvious distortion when looking through the glass, professional evaluation becomes necessary. Deep etching may have compromised the glass’s structural integrity, making aggressive polishing risky.
Professional glass restoration companies use specialized equipment to measure glass thickness and pit depth. They can determine whether polishing will remove enough material to restore clarity without weakening the glass. This assessment typically costs less than $50 but provides crucial information before you invest hours in potentially futile polishing.
Professional Tools and Techniques
Professional glass restoration specialists employ tools beyond typical DIY capabilities. Multi-stage diamond polishing systems, optical clarity meters, and thickness gauges allow them to tackle severe damage safely. They also carry insurance against glass breakage—a risk that increases with etching depth.
Consider professional help for panoramic sunroofs, complex curved glass, or vehicles with advanced driver assistance systems (ADAS) mounted behind the windshield. These systems require precise optical clarity and proper recalibration after any glass work. The cost of professional restoration often proves cheaper than windshield replacement.
Environmental Factors That Worsen Acid Rain Damage
Geographic Hotspots
Certain regions experience significantly worse acid rain damage. Industrial corridors, areas downwind of coal-fired power plants, and regions with high vehicle density show pH levels in rainwater as low as 3.5. The northeastern United States, parts of the Midwest, and urban centers worldwide face the highest risk.
If you live in these areas, proactive glass protection becomes essential rather than optional. Apply protective coatings quarterly instead of annually, and consider keeping a waterless wash solution in your vehicle to neutralize rain deposits before they dry and etch.
Seasonal Considerations
Acid rain damage intensifies during summer months when high temperatures accelerate evaporation, concentrating acidic compounds on glass surfaces. Summer storms often contain higher pollutant loads due to increased ground-level ozone and atmospheric instability mixing pollutants from wider areas.
Winter presents its own challenges. Road salt and de-icing chemicals create alkaline films that interact with acid rain residues, forming compounds that etch glass more aggressively than either contaminant alone. Increase your glass cleaning frequency during winter, paying special attention to removing salt films before they compound with spring acid rain.
Industrial and Urban Pollution
Even outside official acid rain zones, industrial fallout and urban pollution create similar etching effects. Construction sites, manufacturing facilities, and heavy traffic corridors generate particulate matter that settles on glass and creates acidic solutions when mixed with dew or light rain. These localized sources can cause etching as severe as traditional acid rain.
Parking near industrial areas or major highways accelerates glass deterioration. If your daily commute or parking location exposes your vehicle to these conditions, treat your glass with the same protective measures recommended for acid rain zones. Prevention always costs less than restoration.
Frequently Asked Questions
How can I tell if my glass has acid rain etching or just water spots?
Run your fingernail across the affected area. If it feels smooth, you’re likely dealing with surface water spots that chemical removers can address. If you feel tiny pits or roughness, it’s etching requiring mechanical polishing. The breath test also works—fog the glass and watch how condensation behaves. Etched areas retain moisture differently, creating visible patterns.
Will polishing my windshield weaken the glass or make it more prone to cracking?
When performed correctly with appropriate products, polishing removes less than 0.1% of total glass thickness—insignificant to structural integrity. However, aggressive polishing on already chipped or damaged glass can exacerbate weaknesses. Always inspect for existing damage and avoid heavy pressure on edges where chips commonly occur.
Can I use the same polish on my windshield and side windows?
Yes, automotive glass formulations are consistent across windshield (laminated) and side windows (tempered). However, side windows often have more complex curves requiring smaller pads and more careful technique. Rear windows with defroster lines need extra caution—avoid excessive pressure that could damage these delicate heating elements.
How often should I polish my vehicle’s glass to prevent acid rain damage?
Polish only when etching becomes visible. Over-polishing unnecessarily thins the glass. For most vehicles in moderate acid rain areas, full polishing every 2-3 years suffices. Maintain protective coatings annually and perform spot polishing on new damage as it appears. Prevention through protection is far better than frequent restoration.
Is hand polishing effective, or do I need a machine?
Hand polishing works for light etching and spot treatment but becomes impractical for severe damage or entire windshields. A dual-action polisher cuts hand polishing time by 70% while providing more consistent results. For moderate to severe etching, machine polishing isn’t just preferred—it’s essential for achieving professional-quality clarity.
Will glass polish remove scratches from wiper blades or road debris?
Glass polish effectively removes light wiper scratches and swirl marks, which are essentially linear etching. However, deep scratches that catch your fingernail may require professional assessment. Aggressive polishing to remove deep scratches risks creating optical distortion. Minor scratches blend into the surrounding polished surface, becoming nearly invisible.
Can I apply ceramic coating immediately after polishing?
Wait 24 hours after polishing before applying ceramic coatings. This allows any residual polishing oils to evaporate completely and ensures the glass surface reaches optimal bonding condition. Wipe the glass with isopropyl alcohol immediately before coating to remove any remaining contaminants and ensure maximum coating adhesion.
Does parking under cover really make that much difference?
Absolutely. Vehicles parked outdoors experience 5-10 times more acid rain exposure than garage-kept cars. Even a carport provides significant protection by preventing direct rain contact and reducing contaminant concentration. The combination of reduced exposure and slower evaporation dramatically decreases etching rates.
What’s the difference between cerium oxide polish and rubbing compound for glass?
Rubbing compounds designed for paint contain abrasives too coarse for glass, creating visible scratches and distortion. Cerium oxide polishes use specifically graded particles that work at the correct rate for glass removal. Never substitute paint correction compounds for glass polish—the results will be disastrous and potentially require windshield replacement.
How do I maintain my glass after applying a ceramic coating?
Use pH-neutral glass cleaners and avoid abrasive scrubbing. Wash with the two-bucket method, using a separate wash mitt for glass to prevent cross-contamination from gritty paint mitts. Reapply a maintenance booster spray every 3-4 months to replenish hydrophobic properties. Never use automatic car washes with harsh chemicals or brushes, which degrade coatings and can cause new micro-scratches.