Whether you’re debadging your vehicle for a sleek, minimalist aesthetic, replacing faded factory emblems, or preparing a surface for paint correction, emblem removal is a deceptively precise art. What looks like a simple peel-and-stick job often involves industrial-grade adhesives engineered to survive a decade of car washes, blistering sun, and freezing winters. Rush the process with improvised tools, and you’re looking at clear coat damage, paint ghosting, or worse—a costly trip to the body shop. The difference between a flawless, invisible removal and a frustrating repair job boils down to one critical factor: using the right tools with the right technique.
This comprehensive guide dives deep into the world of emblem removal tools, exploring the essential categories, must-have features, and professional-grade considerations that separate amateur attempts from showroom-quality results. We’ll walk you through everything from understanding modern adhesive systems to building a complete toolkit that protects your vehicle’s finish while delivering clean, predictable outcomes every time.
Top 10 Emblem Removal Tools
Detailed Product Reviews
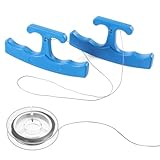
1. Therwen Car Emblem Removal Tool Wrap Tools Plate Line Badge Remover Car Surface Emblem Removal Kit with Extra 5M PE Cables for Vehicle Window Film Installation(Black)

Overview:
The Therwen Car Emblem Removal Tool in black offers a comprehensive solution for DIY enthusiasts looking to remove badges, emblems, and stickers without damaging vehicle paint. This kit includes a pair of ergonomic plastic handles and an impressive 5-meter spare PE cable, providing ample material for multiple projects. Designed for versatility, it serves both automotive and household applications, making it a practical addition to any toolbox.
What Makes It Stand Out:
The generous 5-meter cable length distinguishes this kit from competitors, allowing users to cut custom lengths for various tasks. The ergonomic handle design provides excellent grip and mechanical advantage, reducing hand fatigue during prolonged use. Beyond automotive applications, this versatile tool effectively removes adhesive items from flat surfaces throughout the home, extending its utility far beyond simple debadging.
Value for Money:
At $12.99, this kit presents solid mid-range value. The extensive cable supply offsets the plastic construction, offering more replacement material than pricier alternatives. While aluminum handles would provide superior durability, the cost-effective plastic design with generous cable length makes this ideal for occasional users who prioritize quantity over premium materials. The 5-meter spool ensures you won’t run out mid-project.
Strengths and Weaknesses:
Strengths include the substantial 5-meter cable, ergonomic design, lightweight portability, and versatile household applications. The compact 4.3" handles store easily in any toolbox. Weaknesses involve the plastic handles potentially flexing under heavy pressure and lacking the long-term durability of metal alternatives. The black color shows wear more visibly than lighter options, and the plastic construction may not withstand daily professional use.
Bottom Line:
This Therwen kit excels for hobbyists and DIY detailers undertaking vinyl wrap projects or occasional emblem removal. The abundant cable supply ensures you’re well-equipped for multiple jobs, making it a practical choice despite its plastic construction. For non-professional use, it strikes an excellent balance between functionality and cost.
2. NEWISHTOOL PlateLine Remover Car Emblem Removal Tool with 5PCS 60CM PE Cord for Easily Remove Vehicle Logos, Nameplates, Badges and Paste Signs Plates, Plastic Ergonomic Shape Aid Vinyl Wrap Tools

Overview:
The NEWISHTOOL PlateLine Remover provides a professional approach to emblem removal with its distinctive blue plastic handles and pre-cut PE cord system. Designed specifically for pre-wrap preparation, this kit includes five 60-centimeter cords, offering convenience for users who prefer ready-to-use segments over continuous spools. It’s engineered for efficiency in automotive graphics applications.
What Makes It Stand Out:
The pre-cut cord design eliminates measuring and cutting, allowing immediate replacement during intensive jobs. The vibrant blue color provides excellent visibility against vehicle surfaces, reducing the risk of leaving cord behind. The ergonomic handle shape maximizes mechanical advantage, making badge removal more efficient with less physical effort, particularly beneficial during long detailing sessions.
Value for Money:
Priced at $14.99, this kit commands a premium for convenience. While the total 3-meter cable length falls short of competitors offering 5 meters, the pre-cut format saves time and reduces waste for professional installers. The cost per meter is higher, but the convenience factor justifies the price for those who value efficiency over raw material quantity. It’s optimized for workflow rather than economy.
Strengths and Weaknesses:
Strengths include the convenient pre-cut cords, ergonomic blue handles, professional appearance, and immediate usability. The segmented approach prevents entire spool waste if one section breaks. Weaknesses are the limited total cable length and higher price point compared to spool-based alternatives. The 60cm length may prove insufficient for larger emblems requiring continuous pulls, potentially necessitating cord splicing.
Bottom Line:
Ideal for professional vinyl wrappers and automotive detailers who prioritize workflow efficiency, the NEWISHTOOL kit trades cable length for convenience. While less economical for hobbyists, its pre-cut design streamlines operations in busy shop environments where time savings translate directly to profitability.
3. Therwen Car Emblem Removal Tool Wrap Tools Plate Line Badge Remover Car Surface Emblem Removal Kit with Extra 5M PE Cables for Vehicle Window Film Installation (Blue)
Overview:
The blue variant of the Therwen Car Emblem Removal Tool delivers identical functionality to its black counterpart at a more attractive price point. This budget-conscious kit includes a pair of ergonomic plastic handles and a substantial 5-meter PE cable, making it an excellent entry point for DIY automotive enthusiasts and home improvement hobbyists seeking professional results without premium costs.
What Makes It Stand Out:
This kit’s primary distinction is its exceptional value proposition—offering the same generous cable length and ergonomic design as premium options while maintaining the lowest price in its category. The blue color provides better visibility during use compared to black, helping users track the removal line more effectively against dark vehicle surfaces and reducing the chance of paint contact.
Value for Money:
At just $9.99, this represents outstanding value. The combination of 5 meters of high-strength PE cable and ergonomic handles under ten dollars is difficult to match. While plastic construction limits professional-grade durability, the cost savings more than compensate for occasional users. This price point makes experimenting with vinyl wrapping or emblem debadging accessible to budget-minded consumers without sacrificing capability.
Strengths and Weaknesses:
Strengths include unbeatable pricing, extensive cable supply, lightweight portability, and versatile applications beyond automotive use. The ergonomic design remains comfortable during extended projects, and the blue color enhances visibility. Weaknesses involve plastic handles that may flex under maximum pressure and lack the longevity of aluminum alternatives. The blue color, while visible, may show dirt more readily than darker options.
Bottom Line:
For cost-conscious DIYers seeking maximum cable length without financial strain, this blue Therwen kit is the clear winner. It provides all essential functions for successful emblem removal while leaving money in your pocket for additional detailing supplies. The value proposition is simply unmatched in this category.
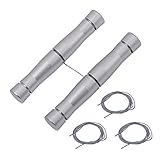
4. SHMZK Emblem Removal Tool, Aluminum Alloy Car Surface Logo Plate Line Remover Tool with Replacement PE Cables, Line Remover for Easily Remove Vehicle Logos Badges, Car Accessories (Silver)

Overview:
The SHMZK Emblem Removal Tool elevates the category with its aluminum alloy handle construction, targeting users who demand durability and professional performance. This silver-finished tool combines corrosion-resistant metal handles with high-quality PE cables for non-destructive emblem removal, representing a significant upgrade from plastic alternatives while remaining affordable for serious enthusiasts.
What Makes It Stand Out:
The aluminum alloy handles provide superior rigidity and force transfer, eliminating flex that can compromise precision. The integrated groove design prevents cable slippage during critical removal operations, while the smooth, ergonomic surface ensures comfort during extended professional use. This tool specifically addresses durability concerns inherent in plastic models, offering a middle ground between budget and premium options.
Value for Money:
At $13.29, the SHMZK tool bridges the gap between budget plastic kits and premium professional sets. The aluminum construction justifies the modest price increase over plastic models, offering substantially improved longevity and performance. For frequent users, this represents excellent long-term value despite including less total cable than some competitors. The corrosion-resistant finish maintains professional appearance in demanding shop environments.
Strengths and Weaknesses:
Strengths include robust aluminum construction, superior ergonomics, non-slip cable management, and professional-grade durability. The even force distribution prevents hand fatigue and paint damage. Weaknesses involve incompatibility with screw-fixed emblems and potentially higher weight than plastic alternatives. The unspecified cable quantity may require additional purchases for heavy users, and the metal construction could theoretically scratch paint if misused.
Bottom Line:
Serious DIY enthusiasts and professional detailers will appreciate the SHMZK’s aluminum construction and precision engineering. While not the cheapest option, its durability and performance make it a wise investment for anyone regularly performing vinyl wrap or emblem removal work. It strikes an optimal balance between quality and cost.
5. Gomake Emblem Removal Tool Vinyl Wraps Car Surface Logo Plate Line Remover Tool for Car Wrapping Film Installation
Overview:
The Gomake Emblem Removal Tool positions itself as a premium professional solution for vinyl wrap installations, featuring aluminum construction and a focused design approach. This kit includes a pair of handles and three replacement PE cables, targeting users who prioritize tool quality over abundant spare materials. It’s engineered specifically for automotive graphics professionals demanding reliable daily performance.
What Makes It Stand Out:
Gomake emphasizes professional-grade materials with its aluminum handle construction, ensuring maximum durability for daily shop use. The tool’s design specifically optimizes vinyl wrap film installation, suggesting specialized engineering for automotive graphics professionals. The compact package focuses on essential components without overwhelming users with excessive accessories, reflecting a professional’s preference for quality over quantity.
Value for Money:
At $16.99, this is the most expensive option reviewed. The aluminum handles provide excellent durability, but only three cables limits project capacity before requiring replenishment. For professionals who value premium construction and can source cables separately, the quality justifies the cost. However, hobbyists may find better overall value in kits offering more comprehensive cable supplies at significantly lower price points.
Strengths and Weaknesses:
Strengths include high-quality aluminum construction, professional-oriented design, and durable PE cable material. The tool’s specialization for vinyl wrap work ensures optimal performance in its intended application. Weaknesses are the highest price point and limited cable quantity, requiring more frequent resupply. The unspecified cable length creates uncertainty for buyers comparing specifications, and the minimal packaging may disappoint those expecting more accessories.
Bottom Line:
Professional installers seeking durable, reliable tools for daily use will find the Gomake kit worth the premium. However, DIY users and budget-conscious buyers should consider alternatives offering more generous cable supplies at lower price points. It’s a specialized tool for specialized users rather than a general-purpose solution.
6. NEWISHTOOL Emblem Removal Tool Wrap Tools, Plate Line Badge Remover Car Emblem Removal Kit with 5PCS Spare 60CM PE Cord for Vehicle Logos, Nameplates, Badges and Paste Signs Plates Remove
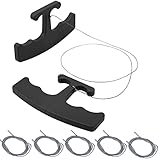
Overview: The NEWISHTOOL Emblem Removal Tool is a specialized solution designed for vehicle enthusiasts and professional wrappers who need to safely remove emblems before applying vinyl wraps or graphics. This kit includes a pair of black removal tools and five 60cm spare PE cords, providing everything needed for multiple emblem removal jobs. The tools are specifically engineered to work behind badges and nameplates, cutting through adhesive without damaging paintwork.
What Makes It Stand Out: This tool set distinguishes itself through its ergonomic design and generous supply of replacement cords. The handles are crafted from durable plastic in a shape that reduces hand fatigue during extended use. The five included PE cords are made from rounded polymers that prevent scratching, which is crucial when working on automotive finishes. At 60cm each, the cords offer sufficient length for most passenger vehicle emblems, and having five spares means you won’t be left mid-job without a replacement if one breaks.
Value for Money: At $14.99, this kit sits in the sweet spot between bargain-basement options and professional-grade equipment. You’re paying for thoughtful design and adequate spares rather than a comprehensive multi-tool kit. Compared to single-use plastic tools or expensive professional sets, this offers reusable handles and multiple cord replacements that justify the price for DIY users who plan to wrap more than one vehicle.
Strengths and Weaknesses: Strengths include the ergonomic handle design that saves labor, paint-safe polymer cords that minimize damage risk, and the inclusion of five spare cords for demanding tasks. The reusable nature of the handles adds long-term value. Weaknesses are the relatively short 60cm cord length, which may be insufficient for larger trucks or SUVs, and the lack of additional accessories like a heat gun or scraper for adhesive cleanup. The tool is also primarily limited to flat surfaces.
Bottom Line: This is a solid choice for hobbyist car wrappers and DIY enthusiasts who need a reliable, paint-safe emblem removal solution without investing in a full professional kit. The ergonomic design and spare cords make it practical for multiple projects, though those tackling larger vehicles or frequent jobs might want longer cords or a more complete set.
7. WILLBOND Emblem Removal Tool Kit Vinyl Wrap Kit Plate Line Remover with 5m PE Cord Heat Gun Razor Blade Scraper Squeegee Scratch Repair Paste Applicator Sponge Towel for Car Wrapping Film Installation
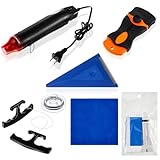
Overview: The WILLBOND Emblem Removal Tool Kit is a comprehensive all-in-one solution for vehicle wrapping projects, combining emblem removal capabilities with essential installation and finishing tools. This extensive package includes a heat gun, razor blade scraper, squeegee, towel, and a generous 5-meter PE cord with handles, plus scratch repair paste and applicators. It’s designed to take you from start to finish in the emblem removal and wrap installation process.
What Makes It Stand Out: The standout feature is the inclusion of a heat gun, which is essential for softening stubborn adhesive and making emblem removal significantly easier while minimizing residue. The 5-meter PE cord provides ample length for any vehicle size, from compact cars to large SUVs. The addition of a scratch repair paste with polishing sponge shows thoughtful consideration for potential paint damage, allowing users to remedy any minor scratches that might occur during the process.
Value for Money: Priced at $21.99, this kit represents excellent value despite being the most expensive option reviewed here. You’re essentially getting a mini workshop in one package. Purchasing a heat gun, scraper, squeegee, and emblem removal tools separately would easily exceed $40. For DIY enthusiasts planning multiple wrapping projects or professionals needing backup equipment, the comprehensive nature justifies every penny.
Strengths and Weaknesses: Major strengths include the versatile heat gun for adhesive removal, the extra-long 5-meter cord, the complete set of finishing tools, and the scratch repair system for peace of mind. The quality plastic handles are reusable and ergonomic. The main weakness is that casual users might find the kit overkill for a single project, and the heat gun’s quality may not match standalone professional units. Some users might prefer separate, higher-quality individual tools.
Bottom Line: This is the ideal kit for serious DIY car wrappers or professional installers who want a complete, ready-to-use solution. The heat gun and extensive accessories eliminate the need to purchase additional tools separately, making it a cost-effective and convenient choice for multiple projects or commercial use.
8. Gomake Emblem Removal Tool Vinyl Wraps Car Surface Logo PlateLine Remover Tool for Car Wrapping Film Installation with 3PCS Replacement PE Cables-Red

Overview: The Gomake Emblem Removal Tool positions itself as a professional-grade instrument for vinyl wrap installation, featuring distinctive aluminum handles and a focus on durability. This kit includes one pair of red removal handles and three replacement PE cables, designed to help users achieve clean, clear film application by properly removing emblems and badges. The aluminum construction suggests a step up from standard plastic tools in terms of longevity and professional feel.
What Makes It Stand Out: The primary differentiator is the aluminum handle construction, which offers superior durability and a more substantial feel compared to plastic alternatives. This metal build suggests the tool can withstand repeated professional use without flexing or breaking. The tool is marketed as a “professional helper,” indicating it’s designed for users who prioritize quality materials and precision. The red color also provides high visibility in a busy workshop environment.
Value for Money: At $16.99, this kit is moderately priced but offers less overall value than some competitors. You’re paying a premium for the aluminum construction, but receiving only three replacement cables versus five in similarly priced kits. For professionals who value tool longevity and ergonomics, the aluminum handles may justify the cost. However, DIY users might find better value in kits with more accessories or spare cords, unless they specifically want the durability advantage.
Strengths and Weaknesses: Strengths include the robust aluminum handles that resist wear and provide better leverage, the professional-grade build quality, and the tool’s suitability for all vehicle types. The design ensures clearer wrap application by properly removing emblems. Weaknesses are the limited number of replacement cables (only three), the absence of any additional tools like scrapers or squeegees, and the higher price point compared to basic plastic models without offering more functionality.
Bottom Line: This tool is best suited for professional wrappers or serious enthusiasts who prioritize durability and tool feel over quantity of accessories. The aluminum construction ensures longevity, but the limited number of replacement cables and lack of additional tools make it less ideal for beginners or those wanting a complete kit. Choose this if you already own supplementary tools and want a reliable, long-lasting emblem remover.
9. GOOACC 5PCS Auto Trim Removal Tool Kit No-Scratch Pry Tool Kit for Car Door Clip Panel & Audio Dashboard Dismantle -5PCS
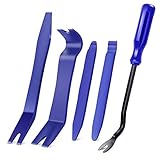
Overview: The GOOACC 5PCS Auto Trim Removal Tool Kit is a versatile, budget-friendly set designed for interior and exterior automotive trim work rather than specifically for emblem removal. This kit includes five different nylon pry tools, including four panel removal tools and one fastener remover. It’s engineered for tasks like door panel removal, audio system installation, dashboard work, and general trim dismantling where preventing scratches is paramount.
What Makes It Stand Out: This kit’s standout feature is its exceptional value and specialized nylon construction that prevents scratching delicate surfaces. Unlike metal pry bars that can mar plastic and paint, these impact-resistant nylon fiber tools are designed to be tough yet non-damaging. The ergonomic design reduces hand fatigue during prolonged use, and the variety of five different tool shapes addresses multiple trim types and access angles, making it surprisingly versatile for such an affordable set.
Value for Money: At just $6.47, this is by far the most budget-friendly option reviewed, offering remarkable value for anyone working on automotive interiors. The nylon material is non-toxic and eco-friendly, providing a guilt-free purchase. For the price of a fast-food meal, you get five specialized tools that would cost significantly more if purchased individually from auto parts stores. This makes it an easy recommendation for DIY mechanics and car audio enthusiasts.
Strengths and Weaknesses: Strengths include the incredibly low price, scratch-proof nylon material, ergonomic lightweight design, and multi-functionality across various automotive and even furniture restoration projects. The 100% satisfaction guarantee adds buyer confidence. Weaknesses are that these tools are not designed for emblem removal (no cutting cords), the nylon may flex too much for stubborn fasteners, and they lack the specialized design needed for cutting through adhesive behind badges.
Bottom Line: This is an excellent entry-level trim removal kit for DIY mechanics, car audio installers, and anyone needing to remove interior panels without damage. However, it’s not a substitute for dedicated emblem removal tools. Purchase this for general trim work, but look elsewhere if your primary need is badge removal for vinyl wrapping.
10. GOOACC 5 PCS Nylon Auto Trim Removal Tool Kit No-Scratch Removal Tool Kit for Car Panel & Audio Dashboard Dismantle Red

Overview: The GOOACC 5 PCS Nylon Auto Trim Removal Tool Kit in red is essentially a color variant of the brand’s popular trim removal set, offering the same functionality with enhanced visibility. This kit includes five impact-resistant nylon tools designed for interior and exterior automotive trim work, panel removal, and dashboard dismantling. The red color scheme makes tools easier to spot in a busy garage or toolbox, reducing the chance of misplacement during projects.
What Makes It Stand Out: Beyond the eye-catching red color, this kit maintains GOOACC’s reputation for providing non-scratch solutions for delicate automotive work. The nylon fiber material is specifically chosen to be tougher than common nylon while remaining non-damaging to surfaces. The set includes four panel removal tools and one fastener remover, covering most trim removal scenarios. The ergonomic design ensures comfortable use during extended projects, and the lightweight construction prevents hand fatigue.
Value for Money: Priced at $8.09, this kit offers slightly less value than its gray counterpart but remains an affordable option for quality trim removal tools. The red color adds minimal cost but significant convenience in tool organization. Compared to purchasing individual professional trim tools, this set still represents substantial savings. For users who value tool visibility and already own emblem-specific removal equipment, this is a worthwhile addition to their toolkit.
Strengths and Weaknesses: Strengths include the highly visible red color, durable impact-resistant nylon construction, versatile application range from car audio to furniture restoration, and ergonomic lightweight design. The tools effectively prevent scratching and are non-toxic. Weaknesses are the lack of specialized emblem removal cords, potential flexing under heavy force compared to metal tools, and the slightly higher price than the identical gray version. It’s also not designed for cutting through adhesive-backed badges.
Bottom Line: This is a solid, affordable trim removal kit best suited for DIY enthusiasts and mechanics who need general-purpose panel tools with the added benefit of high visibility. While not appropriate for dedicated emblem removal, it’s an excellent complement to a more specialized kit. Choose this if you prefer red tools or need to color-code your tool collection, but the gray version offers better pure value.
Understanding Vehicle Emblems and Adhesive Systems
Before selecting any tool, you need to understand what you’re working against. Modern automotive emblems aren’t just decorative—they’re engineered to outlast most components on your vehicle.
Types of Automotive Emblems and Badges
Vehicle emblems fall into several distinct categories, each requiring a slightly different approach. Chrome-plated plastic badges with foam adhesive backing are the most common, found on trunks and fenders. Raised individual letters—popular with luxury brands—use high-strength foam tape or even mechanical fasteners hidden behind body panels. Vinyl decal emblems, increasingly common on performance models, use pressure-sensitive adhesives that bond aggressively to clear coat. Gel-domed resin emblems combine a polyurethane lens with industrial adhesive, creating a thick profile that traps heat and complicates removal. Understanding your emblem type dictates your tool selection and heat application strategy.
Modern Adhesive Technologies in Automotive Applications
The adhesive holding your emblem is likely 3M VHB (Very High Bond) or a similar acrylic foam tape designed to create a permanent bond within 72 hours of application. These adhesives use viscoelastic properties to absorb vibration while maintaining a molecular-level grip on painted surfaces. Some manufacturers supplement tape with cyanoacrylate adhesives for emblems exposed to extreme conditions. This chemistry matters because heat-based tools must reach the adhesive’s softening point—typically 150-200°F—without overheating the adjacent clear coat, which can fail at temperatures as low as 250°F. Quality removal tools are engineered with these thermal thresholds in mind.
Core Categories of Emblem Removal Tools
A complete emblem removal strategy requires four complementary tool categories working in sequence. Skipping any category dramatically increases your risk of damage.
Heat Application Tools for Adhesive Softening
Heat is your primary weapon against stubborn automotive adhesives. Variable-temperature heat guns with digital displays offer precise control, allowing you to dial in the exact temperature needed for your specific adhesive type without guesswork. Look for models with adjustable airflow rates—high velocity can cool the surface unevenly, while gentle, consistent flow maintains optimal softening temperature. For delicate areas near plastic trim, infrared heat lamps provide contactless, uniform heating that eliminates the risk of scorching from direct nozzle contact. While household hair dryers can work in a pinch, they lack the temperature control and sustained output needed for most modern VHB tapes, often leading to overheating or insufficient softening.
Cutting and Separation Implements
Once adhesive reaches its softening point, you need a tool that can slice through it without scratching the paint. Monofilament fishing line in 50-80 pound test strength serves as an excellent sawing tool when pulled back and forth behind the emblem. For thicker emblems, specialized plastic razor blades with beveled edges provide controlled cutting action—their rigid yet forgiving material scores adhesive without metal-on-paint contact. Professional-grade removal kits often include flexible plastic putty knives with tapered edges, designed to wedge between emblem and panel while distributing pressure across a wide area. Avoid metal razor blades unless you’re a seasoned professional; even a slight angle miscalculation can create an instant scratch through clear coat.
Adhesive Residue Removal Tools
After the emblem separates, you’re left with adhesive residue that requires chemical and mechanical removal. Rubber eraser wheels, when used with a low-speed drill, gently roll across the surface, heating and lifting adhesive through friction without harsh solvents. For manual removal, plastic razor scrapers with 30-degree angled heads let you peel adhesive strips methodically. Adhesive remover solutions—available in solvent-based and citrus-derived formulations—break down adhesive bonds chemically. Always pair these with microfiber towels and a spray bottle for controlled application; pouring remover directly onto paint can cause it to run into unwanted areas, potentially damaging plastic trim or rubber seals.
Surface Protection and Preparation Equipment
The best removal tools include protective elements that prevent collateral damage. High-temperature masking tape—rated for at least 200°F—creates a protective barrier around the emblem, preventing heat damage to adjacent clear coat and making cleanup easier. Automotive-grade protective film sheets can be applied under cutting tools to create a sacrificial layer. Nitrile gloves protect your hands from hot surfaces and chemical removers, while safety glasses shield against snapping monofilament or splashing solvents. These seemingly minor accessories often determine whether your project ends with a pristine panel or an expensive mistake.
Critical Features to Evaluate Before Purchasing
Not all emblem removal tools are created equal. These features separate professional-grade equipment from disappointing knockoffs that waste your money and jeopardize your paint.
Material Quality and Durability Standards
Examine tool construction carefully. Heat gun nozzles should be stainless steel or ceramic-coated to resist corrosion and maintain consistent temperature output. Plastic blades and scrapers must use high-density polyethylene or nylon—materials hard enough to cut adhesive yet soft enough to register below paint hardness on the Mohs scale. Cheap tools use brittle plastics that snap under pressure or soften when exposed to heat, leaving you with a broken tool and a partially removed emblem. Look for tools with reinforced handles and metal hardware where components join; these withstand the repetitive stress of professional use.
Ergonomic Design and User Comfort Considerations
Emblem removal requires patience and precision, often in awkward positions. Tools with contoured, non-slip grips reduce hand fatigue during extended sessions. Heat guns should balance weight toward the handle, not the nozzle, preventing wrist strain. Scraper handles with finger grooves and palm swells provide better control, especially when hands become slick with adhesive remover. The best tools feature rubber overmolding that insulates against vibration and heat transfer. Remember, a comfortable tool is a controllable tool, and control is everything when working millimeters from expensive paintwork.
Multi-Surface Compatibility and Versatility
Your tool investment should work across various substrates—clear coat, single-stage paint, glass, chrome trim, and plastic cladding. Heat guns with multiple nozzle attachments let you concentrate heat on small emblems or diffuse it across large badges. Scraper sets with interchangeable blade profiles—straight, curved, and angled—adapt to different emblem shapes and body contours. Chemical adhesive removers must be safe for urethane clear coats, polycarbonate headlight lenses, and rubber door seals. Always verify compatibility with your specific vehicle materials; what works on a Toyota’s hard clear coat might damage a BMW’s softer water-based finish.
Integrated Safety Mechanisms and Protective Elements
Professional tools incorporate safety features that protect both user and vehicle. Quality heat guns include automatic shutoff circuits that engage if the unit overheats or tips over, preventing fire hazards. Cold-air cooldown cycles extend heating element life and prevent accidental burns during storage. Plastic blades with rounded corners and safety guards prevent gouging if you slip. Eraser wheels with torque-limiting mandrels stop rotation if they catch an edge, preventing paint burn-through. These features add cost but eliminate catastrophic failures that cheap tools can’t prevent.
Professional-Grade vs. Consumer-Level Tool Sets
The tool market bifurcates into two distinct tiers, and understanding the differences helps you make an informed investment decision.
Performance and Precision Differences
Professional-grade heat guns maintain temperature within ±5°F of the setpoint, critical for working near thermal limits of clear coat. Consumer models can fluctuate ±20°F, creating hot spots that blister paint. Professional monofilament line uses uniform diameter extrusion with consistent tensile strength, while cheaper alternatives stretch unpredictably or snap prematurely. The precision-ground edges on professional plastic scrapers create clean separation lines; consumer versions often have molding flash or uneven bevels that require additional pressure, increasing scratch risk. For occasional use on common vehicles, consumer tools suffice. For frequent use, vintage cars, or high-value vehicles, professional precision pays for itself after one prevented paint job.
Long-Term Investment Value Assessment
A professional heat gun costing three times more than a consumer model often lasts ten times longer, with replaceable heating elements and serviceable switches. Professional tool sets include hard-shell cases with custom foam inserts that protect delicate edges and prevent loss—a small detail that matters when you’ve invested hundreds in precision implements. Consider your usage frequency: a DIYer removing one emblem set per year gains little from professional-grade equipment. An enthusiast who details multiple vehicles or runs a side business will recoup the investment through durability, efficiency, and prevented damage. Calculate cost-per-use over five years; professional tools typically cost pennies per use compared to dollars for disposables.
Budget Considerations and Cost-Benefit Analysis
Emblem removal tools span a wide price spectrum, from $5 plastic scrapers to $300 professional heat gun kits. A basic DIY kit with adequate quality—heat gun, monofilament, plastic scrapers, and adhesive remover—typically costs $75-125. Mid-range kits with ergonomic improvements and better materials run $150-250. Professional setups with multiple heat sources, comprehensive scraper sets, and premium chemicals can exceed $400.
Don’t fall into the false economy trap. A $15 heat gun that overheats and damages your hood’s clear coat creates a $500 paint correction bill. Budget for quality in heat application and cutting tools—these directly contact your paint. You can economize on protective films and basic chemicals. Look for modular kits that let you add specialized tools later rather than buying everything upfront. Many professional detailers started with mid-range consumer tools and upgraded specific components as their skills and needs grew.
Essential Safety Protocols You Must Follow
Emblem removal involves heat, chemicals, and mechanical force—three elements that demand respect and proper safety measures.
Personal Protective Equipment Requirements
Always wear nitrile gloves rated for chemical resistance and heat protection up to 200°F. Thin latex gloves tear easily and offer minimal thermal insulation. Safety glasses with side shields protect against monofilament whiplash if it snaps under tension—this happens more frequently than you’d expect. When using solvent-based adhesive removers, a respirator with organic vapor cartridges prevents inhalation of volatile compounds. Even citrus-based removers release terpenes that cause respiratory irritation in enclosed spaces. Long sleeves and closed-toe shoes protect against accidental heat gun contact and chemical spills.
Vehicle Protection Measures
Masking is non-negotiable. Apply high-temperature automotive masking tape at least two inches beyond the emblem perimeter, creating a thermal barrier and catchment zone for adhesive remover. For emblems near plastic trim, cover adjacent surfaces with aluminum foil—it reflects heat and prevents warping. Place a damp microfiber towel under your work area to catch falling adhesive chunks before they scratch paint elsewhere on the vehicle. Always test heat settings on an inconspicuous area first, like the inside of the trunk lid, to verify your technique won’t damage the finish.
Proper Technique: A Methodological Approach
Success follows a specific sequence. Deviating from this order increases risk exponentially.
Preparation Phase Best Practices
Wash and decontaminate the emblem area thoroughly. Any dirt trapped between your tool and paint becomes an abrasive. Dry the area completely—water interferes with heat transfer and adhesive remover effectiveness. Warm the vehicle in a garage if possible; working in temperatures below 60°F makes adhesives brittle and uncooperative. Mask extensively. Photograph the emblem from multiple angles before removal—this reference proves invaluable if you need to reinstall or position a replacement.
Removal Execution Strategy
Apply heat in overlapping passes, never holding the gun stationary. Target 150-180°F surface temperature, verified with an infrared thermometer if possible. Insert monofilament or plastic blade at the emblem’s lowest point, working against gravity. Use a gentle sawing motion—let heat and minimal pressure do the work. Force indicates insufficient heating. Work slowly across the emblem, reheating as needed. For large badges, remove in sections rather than trying to release the entire piece at once. This controlled approach prevents adhesive from cooling and re-bonding.
Cleanup and Finishing Procedures
Immediately after emblem separation, roll the eraser wheel or apply adhesive remover to the warm adhesive residue—it’s more pliable before cooling. Work in small sections, wiping with a clean microfiber towel after each pass. Never let solvent dry on the surface; it can redeposit adhesive or etch the clear coat. After residue removal, wash the area with automotive soap, clay bar if necessary to remove remaining contamination, and inspect under multiple light sources. Any ghosting or hazing indicates the need for light polishing.
Common Mistakes That Damage Paint
The most frequent error is excessive heat. Holding a heat gun too close or at too high a temperature causes clear coat to bubble or discolor—damage invisible until you view the panel at an angle in sunlight. Second is using metal blades at incorrect angles; even a slight tilt exposes the sharp corner to paint. Third is rushing the process, which leads to adhesive tearing rather than clean separation, leaving patches that require aggressive scraping. Fourth is failing to clean the area first, grinding dirt particles into the finish. Fifth is using adhesive removers on hot surfaces, which can cause solvents to flash-dry and leave stains. Each mistake is preventable with proper tools and patience.
Post-Removal Surface Care and Restoration
Even perfect removal can reveal “ghosting”—a faint outline where the emblem shielded paint from UV fade. This requires paint correction, not just polishing. Start with a dual-action polisher and a fine-cut compound on a microfiber pad, working at low speed with minimal pressure. Check your work frequently; over-polishing thins clear coat. For severe ghosting on older vehicles, wet sanding with 3000-grit paper may be necessary—this is advanced work best left to professionals. After correction, apply a paint sealant or ceramic coating to the entire panel, not just the removal area, to ensure uniform protection and appearance. If you plan to reinstall emblems, thoroughly remove all old adhesive and clean with isopropyl alcohol for maximum new adhesive bond.
Tool Maintenance and Storage Best Practices
Clean plastic scrapers immediately after use with adhesive remover to prevent residue buildup that hardens and compromises edge sharpness. Store them in a dedicated case or wrap in microfiber cloths to protect beveled edges from chips. Heat guns require periodic filter cleaning—compressed air blows dust from intake vents, preventing overheating. Coil the cord properly using the over-under method to prevent internal wire fatigue. For eraser wheels, store in airtight bags to prevent rubber oxidation and hardening. Check monofilament for nicks or kinks before each use; compromised line snaps unexpectedly. A well-maintained toolkit lasts years and performs predictably, while neglected tools fail when you need them most.
Environmental Factors Affecting Removal Success
Ambient temperature dramatically impacts adhesive behavior. Below 50°F, VHB tape becomes glass-hard and won’t release cleanly, even with heat. Above 90°F, adhesives become stringy and difficult to peel in one piece. Ideal conditions are 65-75°F with moderate humidity. Direct sunlight heats panels unevenly, creating thermal gradients that cause adhesive to release in patches—always work in shade or a garage. Wind accelerates heat gun cooling, forcing you to use higher settings that risk paint damage. If you must work outdoors, create a windbreak with a tarp. High humidity slows solvent evaporation from adhesive removers, giving you more working time but requiring longer drying before subsequent steps.
Recognizing When Professional Intervention is Necessary
Certain scenarios demand professional expertise. Vintage vehicles with single-stage lacquer paints have no clear coat buffer—one mistake cuts directly to color coat. Complex emblems with hidden mounting studs require interior panel removal; breaking these clips creates rattles and water leaks. If the emblem sits over body seams or plastic body filler, DIY removal can compromise waterproofing. Vehicles with ceramic coatings or paint protection films need specialized techniques; improper heat application damages these expensive treatments. When ghosting extends through the clear coat into base color, or if the panel shows signs of prior paintwork, stop and consult a professional. Their tools and experience cost far less than repainting a panel.
Warranty and Legal Considerations
Debadging a leased vehicle often violates your contract’s modification clause, potentially triggering penalties at lease-end. Check your agreement before removing any factory emblem. For owned vehicles, understand that removal doesn’t void warranty, but damage caused by improper technique isn’t covered. Document the original condition with photos before starting. Some states require specific emblems (like hybrid or electric badges) for HOV lane access or registration—research local regulations. If you’re removing safety-related labels (tire pressure, VIN), you may face inspection issues. Keep removed emblems and hardware in labeled bags; they add value if you sell the vehicle and may be required to return a lease to stock condition.
Advanced Techniques for Stubborn or Problematic Emblems
For emblems that refuse to release, employ a multi-heat-cycle approach: heat for 60 seconds, cool for 30 seconds, repeat three times. This thermal cycling weakens adhesive bonds through expansion-contraction fatigue without overheating paint. For emblems with cracked or brittle plastic, apply protective film over the top before heating to contain shards. When adhesive residue proves impervious to standard removers, use a clay bar lubricated with adhesive remover instead of clay lubricant—its mild abrasive action combined with chemical breakdown tackles stubborn spots. For emblems on vertical surfaces where gravity works against you, use painter’s tape to create a “sling” that catches the emblem as it releases, preventing it from falling and scratching paint.
Assembling Your Complete Emblem Removal Kit
Build your kit systematically. Start with core essentials: a quality variable-temperature heat gun, 50-pound monofilament, three plastic razor blades with different profiles, citrus-based adhesive remover, and high-temp masking tape. Add specialized tools as needed: an eraser wheel for large areas, infrared thermometer for temperature verification, and protective film sheets. Organize everything in a compartmentalized case with a checklist taped inside the lid. Include a small notebook to record settings and techniques that worked for specific vehicles—this becomes your personal reference manual. A complete, organized kit ensures you have the right tool within reach at every stage, eliminating the improvisation that leads to mistakes.
Frequently Asked Questions
Can I use a household hair dryer instead of a heat gun for emblem removal?
While a hair dryer can work on older vehicles with weaker adhesives, it lacks the temperature control and sustained output needed for modern VHB tapes. Most hair dryers max out around 140°F, which may soften but not fully release automotive-grade adhesives, leading to excessive mechanical force and paint damage. A quality heat gun with adjustable temperature settings is a worthwhile investment for any serious DIY enthusiast.
Will removing emblems damage my vehicle’s paint?
When performed correctly with proper tools and technique, emblem removal shouldn’t damage factory paint. The risk increases significantly with aftermarket paint jobs, single-stage paints, or panels that have been repainted. Always test your process on an inconspicuous area first, and never rush the job. Damage typically occurs from excessive heat, improper tool angles, or working on dirty surfaces.
How long does a typical emblem removal take?
A single trunk badge usually requires 20-30 minutes of careful work. Individual letters might take 10-15 minutes each. Larger, complex emblems or those with thick adhesive can require 45-60 minutes. This includes preparation, heating, separation, and cleanup. Rushing to complete the job in under 10 minutes dramatically increases damage risk.
What’s the safest way to remove adhesive residue after the emblem is off?
Start with the gentlest method: a rubber eraser wheel on low speed, keeping the wheel flat and moving constantly. For manual removal, use a plastic razor blade at a shallow angle with adhesive remover. Always keep the surface wet with remover, work in small sections, and wipe with a clean microfiber towel. Avoid aggressive scraping or harsh solvents that can etch clear coat.
Can I reuse emblems after removal?
Generally, no. The adhesive backing tears during removal and loses its uniform thickness, preventing proper reapplication. Additionally, heat exposure can warp plastic emblems. If you must reuse an emblem, remove all old adhesive with extreme care, clean the back surface with isopropyl alcohol, and apply new automotive-grade foam tape cut to exact shape. However, new emblems are inexpensive compared to the labor of careful removal.
Is debadging my car legal?
For privately owned vehicles, debadging is legal in all 50 states. However, leased vehicles typically prohibit modifications, and removing emblems may violate your lease agreement. Some jurisdictions require certain safety or emissions badges to remain visible. Always check local regulations and your specific contract before proceeding.
What temperature should I heat the emblem to?
Aim for a surface temperature of 150-180°F on the emblem itself, verified with an infrared thermometer. The surrounding paint should stay below 200°F. Most quality heat guns set to medium-low (around 300-400°F nozzle temperature) held 6-8 inches away achieve this safely. Never exceed 250°F on the paint surface, as clear coat can begin to soften and fail.
How do I prevent ghosting or paint discoloration after removal?
Ghosting occurs when the emblem shielded paint from UV fade. There’s no guaranteed prevention, but thorough polishing of the entire panel after removal helps blend the area. On older vehicles, consider paint correction or live with subtle ghosting rather than risking aggressive polishing. Applying a ceramic coating uniformly across the panel after removal helps minimize visual differences.
Can I remove emblems in cold weather?
It’s strongly discouraged. Below 50°F, adhesives become brittle and won’t release cleanly, even with heat application. The thermal shock between cold panel and hot gun stresses paint. If you must work in cool conditions, warm the vehicle in a garage for several hours first and use lower heat gun settings with longer application times. Results are never as good as working in ideal temperatures.
What’s the learning curve for DIY emblem removal?
Most enthusiasts achieve competent results after 2-3 practice sessions. Start with an inconspicuous emblem, like one on the trunk lid edge, before tackling prominent badges. Watch tutorial videos, but remember each vehicle’s paint and adhesive combination is unique. Your first removal will feel slow and uncertain; by your fifth, you’ll develop a rhythm and intuitive sense for temperature and pressure. If you’re not confident, practice on a junkyard panel first.