You’re cruising down the highway when—ping!—a stray pebble catapults into your windshield, leaving behind a spiderweb crack that seems to spread before your eyes. Your heart sinks as you mentally calculate the cost of professional repair or even full replacement. But here’s what most drivers don’t realize: many of these pesky chips and cracks are entirely fixable from your own driveway, with results that can rival professional work—if you have the right tools and know-how.
diy windshield crack repair kits have evolved from gimmicky gadgets into sophisticated systems that leverage the same scientific principles professionals use. Whether you’re dealing with a bullseye chip from a rogue stone or a short crack that’s just beginning to spread, the right kit can restore your windshield’s structural integrity and optical clarity for a fraction of shop prices. This comprehensive guide dives deep into everything you need to know about selecting and using these kits effectively, ensuring your repair doesn’t just look good for a week, but lasts for the life of your vehicle.
Top 10 diy windshield crack repair kit
Detailed Product Reviews
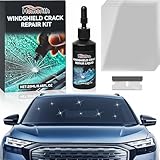
1. Rain-X 600001 Windshield Repair Kit - Quick and Easy Durable Resin Based Windshield Repair Kit for Chips and Cracks, Good for Round Damage Below 1" in Diameter and Cracks Smaller Than 12" in Length

Overview: The Rain-X 600001 offers a straightforward solution for minor windshield damage, targeting chips under 1 inch and cracks shorter than 12 inches. This universal-fit kit provides a complete package for DIY enthusiasts looking to prevent small imperfections from spreading. Designed for quick application, it works best when used immediately after damage occurs, before contamination compromises the repair.
What Makes It Stand Out: Rain-X leverages its automotive credibility with a durable resin formula that bonds to the first glass layer, creating a stronger repair than the original damage. The kit emphasizes contamination prevention, providing clear pro-tips to avoid common pitfalls like air pockets and rushed application. Its simplicity shines—everything needed is included, requiring minimal steps and direct sunlight for curing.
Value for Money: At $11.49, this kit sits in the sweet spot between budget generics and premium professional systems. You’re paying for brand reliability and proven chemistry rather than fancy applicators. For single-windshield households, the “good for multiple repairs” claim adds long-term value, though resin has a shelf life.
Strengths and Weaknesses: Strengths: Trusted brand reputation; straightforward, photo-based instructions; durable resin formula; prevents damage spread effectively; no mixing required. Weaknesses: Limited to smaller damage (1" chips, 12" cracks); requires direct sunlight for curing; contamination-sensitive; basic application tool may lack precision.
Bottom Line: The Rain-X 600001 is ideal for cautious DIYers who prioritize brand trust over advanced features. It reliably handles minor damage if you follow instructions meticulously and act quickly. For larger cracks or professional-grade clarity, consider upgrading.
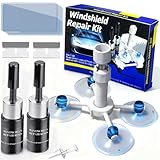
2. Permatex 09103 Automotive Windshield Repair Kit For Chipped And Cracked Windshields. Permanent Air-Tight Repairs, With Repair Syringe & Plunger, 9-piece Kit

Overview: Permatex positions its 09103 kit as a professional-grade solution for bullseye damage up to 1.25 inches. The 9-piece system targets drivers seeking permanent, air-tight repairs without paying shop prices. Designed for laminated windshield glass, it promises restoration rather than just damage control.
What Makes It Stand Out: The spring-lock syringe and plunger system delivers controlled resin injection, mimicking professional tools. This advanced applicator ensures deep penetration without mixing, while photographic instructions eliminate guesswork. The “permanent air-tight” claim reflects confidence in its bonding capability, curing naturally by daylight for convenience.
Value for Money: At $14.18, it’s the priciest option here, but you’re investing in application precision. The professional-quality delivery system justifies the premium for those wanting invisible results. Compared to $100+ professional repairs, it offers significant savings if you value the upgraded tooling.
Strengths and Weaknesses: Strengths: Superior spring-lock applicator; permanent air-tight seal; clear photo instructions; no mixing needed; cures in natural light; handles larger bullseyes (1.25"). Weaknesses: Highest price point; primarily designed for bullseye damage, not all crack types; requires patience for proper curing; overkill for minor chips.
Bottom Line: Choose Permatex 09103 if you demand professional-level results and are willing to pay extra for precision tooling. It’s perfect for significant bullseye damage where appearance matters. For casual repairs or budget constraints, simpler kits suffice.
3. 2025 Windshield Crack Repair Kit,Latest Upgraded Glass Crack Repair Kit,5MinQuick-Glass Repair Liquid,Long-Lasting for Windshields, Mirrors, Windows,All Crack Types Windshield Repair Kit (black).

Overview: This generically-branded “2025” kit promises high-tech innovation at a bargain price. Targeting all crack types—from bullseyes to star-shaped and reticular cracks—it uses imported high-transparency resin to penetrate nano-scale cracks. The 5-minute cure time appeals to impatient DIYers wanting immediate results without UV dependence.
What Makes It Stand Out: The multi-surface versatility is unmatched, claiming to repair not just windshields but also mirrors, sunroofs, headlight covers, and industrial glass. The nano-scale penetration claim suggests advanced chemistry, while the 5-minute repair time dramatically accelerates the process compared to traditional kits requiring sunlight curing. Its comprehensive approach breaks traditional limitations.
Value for Money: At $8.89, this is the cheapest option, offering remarkable versatility for the price. If the imported resin performs as claimed, it delivers premium features at a budget price. However, the generic branding and vague “high-tech” claims require skepticism. The potential for multiple applications across different glass types adds value.
Strengths and Weaknesses: Strengths: Lowest price; extremely fast 5-minute cure; comprehensive crack type coverage; multi-surface application; high-transparency resin. Weaknesses: Unproven brand; marketing-heavy claims lacking certification; unclear durability; potential quality control issues; limited customer support infrastructure.
Bottom Line: This kit suits experimental DIYers prioritizing price and speed over brand assurance. It’s a gamble—potentially brilliant for multiple surfaces, but risky for critical windshield repairs. Verify seller reputation before purchasing.
4. popalula Windshield Chip Repair Kit - 2025 Upgrade Car Windshield Crack Repair Kit, Glass Repair Liquid for Cracks and Chips, Rock Chip Repair Kit for Fix Windows, Mirrors, Glasses, All Crack Types
Overview: Popalula’s 2025 upgrade kit targets the all-in-one repair market with professional aspirations. It promises near-invisible repairs in five minutes using cutting-edge technology and imported high-transparency resin. The kit addresses chips, bullseyes, star cracks, and radial fractures across windshields, windows, mirrors, and even industrial glass surfaces.
What Makes It Stand Out: The emphasis on “near-invisible results” and structural integrity restoration sets it apart from basic fillers. Its advanced multi-layer curing technology claims to withstand vibrations and temperature shifts long-term. The universal formula’s ability to repair headlight covers and industrial glass demonstrates impressive versatility that breaks traditional DIY limitations.
Value for Money: At $12.99, it bridges the gap between budget generics and established brands. You’re paying for enhanced marketing credibility and broader claims without reaching Permatex’s price point. For DIYers wanting versatility with slightly more confidence than no-name brands, it’s reasonably priced for the claimed capabilities.
Strengths and Weaknesses: Strengths: Fast 5-minute cure; comprehensive crack coverage; multi-surface versatility; durable multi-layer curing; clear DIY process. Weaknesses: Newer brand with limited track record; marketing language may oversell capabilities; unclear resin origin; durability claims untested by time.
Bottom Line: Popalula offers a compelling middle-ground option for versatile repairs. It’s perfect for households needing to fix multiple glass types beyond just windshields. While brand history is short, the feature set justifies the moderate price for confident DIYers willing to test newer products.
5. tuncate Windshield Repair Kit for Chips and Cracks– 4 Pack Glass Repair Kit with Enhanced Injection Head for Chips, Cracks & Star-Shaped Cracks, Quick & Easy DIY Fix for Windshields, Black

Overview: Tuncate’s 4-pack kit emphasizes exceptional value and safety certification for families. It includes four complete repair sets with an enhanced injection head, targeting chips, star cracks, and combination fractures. The kit promises professional-grade strength with a nano-enhanced resin achieving 120MPa compressive strength—130% of ordinary glass—for lasting repairs.
What Makes It Stand Out: Safety certification is the headline: child/pet-friendly, no pungent odor, biodegradable resin, and 97% light transmittance with zero color difference. The three-dimensional mesh resin structure locks crack paths effectively. Remarkably, it works from -4°F to 104°F, day or night, making it uniquely environment-independent for emergency repairs anywhere.
Value for Money: At $9.99 for four kits, the per-unit cost is just $2.50—unbeatable value. This makes it ideal for families with multiple vehicles or for neighbors to share. Even if individual component quality trails premium brands, the aggregate value is exceptional for minor repairs and preparedness.
Strengths and Weaknesses: Strengths: Unbeatable price per unit; comprehensive safety certifications; extreme temperature versatility; high compressive strength rating; enhanced injection head. Weaknesses: Multi-pack may exceed single-user needs; individual kit quality unclear; brand recognition low; durability claims need independent verification.
Bottom Line: Tuncate is the pragmatic choice for multi-vehicle households or community sharing. Its safety certifications and temperature independence are genuine differentiators. For single-use needs, consider the potential waste, but for preparedness or group buys, it’s unmatched value.
6. BLUTOKS Windshield Repair Kit, 2 PCS Windshield Crack Repair Kit with Suction Cup Curing Light, Automotive Nano Fluid Vehicle Windscreen Tool, Glass Repair Kit for Chips and Cracks (Navy)

Overview:
The BLUTOKS Windshield Repair Kit delivers professional-grade repair capabilities in a DIY package. This two-piece set features advanced vacuum technology and UV curing for comprehensive windshield damage repair. Designed for chips, cracks, and spiderwebs up to 12 inches, it promises structural restoration without replacement costs.
What Makes It Stand Out:
The 20PA vacuum holder creates an airtight seal that forces resin deep into damage, eliminating bubbles for superior clarity. The included UV curing light with timer settings hardens resin in just 5-10 minutes—no mixing required. This dual-kit configuration allows multiple repairs or a backup attempt.
Value for Money:
At $16.99 for two complete kits, this represents exceptional value compared to $100+ professional repairs. Each repair costs under $8.50, making it economical for addressing multiple damage points or sharing with family members. The professional features rival shop-grade equipment.
Strengths and Weaknesses:
Strengths include powerful vacuum injection, rapid UV curing, comprehensive damage coverage, and clear instructions. The two-kit package provides excellent backup value. Weaknesses include a potential learning curve for first-time users and limited resin quantity per kit. The navy color is purely aesthetic and doesn’t affect performance.
Bottom Line:
Perfect for DIY enthusiasts seeking professional results, the BLUTOKS kit offers advanced technology and genuine value. While beginners should practice patience, the vacuum system and UV curing deliver superior repairs that justify the moderate price premium over basic kits.
7. Windshield Repair Kit - Nano Glass Repair Fluid for Chips & Cracks | Quick Fix, Works on for Chips and Cracks,Cracks Gone Glass Repair Kit, Automotive Windscreen Repair Tool Nano Repair Liquid (Blue)
Overview:
This Windshield Repair Kit positions itself as a technologically advanced solution for comprehensive glass restoration. Featuring nano glass repair fluid and professional-grade vacuum injection, it tackles chips, cracks, and complex fractures up to 12 inches with molecular-level penetration for durable fixes.
What Makes It Stand Out:
The extreme temperature durability (-40°F to 240°F) with 5-layer reinforcement technology sets it apart for harsh climates. The 20P-A strength rating and vacuum injection prevent air bubbles while ensuring vibration-resistant repairs. Its universal application works on windshields, sunroofs, and even headlight covers, maximizing utility.
Value for Money:
Priced at $13.99, this kit sits in the sweet spot between budget options and premium systems. It delivers professional features like nano-fluid technology and temperature resilience typically found in more expensive kits, offering strong ROI for drivers in variable climates.
Strengths and Weaknesses:
Strengths include exceptional temperature resistance, versatile surface compatibility, and deep resin penetration. The 3x faster curing claim accelerates repairs significantly. Weaknesses include the wide 5-20 minute cure time variance (dependent on sunlight vs. UV lamp) and potentially excessive capabilities for simple bullseye repairs.
Bottom Line:
An excellent choice for those facing extreme weather conditions or needing multi-surface repairs. The nano-fluid technology and temperature durability justify the moderate investment, particularly for northern or southern climate drivers.
8. WITIFIG Windshield Repair Kit Windshield Crack Repair Kit Windshield Crack Repair Liquid Automotive Windscreen Tool for Fixing Chips Chips and Cracks 2 Pack (Black)
Overview:
The WITIFIG Windshield Repair Kit offers a budget-conscious entry point into DIY glass repair. This two-pack provides basic nano repair fluid for addressing common windshield chips and cracks without complex equipment or procedures. Designed for simplicity, it targets users seeking quick fixes without technical complexity.
What Makes It Stand Out:
Its primary distinction is exceptional affordability combined with simplicity. The kit emphasizes safety with no harmful chemical odors and prioritizes portability for emergency use. The straightforward application process requires no specialized tools or curing lights, making it accessible to complete beginners.
Value for Money:
At just $7.19 for two kits, this represents the lowest cost-per-repair option in the market. Each repair costs approximately $3.60—far below professional services. For minor damage and occasional use, the value proposition is compelling despite limited advanced features.
Strengths and Weaknesses:
Strengths include unbeatable price, lightweight portability, chemical-free composition, and user-friendly design. The 20-30 minute repair time is reasonable for casual users. Weaknesses include lack of professional vacuum technology, longer cure times, vague durability specifications, and no UV curing light. Repairs may lack long-term clarity compared to premium kits.
Bottom Line:
Ideal for budget-minded drivers with minor chips who prioritize cost over advanced features. While it won’t match professional results, it effectively prevents crack spread and provides adequate cosmetic improvement for small damages.
9. popalula Car Windshield Crack Repair Kit - 2025 Upgrade Nano Glass Repair Liquid for Cracks & Chips, Cracks Gone Glass Remover Fluid for Quick Fix Windshields, Windows, Mirrors

Overview:
The popalula 2025 Upgrade Windshield Repair Kit promises cutting-edge technology for rapid glass restoration. This nano glass repair liquid targets chips and cracks with a five-minute repair claim, utilizing imported high-transparency resin for near-invisible results across multiple glass surfaces and automotive applications.
What Makes It Stand Out:
Unmatched speed is the headline feature—five-minute repairs dramatically outperform competitors. The multi-surface versatility extends beyond windshields to mirrors, sunroofs, and headlight covers. Advanced multi-layer curing technology ensures deep penetration at the nano-scale for lasting bonds and clarity.
Value for Money:
At $7.99, this kit delivers premium features at a budget price point. The combination of speed, versatility, and advanced resin formulation creates exceptional value, particularly for users needing repairs on various glass types beyond just windshields.
Strengths and Weaknesses:
Strengths include ultra-fast curing, universal surface compatibility, straightforward DIY process, and high-transparency resin. The 2025 upgrade suggests modern formulation improvements. Weaknesses include potentially optimistic five-minute claim (actual time may vary) and limited information about included tools or vacuum assistance. As a newer product, long-term durability data is scarce.
Bottom Line:
Perfect for users prioritizing speed and versatility. The multi-surface capability and rapid repair time make it an excellent value, though realistic expectations about cure times are advisable. Best for minor to moderate damage across various glass components.
10. AUTO PRO DIY Windshield Repair Kit, 4 Pack (Repairs 4 Chips), 20-Minute Glass Rock Chip Repair Tool

Overview:
The AUTO PRO DIY Windshield Repair Kit takes a quantity-focused approach, providing four complete repair sets in one package. Designed for rock chips and small cracks, this kit emphasizes cost-efficiency for multiple repairs across vehicles or for fleet maintenance applications.
What Makes It Stand Out:
The four-pack configuration is unique, offering the lowest per-repair cost in the premium category. Each kit contains professional-grade resin for star breaks and bulls-eyes, with a straightforward 20-minute application process. The bulk packaging is ideal for families or commercial users managing several vehicles regularly.
Value for Money:
At $19.99 for four repairs, the per-chip cost drops to approximately $5—exceptional value for those with multiple vehicles or recurring damage. While higher upfront cost, the bulk savings are substantial compared to individual kits or professional services exceeding $100 per repair.
Strengths and Weaknesses:
Strengths include unbeatable per-repair pricing, professional-grade formula, clear results, and damage prevention capabilities. The 20-minute cure time is consistent and reliable. Weaknesses include lack of advanced vacuum technology, no UV curing light included, and potential resin waste if repairs aren’t needed immediately after opening.
Bottom Line:
The smart choice for multi-vehicle households, fleet managers, or those prone to frequent windshield damage. The bulk packaging delivers professional results at the lowest per-repair cost, making it a practical long-term investment for ongoing maintenance needs.
Understanding Windshield Damage: What DIY Kits Can Actually Fix
Before investing in any repair system, you need to become fluent in the language of windshield damage. Not all glass trauma is created equal, and recognizing the difference between repairable and terminal damage will save you time, money, and frustration.
The Science Behind Laminated Glass
Modern windshields aren’t simple sheets of glass—they’re sophisticated safety devices. Two layers of annealed glass sandwich a polyvinyl butyral (PVB) interlayer, creating a laminated composite that stays intact during impacts. When a rock strikes, it typically penetrates only the outer glass layer, leaving the inner layer and PVB intact. DIY kits exploit this design by injecting specialized resin into the void, bonding with the glass and restoring its mechanical properties. Understanding this architecture is crucial because repairs that penetrate both layers or damage the PVB exceed DIY capabilities.
Types of Repairable Damage: Chips vs. Cracks
Chips come in several flavors: bullseyes (circular with a cone-shaped impact point), stars (multiple radial cracks emanating from a central point), and combination breaks (mixing both patterns). Most kits handle chips under one inch in diameter effectively. Cracks are linear fractures that can spread across your field of vision. DIY success with cracks depends heavily on length—generally under 12 inches is workable—and location. Edge cracks (within two inches of the windshield perimeter) are structurally compromising and often require professional evaluation.
When Damage Exceeds DIY Capabilities
Certain scenarios demand professional intervention: damage in the driver’s direct line of sight, cracks longer than a dollar bill, damage that penetrates both glass layers, contamination from water or debris that has settled for days, or cracks that have already been filled with inferior resin. Additionally, if your windshield has advanced driver-assistance systems (ADAS) cameras mounted behind it, even minor repairs can affect calibration—something no DIY kit can address.
Why Choose a DIY Repair Kit? Cost-Benefit Analysis
The economics of windshield repair heavily favor the DIY approach, but the benefits extend beyond your wallet.
Professional Repair Costs vs. DIY Investment
A typical professional chip repair runs $60-$100, while crack repairs can cost $125-$300. Full windshield replacement easily exceeds $400-$1,200 for modern vehicles with embedded sensors and heating elements. A quality DIY kit ranges from $20-$80 and can perform 5-10 repairs, dropping your per-repair cost to under $10. For families with multiple vehicles or those living in construction zones where windshield damage is frequent, the ROI becomes undeniable within the first year.
Time Savings and Convenience Factors
Scheduling a shop appointment means taking time off work, arranging transportation, and waiting in a lobby. DIY repairs take 30-60 minutes on your schedule. More importantly, you can address damage immediately before it spreads. Temperature fluctuations, moisture intrusion, and road vibrations worsen cracks exponentially—what starts as a tiny chip can become a replacement-worthy crack within days. Having a kit in your garage empowers instant intervention.
Skill Level Requirements for Success
Contrary to popular belief, you don’t need mechanic-level expertise. Modern kits are engineered for novices, with detailed instructions and foolproof components. The learning curve is gentle—most users achieve professional-looking results on their first or second attempt. The key is patience and attention to detail, not technical prowess. That said, understanding the process and potential pitfalls dramatically improves outcomes.
Essential Components of Quality Repair Kits
Not all kits are built equally. Understanding what separates premium systems from bargain-bin disappointments ensures you invest wisely.
Resin Formulations: What Makes Them Effective
The heart of any kit is its resin. Professional-grade formulations are optically matched to glass’s refractive index (around 1.52), ensuring the repair becomes nearly invisible. They also contain viscosity modifiers that allow deep penetration into micro-fractures while maintaining enough body to fill larger voids. Look for resins that cure to a hardness similar to glass itself and resist yellowing from UV exposure. Some advanced kits include multiple resin types: thin for injection, thicker for surface pit filling, and ultra-thin for capillary action into hairline cracks.
Bridge and Injector Systems Explained
The bridge is the apparatus that anchors to your windshield, positioning the injector directly over the damage. Quality bridges use suction cups with locking levers that create a vacuum-tight seal, preventing air intrusion during injection. The injector itself should offer precise pressure control—either through threaded plungers or vacuum/pressure cycling. Cheap kits use simple squeeze bottles that can’t generate the controlled pressure needed to fully fill complex cracks. A good bridge system remains stable throughout the 10-20 minute injection process without shifting or losing seal.
Curing Methods: UV Light vs. Natural Sunlight
Resin hardens through photoinitiation, typically requiring UV light between 365-400 nanometers. While sunlight contains UV rays, intensity varies by weather, season, and time of day. Premium kits include dedicated UV lamps that cure resin in 5-10 minutes regardless of conditions. These lamps provide consistent wavelength and intensity, eliminating variables. If you opt for a sun-cure kit, understand you’ll need direct, strong sunlight for 15-30 minutes—overcast days can lead to incomplete curing and weak repairs.
Additional Tools That Matter
Comprehensive kits include more than just resin and an injector. Look for razor blades for leveling cured resin, pit polish for optical clarity, cleaning swabs with alcohol solution, a pin or probe to open tight cracks, and a curing strip to protect resin during UV exposure. Some professional-grade kits add a drill with tiny bits to create access points in tight cracks, though this requires advanced skill.
Key Features to Evaluate Before Buying
When comparing kits, focus on these critical performance indicators rather than marketing hype.
Resin Viscosity and Clarity Standards
High-quality resin should be crystal clear in the bottle, not yellow or cloudy. Viscosity matters: too thick and it won’t penetrate; too thin and it won’t fill properly. The best kits include resins with different viscosities for various damage types. Check if the manufacturer provides technical specs like refractive index and Shore hardness after curing—transparency here indicates professional-grade formulation.
Bridge Design Stability and Seal Quality
Test the bridge’s suction power if possible. The suction cups should be made from durable, flexible silicone or rubber that conforms to the windshield’s curvature. Metal bridges outperform plastic for stability. The seal between the injector and glass needs to be replaceable—O-rings wear out and affect performance. Look for kits with spare seals or easily replaceable components.
Pressure Control Mechanisms
Effective repair requires alternating vacuum and pressure cycles. Vacuum pulls air out of the crack; pressure pushes resin in. Kits with manual vacuum pumps or threaded injectors allow this cycling. Avoid single-pressure systems that can’t evacuate trapped air. The ability to fine-tune pressure prevents over-stressing the glass and creating new damage.
Curing Light Power and Wavelength
If the kit includes a UV lamp, check its specs. A quality lamp outputs at least 4-6 watts of UV-A light in the 365-395nm range. LED UV lamps are preferable—they’re instant-on, don’t generate damaging heat, and last thousands of hours. Some cheap kits include incandescent “UV” bulbs that are ineffective and can overheat resin, causing shrinkage.
The Repair Process: Step-by-Step Overview
Understanding the full workflow helps you assess kit quality and prepare mentally for the task.
Preparation: Cleaning and Stabilizing the Damage
Start by cleaning the area with alcohol swabs to remove oils and debris. Use a pin to gently pick out loose glass from the impact point—this is crucial. If moisture has entered the crack, apply gentle heat with a hair dryer (not a heat gun) to evaporate it. Position the bridge so the injector aligns perfectly with the damage’s deepest point. A slight misalignment means incomplete filling.
Injection Techniques for Optimal Fill
The vacuum-pressure cycle is key. Apply vacuum for 2-3 minutes to draw air out of the crack’s micro-fissures. You’ll see bubbles rising in the injector. Then switch to pressure, forcing resin into the void. Repeat this cycle 3-5 times. For star breaks, inject at the center; for cracks, start at one end and work toward the other. Patience here pays dividends—rushing injection leaves air pockets that become visible after curing.
Curing Protocols for Lasting Results
Once resin fills the damage completely, apply a curing strip over the area. This prevents oxygen inhibition (oxygen prevents resin from curing properly at the surface). Position your UV lamp 1-2 inches away and cure for the recommended time—usually 5-10 minutes. If using sunlight, cover the area with a box to prevent premature exposure and ensure even curing. After initial curing, remove the bridge and add a drop of pit resin to fill any surface depression, then cure again.
Finishing and Polishing Steps
After full curing, scrape away excess resin with a razor blade held at a 45-degree angle. Use gentle, single-direction strokes. Follow with pit polish and a microfiber cloth to restore optical clarity. The repair should be smooth to the touch and nearly invisible when viewed at an angle. Any remaining haze can often be polished out with automotive glass polish.
Common Mistakes That Ruin Repairs
Even premium kits fail when users fall prey to these frequent errors.
Temperature and Humidity Considerations
Resin behaves differently across temperature ranges. Ideal working conditions are 60-85°F (15-29°C). Cold resin becomes too viscous to penetrate; hot resin cures prematurely. Humidity above 60% can introduce moisture into the repair, causing cloudiness. If you must work in cold weather, warm the resin bottle in your pocket first. In high heat, work in shade and cure quickly.
Overfilling and Underfilling Issues
Overfilling creates a resin mound that’s difficult to level and can distort vision. Underfilling leaves visible voids. The solution is incremental injection: fill 90%, cure, then top off. This “layered” approach prevents both problems and ensures complete penetration. Watch for resin flowing out of the crack—it indicates you’ve applied too much pressure or the crack has extended beyond the seal.
Impatience During Curing
Prematurely removing the curing light or disturbing the bridge before full cure compromises strength. Resin reaches 90% hardness quickly but needs the full recommended time for complete polymerization. Moving the vehicle or washing the windshield within 24 hours can stress the uncured resin. Mark your calendar and resist the urge to “check if it’s done.”
Longevity: How Long Do DIY Repairs Last?
A properly executed DIY repair should last the remaining life of the windshield, but several factors influence durability.
Factors Affecting Repair Durability
The original damage size and type matter most—small bullseyes last indefinitely; complex star breaks may show slight spreading over years. Environmental exposure is critical: UV-resistant resins prevent yellowing, but parking in direct sun daily will test any repair. Temperature cycling from hot days to cold nights stresses the resin-glass bond. Quality kits use flexible resins that accommodate this expansion/contraction. Vibration from rough roads can degrade poor-quality repairs, which is why complete penetration and full cure are non-negotiable.
Warranty Considerations
Most kit manufacturers offer satisfaction guarantees, but these cover product defects, not repair failure due to user error or uncontrollable damage progression. Some professional-grade kits include insurance: if the repair fails, they’ll cover part of your replacement cost. Read warranty terms carefully—they often require photo documentation of the original damage and adherence to their specific process. Keep your receipt and any batch numbers from the resin bottle.
Safety Considerations and Legal Implications
Your windshield contributes up to 60% of your vehicle’s structural integrity in a rollover. Repairs must maintain this strength.
Visibility Standards and Inspection Laws
Most states prohibit repairs in the driver’s critical viewing area (typically the area swept by windshield wipers directly in front of the driver). Repairs must not cause significant optical distortion or create a “prism effect” that splits light. DIY repairs that leave visible defects can cause inspection failures. Always test your repair by viewing oncoming headlights at night—any starburst pattern indicates a failed repair legally and functionally.
Structural Integrity Concerns
A proper repair restores 80-95% of original strength. However, cracks that reach the windshield’s edge compromise the entire pane—these shouldn’t be DIY repaired. The PVB interlayer can delaminate if the damage is severe. If you see a white haze around the damage that grows, stop and seek professional assessment. Never repair damage on heated windshields or those with embedded antennas without consulting your vehicle manual.
Advanced Techniques for Challenging Repairs
Once you’ve mastered basic chips, these methods expand your capabilities.
Star Break and Bullseye Strategies
For star breaks, inject at the center but then apply gentle pressure to each leg with a pin to ensure resin flows to the tips. Some pros use a “tapping” technique—lightly tapping the glass around the damage while under vacuum helps release stubborn air bubbles. For bullseyes, the cone shape requires longer injection time. Apply vacuum until bubbling stops completely, indicating air removal from the deepest point.
Long Crack Stabilization Methods
Cracks over 6 inches require specialized approach. Drill a tiny hole (1/16") at each crack tip to stop propagation—this is called “ending the crack.” Use a fine drill bit and go slowly, penetrating only the outer glass layer. Inject resin starting at one end and slowly move the injector along the crack using a sliding seal technique. Some advanced kits include flexible injection ports that adhere along the crack length, allowing sequential curing.
Environmental Factors Impacting Your Repair
Weather isn’t just a comfort issue—it directly affects chemical reactions and material behavior.
Working in Cold Weather
Below 50°F, resin thickens and won’t flow properly. Warm your windshield with a car heater for 10 minutes before starting. Keep resin in an inside pocket until use. After repair, let the vehicle sit in a warm garage for 24 hours to ensure full cure. In extreme cold (below 40°F), even successful repairs may remain slightly soft until temperatures rise.
High Humidity Challenges
Moisture is resin’s enemy. On humid days (>70%), use a hair dryer on low setting to gently warm the glass before cleaning—this evaporates surface moisture. Work quickly after cleaning to prevent reabsorption. Some pros use a small amount of acetone (not included in most kits) to displace water in the crack, but this requires extreme care as acetone can damage paint and rubber seals.
Direct Sunlight vs. Shade
While sunlight cures resin, working in direct sun heats the glass unevenly, causing thermal stress. Set up in shade, then move to sun for curing, or use a UV lamp for consistency. If sun-curing, rotate the vehicle every few minutes to ensure even exposure. Morning sun is preferable—it’s less intense, reducing the risk of thermal shock.
Maintenance After Repair: Protecting Your Work
Your job isn’t done when the resin hardens. Proper aftercare ensures longevity.
Cleaning Recommendations
Wait at least 24 hours before washing the vehicle. When you do, use mild soap and avoid pressure washers directly on the repair for a week. Never use ammonia-based cleaners (like Windex) on fresh repairs—they can attack uncured resin at the molecular level. Stick to automotive glass cleaners or simple water and vinegar solutions.
Avoiding Stress on the Repair
For the first week, avoid slamming doors, driving on rough roads, or exposing the vehicle to extreme temperature swings. These actions stress the fresh bond. In winter, scrape ice gently around the repair area—never jab directly at it. In summer, use sunshades to reduce thermal cycling. Think of the repair as a “scab” that needs time to fully integrate.
Troubleshooting Failed or Imperfect Repairs
Even careful work sometimes yields suboptimal results. Knowing how to diagnose and fix issues separates amateurs from experts.
Identifying Air Bubbles and Void Spaces
Small bubbles near the surface often appear as white specks. These can be fixed: re-drill a small access hole, re-inject resin under vacuum, and re-cure. Deep bubbles or voids that distort vision indicate incomplete initial fill—the repair must be redone completely. A “fish-eye” appearance around the repair suggests contamination; the resin didn’t bond properly due to oils or moisture.
When to Attempt a Second Repair
You can re-repair the same damage once, maybe twice, before the glass becomes too compromised. Each attempt introduces more resin and stress. If your first repair failed due to technique errors (insufficient vacuum, incomplete cure), a second attempt often succeeds. However, if the damage has visibly spread or the first repair used low-quality resin, you’re likely fighting a losing battle. After two failed attempts, professional assessment is mandatory.
The Role of Insurance in DIY Repairs
Your auto insurance might actually want you to DIY repair small damage.
Comprehensive Coverage Considerations
Most comprehensive policies cover windshield repair with zero deductible because it prevents costly replacement. However, they typically require professional service. Some insurers now accept DIY repairs with documentation—before/during/after photos, kit receipt, and sometimes a sworn statement. Call your agent before starting. A successful DIY repair documented properly can prevent a claim from affecting your rates.
Documentation Best Practices
Photograph the damage from multiple angles with a ruler for scale before starting. Document each step of your repair process. Keep the resin bottle with its batch number. If the repair fails later, this documentation proves you attempted proper remediation, which can influence insurance decisions on replacement coverage. Some insurers maintain a list of approved DIY kits—using one can streamline claims if needed.
Upgrading Your Kit: Professional-Grade Options
If you find yourself repairing windshields frequently, consumer kits may feel limiting.
What Separates Consumer from Pro Kits
Professional kits ($150-$400) feature metal bridges with micrometer adjustments, multiple specialized resins, high-power UV lamps (12+ watts), and sometimes crack-opening tools. They include enough resin for 50+ repairs and replacement O-rings. The resin is often chemically identical to what shops use, meeting ANSI Z26.1 safety standards. Pro kits also come with technical support hotlines and detailed training materials.
Investment vs. Return Analysis
A pro kit pays for itself after 3-4 repairs compared to shop prices. For fleet managers, car dealers, or mechanically inclined families, the investment is obvious. However, the skill requirement increases—pro tools assume you understand glass behavior and can troubleshoot complex damage. Consider your frequency of need: if you repair more than three windshields a year, upgrade. Otherwise, a quality consumer kit suffices.
Expert Tips for First-Time Users
Success favors the prepared mind. These pro tips accelerate your learning curve.
Practice Techniques
Practice on a cracked piece of scrap glass first. Old windows from a salvage yard cost nothing and let you perfect your vacuum-pressure cycling technique. Time yourself to understand how long each step truly takes. Learn to “read” the resin flow—clear resin turning cloudy indicates moisture contamination. Practice holding the bridge steady; even slight movement during injection introduces air.
Setting Realistic Expectations
A DIY repair should make damage 80-95% less visible and stop spreading. Perfect invisibility is rare, especially on complex star breaks. The goal is structural restoration and safety, not showroom perfection. Some repairs will always show a faint “scar”—this is normal and acceptable if it doesn’t distort vision. Manage your expectations: you’re preventing replacement, not performing magic.
Frequently Asked Questions
1. How do I know if my windshield damage is too severe for a DIY kit?
If the crack extends to the windshield edge, is longer than 12 inches, sits directly in your line of sight, or has been contaminated with water for more than 24 hours, professional assessment is needed. Additionally, if you can feel the crack on the inside of the windshield, the damage has penetrated both layers and requires expert evaluation.
2. Will a DIY repair pass vehicle inspection?
If performed correctly, yes. The repair must not create significant optical distortion or be located in the driver’s critical viewing area. Most states allow repairs in the wiper-swept area if they meet specific size limits and don’t interfere with visibility. Always check your local regulations and ensure your repair is smooth and clear before inspection.
3. Can I use a DIY kit on a heated windshield or one with built-in antennas?
Proceed with extreme caution. Damage over heating elements or antenna traces can affect functionality. These windshields often have special coatings that DIY resins may not bond to properly. Consult your vehicle’s manual and consider professional repair for damage in these sensitive areas. Some manufacturers void warranties if non-approved repair methods are used on ADAS-equipped vehicles.
4. How long should I wait after a rock strike before repairing?
Repair immediately. Within hours, dirt, moisture, and oils contaminate the crack, reducing success rates. If you can’t repair right away, cover the damage with clear tape to keep it clean. Avoid washing the car or driving in rain. After 24-48 hours, contamination is likely too severe for effective DIY repair, and professional cleaning becomes necessary.
5. What’s the difference between the resin in cheap kits versus expensive ones?
Premium resins match glass’s refractive index more precisely, cure harder, resist yellowing from UV exposure, and remain flexible enough to handle thermal expansion. Cheap resins often cure cloudy, shrink during curing, or turn yellow within months. They may also lack the viscosity range needed for different damage types, resulting in incomplete fills and visible repairs.
6. Can temperature affect my repair after it’s completed?
Once fully cured, quality repairs withstand normal temperature extremes. However, during the first 24-48 hours, the resin continues hardening. Avoid subjecting the fresh repair to rapid temperature changes, car washes, or pressure washers. After a week, the repair is chemically stable and as temperature-resistant as the original glass.
7. Is it normal for the repair to still be slightly visible?
Yes. While a perfect repair is invisible, most retain a faint “scar” where the damage was. The goal is structural integrity and minimal visual obstruction, not absolute invisibility. A good repair should be 80-95% less noticeable than the original damage and should not create any distortion or rainbow effects when you view light through it.
8. How many repairs can I expect from one kit?
Most consumer kits contain enough resin for 5-10 average-sized chip repairs. Crack repairs consume more resin, typically allowing 2-4 repairs per kit. Professional-grade kits may include enough material for 50+ repairs. Always check the resin volume (usually measured in milliliters) and compare it to typical usage rates of 0.5-1ml per chip repair.
9. What should I do if the repair fails after a few weeks?
If the crack begins spreading again or the repair clouds over, you may attempt one more repair using the same process. However, first assess why it failed—was it contamination, incomplete cure, or structural damage beyond repair? If a second attempt doesn’t work, the windshield likely needs professional evaluation or replacement. Document everything for insurance purposes.
10. Are there any risks to attempting a DIY repair?
When done properly, risks are minimal. However, improper technique can spread the crack, create optical distortions that impair vision, or waste your time and money on a doomed repair. Using excessive pressure can shatter the glass, and drilling (in advanced techniques) can cause further damage if done incorrectly. Always follow instructions meticulously and know when to stop and call a professional.