That sinking feeling when you spot the first orange bubble of rust creeping along your wheel well is something no car owner wants to experience. Yet for many budget-conscious drivers, the prospect of professional undercoating services—with price tags ranging from $150 to $500+—feels just as painful as the corrosion itself. Here’s the reality: DIY undercoating kits have evolved dramatically, offering professional-grade protection at a fraction of the cost, often for under $100. The key is knowing what to look for, how to apply it correctly, and which features actually matter for your specific vehicle and climate.
Whether you’re protecting a daily driver from harsh winter salt or preserving a classic car investment, this comprehensive guide walks you through everything you need to know about selecting and using budget-friendly undercoating kits. No product pitches, no sponsored recommendations—just pure, actionable expertise to help you make an informed decision and execute a professional-quality job in your own garage.
Top 10 Diy Undercoating Kits
Detailed Product Reviews
1. U-POL Raptor Black Urethane Spray-On Truck Bed Liner Kit, Protective Paint with Spray Gun, for Tailgates & Trucks, Vehicle Undercoating, 4 Quart Kit

Overview: The U-POL Raptor kit delivers professional-grade 2K urethane protection for truck beds and beyond. This comprehensive system combines a tough, flexible coating with a specialized spray gun, offering DIY enthusiasts a complete solution that rivals commercial applications. Designed to withstand brutal conditions while reducing road noise, it covers a full 6-8 foot truck bed with a single kit.
What Makes It Stand Out: Unlike basic rubberized coatings, Raptor’s 2K urethane chemistry creates a molecular bond that won’t crack, peel, or fade under UV exposure. The included spray gun is calibrated specifically for this thick material, eliminating guesswork. Its unique tintable formula allows custom color matching, while the rapid-drying property enables multiple coats within an hour. The versatility extends from truck beds to trailers, boats, and undercarriages, making it a true multi-surface armor system.
Value for Money: At $142.98, this kit positions itself as a premium DIY alternative to $500+ professional sprays. Considering it includes four 750ml base bottles, hardener, dedicated spray gun, and covers an entire truck bed, the per-square-foot cost undercuts most competitors. Professional-grade durability means you won’t retreat annually, saving hundreds in long-term maintenance.
Strengths and Weaknesses:
- Strengths: Exceptional durability against scratches and chemicals; complete ready-to-spray kit; UV-resistant formula prevents fading; flexible coating reduces vibration noise; bonds directly to OEM paint; rapid recoat time.
- Weaknesses: Requires compressor delivering 8 CFM @ 50-60 PSI; significant surface prep mandatory for adhesion; urethane chemistry demands careful mixing ratios; higher upfront cost than single-can products.
Bottom Line: For serious truck owners seeking professional results without the professional price tag, the U-POL Raptor kit is the gold standard. The investment pays dividends in protection and appearance, provided you have the necessary compressor and patience for proper prep work.
2. InoKraft Undercoating Spray Gun with Suction Feed Cup, 360° & Straight Spray Hoses, for Truck Bed Liner Coating, Rubberized Undercoat, Rust Proofing

Overview: The InoKraft spray gun is a specialized tool engineered specifically for high-viscosity undercoating applications. This professional-grade applicator tackles the toughest protective coatings without thinning, delivering precision and efficiency where standard paint guns fail. The comprehensive accessory package transforms an otherwise messy job into a controlled, manageable process.
What Makes It Stand Out: The 60% increased flow rate handles thick rubberized undercoats and bed liner materials straight from the can, preserving their protective properties. The innovative 360° extension wand reaches frame rails and inner panels that are traditionally inaccessible, while the threaded nozzle allows on-the-fly flow adjustments without crawling out from under the vehicle. The snap-lock suction cup prevents messy spills even when inverted, a common frustration with cheaper units.
Value for Money: Priced at $49.99, this tool-only purchase represents exceptional value for anyone undertaking multiple undercoating projects. Comparable professional guns cost $80-$150, and the included wands and regulator eliminate separate purchases. The efficiency gains and material savings from proper application quickly offset the initial investment.
Strengths and Weaknesses:
- Strengths: Superior flow rate for unthinned materials; 360° wand reaches hidden cavities; adjustable pressure regulator and nozzle; leak-proof snap-lock design; large pot opening for easy filling; versatile for bed liners and undercoats.
- Weaknesses: Coating material not included; requires compatible compressor; overkill for single small projects; cleaning thick materials demands diligence; instruction manual could be more detailed.
Bottom Line: The InoKraft gun is an essential investment for DIY mechanics and restorers who regularly apply protective coatings. Its reach and flow control capabilities make challenging undercoating jobs significantly easier and more effective, justifying every penny for frequent users.
3. Barrier Bond - Rubberized Undercoating Sound Deadener Kit, 28oz 4-Pack, Black Spray, Vehicle Undercoating, with Spray Gun
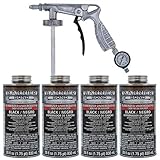
Overview: Barrier Bond offers a convenient, ready-to-spray rubberized undercoating solution focused on sound deadening and corrosion protection. This four-can kit with included applicator gun targets DIY users wanting a straightforward, compliant solution without complex mixing or equipment requirements. The formula balances protection with user-friendliness.
What Makes It Stand Out: The 50-state VOC compliance ensures legal use nationwide, a critical advantage over restricted products. Its paintable surface allows topcoat customization, unlike many rubberized coatings that remain tacky. The fast-drying formula minimizes downtime, while the included spray gun eliminates the need for separate equipment purchases. The four-pack configuration provides adequate coverage for a complete undercarriage or multiple smaller projects.
Value for Money: At $114.99 for four 28oz cans plus an applicator gun, this kit sits in the mid-range segment. While more expensive per ounce than bulk urethane systems, it eliminates compressor and gun investment costs. For users without existing spray equipment, this represents an all-in-one solution that avoids $100+ in tool purchases.
Strengths and Weaknesses:
- Strengths: Complete kit with spray gun included; VOC compliant in all states; paintable finish for customization; effective sound deadening properties; fast drying time; no mixing required; good for beginners.
- Weaknesses: Limited coverage compared to quart-based systems; rubberized formula less durable than urethane; may require multiple kits for larger trucks; spray gun quality is basic; not ideal for heavy abrasion areas like truck beds.
Bottom Line: Barrier Bond excels for budget-conscious DIYers prioritizing ease of use and compliance. It’s ideal for daily drivers needing sound dampening and rust prevention rather than heavy-duty truck bed abuse. Purchase if you want a simple, legal, and complete undercoating solution without equipment investment.
4. Gal NH Oil Undercoating, Pro Undercoating Gun, 2 Wands, 3 Quart Bottle, 50 Plugs

Overview: This professional-grade oil undercoating kit represents the premium approach to rust prevention, favored by Northeastern US shops battling harsh winters. The NH Oil system penetrates existing rust and creates a self-healing barrier that actively displaces moisture. Designed for serious corrosion protection, it’s a tool-and-material system for demanding environments.
What Makes It Stand Out: Oil-based formulations creep into seams and crevices where rubberized coatings cannot reach, providing superior protection against road salt. The inclusion of 50 rust plugs demonstrates professional attention to detail, allowing treatment of rocker panels and structural cavities. The two-wand system (straight and curved) ensures comprehensive coverage of frame rails, crossmembers, and boxed sections that trap moisture and salt.
Value for Money: At $174.95, this is the premium option in the category. The price reflects professional-grade components and the superior protection oil formulas provide in severe climates. While significantly more expensive than rubberized alternatives, the cost is justified if it prevents one major rust repair, which can easily exceed $1,000.
Strengths and Weaknesses:
- Strengths: Superior penetration into seams and rust; self-healing oil barrier; excellent for harsh winter climates; professional-quality spray gun; comprehensive wand set; rust plugs included for cavity treatment; long-lasting protection.
- Weaknesses: Highest price point; oil-based formula is messy and drips; requires reapplication more frequently than urethane; strong odor during application; not suitable for visible surfaces; minimal product documentation provided.
Bottom Line: This kit is the definitive choice for vehicles in salt-belt states or coastal areas where corrosion is relentless. The investment is justified for preserving valuable vehicles, but it’s overkill for mild climates. Recommended for serious enthusiasts and professionals who understand oil undercoating’s unique benefits and limitations.
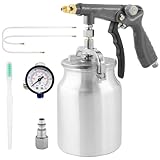
5. Pro Undercoating Spray Gun Kit with 2 Wands, 3 Empty Quart Bottles, and 50 Rust Plugs

Overview: This mid-range undercoating gun kit provides the essential tools for professional-style rustproofing without the premium price tag. The package focuses on application hardware, leaving material choice to the user. It’s a practical solution for DIYers who want reusable, professional-grade equipment for periodic undercarriage maintenance.
What Makes It Stand Out: The inclusion of three empty quart bottles allows users to batch-mix custom formulations or switch between different coatings (oil, wax, rubberized) without cross-contamination. The 50 rust plugs enable complete cavity treatment, a feature often omitted in budget kits. The dual-wand configuration provides flexibility for reaching various undercarriage geometries, from straight frame rails to curved wheel wells.
Value for Money: At $96.49, this kit strikes a balance between budget throwaway guns and high-end professional units. The reusable bottles and rust plugs add tangible value, while the gun itself handles most undercoating materials effectively. For users planning 2-3 applications over several years, it avoids repeated rental or replacement costs.
Strengths and Weaknesses:
- Strengths: Versatile quart bottle system for multiple coatings; rust plugs included for complete protection; two wands for different access needs; reusable design saves long-term costs; handles oil, wax, and rubberized products; good build quality for price point.
- Weaknesses: No coating material included; lacks fine adjustment features of premium guns; basic spray pattern control; cleaning requires disassembly; not ideal for thick bed liner materials; pressure regulator not included.
Bottom Line: This kit serves as a solid workhorse for periodic undercoating maintenance. It’s perfect for the DIYer who wants professional tools without professional expense, provided you purchase your preferred coating separately. Recommended for those comfortable with basic spray gun operation and routine equipment cleaning.
6. KCNKCN Undercoating Spray Gun with 1000ml Suction Feed Cup, 2 Wands - 360° & Straight Spray Hoses, Undercoat Gun for Truck Bed Liner Coating, Rubberized Undercoat, Rust Proofing
Overview: The KCNKCN Undercoating Spray Gun positions itself as a versatile, budget-friendly solution for DIY automotive protection. This pneumatic spray gun system is specifically designed for applying truck bed liners, rubberized undercoatings, and rust-proofing treatments. With a 1000ml suction feed cup and two specialized wands, it addresses the challenge of reaching confined undercarriage spaces effectively.
What Makes It Stand Out: The dual-wand configuration is the star feature—a 360° multi-directional nozzle wand for coating inside hollow frames and hard-to-reach cavities, plus a straight wand for targeted applications. The adjustable flow control offers a claimed 60% boost for thick materials while maintaining precision for detail work. The snap-lock pot design prevents leakage even when inverted, a thoughtful touch for undercarriage work.
Value for Money: At $32.59, this gun competes in the entry-level category, making professional-style application accessible to home mechanics. Comparable guns from established brands often cost $50-100, though they may offer better long-term durability. For occasional use on 1-2 vehicles annually, this represents solid value.
Strengths and Weaknesses: Strengths include versatile wand options, large capacity cup, adjustable atomization, and user-friendly assembly. The lightweight design reduces fatigue during extended use. Weaknesses involve potential durability concerns with heavy use, possible clogging with very thick materials, and the need for a suitable air compressor. The brand lacks the long-term reputation of competitors.
Bottom Line: This undercoating gun is an excellent entry point for DIY enthusiasts tackling rust prevention projects. While professionals may invest in premium alternatives, occasional users will appreciate its functionality and value. Just ensure your compressor meets the requirements and clean thoroughly after each use.
7. 3M Professional Grade Rubberized Undercoating, Corrosion, Water and Salt Spray Resistant, 03584, 16 oz. Aerosol

Overview: 3M’s Professional Grade Rubberized Undercoating delivers trusted brand performance in a convenient aerosol format. This 16-ounce can provides asphalt-based protection against corrosion, water, and salt spray—primary enemies of vehicle undercarriages. Designed for wheel wells, quarter panels, fenders, and hood areas, it doubles as a sound dampener to reduce road noise.
What Makes It Stand Out: The 3M name carries weight in automotive circles, representing consistent quality and research-backed formulations. Its sound-deadening properties differentiate it from basic undercoatings, addressing both protection and NVH (noise, vibration, harshness) concerns. The aerosol dispenser enables precise application without requiring specialized equipment.
Value for Money: At $9.99 ($0.62 per ounce), this sits in the mid-range for aerosol undercoatings. Premium alternatives can reach $12-15 per can, while budget options dip to $6-8. For a name-brand product with proven performance, this pricing strikes a reasonable balance between quality and affordability.
Strengths and Weaknesses: Strengths include trusted 3M quality, easy application, effective corrosion resistance, and sound dampening capabilities. The asphalt base adheres well to clean metal surfaces. Weaknesses include limited coverage per can (typically one wheel well), strong fumes requiring excellent ventilation, and the need for multiple cans for complete undercarriage protection. Overspray can be messy.
Bottom Line: This undercoating excels for touch-ups, small areas, or individual component protection. It’s ideal for DIYers who prioritize brand reliability and convenience over bulk economy. For full undercarriage jobs, consider purchasing multiple cans or exploring spray gun systems for better coverage and cost efficiency.
8. Gal NH Oil Mouse Out Undercoating, Pro Undercoating Gun, 2 Wands, 3 Quart Bottle, 50 Rust Plugs

Overview: The Gal NH Oil Mouse Out Undercoating Kit represents a comprehensive professional-grade solution for serious rust prevention. This premium package includes an undercoating gun, two wands, a substantial 3-quart bottle of oil-based undercoating, and 50 rust plugs—a complete system for thorough vehicle protection. Oil-based formulations penetrate existing rust and creep into seams better than rubberized alternatives.
What Makes It Stand Out: The oil-based approach is the defining feature, providing active corrosion inhibition rather than just barrier protection. The inclusion of 50 rust plugs demonstrates attention to detail, allowing users to access enclosed box sections and rocker panels properly. This is a true professional kit, not a consumer-grade shortcut.
Value for Money: At $173.95, this commands a premium price but includes everything needed for multiple vehicles. Professional undercoating services charge $150-300 per vehicle, so this kit pays for itself after 1-2 applications. The oil-based formula’s longevity justifies the investment for those in harsh climates.
Strengths and Weaknesses: Strengths include comprehensive kit contents, superior oil-based protection, professional-grade application equipment, and rust plugs for complete coverage. The large volume treats multiple vehicles. Weaknesses include the high initial cost, minimal product documentation, potential messiness of oil-based products, and requirement for a suitable compressor. The brand recognition is lower than 3M or Raptor.
Bottom Line: This kit suits serious DIY enthusiasts, restoration specialists, or professionals seeking oil-based protection. While the upfront investment is significant, the superior penetration and complete system components deliver exceptional value for those combating severe corrosion. Ideal for northern climates where salt exposure is extreme.
9. Raptor Tintable Urethane Spray-On Truck Bed Liner Kit, Protective Paint With Spray Gun, For Tailgates & Trucks, Vehicle Undercoating, 4 Quart Kit

Overview: The Raptor Tintable Urethane Spray-On Truck Bed Liner Kit brings professional 2K urethane technology to the DIY market. This comprehensive 4-quart system creates a durable, flexible, UV-resistant coating that withstands extreme temperatures, chemicals, and abrasion. Unlike basic undercoatings, this 2K system chemically cures for superior adhesion and longevity.
What Makes It Stand Out: The tintable 2K urethane formula represents professional-grade technology, allowing color matching while delivering exceptional durability. The kit includes everything needed: four 750ml base bottles, hardener, spray gun, and instructions. This system covers 6-8 foot truck beds completely, doubling as premium undercoating for rocker panels and frames.
Value for Money: At $144.99 ($1.07 per fluid ounce), this offers tremendous value compared to professional spray-on liner installations costing $500-800. The included spray gun and complete chemical system justify the price point. For those seeking permanent, professional results, this undercuts commercial services significantly.
Strengths and Weaknesses: Strengths include professional 2K urethane performance, tintable UV-resistant formula, comprehensive kit contents, rapid drying for multiple coats, and exceptional durability. The flexible coating reduces road noise effectively. Weaknesses include requiring a substantial compressor (8 CFM @ 50-60 PSI), chemical mixing complexity, and higher skill requirements than aerosols. Overspray must be carefully managed.
Bottom Line: This Raptor kit is the top choice for truck owners wanting professional bed liner results plus premium undercoating protection. While demanding proper equipment and technique, it delivers unmatched durability and appearance. The investment pays dividends in long-term protection and enhanced vehicle value. Perfect for dedicated enthusiasts.
10. Rust-Oleum Black Undercoating 15 oz. (12 Pack)

Overview: The Rust-Oleum Black Undercoating 12-Pack provides bulk convenience for large-scale rust prevention projects. Each 15-ounce aerosol can delivers Rust-Oleum’s trusted rust-fighting formula in a rubberized black finish that protects undercarriages from moisture, salt, and abrasion. This multi-can package targets fleet operators, restoration shops, or serious DIYers tackling multiple vehicles.
What Makes It Stand Out: The bulk packaging delivers significant per-ounce savings while ensuring consistent product availability for extensive projects. Rust-Oleum’s reputation for reliable corrosion protection spans decades. The aerosol format eliminates equipment cleanup and compressor requirements, making it accessible for users at any skill level.
Value for Money: At $80.62 for twelve 15-ounce cans (180 total ounces), the per-ounce cost drops to $0.45—substantially lower than individual can purchases. Professional undercoating services cost $150+ per vehicle, making this economical for treating 3-4 vehicles completely. The bulk approach maximizes value for planned projects.
Strengths and Weaknesses: Strengths include exceptional bulk pricing, trusted brand reliability, convenient aerosol application, and good baseline rust protection. The black finish provides uniform appearance. Weaknesses include aerosol limitations for thick coatings, potential for uneven application without experience, strong solvent fumes, and the need for multiple cans per vehicle. It’s less durable than 2K urethane systems.
Bottom Line: This 12-pack excels for users with multiple vehicles or ongoing rust prevention needs. The combination of bulk savings and Rust-Oleum reliability makes it a smart purchase for fleet maintenance or restoration shops. While not as robust as professional spray systems, it delivers practical protection at an unbeatable per-ounce price for large projects.
Why Undercoating Matters for Budget-Conscious Car Owners
The True Cost of Rust and Corrosion
Rust isn’t just a cosmetic issue—it’s a structural cancer that can turn a $5,000 repair bill into a total loss declaration. Modern vehicles use advanced high-strength steel that, while lighter and more fuel-efficient, is actually more susceptible to corrosion when the factory coatings fail. A single rusted frame section can compromise crash safety ratings and leave you with a vehicle that won’t pass inspection.
The financial math is stark: replacing a rusted subframe can cost $2,000-$4,000, while a complete frame replacement easily exceeds $10,000. Compare that to a $75 DIY undercoating kit that can prevent the problem entirely, and the value proposition becomes crystal clear. For budget-minded owners driving older vehicles, undercoating often represents the difference between reaching 200,000 miles and sending your car to the scrapyard at 120,000.
How DIY Undercoating Saves Money Long-Term
Professional undercoating services charge premium rates for labor that you can realistically perform yourself in about 3-4 hours. The actual material cost for most professional jobs is only $40-$60—the rest is shop overhead and markup. By investing in your own kit and reusable application equipment, you’re building a maintenance system that protects not just your current vehicle, but every car you’ll own in the future.
Beyond the immediate savings, DIY undercoating allows you to target specific problem areas on your vehicle. Maybe your car has a known weak spot behind the rear wheels, or you’ve noticed factory coating degradation along the rockers. With your own kit, you can spot-treat these areas annually without paying for a full-service package you don’t need.
Understanding Different Undercoating Types
Rubberized Undercoatings: Pros and Cons
Rubberized coatings dominate the DIY market for good reason—they create a flexible, sound-dampening barrier that seals out moisture while reducing road noise. These asphalt-rubber blends typically offer 2-3 years of protection in moderate climates and excel at self-healing from minor stone chips. However, they can trap moisture if applied over existing rust, potentially accelerating corrosion from the inside out.
Budget kits in this category often contain 15-20% solids content, requiring multiple coats for adequate thickness. Look for formulations with rust inhibitors like zinc or barium compounds, which actively fight corrosion rather than just sealing it out. The trade-off? Rubberized coatings add noticeable weight (5-8 lbs per gallon) and can be difficult to remove if you need to perform repairs.
Asphalt-Based Options: Heavy-Duty Protection
For maximum durability in harsh environments, asphalt-based undercoatings provide the thickest barrier—often 3-4mm in a single coat. These products contain high concentrations of bitumen and fibrous fillers that create a nearly impenetrable shield against salt, chemicals, and abrasion. They’re particularly valuable for trucks and SUVs that see off-road use or frequent exposure to gravel roads.
The downside for budget buyers is that pure asphalt coatings typically require professional-grade spray equipment due to their high viscosity. Many DIY-friendly versions cut the asphalt with solvents, reducing protection but improving application. Expect strong odors during application and curing—plan for extended ventilation time.
Wax and Paraffin Coatings: The Silent Protectors
Penetrating wax-based undercoatings offer a stealthier approach, creeping into seams and crevices where thicker products can’t reach. These formulations create a hydrophobic barrier that actively repels water while remaining pliable in extreme cold. They’re ideal for vehicles with existing surface rust, as the wax displaces moisture and prevents further oxidation.
Budget kits in this category often provide superior coverage—up to 100 square feet per gallon—making them extremely cost-effective. The compromise is shorter lifespan, typically requiring annual reapplication. They also offer minimal sound deadening compared to rubberized alternatives.
Water-Based Undercoatings: Eco-Friendly Alternatives
Emerging water-based formulations use acrylic polymers and rust inhibitors suspended in water rather than harsh solvents. These products clean up with soap and water, produce minimal VOCs, and are safe for use in enclosed spaces with basic ventilation. Performance has improved dramatically, with some premium water-based options matching solvent-based durability.
For budget-conscious eco-aware consumers, these kits eliminate disposal headaches and reduce long-term health risks. The primary limitation is reduced performance in extreme cold—water-based coatings can become brittle below -20°F. They also require pristine surface preparation, as any residual oil will cause adhesion failure.
Essential Features to Look for in Budget DIY Kits
Coverage Area: Getting the Most Square Footage
Manufacturers love to advertise “up to 100 sq ft coverage” while burying the fine print that specifies single-coat application at 1mm thickness. Real-world coverage is typically 40-60% of claimed numbers when you apply the recommended two coats with adequate thickness. For a standard sedan, you need approximately 60-80 square feet of coverage. For trucks and SUVs, plan for 100-120 square feet.
Calculate your actual needs by measuring your vehicle’s rocker panels, wheel wells, floor pans, and frame sections. Then add 30% for overspray and waste. Budget kits ranging from $50-$75 should provide 1.5-2 gallons of product—sufficient for most passenger vehicles with careful application.
Viscosity and Spray Pattern Control
Thicker isn’t always better. Ideal viscosity for DIY spray guns falls between 20-30 seconds in a #4 Ford cup (similar to heavy cream). Products that are too thick require excessive thinning, which reduces solids content and protection. Too thin, and you’ll need four or five coats to build adequate film thickness.
Look for kits that specify adjustable spray patterns—from fan to cone—to tackle different areas. Wheel wells need a wide fan pattern for quick coverage, while frame rails and inside rocker panels require a narrow cone to penetrate deep cavities. Some budget kits include interchangeable nozzles; others require separate purchases.
Drying Time and Curing Process
Fast-dry formulations that tack-free in 30 minutes sound appealing but often sacrifice long-term flexibility. Quality budget undercoatings should be dry to touch in 2-4 hours and fully cured in 24-48 hours. This allows proper film formation and adhesion development.
Consider your climate and application timing. If you’re working in a home garage with limited ventilation, slower-curing products give you more working time and reduce inhalation risks. For winter applications, look for formulations that cure effectively at temperatures as low as 50°F. Some kits include accelerators for cold-weather use.
VOC Compliance and Safety Ratings
Volatile Organic Compound regulations vary dramatically by state. California’s CARB standards are the strictest, limiting VOCs to 420g/L for undercoatings. Many budget kits sold online exceed these limits and are illegal to ship to CA, NY, and NJ. Check your local regulations before purchasing.
Lower VOC formulations (under 350g/L) reduce health risks and odor but may require longer cure times. For enclosed garage applications, VOC content under 250g/L is strongly recommended. Don’t compromise on respirator protection regardless of VOC rating—these products still contain irritants and carcinogens.
Tools and Equipment: What Your Kit Should Include
Spray Gun vs. Aerosol: Making the Right Choice
Aerosol cans seem convenient until you calculate the cost—typically $8-$12 per can covering only 10-15 sq ft. For a full vehicle, you’ll need 8-10 cans, making them more expensive than gun applications. However, aerosols excel for touch-ups and hard-to-reach areas where setting up a gun isn’t practical.
Entry-level spray guns included in budget kits are usually siphon-feed HVLP (High Volume Low Pressure) guns requiring a 3-5 HP compressor delivering 8-10 CFM at 90 PSI. If your compressor is marginal, consider kits with gravity-feed guns that require less air volume. Some innovative budget kits now include battery-powered handheld sprayers that eliminate compressor needs entirely.
Wand Attachments for Hard-to-Reach Areas
The difference between amateur and professional results often comes down to access. Quality budget kits include a 24-36 inch flexible wand with a 360-degree spray tip for inside rocker panels, frame rails, and door bottoms. Without this tool, you’re leaving 30% of vulnerable surfaces unprotected.
Inspect wand construction—cheap plastic wands crack under pressure, while reinforced nylon or metal wands last for multiple applications. Some kits offer interchangeable tips: a narrow 90-degree tip for precise seam application and a wide 360-degree tip for cavity flooding. If your kit doesn’t include a wand, budget an extra $15-$25 for this essential accessory.
Masking Materials and Surface Prep Tools
While most budget kits focus on the coating itself, the best value packages include essential prep materials. Look for kits containing plastic sheeting for overspray protection, quality masking tape that won’t leave residue, and disposable coveralls. Some premium budget options even include wire brushes and scrapers for surface preparation.
If these aren’t included, you’ll need to budget an additional $20-$30 for proper prep supplies. Skimping on masking leads to overspray on exhaust components (creating fire hazards) and suspension parts (affecting performance). The included plastic should be at least 0.7 mil thickness to withstand wind and incidental contact.
Surface Preparation: The Foundation of Success
Cleaning Protocols That Don’t Break the Bank
Professional shops use pressure washers delivering 3,000+ PSI, but you can achieve comparable results with a $30 driveway rental and proper technique. Start with a degreaser application, let it dwell for 10-15 minutes, then blast from multiple angles—especially from behind wheel wells and inside frame holes. The goal is removing loose rust, dirt, and previous undercoating that’s failing.
For vehicles with heavy buildup, invest in a $15 bottle of citrus-based tar and asphalt remover. This biodegradable option dissolves old undercoating without the harsh fumes of mineral spirits. Work in sections, keeping the surface wet to prevent flash rusting. A final rinse with clean water and immediate drying with compressed air or leaf blower prevents new surface rust from forming within hours.
Rust Removal on a Budget
Contrary to popular belief, you don’t need to remove every speck of rust before undercoating. The goal is converting active red rust (iron oxide) into a stable black oxide that won’t continue expanding. For light surface rust, a $10 wire cup brush on a drill removes enough material for coating adhesion.
For heavier scaling, consider a chemical rust converter rather than expensive sandblasting. These $15-$20 solutions contain tannic acid that chemically transforms rust into an inert iron tannate, ready for coating in 24 hours. Avoid converters containing phosphoric acid—they’re cheaper but create a dusty residue that interferes with adhesion. After conversion, rinse thoroughly and dry completely before coating application.
Degreasing: The Critical Step Most People Skip
Even invisible oil residue from road grime or previous rust-proofing treatments will cause undercoating to delaminate. Standard dish soap won’t cut it—you need a petroleum-based degreaser or specialized undercarriage cleaner. Apply liberally to dry surfaces (water dilutes effectiveness) and agitate with a stiff brush.
The budget pro tip? Use a $5 pump sprayer to apply degreaser evenly and reduce waste. Let it dwell for the manufacturer-recommended time, then pressure wash thoroughly. Perform a “water break test” afterward—spray a light mist of water; if it beads up, you still have oily residue and need to degrease again. This step alone determines 70% of your coating’s longevity.
Application Techniques for Professional Results
Temperature and Humidity Considerations
Ideal application conditions are 65-75°F with humidity below 60%. Budget undercoatings become increasingly difficult to apply below 55°F, thickening and creating orange peel texture. Above 85°F, they dry too quickly, preventing proper leveling and adhesion. If you must apply in marginal conditions, adjust your technique—warm cans in warm water before use in cold weather, or work in smaller sections during heat.
Humidity above 70% can cause blushing (a cloudy appearance) and interfere with cure. In humid climates, apply early morning when temperatures are rising, not in evening when dew forms. Some budget formulations include moisture scavengers that tolerate higher humidity—check the technical data sheet if you’re in the Gulf Coast or Pacific Northwest.
Layering Strategy: Thin Coats vs. Heavy Applications
The amateur mistake is applying one heavy coat, expecting better protection. This creates solvent entrapment, leading to soft, uncured spots that fail within months. Professional results come from 2-3 thin coats at 8-12 mil wet thickness each, allowing 2-4 hour flash time between applications.
First coat should be a “tack coat”—thin enough that some surface texture shows through. This creates mechanical adhesion for subsequent layers. Second coat builds thickness, and optional third coat targets high-wear areas like wheel wells and rocker panels. Total dry film thickness should be 20-30 mils for adequate protection. Budget kits often require three coats to reach this spec, while premium formulations achieve it in two.
Common Application Mistakes to Avoid
Overspray on exhaust components creates a fire hazard and produces toxic fumes when heated. Wrap exhaust pipes and mufflers with aluminum foil before starting—it’s cheaper and more heat-resistant than plastic. Another critical error is coating suspension components: rubber bushings, ball joints, and CV boots. Undercoating swells and deteriorates rubber, leading to premature failure.
Avoid the temptation to coat everything. Brake lines, fuel lines, and wiring harnesses should be masked off. Some DIYers intentionally coat these for “extra protection,” but undercoating traps heat and moisture against these critical components, accelerating corrosion and creating safety hazards. Use aluminum foil and painter’s tape to protect these areas precisely.
Budget-Friendly Application Tips and Tricks
How to Stretch Your Undercoating Kit Further
Professional applicators target only vulnerable areas, not the entire undercarriage. Focus on rocker panels (front 18 inches and rear 12 inches), wheel wells, frame rails, floor pan seams, and inside door bottoms. These areas represent 20% of the undercarriage but suffer 80% of corrosion damage. This strategic approach can make a single kit cover two vehicles.
Dilution is another controversial but effective technique. Some budget undercoatings can be thinned 10% with mineral spirits without significantly reducing protection, increasing coverage by 15-20%. Test on a small area first—if the thinned coating sags or runs, it’s too thin. Never exceed 15% thinning or you’ll compromise film thickness.
Reusing Equipment for Future Applications
That $30 spray gun isn’t a one-time use tool. Clean immediately after use by running mineral spirits through until it sprays clear, then disassemble and soak parts in a parts washer or solvent bath. Store disassembled to prevent gaskets from compressing. With proper care, a budget gun lasts 5-7 applications.
Wand attachments can be cleaned by spraying solvent through them and hanging to drain. Store vertically to prevent tip clogging. Keep leftover undercoating in the original can, transfer to a glass jar filled to the brim to minimize air exposure, or use Bloxygen (argon gas) to displace oxygen and prevent skinning. Properly stored, opened undercoating remains usable for 12-18 months.
Safety Considerations for DIY Undercoating
Respiratory Protection on a Budget
A $5 dust mask is worse than useless—it provides false security while allowing VOCs and particulates to pass through. Minimum protection is a NIOSH-approved half-face respirator with organic vapor cartridges (P100 rating). These cost $25-$35 but are reusable for years with cartridge replacement every 40 hours of use.
For maximum protection in enclosed spaces, consider a supplied-air respirator. While professional units cost $500+, budget-friendly hobbyist options around $150 use a belt-mounted fan drawing air through a long hose from outside the workspace. This eliminates cartridge costs and provides cool, fresh air during hot summer applications.
Ventilation Setup in Home Garages
Even with respirator protection, adequate ventilation prevents explosive vapor buildup and reduces cleanup. For a standard two-car garage, you need 10-15 air changes per hour. This can be achieved with a $50 box fan in one window exhausting outward and another window open for makeup air. Position the fan at ground level—vapors are heavier than air.
For winter applications when opening windows isn’t practical, invest in a $100 explosion-proof ventilation fan designed for paint booths. These units safely remove flammable vapors and can be ducted through a slightly open garage door. Never use standard household fans—they can spark and ignite concentrated vapors.
Protecting Your Skin and Eyes
Undercoating contains asphalt, rubber, and solvents that cause dermatitis and chemical burns. Disposable coveralls ($5-$8) are non-negotiable. Wear chemical-resistant nitrile gloves (not latex) and safety goggles with indirect ventilation to prevent overspray mist from reaching your eyes. A $10 face shield provides additional protection for your neck and face.
If undercoating contacts skin, remove immediately with baby oil or vegetable oil before using soap and water. Solvents like mineral spirits or gasoline remove undercoating but also strip your skin’s protective oils, causing worse irritation. Keep a bottle of baby oil and clean rags accessible during application.
Longevity and Performance Expectations
How Long Budget Undercoatings Really Last
Marketing claims of “lifetime protection” are fantasy. Real-world performance for budget undercoatings in salt-belt states is 18-24 months before reapplication is needed. In milder climates, you can stretch this to 3-4 years. Rubberized and asphalt-based products generally outlast wax-based options by 50%.
The critical factor is initial application thickness. Undercoatings applied at 15 mils dry film thickness show significant degradation within 12 months. Those applied at 25-30 mils typically last the full 2-year cycle. This is why multi-coat application is essential—skipping the second coat cuts your protection lifespan in half, negating any initial savings.
Factors That Accelerate Wear and Degradation
Stone chip damage is the primary failure mode. At highway speeds, small stones impact with enough force to puncture undercoating, exposing bare metal. Areas behind tires see 10x more wear than center floor pans. Road salt doesn’t just cause rust—it chemically breaks down undercoating binders, especially in spring when temperature fluctuations cause expansion and contraction.
Pressure washing your undercarriage, while necessary for maintenance, gradually erodes undercoating. Hold the wand at 45-degree angles, never directly perpendicular, and stay 12+ inches away. Automatic car washes with undercarriage sprays are particularly damaging, removing 5-10% of coating thickness per wash.
When to Reapply for Maximum Protection
The optimal schedule is annual inspection and spot-treatment, with full reapplication every 2-3 years. Inspect in early fall before winter salt season begins. Use a putty knife to probe edges and seams—if you can easily scrape through to metal, it’s time to recoat. Pay special attention to wheel wells and behind tires, where wear occurs fastest.
Don’t wait for visible rust to appear. Undercoating failure begins microscopically, and by the time you see orange staining, the damage is already occurring. A $50 maintenance coat applied proactively saves the $200+ cost of rust conversion and repair later.
Troubleshooting Common DIY Undercoating Issues
Dealing with Runs and Sags
Runs occur when applying too heavy a coat or working in excessive heat. The fix is immediate—within 5 minutes, use a dry brush to spread the excess material or carefully wipe with a rag soaked in mineral spirits. Once the coating skins over (after 10-15 minutes), removal requires scraping and reapplication.
Prevent runs by maintaining 6-8 inch spray distance and constant gun movement. If a run forms in a hard-to-reach area, don’t panic—once cured, you can slice it flush with a utility knife and touch up with a small brush. Thick runs are actually more protective than thin areas; the cosmetic issue doesn’t affect performance.
Fixing Uncured or Tacky Surfaces
Soft, gummy undercoating after 48 hours indicates solvent entrapment from excessive thickness or high humidity during application. The solution is forced curing—place a space heater under the vehicle (maintaining 80-90°F) for 6-8 hours to slowly drive out remaining solvents. Never exceed 100°F, which can cause bubbling.
If tackiness persists beyond 72 hours, the coating is likely contaminated. You’ll need to remove the affected area with a wire brush, re-clean with degreaser, and reapply. To prevent this, always test your surface preparation by wiping with a clean white rag—if it picks up any gray or black residue, you’re not clean enough.
Addressing Adhesion Problems
Peeling or flaking undercoating screams surface contamination or inadequate prep. Small areas can be repaired by feathering the edges with sandpaper, cleaning thoroughly, and spot-applying new material. Large-scale failure requires complete removal—a miserable job involving scrapers, heat guns, and solvents.
The prevention is simple: perform a cross-hatch adhesion test on a small hidden area. Apply a 2-inch square of coating, let it cure for 24 hours, then score it with a utility knife in a cross-hatch pattern. Press duct tape firmly over the area and rip it off quickly. If more than 10% of the coating pulls off, your prep is inadequate.
Seasonal Timing for Undercoating Application
Best Time of Year for DIY Undercoating
Late spring (May-June) offers optimal conditions: moderate temperatures, low humidity, and minimal precipitation. Applying in spring allows the coating to fully cure before fall salt season while protecting against summer humidity and unexpected early snow. The second-best window is early fall (September), but you risk incomplete curing before first freeze.
Avoid winter application entirely—even in heated garages, temperature fluctuations when driving in and out cause condensation under the coating, leading to adhesion failure. Summer application is possible but requires early morning starts to avoid excessive heat and humidity.
Winter Preparation vs. Spring Maintenance
Winter prep applications should focus on maximum thickness and coverage, using your full kit allocation. Spring maintenance is lighter—inspect for winter damage and spot-treat only compromised areas. This conserves material and extends the time between full applications.
If you live in a salt-belt state, consider a “winterizer” approach: apply a thin wax-based coating in October that’s designed to wash off by spring, taking salt residue with it. Then apply your primary rubberized or asphalt-based coating in spring for multi-year protection. This two-product strategy costs more initially but provides superior protection.
Cost Breakdown: True DIY Undercoating Expenses
Hidden Costs Beyond the Kit Price
That $69.99 kit is just the beginning. Essential add-ons include: respirator cartridges ($15), mineral spirits for cleanup ($10), masking materials ($15), and replacement spray gun tips ($8). If you need to rent a pressure washer, add another $30. Suddenly your “budget” project approaches $150.
Factor in your time value—4 hours at even minimum wage is $30-$40. However, this is still roughly half the cost of professional application, and you gain knowledge and reusable equipment. The real savings materialize on subsequent vehicles, where your only cost is the undercoating itself.
Professional vs. DIY: The Real Savings
A professional oil-based undercoating service averages $180-$250 for cars, $250-$350 for trucks. This typically uses 1-1.5 gallons of material costing the shop $40-$60. Your DIY kit costs $70-$90 for comparable material, but you retain $100+ worth of equipment and supplies.
The break-even point is your second vehicle. By the time you’ve undercoated your daily driver and your spouse’s car, you’ve saved $200-$300 compared to professional services. Each subsequent application saves the full professional labor cost. For families with multiple vehicles or car enthusiasts with collections, DIY undercoating becomes a $500+ annual savings.
Environmental and Legal Considerations
Disposal of Overspray and Empty Containers
Undercoating overspray captured on plastic sheeting is considered hazardous waste in most jurisdictions. Never throw it in regular trash. Dry, cured undercoating is typically non-hazardous, but the wet material contains solvents and heavy metals. Allow overspray to dry completely, then seal in heavy-duty trash bags for disposal at household hazardous waste facilities.
Empty aerosol cans require special handling—puncture and drain completely (into your waste solvent container) before recycling. Liquid undercoating cans should have lids sealed with duct tape and be disposed as hazardous waste. One gallon of waste undercoating costs $5-$15 to dispose of properly at municipal facilities—a small price for environmental responsibility.
Local Regulations You Need to Know
Many municipalities prohibit automotive painting and coating in residential areas due to VOC emissions. Undercoating typically falls into a gray area, but check local ordinances. Some HOAs explicitly forbid any automotive work visible from the street. Performing undercoating in a driveway may violate stormwater regulations if overspray enters storm drains.
If regulations are restrictive, consider renting a DIY paint booth for $50-$75 per day. These ventilated spaces provide legal compliance, professional results, and eliminate neighbor complaints. Some auto parts stores partner with booth facilities, offering discounts when you purchase undercoating kits.
Maximizing Your Undercoating Investment
Maintenance Tips to Extend Protection
Monthly undercarriage rinsing during winter salt season is the single most effective maintenance step. Use a lawn sprinkler under the vehicle for 20 minutes, targeting wheel wells and frame rails. This passive approach uses minimal water and prevents salt buildup without pressure washer damage.
In spring, inspect for stone chip damage and touch up with a small brush and leftover material. Apply a thin coat of fluid film or similar lanolin-based product to seams and fasteners—these creep into cracks and rejuvenate aging undercoating. This $15 annual treatment can extend your primary undercoating’s life by 50%.
Inspection Checkpoints Throughout the Year
Mark your calendar for quarterly inspections: March (post-winter), June (pre-summer), September (pre-winter), and December (mid-winter check). Use a creeper and bright LED work light to examine high-stress areas. Document with photos to track degradation over time. This 30-minute investment catches problems before they require complete reapplication.
Focus on leading edges that face road debris: the front of wheel wells, forward frame sections, and rocker panel fronts. These areas see 5x more wear than protected sections. A $10 tube of seam sealer applied to cracks and chips during inspection prevents water intrusion and extends coating life indefinitely.
Frequently Asked Questions
How do I know if my car actually needs undercoating?
If your vehicle is less than 5 years old and still has intact factory coatings, you may only need spot treatments. However, any vehicle over 7 years old, showing surface rust, or driven in salt-belt states benefits significantly. Perform a screwdriver test on factory undercoating—if you can easily poke through to metal, protection is failing.
Can I apply undercoating over existing surface rust?
Light surface rust is acceptable if properly converted using a rust converter product. Heavy scaling rust must be removed down to sound metal. Undercoating over active rust seals in moisture and accelerates corrosion. The rule: if rust is flaking or thicker than a credit card, remove it first.
What’s the minimum compressor size needed for spray gun application?
A 20-gallon compressor delivering 5 CFM at 90 PSI is the practical minimum. You’ll work in short bursts, allowing the compressor to recover between sections. For continuous spraying, you need 10+ CFM. Battery-powered handheld sprayers are viable alternatives for those without adequate compressors.
How long should I wait after undercoating before driving in rain?
Most budget undercoatings are rain-safe after 24 hours, but full water immersion resistance requires 7 days. Avoid puddles and heavy rain for the first week. Light mist is acceptable after 12 hours if the coating feels dry to touch. Colder temperatures extend all curing times by 50-100%.
Is it safe to undercoat a vehicle with existing fluid film or oil-based rust proofing?
No. These products prevent proper adhesion and must be removed completely. Degreasing alone won’t suffice—you’ll need a pressure washer and solvent rinse. Some shops use steam cleaning for removal. Plan on 2-3 hours of prep time for previously oiled vehicles.
Can I paint over undercoating if I want a color-matched finish?
Standard undercoatings aren’t designed for topcoating. If you want color, use an undercoating-specific topcoat or choose a “coatable” undercoating formulation. These contain less asphalt and more resin, accepting paint after 48 hours of cure. Most budget kits aren’t coatable—verify before purchasing if this matters to you.
How do I remove undercoating from areas I accidentally coated?
If caught within 30 minutes, mineral spirits on a rag removes fresh coating. After curing, removal requires mechanical means: heat gun and scraper, or specialty undercoating removal wheels on a drill. For small spots, a wire brush attachment on a Dremel works. Always re-treat bare metal immediately after removal.
Will undercoating affect my vehicle’s resale value?
Properly applied undercoating typically increases resale value in rust-prone regions by $500-$1,000, as it demonstrates maintenance consciousness. However, sloppy application with overspray on components can signal amateur work and may decrease value. Professional appearance matters—mask meticulously and apply evenly.
Can I use truck bedliner as undercoating?
Technically yes, but it’s a poor choice. Bedliners are formulated for impact resistance, not corrosion protection. They lack rust inhibitors and don’t flex with temperature changes, leading to cracking and delamination. Additionally, bedliners are significantly more expensive per square foot than dedicated undercoatings.
How do I dispose of leftover undercoating and cleaning solvents?
Never pour solvents down drains or onto ground. Collect waste solvents in sealed metal containers and dispose at household hazardous waste facilities. Many auto parts stores accept waste oil and solvents for recycling. Cured undercoating is solid waste but should be bagged separately. Check Earth911.com for local disposal options.