That first glimpse of rust blooming on your vehicle’s undercarriage is a gut punch every car enthusiast knows. You’ve invested time, money, and emotion into your ride, only to find corrosion silently eating away at the frame, control arms, and floor pans. While modern vehicles arrive with some factory protection, the harsh reality is that road salt, moisture, and debris don’t discriminate—they’re constantly waging war on your metal components. This is where asphalt undercoating becomes your vehicle’s silent guardian, and the brush-on method offers a precision that spray applications simply can’t match.
Brush-on asphalt undercoating isn’t just about slapping protective goo on metal—it’s a deliberate, methodical process that puts you in complete control. You become the craftsman, ensuring every seam, weld spot, and vulnerable crevice receives the exact coverage it needs. Whether you’re restoring a classic muscle car, protecting a daily driver through brutal winters, or preparing an off-road rig for mud season, understanding the nuances of brush-on application separates the enthusiasts from the amateurs.
Top 10 Asphalt Undercoating
Detailed Product Reviews
1. Rust-Oleum 248656 Professional Grade Rubberized Undercoating Spray, 15 oz, Black

Overview: The Rust-Oleum 248656 Professional Grade Rubberized Undercoating Spray delivers industrial-strength protection for vehicle underbodies. Designed for bare or primed metal surfaces on cars, trucks, trailers, and RVs, this 15-ounce can provides a robust shield against corrosion, water, salt, and chemical damage. The professional-grade formulation sets it apart from consumer-grade alternatives, offering superior adhesion and durability for long-lasting results.
What Makes It Stand Out: This product features a unique rubberized formula that not only prevents rust but also provides excellent sound-deadening properties, reducing road noise and vibration. The innovative any-angle spray technology, combined with a wide comfort spray tip, allows for effortless application—even upside down—making it easier to reach challenging undercarriage areas. With a drying time of just one hour and coverage of 10-15 square feet per can, it balances efficiency with performance.
Value for Money: At $8.27 per can ($0.55 per ounce), this undercoating sits in the mid-range price point. The professional-grade formula justifies the cost over cheaper alternatives, offering superior protection that can prevent costly rust repairs. The coverage area is respectable, though larger vehicles may require multiple cans. Compared to professional undercoating services costing hundreds of dollars, this DIY solution provides exceptional value.
Strengths and Weaknesses: Strengths include excellent corrosion resistance, easy any-angle application, effective sound deadening, and quick one-hour drying time. The professional-grade formula ensures durability. Weaknesses include variable coverage depending on application thickness, strong fumes requiring proper ventilation, and the need for multiple cans for complete underbody coverage. The black finish may not match all vehicle undercarriages.
Bottom Line: For DIY enthusiasts seeking professional-quality underbody protection, the Rust-Oleum 248656 is an excellent investment. It offers robust rust prevention, noise reduction, and user-friendly application at a fraction of professional service costs.
2. Rust-Oleum 248657 Rubberized Undercoating Spray, 15 oz, Black

Overview: The Rust-Oleum 248657 Rubberized Undercoating Spray offers versatile protection for automotive underbodies at a slightly more accessible price point. This 15-ounce can is formulated for bare or primed metal surfaces on vehicles, trailers, and RVs, providing reliable defense against rust, water, salt, and chemical damage. It represents the brand’s consumer-friendly option without sacrificing core protective qualities.
What Makes It Stand Out: The standout feature is its rapid 30-minute drying time—twice as fast as many competitors. This accelerates project completion and reduces the risk of debris sticking to fresh coating. The same any-angle spray technology and wide comfort tip found in professional versions ensure easy application in hard-to-reach areas. The rubberized formula effectively deadens road noise while creating a flexible barrier against corrosion.
Value for Money: At $7.98 per can ($0.53 per ounce), this is the most affordable single-can option in the Rust-Oleum lineup. The faster drying time adds value by reducing project duration and minimizing downtime. While coverage is slightly less (10-12 square feet) than the professional grade, the lower price and time savings make it ideal for touch-ups and smaller vehicles. It delivers solid protection without the premium price tag.
Strengths and Weaknesses: Strengths include ultra-fast 30-minute drying, budget-friendly pricing, easy any-angle application, and effective sound reduction. The rubberized coating provides good flexibility and adhesion. Weaknesses include marginally less coverage per can, potentially requiring more product for complete jobs. It may not be as durable as true professional-grade formulas for extreme conditions. Multiple coats might be necessary for optimal protection.
Bottom Line: Perfect for budget-conscious DIYers and quick maintenance projects, the Rust-Oleum 248657 offers excellent value. Its fast drying time and reliable protection make it ideal for regular underbody maintenance and rust prevention.
3. 3M Professional Grade Rubberized Undercoating, Corrosion, Water and Salt Spray Resistant, 03584, 16 oz. Aerosol

Overview: The 3M Professional Grade Rubberized Undercoating brings the trusted reputation of a premium automotive brand to underbody protection. This 16-ounce aerosol can features an asphalt-based formula designed for comprehensive undercarriage defense on cars, trucks, and recreational vehicles. It targets wheel wells, quarter panels, interior fenders, and under-hood applications with professional results.
What Makes It Stand Out: Unlike rubberized competitors, 3M’s asphalt-based formulation provides exceptional sound deadening and a thicker, more substantial barrier against abrasion and impact. The slightly larger 16-ounce can offers more product per unit, while 3M’s engineering ensures consistent spray patterns and adhesion. This product excels in high-impact areas where stone chips and road debris constantly assault the undercarriage.
Value for Money: At $9.99 per can ($0.62 per ounce), this is the premium-priced option. However, the 3M brand reputation, asphalt-based durability, and superior sound dampening justify the higher cost for discerning users. The extra ounce per can provides marginally more coverage, while the professional-grade performance can prevent expensive rust repairs. For those prioritizing maximum protection and noise reduction, the investment pays dividends.
Strengths and Weaknesses: Strengths include exceptional sound deadening, superior abrasion resistance, trusted 3M quality, versatile application areas, and excellent corrosion protection. The asphalt base creates a thick, durable shield. Weaknesses include the highest price per ounce, potentially messier application than rubberized formulas, and unspecified drying time. The black asphalt finish may be too thick for some applications, and overspray requires careful masking.
Bottom Line: For maximum undercarriage protection and noise reduction, the 3M Professional Grade Undercoating is worth the premium. It’s ideal for harsh climates and heavy-duty vehicles where superior durability is essential.
4. Rust-Oleum Black Undercoating 15 oz. (12 Pack)

Overview: The Rust-Oleum Black Undercoating 15 oz. (12 Pack) is designed for serious DIY enthusiasts and professional users tackling large-scale rust prevention projects. This bulk offering provides a dozen cans of Rust-Oleum’s reliable undercoating formula, making it ideal for complete vehicle restorations, fleet maintenance, or multiple vehicle applications without the need for frequent resupply.
What Makes It Stand Out: The primary advantage is the exceptional bulk pricing at $0.45 per ounce—the lowest cost in this comparison. This represents significant savings over individual can purchases. The 12-pack ensures consistent product batch quality across large projects, eliminating color or formulation variations. For professional shops or collectors maintaining multiple vehicles, having ample supply on hand streamlines workflow and reduces per-project costs substantially.
Value for Money: At $81.81 for twelve 15-ounce cans, the value proposition is undeniable for large projects. The per-ounce savings of $0.10-$0.17 compared to single cans adds up quickly, saving over $15 per dozen cans versus premium competitors. While the upfront investment is higher, the cost per application drops dramatically, making professional-grade protection economical for extensive underbody work. This is the smartest financial choice for high-volume users.
Strengths and Weaknesses: Strengths include lowest per-ounce cost, bulk convenience, consistent product quality across large jobs, and significant savings for multiple vehicles. The familiar Rust-Oleum performance ensures reliable protection. Weaknesses include the lack of specified features (likely standard grade), large upfront cost, and storage requirements for 12 cans. Not ideal for single-vehicle users or small touch-up jobs, as unused cans may degrade over time.
Bottom Line: For professionals or owners of multiple vehicles, this 12-pack offers unbeatable value. The substantial bulk discount makes comprehensive undercoating projects economically feasible while maintaining quality protection.
5. Rust-Oleum 248656-6PK Stops Rust Professional Grade Undercoating Spray Paint, 15 oz, Rubberized Black, 6 Pack

Overview: The Rust-Oleum 248656-6PK Stops Rust Professional Grade Undercoating Spray Paint provides a convenient middle ground between single-can purchases and bulk orders. This six-pack contains the same professional-grade 248656 formula trusted for superior underbody protection, packaged for serious DIY enthusiasts tackling multiple vehicles or extensive restoration projects.
What Makes It Stand Out: This offering combines the proven professional-grade rubberized formula with sensible multi-pack savings. Users get the same superior corrosion protection, one-hour drying time, 10-15 square foot coverage, and any-angle spray technology as the single can version, but with the convenience of having multiple cans ready for larger projects. The six-pack quantity perfectly suits complete single-vehicle undercoating plus touch-ups or two smaller vehicles.
Value for Money: At $49.62 for six cans ($0.55 per ounce), the per-ounce cost matches the single-can price, offering convenience without bulk discount. While not cheaper per unit than individual purchases, it eliminates multiple store trips and ensures batch consistency. For projects requiring 4-6 cans, it’s more convenient than buying separately. However, the 12-pack offers better true bulk savings for larger needs.
Strengths and Weaknesses: Strengths include professional-grade formula, convenient six-pack quantity for medium projects, any-angle spray technology, effective sound deadening, and reliable Rust-Oleum quality. Having multiple cans ensures color consistency. Weaknesses include no per-ounce savings compared to single cans, potential waste if fewer cans are needed, and storage requirements. The price point is less attractive than the 12-pack for truly large projects.
Bottom Line: This six-pack is ideal for dedicated DIYers working on one to two vehicles. It offers the right balance of convenience and quantity for comprehensive underbody protection projects without the commitment of a full dozen cans.
6. Bondo 737 Heavy Duty Rubberized Undercoating Spray – 18 oz Aerosol, 5-Pack, Textured Finish, Chip and Abrasion Resistant, Non-Paintable, Asphalt-Based
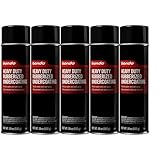
Overview: The Bondo 737 Heavy Duty Rubberized Undercoating Spray arrives as a five-pack of 18-ounce aerosols, delivering professional-grade protection through an asphalt-based formula. This non-paintable coating creates a durable textured finish designed to withstand severe chipping, abrasion, and weathering. Engineered for single-coat application, it effectively seals undercarriages, wheel wells, and even non-automotive surfaces like roof gutters and tree wounds while providing sound-deadening benefits.
What Makes It Stand Out: The single-coat application sets this product apart, eliminating common issues like dripping and sagging while saving significant time. Its versatility extends beyond typical vehicle undercoating to agricultural and home applications. The heavy-duty formulation creates a genuinely rugged textured finish that professional shops trust for lasting protection against road salt and debris.
Value for Money: At $89.99 for 90 total ounces, the per-ounce cost is approximately $1.00—competitive with premium single cans while offering bulk convenience. For restoration shops or owners of multiple vehicles, this five-pack eliminates repeated store trips. However, casual DIYers with one project may find the upfront investment steep compared to single-can alternatives.
Strengths and Weaknesses: Strengths include exceptional durability, true single-coat coverage, versatile application, and professional-grade chip resistance. The asphalt base provides superior adhesion. Weaknesses center on its non-paintable nature, limiting customization options. The aerosol format, while convenient, raises environmental concerns and requires careful masking. The initial cost may deter small-project users.
Bottom Line: Ideal for professionals and serious enthusiasts undertaking multiple projects, this bulk pack delivers uncompromising protection where paintability isn’t required. For single-vehicle owners, consider smaller quantities.
7. U-POL Undercoating Spray, Vehicle Protection Spray with Textured Finish & Anti-Rust Technology, Black, 15 oz

Overview: The U-POL Undercoating Spray offers a 15-ounce solution from a world leader in automotive refinishing. This premium black coating delivers textured protection through an advanced anti-rust formula suitable for prepared metals, primed surfaces, aluminum, rigid plastics, and fiberglass. Designed for both professional and DIY applications, it provides a protective barrier against stone chips and corrosion while offering sound-deadening properties.
What Makes It Stand Out: U-POL’s reputation as an industry leader instills confidence, while the anti-clog spray nozzle technology ensures consistent application—a common frustration with competitor aerosols. Crucially, this formula remains paintable, allowing custom color matching over the undercoating. The comprehensive substrate compatibility makes it exceptionally versatile across restoration projects.
Value for Money: Priced at $14.99 for a 15-ounce can, this represents a mid-tier investment of roughly $1.00 per ounce. It’s accessible for budget-conscious DIYers tackling wheel wells or touch-ups without committing to bulk quantities. While larger projects require multiple cans, the quality justifies the premium over discount brands that often clog or deliver inconsistent texture.
Strengths and Weaknesses: Strengths include the reputable brand heritage, paintable finish, anti-clog nozzle, broad surface compatibility, and clear application instructions emphasizing proper preparation. Weaknesses involve the mandatory surface preparation—sanding and degreasing—which adds time and effort. Single-can quantity proves insufficient for complete underbody coverage, and the textured finish may not match all OEM specifications.
Bottom Line: An excellent choice for discerning DIYers and professionals seeking reliable, paintable protection on smaller areas. For full underbody jobs, purchase multiple cans and invest in thorough prep work.
8. Custom Shop Barrier Bond Black Rubberized Undercoating Sound Deadener - Gallon

Overview: The Custom Shop Barrier Bond Rubberized Undercoating Sound Deadener comes in a professional-grade gallon container designed specifically for body shop environments. This fast-drying, high-build formula creates a paintable, OEM-matching textured finish that provides comprehensive protection against stone chips, abrasion, and corrosion while delivering significant sound-deadening benefits. The 50-state VOC compliance ensures regulatory adherence across all markets.
What Makes It Stand Out: The high-build characteristic allows for substantial thickness in fewer coats, replicating factory undercoating textures with remarkable accuracy. Its formulation prioritizes body shop efficiency with rapid drying times that accelerate workflow. The sheer volume and professional orientation distinguish it from consumer aerosols, while the VOC compliance demonstrates environmental responsibility without performance compromise.
Value for Money: At $99.99 for 128 ounces, the per-ounce cost is approximately $0.78—substantially more economical than aerosol alternatives for large-scale projects. However, the required Schutz spray gun represents an additional investment that casual users must factor in. For restoration shops or enthusiasts undertaking complete vehicle undercoating, the gallon quantity eliminates frequent reordering.
Strengths and Weaknesses: Strengths include professional volume, authentic OEM texture replication, paintability, rapid drying, excellent chip resistance, and nationwide compliance. The high-build formula provides superior coverage. Weaknesses center on equipment requirements, making it impractical for occasional users without a spray gun. The upfront cost and learning curve present barriers for novices, and storage requires proper sealing to prevent skinning.
Bottom Line: Perfect for professional body shops and serious DIYers equipped with Schutz guns. Delivers authentic factory finishes economically, but skip if you lack spray equipment or only need spot treatments.
9. Custom Shop Barrier Bond - No-Drip Undercoating, 1 Gallon, Premium Rust Inhibitor, Rust Prevention Coating, Undercoating for Vehicles
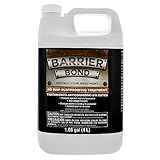
Overview: The Custom Shop Barrier Bond No-Drip Undercoating offers a unique gallon-sized approach to rust prevention through a deep-penetrating, non-drying formula. This silicone-free rust inhibitor flows into seams via capillary action, protecting hard-to-reach areas that traditional coatings miss. It deposits a translucent, water-displacing corrosion-resistant film designed to resist washout and gumming under extreme humidity and temperature conditions.
What Makes It Stand Out: The non-drying, self-healing characteristic ensures continuous protection even if the surface is scratched. Its ability to creep into hidden seams provides comprehensive coverage impossible with surface-only coatings. The silicone-free formulation safely interacts with most plastics and existing coatings, while the water displacement actively repels moisture rather than merely sealing it out.
Value for Money: At $42.99 for 128 ounces, this represents exceptional value at roughly $0.34 per ounce—among the most economical professional-grade undercoatings available. The gallon quantity treats multiple vehicles or allows annual reapplication for years. While requiring an undercoating gun, the low price point offsets equipment costs quickly for regular users.
Strengths and Weaknesses: Strengths include unbeatable price-per-ounce, superior penetration into seams, silicone-free safety, excellent water displacement, and resistance to washout. The non-drying formula maintains flexibility. Weaknesses involve the messy application process and translucent finish that lacks aesthetic appeal. It remains tacky, attracting dirt, and requires six hours before moisture exposure. The non-drying nature may not suit visible areas.
Bottom Line: Outstanding value for comprehensive rust prevention in hidden underbody areas. Ideal for winter vehicle preparation and maintenance, but choose a drying formula for visible components requiring a clean appearance.
10. Barrier Bond - Rubberized Undercoating Sound Deadener Kit, 28oz 4-Pack, Black Spray, Vehicle Undercoating, with Spray Gun
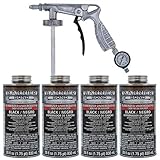
Overview: The Barrier Bond Rubberized Undercoating Sound Deadener Kit provides a complete DIY solution with four 28-ounce cans and an included spray applicator gun. This ready-to-spray system delivers a paintable, fast-drying textured finish specifically formulated for vehicle undercoating. The 50-state VOC compliance ensures environmental legality nationwide, while the sound-deadening properties enhance cabin comfort by reducing road noise transmission.
What Makes It Stand Out: The all-in-one kit eliminates guesswork and separate equipment purchases, making professional results accessible to novices. The included spray gun, typically a $20-30 accessory, adds immediate value. The paintable formulation allows color customization, while the fast-drying characteristic reduces project time. The four-can quantity strikes a balance between bulk economy and manageable batch sizes.
Value for Money: At $114.99 for 112 ounces, the per-ounce cost is approximately $1.03—competitive with aerosols but higher than bulk gallons. However, factoring in the included spray gun and convenience factor, the value proposition strengthens for DIYers without existing equipment. It avoids the $40-60 investment in a separate Schutz gun while providing sufficient material for a complete car or light truck undercoating.
Strengths and Weaknesses: Strengths include the complete kit convenience, paintability, rapid drying, VOC compliance, and adequate quantity for most vehicles. The spray gun enables professional application patterns. Weaknesses involve a higher per-ounce cost than bulk gallons and potentially basic gun quality compared to professional models. The 28-ounce cans may prove awkward for some users, and coverage might be tight for full-size trucks.
Bottom Line: The perfect entry point for DIY enthusiasts seeking professional application without separate equipment purchases. Delivers excellent results with convenience, though volume buyers should consider gallon options for future projects.
What Is Asphalt Undercoating and Why Your Vehicle Needs It
Asphalt undercoating is a protective barrier formulated from bitumen—a sticky, viscous petroleum derivative—combined with various additives that create a durable, water-resistant shield for your vehicle’s undercarriage. Unlike paint or thin rust inhibitors, asphalt-based products cure into a thick, rubberized membrane that physically blocks moisture, salt, and oxygen from reaching metal surfaces.
The science is straightforward: corrosion requires three elements—iron, oxygen, and water. Remove any one, and the chemical reaction halts. Asphalt undercoating eliminates water and oxygen contact, essentially putting your frame and components into a protective cocoon. For vehicles operating in salt-belt states, coastal regions with salt air, or areas with heavy road chemical usage, this isn’t optional luxury—it’s essential preservation.
Brush-On vs. Spray-On: Understanding the Application Methods
The debate between application methods often misses the point: neither is universally superior. Each serves different purposes, and understanding their distinct advantages helps you make the strategic choice for your specific project.
The Precision Advantage of Brush Application
Brush-on application transforms you into a surgeon of rust prevention. You’re not broadcasting material across broad surfaces hoping for coverage; you’re deliberately placing protection exactly where vulnerability lives. Weld seams, spot welds, boxed frame sections, and complex bracketry—these critical areas demand the accuracy only a brush provides. You can work material into corners, ensure pinholes don’t exist, and build thickness strategically in high-risk zones.
When Brush-On Makes More Sense
Brush application dominates in specific scenarios: restoration projects requiring meticulous detail work, touch-up applications where spray would create overspray nightmares, vehicles with existing undercoating that needs patching, or garage environments where ventilation limits aerosol use. It also excels when you’re working on a budget, as brush-on products typically offer more coverage per dollar and eliminate the need for expensive spray equipment.
Key Ingredients: What Makes Quality Asphalt Undercoating
Not all asphalt undercoating formulations share the same DNA. Understanding the component hierarchy helps you identify products that will perform for years rather than months.
Bitumen Content and Grade
Premium formulations utilize oxidized bitumen with specific penetration grades—typically 85/25 or 90/40 in industrial specifications. These numbers indicate hardness and flexibility at various temperatures. Lower-grade bitumen creates a harder, more brittle coating prone to cracking; higher-grade formulations remain pliable through freeze-thaw cycles. Quality products contain 40-60% bitumen by volume, providing substantial film build without excessive solvent.
Additives That Enhance Performance
Look beyond simple bitumen-solvent mixtures. Modern formulations incorporate rubberized polymers (often SBR or neoprene) that improve flexibility and impact resistance. Corrosion inhibitors like zinc phosphate or barium sulfate actively neutralize rust formation at the molecular level. Fibrous reinforcement—cellulose or mineral fibers—prevents sagging on vertical surfaces and adds mechanical strength. The best products also include UV stabilizers, though this matters less for undercarriage applications than for visible areas.
Solvent vs. Water-Based Formulations
Traditional solvent-based products offer superior penetration into existing rust and adhesion to oily surfaces, but they demand strict ventilation and have longer VOC off-gassing periods. Water-based formulations have improved dramatically, offering easier cleanup and environmental compliance, but they require pristine surface preparation and struggle with cold-weather application. For brush-on use, solvent-based typically provides better workability and self-leveling characteristics.
Essential Features to Evaluate Before Buying
When standing in the aisle or scrolling through product listings, focus on these non-negotiable characteristics:
Solids Content by Volume: This percentage reveals how much material remains after curing. Premium brush-on products range from 60-75% solids, meaning you’re applying actual protective material, not mostly solvent that evaporates. Higher solids translate to fewer coats needed and better value.
Application Temperature Range: Quality products specify a working window, typically 50-90°F. This matters because too cold and the material won’t flow; too hot and solvents flash off before proper leveling occurs. Some advanced formulations extend this range, crucial for garage warriors in variable climates.
Flexibility Rating: Look for elongation-at-break specifications. Products with 200-400% flexibility ratings maintain integrity as your frame flexes during normal driving. Brittle coatings crack, creating entry points for moisture.
Dry Time and Recoat Window: Fast dry times seem appealing but can indicate high solvent content and low solids. Ideal products skin over in 2-4 hours and allow recoating within 12-24 hours, balancing workflow efficiency with proper curing chemistry.
Surface Preparation: The Foundation of Success
The most expensive undercoating in the world fails miserably on a poorly prepared surface. This step determines 80% of your success.
Cleaning Protocols That Actually Work
Start with pressure washing at 2000+ PSI to remove loose scale, mud, and road grime. Follow with a degreaser specifically formulated for automotive undercarriages—simple green cleaners often leave residues that interfere with adhesion. For vehicles with existing factory undercoating, carefully remove loose, flaking material with a wire brush or scraper. Never apply new coating over unstable existing material.
Rust Treatment Strategies
Light surface rust (flash rust) can be treated with phosphoric acid-based converters that chemically transform iron oxide into stable iron phosphate. Heavy scaling requires mechanical removal—wire wheel on an angle grinder, followed by rust converter. Pitted rust needs filling with epoxy-based rust encapsulator before undercoating application. The key principle: undercoating seals; it doesn’t reverse existing corrosion.
Masking and Protection Techniques
Use heavy-duty foil tape to mask off brake lines, suspension bushings, exhaust components, and drivetrain parts. These areas need to remain uncoated for functional and heat reasons. Cover wheels and tires with contractor bags secured by tape. Remove or protect rubberized factory undercoating that remains sound—new asphalt won’t bond well to old rubberized coatings.
Application Techniques for Professional Results
Mastering brush application separates weekend warriors from craftsmen. The technique matters as much as the product quality.
Tools That Make a Difference
Use natural bristle brushes for solvent-based products—synthetic bristles can dissolve and shed. A 2-3 inch chip brush works for detail work, while a 4-inch sash brush covers broad sections efficiently. For textured surfaces, consider a stiff stencil brush to work material into crevices. Keep mineral spirits handy for cleaning tools between coats.
The Ideal Temperature Window
Apply when ambient temperature sits between 60-80°F with humidity below 70%. Cold metal draws heat from the coating, preventing proper flow and adhesion. Warm the product can in a bucket of warm water (never open flame) to improve viscosity if working in cooler conditions. Avoid direct sunlight on the application area—hot surfaces cause solvents to flash too quickly.
Layering Strategies for Maximum Protection
Apply the first coat thin, working material into seams and crevices. This “wetting coat” should be almost translucent. Let it tack up for 30-60 minutes, then apply a second, heavier coat at 15-20 mils wet thickness. For extreme environments, a third coat on high-risk areas (rocker panels, wheel wells) provides insurance. Always brush in multiple directions—horizontal, vertical, diagonal—to eliminate pinholes and ensure complete coverage.
Common Application Mistakes That Ruin Your Effort
Even seasoned DIYers fall into these traps. Avoid them, and your work lasts years instead of months.
Over-application in a single coat: Thick coats skin over while remaining liquid underneath, leading to solvent entrapment and eventual cracking. Multiple thin coats always outperform one heavy coat.
Insufficient flash time between coats: Rushing the process prevents proper intercoat adhesion. Wait until the previous coat is tacky but not wet to the touch—typically 4-6 hours in ideal conditions.
Ignoring hidden cavities: The inside of boxed frame sections, rocker panels, and door bottoms are where rust starts. Use a bendable brush or extension wand to reach these areas. If you can’t see it, you must feel your way to coverage.
Coating hot components: Applying near exhaust systems or catalytic converters causes immediate solvent flashing and poor adhesion. Always mask off areas that exceed 200°F during normal operation.
Curing and Drying: What to Expect
Understanding the curing timeline prevents premature damage to your fresh work. The initial skin forms within 2-6 hours depending on temperature and thickness. Light touch is possible after 24 hours, but full cure requires 7-14 days.
During this period, avoid driving through standing water, heavy rain, or car washes. The coating remains vulnerable to solvent washout and mechanical damage until fully cured. Park the vehicle in a well-ventilated area—garage with door open or covered carport. You’ll notice a solvent smell for 3-5 days; this is normal off-gassing.
Full chemical cure occurs when all solvents have evaporated and the bitumen has oxidized to its final hardness. Test by pressing your thumbnail into an inconspicuous area—properly cured coating resists indentation and feels firm yet pliable.
Longevity and Performance Factors
A properly applied brush-on asphalt undercoating typically protects for 3-5 years in severe conditions, potentially longer in milder climates. Several variables impact this timeline:
Driving environment: Daily exposure to salt slurry in winter months accelerates degradation. Vehicles seeing occasional fair-weather use maintain coating integrity much longer.
Mechanical abrasion: Off-road use, gravel roads, and aggressive driving kick up debris that sandblasts the coating. Regular inspection and touch-up of abraded areas extends overall protection.
Original application thickness: Achieving the manufacturer’s recommended dry film thickness (typically 20-30 mils) is critical. Too thin, and protection fails prematurely; too thick, and cracking occurs.
Substrate condition: Coating applied over stable, prepared metal outlasts coating applied over questionable substrates by years.
Maintenance and Touch-Up Strategies
Protection isn’t a one-and-done affair. Implement a seasonal inspection routine—spring and fall—to catch issues before they escalate.
During inspection, look for cracking, flaking, or thinning in high-abrasion zones. Use a wire brush to remove loose material, clean the area with brake cleaner, and apply a thin tie-coat of fresh material extending 2-3 inches beyond the repair area. For small chips, a touch-up brush and leftover product from the original application suffice.
Pressure wash the undercarriage periodically, but avoid direct high-pressure spray on the coating itself. Use a 45-degree angle and keep the nozzle at least 12 inches away. This removes road grime without mechanically damaging the protective layer.
Safety Protocols You Can’t Ignore
Asphalt undercoating contains solvents and chemicals that demand respect. Shortcuts here risk acute health issues and long-term consequences.
Ventilation Requirements
Solvent vapors are heavier than air and accumulate in low areas. Work with garage doors fully open and use box fans to create cross-ventilation. If you experience headaches, dizziness, or nausea, exit immediately. The “sweet smell” is your nervous system being affected—take it seriously.
Personal Protective Equipment Essentials
Nitrile gloves (not latex) protect your skin from solvent absorption. A NIOSH-approved respirator with organic vapor cartridges is non-negotiable—dust masks provide zero protection. Safety glasses prevent splashes, and disposable coveralls keep solvents off your clothing, where they’d continue off-gassing against your skin.
Disposal and Environmental Responsibility
Never pour leftover product or cleaning solvents down drains or onto soil. Cure waste material by spreading it thin on cardboard until solid, then dispose of it with household trash. Take liquid solvents to hazardous waste collection events. Check local regulations—some areas restrict VOC content and require specific disposal methods.
Cost Analysis: Getting Value Without Compromise
Brush-on asphalt undercoating typically costs $30-60 per gallon, with most passenger vehicles requiring 1-2 gallons for complete coverage. Compare this to professional application at $150-400, and the DIY savings are clear.
However, factor in ancillary costs: surface preparation tools ($50-100), PPE ($40-60), cleaning solvents ($15-25), and your time (6-10 hours for a thorough job). The real value emerges when you maintain the vehicle long-term—subsequent applications require only cleaning and recoat, slashing future time investment by 60%.
Cheaper products often contain more solvent and less bitumen, requiring additional coats and ultimately costing more per mil of protection. Calculate cost per dry mil of thickness, not per gallon, for accurate comparison.
Environmental and Regulatory Considerations
VOC regulations vary dramatically by state. California’s SCAQMD rules limit VOC content to 340 grams per liter for undercoatings, while other states follow EPA’s 450 g/L standard. Using non-compliant products in regulated areas can result in fines and contributes to air quality issues.
Water-based formulations offer lower VOC profiles but trade off some performance characteristics. Consider your local climate and environmental priorities. If you live in a mild climate with minimal salt use, water-based may suffice. For salt-belt warriors, maximum protection often trumps marginal environmental benefits—focus instead on proper disposal and minimal waste.
DIY vs. Professional Application: Making the Right Choice
Professional shops offer advantages: heated application bays, industrial-grade surface prep equipment, and experience. They can apply material more quickly and often warranty their work. However, they typically use spray equipment that can’t match the precision of your brush in complex areas.
DIY brush-on application gives you complete control, costs significantly less, and provides the satisfaction of personal involvement. You can take extra time on problem areas, apply additional coats where you deem necessary, and touch up easily in the future. The downside is time investment and the learning curve.
Choose DIY if you have patience, basic mechanical aptitude, and a suitable workspace. Opt for professional if you’re time-constrained, lack ventilation, or own a high-value vehicle where perfection is paramount.
Troubleshooting Common Issues
Bubbling during application: Usually indicates surface contamination—oil, moisture, or incompatible existing coating. Stop immediately, let the area dry, clean with solvent, and start over.
Failure to cure after 48 hours: Excessive thickness or cold temperatures are typical culprits. Gently warm the area with a heat gun on low setting (keep moving, never concentrate heat) to accelerate solvent release.
Peeling or flaking within months: Inadequate surface prep is the almost universal cause. The coating can’t bond to loose rust, oil, or unstable existing material. Prevention beats remediation here.
Cracking in flexible areas: Product too brittle for the application. Next time, choose a more flexible formulation or apply thinner coats. Current damage requires removal and reapplication.
Seasonal Application Timing for Optimal Results
Timing your application maximizes both working conditions and immediate protection benefit.
Late spring (May-June) offers ideal temperatures and precedes summer road construction season where fresh tar and debris assault your undercarriage. The coating cures fully before winter’s salt onslaught.
Early fall (September-October) provides another temperature window and positions your vehicle with fresh protection before the first salt application. Avoid late fall applications—unexpected cold snaps can trap solvents.
Never apply within 48 hours of predicted rain, and avoid humid days above 70% relative humidity. Morning applications often work best, giving the product the full day to flash off solvents before evening dew.
Frequently Asked Questions
How long does brush-on asphalt undercoating typically last before needing reapplication?
In severe salt-belt conditions with daily winter driving, expect 3-4 years of solid protection. In milder climates with fair-weather use, 5-7 years is realistic. Annual inspections will reveal when touch-ups or full reapplication becomes necessary—look for thinning in wheel wells, cracking along seams, or flaking in high-abrasion areas.
Can I apply brush-on undercoating over existing factory undercoating or rubberized coatings?
Only if the existing coating is completely sound and well-adhered. Scuff the surface with 80-grit sandpaper to create mechanical tooth, then clean thoroughly. However, asphalt-based products bond best to other asphalt-based materials. Over rubberized undercoating, use a specialized tie-coat primer or consider removing the old coating for optimal results.
What’s the minimum temperature I can safely apply brush-on undercoating?
Most manufacturers specify 50°F as the absolute minimum, but 60°F is the practical floor for quality results. Below this, the product becomes too viscous to level properly, and curing extends dangerously long. If you must work in cooler conditions, warm the product and the vehicle in a heated space first, and allow extended cure time before exposing to moisture.
How do I remove brush-on asphalt undercoating if I need to make repairs?
Mechanical removal works best—use a heat gun to soften the material, then scrape with a putty knife. For stubborn areas, a wire wheel on an angle grinder removes material quickly. Chemical strippers exist but are messy and environmentally problematic. Always wear a respirator during removal, as heating asphalt releases fumes.
Will brush-on undercoating affect my vehicle’s resale value?
Properly applied, professional-looking undercoating typically increases value for buyers in rust-prone regions. It demonstrates proactive maintenance. However, sloppy application with overspray on components or visible drips can raise concerns about overall care quality. Take your time and mask meticulously to ensure the finished appearance inspires confidence, not doubt.
Can I paint over asphalt undercoating if I want a different color?
Standard automotive paint won’t adhere well to asphalt’s oily, flexible surface. If color matching matters (for frame sections visible through wheel wells), use a specialized chassis paint formulated for rubberized surfaces, or apply the asphalt undercoating only to hidden areas and use a different protective system for visible components.
How do I handle undercoating inside boxed frame sections and other hidden cavities?
These areas are rust’s favorite hiding spots. Use a bendable extension wand with a brush head, or an undercoating wand with a brush tip. Work blind by feel, applying thin coats in multiple directions. Some enthusiasts drill small 1/4-inch access holes in boxed sections (which they later seal) to ensure complete coverage. Consider using a cavity wax after undercoating for ultimate protection.
Is brush-on undercoating safe for all vehicle components?
No—never coat exhaust systems, catalytic converters, brake components, rubber bushings, flexible brake lines, or drivetrain/U-joint areas. Heat from exhausts can ignite solvents and cause coating failure. Brake components must remain free of any contamination. Mask these areas meticulously before starting. Aluminum and galvanized surfaces also require specialized prep for proper adhesion.
How much product should I buy for a typical sedan or SUV?
A mid-size sedan typically requires 1 to 1.5 gallons for complete coverage including wheel wells and frame sections. SUVs and trucks with larger surface areas and boxed frames need 2-3 gallons. It’s better to have slightly extra than to run short mid-application. Unopened cans store for several years in a cool, dry location, making leftover product valuable for future touch-ups.
Can I apply brush-on undercoating to a vehicle that’s already showing significant rust?
Yes, but with critical caveats. Undercoating seals in existing conditions—it doesn’t reverse rust. For heavy scale, you must mechanically remove loose material, treat with rust converter, and ideally apply an epoxy encapsulator first. Undercoating over active rust simply entombs the problem, which continues deteriorating underneath. Be honest about the substrate condition; sometimes replacement of severely rusted sections is the only proper solution.