That tiny star-shaped chip in your windshield might seem harmless now, but every bump in the road and temperature swing is working against you. What starts as a minor blemish can spiderweb into a costly replacement overnight. Fortunately, UV curing technology has revolutionized DIY windshield repair, putting professional-grade results within reach of any garage tinkerer. These innovative kits don’t just fill cracks—they chemically bond them, restoring structural integrity and optical clarity that was once only possible in a shop setting.
Understanding how these systems work and what separates a quality kit from a disappointing gimmick is crucial before you invest your time and money. The market is flooded with options promising miracle cures, but the science behind effective windshield repair is surprisingly specific. Let’s dive deep into everything you need to know about selecting and using windshield repair kits with UV curing lights, ensuring your next repair is your last.
Top 10 Windshield Repair Kit
Detailed Product Reviews
1. Rain-X 600001 Windshield Repair Kit - Quick and Easy Durable Resin Based Windshield Repair Kit for Chips and Cracks, Good for Round Damage Below 1" in Diameter and Cracks Smaller Than 12" in Length

Overview: The Rain-X 600001 Windshield Repair Kit provides an accessible DIY solution for minor glass damage at $11.49. Designed for universal fit, it targets chips smaller than 1 inch and cracks under 12 inches using a durable resin formula. The kit includes all components necessary for multiple repairs, making it a cost-effective alternative to professional services that typically cost ten times more.
What Makes It Stand Out: This kit distinguishes itself through Rain-X’s automotive expertise and emphasis on preventative action. The durable resin formula claims to strengthen windshields beyond their original condition, while the straightforward application process takes mere minutes. Unusually detailed pro-tips warn against common mistakes like applying resin too quickly or repairing contaminated cracks, demonstrating the brand’s commitment to user education despite the low price point.
Value for Money: At $11.49, this kit offers remarkable value, especially considering it supports multiple repairs. Professional windshield repair services start around $60-$100, making this a fraction of the cost. The resin-based system requires no additional equipment or expensive curing lights, keeping the total investment minimal for effective results.
Strengths and Weaknesses: Strengths: Trusted brand recognition; highly affordable price point; complete kit with all necessary tools; suitable for multiple applications; clear, detailed instructions with professional tips. Weaknesses: Limited to relatively small damage areas; requires direct sunlight for proper curing; results heavily dependent on precise user technique; cannot salvage cracks that have become contaminated with moisture or debris.
Bottom Line: The Rain-X 600001 is an excellent choice for budget-conscious drivers facing minor windshield damage. While it demands careful application, it delivers reliable results that can prevent costly replacements when used immediately after damage occurs.
2. Permatex 09103 Automotive Windshield Repair Kit For Chipped And Cracked Windshields. Permanent Air-Tight Repairs, With Repair Syringe & Plunger, 9-piece Kit

Overview: The Permatex 09103 kit positions itself as a professional-grade solution for bullseye damage up to 1.25 inches, priced at $14.18. This nine-piece system emphasizes permanent, air-tight repairs on laminated windshield glass without requiring mixing or complex preparation. The kit includes a sophisticated syringe and plunger delivery system designed for mess-free application.
What Makes It Stand Out: Permatex’s state-of-the-art spring-lock delivery mechanism sets it apart from basic kits, allowing precise resin placement with professional control. The daylight-curing process eliminates the need for UV lights or direct sunlight dependency. Comprehensive photographic instructions guide users through each step, making advanced techniques accessible to novices while delivering results that rival professional shops.
Value for Money: At $14.18, this kit costs slightly more than entry-level options but justifies the premium through its upgraded application system and larger repair capacity. The ability to fix bullseyes up to 1.25 inches (versus the typical 1-inch limit) expands its utility, potentially saving users from a $200+ windshield replacement.
Strengths and Weaknesses: Strengths: Advanced spring-lock syringe for professional results; no mixing required; cures with natural daylight; handles larger bullseye damage; excellent instructional materials. Weaknesses: Specialized primarily for bullseye-type damage; slightly higher price point; nine pieces may overwhelm absolute beginners; limited effectiveness on star-shaped or linear cracks.
Bottom Line: The Permatex 09103 is ideal for DIY enthusiasts seeking professional-quality results without the professional price tag. Its superior delivery system and larger repair capacity make it worth the modest premium over basic kits.
3. Juxiamal Car Windshield Washer Hose Kit, 3 Meters Universal Windscreen Hose with 30 PCS Connectors for Connecting Car Water Pumps and Nozzles

Overview: The Juxiamal Washer Hose Kit serves a different automotive need, providing 3 meters of high-quality rubber hose and 30 assorted connectors for $8.29. This universal kit enables replacement of aging washer fluid lines, ensuring proper connectivity between water pumps and windshield nozzles. The versatile design accommodates various vehicle configurations with I-type, Y-type, and T-type plastic connectors.
What Makes It Stand Out: Unlike repair kits, this maintenance solution offers exceptional versatility with its three connector types and customizable length. The durable rubber construction withstands under-hood temperatures and chemical exposure from washer fluid. Its unexpected dual-purpose design for garden irrigation demonstrates remarkable value beyond automotive applications, making it a multi-functional household tool.
Value for Money: At $8.29 for 3 meters of hose plus 30 connectors, this kit delivers outstanding value. Individual replacement hoses at auto parts stores often cost $5-$10 for pre-cut lengths with limited connectors. The ability to custom-fit any vehicle configuration while receiving surplus connectors for future use or other projects maximizes return on investment.
Strengths and Weaknesses: Strengths: Complete kit with multiple connector types; high-quality flexible rubber; customizable length; universal compatibility; excellent value with 30 connectors; versatile for non-automotive use. Weaknesses: Requires size verification before purchase; not a repair kit (addresses different problem); connectors are plastic rather than more durable metal; may need additional clamps for secure installation.
Bottom Line: For DIY mechanics dealing with clogged or cracked washer hoses, the Juxiamal kit provides a comprehensive, cost-effective solution. Its versatility and generous component count make it a smart addition to any automotive maintenance supplies.
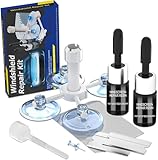
4. BLUTOKS Windshield Repair Kit, 2 PCS Windshield Crack Repair Kit with Suction Cup Curing Light, Automotive Nano Fluid Vehicle Windscreen Tool, Glass Repair Kit for Chips and Cracks (Navy)

Overview: The BLUTOKS Windshield Repair Kit represents the premium DIY option at $16.99, featuring advanced vacuum technology and UV curing capabilities. This two-piece set includes a 20PA vacuum holder that creates an airtight seal to force resin deep into damage, plus a UV curing light for rapid 5-10 minute repairs. It handles chips, cracks, spiderwebs, and scratches up to 12 inches.
What Makes It Stand Out: The powerful 20PA vacuum technology prevents air bubble formation—a common failure point in basic kits—ensuring resin penetrates completely. The included UV curing light with timer settings eliminates weather dependency, allowing repairs in any conditions. Its versatility across damage types (star chips, half-moons, long cracks) makes it a comprehensive glass restoration system rather than a simple chip filler.
Value for Money: While priced higher at $16.99, this kit justifies the cost through professional-grade features that typically require $100+ professional services. The two-kit package allows multiple repairs or backup attempts, while the vacuum and UV technology dramatically improve success rates compared to $10-$12 basic kits. For significant damage, it can prevent $300+ windshield replacements.
Strengths and Weaknesses: Strengths: Professional vacuum technology prevents bubbles; UV curing light for consistent results; repairs multiple damage types up to 12 inches; two kits included; near-invisible finish; restores structural integrity. Weaknesses: Highest price among reviewed kits; UV light requires batteries/power; more complex process may intimidate beginners; overkill for tiny chips.
Bottom Line: The BLUTOKS kit is the top choice for serious DIYers facing substantial windshield damage. Its advanced technology and UV curing system deliver professional results that justify the premium price for valuable windshields or extensive repairs.
5. NASILOOP Windshield Repair kit, Quick and Efficiency Glass Repair Fluid, Car Windshield Crack Repair Resin Kit for Fixing Chips, Bulls-Eye, Cracks and Star-Shape Cack-2 Pack

Overview: The NASILOOP Windshield Repair Kit offers a budget-friendly two-pack solution at $9.99, utilizing nano glass repair fluid with a high-speed curing formula. This kit addresses chips, bullseyes, star-shaped cracks, half-moon damage, and cracks up to 12 inches or 1 inch in diameter. The polymer-based resin creates molecular-level bonds for long-term durability.
What Makes It Stand Out: The two-pack configuration provides exceptional value, allowing multiple repairs or practice attempts at a price lower than many single-kit competitors. The nano fluid technology promises rapid chemical cross-linking that restores both structural integrity and aesthetic appearance. Its comprehensive damage coverage rivals premium kits while maintaining an entry-level price point and user-friendly application process.
Value for Money: At $9.99 for two complete kits, this represents the best per-unit value in the market. Each kit costs effectively $5, making it nearly disposable while still claiming professional-grade results. This pricing structure encourages immediate repair of damage rather than postponement, potentially saving hundreds in replacement costs.
Strengths and Weaknesses: Strengths: Unbeatable price for two kits; nano fluid technology; covers extensive damage types; simple step-by-step instructions; rapid curing formula. Weaknesses: Lesser-known brand; lacks advanced features like vacuum or UV curing; results may vary based on technique; limited user reviews compared to established brands; basic tools included.
Bottom Line: The NASILOOP kit is perfect for budget-conscious drivers wanting backup options or multiple vehicle owners. While it lacks premium features, its two-pack value and comprehensive repair claims make it an excellent entry-level choice for common windshield damage.
6. tuncate Windshield Repair Kit for Chips and Cracks– 4 Pack Glass Repair Kit with Enhanced Injection Head for Chips, Cracks & Star-Shaped Cracks, Quick & Easy DIY Fix for Windshields, Black

Overview: The tuncate Windshield Repair Kit offers a comprehensive 4-pack solution for DIY windshield repair, featuring an enhanced injection head and nano-enhanced resin formula. Designed for safety and versatility, this kit promises almost undetectable repairs without mixing or heating, working effectively across extreme temperatures from -4°F to 104°F.
What Makes It Stand Out: This kit’s authoritative safety certification sets it apart—requiring no protective gloves and being child/pet friendly with no pungent odors. The three-dimensional mesh resin structure achieves an impressive 120MPa compressive strength, exceeding ordinary glass by 30%. Its ability to repair multiple crack types—including bull’s eye, star-shaped, and long-line cracks—in just 10 minutes makes it exceptionally practical for emergency situations.
Value for Money: At $9.99 for a 4-pack, this kit delivers outstanding value at approximately $2.50 per repair unit. Compared to professional services costing $50-100 per repair, it pays for itself after the first use. The multi-pack design is ideal for families with multiple vehicles or those prone to frequent road debris damage.
Strengths and Weaknesses: Strengths include certified safety credentials, extreme temperature versatility, high-strength resin formula, and comprehensive 4-pack quantity. The biodegradable resin and 97% light transmittance ensure environmental responsibility and visual clarity. Weaknesses include potential overkill for single-use buyers and uncertain effectiveness on cracks exceeding 12 inches or damage older than six months.
Bottom Line: The tuncate kit excels for safety-conscious DIYers seeking a versatile, environmentally friendly solution for multiple repairs. Its certified non-toxic formula and extreme weather performance make it ideal for families and fleet vehicles, though those needing a single repair might prefer a smaller kit.
7. Windshield Crack Repair Kit,2025 Latest Upgraded Glass Crack Repair Kit,5MinQuick-Glass Repair Liquid,Long-Lasting for Windshields, Windows, Mirrors,All Crack Types Windshield Repair Kit (Black).

Overview: Marketed as a 2025 upgraded model, this windshield repair kit promises 5-minute repairs using high-tech innovation and imported high-transparency resin. The kit extends beyond automotive windshields to windows, mirrors, sunroofs, and even industrial equipment glass, offering exceptional versatility for various laminated glass surfaces.
What Makes It Stand Out: The 5MinQuick repair claim is this kit’s primary differentiator, using advanced multi-layer curing technology for rapid results. Its nano-scale crack injection system maximizes glass integrity restoration. The comprehensive damage coverage—including bull’s eye, star-shaped, radial, and reticular cracks—combined with multi-surface adaptability makes it uniquely flexible compared to windshield-only competitors.
Value for Money: Priced at $9.68, this kit sits in the budget-friendly segment while offering premium features like imported resin materials and multi-surface compatibility. The ability to repair multiple glass types effectively provides value beyond typical single-purpose kits, making it economical for households with diverse glass repair needs.
Strengths and Weaknesses: Strengths include rapid 5-minute curing, versatile application across multiple glass surfaces, advanced curing technology, and imported high-transparency resin. The no-disassembly requirement simplifies DIY execution. Weaknesses involve marketing-heavy “2025” branding that lacks substantiation, potential over-promising on deep crack restoration, and limited included accessories compared to more comprehensive kits.
Bottom Line: This kit suits DIYers needing quick, versatile glass repairs beyond just windshields. While the “2025 upgraded” claim is speculative marketing, the actual performance on minor to moderate damage appears solid. It’s ideal for those prioritizing speed and multi-surface functionality over specialized windshield-only solutions.
8. Brennenstuhl Windshield Repair Kit, Windshield Crack Repair Kit, 2 Bottles Car Windshield Chip Repair Kit Quick Fix for Rock Chip Repair Kit Windshield Chips, Cracks, Star-Shaped Crack (Blue)
Overview: The Brennenstuhl Windshield Repair Kit provides a professional-grade solution with two bottles of repair resin and comprehensive accessories. Designed to handle chips up to 12 inches long and round damages up to one inch, this kit targets DIY enthusiasts and professionals alike with its user-friendly operation and promise of near-new restoration.
What Makes It Stand Out: This kit emphasizes accessibility for all skill levels, explicitly mentioning suitability for beginners. The complete package includes two resin bottles, blades, five curing strips, and a syringe thruster repair device. Its specially formulated liquid offers long-lasting protection by reinforcing damaged areas and preventing future deterioration, focusing on durability rather than just cosmetic improvement.
Value for Money: At $12.99, the kit offers reasonable value with two resin bottles and a full toolset. While pricier than single-bottle alternatives, the additional accessories and repair capacity up to 12 inches justify the cost. The professional-quality results potential makes it cost-effective compared to $100+ professional repairs.
Strengths and Weaknesses: Strengths include a complete accessory package, 12-inch repair capability, long-lasting protective formula, and clear instructions for all skill levels. The dual-bottle quantity allows for multiple repairs. Weaknesses include a longer 20-minute repair time versus competitors’ 5-10 minute claims and outdated gendered marketing language. The kit may lack advanced features like UV curing lights found in premium options.
Bottom Line: The Brennenstuhl kit excels for DIYers wanting professional tools without professional prices. Its comprehensive accessories and emphasis on long-term protection make it ideal for those tackling multiple repairs or larger chips. While the curing time is slower and marketing language dated, the kit’s substance and completeness deliver solid value for serious DIY auto maintenance.
9. J-B Weld 2100 Windshield Saver Repair Kit, 0.025 fl. oz

Overview: J-B Weld’s Windshield Saver Repair Kit brings the trusted brand’s reputation for adhesive excellence to automotive glass repair. This minimalist kit focuses on small damage up to 1-1/4 inches in diameter, offering a straightforward solution for chips and star patterns without complex equipment or extensive DIY experience required.
What Makes It Stand Out: The J-B Weld brand name itself stands out, representing decades of reliable adhesive technology. This kit’s simplicity is its core feature—no elaborate injection systems or curing lights, just a direct application approach that minimizes chip appearance and prevents spreading. Its specialization for laminated windshields ensures targeted effectiveness for the most common automotive glass type.
Value for Money: At $12.95 for 0.025 fluid ounces, the per-ounce cost appears high, but the kit’s value lies in its precision application for minor damage. For single small chip repairs, it’s competitively priced against professional services. However, the extremely limited quantity makes it unsuitable for multiple repairs or larger cracks, reducing overall value for those with extensive damage.
Strengths and Weaknesses: Strengths include J-B Weld’s trusted brand reputation, ease of use for beginners, focused specialization for small damages, and proven prevention of crack spreading. The minimalist design requires no complex setup. Weaknesses are the minuscule resin quantity, limitation to 1.25-inch damages, lack of accessories like curing strips or blades, and absence of advanced features such as UV curing or vacuum injection.
Bottom Line: This kit serves drivers with minor, recent windshield chips who prioritize brand trustworthiness over advanced features. It’s perfect for emergency glove-box storage for small damage. However, those facing larger cracks, multiple chips, or seeking professional-grade restoration should invest in more comprehensive kits with greater resin volume and specialized tools.
10. Windshield Repair Kit, Windshield Crack Repair Kit with Suction Cup Curing Light, 4 Pcs Car Glass Repair Kit Quick Fix for Chips & Cracks, Windshield Chip Repair Kit, Automotive Nano Fluid(Yellow)

Overview: This premium windshield repair kit distinguishes itself with an integrated UV curing light and advanced vacuum technology, promising professional-grade results at home. The 4-piece set handles cracks up to 12 inches using a smart adjustable UV lamp with timer settings, delivering repairs in 5-10 minutes through its 20PA pressure vacuum system for deep resin penetration.
What Makes It Stand Out: The suction cup-mounted UV curing light with multiple modes and timer settings is this kit’s signature feature, eliminating dependency on sunlight and ensuring consistent curing. The upgraded vacuum holder generating 20PA pressure enables superior resin penetration into nano-scale cracks. This combination of controlled pressure and light curing mimics professional shop equipment in a DIY package.
Value for Money: Priced at $16.99, this is the premium option in the comparison, but the included UV light and advanced vacuum system justify the cost. Professional repairs cost $50-150, so one successful repair provides immediate savings. The 4-piece quantity adds value for multiple vehicles or future damage, making it economical for proactive car owners.
Strengths and Weaknesses: Strengths include the professional-grade UV curing light with adjustable settings, powerful vacuum injection system, 12-inch crack capacity, and comprehensive 4-piece kit. The intelligent timer ensures proper curing without guesswork. Weaknesses involve the highest price point, potential complexity for absolute beginners, and the possibility of UV light bulb longevity issues with extensive use.
Bottom Line: This kit is the top choice for enthusiasts wanting professional-quality repairs with modern technology. The UV curing light and vacuum system deliver superior results compared to basic kits, justifying the premium price. While beginners may face a learning curve, the investment pays dividends for those serious about maintaining their vehicle’s glass integrity and appearance.
Understanding Windshield Repair Kits with UV Curing Technology
Windshield repair kits with UV curing lights represent a significant leap forward from older, passive-drying resin systems. At their core, these kits use photochemical reactions to transform liquid resin into a solid, glass-like material in minutes. The UV light acts as a catalyst, triggering polymerization that creates a molecular bond with the surrounding glass. This isn’t just surface-level patching—it’s structural fusion that can stop damage propagation and restore up to 95% of the windshield’s original strength in the repaired area.
The technology mirrors what professional auto glass technicians use, though shop systems typically employ more powerful UV lamps. For DIY purposes, modern LED UV lights have made the process accessible, portable, and safe for home use. Understanding this foundation helps you appreciate why proper technique matters and why cutting corners on equipment quality inevitably leads to subpar results.
How UV Curing Transforms Resin Repair
Traditional windshield repair resin relied on chemical hardeners and air drying, a process that could take hours and left the repair vulnerable to contamination. UV curing changes the game entirely. When ultraviolet light hits the photoinitiators in modern resin formulas, it triggers an almost instantaneous chain reaction. Within 1-5 minutes under proper UV exposure, the resin transitions from a viscous liquid to a hardened solid with a refractive index nearly identical to automotive glass.
This rapid cure time isn’t just convenient—it’s critical for quality. The faster the resin sets, the less chance for dust, moisture, or air bubbles to compromise the repair. Premium UV resins also exhibit minimal shrinkage during curing, which prevents the formation of voids or stress points that could cause the repair to fail months later. The result is a permanent fix that can withstand temperature extremes, highway speeds, and the constant flexing your windshield endures.
Types of Windshield Damage You Can Fix at Home
Not all glass damage is created equal, and recognizing what’s repairable versus what requires professional intervention is your first step toward success. Bullseye chips, typically caused by round projectiles, are ideal candidates for DIY repair. These cone-shaped breaks usually measure under one inch in diameter and haven’t penetrated the inner PVB layer of laminated glass.
Star breaks, featuring multiple radial cracks emanating from an impact point, are also fixable if the total diameter stays under three inches and no single crack exceeds two inches in length. Combination breaks that mix bullseye and star patterns can work too, provided the damage isn’t in the driver’s direct line of sight and hasn’t collected excessive debris.
Surface pits and small chips that haven’t cracked through the entire outer layer respond beautifully to UV resin. The key metric is whether the damage is contained in the outer lamination. If you can run your fingernail across the surface and feel significant gaps or if cracks have spread to the edges, you’ve likely exceeded DIY territory.
When to Avoid DIY Repairs and Call a Professional
Your safety is non-negotiable, and certain damage patterns demand expert assessment. Any crack longer than six inches, especially those reaching the windshield perimeter, compromises the structural cage of your vehicle and requires replacement. Damage in the acute area—the critical viewing zone directly in front of the driver—should only be repaired by professionals who can guarantee optical clarity standards.
If the impact point has crushed glass or created a white, pulverized area larger than a quarter, the resin may not penetrate effectively. Multiple impact points clustered together create stress concentrations that DIY kits can’t adequately address. Additionally, any damage that has allowed moisture to penetrate between the glass layers, visible as a cloudy or foggy appearance, needs professional equipment to properly dry and seal.
Tempered glass side and rear windows operate differently than laminated windshields and cannot be repaired with these kits. When in doubt, a reputable auto glass shop offers free assessments—take advantage of this before potentially wasting time on a doomed repair.
Key Features to Evaluate Before Buying
The UV curing light itself deserves your closest scrutiny. Look for lights emitting in the 365-405 nanometer wavelength range, which optimally activates automotive glass resin photoinitiators. LED systems should deliver at least 3-5 watts of power; anything less may cure slowly or incompletely. Battery-operated units offer convenience, but verify they maintain consistent output as charge depletes.
Resin quality separates exceptional kits from disappointing ones. Seek out resins specifically formulated for automotive glass with high viscosity (around 200-300 cps) for vertical surface application. The best formulations are optically clear, UV-stable to prevent yellowing, and remain workable for 2-3 minutes under ambient light before curing begins.
The bridge assembly—the device that holds the injector over the damage—must provide stable, precise positioning. Look for metal components rather than plastic, adjustable height settings, and suction cups that create reliable vacuum. A wobbly bridge during the injection phase introduces air and ruins repairs.
Decoding UV Light Specifications
Understanding UV light specifications prevents you from falling for marketing hype. Wavelength is critical: 395nm LEDs have become the sweet spot for consumer kits, offering excellent photoinitiator activation without the heat generation of shorter wavelengths. Power density, measured in milliwatts per square centimeter (mW/cm²), should exceed 50 mW/cm² at the repair surface for reliable curing.
Beam uniformity matters as much as raw power. A focused spot beam might cure the center while leaving edges tacky. Quality lights use diffusers or multiple LED arrays to create even coverage across the repair area. Runtime is another factor—can the light sustain full output for 5-10 minutes? Some budget lights dim significantly after 90 seconds, leading to incomplete cures.
For frequent users, consider lights with replaceable batteries or AC adapters. Occasional DIYers might prefer USB-rechargeable units. Regardless of power source, verify the unit has overcharge protection and temperature management to prevent LED degradation over time.
Resin Quality: The Heart of Effective Repairs
The resin formula determines whether your repair disappears or becomes a permanent eyesore. Automotive glass resin is a specialized acrylic compound, not generic hardware store epoxy. Premium formulations use ethyl cyanoacrylate or modified acrylic bases that bond molecularly with glass silicates while maintaining flexibility to accommodate thermal expansion.
Viscosity is your first quality indicator. Too thin (under 100 cps) and the resin runs out before curing; too thick (over 500 cps) and it won’t penetrate fine cracks. The ideal range of 200-300 cps allows gravity-assisted flow while maintaining position during cure. Color stability is crucial—UV inhibitors prevent yellowing that becomes visible over time.
Shelf life matters more than you’d think. Unopened resin remains viable for 12-18 months when stored in opaque containers away from heat. Once opened, oxygen begins degrading the formula. Quality kits provide single-use ampules or syringes with airtight caps. If your resin has thickened, turned cloudy, or developed crystals, discard it—using compromised resin guarantees a failed repair.
Essential Tools and Components in Quality Kits
Beyond the UV light and resin, several tools distinguish comprehensive kits from barebones offerings. A proper bridge assembly with vacuum and pressure cycles is non-negotiable. This creates the alternating suction and injection needed to remove air and fully fill the damage. Look for kits offering both manual syringe injectors and spring-loaded automatic systems—the latter provides more consistent pressure control.
Cleaning supplies separate good repairs from great ones. Razor blades for leveling cured resin, lint-free wipes, and specialized glass cleaners that leave no residue are essential. The best kits include a pit filler resin for surface-level finishing and a polishing compound to restore optical clarity after curing.
Pedestal seals or gaskets create the critical seal between your injector and the glass. These degrade with use and should be replaceable. Some premium kits include multiple seal sizes for different damage types. A quality carrying case keeps components organized and protects the UV light from damage—loose parts in a toolbox will fail when you need them most.
Step-by-Step: Mastering the Repair Process
Success lives in the details. Start by cleaning the damage area thoroughly with glass cleaner and a lint-free cloth. Any debris trapped under the resin becomes permanent. If water has entered the crack, use a hair dryer on low setting from the interior side to evaporate moisture—never heat the glass above warm to the touch.
Position the bridge assembly so the injector sits directly over the impact point. Apply a drop of resin to the pedestal before attaching it to the glass—this pre-fills the void and prevents air entrapment. Engage the vacuum cycle for 60-90 seconds to draw air out of the cracks. You’ll often see bubbles rising through the resin; this is exactly what you want.
Switch to injection mode and apply steady pressure. Quality resins will flow into the finest cracks through capillary action. Allow 2-3 minutes for complete penetration. If cracks remain visible, repeat the vacuum-injection cycle. Once filled, apply the UV light directly over the repair for a minimum of 3 minutes, ensuring even coverage. The resin should become tack-free and hard to the touch.
Common DIY Mistakes That Compromise Results
The most frequent error is insufficient cleaning. Even microscopic dust particles create voids that scatter light and weaken the repair. Never skip the cleaning step, and avoid touching the glass after cleaning—oils from your fingers prevent proper bonding.
Improper bridge placement ranks second. If the injector isn’t perfectly centered over the damage, resin flows unevenly, leaving air pockets. Take time to position the bridge correctly; use a mirror to view from inside the vehicle if needed. A bridge that shifts during injection introduces catastrophic air entrapment.
Rushing the cure is another killer. Under-cured resin remains soft and will yellow within weeks. Always cure for the manufacturer’s recommended time, then add 30 seconds for safety. Ambient temperature affects cure speed—cold glass requires longer exposure. Conversely, don’t cure in direct sunlight, which can cause uneven polymerization.
Finally, overfilling the damage creates a resin mound that’s difficult to level and may cause optical distortion. Fill cracks completely, but keep surface resin minimal. You can always add more; removing excess is nearly impossible without scratching the glass.
Safety Protocols for Home Windshield Repair
UV light poses genuine risks to eyes and skin. Never look directly at an active UV LED, and avoid exposing bare skin for extended periods. Quality kits include UV-blocking safety glasses—use them. If yours doesn’t, invest in a pair rated for 395nm protection. Work in a well-ventilated area; while quality resins are low-VOC, they still release trace fumes during curing.
Glass handling safety is often overlooked. Windshields are surprisingly heavy and have sharp edges when removed. For in-vehicle repairs, support yourself properly—don’t lean on the glass itself. If you must remove a rearview mirror or trim pieces, use plastic pry tools to avoid scratching glass or damaging mounting hardware.
Chemical safety matters. Resin spills on paint should be wiped immediately with isopropyl alcohol before they cure. Keep a fire extinguisher rated for chemical fires nearby—though rare, UV-curing resins are flammable in liquid form. Never smoke or have open flames in your work area.
Cost Analysis: DIY vs Professional Services
A quality UV curing repair kit costs between $30 and $80, representing a single professional repair’s price. If you successfully repair three chips over the kit’s lifespan, you’ve saved $60-$180. Factor in convenience—no appointments, no waiting rooms, no driving with compromised glass—and the value proposition strengthens.
Professional repairs typically range from $60-$120 for standard chips, with mobile services charging premiums. Insurance often waives deductibles for repairs since they’re cheaper than replacements, but claims can affect premiums. DIY repairs avoid insurance involvement entirely.
The hidden cost is failure. A botched DIY repair that requires professional intervention adds $20-$40 for resin removal before the proper repair. However, this is rare with quality kits and proper technique. For fleet vehicles or families with multiple cars, a single kit can save hundreds annually. The break-even point is typically two successful repairs.
Proper Maintenance and Storage of Your Repair Kit
Your kit’s longevity depends entirely on how you store it. UV resin must live in opaque, airtight containers. Clear bottles allow ambient light to prematurely cure the resin; loose caps let oxygen degrade the formula. Store resin at room temperature—extreme heat accelerates chemical breakdown, while freezing causes separation.
The UV light requires its own care. Remove batteries if storing longer than a month to prevent corrosion. Keep LEDs clean; dust on the lens reduces output. A soft microfiber cloth with isopropyl alcohol removes residue without scratching. Test the light monthly with a piece of white paper—it should glow bright blue-violet. Dim output indicates failing LEDs or weak batteries.
Bridge components and seals need inspection before each use. Check suction cups for cracks or hardening; replace if they don’t hold vacuum. Lubricate O-rings with a drop of silicone grease to maintain flexibility. Keep tools organized—a missing razor blade or cleaning wipe when you’re mid-repair is incredibly frustrating.
Environmental and Temperature Considerations
Temperature dramatically affects repair quality. Ideal conditions range from 60°F to 80°F (15°C to 27°C). Cold glass contracts, making cracks tighter and resin penetration difficult. In temperatures below 50°F, warm the glass gently with a hair dryer from the interior—not hot, just warm to the touch. Never pour hot water on the glass; thermal shock can extend the damage.
High heat presents opposite challenges. Above 85°F, resin becomes too fluid, running out before curing and potentially creating voids. Work in shade, and consider cooling the glass with a damp cloth before starting. Humidity matters too—above 60% relative humidity, moisture can interfere with resin adhesion. Use a dehumidifier in your garage if you live in a humid climate.
Wind is an underrated enemy. Even light breezes introduce dust and cool the glass unevenly. Work indoors when possible, or create a windbreak with cardboard or plastic sheeting. Direct sunlight is problematic even with UV lights—it can partially cure resin before you’re ready and creates glare that makes damage assessment difficult.
Warranty, Insurance, and Legal Implications
Most windshield repair kits include disclaimers stating they’re for temporary repairs—a legal hedge. However, properly executed UV repairs are permanent and often outlast the vehicle. The critical factor is documentation. Photograph the damage before and after repair, keeping date-stamped records. This proves due diligence if issues arise later.
Vehicle warranties rarely address windshield repairs specifically, but improper technique that damages the glass could theoretically void coverage. Follow manufacturer instructions precisely. Insurance claims are more nuanced. While DIY repairs don’t require reporting, some policies mandate professional repair for coverage continuation. Review your policy language.
Legal requirements vary by jurisdiction. Most states prohibit repairs in the driver’s critical viewing area if they cause any optical distortion. Police can issue citations for windshields with unrepaired damage that obstructs vision. A properly executed UV repair that passes inspection is legally acceptable, but keep your receipt and repair documentation in the glove compartment.
Advanced Tips for Perfecting Your Technique
Professionals don’t just fill damage—they manipulate it. For star breaks, apply slight pressure from the interior side with a blunt tool while injecting resin. This opens crack pathways, allowing better penetration. Release pressure during final injection to ensure complete fill.
Creating a resin reservoir helps with deep damage. After initial injection, place a small piece of clear tape over the impact point and add a drop of resin on top. This maintains pressure and feeds resin into the crack as it cures under UV light. Remove the tape immediately after curing and level the surface.
For multiple impact points, repair the smallest first. Larger damage creates stress fields that can interfere with adjacent repairs. Work from the center outward, allowing each repair to fully cure before starting the next. This prevents resin migration between damage sites.
Polishing is the final art. After curing and leveling, use a fine-grit polishing compound (3000-grit or higher) with a felt pad to restore optical clarity. Work in small circles with light pressure, checking from multiple angles. A perfect repair is invisible from the driver’s seat.
Troubleshooting Common Repair Issues
If cracks remain visible after repair, you likely have air entrapment. Re-clean the area, reposition the bridge, and perform additional vacuum-injection cycles. Sometimes heating the glass slightly from the interior helps resin flow into stubborn microcracks.
Yellowing after a few weeks indicates incomplete cure or low-quality resin. Re-apply UV light for an extended period—sometimes 10+ minutes—to post-cure. If yellowing persists, the resin formula lacks UV stabilizers; you’ll need to remove it and start over with better material.
Resin that won’t harden despite UV exposure suggests photoinitiator failure—either the resin is expired or your light output is insufficient. Test the light on a drop of resin on wax paper; if it cures there, your windshield glass may be filtering UV wavelengths. Try curing from the interior side if accessible.
If the repair looks perfect but cracks spread later, you likely repaired too late. The initial impact created micro-fractures that continued growing despite the fill. This isn’t a repair failure; it’s damage beyond the kit’s capability. Professional assessment is needed.
Frequently Asked Questions
How long does a UV-cured windshield repair actually last?
When properly executed with quality materials, a UV-cured repair is permanent and will last the lifetime of the windshield. The resin forms a molecular bond with the glass that doesn’t degrade under normal automotive conditions. Most failures stem from improper technique or contaminated resin, not the curing process itself.
Can I use these kits on tinted windshields or rain-sensing glass?
Standard UV repair kits work perfectly on most tinted windshields since the tint is on the interior surface and repairs target exterior damage. For rain-sensing or heads-up display windshields, exercise caution around sensors. Avoid getting resin on sensor areas, and never cure over electronic components. When in doubt, consult your vehicle manufacturer.
What happens if I get resin on my car’s paint or trim?
Wipe it off immediately with isopropyl alcohol before it cures. Once UV resin hardens, removal requires careful scraping with a razor blade, which can damage clear coat. For textured plastic trim, cured resin is nearly impossible to remove without replacing the part. Always mask adjacent areas with painter’s tape before starting.
Is direct sunlight an acceptable substitute for a UV curing light?
While sunlight contains UV rays, it’s unreliable for quality repairs. Cloud cover, time of day, and glass angle affect intensity unpredictably. Sunlight also cures resin unevenly, causing shrinkage stress. A dedicated UV light provides controlled, consistent output essential for professional results. Think of sunlight as a last resort for emergencies only.
How do I know if my UV light is still strong enough after a year of storage?
Test it monthly on a drop of resin placed on wax paper. The resin should become hard and tack-free within the manufacturer’s specified time. If cure time increases significantly or the surface remains sticky, your light’s output has degraded. LED lights typically maintain output for 10,000+ hours, but battery voltage drops can reduce effective power.
Can temperature extremes after repair cause the resin to fail?
Properly cured UV resin withstands temperatures from -40°F to 200°F without issues. However, rapid temperature changes can stress the surrounding glass, potentially extending original cracks beyond the repaired area. This isn’t resin failure—it’s continued damage propagation. Avoid directing defrosters at full blast onto fresh repairs for the first 24 hours.
Why do some kits include both a thick and thin resin?
Multiple viscosities address different damage types. Thin resin (low viscosity) penetrates fine hairline cracks and star breaks through capillary action. Thick resin (high viscosity) fills larger bullseye chips without running out. Some advanced kits include a surface pit filler for cosmetic finishing. Using the wrong viscosity results in incomplete fills or messy overflow.
Is it normal for the repair to still be slightly visible after curing?
Minor optical distortion at certain angles is normal and acceptable, especially for repairs in non-critical viewing areas. A perfect repair is invisible from the driver’s seat when done correctly. However, if the damage remains prominently visible head-on, you likely have air entrapment or incomplete penetration. Re-treating often improves results.
How many repairs can I realistically expect from one kit?
Most consumer kits contain enough resin for 8-12 small chip repairs. The UV light lasts for thousands of hours, effectively infinite for home use. Seals and pedestals are typically consumable after 3-5 uses. Professional-grade refill packs extend kit life indefinitely. Track your supplies—running out mid-repair is frustrating.
Will a DIY repair affect my vehicle’s inspection or resale value?
Legally, a properly executed repair that doesn’t obstruct vision passes inspection in all 50 states. For resale, documented professional repairs are sometimes viewed more favorably. However, an invisible DIY repair is preferable to visible damage. Keep before/after photos and purchase receipts to demonstrate quality work to potential buyers or inspectors.