That sickening “tick” of a rock hitting your windshield is a sound every driver dreads. In that split second, a tiny chip or crack can appear, threatening to spiderweb across your field of vision and compromise your vehicle’s structural integrity. While professional repair shops offer excellent service, windshield repair kits have revolutionized how car owners address minor glass damage—transforming a potential $100+ service appointment into a quick, cost-effective DIY project you can tackle in your own driveway.
But not all repair kits are created equal, and understanding what separates a reliable fix from a disappointing mess is crucial for any car care enthusiast. This comprehensive guide dives deep into the world of DIY windshield repair, exploring the technology behind these kits, the types of damage they can address, and the essential features that distinguish professional-grade results from temporary patches. Whether you’re dealing with a fresh bulls-eye chip from this morning’s commute or a small star break that’s been nagging you for weeks, we’ll equip you with the knowledge to make informed decisions about your windshield’s health.
Top 10 Windshield Repair Kits
Detailed Product Reviews
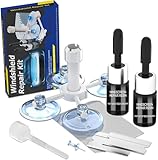
1. Rain-X 600001 Windshield Repair Kit - Quick and Easy Durable Resin Based Windshield Repair Kit for Chips and Cracks, Good for Round Damage Below 1" in Diameter and Cracks Smaller Than 12" in Length

Overview: Rain-X brings its trusted automotive expertise to DIY windshield repair with this straightforward resin-based kit. Designed for quick fixes on minor damage, it addresses round chips under one inch and cracks shorter than 12 inches before they spread. The kit promises professional-grade results with minimal effort, making it an accessible solution for drivers wanting to avoid costly replacements.
What Makes It Stand Out: The Rain-X name carries significant weight in automotive care, and this kit lives up to the brand’s reputation for reliability. Its universal fit design works on all laminated windshields, while the durable resin formula actually strengthens the glass rather than just filling the void. The inclusion of detailed pro-tips demonstrates an understanding of common DIY pitfalls, helping users achieve better results.
Value for Money: At $11.49, this kit sits in the sweet spot between budget options and professional services. A single successful repair saves hundreds compared to windshield replacement, and the kit includes enough resin for multiple applications. While not the cheapest option available, the Rain-X brand assurance and proven formula justify the modest premium over no-name alternatives.
Strengths and Weaknesses: Pros:
- Trusted brand with proven track record
- Durable resin strengthens windshield structure
- Universal fit for all vehicle types
- Includes enough material for multiple repairs
- Clear instructions with professional tips
Cons:
- Requires direct sunlight for curing (weather-dependent)
- Limited to smaller damage (1" round, 12" cracks)
- No vacuum system may trap air bubbles
- Application speed affects results significantly
Bottom Line: The Rain-X 600001 is a reliable choice for confident DIYers who value brand trustworthiness and need a straightforward solution for minor windshield damage. It delivers solid results when instructions are followed carefully.
2. NASILOOP Windshield Repair kit, Quick and Efficiency Glass Repair Fluid, Car Windshield Crack Repair Resin Kit for Fixing Chips, Bulls-Eye, Cracks and Star-Shape Cack-2 Pack

Overview: The NASILOOP Windshield Repair Kit offers a two-pack solution featuring nano-technology resin for rapid chip and crack repairs. This kit targets a comprehensive range of damage types including bullseyes, star-shaped cracks, and linear fractures up to 12 inches long. With its high-speed curing formula, it promises to restore both structural integrity and optical clarity in minutes.
What Makes It Stand Out: The two-pack configuration provides exceptional value, allowing users to address multiple damages or keep a spare for future incidents. The nano-scale repair fluid claims to penetrate micro-fissures at a molecular level, creating bonds that supposedly outlast conventional resins. This advanced polymer technology positions it as a next-generation solution for discerning car owners.
Value for Money: At $9.99 for two complete kits, this represents the best per-unit value in the category. Each kit costs roughly $5, making it cheaper than most single-pack alternatives while delivering comparable performance. The ability to repair various crack types without purchasing specialized equipment makes this an economical choice for comprehensive coverage.
Strengths and Weaknesses: Pros:
- Outstanding value with two complete kits
- Nano-technology resin for deep penetration
- Versatile application for multiple damage types
- Rapid curing formula saves time
- User-friendly step-by-step instructions
Cons:
- Lesser-known brand may lack long-term track record
- Marketing language is overly technical and hyped
- No curing light included (sunlight dependent)
- Vacuum application not mentioned
Bottom Line: NASILOOP delivers impressive value for budget-conscious drivers needing multiple repairs, offering advanced resin technology at an unbeatable price point despite its relative obscurity in the market.
3. Permatex 09103 Automotive Windshield Repair Kit For Chipped And Cracked Windshields. Permanent Air-Tight Repairs, With Repair Syringe & Plunger, 9-piece Kit

Overview: Permatex, a stalwart in automotive maintenance products, offers a professional-grade windshield repair kit designed for permanent, air-tight repairs. This nine-piece system tackles bullseye damage up to 1.25 inches in diameter on laminated glass without requiring mixing. The spring-lock syringe system ensures precise resin delivery for mess-free applications.
What Makes It Stand Out: The advanced spring-lock delivery mechanism sets this kit apart from basic squeeze-tube designs, providing controlled pressure that minimizes air bubble formation. Its ability to repair larger bullseye damage (1.25") than most competitors gives it a practical edge. The daylight-curing process eliminates the need for UV lights or direct sunlight dependency.
Value for Money: Priced at $14.18, this kit commands a premium but delivers professional-quality tools and results. The spring-lock syringe alone justifies the extra cost for serious DIY enthusiasts. Considering a single professional repair costs $50-100, this kit pays for itself with one successful fix while offering the satisfaction of using proper equipment.
Strengths and Weaknesses: Pros:
- Professional-grade spring-lock syringe system
- Repairs larger damage (1.25" bullseyes)
- No mixing required, mess-free application
- Permatex brand reliability and quality
- Daylight curing works in various conditions
Cons:
- Higher price point than basic kits
- Limited to bullseye-type damage primarily
- Fewer online reviews than competitors
- Curing time may be longer in low light
Bottom Line: The Permatex 09103 is ideal for automotive enthusiasts who appreciate quality tools and need to repair larger chips, offering professional results that justify its slightly higher price tag.
4. Windshield Crack Repair Kit,2025 Latest Upgraded Glass Crack Repair Kit,5MinQuick-Glass Repair Liquid,Long-Lasting for Windshields, Windows, Mirrors,All Crack Types Windshield Repair Kit (Black).

Overview: Marketed as a 2025 upgraded model, this windshield repair kit promises five-minute repairs using high-transparency imported resin. The multi-surface versatility extends beyond windshields to windows, mirrors, and even headlight covers. Its nano-scale injection technology aims to restore glass integrity while maintaining optical clarity, positioning it as a cutting-edge solution.
What Makes It Stand Out: This kit’s most compelling feature is its remarkable versatility across multiple glass surfaces, breaking traditional windshield-only limitations. The five-minute repair claim, combined with multi-layer curing technology, suggests a significantly accelerated process. The imported high-transparency resin promises superior aesthetic results compared to standard domestic formulations, potentially delivering near-invisible repairs.
Value for Money: At $9.68, this is among the most affordable options while claiming the most advanced features. The ability to repair various glass types multiplies its value proposition beyond automotive use. However, the “2025 upgraded” marketing should be viewed skeptically, as authenticity of such claims is difficult to verify for an unbranded product.
Strengths and Weaknesses: Pros:
- Exceptionally low price point
- Multi-surface application versatility
- Fast 5-minute repair claim
- High-transparency imported resin
- Nano-scale crack penetration
Cons:
- Unbranded product with unknown manufacturer
- Marketing claims may be exaggerated
- No UV light or vacuum system included
- Limited customer feedback available
- “2025” label seems premature
Bottom Line: This budget-friendly kit offers intriguing versatility for experimental DIYers, but its unverified claims and unknown brand make it a gamble despite the attractive price.
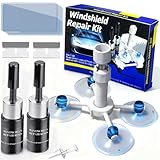
5. BLUTOKS Windshield Repair Kit, 2 PCS Windshield Crack Repair Kit with Suction Cup Curing Light, Automotive Nano Fluid Vehicle Windscreen Tool, Glass Repair Kit for Chips and Cracks (Navy)

Overview: The BLUTOKS Windshield Repair Kit positions itself as a professional-grade solution with advanced vacuum technology and UV curing capabilities. This two-pack system includes a 20PA vacuum holder and dedicated UV curing light, addressing two common DIY repair challenges. It promises to handle everything from bullseyes to spiderwebs and long-line cracks up to 12 inches.
What Makes It Stand Out: The integrated vacuum system actively removes air from cracks before resin injection, dramatically reducing bubble formation—a common failure point in basic kits. The included UV curing light with timer settings eliminates weather dependency, enabling repairs in garages or during overcast conditions. This combination of features typically found only in professional equipment sets BLUTOKS apart.
Value for Money: At $16.99 for two complete kits with UV lights, this offers remarkable value despite being the highest-priced option. The vacuum technology and curing light justify the premium, essentially providing professional capabilities at a fraction of service costs. For those in climates with unpredictable sunlight, the UV light alone makes this worthwhile.
Strengths and Weaknesses: Pros:
- Professional vacuum technology prevents bubbles
- Included UV curing light with timer
- Two complete kits for multiple repairs
- Repairs various crack types effectively
- Strong shear strength resin formula
Cons:
- Highest price point in the comparison
- Vacuum system adds complexity for beginners
- Requires battery/power for UV light
- Brand recognition still building
Bottom Line: BLUTOKS is the top choice for serious DIYers seeking professional results, offering the most complete feature set that justifies its premium price through superior technology and included accessories.
6. Brennenstuhl Windshield Repair Kit, Windshield Crack Repair Kit, 2 Bottles Car Windshield Chip Repair Kit Quick Fix for Rock Chip Repair Kit Windshield Chips, Cracks, Star-Shaped Crack (Blue)
Overview: The Brennenstuhl Windshield Repair Kit provides a practical DIY solution for minor windshield damage. Designed to effectively repair chips, cracks, and star-shaped impacts up to 12 inches long or one-inch diameter, this professional-grade kit restores windshields to near-new condition without requiring specialized skills. Its straightforward operation makes professional results accessible to any car owner.
What Makes It Stand Out: This kit includes two bottles of repair resin, doubling your repair capacity compared to single-bottle alternatives. The 20-minute cure time balances speed and effectiveness perfectly. The manufacturer explicitly designs this for universal accessibility, noting even beginners can achieve quality results. Comprehensive instructions demystify the entire process from start to finish.
Value for Money: At $12.99, this kit delivers exceptional savings versus $100+ professional repairs or $300+ windshield replacements. Two included bottles effectively halve your cost-per-repair, making it ideal for multi-vehicle households or those anticipating future damage. The complete accessory package eliminates hidden costs and provides everything needed for successful repairs.
Strengths and Weaknesses: Strengths: Dual resin bottles; comprehensive accessories (blades, curing strips); clear instructions; quick 20-minute process; prevents further crack spread; suitable for various damage types. Weaknesses: Limited to damage under one-inch diameter; requires direct sunlight or UV lamp; may not achieve perfect clarity on complex cracks; single-use applicator design.
Bottom Line: For budget-conscious drivers facing minor windshield damage, the Brennenstuhl kit offers reliable results and excellent value. It’s perfect for proactive car owners comfortable with DIY maintenance who want professional-quality outcomes without the premium price.
7. tuncate Windshield Repair Kit for Chips and Cracks– 4 Pack Glass Repair Kit with Enhanced Injection Head for Chips, Cracks & Star-Shaped Cracks, Quick & Easy DIY Fix for Windshields, Black

Overview: The tuncate Windshield Repair Kit delivers a four-pack solution for tackling windshield chips and cracks using advanced nano-enhanced resin technology. Engineered to perform reliably from -4°F to 104°F, this kit handles various damage types including bullseyes, star cracks, and half-moon crescents. The all-in-one design requires no mixing or heating for immediate application.
What Makes It Stand Out: Its nano-enhanced resin achieves an impressive 120MPa compressive strength—130% stronger than ordinary glass—creating a robust three-dimensional mesh structure that locks crack paths. The kit’s child and pet-friendly formulation requires no protective gloves and produces no harsh odors. With 97% light transmittance, repairs remain virtually invisible, ensuring zero driving safety compromise.
Value for Money: At just $9.99 for four complete kits, this represents exceptional per-unit value at approximately $2.50 per repair. Professional-quality repairs for under three dollars make this ideal for families with multiple vehicles or fleet managers seeking bulk solutions. The four-pack structure ensures you’re always prepared for unexpected damage.
Strengths and Weaknesses: Strengths: Outstanding four-pack value; extreme temperature versatility; superior 120MPa strength; safe, odorless formula; high clarity (97% transmittance); simple 3-step process. Weaknesses: Individual packaging creates more waste; smaller resin quantity per unit; may require multiple applications for deep cracks; limited to surface-level repairs.
Bottom Line: The tuncate kit excels for users prioritizing value and safety. Its four-pack design and all-weather performance make it perfect for multi-car households and emergency preparedness kits where having spares proves invaluable.
8. Windshield Repair Kit - Nano Glass Repair Fluid for Chips & Cracks | Quick Fix, Works on for Chips and Cracks,Cracks Gone Glass Repair Kit, Automotive Windscreen Repair Tool Nano Repair Liquid (Blue)
Overview: This Nano Glass Repair Fluid Windshield Repair Kit provides industrial-grade performance for DIY enthusiasts seeking professional-caliber results. Capable of repairing cracks up to 12 inches and various damage types including bullseyes and star breaks, the kit features advanced vacuum injection technology and five-layer reinforcement for extreme durability across all glass surfaces.
What Makes It Stand Out: The kit’s exceptional temperature range (-40°F to 240°F) surpasses most competitors, ensuring reliable performance in the harshest climates. Its 20P-A strength rating and high-viscosity resin penetrate deeply into cracks without trapping air bubbles. The nano fluid works at the molecular level to reassemble glass fragments, creating vibration-resistant repairs that maintain structural integrity.
Value for Money: Priced at $13.99, this kit offers premium features typically found in professional systems costing significantly more. The ability to repair extensive 12-inch cracks provides exceptional value compared to $400+ windshield replacements. Universal compatibility with windshields, side windows, sunroofs, and headlight covers maximizes utility and return on investment.
Strengths and Weaknesses: Strengths: Extreme temperature durability; vacuum injection prevents bubbles; repairs up to 12 inches; universal glass application; professional-grade 20P-A strength; fast 5-20 minute cure. Weaknesses: Slightly higher price point; may be overkill for single small chip; requires UV light for optimal curing; complex process for absolute beginners.
Bottom Line: Ideal for drivers in extreme climates or those facing substantial cracks, this kit provides professional-caliber durability and versatility that justifies its premium positioning. It’s a smart investment for comprehensive vehicle glass maintenance.
9. BLUTOKS Upgraded Windshield Repair Kit for Chips and Cracks – Instant Fix for Chips, Cracks, and Bullseyes, High-Pressure Resin Injection Glass Windshield Crack Repair Kit for Long-Lasting (Orange)

Overview: The BLUTOKS Upgraded Windshield Repair Kit leverages advanced nano resin technology to deliver high-pressure injection repairs for chips, cracks, and bullseyes up to 12 inches long. This compact, portable system stores neatly in its included case, making it an excellent emergency solution for drivers seeking professional results without scheduling shop appointments or paying premium labor costs.
What Makes It Stand Out: The specialized injection tip creates optimal pressure to force resin deep into cracks, effectively eliminating air bubbles for superior clarity and strength restoration. The weather-resistant formula ensures long-lasting protection against environmental elements, while the compact storage case prevents resin spills and keeps components organized between uses—a practical feature competitors often overlook.
Value for Money: At $13.99, this kit positions itself in the mid-premium range with features comparable to professional systems. The included storage case preserves unused resin for future repairs, reducing long-term costs. For drivers facing multiple vehicles or recurring damage, this reusability factor enhances overall value considerably compared to single-use alternatives.
Strengths and Weaknesses: Strengths: High-pressure injection for deep penetration; compact portable storage case; weather-resistant formula; repairs multiple damage types; clear instructions; restores 95% glass strength. Weaknesses: 30-minute repair time slower than some competitors; limited to damage under one inch diameter; requires UV light source; single resin bottle limits multiple large repairs.
Bottom Line: Perfect for drivers wanting an organized, portable solution for occasional windshield repairs. The BLUTOKS kit balances performance and convenience effectively for both emergency situations and routine maintenance needs.
10. J-B Weld 2100 Windshield Saver Repair Kit, 0.025 fl. oz

Overview: The J-B Weld 2100 Windshield Saver Repair Kit offers a streamlined, no-frills approach to DIY windshield repair from one of America’s most trusted adhesive brands. Designed specifically for laminated windshields, this kit targets small chips and star-shaped damage up to 1-1/4 inches in diameter, preventing minor issues from escalating into costly full windshield replacements.
What Makes It Stand Out: J-B Weld’s reputation for reliable adhesives translates into a straightforward system prioritizing ease-of-use over complex features. The kit focuses on essential functionality without overwhelming users with unnecessary components. Its precisely measured 0.025 fl. oz. resin quantity is perfectly calibrated for 1-2 small repairs, eliminating waste and guesswork for one-time users.
Value for Money: At $12.95, this kit offers brand-name reliability at a competitive price point. While the per-fluid-ounce cost appears high, the pre-measured quantity prevents over-purchasing unused resin. For drivers addressing a single chip or planning one-time use, this focused approach provides better value than larger kits with excess materials that may expire before use.
Strengths and Weaknesses: Strengths: Trusted J-B Weld brand reputation; simplified operation; pre-measured resin prevents waste; effective for star damage; prevents crack spreading; compact packaging. Weaknesses: Extremely limited resin quantity; only 1-1/4" maximum damage; no advanced features; minimal accessories; not suitable for long cracks; essentially single-use design.
Bottom Line: Best for brand-loyal customers needing a simple, one-time repair for minor star-shaped chips. The J-B Weld kit delivers reliability without complexity for straightforward damage scenarios where premium features would be unnecessary.
The Critical Role of Windshield Repair Kits in Car Care
Your windshield does far more than block wind and bugs—it’s a critical structural component that provides up to 45% of your vehicle’s cabin strength in a front-end collision and up to 60% in a rollover. When compromised by even minor damage, this safety feature becomes a liability. Windshield repair kits serve as your first line of defense, preventing small imperfections from becoming major replacements.
The economic argument is equally compelling. A quality DIY kit typically costs less than a single professional repair, yet can often address multiple chips. More importantly, timely repairs prevent cracks from spreading, saving you the $200-$500+ cost of a full windshield replacement. For car care enthusiasts who understand that prevention beats replacement every time, these kits are as essential as a good wax or tire pressure gauge.
Decoding Windshield Damage: A Visual Guide
Before reaching for any repair kit, you must accurately assess the damage. Different fracture patterns respond differently to DIY treatment, and misidentifying the damage type is the most common reason repairs fail. Modern laminated glass cracks in predictable ways, and understanding these patterns helps you set realistic expectations.
Bulls-Eye and Half-Moon Chips
These circular or semi-circular damages occur when a rounded object impacts the glass at a perpendicular angle. The damage creates a clean cone-shaped crater with a dark center where air has entered. Bulls-eyes are the most DIY-friendly damage type because their geometry allows resin to flow easily into all voids. Half-moons (partial bulls-eyes) behave similarly but may require slightly more pressure during injection.
Star Breaks and Spider Cracks
Characterized by multiple radial cracks extending from a central impact point, star breaks resemble a firework explosion. These are more challenging because each crack leg must be completely filled with resin. The longer the cracks, the more difficult the repair. Spider cracks are essentially advanced star breaks where the radial pattern has begun connecting with lateral cracks, creating a web-like appearance.
Combination Breaks and Surface Pits
Combination damage merges multiple patterns—perhaps a bulls-eye with star break legs extending from it. These require patience and often multiple resin applications. Surface pits, meanwhile, are shallow damages that haven’t penetrated the plastic interlayer. While they don’t threaten structural integrity, they can create annoying glare and are easily remedied with minimal resin.
The Science Behind DIY Windshield Repair
Modern repair kits leverage the same principles professional technicians use, just scaled for consumer application. The process relies on capillary action, vacuum pressure, and photopolymerization. First, a specialized bridge apparatus creates an airtight seal over the damage. A vacuum cycle removes air from the crack, then resin is injected under pressure to fill the void completely.
The resin itself is the star of the show—a clear, low-viscosity acrylic compound that matches the refractive index of glass (approximately 1.52). This optical matching is why a properly repaired chip becomes nearly invisible. Once injected, the resin must cure, typically through UV light exposure. The polymerization process transforms the liquid resin into a solid that bonds permanently with the surrounding glass, restoring up to 95% of the windshield’s original strength.
Essential Features That Define Premium Kits
Not all kits include the components necessary for durable repairs. Understanding which features directly impact success rates helps you avoid budget options that waste time and potentially worsen damage. Premium kits differentiate themselves through engineering refinement, not just additional accessories.
Resin Formulation and Curing Technology
The resin is your repair’s foundation. High-quality formulations feature multiple viscosity options—thinner resin for hairline cracks and thicker gel for larger voids. Look for resins that cure crystal-clear without yellowing over time. Advanced kits include dual-cure resins that begin setting with minimal UV exposure, preventing premature curing during cloudy conditions. The best resins also contain impact modifiers that make them more flexible than glass, absorbing future impacts without cracking.
Bridge Assembly and Injection Systems
The bridge is the mechanical heart of any kit. Professional-grade designs feature three-point or four-point stabilization that distributes pressure evenly, preventing the injector from rocking and creating new micro-cracks. Threaded injection systems offer superior control compared to simple plunger designs, allowing you to apply precise pressure measured in PSI rather than guesswork. Look for bridges with adjustable height settings to accommodate curved windshields.
Vacuum Creation and Pressure Application
Effective repair requires both vacuum and pressure cycles. Premium kits achieve this through dual-action syringes or specialized vacuum pumps that can pull 20+ inches of mercury. This strong vacuum extracts not just air but also microscopic moisture and glass dust that contaminate the crack. The pressure injection phase should maintain consistent force for 5-10 minutes, ensuring resin penetrates to the crack’s terminus.
UV Curing vs. Natural Sunlight
While sunlight can cure resin, its UV intensity varies dramatically by time of day, season, and cloud cover. Professional results demand consistency. Top-tier kits include high-intensity UV LED lamps that cure resin in 5-15 minutes regardless of conditions. These lamps emit 365-395nm wavelength light—the optimal spectrum for resin polymerization. Some advanced kits even feature timed curing cycles that automatically shut off to prevent over-exposure, which can make resin brittle.
Professional Repair vs. DIY: A Comprehensive Comparison
The gap between professional and DIY repairs has narrowed significantly, but differences remain. Professional technicians use industrial-grade equipment costing thousands of dollars, providing superior vacuum pressure (up to 28 inches of mercury) and resin injection control. They also access professional-grade resins with longer shelf lives and better flow characteristics.
However, modern DIY kits can achieve 85-90% of professional quality for small damage under 1 inch. The key differentiator is technician skill—professionals perform hundreds of repairs monthly, developing an intuitive feel for pressure, timing, and resin behavior. DIY success requires strict adherence to instructions and patience. Where professionals might complete a repair in 20 minutes, DIYers should allocate 45-60 minutes for their first few attempts.
Cost analysis reveals the true value proposition. Professional repairs average $60-$100 per chip, while quality DIY kits cost $30-$50 and can repair 5-10 chips. The break-even point occurs at just two repairs. For fleet vehicles or families with multiple cars, the savings multiply dramatically.
Mastering the Repair Process: A Detailed Walkthrough
Success depends on meticulous preparation and patience. Begin by cleaning the damage area with a glass cleaner and microfiber cloth. Use a razor blade at a 45-degree angle to remove loose glass fragments and contaminants. This step is critical—any debris left in the crack will become a permanent inclusion.
Next, position the bridge assembly directly over the impact point, ensuring the rubber seal makes full contact. Apply a drop of resin to the damage before attaching the bridge—this prevents air pockets. Once secured, initiate the vacuum cycle for 5-10 minutes. You’ll see air bubbles rising through the resin; wait until they cease.
Now comes the injection phase. Slowly apply pressure, adding resin drop by drop. Watch the crack through the bridge’s viewing window. When resin reaches every crack terminus, stop and cover the area with curing film. Move the vehicle into direct sunlight or use the UV lamp. After curing, scrape away excess resin with a razor blade and polish with glass cleaner.
Pitfalls That Can Ruin Your Repair Attempt
Even premium kits fail when users rush or skip steps. The most common mistake is attempting repairs in direct sunlight—the resin begins curing before injection completes, creating a permanent haze. Temperature matters too; repairs below 50°F or above 90°F prevent proper resin flow. Always work in shade and moderate temperatures.
Another critical error is over-injecting resin. Excessive pressure can cause the laminate layer to delaminate, creating a visible “halo” around the repair. Similarly, insufficient vacuum time leaves air trapped in micro-fractures, which expands and contracts with temperature changes, eventually causing the crack to spread.
Using expired resin is a silent killer of repairs. Most resins have a 12-18 month shelf life; after that, they yellow and lose bonding strength. Store kits in cool, dark places and check expiration dates before starting. Finally, never attempt repairs on contaminated cracks—if water or windshield washer fluid has entered the damage, professional help is required.
Repair or Replace? Making the Right Decision
DIY kits have limitations you must respect for safety. The general rule: if damage fits under a dollar bill and isn’t in the driver’s direct line of sight, repair is viable. However, cracks longer than 6 inches, damage at the windshield’s edge (within 3 inches of the frame), or any fracture that penetrates both glass layers demand replacement.
Location matters critically. Repairs in the acute area (directly in front of the driver) can cause subtle optical distortion that impairs vision. Even perfect repairs create a slight prism effect; while acceptable in peripheral areas, this distortion is dangerous in your primary viewing zone. Similarly, damage in the sensor area (where ADAS cameras mount) requires professional assessment to ensure sensors remain calibrated.
Multiple damages complicate decisions. While a single repair strengthens the glass, three or more repairs in close proximity create a weakened zone. In rollover accidents, this area may fail to support the roof. When in doubt, consult a professional—many offer free assessments.
Safety Considerations and Best Practices
Your safety during repair is paramount. Always wear safety glasses—glass dust and resin can cause eye irritation. Nitrile gloves protect your skin from uncured resin, which can cause allergic reactions with repeated exposure. Work in a well-ventilated area; while modern resins are low-VOC, they still emit fumes during curing.
Never attempt repairs on a hot windshield. Glass expands when heated, and applying pressure can cause existing cracks to run. Let the vehicle cool in shade for at least 30 minutes before starting. Similarly, avoid repairs during temperature swings; a cold morning followed by a hot afternoon creates stress that can fracture the repair.
Keep a fire extinguisher nearby when using UV lamps. While rare, electrical malfunctions can occur. More importantly, understand that a repair kit is a temporary safety measure, not a permanent solution. Have repaired windshields inspected annually, as temperature cycling and road vibration can cause old repairs to degrade.
Long-Term Windshield Care After Repair
A successful repair isn’t the end of windshield maintenance—it’s the beginning of a new care regimen. Avoid car washes for 24-48 hours post-repair, as high-pressure water can infiltrate uncured resin edges. Similarly, avoid slamming doors or driving on rough roads immediately after repair; vibrations can disrupt the curing process.
Apply a quality glass sealant every 3-6 months to the entire windshield. These hydrophobic coatings reduce water infiltration into microscopic surface cracks, preventing future damage. When parking, choose covered areas when possible—UV exposure degrades resin over time, causing yellowing in repairs older than 2-3 years.
During winter, never pour hot water on a cold windshield to melt ice. The thermal shock can crack both original glass and repairs. Use a proper ice scraper and defroster. If you notice a repaired area beginning to darken or crack, address it immediately. Early intervention can prevent the need for complete windshield replacement.
Frequently Asked Questions
How long does a DIY windshield repair actually last?
A properly executed repair using quality resin can last the lifetime of the windshield. The resin forms a permanent molecular bond with the glass, essentially becoming part of the laminate. However, real-world longevity depends on factors like UV exposure, temperature extremes, and road vibration. Most quality repairs remain stable for 5-7 years before showing any degradation. The key is using fresh resin, following instructions precisely, and avoiding subsequent impacts to the same area. Annual inspections help catch any early signs of separation or yellowing.
Can I repair a crack that’s longer than six inches?
While some kits claim to handle cracks up to 12 inches, this is risky. Cracks longer than six inches have likely compromised the windshield’s structural integrity beyond what DIY resin can restore. The longer the crack, the higher the chance it extends to the edge of the glass, where repairs always fail. Additionally, long cracks often involve the inner PVB layer, which DIY resins cannot properly bond to. For cracks exceeding six inches, professional assessment is mandatory—many shops use specialized long-crack resins with different viscosity and curing properties.
What temperature is ideal for windshield repair?
The sweet spot is 60-80°F (15-27°C). At these temperatures, resin flows smoothly without being too runny, and the glass is dimensionally stable. Below 50°F, resin becomes too viscous to penetrate micro-cracks, while above 90°F, it cures too quickly, potentially trapping air. If you must repair in cold weather, warm the windshield gradually using a hair dryer on low setting held 12 inches away. In hot weather, work in early morning shade and cool the glass with a damp cloth (dry thoroughly before starting). Never repair glass below 40°F or above 100°F.
Will my insurance cover the cost of a DIY repair kit?
Most comprehensive auto policies cover professional windshield repair with no deductible, but DIY kit reimbursement is rare. Some progressive insurers offer “preventive repair” credits if you submit before-and-after photos of a successful DIY repair, but this isn’t standard. Check your policy details or call your agent. However, the math still favors DIY: a $40 kit costs less than most deductibles, and many insurers won’t raise rates for a single chip claim. Document your repair with photos anyway—if it fails and you need professional help, some insurers accept this as evidence of good-faith effort.
Can I use a repair kit on my tinted windshield?
Standard tint films applied to the interior surface don’t interfere with exterior repairs. However, if you have a factory-tinted interlayer (common in some luxury vehicles and SUVs), proceed with caution. The tint is embedded within the laminate, and aggressive vacuum pressure can cause delamination around the repair area. Test in an inconspicuous spot first, or better yet, consult a professional. For windshields with aftermarket tint strips across the top, avoid repairing damage that extends into the tinted zone—the resin can cause the tint to bubble or discolor during UV curing.
How soon after damage occurs should I attempt a repair?
Immediately. Fresh, clean damage repairs at a 95% success rate, but that drops to 60% after just one week of contamination. Road grime, water, and windshield washer fluid seep into cracks, creating barriers resin cannot penetrate. Temperature changes also cause cracks to expand and contract, making them harder to seal. If you can’t repair right away, cover the damage with clear tape to keep contaminants out and avoid using windshield washers. Even waiting 24-48 hours significantly reduces success odds. Think of it like a cut on your skin—clean it and treat it promptly for best healing.
Why does my repaired chip still look visible after curing?
Perfect invisibility is rare. Most repairs leave a subtle “witness mark” where the resin’s refractive index doesn’t perfectly match the glass. However, if the damage remains highly visible, several issues may have occurred: incomplete vacuuming left air bubbles, the resin cured too quickly trapping moisture, or the crack was contaminated before repair. Improper pressure during injection can also cause the resin to fill unevenly. Try re-drilling the impact point with a fine bit and performing a second injection. If visibility remains poor after two attempts, the damage may be too severe for cosmetic improvement.
Can I drive immediately after completing a windshield repair?
Yes, but with caveats. The resin achieves initial cure within 5-10 minutes under UV light, making the windshield safe to drive. However, full hardness takes 24-48 hours. During this window, avoid high speeds, rough roads, and temperature extremes. Don’t use automated car washes or apply windshield treatments. If possible, park in a garage to protect from debris and temperature swings. The repair reaches 90% strength after one hour, but that final 10% of curing is crucial for long-term durability. Think of it like fresh paint—dry to the touch doesn’t mean fully cured.
Are all windshield repair resins fundamentally the same?
Absolutely not. Resins vary in viscosity (measured in centipoise), UV initiator concentration, and impact modifier content. Professional-grade resins range from 20 cps for hairline cracks to 200 cps for large voids. Cheap kits often use single-viscosity resins that work poorly for diverse damage types. Premium resins include photo-initiators that respond to specific UV wavelengths, ensuring complete polymerization. They also contain adhesion promoters that chemically bond to both glass and the PVB interlayer. Yellowing resistance varies too—quality resins include UV stabilizers that prevent degradation for 7+ years, while budget options may yellow within 18 months.
What happens if I just ignore a small chip?
The “small chip” is a ticking time bomb. Every bump, temperature swing, and door slam sends shockwaves through the glass. The chip acts as a stress concentrator, multiplying these forces at its edges. Within days or weeks, those tiny legs can spread across your entire windshield, especially in extreme heat or cold. Moisture also penetrates the laminate, causing delamination and fogging between layers. What started as a $40 DIY fix becomes a $400 replacement. Worse, in an accident, a cracked windshield provides less structural support and may shatter instead of flexing, reducing roof crush resistance by up to 30%. The risk isn’t worth it.