A small pebble kicks up on the highway, and suddenly you’re staring at a star-shaped chip in your windshield. It’s a scenario every driver dreads, yet one that affects millions of vehicles annually. While professional auto glass services offer comprehensive solutions, modern windshield repair kits have evolved from rudimentary DIY gadgets into sophisticated systems that can deliver professional-grade results—if you know what to look for.
Understanding these kits isn’t just about saving money; it’s about preserving your vehicle’s structural integrity and maintaining clear visibility for safe driving. Whether you’re managing a family fleet, caring for a classic car collection, or simply want to be prepared for roadside emergencies, choosing the right repair system requires knowledge beyond what’s printed on the box.
Top 10 Windshield Repair Kit
Detailed Product Reviews
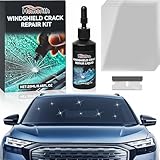
1. Rain-X 600001 Windshield Repair Kit - Quick and Easy Durable Resin Based Windshield Repair Kit for Chips and Cracks, Good for Round Damage Below 1" in Diameter and Cracks Smaller Than 12" in Length

Overview: The Rain-X 600001 Windshield Repair Kit offers a straightforward solution for minor windshield damage, targeting chips under 1 inch and cracks shorter than 12 inches. This universal-fit kit leverages Rain-X’s automotive credibility to deliver a budget-friendly DIY option that prevents small imperfections from spreading into costly replacements. Designed for quick application, it provides essential tools for drivers seeking immediate intervention without professional help.
What Makes It Stand Out: This kit distinguishes itself through Rain-X’s trusted brand heritage and remarkably simple operation requiring only sunlight for curing. The durable resin formula not only fills damage but reportedly strengthens the windshield beyond its original state, addressing the first layer of glass with minimal steps. Its contamination-warning system demonstrates thoughtful engineering, emphasizing that timing and cleanliness directly impact results.
Value for Money: At $11.49, this represents exceptional savings compared to $50-100 professional repairs or $200-400 windshield replacements. The kit supports multiple repairs, making it economical for households with several vehicles. While it lacks advanced features like vacuum pumps or UV lights found in pricier competitors, its effectiveness for qualifying damage delivers outstanding ROI for budget-conscious consumers.
Strengths and Weaknesses: Strengths include trusted brand reputation, straightforward instructions, durable resin chemistry, and excellent price point. The kit’s universal compatibility covers most laminated windshields. Weaknesses involve dependence on direct sunlight for curing, limited to smaller damage sizes, and no vacuum system which may trap air bubbles. Results vary significantly based on user technique and contamination control.
Bottom Line: Ideal for proactive drivers wanting to address small chips before they spread, the Rain-X kit offers reliable performance at an unbeatable price. It’s best suited for minor bullseye damage and patient DIYers who follow instructions meticulously. For larger cracks or professional-grade clarity, consider upgrading to a vacuum-equipped system.
2. Permatex 09103 Automotive Windshield Repair Kit For Chipped And Cracked Windshields. Permanent Air-Tight Repairs, With Repair Syringe & Plunger, 9-piece Kit

Overview: The Permatex 09103 Automotive Windshield Repair Kit positions itself as a professional-grade solution for bullseye damage up to 1.25 inches. This 9-piece system from a trusted name in automotive chemicals delivers permanent air-tight repairs without requiring complex mixing procedures. Designed for laminated windshield glass, it targets drivers seeking reliable, mess-free application with enhanced sealing capabilities.
What Makes It Stand Out: The kit’s state-of-the-art spring-lock syringe mechanism creates consistent pressure for optimal resin penetration, eliminating manual plunger control variables. Its advanced delivery system ensures air-tight results that rival professional work, while photographic instructions reduce user error. The 1.25-inch capacity exceeds many competitors, handling slightly larger bullseye damage with confidence.
Value for Money: Priced at $13.99, it costs only $2.50 more than the Rain-X while offering superior application control and larger damage coverage. The permanent repair claim and professional-quality results justify the modest premium. Compared to $50+ shop visits, it pays for itself with a single successful repair, making it a smart investment for vehicles frequently encountering road debris.
Strengths and Weaknesses: Strengths include the innovative spring-lock plunger for consistent results, clear photo-based instructions, no-mixing formula, and permanent air-tight seal technology. It handles larger bullseyes effectively. Weaknesses include limitation to bullseye damage (not optimized for star or linear cracks), sunlight-dependent curing, and lack of vacuum technology that premium kits offer. The 9-piece count feels minimal compared to feature-rich competitors.
Bottom Line: A solid choice for DIYers prioritizing sealing quality over speed, the Permatex kit excels at bullseye repairs with professional-grade reliability. Its spring-lock system justifies the slight price increase over basic kits. Best for users with isolated circular damage who value air-tight results and clear guidance.
3. Windshield Repair Kit, Windshield Crack Repair Kit with Suction Cup Curing Light, 4 Pcs Car Glass Repair Kit Quick Fix for Chips & Cracks, Windshield Chip Repair Kit, Automotive Nano Fluid(Yellow)

Overview: This professional-grade windshield repair kit combines advanced vacuum technology with a powerful UV curing light to address chips, bullseyes, star cracks, and linear damage up to 12 inches. The $16.97 price tag reflects its comprehensive feature set, offering near-professional capabilities for serious DIY enthusiasts. With no mixing required and a 5-10 minute cure time, it transforms complex repairs into manageable tasks without shop visits.
What Makes It Stand Out: The 20PA vacuum holder forces resin deep into damage, preventing air bubbles that plague simpler kits. Its intelligent UV lamp features multiple timer settings and exposure modes, allowing customized curing cycles based on damage type and environmental conditions. This adaptability, combined with nano-fluid resin technology, delivers clarity and strength that basic sunlight-dependent kits cannot match.
Value for Money: While nearly 50% more expensive than entry-level options, the included UV curing light alone justifies the premium, eliminating weather dependency. The vacuum system ensures professional-grade penetration, potentially saving $200-400 on replacements. For vehicles with recurring damage or owners wanting shop-quality results, this kit offers compelling long-term value despite higher upfront cost.
Strengths and Weaknesses: Strengths include powerful vacuum technology, adjustable UV curing with timer modes, versatility across damage types, and rapid 5-10 minute process. The kit handles cracks up to 12 inches effectively. Weaknesses involve a steeper learning curve, higher price point, and potential overkill for users with only occasional minor chips. The yellow color scheme may appeal less to some buyers.
Bottom Line: The ultimate choice for DIYers demanding professional results, this kit’s vacuum and UV technology justify its price premium. Perfect for multi-vehicle households or those with larger, complex cracks. If you value consistency and weather-independent operation, this is your best investment.
4. BLUTOKS Windshield Repair Kit, 2 PCS Windshield Crack Repair Kit with Suction Cup Curing Light, Automotive Nano Fluid Vehicle Windscreen Tool, Glass Repair Kit for Chips and Cracks (Navy)

Overview: The BLUTOKS Windshield Repair Kit delivers two complete repair systems for $16.99, making it ideal for multi-vehicle families or fleet maintenance. Each kit features 20PA vacuum technology and UV curing lights to handle bullseyes, star cracks, spider webs, and linear damage up to 12 inches. The navy-colored components offer the same professional-grade performance as premium single kits while doubling your repair capacity.
What Makes It Stand Out: This package’s exceptional value proposition—two professional kits for the price of one—immediately distinguishes it from competitors. The resin’s remarkable shear strength restores structural integrity beyond cosmetic improvement, while the vacuum holder prevents bubble formation. Multiple UV lamp modes provide curing flexibility, and the comprehensive damage type coverage rivals shop equipment.
Value for Money: At effectively $8.50 per kit, this represents the best per-unit value in the professional-grade category. You’re getting two UV lights, two vacuum systems, and double the resin for less than competitors charge for one. For households with multiple cars or small business vehicles, the savings multiply dramatically compared to $50+ per professional repair. The durability claims ensure long-term cost avoidance.
Strengths and Weaknesses: Strengths include unbeatable two-kit pricing, professional vacuum and UV technology, comprehensive crack type coverage, and strong shear-strength resin. The navy aesthetic is unique. Weaknesses involve potential quality control inconsistencies across two units, identical learning curves as other advanced kits, and storage requirements for extra components. Single-vehicle owners may find the second kit unnecessary.
Bottom Line: Unmatched value for families or fleet managers, the BLUTOKS 2-pack delivers professional repair capabilities at an unbeatable per-unit price. If you have multiple vehicles or anticipate future damage, this is the smartest purchase. Single-car owners should consider whether they’ll use the second kit within its shelf life.
5. Windshield Crack Repair Kit,2025 Latest Upgraded Glass Crack Repair Kit,5MinQuick-Glass Repair Liquid,Long-Lasting for Windshields, Windows, Mirrors,All Crack Types Windshield Repair Kit (Black).

Overview: Marketed as a 2025 upgraded solution, this $9.99 kit promises comprehensive repair capabilities across windshields, windows, mirrors, and even headlight covers. Using imported high-transparency resin with multi-layer curing technology, it claims 5-minute repairs for all crack types including bullseyes, stars, and spider webs. The black packaging and aggressive marketing target budget-conscious buyers seeking maximum versatility.
What Makes It Stand Out: Unprecedented multi-surface adaptability sets this apart, claiming to work on laminated glass, mirrors, and headlight covers—applications most competitors explicitly avoid. The nano-scale crack penetration and optical resin injection suggest advanced chemistry, while the 5-minute cure time rivals premium UV-equipped kits without requiring special equipment. The ultra-low price point challenges market norms.
Value for Money: At $9.99, it’s the cheapest option reviewed, costing less than a fast-food meal. If legitimate, the multi-surface capability offers extraordinary ROI across automotive and household glass repairs. However, professional windshield replacement costs $200-400, making even a 50% success rate financially worthwhile. The risk lies in questionable durability claims and unknown brand reputation compared to established names.
Strengths and Weaknesses: Strengths include unbeatable price, broad surface compatibility, quick application, and imported resin claims. The kit addresses various crack types comprehensively. Weaknesses involve lack of UV curing light, unknown brand reliability, potentially exaggerated marketing claims, and absence of vacuum technology. No sunlight requirement is stated, raising questions about actual curing mechanism. Quality control and customer support remain unproven.
Bottom Line: Approach with cautious optimism—perfect for experimental repairs on non-critical surfaces or as a backup kit. While the price is irresistible for windshield work, critical safety repairs warrant proven brands. Test first on mirrors or headlight covers before trusting it with structural windshield damage. Consider it a high-risk, high-reward gamble rather than a reliable primary solution.
6. WOOKKIT Windshield Repair Kit 2 Bottles Car Windshield Crack Repair Kit Nano Glass Repair Liquid Adhesive Solution for Fix Chips Bullseye

Overview: The WOOKKIT Windshield Repair Kit positions itself as a professional-grade solution for DIY glass repair. This $9.99 kit includes two 3mL bottles of nano glass repair liquid, promising to restore over 90% of original strength and transparency. Designed for laminated automotive glass, phone screens, and mirrors, it addresses bullseye, star, spiderweb, and linear cracks without requiring drills or pumps.
What Makes It Stand Out: WOOKKIT’s primary differentiator is its “nano repair technology” that claims molecular-level adhesion, penetrating deep into micro-fractures. The kit works across an impressive temperature range (-40°F to 200°F after curing) and includes UV-resistant resin to prevent yellowing. The sub-30-minute process requires only sunlight or UV light, with curing films included. Its multi-surface compatibility extends beyond windshields to tempered glass and mirrors, offering unusual versatility for a budget kit.
Value for Money: At $9.99 for two bottles capable of 4-6 repairs, this represents significant savings compared to $100+ professional services. The per-repair cost averages $1.66-$2.50, making it highly economical for minor damage. While cheaper single-bottle kits exist, the dual-bottle package provides backup resin for multiple attempts or subsequent damages, enhancing long-term value.
Strengths and Weaknesses: Strengths include the advanced nano-formula claims, comprehensive crack type coverage, extreme temperature resistance, and straightforward injection process. The kit’s versatility across glass types adds value. Weaknesses involve potentially overstated “nano technology” marketing without independent verification, variability in user results depending on crack complexity, and limited resin quantity for larger damages. The absence of an advanced applicator may affect precision.
Bottom Line: The WOOKKIT kit offers ambitious technology claims at an entry-level price. It’s best suited for confident DIYers addressing minor chips and bullseyes on multiple glass surfaces, though results may vary from the promised molecular-level restoration.
7. J-B Weld 2100 Windshield Saver Repair Kit, 0.025 fl. oz

Overview: J-B Weld brings its trusted adhesive reputation to windshield repair with this compact kit priced at $12.95. Containing just 0.025 fluid ounces of repair resin, this system targets small chips and star-shaped damage on laminated windshields. The kit emphasizes simplicity, allowing DIYers to minimize damage appearance and prevent further spreading without professional help.
What Makes It Stand Out: The J-B Weld brand name carries significant weight in the DIY community, known for durable metal and plastic repairs. This kit leverages that trust for automotive glass applications. Its streamlined approach focuses specifically on laminated windshields rather than promising universal compatibility. The system repairs damage up to 1-1/4 inches in diameter, covering typical road debris impacts without overcomplicating the process with unnecessary components.
Value for Money: At $6.48 per fluid ounce, this appears expensive for the tiny volume provided. However, the J-B Weld brand commands a premium for reliability and quality control. For single, small-chip repairs, it’s still 80-90% cheaper than professional services. The limited resin quantity suits one-time users rather than those anticipating multiple repairs, making it cost-effective for immediate needs but poor value for frequent use.
Strengths and Weaknesses: Strengths include brand reputation, proven adhesive technology, straightforward application, and focused purpose for laminated windshields. The kit’s simplicity reduces error potential. Weaknesses are the extremely limited resin volume, lack of advanced features like UV curing films or multi-surface claims, and absence of temperature resistance specifications. It offers fewer repairs per kit than competitors and lacks nano-technology marketing of newer brands.
Bottom Line: This J-B Weld kit suits brand-loyal DIYers needing a quick, one-time fix for minor windshield chips. While expensive per ounce, it trades flashy claims for trusted reliability, making it ideal for conservative users prioritizing brand confidence over advanced features.
8. popalula Windshield Chip Repair Kit - 2025 Upgrade Car Windshield Crack Repair Kit, Glass Repair Liquid for Cracks and Chips, Rock Chip Repair Kit for Fix Windows, Mirrors, Glasses, All Crack Types
Overview: Marketed as a “2025 upgrade,” the popalula kit promises revolutionary speed in windshield repair at $12.99. This kit claims to fix chips and cracks in just five minutes using cutting-edge technology and imported high-transparency resin. It addresses an extensive range of damage types from bullseyes to reticular cracks while promising compatibility with windshields, mirrors, sunroofs, and even industrial equipment glass.
What Makes It Stand Out: The five-minute repair claim dramatically undercuts competitors’ 20-30 minute timelines, appealing to impatient DIYers. The kit boasts “multi-layer curing technology” and nano-scale crack penetration for near-invisible results. Its versatility extends beyond typical automotive glass to headlights and industrial equipment, making it one of the most broadly applicable kits available. The 2025 branding suggests recent formulation improvements.
Value for Money: At $12.99, this kit sits in the mid-range price point but promises premium speed and versatility. If the five-minute claim holds true, the time savings alone justify the cost over slower alternatives. The universal formula potentially eliminates need for multiple specialized products, creating value for users with varied glass repair needs. However, the ambitious claims require scrutiny—real-world results may not match marketing promises.
Strengths and Weaknesses: Strengths include exceptional speed claims, comprehensive crack type coverage, multi-surface versatility, and user-friendly design requiring no glass removal. The imported resin promises high transparency. Weaknesses involve potentially exaggerated marketing language (“2025 upgrade,” “magical chemical reaction”), lack of temperature resistance specifications, and absence of quantity information. The five-minute timeline may compromise curing quality compared to longer UV exposure.
Bottom Line: The popalula kit targets speed-focused DIYers willing to test bold claims. While its versatility impresses, users should approach five-minute promises skeptically and follow instructions meticulously. Best for minor damage where time matters more than guaranteed invisibility.
9. NASILOOP Windshield Repair kit, Quick and Efficiency Glass Repair Fluid, Car Windshield Crack Repair Resin Kit for Fixing Chips, Bulls-Eye, Cracks and Star-Shape Cack-2 Pack

Overview: NASILOOP offers a budget-friendly two-pack kit at $9.95, targeting drivers seeking quick fixes for various windshield damages. The kit promises high-speed curing through specially-engineered polymers that create molecular-level bonds. It claims versatility across chips, bullseyes, star cracks, half-moon shapes, and remarkably, cracks up to 12 inches long—far exceeding typical DIY kit capabilities.
What Makes It Stand Out: The two-pack configuration provides exceptional value and backup resin for multiple repairs or initial practice attempts. The kit’s most audacious claim is repairing 12-inch cracks, positioning it as an alternative to professional replacement for substantial damage. The “magical chemical reaction” language emphasizes rapid cross-linking for immediate results, appealing to users wanting minimal downtime.
Value for Money: At under $10 for two bottles, this represents the lowest per-unit cost among comparable kits. Even if each bottle only handles one effective repair, the sub-$5 price point per use remains highly economical versus $150+ professional replacements. The two-pack structure eliminates repurchase anxiety for subsequent damages, making it ideal for budget-conscious drivers or those with multiple vehicles.
Strengths and Weaknesses: Strengths include aggressive pricing, dual-bottle packaging, comprehensive damage type coverage, and ambitious crack length claims. The user-friendly design suits novices. Weaknesses involve vague technical specifications (no temperature ratings, transparency percentages, or UV resistance details), potentially unrealistic 12-inch crack promises, and marketing hyperbole that lacks independent validation. The kit includes fewer premium accessories than pricier alternatives.
Bottom Line: NASILOOP serves as an ultra-budget entry point for DIY windshield repair experimentation. While its 12-inch crack claims strain credibility, it offers reasonable value for minor chips and bullseyes. Purchase with managed expectations—excellent for learning, but verify results before relying on it for major cracks.
10. tuncate Windshield Repair Kit for Chips and Cracks– 4 Pack Glass Repair Kit with Enhanced Injection Head for Chips, Cracks & Star-Shaped Cracks, Quick & Easy DIY Fix for Windshields, Black

Overview: The tuncate kit distinguishes itself through sheer volume and safety focus at $8.91. This four-pack system includes enhanced injection heads for improved resin delivery, targeting chips, cracks, and star-shaped damage. The kit emphasizes safety certification, child/pet-friendly formulation, and performance across extreme temperatures from -4°F to 104°F, making it suitable for year-round repairs in harsh climates.
What Makes It Stand Out: Four individual repair units provide unmatched quantity for the price, ideal for families or fleet maintenance. The enhanced injection head promises better precision than standard applicators. Most notably, the kit claims authoritative safety certification with no pungent odor, natural degradation, and 97% light transmittance—addressing health and visibility concerns competitors overlook. The resin’s 120MPa compressive strength claim (130% of ordinary glass) suggests exceptional durability.
Value for Money: At $8.91 for four complete repair sets, this costs merely $2.23 per unit—unbeatable value. Users can address multiple damages across several vehicles or practice on less visible areas before tackling prominent cracks. The safety certifications add intangible value for households with children or pets. Even if individual resin quality slightly trails premium brands, the quantity advantage makes this the most cost-effective option for recurring needs.
Strengths and Weaknesses: Strengths include exceptional per-unit pricing, enhanced applicator design, comprehensive safety features, extreme temperature operability, and high strength claims. The four-pack versatility suits varied repair scenarios. Weaknesses involve potentially smaller resin quantities per unit, less brand recognition than J-B Weld, and marketing claims (120MPa strength, safety certification) lacking specific regulatory references. The black color scheme may show residue if improperly applied.
Bottom Line: The tuncate kit dominates on value and safety for multi-vehicle households or commercial fleets. While brand prestige is minimal, the four-pack quantity and safety-conscious formulation make it the practical choice for frequent users prioritizing economy and family-friendly operation over premium branding.
Understanding Windshield Damage and Repair Viability
Types of Windshield Damage Explained
Not all windshield damage is created equal, and recognizing the difference is your first step toward effective repair. Bullseye breaks appear as circular chips with a dark center, typically caused by rounded debris. Star breaks feature multiple cracks radiating from a central impact point, while combination breaks mix characteristics of both. Edge cracks within two inches of the windshield perimeter present unique challenges due to stress concentration zones. Understanding these patterns helps you assess whether a DIY approach is appropriate or if you’re dealing with damage that compromises the laminated glass structure beyond home repair capabilities.
When DIY Repair Makes Sense vs. Professional Replacement
The golden rule is size and location. Damage smaller than a quarter-inch diameter generally falls within DIY repair territory, while cracks longer than three inches typically require professional intervention. Location matters critically: any damage in the driver’s direct line of sight, even after repair, may violate safety standards. Similarly, chips that have penetrated both glass layers or show moisture contamination inside the laminate require specialized equipment. Your kit should include damage assessment guidelines, but never let cost considerations override safety—when in doubt, consult a certified auto glass technician.
Key Components of Professional-Grade Repair Kits
Resin Quality: The Heart of Every Repair
The resin is where chemistry meets craftsmanship. Professional-grade kits use specially formulated acrylic resins that match your windshield’s refractive index (typically 1.52) to ensure optical clarity. Viscosity ranges from thin water-like formulas for hairline cracks to thicker gels for substantial chips. UV stability prevents yellowing over time, while flexural strength ratings indicate how well the repair will withstand temperature fluctuations. The best formulations cure to at least 80% of the original glass strength, creating a molecular bond that distributes stress across the damaged area.
Injection Tools and Bridge Assemblies
Your kit’s delivery system determines precision and ease of use. Bridge assemblies should feature adjustable height mechanisms to accommodate various windshield curvatures, from flat commercial vehicle glass to steeply raked sports car windshields. Look for vacuum-assisted injection systems that first remove air from the damage cavity before introducing resin—this two-stage process eliminates bubbles that compromise structural integrity. The injection syringe needs smooth, controlled pressure application; jerky or uneven delivery forces resin out of the damage zone or creates incomplete fills.
Curing Technology: UV Light and Alternatives
Curing transforms liquid resin into a solid, load-bearing repair. Most kits include UV LED lights operating at 365-400 nanometers, the optimal wavelength for activating photo-initiators in the resin. Power output matters—a weak light extends curing time and may result in incomplete polymerization. Some advanced systems offer dual-cure resins that also respond to visible light, providing backup curing options on cloudy days. Solar curing is possible but unpredictable; it depends on UV index, glass tinting, and ambient temperature, making it unreliable for critical repairs.
Essential Features to Evaluate Before Buying
Resin Viscosity and Clarity Standards
Thicker resins fill large voids but may not penetrate micro-cracks, while thin resins excel at wicking into fine fissures but can drain out of bigger chips. Premium kits include multiple viscosity options or adjustable formulas. Clarity standards should specify less than 1% haze after curing, with color stability tested to SAE J1990 standards. Ask about refractive index matching—poorly matched resin creates a visible distortion that can be more distracting than the original damage.
Bridge Design and Stability Factors
A wobbly bridge ruins repairs. The suction cup base must maintain vacuum on both dry and wet surfaces, with silicone seals that conform to textured glass coatings. Articulating joints should lock firmly without slipping under injection pressure. For multi-vehicle applications, consider bridge reach—some designs extend further to access damage near windshield edges or behind rearview mirror mounts. Weight distribution prevents the assembly from tipping on steeply angled glass, a common issue with compact car windshields.
Curing Light Power and Wavelength
Check the light’s milliwatt output; effective curing requires at least 1,000 mW/cm² at the resin surface. Beam spread should concentrate on a 1-2 inch diameter area without hot spots that cause uneven curing. Battery life indicators prevent mid-cure failures, while overheating protection extends LED lifespan. For fleet use, consider 12V adapter options that plug into vehicle power outlets, eliminating battery concerns during roadside repairs.
Pressure and Vacuum Control Mechanisms
Manual syringes offer tactile feedback but require steady hands. Semi-automatic systems use spring-loaded plungers for consistent pressure, while professional-grade kits may feature pneumatic assistance. Vacuum cycles should last 30-60 seconds to fully evacuate trapped air; look for kits with built-in timers or clear visual indicators. Over-pressure relief valves prevent blowing out the resin or expanding cracks, a common beginner mistake that turns repairable damage into replacement scenarios.
Vehicle Compatibility Considerations
Windshield Glass Types and Their Impact
Modern vehicles use various glass formulations. Standard laminated glass repairs easily, but acoustic-dampening windshields contain a vinyl layer that absorbs resin differently. Heated windshields with embedded wires require careful resin selection to avoid conductivity issues. Rain-sensing glass has coatings that may interfere with adhesion—your kit should specify compatibility with these advanced materials. Commercial vehicles often use thicker glass, requiring longer injection times and more resin volume.
Curvature and Angle Adaptability
A sports car’s steeply raked windshield demands a different approach than a flat RV window. Adjustable bridges with 45-degree angle capability handle most passenger vehicles, but extreme angles found in some supercars may need specialized adapters. Glass thickness varies too—some luxury vehicles use 6mm glass versus the standard 4.5mm, affecting how deep your injector must reach. Multi-vehicle kits should include extension tips and angle compensators for universal application.
Multi-Vehicle Resin Formulations
If you’re managing a fleet, universal resins that work across different glass manufacturers (Pilkington, AGC, Saint-Gobain) save inventory costs. However, some European vehicles use chemically different interlayers requiring specific resin chemistry. Test reports showing adhesion strength across multiple glass types provide confidence for multi-vehicle applications. Temperature performance specs (-40°F to 200°F) ensure repairs hold up whether you’re in Phoenix summers or Minnesota winters.
The Repair Process: Step-by-Step Professional Approach
Preparation and Damage Assessment
Professional results start with meticulous preparation. Clean the damage area with 90% isopropyl alcohol to remove oils and debris. Use a fine pick to gently remove loose glass fragments—never force material out, as this can extend cracks. Inspect with a magnifying glass for hidden micro-cracks that branch from the main damage; these must be addressed or they’ll spread post-repair. Document damage with photos before starting, both for insurance purposes and to verify repair effectiveness afterward.
Creating a Clean Repair Environment
Dust is your enemy. Work in a garage or shaded area where wind can’t blow contaminants into the resin. If outdoor repair is unavoidable, create a temporary clean zone using a damp cloth around the work area. Temperature matters—glass and resin should be between 50-80°F for optimal flow and curing. In cold weather, warm the glass gently with a hair dryer on low setting; never apply direct high heat, which can shock the glass and worsen damage.
Injection Techniques for Optimal Results
The sequence matters: vacuum first to remove air, then slowly inject resin while monitoring the damage with a inspection mirror. Pulse injection—short 2-3 second bursts followed by 5-second pauses—allows resin to fully penetrate without building excessive pressure. Watch for the “wetting front” where resin fills the damage; stop immediately when you see resin reaching the crack tips. Overfilling wastes material and creates a raised bump that requires extensive polishing.
Curing Protocols for Maximum Strength
Patience pays dividends. Apply UV light for the manufacturer-specified time—typically 5-10 minutes—without moving the light source. For deep damage, cure in stages: 2 minutes, then add more resin to fill any shrinkage, then final cure. After initial curing, remove the bridge and apply a drop of resin directly on the repair surface, then cure again. This “cap cure” ensures a level finish and adds strength. Let the repair rest for 24 hours before washing or exposing to extreme temperatures.
Finishing and Polishing Methods
Post-cure finishing determines final appearance. Use a razor blade at a 30-degree angle to shave excess resin flush with the glass surface. Follow with 1000-grit wet sandpaper to level any remaining high spots, then polish with cerium oxide compound and a felt pad. Professional kits include polishing supplies; if yours doesn’t, automotive glass polish works. The goal is a surface that doesn’t catch your fingernail and shows minimal distortion when viewed at an angle.
Common Pitfalls and How to Avoid Them
Over-Injection and Resin Waste
Beginners often think more resin equals stronger repairs. In reality, excess resin creates hydraulic pressure that can extend cracks or cause delamination. Use the minimum amount needed to fill the damage plus 10% extra for shrinkage. Mark the injection plunger position with tape to track how much you’ve delivered. If resin oozes from the damage periphery, stop immediately—you’ve applied too much pressure or the crack has extended beyond visible boundaries.
Inadequate Curing Issues
Nothing sabotages a repair like incomplete curing. Cloudy or tacky resin indicates insufficient UV exposure or expired photo-initiators. Always check expiration dates on resin vials—old resin may never fully cure. If curing in marginal sunlight, extend exposure time by 50% and protect the area from shadows. Partially cured resin washes out in the first rainstorm, wasting your effort and potentially allowing moisture into the damage, which complicates future repair attempts.
Temperature and Humidity Factors
Resin viscosity changes dramatically with temperature. Cold resin flows like honey, failing to penetrate fine cracks, while hot resin becomes water-thin and drains out before curing. Store resin at room temperature and acclimate it to the work environment for 30 minutes before use. High humidity introduces moisture into the damage, preventing resin adhesion. Use a small amount of acetone on a lint-free cloth to displace moisture before applying resin in humid conditions, but ensure it evaporates completely before injection.
Cost Analysis: DIY vs Professional Services
Breaking Down Kit Value Proposition
A quality multi-vehicle repair kit represents an investment, not an expense. Professional chip repairs average $60-100 per incident; a comprehensive kit pays for itself after 2-3 uses. Fleet managers see ROI faster—one kit can service dozens of vehicles. Factor in downtime savings: a 30-minute DIY repair versus hours at a shop. However, value diminishes if the kit sits unused for years; resins have 1-2 year shelf lives. Consider splitting costs with fellow enthusiasts or neighbors to maximize utility.
Hidden Costs to Consider
The sticker price rarely tells the full story. Replacement suction cups, additional resin vials, and curing light batteries add up. Professional polishing compounds and drill bits for creating access points in tight cracks may not be included. Most significantly, factor in the cost of failed repairs—if you botch a repairable chip and it spreads, you’re looking at a $200-500 windshield replacement. Investing in a slightly more expensive kit with better instructions and support reduces this risk substantially.
Safety and Legal Considerations
Driver Visibility Standards
Repaired damage must not create optical distortion that interferes with road vision. Most jurisdictions follow ANSI Z26.1 standards, which specify maximum allowable repair diameter in the critical viewing area (directly in front of the driver). Repairs in this zone should be less than 1 inch diameter and show no more than 5% light scatter. Document your repairs with photos; if you’re involved in an accident later, insurers may question whether an improper repair contributed to visibility issues.
ADAS Calibration Implications
Modern vehicles with Advanced Driver Assistance Systems (ADAS) mount cameras behind the windshield. Even perfect repairs can subtly alter camera optics, affecting lane departure warnings or automatic braking. Some manufacturers require windshield replacement after any damage in camera zones. Before repairing near ADAS components, consult your vehicle’s service manual. If you proceed, test all ADAS functions afterward in a safe environment. Professional recalibration costs $200-400—factor this into your repair decision.
Longevity and Warranty Factors
Expected Repair Lifespan
A properly executed repair using quality materials should last the remaining life of the windshield. Real-world data shows 85% of professional-grade DIY repairs remain intact after 5 years. However, extreme temperature cycling, vibration, and additional impacts test repair limits. Repairs near windshield edges have shorter lifespans due to higher stress concentrations. Document the repair date and monitor it seasonally; any sign of yellowing, cracking, or delamination indicates the resin bond is failing.
Manufacturer Support Expectations
Reputable kit manufacturers stand behind their products with technical support hotlines and online video libraries. Look for companies offering at least a 1-year warranty on tools and a satisfaction guarantee on resin performance. Some provide free resin analysis if a repair fails—you send a sample, they test it and send replacement product. Community forums and user groups indicate strong manufacturer support. Avoid brands with no listed contact information or those that only offer email support with 5+ day response times.
Frequently Asked Questions
Can I repair a crack that extends to the edge of my windshield?
Edge cracks within two inches of the windshield perimeter are high-stress areas where DIY repairs have low success rates. The constant flexing at the edge usually causes the crack to continue spreading despite repair attempts. Professional replacement is strongly recommended for these cases.
How long should I wait after a repair before washing my car?
Wait a minimum of 24 hours before any car wash, and avoid high-pressure washers near the repair for 72 hours. The resin continues to harden and achieve full strength over the first day. Steam cleaners and automatic car washes with harsh chemicals can degrade partially cured resin.
Will a repaired chip be completely invisible?
Even professional repairs leave some trace. Expect 70-90% visual improvement—the damage becomes a faint shadow rather than a glaring defect. The goal is structural integrity and minimal optical distortion, not perfect invisibility. Location and damage type significantly affect final appearance.
Can I use windshield repair resin on other glass surfaces?
Standard resins work on laminated glass only. Tempered glass (side windows, sunroofs) shatters rather than cracks, making resin injection ineffective. Some specialty resins exist for phone screens or tablet glass, but auto glass resin isn’t formulated for these applications and may not adhere properly.
What temperature is too cold for windshield repair?
Below 50°F, resin becomes too viscous to penetrate micro-cracks effectively. The glass itself may also contract, causing cracks to close tightly and resist resin flow. If you must repair in cold weather, warm the glass gradually to 60°F using a vehicle heater, never direct flames or high heat.
How do I know if my windshield has acoustic or heating elements?
Look for tiny wires or a visible grid pattern, especially at the bottom where wipers rest. Check your vehicle’s build sheet or VIN decoder online. Acoustic glass is marked with “A” or sound wave symbols in the corner etching. These require compatible resins—using standard resin can create visible defects or electrical issues.
Is it normal for the repair to look worse before it looks better?
Yes. During injection, the damage area may appear cloudy or enlarged as resin displaces air. This is temporary. Proper curing clears the resin, and final polishing removes surface haze. If it still looks worse after 48 hours, the repair likely failed and needs professional assessment.
Can I repair multiple chips at once?
Technically yes, but it’s not recommended for beginners. Each repair requires undivided attention to injection pressure and curing. Working on multiple spots simultaneously increases contamination risk and makes it harder to monitor each repair’s progress. Complete one repair fully before starting the next.
How often should I replace unused resin in my kit?
Unopened resin vials last 12-24 months when stored in a cool, dark place. Once opened, use within 30 days as oxygen exposure degrades photo-initiators. Write the open date on vials. If resin appears cloudy, thickened, or has separated, discard it regardless of age—it’s chemically compromised.
Will insurance cover DIY repair kit costs?
Most insurers prefer paying for professional repairs ($50-100) over replacements ($500+). Some may reimburse DIY kit costs if you provide before/after photos and receipts, but this varies by policy. Comprehensive coverage typically includes glass damage, but DIY attempts that lead to replacement may complicate claims. Check with your agent before starting.