There’s something almost sacred about the original paint on a vintage automobile. Those layers of lacquer or early enamel hold decades of stories—sun-drenched road trips, garage conversations, and the gentle patina that only time can create. Unlike modern clear-coated finishes, vintage paint is a living surface that breathes, shrinks, and ages alongside the metal it protects. This delicate relationship demands a completely different approach to protection, one that respects the chemistry of a bygone era while shielding it from today’s harsh environmental assaults.
Choosing the right wax for your classic car isn’t just about achieving a glossy finish; it’s about preservation, reversibility, and working with the paint rather than against it. The wrong product can lock in moisture, accelerate cracking, or create a synthetic barrier that prevents the natural curing process vintage paints need to remain stable. Whether you’re caretaker of a numbers-matching survivor or a beautifully preserved driver, understanding the nuanced world of vintage-specific wax formulations will ensure your paint remains vibrant for generations to come.
Top 10 Best Wax For Vintage Paint
Detailed Product Reviews
1. FolkArt Home Decor Chalk Furniture & Craft Acrylic Paint in Assorted Colors, 8 ounce, Antique Wax
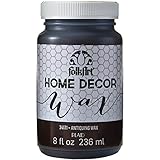
Overview: FolkArt’s Antique Wax offers an accessible entry point into furniture antiquing with its 8-ounce paraffin-infused formula designed specifically for chalk paint projects. This sepia-tone wax provides DIY enthusiasts with a straightforward way to add vintage character while sealing and protecting their creations. The product emphasizes user-friendliness, featuring simple brush application and easy cleanup with paper towels, making it ideal for hobbyists experimenting with distressed finishes.
What Makes It Stand Out: The paraffin base creates a distinctive sepia-toned patina that authentically mimics aged furniture without complex techniques. It’s engineered to work seamlessly with FolkArt’s Home Décor line, creating an integrated solution for cohesive project planning. The formula settles beautifully into crevices and details, automatically creating depth and dimension. The more you buff, the glossier the sheen becomes, offering customizable finish levels from matte to satin.
Value for Money: At $1.99 per fluid ounce, this is one of the most economical waxes available. The 8-ounce bottle provides sufficient product for multiple small to medium projects, making it perfect for beginners who don’t want to invest heavily. While requiring reapplication every 6-12 months, the low cost makes maintenance budget-friendly. However, the paraffin formula trades long-term durability for affordability.
Strengths and Weaknesses: Pros include exceptional affordability, beginner-friendly application, authentic antique aesthetics, and clear instructions that build novice confidence. The integrated system with FolkArt brushes simplifies the learning curve. Cons feature conflicting dry time information (24 hours vs 1-2 hours), less durability than premium alternatives, and the need for frequent reapplication. The finish may not achieve the hardness of beeswax or synthetic polymer waxes.
Bottom Line: FolkArt Antique Wax delivers excellent value for casual DIYers and beginners experimenting with chalk paint techniques. While not professional-grade, it produces charming vintage results at an unbeatable price point, making it ideal for decorative pieces that don’t endure heavy use.
2. Jolie Finishing Wax - Protective topcoat Paint - Use on interior furniture, cabinets, walls, home decor and accessories - Odor-Free, Non-Hazardous - Clear - 120 ml

Overview: Jolie Finishing Wax in Clear sets a new standard for health-conscious furniture finishing with its completely odor-free, non-hazardous formulation. This 120ml protective topcoat delivers professional-grade results without toxic fumes, making it suitable for indoor use even in poorly ventilated spaces. It seals and protects painted, stained, or raw wood surfaces with a beautiful matte finish that can be buffed to a subtle sheen.
What Makes It Stand Out: The non-yellowing formula ensures white and light-colored painted pieces maintain their true hue over time. Its versatility extends beyond furniture to cabinetry, walls, and decorative accessories. The wax can be layered with colored waxes for dimensional effects. A single 500ml can covers an impressive 300-450 square feet, demonstrating remarkable efficiency. The eight-hour dry time between coats ensures proper curing and durability.
Value for Money: At $5.16 per fluid ounce, Jolie positions itself in the mid-range category, but exceptional coverage makes it economical for larger projects. The 120ml size is perfect for testing or small pieces, while the 500ml option offers better value for extensive work. Compared to hazardous alternatives requiring respirators and ventilation, the health benefits alone justify the premium for many users.
Strengths and Weaknesses: Pros include the safest formulation available, non-yellowing properties, excellent coverage, professional results, and versatility across surfaces. The odor-free performance enables comfortable indoor work. Cons involve higher upfront cost than basic waxes and slower project completion due to eight-hour wait times. The small 120ml size may frustrate users with multiple large furniture pieces, requiring frequent repurchases.
Bottom Line: Jolie Clear Wax is worth every penny for serious DIYers and professionals prioritizing safety and quality. The odor-free performance and lasting protection make it a top-tier choice for furniture that sees daily use.
3. Prima Marketing Art Alchemy-Metallique Wax-Vintage Gold, 0.68 Fl Oz (Pack of 1) 655350963958 for Furniture Retouch Decoration Paint Over Furniture Trims

Overview: Prima Marketing’s Metallique Vintage Gold Wax occupies a specialized niche in furniture finishing, offering luxurious metallic accents in a diminutive 0.68-ounce package. This Hungarian-made product is designed specifically for adding gilded highlights to furniture trims, carved details, and decorative elements rather than serving as a full-piece protective topcoat. Its intensely pigmented formula transforms ordinary pieces with strategic touches of vintage glamour and sophisticated shimmer.
What Makes It Stand Out: The metallic finish provides an authentic gold leaf appearance without the complexity and cost of traditional gilding. Its precision application allows for targeted enhancement of moldings, hardware, and textured surfaces. The wax consistency offers more control than liquid metallic paints, reducing drips and mistakes on detailed work. It adheres to multiple surfaces beyond wood, including metal and resin, expanding creative possibilities for mixed-media projects.
Value for Money: At $11.91 per fluid ounce, this is a premium-priced product, but the tiny size keeps the total investment under $9, making it accessible for accent work. For its intended purpose—detail enhancement—the cost is justified by the professional, jewelry-like results. However, using it for large surfaces would be prohibitively expensive, positioning it as a specialty tool rather than a general-purpose finish.
Strengths and Weaknesses: Pros include stunning metallic finish, precise application control, versatility across materials, and low total cost for trial. The small quantity minimizes waste for occasional users. Cons feature extremely limited coverage suitable only for details, high per-ounce pricing, and lack of protective qualities for full furniture pieces. It functions as a complement, not a replacement, for protective waxes.
Bottom Line: This is a specialty tool for furniture artists seeking metallic accents. Purchase it for highlighting details and creating elegant highlights, not as a primary finish, and you’ll be delighted with the professional, gilded results that elevate ordinary pieces to extraordinary.
4. Jolie Finishing Wax - Protective topcoat Paint - Use on interior furniture, cabinets, walls, home decor and accessories - Odor-Free, Non-Hazardous - Brown - 120 ml
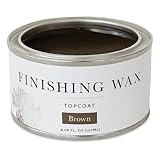
Overview: Jolie Finishing Wax in Brown delivers the same health-conscious formulation as its clear counterpart while adding rich, warm tinting for authentic antique effects. This 120ml tinted wax allows furniture restorers to create depth, age, and dimension without sacrificing the odor-free, non-hazardous benefits that make Jolie a standout brand. The brown pigment naturally settles into crevices, emphasizing carvings and moldings with realistic shadowing.
What Makes It Stand Out: The water-resistant properties provide superior protection compared to many tinted waxes, while the soft, workable consistency enables effortless blending and custom intensity. Users can apply directly for bold aging effects or layer over clear wax for subtle, controlled shading. The formula excels at creating rustic, farmhouse, and genuinely vintage aesthetics that look natural rather than artificial. The brown hue adds warmth and complexity to flat paint colors.
Value for Money: Matching the clear version at $5.16 per fluid ounce, the brown wax offers identical value with added color benefits. The ability to transform flat-painted pieces into dimensional, antique-looking treasures justifies the mid-range pricing. For decorative artists, it eliminates the need to purchase separate tinting mediums or mix custom colors, saving time and reducing waste.
Strengths and Weaknesses: Pros include safe formulation, beautiful brown patina, excellent workability, water resistance, and professional antique effects. The option to layer over clear wax provides unmatched control over intensity. Cons involve the small container size limiting large-project use, eight-hour inter-coat dry time slowing workflow, and potential for over-darkening if applied too heavily. The brown hue may not suit all design styles or color palettes.
Bottom Line: Jolie Brown Wax is essential for achieving authentic aged finishes safely. Its quality, versatility, and health-conscious formulation make it a worthwhile investment for decorative furniture projects where dimensional, antique character is desired.
5. Amy Howard at Home Cerusing Wax for Vintage and Antique Furniture Restoration | Provides Distressed Lime-Washed Protective Finish and Seal | Fast 20-Minute Drying Time | 8oz Soft Wax Bottle
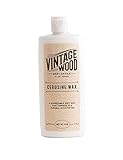
Overview: Amy Howard’s Cerusing Wax revolutionizes the trendy lime-washed look with its innovative white formula and remarkably fast 20-minute drying time. This 8-ounce soft wax creates the sought-after cerused effect—where white pigment settles into wood grain for high-contrast, weathered elegance—without the complicated traditional liming process. The product works on both wood and metal, expanding its utility across multiple restoration projects from dressers to metal accent tables.
What Makes It Stand Out: The rapid drying time dramatically accelerates project completion compared to conventional waxes requiring hours or days. The formula applies white but dries to a protective, white-washed satin patina that highlights wood grain beautifully. Unlike many specialty products, it serves as both decorative finish and protective sealer, preventing water damage while delivering aesthetic impact. The generous 8-ounce size supports multiple furniture pieces.
Value for Money: At approximately $2.75 per ounce, this specialty wax offers mid-range pricing with premium performance. While more expensive than basic antiquing waxes, its unique cerusing capability and dual-function as sealer provide excellent value for those specifically seeking this finish. The quick-dry feature saves significant time, which for many DIYers translates to money, while the ample quantity reduces repurchase frequency.
Strengths and Weaknesses: Pros include lightning-fast 20-minute drying, authentic cerused finish, versatility across wood and metal, protective qualities, and generous 8-ounce quantity. The quick work time allows rapid project progression. Cons feature the niche application limiting general use, full cure requiring 5-7 days before heavy use, and potential learning curve for achieving consistent, natural-looking results. The white finish may not suit all furniture styles or existing decor.
Bottom Line: For creating authentic cerused finishes quickly, this is unmatched. Patient users willing to practice the technique will achieve stunning, professional-looking results that transform ordinary wood pieces into trendy, high-end statement furniture.
6. AMY HOWARD AT HOME Dark Antique Wax for Vintage and Antique Furniture Restoration | Provides Dark Colored Protective Finish and Seal | Multi-Surface Protection | 3.5oz Tin
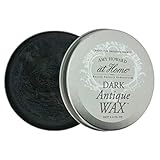
Overview: The AMY HOWARD AT HOME Dark Antique Wax is a premium 3.5-ounce furniture restoration product designed to create authentic aged finishes without sanding. This specialized wax targets vintage and antique furniture enthusiasts seeking professional-quality results. Formulated to work on wood, chalk paint, milk paint, and metal surfaces, it delivers a rich, dark patina that enhances natural grain while providing durable protection.
What Makes It Stand Out: The no-sanding approach sets this wax apart, allowing DIYers to achieve years of authentic aging with minimal prep work. Its multi-surface compatibility makes it exceptionally versatile, while the professional-grade formula creates depth and richness unmatched by standard waxes. The recommended two-step process using Light Antique Wax as a base layer demonstrates a sophisticated understanding of finish building.
Value for Money: At $21.99 ($6.28 per ounce), this premium-priced wax justifies its cost through superior results and time savings. While cheaper alternatives exist, they often require extensive sanding or multiple coats to achieve similar effects. The concentrated formula means a little goes a long way on detailed work.
Strengths and Weaknesses: Strengths include authentic aging without sanding, multi-surface versatility, professional-quality finish, and excellent depth of color. Weaknesses are the small tin size for larger projects, the necessity of purchasing Light Antique Wax separately for optimal results, and the premium price point that may deter casual users.
Bottom Line: This wax is ideal for serious furniture restorers prioritizing authentic patina and professional results. The investment pays dividends in quality and efficiency for dedicated antique enthusiasts.
7. Howard Products Chalk-Tique Dark Paste Wax for Wood - Dark Chalk Paint Polish, Beeswax Wood Polish - Enhance and Distress Home Décor - 6 oz
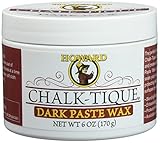
Overview: Howard Products Chalk-Tique Dark Paste Wax is a 6-ounce protective polish specifically formulated for chalk-style painted surfaces. This versatile wax enhances the antique aesthetic while providing robust protection for furniture and décor. Designed to work on wood, glass, ceramic, laminate, and metal, it serves as an essential finishing step for chalk paint projects of any scale.
What Makes It Stand Out: The integrated UV inhibitor distinguishes this wax from competitors, protecting finish colors from sun fade and extending the life of your projects. Its generous 6-ounce size offers excellent coverage for multiple pieces, while the specialized formulation enhances chalk paint’s distinctive matte appearance without compromising durability.
Value for Money: Priced at $15.16 for 6 ounces, this wax delivers exceptional value at approximately $2.53 per ounce. The larger quantity and UV protection features make it more economical than premium boutique brands while maintaining professional-grade performance for chalk paint applications.
Strengths and Weaknesses: Strengths include UV fade protection, generous quantity, multi-surface versatility, and specialized chalk paint enhancement. The paste consistency provides durable protection. Weaknesses include limited appeal for non-chalk paint users and a less premium brand perception compared to high-end restoration products.
Bottom Line: An outstanding value for chalk paint enthusiasts seeking reliable protection and authentic aging effects. The UV protection and quantity make it a practical choice for frequent DIYers.
8. Wood Finishing Wax for Furniture - 100% Natural Chalk Paint Wax for Sealing & Protecting Painted and Raw Wood Surfaces, Wooden Floors & More - Clear Protective Finish, 3.5 Oz (Includes Tools)

Overview: This 3.5-ounce Wood Finishing Wax offers a 100% natural solution for sealing and protecting painted and raw wood surfaces. Crafted from plant-based oils, carnauba wax, and beeswax, this non-toxic formula provides eco-conscious consumers with professional results. The included application tools and indoor/outdoor versatility make it a comprehensive solution for furniture, floors, and décor.
What Makes It Stand Out: The completely natural, non-toxic composition sets this wax apart in a market filled with chemical-based products. Its ability to restore aged wood by nourishing and filling fine cracks demonstrates restorative properties beyond simple protection. The inclusion of premium application tools ensures streak-free results without additional purchases.
Value for Money: At $14.99 with included tools, this wax represents excellent value. The natural ingredients and dual indoor/outdoor capability justify the price point, offering comparable performance to premium brands while maintaining environmental safety. The included tools eliminate extra expenses.
Strengths and Weaknesses: Strengths include eco-safe formula, included application tools, restorative wood nourishment, versatile indoor/outdoor use, and non-toxic composition. Weaknesses are the smaller 3.5-ounce size for large projects and potentially more frequent reapplication compared to synthetic alternatives.
Bottom Line: The ideal choice for environmentally conscious DIYers seeking natural protection without sacrificing performance. The included tools and restorative benefits make it a smart, responsible purchase.
9. Jacquard Dorlands Wax 4fl oz - Cold Wax Medium Made in USA - Oil Painting - Watercolor Sealer - Bundled with Moshify Palette Knife
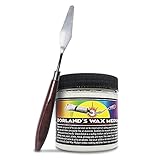
Overview: Jacquard Dorlands Wax is a 4-fluid ounce cold wax medium designed for fine art applications rather than furniture restoration. This versatile medium mixes seamlessly with oil paints, powdered pigments, and colored sands to create textured, luminous effects. Additionally, it functions as a watercolor sealer, protecting paintings from moisture and humidity without requiring framing.
What Makes It Stand Out: Its dual functionality as both an oil painting medium and watercolor sealer provides exceptional versatility for artists. The translucent wax enriches color vibrancy and tone while the included Moshify Palette Knife facilitates precise mixing and application. Made in the USA, it meets professional artist standards for archival quality.
Value for Money: At $24.99, the price aligns with professional art supply standards. The included palette knife adds value, while the 4-ounce quantity provides sufficient material for numerous artistic projects. For fine art applications, the specialized formulation justifies the premium over furniture waxes, offering capabilities standard waxes cannot match.
Strengths and Weaknesses: Strengths include versatile art applications, watercolor sealing capability, included palette knife, and professional-grade formulation. Weaknesses are its unsuitability for furniture restoration, higher price point for non-art uses, and specialized nature that may intimidate casual users.
Bottom Line: An excellent investment for fine artists seeking a versatile cold wax medium. Not recommended for furniture or general DIY projects, but invaluable for creative artistic applications.
10. Jolie Finishing Wax - Protective topcoat Paint - Use on interior furniture, cabinets, walls, home decor and accessories - Odor-Free, Non-Hazardous - White - 120 ml
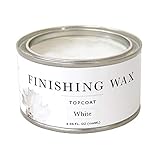
Overview: Jolie Finishing Wax in White is a 120-milliter protective topcoat designed for interior furniture, cabinets, walls, and home accessories. This odor-free, non-hazardous formula provides water-resistant sealing with a soft, workable consistency. The wax creates a durable matte finish that can be buffed to a subtle sheen, offering versatility in final appearance.
What Makes It Stand Out: The odor-free, non-hazardous composition makes it exceptionally suitable for indoor use without ventilation concerns. Its white color allows for creative custom finishes and highlighting of textures and moldings. The soft consistency ensures easy application while the water-resistant properties provide practical protection for everyday use.
Value for Money: At $20.95 ($5.16 per fluid ounce), this wax positions itself in the premium category. The specialized white color and safe formulation justify the price for interior designers and homeowners prioritizing health and convenience. The recommendation to use Clear Finishing Wax as a base adds cost but ensures optimal results.
Strengths and Weaknesses: Strengths include odor-free application, non-hazardous formula, soft workable consistency, water resistance, and versatile interior use. Weaknesses include the white color’s limited applicability, requirement of clear wax basecoat, smaller volume, and premium pricing.
Bottom Line: Perfect for interior projects where safety and odor are concerns. The white color offers unique creative possibilities, making it ideal for decorative applications despite the higher cost.
Understanding Vintage Paint: Why It’s Different
Vintage automotive paint isn’t simply “old paint”—it’s an entirely different chemical ecosystem that requires specialized care. The single-stage lacquers and enamels applied before the 1980s lack the protective clear coat we’ve come to expect on modern vehicles, making them significantly more porous and vulnerable to environmental damage.
Single-Stage Lacquer: The Golden Age Standard
Single-stage lacquer dominated the industry from the 1920s through the 1960s, creating that deep, wet-look gloss enthusiasts crave. This nitrocellulose-based formula dries through solvent evaporation rather than chemical curing, leaving a finish that’s perpetually flexible but incredibly delicate. The paint film remains thin—often less than 2 mils—and continues to shrink for decades, which is why original lacquer develops that characteristic checked pattern over time. Any wax you apply must accommodate this ongoing movement without cracking or delaminating.
Enamel Evolution: From Alkyd to Acrylic
By the late 1960s, manufacturers transitioned to enamel systems that offered better durability and UV resistance. These paints cure through oxidation, creating a harder but still porous surface. Vintage enamel, particularly the early acrylic enamels, can be deceptively fragile. They’ve had 50+ years to cure, making them brittle and prone to micro-fracturing under harsh chemicals or aggressive polishing. Your wax choice needs to provide flexible protection that won’t stress these aged paint films during temperature fluctuations.
The Science Behind Wax Chemistry and Vintage Surfaces
Modern synthetic sealants often create an impenetrable barrier that, while excellent for new cars, can suffocate vintage paint. The microscopic structure of aged lacquer and enamel contains countless pores and fissures that actually benefit from controlled “breathing.”
Molecular Weight Matters
High-quality vintage-specific waxes utilize lower molecular weight oils and natural waxes that can penetrate these microscopic openings, conditioning the paint from within rather than just coating the surface. This penetration helps prevent the paint from becoming brittle and reduces the likelihood of cracking. Heavy, modern polymer sealants sit on top like a plastic sheet, trapping moisture and preventing the natural off-gassing that vintage paints require to remain stable.
Solvent Sensitivity Considerations
Vintage paints, especially lacquer, remain sensitive to strong solvents throughout their life. Many modern waxes contain aggressive cleaners or chemical gloss-enhancers that can soften or swell aged paint films. Look for formulations specifically noted as “solvent-free” or “vintage-safe,” which rely on gentle carrier oils like cosmetic-grade mineral oil or refined nut oils that won’t attack the paint substrate.
Carnauba vs. Synthetic: The Great Debate for Classic Cars
The carnauba versus synthetic debate takes on new urgency when dealing with vintage paint. While modern enthusiasts often chase the longevity of synthetics, classic car preservationists understand that traditional natural waxes offer unique benefits for aged finishes.
The Case for Premium Carnauba Blends
Pure carnauba wax, harvested from the leaves of the Brazilian palm, creates a warm, deep glow that complements vintage paint’s natural characteristics. Its relatively low melting point (around 180°F) means it remains pliable even in summer heat, allowing the paint to expand and contract beneath it without bond failure. The best vintage formulations combine #1 yellow carnauba with conditioning oils that feed the paint while providing protection. This combination creates a micro-thin, flexible barrier that enhances rather than masks the paint’s natural luster.
When Synthetics Make Sense
Not all synthetics are enemies of vintage paint. Modern polymer technology has evolved to create “breathable” synthetic waxes that use short-chain polymers allowing vapor transmission while still providing UV protection. These can be excellent choices for daily-driven classics or vehicles stored in harsh climates. The key is selecting formulations specifically engineered for single-stage paints, which typically contain fewer harsh solvents and incorporate plasticizers that maintain flexibility.
Key Features to Look for in Vintage Paint Waxes
When evaluating waxes for your classic car, certain characteristics separate preservation-grade products from generic offerings that might do more harm than good.
pH-Neutral Formulation
Vintage paint surfaces have had decades to develop a slightly acidic pH due to oxidation and environmental contamination. Waxes with neutral pH (6.5-7.5) won’t disrupt this delicate balance or cause additional chemical reactions within the paint film. Acidic waxes can accelerate oxidation, while overly alkaline products may etch or dull the surface over time.
High Oil Content and Conditioners
The most beneficial vintage waxes contain 30-40% conditioning oils by volume. These oils—often a blend of lanolin, mineral oil, and natural nut extracts—penetrate the porous paint structure, replenishing the plasticizers that have evaporated over decades. This conditioning action helps maintain paint flexibility, reducing the formation of new cracks and stabilizing existing crazing patterns.
UV Inhibitors Without Harsh Chemicals
Vintage paints lack the UV stabilizers built into modern formulations, making them extremely susceptible to sun damage. Look for waxes that incorporate physical UV blockers like micronized zinc oxide or titanium dioxide rather than chemical absorbers. These mineral-based inhibitors reflect harmful rays without introducing aggressive chemicals that could interact with aged paint binders.
Application Techniques That Preserve History
Even the perfect wax can cause damage if applied incorrectly. Vintage paint requires a gentler, more methodical approach that respects its reduced thickness and increased fragility.
The Microfiber Mandate
Never apply wax to vintage paint with traditional foam applicators or—heaven forbid—cotton rags that might harbor embedded dirt. Use only ultra-plush microfiber applicators with a minimum 800 GSM (grams per square meter) rating. These tools lift and trap contaminants rather than grinding them into the soft paint surface. Work in sections no larger than 2x2 feet, using absolutely no pressure—let the product and the cloth do the work.
Temperature and Timing Considerations
Vintage paint should only be waxed when surface temperatures are between 65-75°F. Colder paint won’t allow proper bonding, while hotter surfaces cause wax solvents to evaporate too quickly, leading to uneven curing and potential staining. Apply in the early morning or late afternoon, never in direct sunlight. Allow the wax to haze for only 5-10 minutes before removal; letting it sit longer can make removal difficult and risks pulling up loose paint edges around chips or cracks.
The Role of Oils and Conditioners in Vintage Paint Care
The oil component in vintage-specific waxes does far more than aid application—it actively preserves the paint’s molecular structure. Understanding this mechanism helps you appreciate why cheap, oil-free waxes are false economy for classic cars.
Replenishing Lost Plasticizers
As lacquer and enamel age, the original plasticizers that kept them flexible gradually evaporate. This loss causes the paint to shrink, crack, and become brittle. High-quality vintage waxes contain oils that act as external plasticizers, temporarily replenishing some of this lost flexibility. Regular application creates a cumulative effect, actually slowing the aging process and stabilizing the paint film’s mechanical properties.
Preventing Moisture Migration
Paradoxically, the right oils help vintage paint resist water damage. By partially filling the microscopic pores, conditioning oils reduce the capillary action that draws moisture into the paint substrate. This is crucial because trapped moisture expands and contracts with temperature changes, accelerating the breakdown of the paint-to-metal bond and promoting rust formation underneath.
pH Balance: Why It Matters for Your Classic’s Finish
The pH scale isn’t just for chemistry class—it’s a critical factor in vintage paint preservation. Over decades, your car’s paint has developed a specific pH profile based on its original formulation, environmental exposure, and previous care products.
Acidic Contamination Reality
Rainwater, bird droppings, and industrial fallout create an acidic environment on your paint’s surface, typically driving pH down to 4.5-5.5. While modern clear coats can buffer this acidity, vintage paint absorbs it directly into the pigment layer. A quality vintage wax with pH-neutral to slightly alkaline properties (7.0-7.5) helps neutralize this contamination without causing the dramatic pH swings that stress aged paint binders.
Testing and Maintaining Balance
Invest in pH test strips designed for automotive surfaces. Test your paint in an inconspicuous area before waxing—you’re looking for a reading between 6.0 and 7.0. If readings are below 6.0, perform a gentle pH-neutral cleansing wash before wax application. This prevents the wax from sealing in acidic compounds that would continue to damage the paint underneath.
UV Protection: Shielding Decades-Old Pigments
The vibrant reds, deep blues, and rich greens of the 1950s and 60s were created with organic and inorganic pigments that were never designed to withstand 60+ years of ultraviolet radiation. Many have already faded significantly, and unprotected exposure continues this deterioration.
Wavelength-Specific Protection
Effective vintage waxes target both UVA (320-400nm) and UVB (280-320nm) radiation. UVA penetrates deepest, breaking down the paint resin that holds pigments in suspension. UVB is more energetic, causing direct pigment fading and oxidation. Look for waxes that specifically mention “broad-spectrum UV protection” rather than generic “UV inhibitors.” The best formulations use a combination of physical blockers and antioxidant additives that sacrifice themselves to UV energy before your paint does.
Reapplication Frequency for UV Defense
Unlike modern cars where wax can last six months, vintage paint needs more frequent UV protection due to its porous nature. Plan to apply a quality vintage wax every 45-60 days during driving season, and monthly if the vehicle sits outdoors. This seems frequent, but each application adds to a cumulative UV-blocking layer without creating buildup, thanks to the thin, oil-rich formulas that vintage paint requires.
Breathability: Allowing Vintage Paint to Age Gracefully
The concept of “breathable wax” sounds counterintuitive, but it’s perhaps the most crucial characteristic for vintage paint preservation. Aged lacquer and enamel continue to off-gas solvents and oxidation byproducts for decades.
Vapor Transmission Rates
Quality vintage waxes maintain a vapor transmission rate of 5-15 g/m² per 24 hours, allowing microscopic moisture and gas molecules to escape while still repelling liquid water and contaminants. This is measured by MVTR (Moisture Vapor Transmission Rate). Products that seal too tightly trap these escaping gases, creating pressure beneath the wax film that can lead to lifting, bubbling, or accelerated cracking as the paint tries to “breathe” through the only path available—its own compromised structure.
Signs of Non-Breathable Wax Damage
If you’ve inherited a classic that’s been treated with modern sealants, watch for telltale signs of suffocation: increased cracking patterns, a whitish haze that won’t wash off (trapped moisture), or paint that feels oddly soft or sticky in hot weather. These symptoms indicate the paint is deteriorating underneath an impermeable barrier. The solution is a gentle solvent wash to remove the sealant, followed by a proper vintage-specific breathable wax regimen.
Common Mistakes That Destroy Vintage Paint
Even well-intentioned enthusiasts can cause irreversible damage by applying modern car care philosophies to their vintage vehicles. Recognizing these pitfalls saves both heartache and expensive paintwork.
Over-Waxing and Buildup
Vintage paint needs wax, but too much creates a different problem. Each application should leave virtually no measurable buildup. If you can see or feel a layer on the paint, you’ve applied too much. This excess attracts dust, embeds contaminants, and can actually pull on the paint film during removal, especially around edges and cracks. Use less than you think—about one teaspoon per panel—and buff to a completely clean, oil-free shine.
Aggressive Buffing and Heat Generation
Modern dual-action polishers, even on low speed, generate enough heat to soften vintage lacquer. The friction can cause the paint to “flow,” filling cracks temporarily but actually stretching the paint film and making future cracking worse. Always apply and remove wax by hand using straight-line motions that follow the car’s body lines. Circular buffing creates swirl marks that are permanent in single-stage paint, unlike modern clear coats that can be polished to remove them.
Seasonal Considerations for Vintage Car Waxing
Your vintage car’s paint faces different threats depending on the season, and your waxing strategy should adapt accordingly. A one-size-fits-all approach ignores the reality of your classic’s environmental challenges.
Winter Storage Protocols
Before putting your vintage car into winter hibernation, apply a slightly heavier-than-normal coat of conditioning wax. The dry air in heated storage facilities can desiccate paint, accelerating shrinkage and cracking. This final wax application should focus on oil content over durability, essentially “moisturizing” the paint for its dormant months. Avoid waxes with high water content or those that require water activation, as trapped moisture can freeze and expand in unheated storage.
Summer Driving Protection
High temperatures cause vintage paint to expand significantly more than modern finishes. Summer waxes should have a higher melting point (190-200°F) to prevent them from becoming tacky and attracting road grime, but still maintain flexibility. Apply every 30 days during heavy driving season, and keep a quick-detailing spray specifically formulated for vintage paint in your trunk for removing bugs and bird droppings immediately—letting them sit even for a few hours can etch through wax and into the paint itself.
How to Test Wax Compatibility on Vintage Surfaces
Never assume a wax is safe for your vintage paint based on marketing claims alone. Real-world testing on your specific vehicle is essential, as paint composition varied dramatically between manufacturers and even model years.
The Hidden Spot Test Protocol
Select a test area that’s completely hidden: inside the trunk lip, under a door handle base, or behind a trim piece. Clean the area thoroughly with a pH-neutral vintage car wash, then apply a small amount of wax in a 1-inch circle. Let it fully cure for 48 hours, then remove and inspect with a 10x loupe. You’re looking for any softening of the paint edge, color transfer onto your cloth, or change in the paint’s texture. If the wax passes this test, repeat it on a small, inconspicuous exterior area before committing to the entire vehicle.
Accelerated Aging Simulation
For the truly cautious (or those with extremely rare original paint), create an accelerated test by applying wax to a test spot, then exposing it to controlled stress. Place a heating pad set to 100°F over the waxed area for 30 minutes, then immediately blast it with a freezer spray. This extreme thermal cycle reveals whether the wax maintains flexibility or becomes brittle and risks pulling paint. While this test seems extreme, it mimics the stress your paint endures going from summer sun to evening cool-down.
The Impact of Climate on Wax Selection
Your geographic location should heavily influence your vintage wax choice. What works perfectly in Arizona’s dry heat can be disastrous in Florida’s humidity, and vice versa.
Arid Climate Formulations
Desert environments pose a double threat: intense UV radiation and extreme paint desiccation. Waxes for dry climates should contain humectant ingredients—similar to those in skin moisturizers—that actively attract and retain trace moisture within the paint structure. Look for formulations with glycerin derivatives or hyaluronic acid compounds. These sound like cosmetic ingredients because they are, and they work similarly to keep vintage paint from becoming brittle as parchment.
Humid Climate Challenges
High humidity areas introduce constant moisture infiltration into porous vintage paint. Waxes for these regions need enhanced water-repelling properties without sacrificing breathability. Silicone-free polymer additives can help here, creating a surface tension that causes water to bead and roll off while still allowing vapor transmission. Avoid waxes with natural ingredients that can support mold or mildew growth—yes, vintage paint can actually grow mold in humid conditions, feeding on the organic compounds in old lacquer.
Building a Waxing Schedule for Your Classic
Consistency trumps intensity when caring for vintage paint. A disciplined, calendar-based approach prevents the feast-or-famine treatment that stresses aged finishes.
The 60-Day Rule for Drivers
If you drive your vintage car regularly (2-3 times per month), establish a 60-day waxing cycle. Mark it on your calendar and treat it as non-negotiable as an oil change. This frequency ensures continuous UV protection and maintains the conditioning oil levels within the paint. Between full applications, use a vintage-safe detailing spray weekly to maintain the hydrophobic properties and remove contaminants before they embed.
The Seasonal Deep Conditioning Protocol
Twice yearly—spring and fall—perform a “deep conditioning” treatment. After your normal wax removal, apply a second ultra-thin coat and leave it for 24 hours before buffing. This extended contact time allows maximum oil penetration into the paint’s pore structure. Think of it as a overnight face mask for your car; the extended dwell time lets the beneficial ingredients work their way deep into the paint where they can do the most good.
Frequently Asked Questions
How do I know if my vintage car has lacquer or enamel paint?
The water test is the simplest method. Wet a panel with a damp cloth; if the color transfers to your cloth and the paint appears to “wet” and deepen in color, it’s likely lacquer. Enamel will resist water penetration and show minimal color transfer. For definitive identification, gently rub a hidden area with a cotton swab dipped in non-acetone nail polish remover. Lacquer will soften and come off on the swab, while enamel will remain unaffected.
Can I use modern ceramic coatings on vintage paint?
Absolutely not. Ceramic coatings create an impermeable glass-like barrier that prevents vintage paint from breathing. This trapped condition accelerates cracking, can cause lifting around existing chips, and makes future paint preservation nearly impossible. The removal process alone requires aggressive polishing that would destroy original paint. Stick to traditional waxes designed for classic cars.
How long should I wait before waxing fresh touch-up paint on my vintage car?
Fresh touch-up paint, even vintage-correct lacquer, needs a full 90 days to cure before wax application. The solvents must completely evaporate, and the film needs to stabilize. Waxing too soon traps solvents, causing the new paint to remain soft and potentially fail to bond properly. During this period, protect the area with a breathable car cover only.
Why does my vintage paint feel sticky after waxing?
Sticky paint indicates you’ve used a wax with incompatible solvents or excessive petroleum distillates that are softening the aged paint film. Immediately remove the wax using a gentle solvent wash with a vintage-safe paint cleanser, then reapply with a pure carnauba-based product free of harsh solvents. The stickiness should resolve within 24 hours of proper wax removal.
Is paste wax better than liquid wax for vintage cars?
Generally, yes. Paste waxes typically contain higher concentrations of carnauba and conditioning oils with fewer water-based carriers. The physical act of applying paste wax also encourages a thinner, more controlled application. However, some premium liquid waxes formulated specifically for vintage paint can perform equally well. The key is ingredient quality, not physical form.
How do I remove old, yellowed wax buildup from vintage paint?
Mix a solution of 1 part isopropyl alcohol to 4 parts distilled water. Work in small sections, dampening a microfiber cloth and gently wiping in straight lines. Never scrub or use circular motions. The alcohol breaks down wax residues without attacking vintage paint. Follow immediately with a thorough rinse and a fresh coat of quality vintage wax. This process may need repetition for severe buildup.
Can waxing too often damage vintage paint?
Yes, if you’re using the wrong product or technique. Over-waxing with heavy, non-breathable sealants creates buildup that stresses the paint film. However, using the correct thin, oil-rich vintage wax on a proper schedule (every 45-60 days) actually preserves paint by maintaining conditioning oil levels and UV protection. The key is using minimal product and ensuring complete removal each time.
What’s the best way to store wax for vintage cars?
Store your vintage car wax in a climate-controlled environment, ideally 60-70°F. Extreme heat causes the oils to separate and can degrade UV inhibitors. Extreme cold makes the wax difficult to work with and may cause the emulsion to break. Never store wax in your garage if it experiences temperature swings. The refrigerator (not freezer) is actually ideal for long-term storage of natural carnauba blends, as it slows oxidation of the oils.
Should I wax over patina or original faded paint?
This is controversial, but preservation experts recommend yes—with extreme caution. Use only the thinnest application of pure carnauba wax with high oil content and zero cleaners. The goal is stabilization, not gloss enhancement. The wax will slightly deepen the patina’s appearance while protecting against further UV degradation and moisture infiltration. Avoid anything that promises “color restoration” or “scratch filling,” as these contain abrasives or dyes that destroy authentic patina value.
How do I handle waxing around existing paint cracks?
Cracks need special attention. First, clean them gently with a soft brush and pH-neutral soap to remove embedded dirt. When applying wax, use a separate applicator and work parallel to the crack direction, never across it. Use minimal pressure to avoid flexing the paint edges. During removal, buff carefully around cracks, leaving a slight trace of wax in the crack itself is actually beneficial—it prevents moisture infiltration and stabilizes the edges. Never try to “fill” cracks with wax; they should remain visible but protected.