That telltale crunch of salt under your tires each winter isn’t just a sign of road safety—it’s the sound of your vehicle’s undercarriage slowly surrendering to corrosion. Undercoating has evolved from a dealership upsell into a critical preservation strategy, especially as modern vehicles face increasingly hostile road environments. Yet the moment you decide to protect your investment, you’re confronted with a pivotal choice: trust the pros with their climate-controlled bays and industrial-grade equipment, or roll up your sleeves and tackle the job in your driveway?
This decision isn’t merely about cost. It’s about understanding chemistry, application science, long-term value, and your own willingness to crawl beneath 4,000 pounds of metal with a spray gun. Whether you’re preserving a classic restoration or protecting a daily driver from salt belt punishment, the undercoating you choose—and how it’s applied—will directly impact your vehicle’s structural integrity and resale value. Let’s dive deep into what separates professional application from DIY efforts, and how to make the choice that aligns with your vehicle’s needs, your budget, and your expectations.
Top 10 Undercoating
Detailed Product Reviews
1. Rust-Oleum 248657-6PK Stops Rust Undercoating Spray, 15 oz, Rubberized Black, 6 Pack

Overview: The Rust-Oleum 248657-6PK delivers six 15-ounce cans of rubberized black undercoating designed for automotive underbodies. This standard-grade formula targets DIY enthusiasts tackling rust prevention on cars, trucks, trailers, and RVs. With a 30-minute dry time and 10-12 square feet coverage per can, the six-pack configuration suits multi-vehicle households or comprehensive single-vehicle restoration projects.
What Makes It Stand Out: The any-angle spray technology combined with a wide comfort tip allows effortless application in tight undercarriage spaces, even when spraying upside down. The rubberized coating actively deadens road noise while creating a flexible barrier against moisture, salt, and chemical damage. This six-pack bundle eliminates frequent store trips when working on larger projects.
Value for Money: At $0.40 per ounce, this represents the lowest cost-per-ounce in the Rust-Oleum undercoating lineup. The six-can bundle provides substantial savings compared to individual purchases, making it ideal for extensive undercarriage work. DIYers protecting multiple family vehicles or restoration hobbyists will find exceptional value here.
Strengths and Weaknesses: Strengths include rapid 30-minute drying, superior spray ergonomics, excellent bulk pricing, and proven rust inhibition. The six-pack ensures consistent product batch quality across large jobs. Weaknesses involve slightly less coverage area than professional grade (10-12 vs 10-15 sq ft) and standard-level protection that may not match harsh commercial environments.
Bottom Line: This six-pack offers the best value for DIY automotive rust protection. It’s perfect for budget-conscious enthusiasts seeking reliable underbody defense without professional-grade premiums.
2. Rust-Oleum 248656-6PK Stops Rust Professional Grade Undercoating Spray Paint, 15 oz, Rubberized Black, 6 Pack

Overview: The Rust-Oleum 248656-6PK Professional Grade undercoating delivers six cans of maximum-protection formula for demanding automotive applications. Engineered for bare or primed metal underbodies, this premium coating provides superior corrosion resistance for cars, trucks, trailers, and RVs exposed to harsh conditions. Each 15-ounce can covers 10-15 square feet with a professional-grade rubberized barrier.
What Makes It Stand Out: The professional-grade chemistry offers enhanced adhesion and durability compared to standard formulas, creating a more resilient shield against road salt, chemicals, and moisture. The extended coverage per can (up to 15 sq ft) means fewer cans needed for complete undercarriage protection. Like its standard counterpart, it features any-angle spraying and sound-deadening properties.
Value for Money: At $0.55 per ounce, this commands a 37.5% premium over the standard six-pack, but delivers professional-tier protection. For vehicles in coastal areas or winter salt zones, the superior corrosion resistance justifies the cost. Commercial users and serious enthusiasts will appreciate the batch consistency across six cans.
Strengths and Weaknesses: Strengths include maximum corrosion protection, expanded coverage area, professional-grade durability, and bulk convenience. The formula maintains flexibility while resisting cracking. Weaknesses center on the one-hour dry time (slower than standard) and higher price point that may exceed casual DIY needs.
Bottom Line: Choose this professional six-pack for maximum undercarriage protection in severe environments. The premium price delivers commensurate performance for vehicles facing extreme conditions.
3. Rust-Oleum 248656 Professional Grade Rubberized Undercoating Spray, 15 oz, Black

Overview: This single 15-ounce can of Rust-Oleum 248656 Professional Grade undercoating brings premium corrosion protection without multi-can commitment. The professional-grade formula targets bare or primed metal on vehicle underbodies, delivering the same superior chemistry as the six-pack version. With 10-15 square feet coverage, it’s sized for spot treatments, single-vehicle applications, or testing before bulk purchase.
What Makes It Stand Out: This offering provides access to professional-grade protection in a convenient single-can format. The one-hour dry time indicates a robust, thick coating that builds durable barrier thickness. The any-angle spray technology remains invaluable for reaching frame rails and wheel wells without product waste.
Value for Money: At $0.55 per ounce, the unit cost matches the professional six-pack, making it a smart choice for smaller projects without bulk investment. For touch-up work or coating a single daily driver, this eliminates leftover cans. The price premium over standard grade reflects enhanced chemical resistance and longevity.
Strengths and Weaknesses: Strengths include professional-grade formulation without bulk requirement, superior coverage efficiency, and flexible application. It’s perfect for evaluating product performance before committing to six cans. Weaknesses involve the higher per-can cost versus multi-pack options and slower drying compared to standard formulas.
Bottom Line: Ideal for targeted applications or sampling professional quality, this single can delivers premium protection without overbuying. Perfect for one-vehicle owners or precision touch-up work.
4. Rust-Oleum Black Undercoating 15 oz. (12 Pack)

Overview: The Rust-Oleum Black Undercoating 12-pack offers serious quantity for high-volume automotive rust prevention. Each 15-ounce can provides standard-grade underbody protection for cars, trucks, trailers, and RVs. This bulk configuration targets commercial shops, fleet maintenance, or dedicated enthusiasts managing multiple restorations. While specific features aren’t detailed, the pricing suggests standard-formula performance.
What Makes It Stand Out: The dozen-can quantity delivers maximum inventory for continuous project work without interruption. This bulk packaging likely maintains Rust-Oleum’s signature any-angle spray technology and comfortable wide-tip applicator. The substantial volume provides batch consistency across extensive fleet applications or year-round shop use.
Value for Money: At $0.45 per ounce, this slots between standard six-pack and professional-grade pricing, offering moderate per-ounce savings over individual purchases. For commercial operations, the reduced per-can cost and minimized reordering frequency create operational efficiencies. The $80.62 total investment requires commitment but rewards high-volume users.
Strengths and Weaknesses: Strengths include maximum quantity convenience, moderate bulk discount, and trusted brand performance for standard applications. The 12-can supply ensures uninterrupted workflow. Weaknesses involve the large upfront cost and unspecified features that may lack professional-grade enhancements. Storage space requirements also increase with this volume.
Bottom Line: This 12-pack suits auto shops and multi-vehicle owners best. Buy when volume demands justify the bulk investment and standard-grade protection meets your operational needs.
5. Rust-Oleum 248657 Rubberized Undercoating Spray, 15 oz, Black

Overview: This single can of Rust-Oleum 248657 Rubberized Undercoating delivers targeted rust protection for automotive underbodies. The standard-grade formula suits bare or primed metal on cars, trucks, trailers, and RVs. With 30-minute dry time and 10-12 square feet coverage, this 15-ounce can addresses spot repairs, single-vehicle touch-ups, or first-time users testing application techniques.
What Makes It Stand Out: The rapid 30-minute drying enables quick project completion, allowing same-day driving in dry conditions. The any-angle spray technology proves essential for reaching overhead chassis components and tight wheel wells. The rubberized coating flexes with metal while deadening road noise, improving cabin comfort.
Value for Money: At $0.53 per ounce, this sits between bulk standard and professional pricing, offering accessibility without multi-can commitment. For one-time applications or maintaining a single vehicle, it eliminates waste. The price reflects standard-grade chemistry while remaining affordable for casual DIYers.
Strengths and Weaknesses: Strengths include fast drying, ergonomic spray tip, single-can convenience, and proven rust inhibition for moderate climates. The 30-minute recoat potential accelerates project timelines. Weaknesses involve less coverage than professional grade and higher per-ounce cost versus six-pack bundles. Standard protection may require more frequent reapplication in severe environments.
Bottom Line: Perfect for quick touch-ups or first-time users, this single can delivers reliable protection without overbuying. An excellent entry point into automotive undercoating maintenance.
6. 3M 3584 Professional Grade Rubberized Undercoating 6 16oz Cans

Overview: The 3M 3584 Professional Grade Rubberized Undercoating kit delivers six 16-ounce aerosol cans designed to protect vehicle undercarriages from corrosion, moisture, and salt damage. This bulk package provides comprehensive coverage for multiple vehicles or extensive restoration projects, making it ideal for serious automotive enthusiasts and professional shops. The rubberized formulation creates a durable barrier while simultaneously dampening road noise for a quieter cabin experience.
What Makes It Stand Out: This professional-grade product distinguishes itself through its trusted 3M formulation that resists running during application, ensuring uniform coverage even on complex undercarriage geometries. The sound dampening properties are notably effective, reducing vibrations that transmit road noise into the vehicle interior. The six-can bundle offers significant convenience, eliminating mid-project supply runs and ensuring consistent batch quality across large jobs.
Value for Money: At $53.99 for 96 total ounces ($0.56 per ounce), this six-pack delivers substantial savings compared to purchasing individual cans. The bulk pricing makes it economical for treating multiple vehicles, with each can covering approximately 10-15 square feet. For DIYers maintaining a fleet or undertaking frame-off restorations, the per-unit cost reduction justifies the upfront investment versus buying single cans repeatedly.
Strengths and Weaknesses: Strengths include professional-grade durability, excellent sound deadening, uniform spray application, and bulk quantity convenience. The rubberized coating adheres well to clean metal and provides long-lasting protection. Weaknesses involve aerosol limitations—proper ventilation and respiratory protection are mandatory. Application requires thorough surface preparation and ideal weather conditions. The coating needs adequate curing time before exposure to moisture, and overspray must be carefully masked.
Bottom Line: This 3M six-pack represents excellent value for serious DIY mechanics and professional shops tackling multiple undercoating projects. The combination of trusted performance, noise reduction, and bulk savings makes it a smart investment for comprehensive vehicle protection.
7. 3M Professional Grade Rubberized Undercoating, Corrosion, Water and Salt Spray Resistant, 03584, 16 oz. Aerosol

Overview: This single 16-ounce can of 3M’s Professional Grade Rubberized Undercoating offers the same trusted formulation as the bulk pack, designed for targeted applications on cars, trucks, and recreational vehicles. The asphalt-based compound creates a protective barrier against rust, abrasion, and environmental damage while reducing road noise through effective vibration dampening.
What Makes It Stand Out: The aerosol dispenser provides precise, controlled application without runs or drips, making it perfect for touch-ups and hard-to-reach areas like wheel wells, quarter panels, and interior fenders. Its professional-grade status means you’re using the same product trusted by auto body shops, ensuring reliable performance. The sound deadening properties noticeably improve cabin quietness, especially when applied to large surface areas.
Value for Money: At $9.99 per can ($0.62 per ounce), this single unit commands a premium over the six-pack but requires minimal initial investment. It’s ideal for small projects, spot treatments, or first-time users wanting to test the product before committing to bulk quantities. The coverage area of 10-15 square feet makes it cost-effective for single-vehicle maintenance or addressing specific rust-prone zones.
Strengths and Weaknesses: Strengths include easy spray-on application, professional-quality protection, effective noise reduction, and versatility across multiple vehicle types. The asphalt base provides excellent adhesion and durability. Weaknesses are typical of aerosols—limited coverage per can, higher per-ounce cost, and the need for proper ventilation. Weather conditions affect curing, and surface prep is critical for longevity. Overspray requires careful masking of components.
Bottom Line: Perfect for DIYers needing targeted undercarriage protection or those wanting to sample 3M’s professional formula before bulk purchase. While pricier per ounce than multi-can packs, its accessibility and performance make it excellent for small-scale rust prevention projects.
8. Fluid Film Black Non-Aerosol, Long Lasting Corrosion, Penetrant & Lubricant, Anti-Rust Coating, Protects All Metals in Marine and Undercoating in Automotive & Snow-Handling Vehicles, 1 Gallon
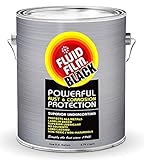
Overview: Fluid Film Black offers a unique non-aerosol, wool-wax based corrosion inhibitor in a one-gallon format, providing powerful protection for automotive undercoatings and marine applications. This non-toxic, non-solvent formula creates a permanently soft gel barrier that actively creeps into seams and crevices, delivering long-lasting defense against salt, brine, and moisture while restoring a rich black appearance to treated surfaces.
What Makes It Stand Out: Unlike traditional rubberized coatings, this product remains pliable and self-healing, never cracking or peeling. Its ability to migrate into tight chassis seams provides superior protection for hidden rust-prone areas. The non-toxic, non-flammable formulation is safe for user application without harsh fumes, making it ideal for enclosed workspace use. Its marine-grade performance translates to exceptional automotive protection, especially in snow-handling regions.
Value for Money: At $54.16 per gallon, Fluid Film Black competes directly with professional undercoating systems while offering unique benefits. The non-aerosol format provides more controlled application and reduces waste, though it requires separate spray equipment. One gallon covers approximately 150 square feet, making it economical for complete vehicle undercoating with product left for touch-ups.
Strengths and Weaknesses: Strengths include non-toxic formulation, superior seam penetration, self-healing properties, versatility across industries, and excellent salt resistance. The black finish restores factory appearance. Weaknesses include the need for spray equipment, messier application than aerosols, and permanent wet/tacky finish that can attract dirt. The black color may not suit all restoration preferences, and annual reapplication is recommended in harsh climates.
Bottom Line: An excellent choice for safety-conscious DIYers and professionals seeking a non-toxic, penetrating undercoating solution. The gallon size offers good value, though equipment requirements make it best suited for those with spray systems or frequent application needs.
9. Fluid Film Black Non-Aerosol, Long Lasting Corrosion, Penetrant & Lubricant, Anti-Rust Coating, Protects All Metals in Marine and Undercoating in Automotive & Snow-Handling Vehicles, 5 Gallons
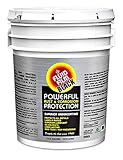
Overview: This five-gallon container of Fluid Film Black delivers maximum quantity for commercial operations and serious enthusiasts requiring extensive corrosion protection. The same wool-wax based, non-toxic formula provides long-lasting defense against salt and moisture while lubricating moving parts. This bulk option treats numerous vehicles or heavy equipment units, making it ideal for fleet maintenance, agricultural operations, or restoration shops.
What Makes It Stand Out: The massive volume offers the lowest per-ounce cost in the Fluid Film lineup, with unique salvage capabilities for severely corroded or frozen components. Its ability to remain permanently soft and pliable means it won’t crack under flexing chassis components. The non-solvent formulation ensures safe, fume-free application in various settings, from home garages to commercial facilities, while providing marine-grade corrosion resistance.
Value for Money: At $213.37 ($0.33 per fluid ounce), this five-gallon container provides exceptional bulk savings, reducing costs by nearly 40% compared to the single gallon. With coverage exceeding 750 square feet, it handles complete undercoating for 5-7 vehicles plus ongoing touch-ups. For commercial users, the low unit cost and multi-vehicle capacity deliver professional-grade ROI.
Strengths and Weaknesses: Strengths include outstanding unit pricing, huge coverage area, non-toxic formula, superior penetration, self-healing properties, and versatility across marine, automotive, and industrial applications. The soft gel state continuously protects. Weaknesses involve significant upfront investment, bulk storage requirements, mandatory spray equipment, and the permanently tacky finish that collects debris. The black color may not match all OEM specifications.
Bottom Line: The ultimate value for professional shops, fleet operators, and serious DIYers with multiple vehicles. While the initial cost and equipment needs are substantial, the per-ounce savings and superior protection make it a wise long-term investment for comprehensive corrosion management.
10. Corrosion Free Rust Cure Formula 3000 – 1 Gallon Jug – No-Drip Rust Inhibitor & Undercoating for Cars, Trucks, Tractors, Snowblowers, Lawn Mowers – Stops & Prevents Rust

Overview: Corrosion Free Rust Cure Formula 3000 provides a clear, no-drip rust inhibitor in a one-gallon jug, offering advanced protection for vehicles and equipment. This odorless, non-toxic formula penetrates seams and cavities to displace moisture, creating a self-healing barrier that actively stops existing rust while preventing new corrosion. Its versatility spans from automotive undercarriages to agricultural and snow removal equipment.
What Makes It Stand Out: The clear finish distinguishes it from traditional black undercoatings, preserving the original appearance of treated metal while providing invisible protection. The self-healing properties ensure that minor scratches automatically reseal, maintaining continuous defense. Being free of VOCs, solvents, and toxic chemicals makes it exceptionally safe for home use without ventilation concerns, while its ability to creep into hidden areas protects critical components like brake and fuel lines.
Value for Money: Priced at $73.50 per gallon, Formula 3000 sits between aerosol cans and bulk alternatives. The clear coating eliminates aesthetic concerns, potentially saving repainting costs. One gallon covers a typical passenger vehicle with product remaining for equipment touch-ups. For users prioritizing safety and appearance, the premium over traditional undercoatings is justified by its non-toxic formulation and versatile application.
Strengths and Weaknesses: Strengths include odorless non-toxic formula, clear invisible finish, excellent seam penetration, self-healing properties, and broad equipment compatibility. It maintains structural integrity without cracking. Weaknesses include higher price than some alternatives, requirement for spray equipment, and potentially less durable than rubberized coatings in extreme abrasion zones. The soft coating may need more frequent reapplication in harsh winter conditions.
Bottom Line: Ideal for users seeking effective rust protection without altering their vehicle’s appearance. The safe, odorless formula makes it perfect for home garage application, while the clear finish and self-healing properties provide professional-grade results for appearance-conscious enthusiasts.
What Is Undercoating and Why Does Your Vehicle Need It?
Undercoating is a protective barrier applied to a vehicle’s undercarriage—those vulnerable frame rails, floor pans, and suspension components constantly bombarded by moisture, salt, and debris. Unlike paint that serves an aesthetic purpose, undercoating is purely functional armor designed to prevent electrochemical corrosion from destroying the metal that keeps you safe on the road.
The Science Behind Rust Formation
Rust isn’t simply metal getting wet; it’s an electrochemical reaction requiring iron, oxygen, and an electrolyte (typically water with dissolved salts). Your vehicle’s underside provides the perfect storm: bare metal surfaces, constant exposure to moisture, and road salt that acts as a powerful electrolyte accelerator. Once oxidation begins, it spreads like a cancer, compromising structural integrity far beyond what visible inspection reveals. Quality undercoating interrupts this process by creating an impermeable barrier that seals out moisture and salts while providing sacrificial protection.
Modern Road Conditions and Corrosion Acceleration
Today’s vehicles face corrosion threats previous generations never encountered. Magnesium chloride and calcium chloride de-icers are more aggressive than traditional rock salt and actively draw moisture from humid air, keeping your undercarriage wet long after precipitation stops. Meanwhile, modern roads shed more abrasive particulates, and increased traffic kicks up fine debris that chips away at factory protective coatings. Even if you live outside the traditional “salt belt,” coastal salt air, agricultural chemicals, and industrial pollutants create micro-corrosive environments that demand proactive protection.
Professional Undercoating: The Gold Standard
Professional undercoating services represent the benchmark for comprehensive protection, combining specialized facilities, commercial-grade materials, and trained technicians who understand the nuanced application requirements of different formulations. These operations don’t just spray product—they execute a systematic preservation protocol.
What to Expect from a Pro Service
A reputable professional service begins with a thorough undercarriage assessment, identifying existing rust that requires treatment before application. They’ll pressure wash the undercarriage with hot water and specialized detergents, then allow complete drying in a climate-controlled environment—often using forced air systems. Application occurs on lifts providing 360-degree access, with technicians using pneumatic spray systems that deliver consistent film thickness between 3-5mm. Most services include warranty coverage ranging from annual inspections to lifetime guarantees, provided you maintain the treatment schedule.
Equipment and Facility Advantages
Professional shops invest $50,000-$150,000 in specialized equipment: diaphragm pumps capable of 3,000+ PSI, heated material tanks that maintain optimal viscosity, and atomizing spray guns with adjustable fan patterns for different undercarriage geometries. Their downdraft ventilation systems capture overspray and VOCs, while infrared curing lamps accelerate drying. Perhaps most importantly, they maintain application bays at 65-75°F year-round—critical for proper adhesion and curing that DIYers can’t replicate in a cold garage or driveway.
Warranty and Certification Benefits
Professional applications often include written warranties that cover reapplication if the coating fails prematurely. Many shops are certified by undercoating manufacturers, allowing them to offer extended protection plans that transfer to subsequent owners—a documented value-add that can increase resale value. These warranties typically require annual inspections (often free) and mandate that any structural repairs or modifications be performed at certified facilities to maintain coverage.
DIY Undercoating: Empowering the Enthusiast
The DIY approach appeals to hands-on owners who want control over material selection, application timing, and cost management. Modern aerosol and quart-container formulations have made undercoating more accessible, but accessibility doesn’t guarantee effectiveness. Success demands meticulous preparation, appropriate expectations, and acceptance of certain limitations.
Common DIY Application Methods
DIYers typically choose between aerosol cans (convenient but limited coverage), undercoating guns that attach to standard compressors (moderate investment, better control), or specialized spray systems with dedicated pumps (significant investment, near-professional results). Each method presents trade-offs: aerosols struggle to achieve adequate film build, while compressor-attached guns require 5+ CFM at 90 PSI—more than many home compressors deliver consistently. The dedicated DIY systems running $200-$400 offer the best balance but still can’t match professional pump capacity.
Essential Tools and Preparation Requirements
Beyond the spray equipment, DIY undercoating demands a comprehensive tool kit: pressure washer (minimum 2,000 PSI), degreasing solution, wire brushes for surface rust, angle grinder with wire wheel for heavier corrosion, multiple jack stands for safe elevation, and quality PPE including respirators with organic vapor cartridges. You’ll also need 3-5 days of clear weather with temperatures above 60°F and humidity below 60%—conditions that can be challenging to schedule in many climates.
Skill Level and Learning Curve
First-time DIY undercoating attempts often suffer from common mistakes: insufficient surface prep (the #1 failure cause), inconsistent film thickness leading to sagging or thin spots, and overspray on exhaust components or brake lines. Achieving professional-looking results requires practice on scrap metal first. Most enthusiasts need 6-8 hours for their first application on a sedan, compared to 2-3 hours for an experienced technician. The learning curve is steep, and mistakes can be costly—removing improperly applied undercoating is labor-intensive.
Understanding rubberized undercoatings
Rubberized undercoatings dominate both professional and DIY markets, offering a flexible, textured finish that deadens road noise while providing solid moisture protection. These water-based or solvent-borne formulations contain rubber polymers that create a durable, slightly elastic film.
Application Characteristics
Rubberized products spray easily through most equipment, building film thickness quickly with minimal sagging. They adhere well to properly prepared metal and factory coatings, though they struggle with adhesion to heavily rusted surfaces without primers. The material remains somewhat pliable after curing, allowing it to flex with chassis movement without cracking—critical for vehicles with frame flex or those used off-road.
Performance Profile
Expect 3-5 years of protection in moderate climates, though salt belt exposure can reduce this to 2-3 years. Rubberized coatings excel at impact resistance, deflecting stones and debris that would chip harder coatings. However, they’re not impervious to petroleum products; oil and brake fluid can soften the film, leading to failure. The noise dampening is a legitimate secondary benefit, reducing cabin noise by 2-4 decibels on most vehicles.
Understanding Asphalt-Based Undercoatings
Asphalt-based formulations represent the heavy-duty option, originally developed for commercial vehicles and military applications. These solvent-borne products create a thick, tar-like barrier that’s exceptionally resistant to water and salt intrusion.
Heavy-Duty Applications
Professional shops often choose asphalt-based products for trucks, work vans, and fleet vehicles that face extreme conditions. The material self-heals minor scratches and provides superior protection against magnesium chloride—the aggressive de-icer that liquefies traditional undercoatings. It builds exceptionally thick films (5-8mm) in a single application, making it ideal for vehicles with existing light surface rust that must be encapsulated.
Limitations and Considerations
The trade-off is rigidity. Asphalt coatings become brittle in extreme cold and can crack under chassis flex, compromising the protective barrier. They’re also the messiest to apply and nearly impossible to remove without harsh chemicals. DIY application is particularly challenging due to extreme viscosity requiring heated spray systems and specialized thinners. Most manufacturers recommend professional-only application for this formulation type.
Understanding Wax and Oil-Based Undercoatings
These “creeping” or “self-healing” formulations work differently than film-building coatings. Rather than creating a thick barrier, they penetrate rust crevices and displace moisture, leaving a waxy or oily film that actively repels water.
Penetrating vs. Surface Protection
Wax-based products (often called “cosmoline-type”) spray thin but creep into seams and spot welds where rust typically begins. They don’t build significant film thickness, making them poor choices for abrasion resistance but excellent for protecting hidden cavities. Oil-based formulations (dripless oils) remain fluid, continuously coating surfaces and flowing back into scratched areas. This makes them ideal for vehicles already showing rust—they don’t trap moisture underneath like thick coatings can.
Reapplication Requirements
The major downside is longevity. Most require annual reapplication to maintain protection, as the film slowly washes off and the active ingredients deplete. They’re also messy, dripping for days after application and transferring to clothing and garage floors. Professional services often offer “dripless oil” treatments that gel after application, reducing mess while maintaining creep characteristics.
Understanding Polyurethane and Polyurea Coatings
These two-component, catalyzed coatings represent the premium tier, originally developed for industrial applications requiring extreme chemical resistance and durability. When properly applied, they create a near-permanent protective shell.
Premium Performance Features
Polyurea formulations cure in seconds, building a 5-10mm film that’s impervious to salt, chemicals, and abrasion while remaining flexible enough for chassis flex. They bond tenaciously to properly prepared metal and can last 10+ years even in salt belt conditions. The material is UV stable (important for exposed frame sections) and maintains properties across extreme temperature ranges (-40°F to 250°F). Many high-end restoration shops now prefer polyurea for show vehicles that must remain pristine.
Application Complexity
The catch? These are two-component systems requiring precise mixing ratios and specialized heated, plural-component spray equipment running $5,000-$15,000. The material cures so quickly that improper technique leads to a ruined gun and wasted material. Temperature and humidity affect cure speed dramatically, demanding environmental control most DIYers lack. For these reasons, polyurethane and polyurea coatings remain firmly in the professional domain for vehicle applications.
Key Features to Evaluate When Choosing Undercoating
Beyond formulation type, several performance characteristics determine whether an undercoating will protect your vehicle for years or fail prematurely. Understanding these features helps you ask the right questions when evaluating both professional services and DIY products.
Adhesion Properties and Surface Compatibility
Superior adhesion requires the coating to wet the surface completely, flowing into microscopic irregularities. Look for products with ASTM D4541 pull-off strength ratings above 300 PSI for professional applications. For DIY, check manufacturer specifications for compatibility with your vehicle’s existing factory coatings—some undercoatings react poorly with e-coat or galvanized surfaces. The best formulations use rust-converting primers for heavily oxidized areas, chemically transforming iron oxide into a stable, paintable surface rather than just covering it.
Flexibility and Crack Resistance
A coating that cracks when your chassis flexes is worse than no coating at all—it traps moisture against bare metal. Evaluate elongation-at-break percentages; quality rubberized coatings should exceed 200% elongation, while premium polyureas can reach 400%. In cold climates, check low-temperature flexibility ratings—materials should remain pliable at -20°F without cracking. Ask professionals about their experience with your specific vehicle type; unibody cars flex differently than body-on-frame trucks, requiring different coating characteristics.
Dry Time and Curing Process
Chemistry matters here. Solvent-borne coatings cure by evaporation, leaving the film vulnerable to wash-off if exposed to moisture before full cure (typically 24-72 hours). Water-based products cure through coalescence, faster but requiring specific humidity conditions. Two-component systems cure chemically, achieving full properties in hours but demanding precise mixing. For DIY planning, understand that “dry to touch” doesn’t mean “ready for road exposure”—premature exposure to wet roads can ruin weeks of work.
VOC Compliance and Environmental Impact
Volatile Organic Compounds (VOCs) aren’t just an environmental concern—they affect your health during application and indicate product quality. Professional shops must use VOC-compliant formulations (typically <420 g/L), which are less toxic and often perform better. DIY products with high VOC content may apply easier but shrink more during cure and contain more hazardous solvents. Water-based formulations have improved dramatically, now rivaling solvent-borne performance while being safer for home use and easier cleanup.
Noise Dampening Capabilities
While rust prevention is primary, noise reduction is a valuable secondary benefit. The mass of the coating dampens panel resonance and blocks road noise transmission. Rubberized coatings typically provide the best sound deadening, reducing cabin noise by 3-5 dB. Asphalt-based products are even more effective but add significant weight (15-25 pounds for a full application). If noise reduction is a priority, discuss this with your professional installer or choose DIY products specifically marketed with acoustic properties.
Application Surface Preparation: The Critical Foundation
The finest undercoating in the world will fail if applied over contamination, loose rust, or moisture. Preparation constitutes 70% of the work and 90% of the success—this is where professional services justify much of their cost, and where DIYers most often compromise.
Professional Prep Protocols
Reputable shops perform a multi-stage preparation process. First, they pressure wash with 180-200°F water and alkaline detergents that strip oils and road film. Next, they inspect under bright lighting, marking areas requiring mechanical rust removal. They use needle scalers and wire wheels to remove scale, then apply rust converters to stabilized oxidation. Finally, they bake the undercarriage with forced air heaters until surface temperatures reach 70°F with less than 10% humidity—optimal conditions for coating adhesion that can’t be achieved with air drying.
DIY Prep Best Practices
Home preparation requires equivalent diligence. Pressure wash with a degreasing agent, then allow 24-48 hours of dry time in a garage with fans circulating air. Use a moisture meter ($30-50) to verify metal surfaces are below 15% humidity before application. Remove all loose rust with wire brushes and 80-grit sandpaper—don’t rely on undercoating to “seal in” rust, as it will continue spreading underneath. Mask off exhaust components, brake lines, and drivetrain parts with aluminum foil (not tape, which leaves adhesive residue). Apply rust converter to any remaining oxidation and let it cure fully per manufacturer instructions.
Common Preparation Mistakes to Avoid
Never apply undercoating over factory undercoating that’s peeling or bubbling—it will continue delaminating and take your new coating with it. Don’t skip the drying step; moisture trapped under the coating creates a rust incubator. Avoid applying in temperatures below 60°F or above 85°F, as adhesion suffers dramatically. Perhaps most critically, don’t undercoat a brand new vehicle without first removing the waxy “cosmoline” shipping protection many manufacturers apply—this residue prevents proper bonding and guarantees failure within months.
Climate-Specific Considerations
Your geographic location dictates undercoating requirements more than any other factor. A product perfect for Arizona sun will fail miserably in Maine winters, and vice versa. Matching formulation to environment is non-negotiable.
Salt Belt and Coastal Region Requirements
If you live where roads are white with salt December through March, or within 10 miles of saltwater coasts, you need maximum protection. Professional asphalt-based or polyurea coatings are worth the investment here—they’re the only formulations proven to withstand magnesium chloride’s aggressive attack. Reapplication intervals shrink to 2-3 years even with premium products. For DIYers in these regions, accept that you’ll need to reapply rubberized coatings every other year and inspect annually for coating breaches. Consider professional application for the initial heavy layer, then DIY maintenance coats.
Dry Climate and Desert Conditions
Desert environments present unique challenges: extreme UV exposure, sand blasting, and wide temperature swings. Here, flexibility and UV stability matter more than salt resistance. Polyurea coatings excel in these conditions, as do quality rubberized formulations with UV inhibitors. Avoid asphalt-based products—they become brittle and crack in extreme heat. The good news: without salt exposure, coatings last significantly longer, often 7-10 years. DIY application is more forgiving in dry climates, as low humidity accelerates cure and reduces rust risk during application.
Humid and Tropical Environment Challenges
Constant humidity means moisture is always present, but without salt, corrosion proceeds more slowly. Wax and oil-based formulations work exceptionally well here, as they actively displace moisture. However, the constant dampness accelerates coating degradation, requiring more frequent reapplication. Professional shops in these regions often apply “cavity wax” treatments inside frame rails and body panels, using wands to reach hidden areas where moisture pools. For DIYers, focus on products with excellent penetration and consider fogging oil treatments for interior cavities.
Longevity and Durability Factors
Understanding realistic lifespan expectations prevents disappointment and ensures you reapply before protection fails. No undercoating lasts forever, and many factors accelerate degradation.
Expected Lifespan by Formulation Type
Rubberized coatings: 3-5 years in moderate climates, 2-3 years in salt belts. Asphalt-based: 5-7 years moderate, 4-5 years severe. Wax-based: 1-2 years regardless of climate, requiring annual touch-ups. Oil-based: 1 year, but reapplication is quick and inexpensive. Polyurea: 10+ years in any climate when professionally applied. These timelines assume proper application and normal driving conditions—off-road use, commercial applications, or damage from accidents can reduce lifespan by 50%.
Factors That Degrade Undercoating Performance
Physical damage from road debris creates entry points for moisture. Petroleum fluid leaks (engine oil, transmission fluid, brake fluid) soften and dissolve most coatings. Improper cure before road exposure allows wash-off. Temperature cycling causes expansion and contraction stress, leading to crack propagation. UV exposure degrades binders, causing chalking and loss of adhesion. Perhaps most insidiously, trapped moisture underneath the coating—either from incomplete prep or coating breaches—accelerates rust far faster than bare metal exposed to air.
Reapplication Intervals and Maintenance
Professional applications should include annual inspections where technicians check for breaches, thin spots, and damage. Many offer discounted “maintenance coats” at 50-70% of initial cost every 3-4 years. DIYers must perform these inspections themselves, using a bright LED light and mirror to examine the entire undercarriage each fall before salt season. Touch-up aerosol cans work for small areas, but plan for full reapplication when you notice widespread thinning or cracking. Mark your calendar—waiting until you see rust means waiting too long.
Cost Analysis: Professional vs DIY
The sticker shock of professional undercoating (often $800-$2,500) sends many owners toward DIY, but a comprehensive cost analysis reveals the true financial picture extends far beyond the initial invoice.
Professional Service Pricing Structures
Professional pricing typically includes comprehensive prep, material costs, application labor, and warranty coverage. A standard sedan runs $800-$1,200, while trucks and SUVs cost $1,200-$1,800 due to larger surface area. Premium polyurea applications can reach $2,000-$2,500. These prices seem high until you factor in the included equipment, facility overhead, and expertise. Many shops offer tiered packages: basic rubberized, premium asphalt, and ultimate polyurea, allowing you to match protection to your budget and needs.
DIY Material and Equipment Costs
A quality DIY setup requires significant upfront investment: undercoating gun ($80-$200), pressure washer ($200-$500 if you don’t own one), angle grinder and wire wheels ($100-$150), PPE including respirator ($75-$150), and materials ($100-$300 per vehicle). That’s $555-$1,300 before you even start, though tools are reusable. Material costs vary dramatically: quality rubberized coating runs $15-$25 per quart (coverage: ~25 sq ft), while premium DIY polyurea kits cost $200-$300 for a single vehicle. Aerosol cans seem cheap at $8-$12 each, but you’ll need 10-15 cans for adequate coverage, making them more expensive per square foot than bulk material.
Hidden Costs and Long-Term Value
DIY hidden costs include your time (8-12 hours for a first-timer), potential rework if application fails ($200-$400 in materials and another weekend), and disposal fees for hazardous waste (many landfills charge $20-$50 for solvent-soaked rags and leftover material). Professional services include these factors in their pricing. Long-term, professional applications often prove more economical in severe climates due to longer intervals between reapplication. A $1,200 professional job lasting 5 years costs $240 annually, while a $300 DIY job requiring reapplication every 2 years costs $150 annually—plus your time and potential premature failure risk.
Safety and Environmental Considerations
Undercoating materials contain solvents, VOCs, and chemicals that demand respect. Professional shops operate under OSHA oversight with ventilation, fire suppression, and waste disposal systems. DIYers must replicate these safety protocols on a smaller scale.
Professional Shop Safety Standards
Certified shops maintain downdraft ventilation systems that capture overspray and fumes, protecting technicians and preventing environmental release. They store flammable materials in approved cabinets, have eyewash stations and fire extinguishers immediately accessible, and maintain spill containment kits. Material Safety Data Sheets (MSDS) are on file for every product used. This infrastructure isn’t just regulatory compliance—it prevents long-term health consequences from chronic solvent exposure and protects your community’s groundwater from improper disposal.
DIY Safety Protocols and PPE
Home applicators need equivalent protection: a NIOSH-approved respirator with organic vapor cartridges (not just a dust mask), chemical-resistant gloves and coveralls, safety goggles, and adequate ventilation. Work outside or in a garage with doors open and fans exhausting fumes away from you. Keep a fire extinguisher rated for chemical fires nearby—solvent vapors are heavier than air and can travel to ignition sources like water heaters or furnaces. Never smoke or use power tools that could spark during application. Dispose of rags properly; solvent-soaked materials can spontaneously combust if piled in trash cans.
Environmental Disposal Responsibilities
One gallon of waste undercoating or thinner can contaminate thousands of gallons of groundwater. Professional shops pay for licensed hazardous waste disposal, often $200-$500 monthly. DIYers must take leftover materials and solvent-soaked rags to household hazardous waste collection events (typically quarterly) or permanent facilities. Never pour solvents down drains or onto soil. Check local regulations—many areas prohibit undercoating application during high ozone days or require permits for generating hazardous waste. The environmental cost of improper disposal far exceeds any savings from DIY application.
Decision Framework: Choosing Your Approach
The pro vs DIY decision isn’t universal—it depends on your specific vehicle, climate, mechanical aptitude, and risk tolerance. Use this framework to make an informed choice rather than defaulting to the cheapest option.
When Professional Application Is Essential
Professional application becomes non-negotiable for: vehicles with existing rust requiring extensive prep, daily drivers in salt belt regions, luxury or collectible vehicles where resale value matters, owners without garage space or proper equipment, and anyone with respiratory sensitivities or safety concerns. Also consider professional application if you plan to keep the vehicle 10+ years—the extended protection warranty provides peace of mind that justifies the cost. Trucks used for heavy hauling or off-roading benefit from professional-grade asphalt or polyurea that DIY equipment can’t properly apply.
When DIY Makes Perfect Sense
DIY undercoating excels for: vehicles less than 3 years old with minimal rust (minimal prep needed), owners in moderate climates without severe salt exposure, mechanically inclined individuals who already own pressure washers and air compressors, and enthusiasts who enjoy the process and want control over material selection. It’s also ideal for maintenance coats over existing professional undercoating that’s thinning but not failing. If you’re coating a second vehicle or project car where perfection isn’t paramount, DIY offers acceptable protection at significant savings.
Hybrid Approaches: The Best of Both Worlds
The smartest strategy often combines both approaches. Pay for professional application initially, especially for severe climates or older vehicles. Then perform DIY inspections and touch-ups annually, using aerosol or quart containers of the same formulation the professional applied. This maintains warranty coverage while reducing long-term costs. Alternatively, have a professional apply premium coating to critical areas (frame rails, floor pans) while you DIY less vulnerable sections (inner fenders, wheel wells) with more economical materials. This targeted approach optimizes both protection and budget.
Frequently Asked Questions
How do I know if my vehicle already has factory undercoating that needs removal?
Check the build sheet or contact the dealer with your VIN. Visually inspect the undercarriage—factory coatings are typically thin, smooth, and uniform in color (usually black or dark gray). If you see a textured, thick coating with visible spray patterns, it’s likely aftermarket. Perform a solvent test: dab a small area with lacquer thinner on a rag. If the coating softens or transfers to the rag, it’s a solvent-borne product that needs removal before reapplication. If unaffected, it’s likely a cured epoxy or urethane that can be coated over after proper cleaning and scuffing.
Can I apply undercoating over existing rust, or must I remove it completely?
You cannot apply undercoating over active, scaly rust and expect protection. Loose rust must be removed with wire wheels or sandblasting down to bright metal. However, you can treat stable, light surface rust (no flaking) with phosphoric acid-based rust converters that chemically transform iron oxide into iron phosphate—a stable, non-reactive surface. After conversion and proper drying, undercoating can be applied. Heavy rust requires professional assessment; sometimes the metal is too far gone for coating to be effective, and replacement is the only safe option.
What’s the ideal temperature and weather for DIY undercoating application?
Target ambient temperatures between 65-75°F with relative humidity below 60%. Avoid application when temperatures will drop below 50°F within 24 hours, as this prevents proper curing. You need 3-5 days of dry weather after application—no rain, snow, or heavy dew. Ideal conditions are early fall in northern climates or spring in southern regions. Never apply in direct sunlight; the metal surface can be 20-30°F hotter than air temperature, causing solvents to evaporate too quickly and preventing proper film formation.
How long must I wait before driving on salted roads after undercoating?
For solvent-borne rubberized coatings, wait 72 hours minimum before salt exposure; water-based formulations need 48 hours. Asphalt-based products require 5-7 days for full cure, while polyurea coatings are ready in 24 hours. The real test: press your fingernail into an inconspicuous area. If it leaves an indentation, it’s not ready. If it feels firm and doesn’t transfer to your finger, you’re generally safe. When in doubt, wait longer. Many DIY failures occur because owners drive through puddles or salt slush before the coating has fully cross-linked.
Will undercoating void my vehicle’s factory corrosion warranty?
Federal law (Magnuson-Moss Warranty Act) prohibits manufacturers from voiding warranties simply because you applied aftermarket undercoating. However, if the undercoating directly causes a problem—like clogging drain holes leading to water accumulation and rust—the manufacturer can deny that specific claim. Professional shops carry insurance for this scenario. If you DIY, avoid spraying into factory drain holes, and never coat rubber bushings, brake components, or heat shields. Keep detailed records and photos of your work in case warranty disputes arise.
How much weight does undercoating add to my vehicle?
A complete professional application adds 15-25 pounds depending on vehicle size and coating type. Rubberized coatings add the least weight (10-15 pounds), asphalt-based adds the most (20-30 pounds), and polyurea falls in the middle (15-20 pounds). DIY applications often add less weight because achieving professional film thickness is difficult, but this also means less protection. The weight is negligible for performance and fuel economy—a full tank of gas adds 100+ pounds—but consider it if you’re building a track car where every pound matters.
Can I undercoat a vehicle myself that has existing professional undercoating?
Yes, but with important caveats. First, identify the existing coating type and use a compatible product—mixing incompatible chemistries causes delamination. Clean the existing coating thoroughly, then scuff it with 220-grit sandpaper to create mechanical tooth. Apply a specialized “tie-coat” primer designed to bond dissimilar coatings if you’re uncertain about compatibility. Focus on thin areas and touch-ups rather than applying a full second coat, which adds unnecessary weight and can obscure inspection points. Annual DIY maintenance coats over professional base layers can extend protection significantly.
What areas should I avoid when applying undercoating?
Never coat: exhaust components (creates fire hazard and burns off producing toxic fumes), brake lines and calipers (can cause fluid overheating and interfere with heat dissipation), rubber bushings and mounts (causes premature deterioration), drive shafts and CV joints (throws off balance and traps heat), and factory drain holes in doors and rocker panels (blocks water escape, causing internal rust). Also avoid coating heat shields—they’re designed to reflect heat, and coating them reduces effectiveness. Professional shops mask these areas meticulously; DIYers should use aluminum foil and tape extensively.
How do I maintain undercoating once it’s applied?
Inspect annually before winter, looking for cracks, chips, and thin spots. Use a pressure washer on low setting to remove road grime—high pressure can breach the coating. Touch up damaged areas immediately with compatible material; small breaches become big problems if salt enters. Avoid petroleum-based degreasers on the undercarriage; they soften most coatings. If you notice the coating becoming brittle or chalky, schedule reapplication before winter. For oil-based coatings, annual reapplication is maintenance. For film-forming coatings, professional inspections every 2-3 years catch problems early.
Is undercoating worth it on a leased vehicle I’ll only keep for 3 years?
This depends on your lease terms and conscience. Most lease agreements prohibit modifications, and undercoating is technically a modification. However, if professionally applied and documented, it can be considered maintenance. The ethical question: you’re protecting a vehicle you’ll return, but the next owner benefits from your investment. Some lessors may charge you for removal if they consider it an unauthorized modification. A better approach: use removable, non-permanent protection like annual oil-based treatments that don’t alter the vehicle permanently. If you plan to buy out the lease, undercoating makes excellent financial sense.