Your brake lines are the unsung heroes of your vehicle’s safety system—carrying life-or-death hydraulic pressure every time you press the pedal. Yet they live a brutal existence, hanging exposed beneath your car, constantly battered by road salt, moisture, and debris. While most car owners religiously wax their paint and condition their leather, the network of steel and aluminum lines under their chassis slowly corrode away, invisible until that terrifying moment when a pedal goes soft.
Undercoating your brake lines isn’t just another item on the “nice to have” maintenance list; it’s a critical investment in your vehicle’s longevity and your family’s safety. But here’s the challenge: not all undercoatings are created equal, and choosing the wrong product or applying it incorrectly can trap moisture against the metal, accelerating failure rather than preventing it. This guide cuts through the marketing noise to help you understand what actually works, what features matter most, and how to make an informed decision that protects your brake system for the long haul.
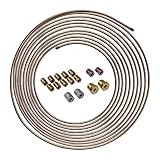
Top 10 Undercoating For Brake Lines


Detailed Product Reviews
Review could not be generated for this product due to an API error.
Review could not be generated for this product due to an API error.
Review could not be generated for this product due to an API error.
Review could not be generated for this product due to an API error.
Review could not be generated for this product due to an API error.
Review could not be generated for this product due to an API error.
Review could not be generated for this product due to an API error.
Review could not be generated for this product due to an API error.
Review could not be generated for this product due to an API error.
Review could not be generated for this product due to an API error.
Why Undercoating Your Brake Lines Matters
Brake line failure accounts for thousands of accidents annually, with corrosion being the primary culprit in vehicles over seven years old—especially in salt-belt states. Unlike body panels that show rust early, brake lines corrode from the inside out and underneath, making visual detection nearly impossible until catastrophic failure is imminent. A quality undercoating acts as a sacrificial barrier, taking the environmental beating so your metal lines don’t have to. Beyond safety, proper undercoating preserves resale value, prevents costly emergency repairs, and gives you confidence during winter driving months when roads become chemical soups of corrosive de-icers.
Understanding the Enemies: What Brake Lines Face
Road Salt and Chemical Degradation
Calcium chloride and magnesium chloride used on modern roads are exponentially more corrosive than old-fashioned rock salt. These hygroscopic chemicals cling to undercarriages, drawing moisture from the air and creating an electrolyte bath that accelerates galvanic corrosion. Your brake lines become the anode in a battery you never wanted, sacrificing metal ions with every passing mile. Quality undercoatings must resist chemical penetration and create a barrier impervious to these aggressive de-icing agents.
Moisture and Humidity Attack
Even in warm climates without road salt, constant humidity and condensation create the perfect environment for oxidation. Brake lines experience rapid temperature swings—from the heat of braking to cold water splashback—causing condensation to form directly on the metal surface. This cycle repeats hundreds of times per drive, making moisture exclusion the single most important function of any undercoating product.
Physical Abrasion from Road Debris
Small stones, gravel, and road grit act like sandpaper, blasting away factory coatings within the first few years of ownership. Each impact creates a micro-fracture in protective layers, exposing bare metal. Effective undercoatings need impact resistance and self-healing properties to maintain continuous protection despite the constant barrage from below.
Types of Undercoating Materials
rubberized undercoatings
These popular formulations create a flexible, sound-dampening barrier that expands and contracts with temperature changes. The vulcanized rubber particles suspended in solvent provide excellent impact resistance and deaden road noise. However, the key consideration is the quality of the polymer—cheap versions harden and crack within two years, while premium formulations remain pliable for a decade. Look for products specifically rated for hydraulic line use, as some rubberized coatings contain plasticizers that can degrade certain rubber brake hoses over time.
Asphalt-Based Undercoatings
The old-school choice still favored by commercial fleets, asphalt-based products offer maximum thickness and stone-chip resistance in a single coat. Their tar-like composition creates an almost impenetrable barrier against salt and water. The trade-off? They’re heavier, can sag in hot climates, and become brittle in extreme cold. Modern formulations blend asphalt with synthetic polymers to improve flexibility, but application requires careful surface prep since adhesion is less forgiving than rubberized options.
Wax and Oil-Based Undercoatings
Cavity waxes and drip oils represent the “creeping” protection philosophy—they start thin, then seep into seams and crevices where sprays can’t reach. These products never fully harden, which means they self-heal from minor abrasions and actively displace moisture. The downside is they require annual reapplication in harsh environments and can attract dirt, creating an unsightly but protective mud-pack effect. They’re ideal for classic cars and vehicles stored outdoors year-round.
Polyurethane and Polyurea Coatings
The premium tier of undercoating technology, these two-part catalyzed systems create a rock-hard, chemically resistant shell that bonds molecularly to metal. Originally developed for industrial pipeline protection, they offer the longest service life—often exceeding 15 years. Professional application is almost mandatory, as improper mixing ratios result in incomplete curing. The cost is significantly higher, but for vehicles you plan to keep forever, nothing else comes close.
Ceramic-Based Undercoatings
Emerging technology leverages ceramic microspheres suspended in polymer resins to create a heat-reflective, electrically insulating barrier. These coatings actively prevent galvanic corrosion by interrupting the electrical circuit between dissimilar metals. They’re particularly valuable for vehicles with mixed-material brake systems (steel lines, aluminum fittings, copper washers). Early formulations showed adhesion issues, but third-generation products now rival polyurea for durability.
Key Features to Evaluate Before Buying
Corrosion Resistance Rating
Look beyond marketing claims for actual test data. Reputable manufacturers publish salt spray test results (ASTM B117), with quality products exceeding 1,000 hours without failure. Some even provide electrochemical impedance spectroscopy data showing real-world corrosion rates. If a product doesn’t list standardized test results, assume it hasn’t passed them. The best undercoatings achieve a corrosion resistance rating of C5-M (very high marine/offshore environment) per ISO 12944 standards.
Temperature Range Compatibility
Your brake lines see temperatures from -40°F in winter to over 300°F near the exhaust manifold. The undercoating must maintain flexibility at the low end without melting or off-gassing at the high end. Check the product’s glass transition temperature (Tg)—this is where it shifts from flexible to brittle. For most climates, you want a Tg below -20°F. Simultaneously, verify the heat deflection temperature (HDT) exceeds 250°F to prevent sagging near hot components.
Flexibility and Adhesion Properties
The best undercoating in the world is useless if it peels off. Adhesion testing (ASTM D4541) should show pull-off strength exceeding 500 psi on clean steel. Flexibility is measured by mandrel bend tests—quality products withstand bending around a 1/8-inch mandrel without cracking. This matters because your brake lines flex slightly with chassis movement and thermal expansion. A rigid coating that cracks during the first pothole season is worse than no coating at all.
Curing Time and Application Conditions
Some products cure in 30 minutes, others need 48 hours. This drastically affects your project timeline. More importantly, check the application temperature range and humidity limits. Many premium coatings require 50-90°F and less than 60% humidity—conditions that might only exist in your garage for two weeks per year. Factor in cure time when choosing; a product that needs 24 hours before driving might not be practical for your daily driver.
Preparing Your Brake Lines for Undercoating
Cleaning and Degreasing Protocols
Never apply undercoating over factory grime, rust, or previous undercoating failures. Start with a power washer, then use a dedicated undercarriage cleaner with a stiff brush. For brake lines specifically, wipe down with brake parts cleaner (chlorinated for maximum grease removal) and lint-free towels. The “white glove test” applies here—if the towel comes away dirty, keep cleaning. Oil contamination is the number one cause of adhesion failure.
Rust Removal and Surface Treatment
Light surface rust can be treated with phosphoric acid-based rust converters that chemically transform iron oxide into iron phosphate—a stable, paintable surface. For heavier corrosion, gentle media blasting with crushed walnut shells or glass beads removes rust without thinning the line walls. Never use sandpaper or wire wheels on brake lines; you’ll remove protective metal and create stress risers. After rust removal, apply a metal prep solution (containing zinc phosphate) within 30 minutes to prevent flash rusting.
Masking and Protection Strategies
Undercoating should never contact rubber brake hoses, ABS sensors, or moving suspension components. Use high-temperature silicone tape or aluminum foil to protect these areas. For threaded fittings, coat the line but keep the threads bare—undercoating here can prevent proper torque and cause leaks. Slip small sections of heat-shrink tubing over line ends before coating; after curing, cut it away to reveal clean metal for connections.
Application Methods Explained
Spray Application Techniques
Aerosol cans work for touch-ups but lack the volume for complete coverage. Professional undercoating guns (using compressed air at 70-90 PSI) with fan-pattern tips provide the most even coverage. Apply in multiple light coats rather than one heavy coat—this prevents runs and ensures proper curing. Hold the gun 6-8 inches away and move at a consistent speed. The first coat should be a “tack coat” that’s just enough to wet the surface; subsequent coats build thickness.
Brush and Roll-On Methods
For DIY enthusiasts, brush application offers superior control in tight spaces. Use natural bristle brushes (synthetic brushes can dissolve in solvents) and apply in cross-hatch patterns to eliminate missed spots. Roll-on application with textured foam rollers works well for accessible straight sections but struggles around bends and brackets. Both methods require 50% more product than spraying due to thicker application, but they virtually eliminate overspray concerns.
Dipping Systems for Professionals
The ultimate protection comes from full immersion in a fluidized bed of coating material. This requires removing the brake lines completely—a major undertaking that often means bleeding the entire system. The advantage is 100% coverage, including inside mounting brackets and around every bend. Most shops won’t offer this due to liability concerns, but if you’re doing a frame-off restoration, it’s the gold standard.
Common Application Mistakes to Avoid
Applying undercoating to wet surfaces is the cardinal sin—trapped moisture will corrode beneath the coating, hidden until failure. Another critical error is coating stainless steel lines without proper etching; these require metal prep solutions to create a tooth for adhesion. Many DIYers also make the mistake of coating only the visible sections, leaving the backsides of lines against the frame completely exposed. Always rotate lines or use mirrors to verify 360-degree coverage. Finally, applying too thick a coat near exhaust components can cause heat retention, actually increasing line temperatures beyond safe limits.
Maintenance and Inspection Best Practices
Even the best undercoating requires periodic inspection. Every oil change, take five minutes to look for cracks, chips, or peeling—especially near clamps and brackets where movement occurs. Use a borescope camera to inspect hard-to-see areas behind fuel tanks and subframes. If you find damage, spot-repair immediately using the same product type; mixing chemistries can cause delamination. For wax-based coatings, annual reapplication of a thin maintenance coat extends life indefinitely. Pressure wash the undercarriage monthly during winter, but avoid aiming directly at coated lines with a 0-degree nozzle, which can cut through the coating.
Professional vs. DIY Application: Making the Right Choice
Professional application typically costs $400-800 but includes proper lift access, surface preparation, and warranty coverage. Shops use commercial-grade products not available to consumers and can apply multiple material types in different undercarriage zones. DIY costs $100-200 in materials but requires investing in proper safety gear (respirator, not just a dust mask), jack stands, and potentially a compressor and spray gun. The deciding factor should be your vehicle’s value and your mechanical skill level. If you can’t safely support the vehicle and remove all wheels, professional application is the only smart choice.
Cost Considerations and Value Analysis
Budget-friendly aerosol undercoatings seem attractive at $8-12 per can, but you’ll need 6-8 cans for adequate coverage, totaling $50-100 for a product that might last three years. Premium two-part systems cost $150-200 but protect for 10+ years. Do the math: $100 every three years versus $200 once equals $133 savings over a decade, not counting your labor. For vehicles in extreme environments, the premium option delivers better value. Factor in the cost of brake line replacement—typically $300-800—when evaluating undercoating as insurance.
Environmental and Safety Factors
Modern undercoatings have moved away from cancer-causing coal tar and ozone-depleting CFC propellants, but many still contain isocyanates, xylene, and other hazardous air pollutants. Always apply in well-ventilated areas with a supplied-air respirator (not cartridge-based). Capture overspray with tarps; many municipalities classify undercoating residue as hazardous waste due to heavy metals and solvents. Water-based undercoatings offer safer application but sacrifice durability—consider them only for garage-kept vehicles in mild climates. Check local VOC regulations; some areas restrict professional application during summer ozone season.
Compatibility Concerns with Modern Brake Systems
ABS sensor wires often run alongside brake lines, and some undercoating solvents can melt their insulation. Electronic brake distribution systems use pressure sensors that can be contaminated by coating overspray. Hybrid and electric vehicles have high-voltage cables near brake lines—never use conductive metallic-based undercoatings here. Always consult your vehicle’s service manual; some manufacturers specifically warn against aftermarket undercoating near brake components, potentially voiding corrosion warranties. When in doubt, apply a small test patch and monitor for 30 days before full application.
Longevity Expectations: How Long Should It Last?
In salt-belt states, a quality rubberized undercoating should provide 5-7 years of protection before needing significant touch-up. Polyurethane systems extend that to 12-15 years. However, longevity depends heavily on application thickness—most DIYers apply half the recommended 8-10 mils dry film thickness. Climate matters too: Arizona vehicles might see 20-year life from basic coatings, while Michigan winters demand annual inspection and spot repair. The real world benchmark: if you see surface rust returning within three years, your coating system has failed prematurely.
Warning Signs of Undercoating Failure
Bubbling or blistering indicates trapped moisture—a death sentence for the underlying metal. Cracking that exposes bare metal, especially in a spiderweb pattern, shows the coating has lost flexibility. Discoloration near exhaust components suggests heat degradation. If you can scrape the coating off with your fingernail, it’s lost adhesion and is no longer protective. Perhaps most insidious: a uniform dulling of the coating’s sheen often means UV degradation on the surface, which progresses to cracking within 12-18 months. Catch these signs early and you can recoat before metal damage occurs.
How to Choose the Right Undercoating for Your Climate
Desert dwellers should prioritize UV resistance and flexibility in extreme heat; asphalt-based coatings perform poorly here. Coastal regions need salt-fog resistance above all—look for marine-grade formulations with passivation inhibitors. Mountain drivers face temperature swings from summer heat to winter salt; polyurethane offers the best all-around performance. For garage-kept classics that see occasional rain, a simple wax-based coating provides adequate protection without the expense of industrial-grade systems. Always choose a product rated at least one severity level higher than your local conditions warrant—this provides a safety margin for unusually harsh winters or unexpected road chemical changes.
Frequently Asked Questions
How often should I inspect my undercoated brake lines?
Inspect them every 3,000 miles or with each oil change, whichever comes first. Focus on winter months when salt exposure is highest. Use a flashlight and mirror to check the backside of lines against the frame where damage often starts.
Can I apply undercoating over existing rust?
Light surface rust can be treated with rust converter, but heavy scaling rust must be removed first. Undercoating over thick rust is like painting over termite damage—it hides the problem while it gets worse. The rust continues expanding beneath, eventually popping the coating off.
Will undercoating affect my brake system’s heat dissipation?
Properly applied undercoating (8-10 mils thick) has negligible thermal effect on brake lines. However, avoid coating near calipers or master cylinders where heat generation is significant. The fluid inside the lines conducts heat far more effectively than the thin metal wall.
Is rubberized or asphalt-based undercoating better for brake lines?
For brake lines specifically, rubberized coatings offer better flexibility and adhesion to the curved surfaces and fittings. Asphalt-based products excel on flat underbody panels but can crack on tight brake line bends. Choose rubberized unless you’re in an extreme stone-chip environment.
Can I use fluid film or other lanolin-based products on brake lines?
Yes, lanolin-based sprays are excellent for brake lines because they creep into crevices and actively displace moisture. They require more frequent reapplication (every 12-18 months) but are safer for surrounding rubber components and easier to touch up without complete removal.
How do I remove old undercoating that’s failing?
Use a plastic scraper to avoid gouging metal, followed by a chemical stripper designed for undercoating removal. Heat guns can soften old coating but risk damaging nearby brake hoses. Media blasting with baking soda removes residue without harming the base metal.
Should I coat stainless steel brake lines?
Absolutely. Stainless steel isn’t stain-proof—it’s stain-less. It still corrodes, just more slowly than regular steel. Use a metal prep etching solution first, as stainless’s chromium oxide layer prevents coating adhesion. The undercoating protects the line and prevents external pitting that can become stress crack initiation points.
What’s the ideal temperature for applying undercoating?
Most products specify 60-80°F with low humidity. The metal surface should be 5°F above the dew point to prevent condensation. Applying in a cold garage in winter is futile—the coating won’t cure properly and will wash off in the first rain. Wait for a proper spring or fall day.
Can undercoating void my vehicle’s warranty?
It can, specifically if the manufacturer has a corrosion perforation warranty and specifies no aftermarket coatings. Dealerships sometimes claim undercoating “traps moisture” to deny rust claims. Keep documentation of proper application and use manufacturer-approved products to protect yourself.
How much does professional brake line undercoating typically cost?
Expect to pay $150-300 for brake line-specific undercoating as a standalone service, or $400-800 for full undercarriage protection including lines. The price reflects proper surface prep, quality materials, and warranty. Be wary of shops offering $99 “splash and dash” deals—these often skip critical cleaning steps.