When your windshield becomes a battlefield of water spots, road grime, and wiper streaks, ordinary glass cleaners simply surrender. turtle wax clearvue kits represent a paradigm shift in automotive glass care, transforming your windows from mere transparent barriers into hydrophobic shields that actively repel the elements. Whether you’re a weekend warrior passionate about DIY car care or a seasoned detailer seeking professional-grade results, understanding the nuances of these comprehensive systems can dramatically elevate your vehicle’s visibility and safety.
The difference between a hazy, water-clinging windshield and one that sheets water effortlessly at highway speeds isn’t just about aesthetics—it’s about reaction time, confidence in adverse weather, and preserving your vehicle’s glass surfaces for the long haul. Let’s dive deep into what makes these kits special, how to select the perfect system for your needs, and the expert techniques that separate satisfactory results from truly spectacular ones.
Top 10 Turtle Wax Clearvue Kit
Detailed Product Reviews
1. Turtle Wax 53435 Speed Headlight Lens Restorer Kit with Ceramic Acrylic Protection Wipes 2 fl. oz
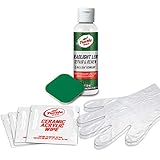
Overview: The Turtle Wax 53435 Speed Headlight Lens Restorer Kit offers a streamlined four-step solution for reviving cloudy, yellowed headlights and taillights. This kit combines a professional-grade clarifying compound with innovative ceramic acrylic protection wipes, delivering long-lasting clarity without requiring expensive professional services. At just $9.29, it provides an accessible entry point into DIY automotive restoration.
What Makes It Stand Out: The integrated ceramic acrylic resin wipes set this kit apart from basic restoration kits, sealing the lens surface to protect against future oxidation for over a year. The precision polishing pad and specialized Lens Repair & Renew Clarifying Compound work synergistically to remove scratches, swirl marks, and severe oxidation more effectively than standard compounds. The inclusion of protective gloves demonstrates thoughtful kit completeness.
Value for Money: At under $10, this kit represents exceptional value, costing less than a single fast-food meal while potentially saving hundreds in headlight replacement costs. Professional headlight restoration services typically charge $75-150, making this kit a budget-friendly alternative that doesn’t compromise on protective features. The ceramic protection extends the value proposition by reducing frequency of reapplication.
Strengths and Weaknesses: Strengths: Ceramic acrylic protection for extended durability; four easy steps suitable for beginners; comprehensive kit contents; effective on severe oxidation; long-lasting results. Weaknesses: Manual application requires significant elbow grease; may not fully restore heavily pitted or cracked lenses; limited compound volume for multiple vehicles.
Bottom Line: This kit is ideal for budget-conscious drivers seeking professional-level headlight restoration with advanced protection. For moderate oxidation, it’s arguably the best value on the market.
2. Turtle Wax T-234KT Premium Grade Scratch Repair Kit

Overview: The Turtle Wax T-234KT Premium Grade Scratch Repair Kit positions itself as a complete solution for tackling light scratches and finish imperfections. This $29.99 kit employs a multi-faceted approach with varying grit sanding pads for deeper defects and a clear coat pen for surface-level blemishes, potentially eliminating costly body shop visits for minor damage.
What Makes It Stand Out: The kit’s dual-approach system distinguishes it from single-step scratch removers. Color-coded restoration pads (varying grits) allow users to progressively treat scratches of different depths, while the clear coat finish pen provides precision application for light surface marks. The inclusion of both spray lubricant and paint clarifying compound creates a professional wet-sanding experience.
Value for Money: Priced at $30, this kit sits in the mid-range for DIY scratch repair solutions. While more expensive than basic rubbing compounds, it offers versatility that single-product solutions cannot match. Compared to professional touch-up work ($100-300), it provides substantial savings for those willing to invest time in proper technique. The comprehensive nature justifies the premium over entry-level options.
Strengths and Weaknesses: Strengths: Versatile multi-grit system; addresses both deep and light scratches; complete kit with lubricant; clear coat pen for precision; minimizes professional repair costs. Weaknesses: Steeper learning curve for beginners; wet sanding risks if misapplied; not suitable for deep paint chips or dents; $30 price point may exceed casual user budgets.
Bottom Line: Perfect for automotive enthusiasts comfortable with DIY paint correction. For drivers with multiple scratch types, this kit offers professional-grade tools worth the investment.
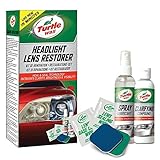
3. Turtle Wax T-240KT Headlight Lens Restorer Kit

Overview: The Turtle Wax T-240KT Headlight Lens Restorer Kit delivers a rapid, multi-stage restoration system designed to transform dull, yellowed headlights to like-new condition in under five minutes per lens. Featuring an impressive grit progression from 2400 to 8000, this $12.99 kit handles everything from surface discoloration to deeper scratches across all automotive lenses, plexiglass, and plastic surfaces.
What Makes It Stand Out: The exceptionally wide grit range (2400-8000) allows for aggressive initial treatment followed by ultra-fine finishing, achieving professional optical clarity. The speed claim—less than five minutes per lens—is ambitious but achievable for moderately oxidized lights. The versatile formulation works beyond headlights, making it valuable for restoring motorcycle windscreens, boat windows, and other plastic surfaces.
Value for Money: At $12.99, this kit offers tremendous value for those dealing with heavily oxidized headlights. The multi-stage approach typically requires purchasing separate sanding materials, but this kit bundles everything needed. Compared to the $9.29 Speed Kit, the additional $3.70 investment provides significantly more abrasive options for severe cases, making it more cost-effective for challenging restorations.
Strengths and Weaknesses: Strengths: Comprehensive grit progression; extremely fast results; versatile on all plastics; generous compound volume; effective for severe oxidation. Weaknesses: May be unnecessary for mildly fogged lenses; manual process still requires effort; no ceramic protection included; multi-step process can be messy.
Bottom Line: The go-to choice for severely degraded headlights. If your lenses are heavily yellowed, this kit’s aggressive approach justifies the slightly higher price over basic options.
4. Turtle Wax 51768 Headlight Restorer Kit Headlamp Cleaning Restores Brightness Kit, (Old Version)
Overview: The Turtle Wax 51768 Headlight Restorer Kit, marketed as the #1 selling headlight kit, targets medium oxidation with a proven formula that restores brightness and clarity without requiring power tools. This $14.00 kit focuses on practical, straightforward restoration while incorporating a sealing step to prevent future yellowing, improving both appearance and safety.
What Makes It Stand Out: The “#1 Selling” designation reflects widespread consumer trust and proven market performance. The kit’s emphasis on preventative sealing addresses the root cause of re-oxidation, extending the time between treatments. Its design specifically for manual application removes the barrier of needing expensive power tools, making it accessible to all skill levels.
Value for Money: At $14.00, this kit is fairly priced for a trusted, established product. While labeled “Old Version,” this often means a time-tested formula rather than inferior performance. It competes directly with newer kits at similar price points, offering reliability over cutting-edge features. For those prioritizing proven results over the latest technology, it represents solid value.
Strengths and Weaknesses: Strengths: Market-leading reputation; effective sealing prevents re-yellowing; no power tools required; improves nighttime visibility; straightforward application. Weaknesses: “Old Version” may lack recent innovations; designed for medium oxidation only; limited components compared to multi-pad kits; potentially less effective on severe damage.
Bottom Line: A reliable, no-frills option for standard headlight oxidation. Choose this for proven performance rather than advanced features, especially if you’re new to DIY restoration.
5. Turtle Wax 53836 Hybrid Solutions Scratch Repair Kit, Car Scratch Remover and Restorer That Repairs Surface Scratches, Swirls, Paint Transfer and More, Boxed Kit

Overview: The Turtle Wax 53836 Hybrid Solutions Scratch Repair Kit represents the brand’s modern approach to paint correction, offering an all-in-one solution for surface scratches, swirl marks, paint transfer, and road rash. This $16.97 kit leverages premium polishing abrasives and clear coat resin technology to deliver professional-level results across all clear-coated paint colors.
What Makes It Stand Out: The Hybrid Solutions branding signals advanced chemical engineering with premium abrasives that cut evenly without damaging surrounding paint. The dual-action approach—using both polishing compound and protective clear coat resin—fills and seals damage simultaneously, creating instant gloss and uniform appearance. Its universal safety for all paint colors eliminates guesswork and risk.
Value for Money: Positioned at $16.97, this kit offers a sweet spot between basic compounds and premium systems. The included clear coat resin adds value typically requiring separate purchase. While pricier than the $9.29 headlight kit, it’s competitive within the scratch repair category, especially considering the advanced Hybrid Solutions technology and protective finishing component.
Strengths and Weaknesses: Strengths: Advanced Hybrid Solutions formula; safe for all paint colors; includes protective clear coat resin; professional-grade abrasives; comprehensive applicator materials. Weaknesses: Not suitable for deep scratches exposing primer; premium price for casual users; requires careful application; limited to clear coat surfaces only.
Bottom Line: The best choice for modern vehicles with clear coat finishes. The protective resin and color-safe formula make it worth the modest premium over basic scratch removers.
6. Warren Turtle Wax Headlight Lens Restorer Kit

Overview: The Warren Turtle Wax Headlight Lens Restorer Kit is a budget-friendly solution designed to combat the common problem of cloudy, yellowed headlights. This DIY kit provides the necessary compounds and tools to restore optical clarity without requiring expensive lens replacements or professional services.
What Makes It Stand Out: This kit distinguishes itself through its straightforward approach to headlight restoration. Unlike simple polishes that offer temporary cosmetic fixes, this system typically includes multi-stage abrasive compounds that physically remove the oxidized layer of plastic. The compact package dimensions make it easy to store in your garage, and at under a pound, it’s convenient to handle during application.
Value for Money: At $13.81, this kit represents exceptional value compared to the $100+ cost of professional restoration or $200+ for headlight assembly replacement. For the price of a fast-food meal, you get a permanent solution that can dramatically improve nighttime visibility and your vehicle’s appearance.
Strengths and Weaknesses: Pros: Extremely affordable; provides permanent results when done correctly; improves safety through better light output; saves hundreds over replacement.
Cons: Requires significant manual effort and time; results depend heavily on proper technique; may not work on severely pitted or damaged lenses; protective coating needs reapplication periodically.
Bottom Line: This kit is ideal for budget-conscious DIY enthusiasts willing to invest elbow grease for professional-looking results. While it demands patience and effort, the dramatic improvement in headlight clarity and safety makes it a worthwhile investment for vehicles with moderately oxidized lenses.
7. Turtle Wax T-3KT Black Box Kit
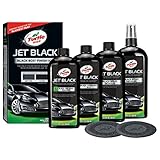
Overview: The Turtle Wax T-3KT Black Box Kit positions itself as a premium, comprehensive detailing system for automotive enthusiasts seeking professional-grade results. This high-end kit appears designed for complete vehicle makeover, likely containing multiple specialized compounds, polishes, and protectants.
What Makes It Stand Out: The “Black Box” designation suggests a complete, systematic approach to vehicle detailing rather than individual products. The 67°C flash point indicates professional-strength solvents capable of tackling severe contamination. This kit likely includes cutting compounds, finishing polishes, and protective coatings that work synergistically, eliminating guesswork about product compatibility.
Value for Money: At $179.99, this represents a significant investment, but consider that professional detailing services charge $300-$500 for comprehensive paint correction. For regular users, the kit pays for itself after two applications. The coordinated system ensures optimal results without the risk of product incompatibility that comes with mixing brands.
Strengths and Weaknesses: Pros: Complete, integrated system ensures professional results; high-quality compounds tackle severe defects; cost-effective versus professional services; builds proper detailing skills.
Cons: Premium price point excludes casual users; steep learning curve for beginners; time-intensive process requiring hours; may be overkill for well-maintained vehicles.
Bottom Line: This kit is best suited for serious car enthusiasts and collectors who regularly maintain multiple vehicles. While the investment is substantial, the ability to achieve concours-level results at home justifies the cost for those committed to proper vehicle care.
8. Turtle Wax Hybrid Solutions Ceramic Graphene Paste Wax for Car Detailing, High Gloss Shine, Extreme Water Beading, Long-Lasting Protection, for Paint, Glass Metal, Wheels and More, 5.5 oz (Pack of 1)
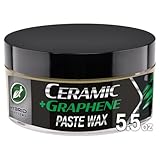
Overview: This paste wax represents Turtle Wax’s entry into the advanced coating segment, combining traditional carnauba with ceramic and graphene polymers. The 5.5-ounce container delivers cutting-edge protection technology for multiple surfaces including paint, glass, metal, and wheels.
What Makes It Stand Out: The proprietary blend of 10 waxes infused with ceramic and graphene creates a super-hydrophobic barrier that actively repels water and contaminants. Unlike conventional waxes, this formula provides genuine UV protection and clear coat preservation while delivering exceptional gloss and slickness. Its versatility across multiple surfaces eliminates the need for separate products.
Value for Money: At $29.99, this premium wax competes favorably with boutique brands costing $50-$80. The advanced polymer technology offers durability approaching ceramic coatings at a fraction of the cost and complexity. A little goes a long way, making the 5.5-ounce container economical for multiple applications.
Strengths and Weaknesses: Pros: Advanced ceramic-graphene technology; extreme water beading prevents spots; multi-surface versatility; easy application even in sunlight; professional-grade results.
Cons: Cannot be used on textured plastics or rubber; premium price over traditional waxes; requires proper surface prep for best results; limited quantity may not suit large vehicles.
Bottom Line: This wax is perfect for enthusiasts wanting ceramic-coating benefits without the complexity or cost. The exceptional hydrophobic properties and durable protection make it a standout choice for maintaining showroom shine on daily drivers and prized possessions alike.
9. Turtle Wax 50834 1-Step Wax and Dry, Quick and Easiest Step to High Shine, for Cars, Trucks, Motorcycles and RVs, 26 oz. Double Pack with Microfiber Towel

Overview: This innovative spray wax revolutionizes the traditional waxing process by allowing application on wet surfaces immediately after washing. The double pack includes two 26-ounce bottles and a microfiber towel, providing enough product for approximately 34 vehicles.
What Makes It Stand Out: The breakthrough formula eliminates the time-consuming drying step, letting you spray directly onto wet paint and towel-dry for instant protection and shine. This carnauba-polymer blend delivers traditional wax benefits in a fraction of the time, making regular maintenance realistic for busy owners.
Value for Money: At $14.99 for two bottles plus a towel, this offers extraordinary value. With each bottle treating up to 17 cars, you’re paying less than 50 cents per vehicle application. Compare this to $15-$25 for a single traditional wax application, and the savings become immediately apparent.
Strengths and Weaknesses: Pros: Unmatched speed and convenience; excellent value with high coverage; safe for all exterior surfaces; includes quality microfiber towel; ideal for regular maintenance.
Cons: Less durable than traditional paste waxes; not suitable for correcting oxidized or damaged paint; requires frequent reapplication; may leave streaks if over-applied.
Bottom Line: This product is ideal for time-pressed car owners who want consistent protection without dedicating hours to detailing. While it won’t replace intensive waxing for show cars, it’s perfect for maintaining daily drivers with minimal effort and maximum convenience.
10. Turtle Wax 50692 Power Out Pet Mess Kit

Overview: The Power Out Pet Mess Kit addresses the unique cleaning challenges pet owners face in vehicles and homes. This specialized three-piece kit combines an all-surface cleaner, odor eliminator spray, and reusable pet hair removal sponge to tackle the complete spectrum of pet-related messes.
What Makes It Stand Out: Unlike generic cleaners, this kit is specifically formulated to be safe around pets and children while effectively breaking down organic stains. The included Pet Hair Lifter Sponge offers a reusable mechanical solution for embedded fur that vacuuming alone cannot remove, addressing a common frustration for pet owners.
Value for Money: At $11.99, this kit delivers targeted solutions for three distinct problems at a price point lower than most single-purpose premium cleaners. Professional pet stain removal services charge $50-$150 per session, making this kit an economical choice for ongoing maintenance.
Strengths and Weaknesses: Pros: Pet-safe formulation; comprehensive three-product system; reusable hair removal tool; effective on multiple surfaces; travel-size odor remover included.
Cons: May struggle with set-in or extreme stains; limited quantities in each container; requires immediate application for best results; not a substitute for deep extraction cleaning.
Bottom Line: This kit is essential for pet owners who regularly travel with animals. The combination of safe, effective cleaning solutions and the innovative hair removal sponge makes it invaluable for maintaining clean, odor-free vehicles and homes despite furry companions.
Understanding Turtle Wax ClearVue Technology
The Science Behind Hydrophobic Coatings
At its core, ClearVue technology leverages advanced silane and siloxane polymers that chemically bond with your glass at a molecular level. Unlike traditional waxes that sit atop the surface, these formulations create a microscopic texture that increases the contact angle of water droplets beyond 110 degrees. This superhydrophobic effect causes water to bead tightly and roll off at speeds as low as 30 mph, dramatically improving wet-weather visibility.
The real magic lies in the cross-linking process that occurs during curing. As the carrier solvents evaporate, the active ingredients form a durable, transparent matrix that becomes part of the glass itself. This isn’t a temporary coating that washes away after a few rainstorms—it’s a semi-permanent solution that can withstand months of environmental abuse.
How ClearVue Differs from Traditional Wax
Conventional carnauba or synthetic waxes might make your windshield feel smooth, but they lack the specialized chemistry for glass adhesion. They degrade quickly under wiper friction and UV exposure, typically lasting only days or weeks. ClearVue formulations contain glass-specific adhesion promoters and are engineered to resist the unique stresses that windshield glass endures—constant wiper movement, extreme temperature fluctuations, and exposure to washer fluids containing alcohol and detergents.
What to Expect in a Typical ClearVue Kit
Core Components Breakdown
Most comprehensive ClearVue systems include a multi-stage treatment process rather than a single bottle. You’ll typically find a deep-cleansing glass polish that removes embedded contaminants and water spots, the hydrophobic coating itself, and specialized applicator pads designed for even distribution. The polish often contains micro-abrasives that restore optical clarity by leveling microscopic imperfections without scratching.
The coating applicator is equally critical—usually a foam block with a suede or microfiber surface that prevents product waste and ensures thin, uniform layers. Some kits also include lint-free cleaning cloths and detailed instruction cards that walk you through the process.
Optional Accessories You Might Find
Premium kits frequently bundle additional tools that streamline the application. Look for razor blade scrapers with protective holders for removing stubborn debris, detailing swabs for getting into tight corners around mirrors and sensors, and even pH-neutral glass cleaners for maintenance washes. These accessories aren’t just nice-to-haves—they’re force multipliers that help achieve professional results in less time.
Key Features That Define Quality
Hydrophobic Performance Metrics
Not all hydrophobic coatings are created equal. The best formulations achieve contact angles exceeding 115 degrees and maintain performance after 10,000+ wiper cycles. Pay attention to water beading speed—quality coatings cause droplets to skate off within milliseconds of contact rather than slowly creeping down the glass. This “sheeting action” is what provides that satisfying clear view during heavy rain without constantly activating your wipers.
UV Protection and Longevity
Your windshield faces more UV radiation than any other glass surface on your vehicle. Top-tier ClearVue kits incorporate UV inhibitors that prevent the coating itself from breaking down while also protecting the glass from long-term degradation. This dual-action protection is crucial for vehicles parked outdoors regularly, as UV exposure is the primary accelerator of coating failure.
Clarity and Optical Grade Formulation
The difference between a mediocre and exceptional coating often comes down to optical clarity. Professional-grade kits use ultra-pure carrier solvents and refined active ingredients that leave zero residue, haze, or rainbow effects when viewed at an angle. This is particularly important for night driving, where any optical distortion can create dangerous glare halos around oncoming headlights.
Choosing the Right Kit for Your Vehicle
Assessing Your Car’s Current Condition
A brand-new vehicle with pristine glass requires a different approach than a 5-year-old car with etched water spots and wiper haze. For severely neglected glass, you’ll need a kit with a more aggressive polishing compound. Conversely, newer vehicles can use a simplified two-step system. Run your fingernail across the glass—if you feel roughness or catch on embedded particles, you need the full treatment protocol.
Climate Considerations
Your local environment dramatically impacts kit selection. Desert dwellers battling mineral-heavy water and dust storms need coatings with superior chemical resistance. Coastal residents facing salt spray require formulations with enhanced corrosion inhibitors. If you live in a region with harsh winters where road salt and sand are prevalent, prioritize durability over initial beading performance, as abrasive contaminants will test the coating’s resilience.
Skill Level and Application Complexity
First-time users should gravitate toward kits with forgiving application windows and extended cure times that allow for corrections. Advanced detailers might prefer rapid-cure formulations that enable multi-layer applications in a single day. Consider whether you’re comfortable using a machine polisher on glass or if you’ll stick to hand application—some kits are optimized specifically for one method or the other.
Application Mastery: Getting Professional Results
Surface Preparation Essentials
The number one reason for coating failure is inadequate prep. Begin with a thorough wash using a dedicated glass cleaner—never use household glass cleaners containing ammonia, which can interfere with bonding. Clay barring the glass is non-negotiable; even seemingly clean windshields harbor invisible contaminants that create bonding barriers. For deeply etched water spots, a cerium oxide polish may be necessary before the included polish stage.
Temperature matters enormously. Apply in shade when ambient temperatures are between 60-80°F with humidity below 60%. Hot glass causes solvents to flash too quickly, leading to streaking. Cold temperatures prevent proper cross-linking. Always test surface temperature with an infrared thermometer—if the glass feels warm to the touch, it’s too hot.
Step-by-Step Application Process
Work in small sections—roughly 2x2 feet maximum. Apply the coating in overlapping cross-hatch patterns using light pressure. The goal is a thin, even layer; more product doesn’t equal better protection. Most formulations require a “flash time” of 30-90 seconds before leveling with a clean microfiber. This is critical: level too early and you remove the coating; too late and it becomes difficult to buff.
Use a high-intensity LED flashlight at a low angle to inspect your work. Any high spots or streaks will be immediately visible as smudges. Address these within the product’s working window, typically 2-3 minutes after application. Once cured, removal becomes extremely difficult.
Curing and Drying Times
Patience separates good results from great ones. While the coating may feel dry to the touch within minutes, full chemical cure takes 24-48 hours. During this period, avoid moisture, dew, and washer fluid contact. Keep the vehicle garaged if possible. Some advanced formulations reach 80% cure within 4 hours, allowing cautious driving, but always check the specific product’s technical data sheet for exact timelines.
Common Mistakes to Avoid
Overapplication Issues
Applying too thick a layer is the most common error. Excess product doesn’t bond properly and creates a hazy, greasy appearance that’s prone to premature failure. Remember, you’re building a layer measured in microns—thinner is actually better. One proper coat outperforms three heavy coats every time.
Environmental Factors During Application
Never apply in direct sunlight, even if the glass feels cool. UV radiation accelerates solvent evaporation unevenly, causing patchy results. Wind is another silent killer—it carries dust that embeds in the coating before it cures. Even a light breeze can deposit enough particulate matter to create a gritty texture that compromises both clarity and durability.
Skipping Critical Prep Steps
The temptation to rush the prep phase is strong, but skipping clay bar decontamination is like painting over rust. Those microscopic contaminants become permanent features under the coating, creating weak points where water can penetrate and undermine the entire system. Spend 80% of your time on prep and 20% on application for results that last.
Maintenance and Longevity Optimization
Proper Washing Techniques Post-Application
Once cured, your treated glass requires specific care. Use pH-neutral, ammonia-free glass cleaners only. Aggressive cleaners strip the coating layer by layer. When washing the entire vehicle, avoid getting wax or sealant on the glass—these products can interfere with the hydrophobic properties. Use a separate wash mitt for glass surfaces to prevent cross-contamination.
When to Reapply: Reading the Signs
Performance degradation is gradual. You’ll notice water no longer sheets off at low speeds, and beading becomes less pronounced. The “waterfall test” is reliable—spray water on the glass; if it clings and runs slowly rather than immediately sheeting off, it’s time for reapplication. Most quality treatments last 3-6 months on windshields and up to a year on side windows that don’t face wiper wear.
Boosting Performance Between Applications
Maintenance sprays specifically designed for hydrophobic coatings can extend life by 30-50%. These “topper” products contain similar chemistry at lower concentrations and refresh the coating’s outer layer. Apply them monthly after washing for sustained performance. Avoid generic quick detailers, which often contain gloss enhancers that reduce beading effectiveness.
Performance Expectations: What ClearVue Actually Delivers
Real-World Water Beading Behavior
Manage your expectations—no coating makes wipers completely obsolete. In light to moderate rain, you’ll find yourself using intermittent wiper settings far less frequently. During heavy downpours, the coating transforms wiper performance; each pass clears dramatically more water, and the glass dries faster between strokes. The real benefit is the reduction in smearing and the ability to see through light rain without wipers at highway speeds.
Durability in Various Conditions
Real-world durability varies wildly based on driving habits. Daily highway commuters may see 3-4 months of optimal performance due to constant wiper use and road debris impact. Garage-kept weekend cars can maintain effectiveness for 8+ months. Winter conditions with salt and sand reduce lifespan by up to 40%, while mild climates can extend it significantly.
Visual Enhancement Capabilities
Beyond water repellency, quality kits improve optical clarity by filling microscopic pits and scratches. This creates a smoother surface that reduces light diffraction, cutting down on nighttime glare. The effect is subtle but noticeable—many users report reduced eye strain during long night drives. The coating also makes removing bugs, tree sap, and bird droppings exponentially easier.
Value Analysis: Investment vs. Return
Cost Per Application Calculations
A premium kit priced at $40 might seem expensive, but when you factor in 4-6 applications per bottle and 4-month durability, you’re looking at less than $2 per month for treated glass. Compare this to $15-25 per professional application, and the DIY route offers compelling savings. Factor in your time at $20/hour, and a 2-hour DIY job still costs half of professional service.
Professional Detailing Comparison
Professional detailers using similar products charge $75-150 for glass coating services. They offer expertise and controlled environments, but the products themselves are often identical to retail kits. The primary value-add is proper paint correction and environment control. If you’re willing to invest in learning proper technique, DIY results can match professional quality at a fraction of the cost.
Time Investment Considerations
Your first application will take 2-3 hours including prep. With experience, you can complete the process in 60-90 minutes. This is a front-loaded time investment—the maintenance savings during washing and the reduced need for glass cleaning more than compensate. Most users find they spend 50% less time cleaning glass over the coating’s lifespan.
Troubleshooting Common Issues
Streaking and Hazing Solutions
If you discover streaks after the coating has cured, don’t panic. Most can be removed with a light polish and reapplication to the affected area. For minor hazing, a 50/50 mix of isopropyl alcohol and distilled water can sometimes dissolve surface residue. Always test in an inconspicuous corner first. Severe cases require a glass polishing compound and complete reapplication.
Poor Water Beading Fixes
When water beads poorly immediately after application, contamination is the culprit. The surface wasn’t clean enough, or you applied over residual glass cleaner. The only solution is removal and reapplication. Use a dedicated coating remover or heavy-duty glass polish to strip the failed layer completely before starting over. Half-measures here guarantee repeated failure.
Removal and Reapplication Protocols
Stripping a failed or old coating requires mechanical abrasion. A glass polishing compound with a machine polisher at low speed (800-1200 RPM) effectively removes the layer without damaging the glass. Hand polishing works but requires significantly more effort. Never use paint thinners or harsh solvents—they can damage window seals and interior trim if they drip.
Environmental and Safety Considerations
VOC Compliance and Eco-Friendliness
Modern ClearVue formulations are increasingly water-based with low volatile organic compound content. This reduces environmental impact and makes application safer in enclosed spaces. However, even low-VOC products require adequate ventilation. Apply with garage doors open or in well-ventilated areas. Dispose of used applicators properly—many contain residual chemicals that shouldn’t enter waterways.
Safe Handling Practices
Always wear nitrile gloves during application. While skin contact won’t cause immediate harm, the solvents can dry skin and the coating will bond to skin cells, requiring days to wear off. Safety glasses are wise, especially when working overhead on windshields. Keep products away from children and pets, and store in climate-controlled environments to prevent premature degradation.
The Evolution of ClearVue: Past to Present
Technological Advancements
Early hydrophobic coatings were finicky, requiring precise humidity and temperature conditions. Today’s formulations feature broader application windows and faster cure times. Nanotechnology integration has improved bonding strength, while hybrid polymer systems combine the best properties of silanes and fluoropolymers. The shift from solvent-heavy to water-based carriers represents the biggest leap forward in user-friendliness and environmental responsibility.
Market Positioning
Turtle Wax has positioned ClearVue as the accessible professional-grade solution, bridging the gap between consumer waxes and expensive ceramic coatings. The kit approach democratizes what was once detailer-exclusive technology, packaging the necessary tools and instructions for successful DIY application. This strategy has forced competitors to follow suit, raising the bar for entire product categories.
Comparing Application Methods
Hand Application vs. Machine
Hand application offers superior control on complex curves and near edges where machines can’t safely reach. The tactile feedback helps ensure even coverage, and the risk of sling is zero. Machine application with a glass-specific pad speeds up large, flat surfaces like windshields but requires experience to avoid product waste and edge buildup. Most experts recommend hand application for first-timers, reserving machines for experienced users tackling multiple vehicles.
Pad Selection Impact
The included applicator pads are designed for optimal product release and minimal absorption. Substituting generic foam or microfiber can reduce effectiveness by 30-40% through uneven distribution and product waste. If you need additional pads, invest in glass-specific applicators with low pile and high density. Avoid plush microfiber, which holds too much product and creates an uneven layer.
Seasonal Application Strategies
Best Times to Apply
Spring and fall offer ideal temperature windows and moderate humidity. Spring application prepares your vehicle for summer thunderstorms and bug season, while fall application provides maximum benefit during winter’s wet, salty conditions. Avoid summer’s peak heat and winter’s freezing temperatures. Early morning applications in summer or midday applications in winter (in a heated garage) can work with careful monitoring.
Storage Considerations
Unopened kits remain stable for 2-3 years when stored between 50-75°F. Once opened, use within 6-12 months as exposure to air begins slowly degrading active ingredients. Never store in vehicles where temperatures can exceed 120°F—the heat causes premature polymerization, turning liquid coating into unusable gel. If the product thickens or develops a skin, it’s compromised and should be replaced.
Professional Tips for Advanced Users
Layering Techniques
While a single proper coat provides excellent protection, some enthusiasts apply two thin coats for maximum durability. Wait 1-2 hours between coats—long enough for solvents to flash but short enough that chemical bonding occurs between layers. Never exceed three coats; additional layers don’t improve performance and increase haze risk. Always apply the second coat thinner than the first.
Combining with Other Products
ClearVue plays well with most paint protection products but conflicts with some glass cleaners. Avoid ammonia-based cleaners and silicone-containing dressings near glass edges. For ultimate performance, apply ClearVue after paint correction but before any trim dressings. Some users report enhanced beading by topping with a dedicated glass sealant 24 hours after ClearVue application, though this is often unnecessary with modern formulations.
Frequently Asked Questions
How long does a Turtle Wax ClearVue treatment typically last on a daily driver?
On a vehicle driven daily with regular wiper use, expect 3-4 months of optimal hydrophobic performance, with gradual degradation afterward. Side windows and rear glass can maintain effectiveness for 6-8 months since they don’t face wiper abrasion. Garage-kept vehicles or those driven primarily on highways (where wipers are used less) may see 5-6 months of peak performance.
Can I apply ClearVue to my windshield if it has existing scratches or pitting?
Yes, but manage your expectations. The coating will fill micro-scratches and improve optical clarity, but it cannot repair deep gouges or significant pitting. For best results, address severe damage with glass polishing before application. The coating will make future damage less likely by providing a sacrificial layer, but it won’t reverse existing structural glass damage.
Is it safe to use my windshield wipers immediately after application?
No. Avoid wiper use for at least 24 hours, and ideally 48 hours, to allow full chemical curing. Using wipers too early can drag uncured coating across the glass, creating streaks and weak spots. If you must drive during the curing period, raise your wiper arms away from the glass or use a temporary cover. After full cure, wipers will actually perform better and last longer due to reduced friction.
Will ClearVue damage my windshield’s heating elements or radio antenna?
Quality ClearVue kits are completely safe for heated windshields and integrated antennas. The coating bonds to glass, not electrical components, and is non-conductive. In fact, it can protect heating elements from corrosion. Avoid getting liquid coating directly on exposed connectors at the glass edges, but the treated area itself poses no risk to functionality.
Can I apply ClearVue in my garage with the door closed?
Only if your garage is well-ventilated. While modern formulations are low-VOC, they still contain solvents that require airflow. At minimum, open the garage door and use a fan to create cross-ventilation. For optimal safety and results, apply with the door fully open. If you experience headaches or dizziness, increase ventilation immediately and take a break.
How does ClearVue perform on rear windows with defrosters?
It performs excellently and can actually improve defroster efficiency by creating a smoother surface where ice and condensation have less grip. Ice releases more easily, and defrosting times may decrease slightly. The coating is unaffected by the heating cycles and won’t crack or peel under thermal stress. Apply carefully around the defroster grid lines to ensure complete coverage.
What should I do if it rains unexpectedly within 12 hours of application?
If light rain occurs after 6+ hours, the coating has likely flash-cured enough to resist minor water contact. Gently blot (don’t wipe) any water drops with a clean microfiber. Heavy rain or dew within 12 hours is problematic—you may see spotty performance. If this happens, wait 48 hours, then inspect. Poor beading areas will need spot correction with polish and reapplication to those sections only.
Can I use ClearVue on my mirrors and headlights?
Absolutely, and you should. Side mirrors benefit tremendously from water repellency, dramatically improving rearward visibility in rain. For headlights, the coating improves light output in wet conditions and makes cleaning bug splatter easier. Use the same application technique but work in smaller sections. Avoid getting coating on headlight lenses with existing UV damage or yellowing—address those issues first for best results.
Why is my coating beading water but not sheeting it off at speed?
This indicates either insufficient application or surface contamination. Properly applied ClearVue should sheet water at 30-40 mph. If water beads but clings, you may have applied too thin a layer or leveled too aggressively, removing product. Alternatively, residual oils from previous treatments or contaminated applicators can interfere. A light second coat after 24 hours often resolves this, or strip and reapply if the problem persists.
How do I remove ClearVue if I’m unhappy with the results or want to switch products?
Removal requires mechanical abrasion. Use a glass polishing compound with a machine polisher at low speed (800-1200 RPM) and light pressure. Work in small sections until water no longer beads. For hand removal, expect significant elbow grease—use a cerium oxide polish and a firm foam pad. Once removed, clean thoroughly with isopropyl alcohol before applying any new product. Never layer a different coating over ClearVue without complete removal first.