If you’ve ever flinched at the scorching heat radiating from your firewall, watched your intake temperatures climb on a summer track day, or simply endured a cabin that feels like a sauna despite the AC working overtime, you’re experiencing a fundamental challenge of modern automotive design. Heat is the enemy of performance, comfort, and component longevity. While traditional insulation methods have served us for decades, the evolution of spray-on thermal barriers has revolutionized how enthusiasts and professionals manage thermal transfer in vehicles. These advanced coatings don’t just insulate—they actively reflect, dissipate, and block heat at the molecular level, creating a protective shield that can be precisely applied to complex surfaces where mats and foams simply can’t reach.
Understanding what separates an exceptional spray-on thermal barrier from a mediocre one requires more than reading marketing claims. It demands a grasp of material science, application techniques, performance metrics, and real-world automotive environments. Whether you’re building a track-focused monster, restoring a classic, or simply want your daily driver to run cooler and more efficiently, this comprehensive guide will equip you with the knowledge to evaluate these products like an industry insider. We’ll explore the critical features, debunk common myths, and walk through everything from surface prep to long-term maintenance—without ever mentioning specific brands, so you can make an informed decision based on performance characteristics, not hype.
Top 10 Spray-on Thermal Barriers
Detailed Product Reviews
1. Design Engineering ATAC | Advanced Thermal Acoustic Coating | 15 oz Spray-On Ceramic Thermal & Acoustic Barrier Spray | Heat Insulation, Noise & Vibration Dampening, Easy Application

Overview: Design Engineering’s ATAC spray-on coating delivers targeted thermal and acoustic protection for automotive interiors. This 15-ounce canister employs advanced ceramic sphere technology to reflect heat up to 375°F while dampening noise, vibration, and harshness. Engineered for precision application in cramped engine bays and cabin spaces, it adheres to metal, fiberglass, and select plastics.
What Makes It Stand Out: The clog-free nozzle ensures consistent spray patterns without frustrating interruptions, while the spot-treatment design excels in irregular areas like firewall contours and transmission tunnels. The micro-sphere ceramic formula creates a lightweight barrier that won’t add significant weight to your project. Made in the USA by a brand with decades of performance experience, it includes comprehensive safety data and application instructions.
Value for Money: At $37.72 for approximately 12 square feet of coverage ($3.14/sq ft), this spray can positions itself as a premium spot-treatment solution. While more expensive per square foot than bulk alternatives, it eliminates waste in small applications and saves hours of labor compared to cutting and fitting traditional mat insulation. For DIY enthusiasts tackling specific problem areas rather than entire vehicles, the convenience justifies the cost.
Strengths and Weaknesses: Strengths include exceptional ease of use, versatile substrate compatibility, and trusted brand reputation. The 24-hour cure time requires planning, and the interior-only limitation restricts applications. Coverage is modest—most projects require multiple cans. It’s unsuitable for exhaust systems or exterior surfaces, and the temperature rating, while adequate, trails some high-performance alternatives.
Bottom Line: Perfect for targeted automotive insulation projects where precision matters more than coverage. Ideal for weekend warriors addressing specific heat or noise issues without committing to a gallon purchase.
2. Design Engineering - ATAC Advanced Thermal Acoustic Coating - 1 Gallon | 2-in-1 Sound & Heat Barrier for Car Insulation | Sound Deadening Spray/Roll On

Overview: This gallon-sized version of DEI’s ATAC coating scales up the same advanced ceramic technology for comprehensive vehicle insulation projects. Covering approximately 75 square feet, this water-based formulation functions as both a thermal barrier and acoustic dampener, reflecting heat up to 375°F while minimizing cabin noise.
What Makes It Stand Out: The versatility of application methods sets this apart—spray with an ATAC spray gun, roll it on, or brush it into intricate areas. The water-based formula ensures easy cleanup with soap and water, while the micro-sphere ceramic technology maintains performance without toxic solvents. This bulk format transforms the product from a spot treatment into a complete vehicle solution.
Value for Money: At $107.99 for 75 square feet, the cost drops to approximately $1.44 per square foot—less than half the price of the aerosol version. This makes full-vehicle insulation financially practical. Compared to traditional sound deadening mats costing $2-5 per square foot plus installation labor, the gallon offers compelling value for larger projects.
Strengths and Weaknesses: Strengths include cost-efficiency at scale, multiple application options, and the same trusted ceramic technology. The water-based formula is safer to handle and environmentally preferable. Weaknesses include the need for additional equipment (spray gun) for optimal application, substantial upfront investment, and the same 24-hour cure time. Interior-use-only restrictions remain, and coverage may vary based on application thickness.
Bottom Line: The smart choice for restorers and builders insulating entire vehicles. The per-square-foot savings quickly offset the higher initial cost, making it the most economical path to a cooler, quieter cabin.
3. Lizard Skins Heat Barrier, Spray On, 350 Degree Fahrenheit Maximum, Ceramic, Black, 1 gal Bucket, Each
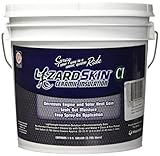
Overview: Lizard Skins Heat Barrier offers a gallon-sized ceramic coating solution for automotive thermal management. This black, spray-on formula provides protection up to 350°F, positioning itself as a direct competitor to more established brands in the vehicle insulation market. The product arrives ready for application on metal and other automotive substrates.
What Makes It Stand Out: The black finish distinguishes it from typical gray or white thermal coatings, which may appeal to builders concerned with visible areas or specific aesthetic requirements. As a gallon quantity, it targets the same full-vehicle market segment as bulk alternatives. Lizard Skins has built recognition in the protective coatings industry, lending credibility to this offering.
Value for Money: At $113.13 per gallon, it commands a slight premium over competitors, though exact coverage isn’t specified. Assuming similar spread rates to alternatives (70-80 sq ft), the per-square-foot cost aligns closely with premium options. The lack of detailed specifications makes precise value assessment difficult, potentially giving pause to data-driven buyers.
Strengths and Weaknesses: Strengths include the convenient gallon format, established brand name, and ceramic-based formulation. The black color may be advantageous for certain applications. Weaknesses are significant: the 350°F rating trails the 375°F standard, product details are sparse, no application instructions are referenced, and coverage estimates are absent. This information gap forces buyers to assume compatibility and performance.
Bottom Line: A serviceable option for those preferring a black thermal coating, but the vague specifications and slightly lower temperature rating make it less compelling than more transparent alternatives. Purchase only if color requirements outweigh detailed performance data.
4. DIVERSITECH COOLWELD-32 Cool-Weld Heat Barrier Spray- 32 Ounce Container

Overview: DIVERSITECH COOLWELD-32 provides a budget-conscious entry point into heat barrier protection with its 32-ounce spray-on gel formula. Designed to shield surfaces from heat damage, this product targets cost-sensitive consumers seeking basic thermal management without premium pricing. The thick gel consistency suggests substantial coverage potential for the volume.
What Makes It Stand Out: The remarkably low $18.45 price point makes this the most accessible option in the category, democratizing thermal protection for experimental projects or light-duty applications. The thick gel formulation may offer superior vertical surface adhesion compared to thinner liquids, reducing drips and waste during application. Its straightforward, no-frills approach appeals to pragmatic users.
Value for Money: At approximately $0.58 per ounce, the value proposition is undeniable—roughly one-third the cost of premium aerosol alternatives. For under $20, users can test thermal coating concepts or protect small areas without significant financial risk. However, the absence of specified coverage area, temperature rating, and durability claims complicates true cost comparison.
Strengths and Weaknesses: Strengths center on affordability and the potentially user-friendly gel consistency. The product’s primary weakness is its complete lack of technical specifications—no maximum temperature resistance, no coverage estimates, no substrate compatibility list, and no cure time information. This opacity makes it unsuitable for critical applications where performance verification is essential. Durability and long-term effectiveness remain unknown.
Bottom Line: Suitable for non-critical experiments, hobbyist projects, or temporary solutions where absolute performance isn’t paramount. Avoid for professional or high-temperature applications until specifications are clarified.
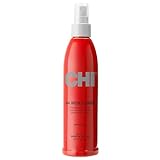
5. CHI 44 Iron Guard Thermal Protection Spray, Nourishing Formula Helps Resist Heat Damage to Hair & Tame Frizz, 2 Oz

Overview: CHI 44 Iron Guard Thermal Protection Spray serves an entirely different market—hair care—providing thermal protection for styling tools up to 450°F. This 2-ounce bottle delivers a nourishing formula that shields hair from heat damage while taming frizz and enhancing shine. The ceramic and protein-infused formula represents salon-grade technology in a consumer-friendly package.
What Makes It Stand Out: This product combines ethical formulation with professional performance. The cruelty-free, paraben-free, and sulfate-free composition appeals to conscious consumers, while the ceramic technology releases negative ions that seal hair cuticles for enhanced luster. CHI’s reputation in professional salon circles ensures quality formulation, and the protein complex strengthens hair during heat styling.
Value for Money: At $3.74 ($1.87 per ounce), this represents exceptional value in the thermal hair protectant category, where comparable products often cost $5-10 per ounce. The dual-action protection and styling benefits effectively deliver two products in one, further enhancing its affordability. For regular heat styling, the cost-per-use is negligible.
Strengths and Weaknesses: Strengths include outstanding price point, ethical formulation, reputable brand heritage, and multi-benefit performance (protection plus frizz control). The ceramic-protein technology provides genuine heat defense while improving hair health. Weaknesses are contextual: the 2-ounce size requires frequent repurchase for heavy users, and it’s completely unsuitable for automotive or industrial applications—a critical distinction given the product category confusion.
Bottom Line: An outstanding value for protecting hair from styling heat. Don’t mistake this for automotive thermal coating—it’s a premium hair care product at a drugstore price, perfect for daily heat styling with ethical peace of mind.
6. CHI 44 Iron Guard Thermal Protection Spray, Nourishing Formula Helps Resist Heat Damage to Hair & Tame Frizz, Clear, 8 Oz
Overview: CHI’s 44 Iron Guard Thermal Protection Spray delivers professional-grade heat defense in an 8-ounce bottle for $13.38. This clear, nourishing formula creates a protective barrier against styling tool damage while taming frizz and boosting shine. Suitable for both wet and dry hair application, it integrates seamlessly into any styling routine.
What Makes It Stand Out: The brand’s signature ceramic compound technology releases negative ions that bond proteins to hair cuticles, strengthening strands from within. Founded by a hairdresser allergic to ammonia, CHI maintains a commitment to ethical, cruelty-free formulations that are paraben and sulfate-free. The versatile spray works across the entire CHI 44 Iron Guard system, providing layered protection from cleansing through styling.
Value for Money: At $1.67 per fluid ounce, this positions CHI in the affordable mid-range category—significantly cheaper than salon-exclusive brands while delivering comparable performance. The 8-ounce size provides approximately 2-3 months of regular use, making it a cost-effective choice for daily heat stylers who prioritize ethical ingredients without premium pricing.
Strengths and Weaknesses: Strengths:
- Reputable professional brand with proven ceramic technology
- Can be applied to both wet and dry hair for maximum versatility
- Ethical formulation: cruelty-free, paraben-free, sulfate-free
- Generous 8-ounce size reduces frequency of repurchasing
Weaknesses:
- Does not specify maximum temperature protection rating
- May feel slightly heavier on fine hair compared to water-based alternatives
- Scent may be strong for sensitive users
Bottom Line: CHI 44 Iron Guard offers reliable, ethically-formulated heat protection at an accessible price point. Ideal for regular heat tool users seeking a trusted brand without breaking the bank.
7. wavytalk Smooth Barrier Heat Protectant Spray for Hair, Thermal Protection Spray for All Hair Tools to Smooth&Hydrate, Up to 450℉ Protection, Damage Repair&Frizz Control, Lightweight Formula, 5 Fl Oz

Overview: Wavytalk’s Smooth Barrier Heat Protectant Spray offers high-performance thermal defense up to 450°F in a lightweight 5-ounce formula priced at $29.99. This premium spray combines heat protection with frizz control and hydration, targeting users who demand maximum safeguarding for frequent high-temperature styling.
What Makes It Stand Out: The hydrolyzed lupin protein technology creates an invisible, lightweight barrier that locks in moisture for 72 hours while delivering mirror-like shine. Its water-based formula ensures zero stickiness or buildup across all hair types, including fine and color-treated strands. The explicit 450°F rating provides confidence for flat iron and curling wand users who operate at maximum temperatures.
Value for Money: At $6.00 per fluid ounce, this sits in the premium tier. The advanced protein technology and extended 72-hour frizz control justify the cost for those who style daily at high heat. While pricier than drugstore options, the concentrated formula requires minimal product per application, stretching the 5-ounce bottle further than expected.
Strengths and Weaknesses: Strengths:
- Explicit 450°F maximum heat protection rating
- 72-hour frizz control with hydrolyzed lupin protein
- Water-based, lightweight formula suits all hair types
- Clean formulation: sulfate-free, paraben-free, phthalate-free, cruelty-free
Weaknesses:
- Premium price point may deter budget-conscious buyers
- Smaller 5-ounce size requires more frequent repurchasing
- Limited brand recognition compared to established competitors
Bottom Line: Wavytalk delivers exceptional high-heat protection and long-lasting frizz control for serious stylers. Worth the investment if you regularly use tools at maximum temperatures and prioritize clean, lightweight formulations.
8. CHI 44 Iron Guard Thermal Protection Spray, Nourishing Formula Helps Resist Heat Damage to Hair & Tame Frizz, Clear, 8 Oz, Pack of 2

Overview: This two-pack bundle of CHI’s 44 Iron Guard Thermal Protection Spray delivers the same trusted 8-ounce formula in a cost-saving package for $22.25. Designed for committed users, it provides identical ceramic-based heat protection and frizz control as the single bottle, ensuring continuous supply for regular heat styling routines.
What Makes It Stand Out: The bundle reduces the per-ounce cost to $1.39—a significant saving over purchasing individually. Each bottle maintains CHI’s professional-grade ceramic compound technology that releases negative ions to bond proteins into hair cuticles. The twin-pack format eliminates the risk of running out unexpectedly and reduces packaging waste, appealing to environmentally conscious consumers who have made CHI their go-to protectant.
Value for Money: This represents exceptional value, dropping the price per ounce below most competitors while maintaining premium performance. For households with multiple heat tool users or individuals who style daily, the bulk purchase amortizes to substantial annual savings. The upfront investment pays for itself within three months compared to buying single bottles.
Strengths and Weaknesses: Strengths:
- Significant cost reduction at $1.39 per ounce
- Same trusted CHI formula with ceramic protein technology
- Reduces repurchasing frequency and shipping costs
- Ideal for families or heavy users
Weaknesses:
- Higher initial investment required
- Requires storage space for second bottle
- Product may lose efficacy if stored improperly long-term
Bottom Line: The CHI two-pack is a smart bulk buy for dedicated users. The substantial per-ounce savings and convenience make it the most economical way to maintain consistent heat protection.
9. wavytalk Smooth Barrier Heat Protectant Spray for Hair, Thermal Protection Spray for All Hair Tools to Smooth&Hydrate, Up to 450℉ Protection, Damage Repair&Frizz Control, 1.69 Fl Oz

Overview: Wavytalk offers its premium Smooth Barrier formula in a travel-friendly 1.69-ounce bottle for $21.99. This miniature version delivers the same 450°F heat protection and 72-hour frizz control as its full-size counterpart, packaged for portability and TSA compliance, making it ideal for on-the-go styling needs and gym bags.
What Makes It Stand Out: The compact size fits effortlessly into carry-on luggage, gym bags, or purses without sacrificing performance. It features identical hydrolyzed lupin protein technology and water-based lightweight formulation, ensuring salon-quality protection away from home. This format serves as an affordable trial size for those hesitant to commit to the larger investment.
Value for Money: At $13.01 per fluid ounce, this travel size commands a steep premium—more than double the full-size version. While economically inefficient for regular use, the value lies in convenience and risk-free experimentation. For frequent travelers or those testing the formula, the premium may be justifiable, but daily users should opt for the 5-ounce bottle.
Strengths and Weaknesses: Strengths:
- Ultra-portable TSA-compliant size
- Full-strength formula identical to larger version
- Perfect for travel or trial purposes
- Maintains 450°F protection and 72-hour frizz control
Weaknesses:
- Extremely poor value at $13.01 per ounce
- Small size depletes quickly with regular use
- Generates more packaging waste per ounce
Bottom Line: Purchase this travel size only for portability or testing. For everyday use, the 5-ounce bottle offers vastly superior value. Essential for frequent flyers committed to premium heat protection.
10. L’ANGE HAIR Thermal Agent - Thermal Heat Protectant Spray for Hair - Guards Strands from Damage Up to 450°F - Enhances Shine, Volume & Controls Frizz - Lightweight, Non-Greasy Formula - 4 Fl oz
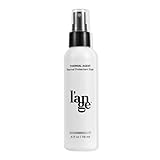
Overview: L’ANGE Thermal Agent combines heat protection up to 450°F with styling benefits in a 4-ounce bottle for $20.00. This multitasking spray integrates fermented bamboo extract and hydrolyzed keratin to shield strands while enhancing shine, volume, and frizz control, targeting users who want protection plus styling performance in one product.
What Makes It Stand Out: The fermented bamboo leaf extract and keratin infusion strengthen hair while providing a lightweight, brushable hold that enhances texture without stiffness. Unlike purely protective sprays, this formula doubles as a styling primer with alcohol-free composition, making it gentle for daily use on all hair types, including chemically treated and color-processed strands that need extra care.
Value for Money: At $5.00 per ounce, L’ANGE positions itself between budget-friendly CHI and premium wavytalk. The added styling benefits and nourishing botanical ingredients justify the mid-range price point. The 4-ounce size provides a sweet spot for testing without commitment while delivering more product than travel sizes and minimizing waste.
Strengths and Weaknesses: Strengths:
- Bamboo extract and keratin provide genuine strengthening benefits
- Lightweight hold adds styling versatility without residue
- Alcohol-free, paraben-free, phthalate-free formulation
- Explicit 450°F protection rating for high-heat tools
Weaknesses:
- Smaller brand recognition than established competitors like CHI
- 4-ounce size less economical than CHI’s 8-ounce option
- Hold may be too light for those seeking strong control or structure
Bottom Line: L’ANGE Thermal Agent excels as a hybrid protectant-styling product. Ideal for users wanting natural ingredients and light hold without stiffness, effectively bridging the gap between pure protection and styling versatility for everyday salon-worthy results.
What Are Spray-On Thermal Barriers and How Do They Work?
Spray-on thermal barriers are liquid-applied coatings that cure to form a continuous, seamless membrane designed to resist heat transfer. Unlike conventional insulators that rely on trapped air pockets within fibrous or foam structures, these advanced formulations employ multi-phase technologies that work through reflection, absorption resistance, and emissivity control. When properly applied, they create a monolithic layer that conforms to every contour, weld seam, and irregular surface in your engine bay, undercarriage, or cabin.
The Science Behind Heat Reflection and Absorption
At the core of any effective thermal barrier is its ability to manipulate infrared radiation—the primary mechanism of heat transfer in automotive environments. High-performance formulations contain ceramic microspheres, reflective metal oxides, or specialized pigments that create what scientists call a “photonic bandgap” for infrared wavelengths. This means incoming heat energy gets reflected away rather than absorbed into the substrate. The coating’s binder system then provides a secondary defense by resisting thermal conduction through the film itself. Think of it as a one-way mirror for heat: it blocks incoming thermal energy while allowing the substrate underneath to dissipate any residual heat more effectively.
Spray-On vs. Traditional Insulation Methods
The fundamental advantage of spray-on technology lies in its conformability and continuity. Traditional thermal mats require cutting, fitting, and securing with adhesives or fasteners, inevitably leaving gaps and seam lines where heat can bypass the insulation. These mechanical attachment points also become failure modes over time as adhesives degrade and fasteners loosen. Spray-on barriers eliminate these weaknesses by creating a chemically bonded, seamless envelope that adheres directly to the substrate. This is particularly crucial in engine bays where components have complex geometries, or in restoration projects where original sheet metal may be irregular or corroded. The liquid application also allows for precise thickness control, enabling you to apply heavier coats in high-heat zones while maintaining minimal thickness in areas where clearance is tight.
Why Your Vehicle Needs a Thermal Barrier
Modern vehicles pack more power and components into tighter spaces than ever before, creating thermal environments that factory insulation was never designed to handle. Turbochargers running at 1,600°F, exhaust manifolds glowing orange, and densely packed engine bays turn your vehicle into a heat-soak nightmare that affects everything from performance to passenger comfort.
Engine Bay Heat Management
Your engine bay operates as a high-temperature furnace, with surface temperatures on headers and intake manifolds routinely exceeding 1,200°F. This radiant heat doesn’t just stay put—it conducts through metal components, raises intake air temperatures, and compromises rubber hoses, wiring insulation, and plastic components. A quality spray-on thermal barrier applied to the underside of your hood, firewall, and inner fenders can reduce surface temperatures by 50-70%, keeping heat where it belongs and preventing it from migrating into sensitive areas. This is particularly critical for forced induction applications where elevated under-hood temperatures can rob you of 10-15 horsepower through heat-soaked intercoolers and intake tracts.
Cabin Comfort and Climate Control
The thermal load on your HVAC system is directly proportional to the heat penetrating the firewall, transmission tunnel, and floor pans. Uninsulated metal surfaces can reach 180°F or more, turning your cabin into a heat sink that your air conditioner must constantly battle. By creating a thermal break between these surfaces and the interior space, spray-on barriers can reduce cabin heat gain by 30-40%. This translates to faster cool-down times, less AC compressor cycling, and measurable fuel economy improvements—often 2-3% in hot climates. For classic car owners, this means enjoying your vintage ride on a summer afternoon without the traditional sauna experience.
Protecting Sensitive Components
Modern vehicles contain a network of sensitive electronics, sensors, and modules that begin degrading at temperatures above 185°F. Factory wiring harnesses, ABS modules, and ECMs are often mounted in locations where they’re bombarded by radiant heat from exhaust components. Over time, this thermal stress causes insulation embrittlement, solder joint fatigue, and premature component failure. Applying a thermal barrier to surrounding panels creates a protective microclimate that extends component life and prevents those frustrating heat-related electrical gremlins that plague high-performance and older vehicles alike.
Key Performance Metrics to Evaluate
When comparing formulations, you need to look beyond marketing temperature ratings and understand the quantitative metrics that predict real-world performance. These numbers tell the story of how a product will behave when applied to your specific vehicle and use case.
R-Value and K-Value Demystified
Thermal resistance (R-value) and thermal conductivity (K-value) are often misrepresented in automotive coatings. Unlike building insulation where these values are standardized, automotive thermal barriers operate in a different regime. The effective R-value of a 40-mil spray-on coating typically ranges from R-3 to R-5, but this number alone is misleading because it doesn’t account for the coating’s reflective properties. A more useful metric is the “apparent thermal conductivity” which measures heat flow under dynamic temperature gradients similar to engine bay conditions. Look for products that provide ASTM C518 test data showing conductivity below 0.15 Btu·in/(hr·ft²·°F) at elevated temperatures.
Temperature Reduction Ratings
Manufacturers love to quote impressive temperature drop numbers, but these are meaningless without context. A legitimate rating should specify the substrate material, coating thickness, heat source temperature, and measurement method. For example, “reduces surface temperature by 100°F on 20-gauge steel with 1,200°F radiant source at 40-mil dry film thickness, measured per ASTM E1933” is a meaningful specification. Be skeptical of vague claims like “reduces heat by 70%” without supporting methodology. The most relevant test for automotive use is the “cyclic thermal shock” test, which subjects the coating to repeated rapid heating and cooling to simulate real-world driving conditions.
Adhesion Strength and Durability
A thermal barrier that peels or delaminates after one summer is worse than useless—it’s a liability. Pull-off adhesion strength should exceed 300 psi on properly prepared steel or aluminum substrates when tested per ASTM D4541. More important is the “wet adhesion” performance after thermal cycling. Premium formulations maintain over 80% of their original adhesion after 100 cycles between -40°F and 400°F. Also examine the coating’s flexibility—measured as elongation at break. A value above 15% ensures the barrier can handle the expansion and contraction of metal panels without cracking, which is critical for under-hood applications where temperature swings of 200°F are routine.
Material Science: Understanding Different Formulations
Not all spray-on thermal barriers are created equal. The resin binder, filler technology, and additive package determine everything from application characteristics to long-term performance. Understanding these material differences is crucial for selecting the right product for your specific application.
Ceramic-Based Formulations
Ceramic microsphere technology represents the gold standard for high-temperature applications. These hollow glass or ceramic spheres, typically 10-100 microns in diameter, create a multi-layered reflective structure within the coating matrix. The spheres reflect radiant heat while their hollow interior provides resistance to conductive heat transfer. Premium formulations use graded sphere sizes to maximize packing density and create a tortuous path for heat flow. Look for products specifying “closed-cell ceramic microspheres” rather than generic “ceramic content.” The binder is typically a high-temperature silicone or siloxane resin that can withstand continuous exposure to 500°F with intermittent spikes to 1,200°F. These formulations excel in engine bay applications but require careful surface prep and multiple thin coats to prevent sagging.
Acrylic and Elastomeric Blends
For applications where flexibility and cost-effectiveness are priorities—such as interior floor pans, trunk areas, or door panels—acrylic-based thermal barriers offer an excellent balance of performance and ease of use. These water-based formulations use acrylic or styrene-acrylic copolymer binders filled with reflective pigments like titanium dioxide and hollow polymer microspheres. While they can’t match ceramics for extreme temperature resistance (typically rated to 250-300°F continuous), they offer superior adhesion to a variety of substrates and excellent flexibility with elongation values exceeding 30%. Many modern formulations incorporate elastomeric modifiers that allow the coating to bridge small cracks and gaps, making them ideal for older vehicles with less-than-perfect sheet metal.
Emerging Nanotechnology Solutions
The cutting edge of thermal barrier technology lies in nanomaterial-enhanced formulations. These products incorporate aerogel particles, graphene derivatives, or boron nitride nanotubes to achieve thermal performance previously impossible in thin-film coatings. Aerogel-enhanced barriers can provide equivalent insulation to 1-inch of foam in a 30-mil coating, though at a premium price point. Graphene-based formulations offer unique advantages in electrical conductivity control, preventing static buildup while providing exceptional thermal resistance. While these technologies show tremendous promise, they’re still maturing in the automotive aftermarket. If you choose to go this route, ensure the manufacturer provides comprehensive test data and real-world case studies, as some nanomaterial formulations struggle with long-term UV stability and mechanical durability.
Application Surface Preparation: The Foundation of Success
The world’s best thermal barrier will fail miserably if applied to a poorly prepared surface. In the car care world, we understand that prep work is 90% of the final result, and thermal barriers are no exception. The preparation protocol varies significantly based on the substrate condition and location.
Cleaning and Degreasing Protocols
Start with a two-stage cleaning process. First, remove gross contamination with a high-quality automotive degreaser like you’d use for engine detailing. Scrub all surfaces with a stiff brush to dislodge oil, grease, and road grime. The second stage is critical: use a wax and grease remover with lint-free cloths, wiping in one direction and frequently changing cloths to prevent recontamination. For aluminum surfaces, which are particularly prone to adhesion failures, follow up with an aluminum prep wash that etches the surface microscopically. Never use mineral spirits or generic solvents—they leave residues that interfere with bonding. Pay special attention to areas around the engine where silicone-based dressings may have been oversprayed; these create invisible barriers that cause immediate delamination.
Sanding and Profiling Techniques
Thermal barriers require a mechanical “tooth” for optimal adhesion. For bare metal, use 80-120 grit aluminum oxide sandpaper to create a uniform scratch pattern. The goal isn’t to remove material but to create a micro-profiled surface that increases the bonding area by 30-40%. On painted surfaces, you must sand through the clear coat and into the base coat, creating a surface that fails cohesively within the paint layers rather than at the coating interface. For powder-coated surfaces, which are notoriously difficult to bond to, use a red Scotch-Brite pad followed by a specialized adhesion promoter. Always sand in overlapping strokes and avoid creating deep scratches that could telegraph through the final coating. After sanding, blow off the surface with clean, dry compressed air, then follow with a tack cloth to capture fine dust particles.
Primer Selection and Compatibility
While many thermal barriers claim “direct-to-metal” capability, using a compatible primer can double the service life of your application. For high-temperature areas, use a 2K epoxy primer rated to 300°F, applied in two thin coats with a flash time of 30 minutes between coats. The primer should be sanded with 320-400 grit after curing to create an optimal bonding surface. For aluminum, use a self-etching primer specifically formulated for aluminum substrates. Never use etch primer on steel—it provides inadequate corrosion protection. If you’re applying over existing paint, use a high-build urethane primer to create a uniform surface and isolate any potential compatibility issues. Always verify primer compatibility with your thermal barrier manufacturer; some ceramic formulations contain solvents that can lift certain primers if applied too aggressively.
Professional vs. DIY Application: What You Need to Know
The decision between hiring a professional and tackling the job yourself hinges on equipment access, skill level, and the complexity of your vehicle’s geometry. Both approaches can yield excellent results when executed properly, but the paths to success are quite different.
Equipment Requirements for DIY Enthusiasts
For home application, you’ll need a quality HVLP spray gun with a 1.8-2.2mm tip for most ceramic formulations, or a 1.4-1.6mm tip for acrylic-based products. The compressor must deliver at least 13 CFM at 40 PSI to maintain proper atomization. A moisture trap and oil separator are non-negotiable—water or oil contamination will cause fisheyes and adhesion failures. You’ll also need a respirator rated for organic vapors (not just particulates), full-body covering, and proper ventilation equipment. For small, intricate areas, consider a detail spray gun or even airbrush equipment for touch-ups. The material itself will need to be thoroughly mixed using a mechanical agitator; ceramic microspheres settle quickly and cannot be properly redistributed by hand shaking. Plan on mixing small batches frequently rather than one large batch that could settle during application.
When to Call a Professional Installer
Professional installation becomes cost-effective when dealing with high-value vehicles, complex engine bays with extensive plumbing, or when you lack the space and equipment for proper application. Pros bring industrial-grade plural-component spray equipment that ensures perfect mixing ratios and can apply coatings in a single pass that would require 3-4 coats with DIY equipment. They also have climate-controlled booths that eliminate the variables of humidity and temperature swings that can ruin a DIY job. Consider professional application for any vehicle where the coating will be visible and must be cosmetically perfect, or where you’re dealing with exotic substrates like carbon fiber or magnesium. The cost premium—typically $800-1,500 for a complete engine bay versus $200-400 in materials for DIY—often pays for itself in warranty coverage and guaranteed performance.
Critical Features to Look For
Beyond basic thermal performance, several features distinguish premium formulations from commodity products. These characteristics determine how the coating will perform over years of thermal cycling, chemical exposure, and mechanical stress.
UV Resistance for Exterior Applications
If you’re applying a thermal barrier to the underside of your hood, inner fenders, or any area that sees sunlight, UV resistance is paramount. Many ceramic formulations contain epoxy or polyester resins that chalk and degrade when exposed to UV radiation. Look for products with UV stabilizers like hindered amine light stabilizers (HALS) and UV absorbers like benzotriazole compounds. The coating should carry a UV resistance rating per ASTM G154, showing less than 5% gloss loss and no chalking after 2,000 hours of accelerated weathering. For show vehicles where appearance matters, consider formulations with UV-resistant topcoat compatibility, allowing you to apply a color-matched or clear protective layer without compromising thermal performance.
Flexibility and Crack Bridging
Your vehicle flexes, vibrates, and experiences thermal expansion with every drive. A rigid, brittle coating will crack and fail within months. Premium formulations achieve flexibility through elastomeric modifiers in the resin system. The key metric is elongation at break combined with tensile strength—a delicate balance. You want elongation above 15% but with tensile strength exceeding 1,500 psi to resist tearing. Some advanced formulations incorporate “self-healing” microcapsules that release liquid polymer when cracks form, automatically sealing minor damage. This feature is particularly valuable for off-road vehicles and daily drivers that experience constant vibration and stone impingement.
Fire Retardant Properties
While all thermal barriers resist heat, true fire retardancy is a distinct and critical feature, especially in engine bays where fuel leaks can occur. Look for products with a UL 94 V-0 rating, meaning the coating self-extinguishes within 10 seconds when the flame source is removed and doesn’t produce flaming drips. The formulation should contain intumescent compounds that expand when exposed to flame, creating an insulating char layer. This isn’t just about safety—it’s about compliance with motorsport regulations, which increasingly require fire-retardant coatings in specific locations. Avoid products that use halogenated flame retardants, as these produce toxic gases when burned and can corrode electrical contacts over time.
Common Application Mistakes and How to Avoid Them
Even experienced DIYers can fall victim to pitfalls that compromise coating performance. Understanding these common errors—and their prevention—separates successful installations from costly do-overs.
Over-application and Sagging
The most frequent mistake is applying the coating too thickly in a single pass. Most formulations require multiple thin coats of 8-12 mils wet thickness, building to the final dry film thickness of 30-50 mils. Applying too much material at once causes sagging on vertical surfaces, trapping solvents that lead to bubbling and poor cure. The “rule of 50” applies: never exceed 50% of the recommended single-pass thickness. If you need 40 mils final thickness, plan on four coats of 10 mils each, with proper flash-off time between coats. Use a wet film thickness gauge religiously—it’s a $15 tool that can save you hundreds in wasted material and rework. On complex geometries, start with the underside and vertical surfaces first, then finish with horizontal areas where sagging is less problematic.
Inadequate Curing Time
Patience is the most critical ingredient in a successful application. While the coating may be dry to the touch in 2-4 hours, full chemical cure typically requires 7-14 days depending on formulation and environmental conditions. During this cure window, the coating remains vulnerable to solvents, impacts, and thermal shock. Many enthusiasts make the mistake of firing up the engine 24 hours after application, subjecting the partially cured coating to rapid thermal expansion that causes micro-cracking and adhesion loss. Follow the manufacturer’s cure schedule religiously, and if you’re coating engine bay components, wait the full cure period before subjecting them to temperatures above 150°F. For show vehicles, consider force-curing in a controlled environment at 120-140°F for 4-6 hours, which can accelerate the cure to 80% completion in a single day.
Ignoring Ambient Conditions
Thermal barrier performance is exquisitely sensitive to application environment. Humidity above 70% can cause blushing and poor adhesion, while temperatures below 65°F dramatically slow cure and reduce cross-link density. Wind is your enemy outdoors—it carries overspray onto painted surfaces and contaminates the wet film with airborne debris. Ideal conditions are 70-80°F with 40-50% relative humidity and minimal air movement. If you’re working in your garage, use a dehumidifier and space heaters to control the environment. Track temperature and humidity with a digital psychrometer, not just a wall thermometer. Many professional shops won’t apply these coatings when conditions aren’t optimal, and you shouldn’t either. A job done in poor conditions will fail prematurely, regardless of product quality.
Maintenance and Longevity: Protecting Your Investment
A properly applied thermal barrier should last 5-10 years in automotive service, but this longevity requires appropriate maintenance. Think of it as a long-term protective coating that needs periodic inspection and care, much like your vehicle’s paint.
Inspection Schedules
Establish a quarterly inspection routine, especially during the first year after application. Look for signs of delamination at edges and corners, which typically appear as a whitish haze or lifting. Check for micro-cracking by gently flexing the panel (if accessible) and examining the coating under bright LED light at a low angle. Pay special attention to areas near exhaust components where thermal cycling is most severe. After the first year, semi-annual inspections are usually sufficient unless you track your vehicle regularly. Document each inspection with photos to track any changes over time. Catching issues early allows for spot repairs before they propagate into major failures.
Cleaning and Touch-up Procedures
Clean coated surfaces with pH-neutral automotive shampoo and a soft microfiber mitt, just as you would your vehicle’s paint. Avoid aggressive wheel cleaners or acidic degreasers, which can etch the coating’s surface and degrade its thermal properties. For oil or fluid contamination, use a dedicated engine bay cleaner that’s safe for coated surfaces. If you discover damage during inspection, address it promptly. Lightly sand the damaged area with 320-grit paper, feathering the edges, then clean thoroughly and apply a thin touch-up coat. For small chips, use a fine artist’s brush rather than a spray gun. Always blend the repair into the surrounding coating to maintain continuity. Many manufacturers offer touch-up kits with pre-measured catalyst and resin for this purpose.
Cost vs. Value Analysis
The price spectrum for spray-on thermal barriers is wide, ranging from $50 to $300 per gallon, with coverage rates varying from 40 to 100 square feet per gallon at recommended thickness. Understanding the true cost involves looking beyond the sticker price to coverage efficiency, durability, and performance gains.
Long-term ROI Calculations
A typical engine bay application requires 1-1.5 gallons of material ($100-450) plus $150-200 in prep materials and equipment. If you’re paying a professional, total cost runs $800-1,500. To calculate ROI, factor in tangible benefits: reduced cabin temperatures mean less AC use, saving approximately $50-100 annually in fuel costs. Extended component life—preventing one fried ECM or melted wiring harness—can save $500-2,000. For track enthusiasts, maintaining optimal intake temperatures can preserve 10-15 horsepower, equivalent to hundreds of dollars in other performance modifications. Amortized over a conservative 5-year lifespan, even the premium DIY option costs less than $0.15 per day. Compare this to the cost of replacing traditional insulation that degrades, absorbs moisture, and harbors corrosion, and the value proposition becomes clear. The key is selecting a product that actually delivers on its performance claims rather than choosing based solely on price.
Regulatory Compliance and Safety Standards
Automotive coatings operate in a complex regulatory landscape governing volatile organic compounds (VOCs), hazardous materials, and fire safety. Compliance isn’t optional—it’s essential for legal operation and insurance coverage.
VOC Regulations and Compliance
Most high-performance thermal barriers are solvent-based and contain 250-450 grams per liter of VOCs. Federal EPA regulations limit VOC content for automotive coatings to 840 g/L, but many states have stricter limits. California’s CARB standards, for instance, cap VOCs at 250 g/L for specialty coatings. Always verify that your chosen product is compliant in your jurisdiction. Water-based formulations offer lower VOC content (typically 50-150 g/L) but may sacrifice some high-temperature performance. Keep records of product data sheets and VOC content—if you’re ever questioned by regulatory authorities or your insurance company after a fire, you’ll need documentation proving compliance. Professional installers should provide this paperwork as part of their service.
Environmental Considerations
As automotive enthusiasts, we have a responsibility to minimize our environmental impact. The thermal barrier industry is evolving to address these concerns with more sustainable formulations and application methods.
Eco-friendly Formulation Options
Bio-based resin systems derived from soybean oil or castor oil are emerging as viable alternatives to petroleum-based binders. These formulations reduce lifecycle carbon footprint by 30-40% while maintaining 85-90% of the performance of traditional products. Look for products with Green Seal or UL Environment certification. Water-based acrylic formulations with high recycled content offer another eco-conscious choice, though they’re best suited for moderate-temperature applications. Some manufacturers now offer take-back programs for unused material and solvent waste, preventing these materials from entering landfills. When calculating environmental impact, consider the product’s entire lifecycle—a longer-lasting coating that requires less frequent reapplication has a lower total environmental cost than a cheaper product that needs replacement every two years.
Integration with Other Vehicle Systems
A thermal barrier doesn’t exist in isolation—it interacts with your vehicle’s other protective and enhancement systems. Understanding these interactions ensures compatibility and maximizes overall performance.
Compatibility with Sound Deadening Materials
Many enthusiasts combine thermal barriers with sound deadening for a comprehensive interior upgrade. The order of application is critical: thermal barrier should be applied first, directly to the metal substrate, followed by sound deadening mats on top. This creates a thermal break at the metal interface while the mass-loaded vinyl or butyl mats provide acoustic damping. Never apply sound deadening first—the adhesive systems in these products can fail when subjected to the heat that a proper thermal barrier would block. Some premium thermal barriers are formulated with acoustic dampening properties, incorporating high-density fillers that absorb vibration. These hybrid products can simplify your project but may not match the performance of dedicated single-purpose materials.
Troubleshooting Common Issues
Even with perfect preparation and application, issues can arise. Knowing how to diagnose and address problems quickly prevents small headaches from becoming major failures.
Delamination Issues
If you notice bubbling or peeling, the cause is almost always contamination or inadequate surface prep. Small isolated delamination can be repaired by cutting away the loose material with a sharp utility knife, feathering the edges with sandpaper, and reapplying after thorough cleaning. Widespread delamination, however, indicates a fundamental compatibility issue or application error and usually requires complete removal. Use a plastic scraper and heat gun to soften the coating, then mechanical sanding to return to bare metal. Never use aggressive chemical strippers—these can contaminate the metal and cause the same problem when you reapply. Before recoating, identify the root cause: test your cleaning procedure by applying a small test patch and performing a pull-off adhesion test after full cure.
Discoloration and Fading
Yellowing or chalking typically indicates UV degradation or thermal breakdown of the resin system. This is often cosmetic and doesn’t necessarily compromise thermal performance, but it looks terrible. If the coating remains well-adherent, you can often restore appearance by light sanding and applying a UV-resistant topcoat. For interior applications, discoloration can result from outgassing of interior plastics or contamination from cleaning products. Always use pH-neutral cleaners and avoid silicone-based protectants near coated surfaces. If discoloration is accompanied by embrittlement or cracking, the coating has reached end-of-life and needs replacement.
Future Trends in Thermal Barrier Technology
The automotive thermal management landscape is evolving rapidly, driven by electrification, autonomous systems, and advanced manufacturing. Staying ahead of these trends helps you make forward-looking decisions.
Smart Coatings with Adaptive Properties
Researchers are developing thermal barrier coatings that change their properties based on temperature. These “thermochromic” formulations become more reflective as temperatures increase, providing passive thermal regulation. Another emerging technology involves microencapsulated phase-change materials (PCMs) that absorb heat during temperature spikes and release it slowly during cool-down, smoothing thermal cycles. While these technologies are still primarily in the prototyping phase for automotive use, they represent the next frontier. For now, the most practical advancement is the integration of corrosion inhibitors directly into thermal barrier formulations, providing dual-function protection that eliminates the need for separate corrosion prevention steps in restoration projects.
Frequently Asked Questions
How does a spray-on thermal barrier differ from ceramic coating on my headers?
Header coatings are designed for direct contact with extreme temperatures (up to 2,000°F) and function primarily by creating a ceramic-glass layer that reduces thermal radiation. Spray-on thermal barriers are for surrounding panels and components, operating in the 200-600°F range by reflecting infrared energy and resisting conductive heat transfer. They serve complementary but distinct functions in heat management.
Can I apply a thermal barrier over existing rust?
Never apply over active rust. The coating will trap moisture and accelerate corrosion. Remove rust completely using mechanical methods or chemical treatments, then apply a rust converter if necessary. Follow with a corrosion-inhibiting primer before applying the thermal barrier. Some premium thermal barriers contain rust inhibitors but they’re designed for prevention, not remediation.
Will adding a thermal barrier affect my vehicle’s weight significantly?
A typical engine bay application adds 3-5 pounds when applied at recommended thickness. This is negligible compared to the 20-30 pounds of traditional insulation systems. The weight is distributed across large panels, so it doesn’t affect weight balance. The performance and comfort benefits far outweigh this minimal weight increase.
How do I know if I’ve applied enough coats?
Use a wet film thickness gauge during application and a dry film thickness gauge (Type 2 magnetic or eddy current) after curing. The target is typically 35-45 mils (0.035-0.045 inches) dry thickness for engine bay applications. You can also perform a simple “tap test”—properly cured coating at correct thickness produces a dull thud rather than a sharp tap sound.
Can thermal barriers be painted over or color-matched?
Most can be topcoated after full cure (7-14 days). Use a high-temperature engine enamel for under-hood applications, or standard automotive paint for interior surfaces. Lightly scuff the surface with 400-600 grit paper before painting. Some manufacturers offer tintable formulations, but colorants can reduce thermal performance by 10-15%.
Are these products safe for use on aluminum panels?
Yes, but aluminum requires special preparation. Use a dedicated aluminum prep wash or conversion coating to create a stable surface. Avoid alkaline cleaners which can etch aluminum. The thermal barrier actually helps prevent galvanic corrosion on aluminum by providing a moisture barrier, but only if adhesion is perfect.
How long before I can drive my vehicle after application?
Wait a minimum of 24 hours before light driving, and 7 days before subjecting the coating to sustained high temperatures. The coating may feel dry in 4-6 hours, but it’s only 60-70% cured. Premature heat exposure causes outgassing and micro-cracking. For track cars, wait the full 14-day cure period before competition use.
Will a thermal barrier reduce engine noise?
Thermal barriers provide minimal acoustic damping—typically 2-4 dB reduction. They’re designed for thermal management, not sound control. For meaningful noise reduction, combine the thermal barrier with dedicated sound deadening materials like mass-loaded vinyl or butyl mats applied over the cured thermal coating.
Can I remove a thermal barrier if I change my mind?
Removal is difficult but possible. Use a heat gun to soften the coating, then scrape with plastic tools to avoid damaging the substrate. Follow with mechanical sanding. Chemical strippers are generally ineffective and can contaminate the metal. Plan on 8-12 hours of labor for a complete engine bay removal.
Do thermal barriers work in cold weather, or just heat?
They work bidirectionally, preventing heat loss in winter as effectively as they block heat gain in summer. This makes them valuable for cold-climate vehicles by reducing warm-up time and maintaining cabin heat. However, some formulations become brittle below -20°F, so check the low-temperature flexibility rating if you operate in extreme cold.