Your truck bed takes a beating. From heavy cargo and corrosive chemicals to relentless UV rays and weather extremes, that pristine factory finish doesn’t stand a chance. While drop-in liners offer some protection, they can trap moisture and scratch the paint underneath. This is where modern protective coating systems have revolutionized vehicle care—transforming what was once a professional-only service into a rewarding weekend project for serious automotive enthusiasts.
Understanding the nuances of spray-on bedliner application is crucial whether you’re protecting a brand-new truck or restoring an older workhorse. The right combination of equipment and materials can mean the difference between a finish that lasts a decade and one that peels within a year. This comprehensive guide dives deep into the world of Schutz spray guns and Raptor liner kits, exploring the technology, techniques, and insider knowledge you need to achieve professional-grade results in your own garage.
Top 10 schutz gun raptor liner kit
Detailed Product Reviews
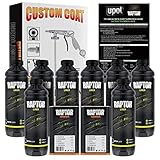
1. U-POL Raptor Black Urethane Spray-On Truck Bed Liner Kit, Protective Paint with Spray Gun, for Tailgates & Trucks, Vehicle Undercoating, 4 Quart Kit

Overview: The U-POL Raptor 4 Quart Kit delivers a professional-grade 2K urethane truck bed liner solution for DIY enthusiasts. Priced at $142.98, this comprehensive package includes everything needed to protect a standard 6-8 foot truck bed: four 750ml bottles of black base, one liter of hardener, a dedicated spray gun, and detailed instructions. The system creates a flexible, impact-resistant barrier that withstands extreme temperatures, chemicals, and UV exposure while reducing road noise and vibration.
What Makes It Stand Out: This kit’s professional-quality 2K urethane chemistry sets it apart from consumer-grade alternatives, offering true automotive refinishing performance. The included spray gun, requiring 8 CFM at 50-60 PSI, ensures proper atomization for a textured, uniform finish. Its remarkable versatility allows application via spray, roll, or brush methods, bonding tenaciously to OEM paint or self-etching primer. The rapid-drying formula enables multiple coats within an hour, transforming a weekend project into a same-day accomplishment.
Value for Money: At approximately $36 per quart, this kit significantly undercuts professional Line-X or Rhino Liner installations ($400-$800) while delivering comparable durability. The all-inclusive nature eliminates guesswork—no separate gun purchase or material sourcing required. For truck owners seeking professional results without labor costs, this represents exceptional ROI, especially considering the 10+ year protection span when properly applied.
Strengths and Weaknesses: Strengths include complete kit convenience, superior adhesion flexibility, fast recoat times, and genuine automotive-grade durability. The UV-resistant formula prevents fading, while the waterproof barrier stops rust and corrosion. Weaknesses involve mandatory compressor requirements (8 CFM minimum), critical surface preparation needs, and potential overspray concerns requiring meticulous masking. The single-color black option limits customization without purchasing separate tint.
Bottom Line: This 4-quart kit is the ideal entry point for DIYers wanting professional bed liner protection. It balances cost, performance, and completeness perfectly for standard truck beds.
2. CUSTOM SHOP U-Pol Raptor Black Urethane Spray-On Truck Bed Liner 8 Quart Kit and Custom Coat Spray Gun with Regulator
Overview: This 8 Quart Kit from CUSTOM SHOP doubles the material capacity of standard kits, catering to larger trucks or multiple vehicle projects. While pricing isn’t specified, the package includes eight quarts of black urethane liner, hardener, and an upgraded Custom Coat Spray Gun with integrated regulator and gauge. Designed for substantial coverage needs, it maintains the signature “add hardener, shake, spray” simplicity while scaling up protection capabilities for demanding applications.
What Makes It Stand Out: The doubled material volume immediately distinguishes this kit for owners of long-bed trucks, commercial vehicles, or those tackling trailers and boat decks simultaneously. The premium Custom Coat spray gun with regulator provides superior pressure control, ensuring consistent texture and reducing material waste. This professional-grade tool upgrade translates to better atomization and a more refined finish compared to basic included guns, making it suitable for users prioritizing application precision.
Value for Money: Without explicit pricing, value assessment relies on typical bulk pricing logic—larger kits usually offer 15-20% better per-quart value. For comprehensive projects, avoiding multiple kit purchases saves shipping costs and ensures color batch consistency. The included regulator eliminates a $25-40 separate purchase, enhancing overall worth for serious DIYers or small shop operators needing scalable solutions.
Strengths and Weaknesses: Strengths include generous material volume, professional application hardware, consistent batch quality, and cost-efficiency for large projects. The adjustable nozzle gun adapts to different texture preferences. Weaknesses center on the missing price point complicating direct comparison, potential material waste for standard short-bed trucks, and identical compressor requirements. Storage of unused mixed material presents challenges, and the lack of tintable option restricts color customization.
Bottom Line: Perfect for oversized trucks or multi-project enthusiasts, this 8-quart kit’s value hinges on confirming competitive pricing. The professional gun makes it shop-worthy.
3. Raptor 821 products RAPTOR Tintable Truck Bed Liner Kit - 4 Liter
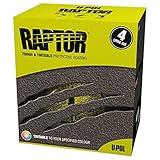
Overview: The Raptor 821 Tintable Kit provides 4 liters (slightly more than 4 quarts) of versatile urethane protection for $139.99, positioning it as a cost-effective custom solution. This kit emphasizes adaptability, allowing users to tint the base to match or complement their vehicle’s color scheme. Engineered for application across diverse surfaces—including metal, plastic, wood, and concrete—it extends beyond truck beds to trailers, boat interiors, and even concrete garage floors.
What Makes It Stand Out: The “10x tougher than other bedliners” claim, while marketing-driven, reflects its industrial-grade 2K urethane formulation. The true differentiator is universal substrate compatibility, making it a multi-project solution rather than a single-use truck product. The availability of complementary 2K aerosols for touch-ups and smaller areas demonstrates ecosystem thinking. This kit empowers users to achieve OEM color matching or creative custom finishes unavailable in pre-tinted black versions.
Value for Money: At $139.99, it’s competitively priced against the black 4-quart kit while offering greater creative freedom. The ability to use leftover material on non-automotive projects maximizes utility and reduces waste. However, tint costs ($15-30) must be factored into total project expense. Compared to professional custom-colored liners ($600+), the DIY approach retains strong value, especially for users wanting unique colors or coordinating with existing vehicle themes.
Strengths and Weaknesses: Strengths include surface versatility, tintable customization, competitive pricing, and multi-project utility. The 2K aerosol companion products enable seamless repair work. Weaknesses involve the vague “10x tougher” metric lacking standardized testing data, additional tint purchase complexity, and potential color-matching challenges for novices. The 4-liter volume may leave very large beds slightly under-covered compared to true 4-quart kits.
Bottom Line: An excellent choice for creative DIYers and multi-surface projects. The tintable feature and substrate flexibility make it the most versatile in the Raptor lineup.
4. Raptor Tintable Urethane Spray-On Truck Bed Liner Kit, Protective Paint With Spray Gun, For Tailgates & Trucks, Vehicle Undercoating, 4 Quart Kit

Overview: This tintable 4-quart kit mirrors the black version’s professional specifications while offering custom color flexibility for $144.99 ($1.07/fl oz). It includes four 750ml bottles of tintable base, one liter of hardener, a spray gun, and instructions—everything required to protect a 6-8 foot truck bed with a personalized hue. The 2K urethane chemistry ensures the same robust protection against stains, scratches, rust, and temperature extremes as its pre-pigmented counterpart.
What Makes It Stand Out: Color customization without sacrificing durability defines this kit. The UV-resistant tintable formula accepts automotive tints to match factory paint codes precisely, enabling seamless integration with vehicle aesthetics. This is particularly valuable for show trucks, restorations, or color-matched commercial fleets. The included spray gun and rapid one-hour recoat window maintain the black kit’s application efficiency, while the flexibility to roll or brush offers texture control for unique finishes.
Value for Money: The $2 premium over the black kit is negligible for customization capability. At $1.07 per fluid ounce, it remains far more economical than professional custom applications. Users must budget an additional $15-25 for quality automotive tint, bringing total cost to approximately $160—still exceptional value. The ability to coordinate bed liner color with body paint enhances vehicle resale value and aesthetic cohesion, justifying the slight upcharge.
Strengths and Weaknesses: Strengths include full customization potential, identical durability to black formula, complete kit convenience, and professional finish quality. The tintable base allows for subtle color matching or bold contrasts. Weaknesses encompass the extra tint purchase step, potential for improper mixing ratios affecting cure, and requiring tinting expertise for accurate color reproduction. Overspray on custom colors may be more visible, demanding meticulous masking. Compressor requirements remain non-negotiable.
Bottom Line: For those wanting protection plus personalization, this tintable kit delivers professional results with infinite color possibilities at minimal extra cost.
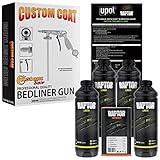
5. CUSTOM SHOP U-Pol Raptor Black Urethane Spray-On Truck Bed Liner 6 Quart Kit and Custom Coat Spray Gun with Regulator

Overview: The CUSTOM SHOP 6 Quart Kit bridges the gap between standard and bulk options, offering 50% more material than 4-quart kits for $219.99. This mid-volume solution targets extended cab and crew cab short-bed trucks that need extra material for bed, tailgate, and potentially rocker panels or bed caps. The package includes six quarts of black urethane base, hardener, and an upgraded Custom Coat Spray Gun with regulator and gauge for precise application control.
What Makes It Stand Out: This kit’s “sweet spot” volume eliminates the common dilemma of running short on larger trucks while avoiding waste from 8-quart bulk purchases. The professional-grade spray gun with regulator ensures consistent pressure delivery, crucial for achieving uniform texture across larger surface areas. It’s particularly suited for comprehensive projects covering bed interiors, exterior lower body panels, and undercoating in one coordinated application, providing material continuity without batch variations.
Value for Money: At approximately $36.67 per quart, the per-unit cost matches smaller kits while including superior application hardware. The $219.99 investment makes economic sense for trucks requiring 5-6 quarts, as purchasing separate 4-quart kits would cost $280+ for equivalent material. The included regulator ($30-40 value) and avoiding multiple shipping charges enhance overall worth. For standard beds, however, the extra $77 over a 4-quart kit may not justify leftover material.
Strengths and Weaknesses: Strengths include optimal volume for modern trucks, professional application equipment, cost-efficiency for appropriate projects, and material consistency. The adjustable nozzle adapts texture from fine to aggressive. Weaknesses involve higher upfront cost deterring budget-conscious buyers, potential material waste for true standard beds, and identical steep compressor requirements. Storage of unused unmixed components requires climate control to prevent premature hardening.
Bottom Line: The perfect middle-ground solution for larger contemporary trucks, delivering professional-grade results with precisely the right amount of material and superior tools.
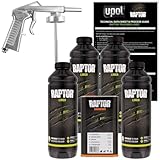
6. Custom Shop U-Pol Raptor Black Urethane Spray-On Truck Bed Liner Kit w/Free Custom Coat Spray Gun with Regulator, 4 Quarts
Overview: The Custom Shop U-Pol Raptor 4-quart kit delivers professional-grade spray-on bed liner protection in a complete DIY package. This comprehensive system includes urethane base, hardener, and a dedicated spray gun with integrated regulator, enabling truck owners to create a durable, textured coating that withstands harsh elements without paying for professional installation.
What Makes It Stand Out: The included Custom Coat spray gun with built-in regulator and gauge distinguishes this kit from competitors requiring separate equipment purchases. The adjustable nozzle provides precise texture control, while the integrated regulator maintains consistent PSI for optimal application. The 4-quart volume perfectly suits compact trucks, touch-up work, or specific high-wear areas like tailgates and wheel wells.
Value for Money: At $139.99, this kit offers exceptional value by bundling a quality spray gun—typically a $30-50 standalone purchase—into one package. Costing roughly $35 per quart, it’s competitively priced against roll-on alternatives while delivering superior spray-application results. DIYers save $400-600 compared to professional spray jobs, making it an economical choice for quality-conscious truck owners.
Strengths and Weaknesses: Strengths: All-in-one convenience; professional-grade spray gun included; excellent abrasion and stain resistance; waterproof flexible coating; sound-deadening properties; straightforward “add hardener, shake, spray” process.
Weaknesses: 4-quart capacity insufficient for full-size long beds; requires compressor delivering 8 CFM @ 50-60 PSI; precise mixing ratios critical; overspray demands extensive masking; limited coverage area.
Bottom Line: Ideal for DIY enthusiasts with air compressor access seeking professional spray-on results for smaller trucks or targeted applications. The included spray gun eliminates equipment barriers, making this kit a smart, cost-effective entry point into premium bed liner protection.
7. Raptor Black Urethane Spray-On Truck Bed Liner Kit, Protective Paint With Spray Gun, For Tailgates & Trucks, Vehicle Undercoating, 8 Quart Kit

Overview: The Raptor 8-quart Black Urethane Kit represents the flagship solution for full-size truck owners demanding maximum coverage and uncompromising durability. This comprehensive system includes two gallons of 2K urethane coating, hardener, and professional spray gun, creating an impenetrable barrier against rust, scratches, chemicals, and extreme temperatures while reducing road noise and vibration.
What Makes It Stand Out: The substantial 8-quart volume covers complete full-size truck beds with material remaining for undercoating or trailer protection. The UV-resistant formula maintains its deep black finish indefinitely, while rapid-drying chemistry enables multiple coats within an hour. The 2K urethane technology provides professional automotive-grade performance that remains flexible across extreme temperature swings from -40°F to 200°F.
Value for Money: At $277.99 ($1.03/fl oz), this kit costs significantly less than professional installation ($500-$800) while delivering comparable results. The price per ounce drops 30% compared to smaller kits, making it economical for large projects. The included spray gun and hardener eliminate additional purchases, providing everything needed for a complete professional-quality application.
Strengths and Weaknesses: Strengths: Generous coverage for full-size trucks; superior UV and chemical resistance; rapid one-hour recoat time; professional-grade 2K urethane; excellent noise and vibration reduction; bonds directly to OEM paint; impact-proof yet flexible.
Weaknesses: Higher upfront investment; requires substantial compressor capacity (8 CFM); mixing process less forgiving than 1K systems; extensive masking required; overkill for small touch-up projects.
Bottom Line: The definitive solution for full-size truck owners committed to comprehensive, long-lasting protection. The premium price is justified by professional-grade materials, ample coverage, and results that rival commercial installations. A worthwhile investment for serious truck protection.
8. Raptor Roll-On Bed Liner Kit, Truck Bed Liners, Long-Lasting Protection, Black, 1 Gallon

Overview: The Raptor Roll-On Bed Liner Kit democratizes professional bed protection by eliminating the need for spray equipment. This one-gallon kit provides a ready-to-use, textured coating applied with basic rollers and brushes, delivering durable protection against impacts, rust, abrasion, and chemical spills for standard truck beds and various surfaces.
What Makes It Stand Out: The roll-on application method opens bed liner protection to virtually anyone, regardless of equipment access. The pre-mixed formula removes mixing complications, while the anti-skid finish enhances cargo safety. Precisely calibrated to cover 65 square feet in two coats, it’s perfectly sized for standard 6-foot truck beds, ensuring minimal waste and optimal results without specialized tools.
Value for Money: At $89.99, this is the most accessible entry point into Raptor’s protection system. It eliminates $100+ in spray equipment costs while delivering equally durable results. Costing roughly $30 less than spray kits and saving hundreds over professional installation, it provides exceptional value for budget-conscious DIYers willing to invest manual labor for professional-grade protection.
Strengths and Weaknesses: Strengths: No spray equipment required; foolproof ready-to-use formula; excellent anti-skid texture enhances safety; non-fade color retention; chemical and rust resistant; perfect coverage for standard truck beds; most affordable Raptor option.
Weaknesses: Labor-intensive manual application; texture less uniform than spray; thicker coating may obscure fine details; limited to 65 sq ft coverage; not ideal for complex shapes or undercarriage work; longer application time.
Bottom Line: The perfect choice for DIY beginners or those without compressor access. While application demands elbow grease, the durable results and unbeatable price make it a smart investment for standard truck bed protection. Ideal for practical truck owners prioritizing function over spray-application aesthetics.
9. Raptor Tintable Urethane Spray-On Truck Bed Liner Kit, Protective Paint With Spray Gun, For Tailgates & Trucks, Vehicle Undercoating, 8 Quart Kit

Overview: The Raptor Tintable 8-quart Kit provides the same robust 2K urethane protection as the black version while adding unlimited customization flexibility. This professional-grade system includes eight bottles of tintable urethane base, hardener, and spray gun, allowing users to integrate automotive tint for exact color matching or creative applications on trucks, trailers, boats, and commercial equipment.
What Makes It Stand Out: The tintable formula distinguishes this kit by enabling precise color matching to factory paint or custom schemes while maintaining Raptor’s legendary durability. The 2K urethane chemistry accepts automotive tints seamlessly without compromising UV resistance, flexibility, or impact protection. This versatility extends beyond trucks to marine and industrial applications where color coordination matters.
Value for Money: At $282.99 ($1.05/fl oz), the modest premium over the black version is justified by unlimited color possibilities. Professional custom-colored bed liners routinely exceed $1,000, making this kit remarkably economical for personalized protection. The cost per ounce remains low for the coverage provided, and the included spray gun eliminates equipment expenses.
Strengths and Weaknesses: Strengths: Unlimited color customization capability; same durable 2K urethane formula as black version; large volume for extensive projects; professional spray gun included; rapid one-hour drying; superior adhesion to various surfaces; UV-resistant tintable base maintains color integrity.
Weaknesses: Requires separate automotive tint purchase; color matching demands skill and experience; highest price point in Raptor lineup; substantial compressor requirements; mixing process adds complexity; significant masking and overspray management needed.
Bottom Line: Essential for enthusiasts seeking custom-colored protection that matches or complements their vehicle. The tintable capability unlocks creative possibilities while maintaining Raptor’s industry-leading durability. Worth the modest premium over standard black for anyone valuing aesthetics alongside maximum protection.
10. U-POL VOC Raptor Tintable Truck Bed Liner Kit w/Gun (4 Liter)
Overview: The U-POL VOC Raptor Tintable 4-Liter Kit bridges the gap between small spray projects and full-size applications while meeting stringent environmental standards. This compact kit includes tintable urethane base, hardener, and spray gun, providing versatile protection for short beds, Jeep interiors, trailer floors, or touch-ups with color customization options and reduced VOC emissions.
What Makes It Stand Out: The VOC-compliant formula meets stricter environmental regulations without sacrificing Raptor’s signature durability, making it suitable for areas with emission restrictions. The 4-liter volume (approximately 4.2 quarts) is ideal for specialized projects where tinting is desired but an 8-quart system would be excessive waste. It combines customization with environmental responsibility.
Value for Money: At $147.99, this kit positions itself as the premium small-volume option. While costing more per ounce than bulk kits, it includes the spray gun and allows tinting—features absent in the standard 4-quart black kit. It’s perfect for those needing custom colors for smaller applications without committing to the higher cost of an 8-quart tintable system.
Strengths and Weaknesses: Strengths: VOC-compliant environmentally friendly formula; tintable for custom colors; includes professional spray gun; ideal for small to medium projects; waterproof flexible coating; effective sound and vibration deadening; professional-grade protection in smaller quantity.
Weaknesses: Higher cost per ounce than bulk alternatives; limited coverage (approximately 50 sq ft); requires compressor (8 CFM @ 50-60 PSI); automotive tint sold separately; mixing precision critical; not economical for large truck beds.
Bottom Line: The smart choice for environmentally conscious users or those requiring custom-colored protection for smaller applications. The VOC compliance and tintable formula justify the premium over standard black kits for specialized projects, offering responsible chemistry without compromising Raptor’s legendary toughness.
What Are Schutz Guns and Raptor Liner Kits?
Schutz guns are specialized spray applicators originally designed for automotive undercoating, now widely used for applying textured protective coatings. Unlike conventional paint guns, these devices are engineered to handle high-viscosity, two-part polyurea/polyurethane materials that create the distinctive durable finish truck owners demand. The term “Schutz” comes from the German word for “protection,” reflecting their original purpose in rust prevention.
Raptor liner kits represent a complete DIY solution for applying professional-quality protective coatings. These systems typically include the two-part coating material (resin and activator), a dedicated spray gun, and various accessories for surface preparation and application. The beauty of these kits lies in their engineered compatibility—every component is designed to work together, eliminating the guesswork that plagues pieced-together systems.
Understanding the Technology Behind Protective Coatings
The science behind modern bedliner materials is fascinating. Two-part polyurethane/polyurea hybrids create a cross-linked molecular structure that delivers exceptional durability. When the resin and hardener mix, a chemical reaction begins that can’t be reversed—this isn’t just paint drying, it’s a curing process that creates a new, unified material.
This chemistry provides several performance advantages over traditional coatings. The resulting film exhibits impressive tensile strength (typically 1,200-1,800 psi), elongation properties of 150-400% (meaning it flexes with your truck bed instead of cracking), and excellent impact resistance. The texture you see isn’t just decorative—it creates a non-slip surface while adding thickness where protection matters most.
Key Benefits of Professional-Grade Bedliner Application
Applying your own protective coating offers advantages beyond cost savings. First, you control the thickness and texture, customizing protection for your specific use case. Hauling gravel? Apply extra material on the floor. Need a smoother surface for sliding cargo? Adjust your technique accordingly.
DIY application also ensures complete coverage without seams or gaps. Drop-in liners leave edges exposed, but a sprayed coating adheres directly to every contour, including vertical walls and tie-down points. This seamless protection prevents the moisture intrusion that causes rust. Additionally, you can extend the coating onto tailgates, bed caps, and even rocker panels for comprehensive protection that looks factory-installed.
Essential Components of a Complete Raptor Liner Kit
Before committing to a purchase, understand what should be included. A comprehensive kit contains the two-part coating material in pre-measured containers, a Schutz-style spray gun with appropriate nozzles, scuff pads for surface preparation, tack cloths, masking tape, and detailed instructions. Some premium kits include degreaser solutions and adhesion promoters.
Pay attention to material volume. Most standard kits cover approximately 30-35 square feet at the recommended thickness—enough for a 6-foot truck bed with proper application. Larger beds or multiple coats require additional material. The gun quality varies significantly between kits; look for models with adjustable spray patterns and durable construction rather than disposable plastic versions.
Schutz Gun Anatomy: Parts and Functionality
Understanding your spray gun’s mechanics improves results dramatically. The body houses the mixing chamber where resin and hardener combine just before atomization. This “impingement mixing” is critical—if the components mix too early, they’ll cure inside the gun, creating an expensive paperweight.
The nozzle determines your spray pattern and texture. Larger orifices (2.0-2.5mm) create the aggressive texture most associate with bedliners, while smaller tips produce finer, more uniform surfaces. The canister connection must maintain pressure without leaking, and the trigger mechanism should offer smooth, progressive control. Premium guns feature adjustable fluid flow, allowing you to fine-tune material delivery based on temperature and viscosity.
Material Composition: What Makes Raptor Liner Durable?
The coating’s performance stems from its carefully balanced formulation. Aliphatic isocyanates provide UV stability, preventing the chalking and fading that plague aromatic systems. Flexible polyols create the elastic properties that absorb impacts, while reinforcing additives increase abrasion resistance.
Quality kits use a 1:1 or 2:1 mixing ratio by volume, simplifying the process and reducing errors. The solids content matters too—higher solids mean more material stays on the surface (less evaporates), building thickness faster. Premium formulations achieve 60-70% solids by volume. Color is achieved through pigment dispersions that must be chemically compatible; this is why using automotive tints not designed for these systems often leads to curing failures.
Surface Preparation: The Foundation of a Lasting Finish
Every expert agrees: preparation determines 80% of your success. Start with aggressive cleaning—soap and water followed by a wax and grease remover. Even fingerprints contain oils that prevent adhesion. Next, scuff the existing paint with 80-120 grit sandpaper or the included pads. You’re not removing the paint, just creating a mechanical profile for the coating to grip.
After sanding, blow out all dust with compressed air and wipe with a tack cloth. Mask precisely using quality automotive tape and masking paper (not newspaper, which bleeds). Remove tailgate handles, bed caps, and any removable accessories. For bare metal spots or aluminum beds, apply an etching primer specifically designed for two-part coatings. Skipping this step on aluminum almost guarantees eventual delamination.
Application Techniques for Professional Results
Temperature and humidity dramatically affect application. Ideal conditions are 65-75°F with humidity below 60%. Too cold and the material won’t flow properly; too hot and it cures before leveling, creating texture that’s too rough. Always apply in a well-ventilated area with minimal dust.
Start with a light tack coat—about 50% coverage—that flashes off in 10-15 minutes. This coat provides a chemical anchor for subsequent layers. Apply 3-4 medium coats, each building thickness. Hold the gun 12-18 inches from the surface, moving in smooth, overlapping passes. Keep your wrist locked and move your entire arm to maintain consistent distance. The goal is wet-on-wet application without runs. If you get a run, stop immediately—trying to fix it while wet makes it worse. Let it flash, then sand the run and reapply.
Common Mistakes to Avoid During Application
The most frequent error is inadequate surface prep. Rushing this step always leads to failure within months. Second is incorrect mixing—never eyeball ratios. Use separate measuring containers and mix thoroughly for at least two minutes, scraping the sides and bottom. Incomplete mixing leaves uncured, tacky spots.
Environmental miscalculation runs a close third. Don’t spray in direct sunlight, even if the air temperature seems right. Panel temperature can be 20-30°F hotter, accelerating cure and causing texture problems. Also, avoid spraying when rain is expected within 24 hours—moisture interferes with curing. Finally, resist the urge to touch up spots immediately. Let each coat flash completely; re-coating too soon traps solvents, causing bubbling and poor adhesion.
Curing and Drying: Patience Pays Off
Understanding the curing timeline prevents premature use. “Dry to touch” occurs within 1-2 hours, but this is just the surface. The coating remains vulnerable for much longer. Most formulations require 24-48 hours before light use, with full chemical cure taking 5-7 days.
During the first 24 hours, protect the surface from moisture, including morning dew. The coating breathes as it cures, and water can cause whitening or blistering. Temperature affects cure speed dramatically—below 60°F, cure time doubles. Above 85°F, the surface may skin over before underlying layers cure, leading to solvent entrapment. If you must use the bed sooner, add a sacrificial layer of cardboard to protect the fresh coating.
Maintenance and Long-Term Care
A properly applied coating requires minimal maintenance but isn’t maintenance-free. Wash regularly with mild soap and water, avoiding harsh chemicals like brake cleaner or MEK that can soften the finish. For stubborn stains, use a nylon brush and avoid abrasive pads that can dull the texture.
Inspect annually for damage, especially in high-impact areas. Small chips can be touched up by cleaning the area, scuffing with 180-grit paper, and applying thin coats of fresh material. The new coating will chemically bond to the old if applied within the recoat window (typically 24 hours) or after light sanding. UV-stable formulations resist fading, but darker colors may benefit from occasional UV-protective spray to maintain richness.
Cost Analysis: DIY vs Professional Installation
Professional spray-on bedliners typically cost $400-$700 for a standard truck bed, with premium shops charging $800-$1,200 for color-matched or extended coverage. DIY kits range from $120-$200, seemingly a massive savings. However, the true cost includes preparation materials ($40-$60), safety equipment ($50-$100 if you don’t own a quality respirator), and potential rework if mistakes occur.
The hidden value lies in customization. Want the coating extended 6 inches up the bed sides? That’s often a $150 upcharge professionally but costs nothing extra DIY. Need a thicker coating for extreme use? Apply an extra coat. The time investment is significant—expect 6-10 hours total including prep. For enthusiasts who enjoy hands-on projects, this time is rewarding. For others, the professional warranty and time savings justify the higher cost.
Safety Considerations and Protective Equipment
These materials contain isocyanates, which are respiratory sensitizers. Once sensitized, even small exposures can trigger severe asthma-like reactions. A NIOSH-approved supplied-air respirator is ideal, but a properly fitted half-face respirator with organic vapor cartridges and P100 particulate filters provides adequate protection for occasional use.
Skin protection is equally critical. Isocyanates absorb through skin, contributing to sensitization. Wear nitrile gloves (not latex, which degrades with solvents) and long sleeves. Cover exposed skin with barrier cream. Safety goggles prevent overspray from contacting eyes. Ensure excellent ventilation—an exhaust fan pulling fumes away from your breathing zone is essential. Keep a bucket of soapy water nearby for immediate cleanup of spills on skin; once cured, removal requires harsh solvents.
Troubleshooting Common Application Issues
Orange peel texture often indicates too little material or excessive distance. Move closer and apply heavier coats. Runs mean you’re too close or moving too slowly—back off and speed up. If the coating feels tacky after 24 hours, you likely had incorrect mixing ratios or incomplete mixing. Unfortunately, the only fix is removal and reapplication.
Poor adhesion or peeling reveals preparation failures. The coating may look fine initially but delaminates within weeks. This requires complete removal, proper prep, and reapplication. Clogging in the gun usually means material was too cold—warm the cans in warm water (never open flame) before mixing. If the texture is inconsistent, check your gun’s fluid adjustment and ensure both components are flowing equally. A simple test is to spray onto cardboard—if one side of the pattern is wetter, you have a pressure imbalance.
Frequently Asked Questions
How long will a DIY Raptor liner last compared to professional applications?
With proper surface preparation and application technique, a DIY coating can last 10-15 years, matching professional installations. The key difference is warranty—professionals typically offer lifetime warranties against cracking, peeling, or bubbling, while DIY results depend entirely on your execution. Professional-grade materials are similar; the applicator skill separates good from great results.
Can I apply Raptor liner over existing bedliner material?
Generally, no. Existing coatings, whether spray-on or drop-in, create compatibility issues. Old spray-on liners may be worn thin or contaminated, preventing proper adhesion. Remove them completely using mechanical methods (sanding, scraping) or chemical strippers designed for urethanes. For drop-in liners, remove and prepare the original paint underneath. The only exception is applying fresh material over a properly prepared, same-brand coating within the recoat window.
What’s the ideal temperature range for application?
Most formulations perform best between 65-75°F with humidity under 60%. Never apply below 60°F or above 85°F. Panel temperature matters more than air temperature—metal beds in direct sun can exceed 120°F even on mild days, causing the coating to cure too rapidly. Use an infrared thermometer to verify surface temperature is within range before starting.
How do I achieve a smoother, less aggressive texture?
Texture is controlled by three factors: nozzle size, application distance, and material flow. Use a smaller nozzle (1.8mm vs 2.5mm), increase your spraying distance to 18-24 inches, and reduce fluid flow at the gun. Apply lighter coats and build thickness gradually. Some kits offer “fine texture” additives that reduce the aggregate size in the coating material itself.
Can I use a Schutz gun with other brands of bedliner material?
While physically possible, it’s not recommended. Different brands use varying viscosities and cure chemistries. A gun calibrated for one material may not provide proper mixing ratios for another, leading to cure failures. Nozzle sizes and fluid passages are optimized for specific material characteristics. If you experiment, test on a small, inconspicuous area first and verify proper cure before proceeding.
How much material do I need for an 8-foot bed with over-rail coverage?
An 8-foot bed typically requires 3-4 liters of mixed material for standard coverage. Extending over the rails adds approximately 30% more surface area, bringing your total to 4-5 liters. It’s better to have slightly too much than too little—running out mid-project creates visible dry lines where the new batch overlaps. Most manufacturers offer “large bed” kits specifically sized for 8-foot applications with over-rail coverage.
Is it necessary to use an adhesion promoter on bare metal?
Absolutely. Two-part urethanes adhere well to properly prepared paint but struggle with bare steel or aluminum. Etching primers designed for these coatings create a chemical and mechanical bond. For aluminum beds, this step is non-negotiable—without it, expect delamination within months. Clean bare metal spots with a metal prep solution before applying the promoter.
Can I color-match the liner to my truck’s paint?
Most kits offer tintable bases that accept automotive toners. However, use only toners specified by the coating manufacturer—standard paint tints can interfere with curing. Keep in mind that the textured surface affects color perception; even with perfect tinting, the finish will appear slightly darker and less reflective than body paint. For best results, professional color-matching services can create a custom formula.
How do I repair damaged areas years after application?
Clean the area thoroughly with soap and water, then scuff with 180-grit sandpaper extending 2-3 inches beyond the damage. Wipe with a lint-free cloth dampened with isopropyl alcohol. Apply thin coats of fresh material, feathering the edges. If the original coating is more than a year old, the new material bonds mechanically rather than chemically, so proper scuffing is critical. For best results, use material from the same manufacturer.
Will the coating add significant weight to my truck?
A typical application adds 40-60 pounds to a standard truck bed. At 60-70% solids, the material builds approximately 15-20 mils (0.015-0.020 inches) thickness per coat. Four coats achieve the recommended 60-80 mil thickness. While not insignificant, this weight is comparable to a drop-in liner and is distributed across the bed structure. The weight-to-protection ratio heavily favors spray-on coatings over heavier alternatives like rubber mats or thick plastic liners.