You’ve invested serious time and money into that flawless ceramic coating—maybe hours of meticulous paint correction followed by professional application. The result? A jaw-dropping, mirror-like finish that makes your daily driver look like a concours champion. But here’s the reality check that separates the enthusiasts from the truly educated: that ceramic coating isn’t invincible. Environmental contaminants, harsh detergents, and the simple abrasion of weekly washes are constantly waging war on your paint’s protective shield. This is where sacrificial layers enter the picture—not as an optional luxury, but as a critical component of a comprehensive paint protection strategy that can double or even triple the effective lifespan of your base coating.
Think of sacrificial layers as your ceramic coating’s personal bodyguard. They take the hits so the underlying layer doesn’t have to, and they’re designed to be replenished regularly without the commitment of a full re-coating. The market has exploded with options, from simple spray-and-wipe detailers to complex graphene-infused formulations, each promising to extend your coating’s hydrophobic properties and gloss. But not all sacrificial layers are created equal, and understanding the nuances between them can mean the difference between genuinely preserving your investment and simply wasting money on marketing hype. Let’s dive deep into what makes these protective toppers tick and how to choose the right one for your specific needs.
Top 10 Sacrificial Layer For Ceramic Coating
Detailed Product Reviews
1. Ceramic Films and Coatings: Properties and Applications

Overview: This technical reference book delivers comprehensive insights into the science behind ceramic protective films and coatings. Aimed at professionals and serious enthusiasts, it explores material properties, application methodologies, and real-world usage across automotive and industrial sectors. The $96.03 price point positions it as a specialized academic resource rather than a casual read for the average consumer.
What Makes It Stand Out: Unlike consumer-focused product guides, this volume provides deep engineering-level understanding of ceramic technology. It covers thermal properties, adhesion science, durability metrics, and application physics that most manufacturers never disclose. For those seeking to truly understand why ceramics work rather than just how to apply them, this text is absolutely invaluable.
Value for Money: At nearly $100, this book represents significant investment. For professional detailers, coating installers, or materials engineers, the specialized knowledge justifies the cost. Hobbyists may find better value in free online resources. Compared to certification courses costing hundreds of dollars, it’s economical for technical education purposes.
Strengths and Weaknesses:
- Strengths: Authoritative technical depth; industry-standard reference material; comprehensive coverage of properties and applications
- Weaknesses: Dense academic writing style; no practical application photos; outdated information risk in fast-evolving field; overkill for casual users
Bottom Line: This book serves a narrow but vital audience. Professional coating installers and materials scientists will extract immense value, while weekend warriors should invest their money in actual products instead. It’s a textbook, not a tutorial.
2. Professional Ceramic Nano Coating for Vehicle Interior - Long-Lasting Hydrophobic Protectant for Upholstery & Leather - Repels Dirt, Spills, & Moisture - Perfect for Fabric, Velour and Suede 8.45oz

Overview: This specialized interior protectant addresses a often-overlooked aspect of ceramic protection—upholstery and leather surfaces. The 8.45oz formula creates a hydrophobic barrier on fabric, velour, and suede without compromising breathability. At $38.99, it targets vehicle owners seeking to preserve their interior investment from daily wear and accidental spills.
What Makes It Stand Out: The breathable nano-coating technology preserves original texture and comfort while repelling liquids—a delicate balance most interior protectants fail to achieve. Its particular effectiveness on light-colored interiors addresses a common pain point, preventing permanent staining from dirt, salt, and pet accidents that typically ruin pale upholstery.
Value for Money: For vehicles with premium interiors, this $39 investment pales compared to $500+ professional reupholstering costs. Competing interior ceramics often cost $50-70 for similar volumes. The application efficiency and multi-surface compatibility stretch the value further, covering an entire vehicle interior with one bottle.
Strengths and Weaknesses:
- Strengths: Maintains fabric breathability; excellent for light interiors; easy DIY application; versatile material compatibility; extends upholstery lifespan
- Weaknesses: Limited to 8.45oz; requires thorough prep work; not for exterior use; durability claims lack specific timeframe
Bottom Line: A must-have for owners of vehicles with light-colored premium interiors. The breathable protection formula sets it apart from conventional fabric guards, making it worth the investment for those prioritizing interior preservation over exterior shine.
3. DURA-COATING TECHNOLOGY, Re-Charge Silica Ceramic Spray Wax - Ceramic Infused Spray Detailer, High-Gloss, Streak Resistant - Car Detailing - 16 oz Bottle of Re-Charge Silica Ceramic Spray Wax

Overview: This maintenance spray serves as a critical companion for ceramic-coated vehicles, designed to rejuvenate and extend existing protection. The 16oz bottle delivers a high-concentration silica formula that bonds with both ceramic and non-ceramic surfaces. At $40.95, it’s positioned as a premium maintenance solution for serious detailers.
What Makes It Stand Out: The brand claims higher ceramic content than competitors, creating a genuine sacrificial layer rather than superficial gloss. Its unique bonding capability with existing ceramic coatings solves a real problem—most spray waxes bead up on top of ceramics rather than integrating with them. The streak-resistant finish demonstrates thoughtful formulation.
Value for Money: Professional ceramic maintenance sprays typically range $35-50, placing this competitively. The 16oz size offers 30-90 day application cycles, potentially lasting a year. Compared to $1,000+ ceramic coating reapplications, this preventative maintenance represents exceptional value, especially for high-end vehicles.
Strengths and Weaknesses:
- Strengths: High ceramic concentration; bonds to existing coatings; versatile surface compatibility; USA-made quality; streak-free finish
- Weaknesses: Requires frequent reapplication; not a standalone coating; premium pricing; needs proper technique to avoid streaking
Bottom Line: Essential for maintaining expensive ceramic coatings. While not cheap, it costs far less than professional reapplication and extends coating life significantly. DIY enthusiasts with ceramic-coated vehicles should consider this mandatory maintenance equipment.
4. Renegade Products Graphene Ceramic Wash Coating with Sio2, 1 Year Coating For Enthusiasts And Professionals
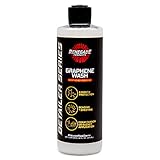
Overview: This innovative wash coating combines graphene and SiO2 technologies into a single-application product promising one-year protection. Aimed at both enthusiasts and professionals, the $30 price point makes advanced coating technology accessible. It functions as a sacrificial layer that simplifies maintenance washing while delivering enhanced gloss and water behavior.
What Makes It Stand Out: The graphene infusion claims 3x the beading of standard ceramic sprays, representing genuine material innovation rather than marketing hype. The wash coating format allows application during routine washing, eliminating the intensive prep and cure times of traditional coatings. This convenience factor revolutionizes how owners maintain protection.
Value for Money: At $30, it undercuts most ceramic sprays while offering longer protection. One-year durability from a $30 bottle rivals $50-80 competitors. The time savings alone—no separate application session—justifies the cost. For enthusiasts wanting professional results without professional pricing, this represents outstanding value.
Strengths and Weaknesses:
- Strengths: One-year protection; graphene-enhanced performance; easy wash-application; exceptional water beading; enthusiast-friendly
- Weaknesses: Single application may intimidate beginners; durability claims need verification; graphene benefits over SiO2 unclear
Bottom Line: A breakthrough in coating convenience. The wash-application method and graphene enhancement deliver premium results at a budget-friendly price. Perfect for enthusiasts seeking maximum protection with minimal effort and investment.
5. Ceramic FX CFX¹ Ceramic Coating for Cars - Easy to Apply Ceramic Spray Coating - 24 Month Protection Against Scratches & Swirls - Adds a Permanent Car Wax Polish Gloss and Ceramic Sealant (8oz)
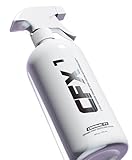
Overview: This graphene-infused ceramic spray promises 24-month protection with a “liquid glass” aesthetic. The 8oz bottle delivers molecular-level bonding across multiple exterior surfaces including paint, wheels, glass, and trim. At $34.99, it targets detailing enthusiasts seeking professional-grade results with DIY simplicity and extended durability.
What Makes It Stand Out: The hand-bottled, fresh-fill approach maximizes SiO2 molecule potency—a unique quality control measure. The multi-surface versatility eliminates need for separate trim, wheel, and glass products. The two-year protection claim exceeds most sprays by 12-18 months, while the graphene formula promises enhanced reflection and chemical resistance.
Value for Money: Two-year protection at $35 undercuts competitors offering 6-12 months at similar prices. The multi-surface capability replaces 2-3 specialized products, compounding savings. Compared to $1,000+ professional ceramic jobs, this delivers 80% of benefits at 3% of cost, making it exceptional value for hands-on owners.
Strengths and Weaknesses:
- Strengths: 24-month durability; multi-surface versatility; fresh-bottled potency; graphene enhancement; USA-made
- Weaknesses: Panel-by-panel application time-consuming; overspray risk; durability claims need long-term verification
Bottom Line: The two-year protection claim and multi-surface versatility make this a standout value. For dedicated DIY detailers willing to invest application time, it delivers professional results at a fraction of shop prices. The fresh-bottling process signals genuine quality commitment.
Understanding Sacrificial Layers: Your Ceramic Coating’s Best Friend
What Exactly is a Sacrificial Layer?
A sacrificial layer is a renewable, temporary protective coating applied on top of your primary ceramic coating. Unlike the base layer that chemically bonds to your clear coat for years, these toppers are designed to be consumed through normal wear—hence the term “sacrificial.” They act as the first line of defense against environmental fallout, wash-induced marring, and chemical contamination. Most formulations contain diluted concentrations of SiO2 (silicon dioxide), polymers, or newer graphene compounds that create a slippery, hydrophobic surface. This isn’t just about adding gloss; it’s about creating a replaceable barrier that absorbs damage before it reaches your permanent coating. The key distinction is that while your base ceramic coating forms a semi-permanent covalent bond with the paint, sacrificial layers rely primarily on weaker physical adhesion, making them far easier to remove and reapply without compromising the underlying protection.
Why Your Ceramic Coating Needs This Extra Shield
Even the most advanced 9H-rated ceramic coatings face degradation from daily exposure. Road salt in winter, acidic bird droppings, industrial fallout, and even the surfactants in some car shampoos gradually break down the coating’s surface energy. Sacrificial layers provide three critical benefits: first, they absorb these contaminants, preventing them from embedding in your base coating; second, they restore and enhance hydrophobic properties that may have diminished over time; and third, they add measurable thickness to your protection stack, creating a more effective barrier against UV radiation and chemical etching. Without this renewable shield, you’re essentially running your ceramic coating at full wear all the time. With it, you’re cycling through replaceable protection while preserving the integrity of your foundational layer. The difference in longevity can be staggering—properly maintained coatings with regular sacrificial top-ups can last 5-7 years instead of the typical 2-3.
The Science Behind Layering: How Sacrificial Toppers Work
Chemical Bonding vs Physical Protection
The interaction between your base ceramic coating and a sacrificial layer is more complex than simple stacking. Base coatings create a dense network of Si-O-Si (siloxane) bonds that chemically anchor to the clear coat’s hydroxyl groups. Sacrificial layers, however, primarily form hydrogen bonds and van der Waals forces with the ceramic coating’s surface. This weaker bonding is intentional—it allows the topper to release when overwhelmed by contamination rather than pulling at the base layer. Some advanced formulations include bridging agents that create slightly stronger secondary bonds, but the principle remains: these layers are meant to let go gracefully. Understanding this chemistry helps explain why surface preparation is crucial; any oils, waxes, or existing contamination will prevent even this weak physical adhesion, causing the sacrificial layer to bead up or fail prematurely.
The Role of SiO2 and Other Active Ingredients
Most sacrificial layers lead with SiO2 content, but the concentration and particle size dramatically affect performance. High-quality toppers use nano-scale SiO2 particles (typically 20-100 nanometers) suspended in a carrier fluid. These particles fill microscopic pits in your ceramic coating, creating a smoother surface that amplifies hydrophobicity. Graphene-oxide additives take this further by forming a two-dimensional lattice that enhances chemical resistance and thermal conductivity, helping the surface shed heat and water more efficiently. Polymer-based sealants work differently—they create a flexible film that excels at impact absorption but may attract dust. The most sophisticated products use hybrid chemistry, combining SiO2’s hardness with polymers’ flexibility and graphene’s conductivity. When evaluating options, look beyond marketing percentages; a 5% concentration of properly dispersed nano-SiO2 often outperforms a 15% concentration of larger, poorly suspended particles.
Types of Sacrificial Layers: A Comprehensive Overview
Spray Sealants: The Everyday Workhorse
Spray sealants represent the most accessible category of sacrificial layers, typically offering 2-4 weeks of protection per application. These products strike a balance between ease of use and meaningful protection, requiring just a clean surface and a microfiber towel. The best formulations use a water or alcohol base that flashes off quickly, leaving behind a thin film of active ingredients. They’re ideal for weekly maintenance, restoring that just-coated slickness in under 15 minutes. However, not all spray sealants are ceramic-coating-friendly. Avoid any containing waxes, oils, or “glaze” ingredients that can mask the coating’s properties. Look specifically for labels mentioning “ceramic coating topper,” “SiO2 sealant,” or “maintenance spray.” The trade-off for convenience is durability; these are your frequent-use option, not your long-term solution.
Ceramic Boosters: Reinforcing Your Foundation
Ceramic boosters occupy the middle ground between spray sealants and standalone coatings. These products contain higher SiO2 concentrations (often 10-20%) and are designed to be applied every 2-3 months. They partially fill in areas where the base coating has worn thin, essentially “boosting” the ceramic layer rather than just sitting on top. Application is more involved—typically requiring a foam applicator, careful panel-by-panel work, and a longer cure time of 1-4 hours. Some boosters require a 24-hour cure before exposure to water. The benefit is significant: they can restore 70-80% of your coating’s original water contact angle, making them perfect for seasonal refreshes. Think of boosters as tune-ups for your coating, while spray sealants are the daily vitamins.
Quick Detailers: Convenience Meets Protection
Quick detailers blur the line between cleaning and protection. These products contain light cleaning agents (often citrus-based) to remove light dust and fingerprints while depositing a thin layer of protection. They’re perfect for show-day touch-ups or removing bird bombs between washes. However, the cleaning agents can be a double-edged sword—used too frequently on a heavily soiled car, they create swirl marks. The protective film is also the thinnest of all options, typically lasting 1-2 weeks. For ceramic-coated cars, choose detailers specifically formulated for coated surfaces; traditional quick detailers often contain gloss enhancers that interfere with hydrophobicity. The ideal use case is post-wash wipe-downs to enhance slickness and add a minor protective boost without a full sealant application.
Drying Aids: Protection While You Dry
Drying aids represent one of the smartest innovations in coating maintenance. Applied during the drying phase of your wash, these products use the remaining water as a dispersal agent, spreading protection evenly across wet panels. As you towel-dry, the product bonds to the surface, eliminating a separate application step. Most drying aids use water-soluble SiO2 compounds that activate upon contact with moisture, making them incredibly easy to use. Protection typically lasts 2-3 weeks, and the application method ensures zero streaking since you’re removing the carrier fluid immediately. The key is proper dilution—overly concentrated formulas can cause water spots if not dried thoroughly. This category is perfect for enthusiasts who want consistent protection without adding time to their wash routine.
Graphene-Infused Toppers: Next-Generation Technology
Graphene-enhanced sacrificial layers are the newest entrants, promising enhanced durability, chemical resistance, and anti-static properties. Graphene oxide particles create a conductive network across the surface that dissipates static charge, reducing dust attraction by up to 60% compared to SiO2-only products. They also exhibit superior heat rejection, keeping surfaces cooler and reducing water spotting. However, the technology is still evolving, and many “graphene” products contain minimal active graphene, using it more as a marketing term. True graphene toppers should feel noticeably slicker and show improved water behavior in hard water areas. They typically command a 30-50% price premium but can extend reapplication intervals to 3-4 months. The application process is similar to ceramic boosters, but cure times are often shorter due to graphene’s catalytic properties.
Polymer-Based Sealants: The Traditional Approach
Before SiO2 dominated the market, polymer sealants were the gold standard for sacrificial protection. These synthetic polymers (often polyethylene or Teflon derivatives) create a flexible, slick film that excels at repelling water and resisting detergents. They’re less prone to water spotting than SiO2 products and often provide a warmer, deeper gloss that some enthusiasts prefer on darker colors. The downside is shorter longevity—most last 2-3 weeks—and they can attract dust due to static buildup. Modern polymer sealants sometimes incorporate small amounts of SiO2 to bridge the gap, but pure polymer formulas remain popular for their forgiving application and instant cure time. They’re an excellent choice for beginners or for use in dusty climates where SiO2’s static-reducing properties aren’t as critical.
Hybrid Solutions: Best of Both Worlds
Hybrid sacrificial layers combine multiple chemistries—typically SiO2 for hardness, polymers for flexibility, and sometimes graphene for conductivity. The goal is to create a more resilient film that captures the benefits of each ingredient while minimizing weaknesses. These products often use a proprietary emulsion to keep incompatible ingredients suspended, requiring more sophisticated manufacturing. Performance-wise, hybrids can deliver 4-6 weeks of protection with spray-ease application, making them increasingly popular among serious enthusiasts. The complexity comes in compatibility; some hybrids don’t play well with certain base coatings, particularly older silicone-based ceramics. Always check manufacturer compatibility charts, and when in doubt, test on a small, inconspicuous area. The premium price is justified if you want maximum protection with minimal application frequency.
Professional-Grade Maintenance Coatings
These are essentially diluted versions of professional ceramic coatings, designed for certified installers to apply as maintenance top-ups. They contain higher solid content (15-25%) and require precise application techniques, often using specialized towels and controlled environments. Durability can reach 6+ months, but the learning curve is steep. Many are solvent-based, requiring respirators and proper ventilation. For DIYers, these products are risky—mistakes can lead to high spots that are difficult to remove without polishing. However, if you’re comfortable with advanced techniques, they offer the closest performance to a fresh coating without the full reapplication process. Most are sold through professional channels rather than consumer retailers, reflecting their target audience.
Water-Based Formulas: Eco-Friendly Options
Water-based sacrificial layers have gained traction as environmental regulations tighten and eco-conscious detailing grows. These products use water as the primary carrier, eliminating volatile organic compounds (VOCs) and reducing inhalation risks. Performance has improved dramatically; modern water-based formulas can rival alcohol-based sprays in durability and beading. They tend to be more forgiving in hot weather since they evaporate slower, reducing flash marks. The trade-off is longer cure times—often 2-4 hours before water exposure vs. 30 minutes for solvent-based alternatives. They’re also more susceptible to freezing during shipping and storage. For detailers in regulated states like California, water-based options aren’t just preferable; they’re often the only legal choice for commercial application.
Solvent-Based Solutions: Maximum Durability
Solvent-carried sacrificial layers still reign supreme for maximum durability and chemical resistance. The solvent (often alcohol or acetone) evaporates rapidly, depositing a dense concentration of active ingredients that cross-link quickly into a tough film. These products excel in harsh environments—coastal salt air, industrial areas, or regions with heavy road salt. The rapid flash time means less chance of water spotting during application, but it also demands working in smaller sections to avoid streaking. Health precautions are non-negotiable: use a respirator with organic vapor cartridges and ensure adequate ventilation. For garage detailers, solvent-based options offer the longest intervals between applications, often 2-3 months for spray products and 6+ months for wipe-on formulas.
Key Features to Evaluate Before Buying
Concentration of Active Ingredients
Marketing departments love to tout high percentages, but concentration without context is meaningless. A product claiming “20% SiO2” could mean 20% by weight of raw silica nanoparticles or 20% of a pre-diluted SiO2 suspension—the difference is massive. What matters is the final concentration of active material on the surface after the carrier evaporates. Look for products that specify “solids content by volume” rather than just ingredient percentages. Also consider particle size: 50nm particles provide better filling and bonding than 200nm particles, even at lower concentrations. Independent testing data showing water contact angles and gloss measurements is far more valuable than percentage claims. Reputable manufacturers publish technical data sheets; if they don’t, that’s a red flag.
Ease of Application
Your sacrificial layer is only effective if you actually use it consistently. A product that takes 30 minutes to apply correctly but promises 3 months of protection might sound appealing, but if the complexity means you skip applications, it’s worthless. Evaluate your realistic commitment level. Spray-and-wipe formulas take 10-15 minutes for a whole car but need weekly application. Boosters require 45-60 minutes every 2-3 months. Consider your climate too—hot, humid environments make slow-flashing products difficult to work with, while cold weather extends cure times dramatically. The sweet spot is a product you can apply comfortably in your typical conditions without dreading the process. Many enthusiasts keep two products: a quick spray for busy weeks and a booster for seasonal deep-care sessions.
Curing Time Requirements
Curing time directly impacts your workflow and the product’s final performance. “Cure” refers to the time needed for solvents to evaporate and for the active ingredients to cross-link and harden. Short-cure sprays (30 minutes to 2 hours) are convenient but sacrifice durability. Long-cure boosters (4-24 hours) create harder, more resilient films but require garage storage and perfect weather planning. Some products advertise “instant cure” but rely on volatile solvents that evaporate quickly; these often have weaker final bonds. The critical question is water exposure: when can the car get wet without compromising the layer? This varies from 30 minutes for some drying aids to 24 hours for professional-grade boosters. Always plan application around weather forecasts and your driving schedule—a ruined application because of unexpected rain is both frustrating and expensive.
Compatibility with Your Base Coating
Not all sacrificial layers play nice with all ceramic coatings. The chemistry of your base coating—whether it’s a traditional SiO2, a hybrid, or a newer SiC (silicon carbide) formula—determines which toppers will bond effectively. Some base coatings have “low surface energy” designs that reject anything but their own brand’s maintenance products. Others are more forgiving. The age of your coating matters too; a 2-year-old ceramic coating has likely lost some surface activity, making it harder for new layers to adhere. Always check the base coating manufacturer’s approved maintenance product list. When experimenting, test on a small, hidden area like the door jamb or lower rocker panel. Look for beading consistency after 24 hours—if water behavior is patchy, the products aren’t compatible. Cross-brand compatibility is improving, but assuming universal fit is a rookie mistake that leads to wasted product and poor performance.
UV Protection Additives
While ceramic coatings provide UV protection, sacrificial layers can enhance this defense or, in some cases, compromise it. Quality toppers include UV absorbers like benzotriazole compounds that preferentially absorb UV radiation and dissipate it as heat, sparing both the sacrificial layer and the underlying ceramic. However, some inexpensive sprays use UV-reflective titanium dioxide, which can create a chalky appearance over time and actually accelerate degradation of the base coating through photocatalytic reactions. Check for products that specify “non-chalking UV inhibitors” or “UV absorbers” rather than just “UV protection.” Dark-colored cars particularly benefit from UV-enhanced toppers, as they experience more heat cycling and UV stress. The protection is cumulative: a base coating with 80% UV block plus a sacrificial layer with 60% block doesn’t equal 140%, but it does significantly extend the time before UV damage reaches your clear coat.
Application Techniques for Maximum Performance
Surface Preparation: The Non-Negotiable First Step
Applying a sacrificial layer to a contaminated surface is like painting over rust—it might look fine initially, but failure is inevitable. The surface must be chemically clean, meaning free from oils, waxes, and existing sacrificial layer buildup. Use an IPA (isopropyl alcohol) wipe-down at a 10-15% concentration, or better, a dedicated coating prep spray. Clay barring isn’t always necessary but is recommended every 3-4 applications to remove embedded contamination. The key is ensuring the surface is completely dry and cool to the touch; moisture trapped under the sacrificial layer creates milky high spots that are nearly impossible to remove without polishing. For boosters, consider a light paint decontamination wash with a iron fallout remover first. This prep work is 90% of the battle—skip it, and even the best product will underperform.
Weather Conditions: Timing Matters
Temperature and humidity dramatically affect application success. Most products specify an ideal range of 60-80°F (15-27°C) with humidity below 60%. Hotter temperatures cause carriers to evaporate too quickly, leading to streaking and poor leveling. Cold temperatures slow curing and can prevent proper bonding. Humidity is equally critical—high moisture in the air interferes with solvent evaporation and can cause the product to blush or turn cloudy. Wind is often overlooked but can deposit dust and pollen on your wet application, creating permanent imperfections. The ideal setup is an indoor garage with climate control. If you must work outside, choose an overcast day with stable temperatures, work in the shade, and avoid application when the forecast shows temperature swings of more than 10°F. Morning applications are generally better than evening, as overnight dew can interfere with curing.
Layering Strategies: Less is More
The most common mistake is over-application. Sacrificial layers work best when applied in ultra-thin, even coats. A single pass with a microfiber towel is usually sufficient—if you’re seeing visible product buildup or streaks, you’re using too much. For spray products, one or two light mists per panel is plenty. With booster pads, a few drops spread thinly across the applicator covers an entire door. The goal is to barely coat the surface; excess product simply wipes off as waste and can actually reduce clarity. Multiple thin layers are better than one heavy layer, but there’s diminishing returns—two applications spaced 24 hours apart is the practical maximum for most products. After application, use a clean, high-plush microfiber to level the product, flipping the towel frequently. The surface should feel slick but not tacky; if your towel drags, there’s too much product remaining.
Common Mistakes That Destroy Effectiveness
Over-Application Problems
More product does not equal more protection—in fact, it often creates the opposite effect. Excess sacrificial layer material forms a soft, thick film that attracts dust, shows fingerprints, and washes off prematurely. Heavy applications are prone to “sheet” during rain rather than bead, reducing self-cleaning properties. In extreme cases, thick layers can crack as they cure, creating pathways for water intrusion. The visual signs of over-application include a rainbow oil-slick appearance in sunlight, a tacky feel after the stated cure time, and excessive smearing when you run a finger across the surface. If you’ve over-applied, the only fix is to remove it with an IPA wipe-down and start over. Remember, these products are engineered for specific film thicknesses; deviating upward offers no benefit and significant drawbacks.
Contamination During Application
Your freshly applied sacrificial layer is a contamination magnet for the first hour of cure time. Airborne dust, pollen, and industrial fallout can embed in the wet film, creating rough spots that permanently degrade performance. Even worse, silicone contamination from lubricants or tire dressings can cause the entire layer to crawl and de-wet, resulting in a patchy, ineffective coating. Always apply in a clean environment, and if you must work outdoors, use a portable garage or at least a pop-up canopy to block falling debris. Change into clean clothes before starting—cotton fibers and lint from dirty shirts are common culprits. Keep a second clean microfiber towel nearby to gently lift any contamination that lands on the surface during application; never rub it in. The first 30 minutes are critical; after that, the surface is usually tacky enough to resist light dust.
Skipping Cure Times
Impatience is the enemy of performance. Applying a second layer or exposing the car to water before the product has fully cured disrupts the cross-linking process, leaving the film soft and poorly bonded. This results in dramatically reduced durability—what should last a month might wash off in a week. The product’s stated cure time assumes ideal conditions; in high humidity or low temperatures, add 50% more time. The water beading test is your friend: after the minimum cure time, flick a few drops of water on the surface. If they sheet off immediately, the product isn’t ready. If they bead up and roll off, you’re good to go. For boosters requiring 24-hour cures, resist the temptation to “just move the car into the garage”—the vibration and flexing can disrupt the forming film. Plan applications when the vehicle can remain stationary for the full duration.
Maintenance Schedules: How Often Should You Reapply?
Daily Driver vs Garage Queen
Your reapplication schedule should match your vehicle’s exposure level. A daily driver facing sun, rain, and road grime needs weekly spray sealant applications or monthly boosters to maintain peak performance. The sacrificial layer on a daily driver might only last 1-2 weeks before wash-induced wear diminishes its effectiveness. Conversely, a garage-kept weekend car might only need a sacrificial layer applied monthly, with the base coating providing adequate protection between applications. Track your coating’s performance using a water contact angle gauge (available for under $20); when the angle drops below 100 degrees, it’s time to reapply. For daily drivers, consider a quick spray application every other wash as part of your drying routine. For garage queens, a seasonal booster before storage and before show season is sufficient. The key is consistency—irregular applications create protection gaps that allow cumulative damage.
Climate Impact on Reapplication Frequency
Climate dictates degradation speed more than mileage does. Coastal environments with salt air can cut sacrificial layer life in half—the salt crystals are abrasive and hygroscopic, constantly pulling moisture and contaminants onto the surface. Desert climates with intense UV and blowing sand require UV-enhanced toppers applied every 1-2 weeks. Northern climates with road salt in winter need the thickest protection possible, applied before the first snow and maintained with weekly sprays throughout the salt season. Humid subtropical climates promote water spot formation, making quick-cure, water-repellent formulas essential. In contrast, mild Mediterranean climates might allow monthly applications to suffice year-round. Adjust your schedule seasonally: increase frequency by 50% during your region’s most challenging weather, and you can reduce it during mild periods. Keep a log of applications and performance; after a year, you’ll have a customized schedule that maximizes protection while minimizing effort.
Cost Analysis: Budgeting for Long-Term Protection
Price Per Application vs. Price Per Month
A $50 bottle of premium booster that lasts 6 months is cheaper than a $15 spray that needs weekly application, but the math isn’t always obvious. Calculate cost per month: the $50 booster used every 3 months costs about $17/month, while the $15 spray used weekly costs $60/month. However, factor in your time—weekly applications might take 15 minutes vs. 90 minutes for a booster. Your time has value. Also consider waste: sprays get used more liberally, while boosters are measured drops. Bulk buying can reduce costs significantly; many manufacturers offer gallon sizes that cut per-ounce prices by 40-60%. Professional-grade products seem expensive upfront but often have higher active ingredient concentrations, requiring less product per application. Create a spreadsheet tracking product cost, number of applications per bottle, application time, and reapplication frequency to find your true cost of ownership.
Professional Application vs. DIY Savings
Having a professional apply sacrificial layers during routine maintenance visits costs $50-150 per session but ensures perfect application and often includes paint decontamination. DIY costs 70-90% less but requires product purchases, microfiber towels, and your time. The break-even point is typically 3-4 applications; after that, DIY is cheaper. However, consider the cost of mistakes: a botched booster application that requires polishing to fix can cost $200+ in professional correction. For spray sealants, DIY is a no-brainer due to low risk. For advanced boosters and professional-grade coatings, the learning curve cost might offset savings initially. A hybrid approach works well: have a professional apply a booster seasonally while you handle weekly spray maintenance. This gives you professional-grade durability with minimal investment in expensive products you might not use efficiently.
Seasonal Considerations: Adapting Your Protection Strategy
Winter Salt and Grime Defense
Winter demands your most robust sacrificial layer strategy. Road salt is hygroscopic and abrasive, creating a constant wet, gritty layer that accelerates wear. Apply a thick booster or professional-grade maintenance coating before the first freeze, creating a dense barrier. Then, switch to a weekly spray sealant that can be applied even in cold weather—water-based formulas work best below 40°F. The key is creating a sacrificial layer that’s replaced frequently, ensuring salt never reaches the base coating. Avoid wax-based products in winter; they become brittle in cold and trap salt against the paint. Instead, use SiO2-rich sprays that maintain flexibility. After any salt exposure, rinse the car with deionized water if possible; the sacrificial layer will still be intact, but removing the salt slurry prevents abrasion during the next wash. Consider a sacrificial layer with anti-corrosion additives for winter use.
Summer UV and Heat Protection
Summer sun and heat create different challenges. UV radiation is strongest, and surface temperatures on dark cars can exceed 180°F, softening sacrificial layers and accelerating their breakdown. Use products with robust UV absorbers and apply them in the evening to avoid heat shock. Graphene-infused toppers excel here due to their thermal conductivity, helping the surface shed heat faster. Water spots are the summer scourge—apply a sacrificial layer that cures quickly and has strong water repellency to minimize spotting. Boosters applied in late spring can provide protection through the entire summer if they’re designed for high-temperature environments. For daily drivers, a weekly application of a UV-enhanced spray sealant is mandatory. Consider a sacrificial layer with self-cleaning properties; summer dust and pollen are relentless, and a slick surface that sheds contaminants reduces wash frequency and associated wear.
Spotting Quality: Red Flags in Marketing Claims
“Lifetime Warranty” Warning Signs
Any sacrificial layer promising “lifetime protection” is lying—by definition, these are temporary, consumable products. Such claims indicate either deceptive marketing or a misunderstanding of the product’s purpose. Quality manufacturers specify realistic durability: “up to 3 months” or “4-6 weeks depending on conditions.” Be wary of vague claims like “long-lasting” without specific timeframes. Also, question any product that promises to “repair” your ceramic coating. Sacrificial layers can mask minor wear but cannot rebuild the covalent bonds of a degraded base layer. True repair requires polishing and re-coating. Look for brands that provide detailed technical data sheets, independent test results, and clear ingredient disclosures. Transparency is the hallmark of quality; mystery formulations and proprietary “secret ingredients” are usually masking inferior chemistry.
Concentration Misconceptions
High SiO2 percentage doesn’t automatically mean better protection. As mentioned earlier, particle size, dispersion quality, and the presence of stabilizers matter more. A product advertising “30% SiO2” might use cheap, large particles that settle in the bottle and scratch the surface during application. Quality products often list “active solids” or “ceramic content” rather than raw ingredient percentages. Also, be suspicious of products claiming “100% SiO2”—pure silicon dioxide is a solid powder, not a sprayable liquid. The carrier fluid and suspension agents are necessary and beneficial. Another red flag is comparing concentrations across product types; a spray sealant at 5% active content might be more effective than a booster at 20% if the particles are smaller and better dispersed. Focus on independent performance metrics like water contact angle, gloss improvement percentages, and real-world durability tests rather than marketing numbers.
The Environmental Factor: Eco-Friendly Choices
VOC Regulations and Compliance
Volatile Organic Compounds (VOCs) in solvent-based sacrificial layers contribute to air pollution and pose health risks. Many states now regulate VOC content in automotive detailing products, with California’s CARB standards being the strictest. Water-based formulas are inherently VOC-free or VOC-compliant, making them the safe choice in regulated areas. Even if you’re not in a regulated state, choosing low-VOC products reduces your exposure to harmful fumes, especially important for garage detailers without professional ventilation. Look for products with “VOC Compliant” labels and check the SDS (Safety Data Sheet) for specific content. The shift to water-based isn’t just regulatory—modern formulations have closed the performance gap significantly, making eco-friendly choices viable for even demanding enthusiasts.
Waterless Wash Compatibility
Waterless wash products and sacrificial layers have a complex relationship. Many waterless washes contain polymers that can interfere with SiO2 bonding, while others are designed to be compatible with ceramic coatings. If you regularly use waterless washes, choose a sacrificial layer specifically marketed as “waterless wash safe” or “rinseless wash compatible.” These products use cross-linking chemistries that aren’t disrupted by the lubricants in waterless washes. Alternatively, apply your sacrificial layer after a traditional wash, then maintain with waterless products that are coating-friendly. Some manufacturers offer waterless washes with built-in sacrificial layer boosters, providing cleaning and protection in one step. While convenient, these hybrids typically offer less protection than dedicated products but are perfect for apartment dwellers or water-restricted areas.
Professional vs. DIY: Which Route Should You Take?
Skill Level Assessment
Be brutally honest about your skill level. If you’ve never machine polished and struggle with basic wax application, start with spray sealants and work up. Booster application requires the ability to work in precise sections, recognize proper flash times, and remove residue without creating high spots. Professional-grade products demand experience with solvent handling, respirator use, and correction techniques for mistakes. The learning curve is steep and expensive—botching a $100 booster application costs more than paying a pro $150 to do it right. That said, DIY skills develop quickly with practice. Start with forgiving products on a daily driver before attempting show-car work. Watch manufacturer videos, practice on glass first (it’s more forgiving), and join online forums to learn from others’ mistakes. The satisfaction of mastering advanced application is real, but rushing into products beyond your skill level is a costly ego trip.
Equipment Investment
DIY sacrificial layer application requires more than just the product itself. Quality microfiber towels (at least 12-16 for a car, using fresh sides constantly), foam applicators, an IPA solution for prep, and potentially a paint thickness gauge to monitor your coating’s health represent a $100-200 initial investment. For solvent-based products, add a proper respirator ($50-100) and ventilation fan. Professional application includes all this equipment and expertise, but you’re paying for it each visit. The math works in DIY’s favor after 3-4 applications, but only if you maintain your equipment. Microfiber towels must be washed with dedicated detergent and replaced regularly; contaminated towels cause scratches that cost far more to fix than professional application would have. Factor in storage space for products and equipment, plus the value of your time. For many, a hybrid approach—DIY for sprays, professional for seasonal boosters—optimizes both cost and results.
Frequently Asked Questions
How often do I really need to apply a sacrificial layer to my ceramic coating?
It depends entirely on your driving conditions and the product type. For daily drivers in harsh climates, a spray sealant every 1-2 weeks maintains optimal performance. For garage-kept weekend cars, a monthly application is sufficient. Use a water contact angle gauge to be precise: when beading drops below 100 degrees, it’s time to reapply. Most enthusiasts develop a routine that combines weekly quick sprays with a more durable booster every 2-3 months for seasonal reinforcement.
Will using a sacrificial layer affect the hydrophobic properties of my base ceramic coating?
Properly formulated sacrificial layers enhance, not diminish, your coating’s hydrophobicity. They restore surface energy that degrades over time, bringing back that fresh-coated beading behavior. However, using incompatible products—especially those containing waxes, oils, or certain polymers—can temporarily mask hydrophobic properties. Always choose products specifically designed for ceramic coating maintenance, and test compatibility on a small area first. The right sacrificial layer will make water bead tighter and roll off faster.
Can I use any spray sealant or quick detailer on my ceramic-coated car?
Absolutely not. Traditional spray sealants and quick detailers often contain gloss enhancers, waxes, or fillers designed for uncoated paint. These ingredients create a film that interferes with the ceramic coating’s performance, reducing water beading and creating a smeary appearance. Look for products explicitly labeled “ceramic coating safe,” “ceramic topper,” or “coating maintenance.” When in doubt, check the ingredient list for carnauba wax, petroleum distillates, or silicone oils—these are red flags for coated surfaces.
What’s the practical difference between a ceramic booster and a maintenance spray?
Think of it as the difference between a protein shake and a multivitamin. A booster contains high concentrations of active ingredients (10-20% SiO2) designed to partially rebuild worn areas of your base coating, lasting 2-3 months. It requires careful application with an applicator pad and has a longer cure time. Maintenance sprays are dilute (2-5% active ingredients) for frequent use, applied weekly with a simple spray-and-wipe technique. Boosters are for seasonal deep protection; sprays are for regular upkeep.
Do I need to clay bar or decontaminate before every sacrificial layer application?
No, but you do need to before the first application and then every 3-4 subsequent applications. Light contamination like dust and water spots washes off, but bonded contaminants like tar, iron fallout, and tree sap embed in the surface and prevent proper bonding. Use an iron fallout spray every 2-3 months, and clay bar if the surface feels rough after washing. Over-claying causes unnecessary wear on your base coating, so reserve it for when you feel physical roughness. Always do a chemical decontamination wash before applying a new booster for the season.
Can I apply sacrificial layers in direct sunlight or on hot panels?
This is one of the fastest ways to ruin an application. Hot panels cause the carrier to evaporate instantly, preventing the active ingredients from leveling and bonding properly. This results in streaking, high spots, and premature failure. Always apply in shade with panels cool to the touch (ideally below 80°F). If you must work outside, do it early morning or evening, and keep a spray bottle with cool water to mist panels and lower their temperature before application. Some products are marketed as “sun-friendly,” but even these perform better in controlled conditions.
How can I tell if I’m over-applying the product during installation?
Visual cues are your best guide. If you see visible streaks, rainbow oil-slick effects, or a hazy film that doesn’t flash clear within the product’s specified time, you’re using too much. The surface should look slightly wet but not coated; excess product should level out within 30-60 seconds. After wiping, the towel should glide smoothly; if it drags or feels tacky, there’s residual product that needs removal. A good rule: if you can see the product on the surface after leveling, you’ve applied too much. It should be invisible.
Are graphene-infused sacrificial layers genuinely better than traditional SiO2 products?
For specific use cases, yes. Graphene toppers offer superior chemical resistance, anti-static properties, and heat dissipation—benefits that are measurable in lab tests and noticeable in real-world use, especially on dark colors in hot climates. However, they cost 30-50% more. For mild climates and light-colored cars, a high-quality SiO2 spray performs nearly as well at a lower price point. The technology is still evolving, and some “graphene” products contain minimal active material. Look for independent test data showing reduced dust attraction and improved water spot resistance before paying the premium.
Can I just wax over my ceramic coating instead of using a sacrificial layer?
Waxing over a ceramic coating defeats the purpose of both products. Wax fills the microscopic structure of the ceramic coating, masking its hydrophobic properties and creating a soft layer that attracts dust and washes off quickly. Waxes also contain oils that can interfere with the ceramic’s chemical structure over time. While the car will look glossy, you’re essentially paying for a ceramic coating then covering it with an inferior product. Use sacrificial layers designed for ceramics; they work synergistically rather than antagonistically. If you love the warm glow of wax, either skip the ceramic coating entirely or reserve wax for non-coated trim pieces.
What’s the real cost difference between professional application and doing it myself over a year?
DIY costs about $150-200 annually for products and supplies (sprays, boosters, microfibers, prep materials). Professional maintenance runs $400-600 per year for quarterly visits. The DIY savings of $250-400 assumes you never make a mistake that requires professional correction. Factor in your time—professional visits take 1-2 hours of drop-off time, while DIY takes 15 minutes weekly plus 2-3 hours for seasonal boosters. If you value your time at $25/hour, DIY costs roughly the same as professional work. The real value of DIY is control and convenience; you can apply protection anytime without scheduling. The value of professional work is expertise and guaranteed results. Most enthusiasts find a hybrid approach—DIY sprays weekly, professional booster seasonally—offers the best balance of cost, time, and protection quality.