When it comes to protecting your vehicle from rust and corrosion, undercoating is only half the battle. The real magic happens during the curing process, where the coating transforms from a sticky liquid into a durable, impenetrable shield against road salt, moisture, and debris. While many DIY enthusiasts focus solely on application technique, professional auto restorers know that proper curing is what separates a five-year protection job from a decade-long defense system.
Heat lamps have revolutionized the undercoating game, turning what was once a weather-dependent, multi-day waiting game into a controlled, efficient process you can complete in your garage any time of year. Whether you’re restoring a classic muscle car or protecting your daily driver through harsh winters, understanding how to select and use the right heat curing equipment will elevate your results from amateur to professional grade. Let’s dive deep into everything you need to know about choosing the perfect heat lamp system for curing undercoating.
Top 10 Heat Lamps For Curing Undercoating
Detailed Product Reviews
1. Solary Infrared Paint Curing Lamp, 2100W 110V Short Wave Infrared Paint Heater Lamp, Auto Body Heat Lamp with Smart Timer, Movable and Height Adjustable(Yellow)
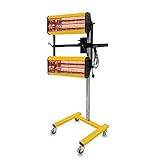
Overview: The Solary 2100W Short Wave Infrared Paint Curing Lamp delivers professional-grade performance for automotive body shops demanding precision and mobility. This 110V unit combines shortwave infrared technology with robust construction, featuring a 304 stainless steel lamp shade and die-cast aluminum radiator engineered for optimal heat concentration and dissipation. Designed for versatile applications from spot repairs to engine drying, its intelligent timing system and adjustable positioning make it a comprehensive curing solution.
What Makes It Stand Out: This unit’s premium build quality distinguishes it from competitors. The 304 stainless steel shade resists oxidation while collecting energy efficiently, and the aluminum radiator prevents overheating during extended use. The smart timer (1-30 minutes) offers precise control, while the pulley system, height-adjustable bracket, and rotating lamp head provide exceptional maneuverability in tight spaces. Shortwave infrared penetrates paint layers from inside out, accelerating cure times while enhancing gloss and adhesion.
Value for Money: At $299.99, this represents a premium investment. The price reflects superior materials and engineering compared to budget alternatives. For professional shops requiring daily reliability and mobility, the cost is justified by reduced rework and faster throughput. DIY enthusiasts may find better value in less expensive options, but professionals will appreciate the durability dividend.
Strengths and Weaknesses: Strengths include exceptional build quality, precise timer control, superior mobility, and effective shortwave penetration. The 2100W output handles demanding jobs efficiently. Weaknesses center on the 110V limitation for industrial settings and premium pricing that may deter hobbyists. The yellow color scheme, while distinctive, offers no functional benefit.
Bottom Line: Ideal for professional auto body shops prioritizing quality and mobility. The robust construction and intelligent features justify the investment for daily commercial use, delivering consistent results that cheaper alternatives cannot match.
2. Solary Infrared Paint Curing Lamp, 2100W 110V Short Wave Infrared Paint Baking Lamp Tool with Bracket

Overview: The Solary 2100W Infrared Paint Curing Lamp offers nearly identical performance to its sibling model at a more accessible price point. This 110V shortwave infrared system features dual 1050W halogen lamps, providing powerful penetration for rapid paint curing from the inside out. Built with the same high-grade materials as premium models, it targets professional users seeking reliability without unnecessary frills.
What Makes It Stand Out: Sharing the 304 stainless steel shade and die-cast aluminum radiator of its pricier counterpart, this model maintains excellent heat management and durability. The 1-30 minute smart timer provides flexible control for various paint types and surfaces. Its mobile design with pulleys, height adjustment, and rotating lamp head ensures easy positioning. The dual-lamp configuration offers redundancy and even heat distribution across the target area.
Value for Money: At $269.99, this model presents compelling value—$30 less than the yellow version while delivering equivalent core functionality. The savings likely reflect minor cosmetic differences rather than performance compromises. For budget-conscious professionals or serious DIYers, this hits the sweet spot between quality and affordability, outperforming generic brands while undercutting premium alternatives.
Strengths and Weaknesses: Strengths include proven Solary build quality, effective shortwave heating, generous timer range, and excellent mobility. The 2100W power handles most automotive applications efficiently. Weaknesses include the same 110V constraint as other models and lack of distinguishing features from its stablemate. Documentation may be limited, typical of imported equipment.
Bottom Line: A smart choice for users wanting professional Solary performance without paying for cosmetic upgrades. Delivers identical curing capability and durability to the yellow model, making it the more economical option for practical buyers.
3. DATOUBOSS Infrared Paint Curing lamp 2000W Shortwave Infrared Paint Dryer Car Body Repair Paint Curing Systems 110V with Bracket

Overview: The DATOUBOSS 2000W Infrared Paint Curing Lamp enters the market as a budget-conscious alternative for automotive enthusiasts and smaller shops. This 110V shortwave system prioritizes functionality over brand prestige, offering extended timing options and a generous curing area. While lacking the premium materials of higher-priced competitors, it delivers essential infrared curing capabilities for local paint drying, putty work, and spot repairs.
What Makes It Stand Out: The standout feature is the 0-90 minute timer—three times longer than most competitors—allowing extended curing cycles for thicker applications. The 650x500mm curing area covers substantial surface sections, while the quick-disconnect bulb design simplifies maintenance. Aluminum alloy construction provides adequate heat dissipation without the cost of stainless steel components. The reflector design promotes uniform heat distribution, reducing hot spots.
Value for Money: At $129.99, this represents exceptional value for hobbyists and entry-level professionals. The price point makes infrared curing accessible to DIYers who couldn’t justify $200+ investments. While build quality may not match premium brands, the feature set—particularly the extended timer and large curing area—exceeds expectations for the cost. It’s a calculated compromise: functionality over longevity.
Strengths and Weaknesses: Strengths include unbeatable pricing, extended timer range, large curing footprint, and user-replaceable bulbs. The 2000W output is sufficient for most tasks. Weaknesses involve unknown brand reliability, potentially shorter lifespan, and less robust construction. The 110V limitation persists, and mobility features aren’t as refined as pricier models.
Bottom Line: Perfect for DIY enthusiasts and small shops prioritizing budget over brand name. Delivers capable performance for occasional use, though professionals should consider long-term durability before committing to heavy daily operation.
4. VEVOR Baking Infrared Paint Curing Lamp 2000W Dryer Heater Short Wave Infrared Heater Car Bodywork Repair Paint Dryer/Stand

Overview: VEVOR’s 2000W Infrared Paint Curing Lamp positions itself as a safety-conscious mid-range option for automotive repair environments. This shortwave system balances performance with environmental considerations, featuring automatic overload protection and a design that minimizes secondary pollution. The unit targets users wanting reputable brand backing without premium pricing, suitable for both spot repairs and booth applications.
What Makes It Stand Out: The integrated safety overload protection automatically cuts power during anomalies, protecting both equipment and workpieces—crucial for busy shops. VEVOR emphasizes environmental responsibility, with no hot air emissions or secondary pollution. The 80x80cm drying area covers substantial surfaces, while the adjustable metal tube construction and locking casters provide stable positioning. The temperature range of 104-167°F offers precise low-temperature control for sensitive materials.
Value for Money: At $193.90, this occupies the middle ground—more expensive than budget brands but cheaper than premium Solary models. The VEVOR name carries reliability assurances, and the safety features justify the modest premium. For shops prioritizing operator safety and environmental compliance, the price represents solid value. DIYers may find better economics elsewhere.
Strengths and Weaknesses: Strengths include brand reputation, safety protections, large curing area, stable stand design, and environmental benefits. The adjustable height (0.1-1.7M) accommodates various vehicle sections. Weaknesses include a lower maximum temperature than some competitors and occasional inconsistencies between “far-infrared” and “shortwave” terminology in marketing. The 110-120V range may limit industrial flexibility.
Bottom Line: A reliable, safety-focused choice for professional shops wanting brand assurance and environmental considerations. The protective features and stable construction make it ideal for high-traffic environments where equipment durability and safety are paramount.
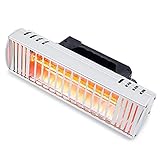
5. TFCFL 2PCS Baking Infrared Paint Curing Lamp, 1 Set 2000W Heater Lamp 110V for Automotive Spray Booths Far Infrared Radiation Heating, Hardwired, No Plug

Overview: The TFCFL 2PCS Infrared Paint Curing Lamp set redefines budget infrared heating at just $57 for a 2000W system. This hardwired-only solution targets permanent installation scenarios like spray booths rather than mobile repair work. Each 1000W lamp operates independently, providing flexible positioning for dedicated curing stations. The far-infrared carbon fiber tubes prioritize environmental cleanliness over raw penetration power.
What Makes It Stand Out: The unprecedented price point makes this accessible for home garage conversions and small booth setups. The dual-lamp configuration allows targeted heating from multiple angles simultaneously. Carbon fiber heating elements operate cleanly without emissions, aligning with environmental concerns. The swing-up-down adjustment provides basic positioning control. As a hardwired system, it eliminates plug-related failures and supports continuous operation.
Value for Money: At $57, this is by far the cheapest 2000W solution available—less than one-third the cost of budget competitors. However, the value equation changes when factoring installation costs and lack of mobility. For permanent booths, it’s unbeatable. For mobile technicians, it’s unsuitable. The absence of a timer and plug requires additional investment in controls and wiring, partially offsetting initial savings.
Strengths and Weaknesses: Strengths include rock-bottom pricing, clean far-infrared heating, dual-lamp flexibility, and suitability for fixed installations. The carbon fiber elements provide consistent output. Weaknesses are substantial: no plug, no timer, no mobility, limited documentation, and basic construction. Requires electrical expertise to install safely. Not suitable for spot repairs or field work.
Bottom Line: Only purchase for permanent spray booth installations where mobility isn’t required. The rock-bottom price demands significant compromises, making it unsuitable for professional mobile use or users wanting out-of-box convenience.
6. DATOUBOSS Infrared Paint Curing Lamp 2000W Paint Curing Lamp Heater Paint Dryer Lamp for Car Body Repair Paint Curing Systems 110V (DT-004)

Overview: The DATOUBOSS 2000W Infrared Paint Curing Lamp delivers serious power for automotive refinishing in a handheld format. This professional-grade tool cures paint across a generous 800x600mm area with temperatures reaching 230°C, making it suitable for comprehensive panel work. The shortwave infrared technology ensures deep penetration for glossy, durable finishes from the inside out.
What Makes It Stand Out: The dual-switch control system sets this unit apart, allowing independent operation of each tube plus an intuitive touch-sensitive handle switch that lights when pressed and releases to turn off. The locking mechanism enables continuous operation without hand fatigue. Its aluminum alloy construction with mesh front and perforated back panel provides exceptional heat dissipation, extending component lifespan significantly.
Value for Money: At $85.89, this lamp occupies a sweet spot between budget handhelds and premium stand-mounted units. The 2000W output rivals commercial equipment costing twice as much, while the robust build quality ensures longevity. For small body shops and dedicated DIY enthusiasts, it eliminates costly rework through superior curing performance.
Strengths and Weaknesses: Strengths include powerful dual-tube output, large curing footprint, intelligent switch design, excellent thermal management, and versatile application for filler, primer, and basecoat curing. Weaknesses involve the lack of a built-in timer requiring manual monitoring, and handheld design may cause fatigue during extended use on large panels.
Bottom Line: This DATOUBOSS lamp offers professional-grade curing capability at an accessible price point. It’s ideal for spot repairs, panel work, and mobile technicians who need powerful performance without stand-mounted bulk.
7. Solary Shortwave Infrared Paint Curing Lamp - 1600W 110V Paint Baking Lamp with Timer for Automotive Spray Booth, Temperature & Height Adjustable

Overview: The Solary 1600W Shortwave Infrared Paint Curing Lamp represents a professional-grade solution for precision automotive refinishing. This floor-standing unit combines mobility with sophisticated control features, delivering consistent results across its 60x80cm curing area. Operating at 110V, it reaches optimal working temperatures of 60-70°C while maintaining energy efficiency through advanced shortwave technology.
What Makes It Stand Out: Integrated timer functionality and full height adjustability distinguish this model from basic curing lamps. The 304 stainless steel lamp shade resists oxidation while concentrating infrared energy effectively. Smooth-rolling pulleys enable effortless repositioning around the vehicle, and the rotating lamp head accesses tight spaces that fixed units cannot reach. Temperature control adds another layer of precision for delicate substrates.
Value for Money: Priced at $289.99, this Solary unit targets professional users willing to invest in productivity-enhancing features. While more expensive than handheld alternatives, the stand-mounted design reduces technician fatigue and improves consistency across multiple jobs. The build quality justifies the premium over entry-level stands.
Strengths and Weaknesses: Strengths include excellent mobility, timer integration, height/rotation adjustability, premium stainless steel construction, and precise temperature control. The 1600W output is adequate for most repairs, though some competitors offer higher wattage. The price may exceed hobbyist budgets.
Bottom Line: Perfect for busy auto body shops requiring mobility and precision. The Solary 1600W delivers professional results with features that streamline workflow and ensure consistent curing quality.
8. Solary Infrared Paint Curing Lamp - Short Wave Infrared Dryer with Timer for Car Paint Spray Booth, 2100W

Overview: The Solary 2100W Infrared Paint Curing Lamp brings substantial power to professional refinishing environments. This robust floor-standing unit features a programmable 1-30 minute timer that automatically shuts off, preventing overbaking and protecting sensitive substrates. The shortwave infrared system penetrates deeply for superior gloss and adhesion while minimizing rework.
What Makes It Stand Out: Exceptional safety features define this model, utilizing high-quality halogen lamps that produce minimal visible light and glare without generating hot air currents that can introduce contaminants. The automatic timer with zero-shutoff provides peace of mind during busy shop operations. Individual light head controls, adjustable height, and 360-degree rotation offer unparalleled versatility in confined engine bays or interior spaces.
Value for Money: At $279.99, this 2100W unit delivers impressive power-to-price ratio, undercutting many competitors while offering superior wattage. The timer and safety features add significant value, reducing the risk of costly paint damage from overheating. For high-volume shops, the efficiency gains quickly offset the investment.
Strengths and Weaknesses: Strengths include high power output, intelligent timer, excellent safety profile, smooth mobility, and flexible positioning. The 2100W capacity handles large areas efficiently. Weaknesses may include substantial power consumption and potential overkill for minor touch-up work. The unit requires dedicated 110V circuit consideration.
Bottom Line: An outstanding choice for professional technicians prioritizing safety and power. The Solary 2100W combines high-performance curing with smart features that protect both the finish and the operator.
9. DATOUBOSS Handheld Infrared Paint Curing Lamp 1000w Shortwave Infrared Paint Lamp Paint Baking Dryer Car Body Repair Tool (110V)
Overview: The DATOUBOSS 1000W Handheld Infrared Paint Curing Lamp offers an accessible entry point into professional-quality paint curing technology. This compact, lightweight unit focuses infrared energy into a 300x150mm area, making it ideal for precise spot repairs, touch-ups, and specialized applications like vinyl car wrap conforming. Operating at 60-80°C, it provides controlled heating for delicate work.
What Makes It Stand Out: Remarkable versatility distinguishes this model, particularly its effectiveness for vinyl wrap baking—a niche application where controlled, localized heat prevents material damage while achieving perfect adhesion. The aluminum alloy construction with mesh front and perforated back ensures rapid heat dissipation despite its compact size. The ergonomic handheld design allows direct operator control over distance and angle.
Value for Money: Priced at just $66.49, this represents exceptional value for DIY enthusiasts and mobile detailers. While less powerful than shop-grade equipment, it performs admirably for its intended scope. The cost-to-capability ratio makes professional-grade infrared curing accessible to hobbyists without compromising essential performance.
Strengths and Weaknesses: Strengths include extreme portability, affordability, vinyl wrap compatibility, excellent heat management, and straightforward operation. Weaknesses involve limited curing area, lower wattage extending drying times, absence of timer functionality, and handheld fatigue during prolonged use. Not suitable for large panel work.
Bottom Line: Perfect for beginners, mobile technicians, and vinyl wrap specialists. The DATOUBOSS 1000W delivers targeted performance where it matters most, offering professional results on a budget for small-scale applications.
10. Paint Curing Baking Lamp, 1050W 110V Short Wave Infrared Paint Drying Lamp for Car Body Repair, Equipped with Smart Timer and Height Adjustable

Overview: This 1050W Paint Curing Baking Lamp bridges the gap between handheld units and professional stand systems. Featuring a smart timer adjustable from 1-30 minutes and lockable wheels for stable positioning, it offers sophisticated control in a mobile package. The shortwave infrared technology ensures rapid paint drying with excellent penetration for durable, glossy finishes.
What Makes It Stand Out: The combination of timer functionality and lockable casters provides both automation and stability—critical features often missing in this price tier. The 304 stainless steel lamp shade delivers professional-grade energy concentration and oxidation resistance. Die-cast aluminum radiator components ensure consistent cooling, extending bulb and component lifespan significantly. Height and lamp head adjustments accommodate various vehicle contours.
Value for Money: At $179.89, this unit delivers exceptional value by integrating premium features typically found in $250+ equipment. The timer alone justifies the upgrade from basic models, while the lockable wheels add safety and precision. For small body shops and serious DIYers, it eliminates the need for immediate professional-grade investment.
Strengths and Weaknesses: Strengths include intelligent timer, mobility with stability locks, premium materials, safe operation with low glare, and versatile positioning. The 1050W output handles most repairs efficiently. Weaknesses include moderate power compared to 2000W+ units, and assembly required. The stand design lacks the compact storage of handhelds.
Bottom Line: An excellent mid-range choice offering professional conveniences without premium pricing. Ideal for garage shops and entry-level professionals seeking reliable, feature-rich curing capability.
Understanding Undercoating and the Curing Process
Before investing in equipment, it’s crucial to understand what’s happening at a chemical level when you cure undercoating. Modern automotive undercoatings are sophisticated polymer-based compounds that require specific temperature ranges to cross-link properly and achieve their full protective properties.
Why Heat Curing Matters for Undercoating Longevity
Heat curing accelerates the molecular bonding process within the coating material. Without adequate heat, undercoating may skin over on the surface while remaining soft underneath, creating a false sense of completion. This incomplete cure leaves your vehicle vulnerable to washout, peeling, and premature failure when exposed to road spray and mechanical stress. Properly cured undercoating forms a cohesive, flexible barrier that won’t crack in cold weather or soften in summer heat.
The Science Behind Undercoating Materials and Temperature
Different undercoating formulations—whether rubberized, asphalt-based, or wax-infused—have distinct activation temperatures. Most products require sustained surface temperatures between 120°F and 180°F to cure completely. Below this range, the curing process slows dramatically, extending from hours to days. Above it, you risk boiling off essential plasticizers or causing the coating to become brittle. Quality heat lamps give you precise control over this critical temperature window.
Key Benefits of Using Heat Lamps for Undercoating
Investing in a dedicated heat curing system delivers advantages that extend far beyond simple time savings. The controlled application of infrared energy transforms your entire undercoating workflow.
Accelerated Curing Times
What traditionally took 24-48 hours of air drying can be reduced to 30-90 minutes with proper heat lamp curing. This means you can complete a full undercoating job—including multiple coats—in a single afternoon rather than spreading the project across an entire weekend. For professionals, this efficiency translates directly into increased shop throughput and profitability.
Enhanced Adhesion and Performance
Heat energy opens the pores of the factory undercoating and metal substrate, allowing new material to penetrate and create a mechanical bond rather than just sitting on the surface. This fusion creates a monolithic layer that won’t delaminate when rocks chip away at the surface. The result is a protective barrier that actually becomes stronger over the first few weeks as the polymer chains continue cross-linking.
Year-Round Application Capability
Gone are the days of waiting for that perfect 70°F day in spring to undercoat your vehicle. With heat lamps, you can apply and cure undercoating in your garage during the dead of winter when rust protection is most critical. This capability ensures you’re never caught off-guard by early snowstorms or salt trucks, and you can tackle restoration projects on your schedule, not Mother Nature’s.
Types of Heat Lamps Suitable for Undercoating Curing
Not all heat sources are created equal when it comes to curing automotive coatings. Understanding the different technologies helps you match equipment to your specific needs and budget.
Infrared Heat Lamps: The Professional Standard
Infrared (IR) lamps emit electromagnetic waves that penetrate the coating and heat the substrate directly, curing from the inside out. This method prevents surface skinning and ensures even through-cure. Short-wave IR lamps reach operating temperature within seconds and provide intense, focused heat ideal for spot curing or smaller vehicles. Medium-wave units offer gentler, more diffuse heating perfect for large surface areas and temperature-sensitive components.
Quartz Halogen Lamps: High-Intensity Options
These lamps combine the benefits of infrared radiation with intense visible light, generating extremely high surface temperatures. They’re particularly effective for curing thick, rubberized undercoatings that require substantial heat energy. However, their intense output demands careful positioning to avoid overheating nearby fuel lines, brake hoses, or wiring harnesses. Quartz halogen systems often feature multiple bulbs that can be switched independently for zone control.
Ceramic Emitter Lamps: Even Heat Distribution
Ceramic emitters produce consistent, uniform heat across their entire surface, eliminating hot spots that can cause coating inconsistencies. While they take longer to reach full operating temperature, their steady output makes them ideal for beginners who want forgiving equipment. The diffuse heat pattern works exceptionally well for curing undercoating on complex undercarriage geometries where precise temperature control is paramount.
Portable vs. Fixed Systems: Which Fits Your Needs?
Portable heat lamp stands with casters offer flexibility to move around the vehicle and target specific areas, making them perfect for DIY enthusiasts working in multi-use garage spaces. Fixed overhead systems, common in professional shops, provide hands-free operation and consistent coverage but require dedicated bay space and permanent installation. Your choice depends on workshop layout, how frequently you undercoat vehicles, and whether you need the equipment for other tasks like paint curing or dent repair.
Critical Features to Evaluate When Choosing a Heat Lamp
Selecting the right heat lamp involves more than just picking the highest wattage unit you can afford. Focus on these key attributes to ensure your investment delivers professional results.
Wattage and Power Output Considerations
Effective undercoating curing typically requires 1,000 to 3,000 watts per lamp, depending on coverage area. A single 1,500-watt unit suffices for compact cars and spot work, while trucks and SUVs benefit from dual 2,000-watt setups. Remember that higher wattage demands dedicated 20-amp or 30-amp circuits—standard 15-amp garage outlets will trip breakers under continuous high-load operation.
Heat Output and Temperature Range
Look for lamps with adjustable output ranging from 500°F to 1,200°F at the emitter surface. This range gives you the versatility to cure everything from thin wax-based rust inhibitors to heavy-duty truck bed liner materials. Variable controls, preferably with digital displays, allow precise temperature management rather than simple high-medium-low switches that leave you guessing.
Coverage Area and Beam Pattern
The effective heating area varies dramatically between models. Narrow beam patterns (30-45 degrees) concentrate heat for fast spot curing but require frequent repositioning. Wide patterns (90-120 degrees) cover entire undercarriage sections but need higher mounting positions to avoid overheating. Consider your typical project scope—restoring a classic car frame demands different coverage than annually treating a daily driver.
Adjustability and Positioning Flexibility
Professional-grade lamps feature telescoping stands, multi-axis swivel heads, and counterbalanced arms that maintain position without drifting. These adjustments matter immensely when you’re trying to maintain a consistent 18-inch distance from an irregular surface like a rear differential or frame rail. Cheap clamp-on lights may seem economical but become frustrating when they constantly slip and require readjustment.
Build Quality and Durability for Workshop Environments
Your heat lamp will face dust, chemical overspray, and occasional impacts from tools and vehicle components. Heavy-gauge steel housings, powder-coated finishes, and protective grilles over emitters separate professional equipment from hobbyist gear. Look for IP-rated enclosures that resist moisture intrusion from condensation or accidental fluid spills—electrical shorts in high-heat equipment create serious fire hazards.
Safety Features and Certifications
Essential safety features include automatic shutoff timers, tilt-switches that cut power if the unit falls over, and thermal overload protection. UL or ETL certification indicates the unit has been tested for electrical safety. Some advanced models include infrared thermometers with automatic feedback loops that modulate power output to maintain target surface temperatures, preventing accidental overheating of critical components.
Proper Setup and Positioning Techniques
Even the best heat lamp produces poor results with improper positioning. Master these setup fundamentals to achieve consistent, professional-quality cures every time.
Optimal Distance from Vehicle Surface
The sweet spot typically ranges from 12 to 24 inches from the coating surface. Closer than 12 inches creates intense hot spots that can bubble or burn the undercoating. Beyond 24 inches, heat dispersion reduces efficiency, extending cure times unnecessarily. Use a simple infrared thermometer to verify you’re maintaining 150°F to 170°F at the coating surface, adjusting distance in 2-inch increments until you hit the target range.
Angling for Even Coverage
Undercarriage surfaces are rarely flat. Angle your lamp to match the surface plane rather than pointing directly upward from the floor. For frame rails, position the lamp at a 30-degree angle to heat both the vertical side and horizontal bottom simultaneously. When curing inside wheel wells, angle the beam to reflect off the inner fender, using indirect heat to prevent direct blast on sensitive ABS sensors or brake lines.
Multiple Lamp Configurations
For full undercarriage curing, position two lamps at opposite corners of the vehicle, overlapping their beams in the center. This setup eliminates shadowed areas under crossmembers and differential housings. Use three lamps in a triangular arrangement for trucks with long wheelbases, placing one at each front corner and one centered at the rear. Always cure in sections, moving systematically from front to rear rather than trying to heat the entire undercarriage at once.
Safety Protocols and Best Practices
Heat lamps operate at temperatures that can ignite materials and cause severe burns. Implement these non-negotiable safety measures before plugging in your equipment.
Fire Hazard Prevention
Clear a 5-foot radius around your work area of all flammable materials—including cardboard, rags, wood shavings, and aerosol cans. Never leave operating heat lamps unattended, even for “just a minute.” Keep a Class B fire extinguisher (for flammable liquids) within arm’s reach, and ensure your workspace has functional smoke detectors. The combination of petroleum-based undercoating and high heat creates a genuine fire risk that demands constant vigilance.
Electrical Safety in Automotive Workshops
Garage electrical systems often lack proper grounding or GFCI protection. Have a qualified electrician install a dedicated 240V circuit with ground fault interruption for high-wattage curing equipment. Inspect power cords before each use—cracked insulation or exposed wires create shock and fire hazards. Never use extension cords rated below the lamp’s amperage draw; voltage drop causes overheating and premature failure.
Protecting Sensitive Vehicle Components
Fuel lines, brake hoses, wiring harnesses, and plastic underbody panels can’t tolerate the same temperatures as undercoating. Shield these components with aluminum foil or heat-resistant blankets during curing. Pay special attention to rubber bushings and CV joint boots—these can dry out and crack if overheated, leading to costly repairs. A laser thermometer helps you monitor adjacent component temperatures, keeping them below 200°F.
Common Mistakes to Avoid When Curing Undercoating
Learning from others’ errors saves you time, money, and potential vehicle damage. Watch out for these frequent pitfalls that compromise undercoating performance.
Overheating and Coating Damage
The most common mistake is rushing the process with excessive heat. This causes the coating’s surface to cure instantly, trapping solvents underneath that later outgas and create bubbles or pinholes. These defects become entry points for moisture, defeating the purpose of undercoating. Follow manufacturer temperature recommendations precisely—more heat is not better when it comes to polymer curing.
Inadequate Curing Times
Pulling the lamps away too soon leaves the coating soft and vulnerable. Even when the surface feels dry to the touch, the underlying layers may need another 20-30 minutes of sustained heat to fully cross-link. Perform a simple thumb test: press firmly on an inconspicuous area. Properly cured undercoating won’t leave an indentation and feels firm, not tacky. When in doubt, add 15 minutes of cure time—it’s far better than redoing the entire job in six months.
Poor Ventilation Issues
Curing undercoating releases volatile organic compounds (VOCs) that accumulate quickly in enclosed garages. Without adequate ventilation, these fumes create health hazards and can condense on cold surfaces, leaving a sticky residue. Use exhaust fans to maintain airflow, positioning them to pull fumes away from the work area. Never cure undercoating in a garage attached to living spaces without positive pressure ventilation preventing vapor migration.
Maintenance and Care for Your Heat Lamp Investment
Professional-grade heat lamps represent a significant investment that pays dividends when properly maintained. Establish these care routines to maximize equipment lifespan.
Cleaning and Storage Recommendations
After each use, wipe down the lamp housing with a dry cloth to remove dust and overspray. Never use liquid cleaners on hot emitters—thermal shock can crack quartz tubes. For stubborn buildup, wait until the unit cools completely, then use isopropyl alcohol on a microfiber cloth. Store lamps in their original packaging or cover them with breathable cloth bags to prevent dust accumulation. Keep them in climate-controlled spaces; extreme cold makes metal components brittle and can crack ceramic insulators.
Bulb Replacement and Lifespan Management
Quartz halogen bulbs typically last 5,000 hours but degrade gradually, losing intensity long before they fail completely. Replace bulbs annually if you use the lamp frequently, or when you notice cure times increasing by more than 20%. Always replace all bulbs in multi-lamp units simultaneously—mixing old and new bulbs creates uneven heating patterns. Handle new bulbs with clean cotton gloves; skin oils create hot spots that drastically reduce lifespan. Keep spare bulbs in stock; they have a habit of failing when you’re halfway through a critical job.
Cost Considerations and Value Analysis
Heat lamp systems range from budget-friendly portable units to professional fixed installations. Understanding the true cost of ownership helps you make a smart investment decision.
Initial Investment vs. Professional Services
A quality dual-lamp portable system runs $400-$800, while professional undercoating services charge $150-$300 per vehicle. If you undercoat just two vehicles, your equipment pays for itself. Factor in the convenience of working on your schedule and the ability to touch up specific areas as needed. For restoration shops, the math is even more compelling—a single $1,500 fixed system can cure 200+ vehicles annually, saving tens of thousands in outsourced labor costs.
Long-Term ROI for DIY Enthusiasts
Beyond direct cost savings, consider the value of protecting your investment. A properly cured undercoating adds years to a vehicle’s structural integrity, preserving resale value and preventing costly rust repairs. For collectors, maintaining an original body shell is priceless. The ability to reapply undercoating annually in just a few hours means you’ll actually do the maintenance, rather than procrastinating due to time constraints or weather concerns.
Frequently Asked Questions
How long should I cure undercoating with a heat lamp?
Most undercoatings require 30-90 minutes of sustained heat at 150-170°F surface temperature. Apply heat in 20-minute intervals, checking progress with a thermometer. Thicker applications and rubberized products need the longer end of this range, while thin wax-based coatings cure more quickly. Always verify the specific product’s technical data sheet for manufacturer recommendations.
Can I use a regular space heater instead of a dedicated heat lamp?
Standard space heaters are ineffective and dangerous for this purpose. They heat air rather than emitting infrared radiation, making them inefficient at warming the undercarriage surface. Their open elements also pose severe fire hazards around flammable undercoating materials. Dedicated infrared heat lamps are specifically designed for curing coatings and include necessary safety features.
What temperature should the undercoating surface reach during curing?
Target 150-170°F for most petroleum-based undercoatings. Rubberized products may require 180-200°F for full cure, while wax-based rust inhibitors cure effectively at 120-140°F. Use an infrared thermometer to measure surface temperature, not air temperature. Never exceed 200°F on adjacent components like fuel lines or bushings.
How far should I position the heat lamp from the vehicle?
Start with the lamp 18 inches from the surface and adjust based on temperature readings. Closer positioning increases intensity but risks hot spots; farther positioning provides gentler, more uniform heating. The optimal distance varies by lamp wattage and beam pattern—always verify with a thermometer rather than guessing.
Is it safe to cure undercoating on a vehicle with a full gas tank?
Yes, if you follow proper safety protocols. The fuel tank itself is designed to handle underhood temperatures far exceeding what your heat lamp produces. The risk comes from heating fuel lines and vapor recovery systems. Shield these components with aluminum foil and monitor their temperatures to keep them below 200°F. Work in a well-ventilated area and never place lamps directly above the fuel tank.
Can I cure undercoating in cold weather?
Absolutely—this is one of the primary advantages of heat lamps. You can effectively cure undercoating in a garage at 40°F ambient temperature. The infrared energy heats the substrate directly, ignoring cold air. However, extremely cold concrete floors can act as heat sinks, so consider insulating the floor beneath the vehicle with rigid foam boards for projects in unheated spaces.
How do I know when the undercoating is fully cured?
Perform the thumb test on an inconspicuous area. Press firmly with your thumb for five seconds. Properly cured undercoating feels firm, doesn’t deform, and leaves no residue on your skin. The surface should have a uniform matte appearance without tackiness. If you can dent it or it feels gummy, continue curing for another 20-30 minutes.
What’s the difference between short-wave and medium-wave infrared for undercoating?
Short-wave infrared penetrates deeper and heats faster, making it ideal for thick coatings and large metal mass components like frame rails. Medium-wave provides gentler, more surface-oriented heating that’s forgiving on sensitive adjacent parts. For most DIY undercoating work, medium-wave offers the best balance of efficiency and safety.
Can heat lamps damage my vehicle’s paint or plastic components?
Yes, if misused. Direct exposure can bubble paint on body panels and warp plastic trim. Always mask off areas above the undercoating line with aluminum foil. Position lamps to direct heat upward at the undercarriage, not outward toward the body. Check adjacent painted surfaces periodically with a thermometer, keeping them below 140°F.
How many heat lamps do I need for effective undercoating cure?
One 1,500-watt lamp suffices for compact cars and spot repairs. Mid-size sedans and crossovers benefit from two lamps positioned at opposite corners. Full-size trucks and SUVs require three lamps for complete coverage. The goal is overlapping heat patterns that eliminate cold spots where curing would be incomplete. It’s better to cure in sections with one properly positioned lamp than to rush with inadequate coverage.