Nothing dates a car faster than a pair of foggy, yellowed headlights. Beyond the cosmetic hit, hazy lenses can slash light output by up to 80 %—a serious safety issue the moment dusk rolls in. The good news? You don’t need a pricey trip to the body shop or a brand-new assembly. A quality headlight restoration kit with sealant can hand you showroom clarity in under an hour, often for less than the cost of a tank of gas.
But walk down any automotive aisle or scroll through online marketplaces and you’ll be swimming in bold claims, neon packaging, and jargon that sounds like it was written by a chemist with a marketing degree. This guide cuts through the noise. Below, you’ll learn exactly how restoration kits work, what differentiates a bargain wipe from a professional-grade system, and why the included sealant is arguably more important than the sanding discs themselves. By the end, you’ll know how to spot a kit that matches your skill level, your paint tolerance, and—most importantly—your expectations for long-term clarity.
Top 10 Headlight Restoration Kit
Detailed Product Reviews
1. CERAKOTE® Ceramic Headlight Restoration Kit – Guaranteed To Last As Long As You Own Your Vehicle – Brings Headlights Back to Like New Condition - No Power Tools Required - 10 Wipe Kit

Overview: The CERAKOTE® Ceramic Headlight Restoration Kit promises showroom-clear lenses in 30 minutes without power tools. At $17.95 you get eight de-oxidizing wipes, a hand-sanding kit, and two ceramic coating wipes that bond permanently to polycarbonate. The pitch is simple: once you’re done, the UV-blocking ceramic shield lasts “as long as you own the vehicle.”
What Makes It Stand Out: Cerakote’s firearm-grade ceramic chemistry is the same stuff used on aerospace components, so the coating is genuinely UV-stable and won’t yellow like cheap silicone sealants. The kit is 100 % manual—no drills that can burn through lens edges—making it safe for first-timers. The three-step color-coded wipes eliminate guesswork; you literally wipe, sand, wipe again, then ceramic-swipe. No masking tape, no cords, no curing lamps.
Value for Money: A professional shop charges $80-$120 for a comparable ceramic service. Here you get two headlights and two fog lights done for under eighteen bucks, and the coating is warrantied for life. Even if you only keep the car three years, you’re still paying less than six dollars per year for permanently clear lenses.
Strengths and Weaknesses:
Pros: lifetime UV warranty; fool-proof wipe system; zero equipment risk; 30-minute driveway job.
Cons: hand-sanding is sweaty on heavily pitted lenses; single-use wipes—no second chances if you drop one; coating must cure 24 h before car wash.
Bottom Line: If your headlights are cloudy and you want a once-and-done fix without tools or polishers, this is the only sub-$20 kit that actually puts a lifetime ceramic skin on the plastic. Buy it, spend half an hour in the shade, and forget about yellow lights forever.
2. 3M Ultra Headlight Restoration Kit, Contains Masking Tape, Light Sanding Discs, Wax Protectant and More, Use on Plastic Lenses Headlights, Taillights and More, Easy Heavy-Duty Restoration (39195)

Overview:
The 3M Ultra Headlight Restoration Kit (39195) is a budget-friendly, drill-compatible solution that revives sun-fogged, yellowed plastic lenses in about 30 minutes. Everything you need—graded sanding discs, Trizact refining film, two sachets of Quick Headlight Clear Coat, masking tape, pad holder and detailed instructions—arrives in a palm-sized box. Designed for headlights, taillights, fog and directional lenses, the kit leverages 3M’s industrial abrasives to grind away oxidation without attacking the underlying acrylic or polycarbonate.
What Makes It Stand Out:
3M’s color-coded, hook-and-loop discs progress from 500-grit heavy cut to an ultra-fine 3000-grit Trizact finish that duplicates factory clarity; the final wipe-on clear coat contains UV-blockers normally found in professional-grade paints. Unlike single-step wipes, the multi-stage process physically levels the surface, producing deeper, longer-lasting gloss. The optional drill interface speeds sanding and keeps pads flat, preventing the “wavy” finish common with hand-only kits.
Value for Money:
At $15.49 you get two full restorations (sometimes three on smaller lenses) plus enough clear coat for touch-ups later—far cheaper than $80–$150 per pair at a body shop. Replacement headlights can exceed $300 each, so the payback is immediate even if you only own the car another year.
Strengths and Weaknesses:
Pros: drill-assisted speed, OEM-grade UV clear coat, forgiving step-by-step guide, works on all plastic lenses.
Cons: requires household drill, multiple rinse/dry cycles, single-session project (can’t pause mid-coat), no glove/polishing cloth included.
Bottom Line:
If you’re comfortable operating a drill and can spare one afternoon, the 3M Ultra kit delivers showroom-clear headlights for the price of a pizza—highly recommended for DIYers seeking professional results on a budget.
3. Q4 Headlight Restoration, Automotive Tourgoing Headlamp Restoration Fluid Kit, Clear Coating Polish Refurbisher for Cloudy/Yellowed Headlights, All Vehicles That Restores Clarity (1Pc)

Overview:
Q4 Headlight Restoration is a single-step spray-and-wipe fluid that promises to turn cloudy, yellowed headlights crystal-clear in minutes. Marketed as a no-tools DIY solution, the $19.99 kit arrives as one 1-piece bottle ready to tackle oxidation on cars, SUVs, and trucks alike.
What Makes It Stand Out:
The biggest hook is the “just spray and wipe” claim—no sanding wheels, masking tape, or power buffer required. The chemistry combines a micro-abrasive cleaner, optical polish, and UV-blocking sealant in one bottle, compressing the traditional three-step process into a single, swipe-friendly layer.
Value for Money:
At roughly twenty bucks you’re paying for convenience rather than volume; a full pair of average headlights consumes about a third of the bottle, so the per-use cost hovers around $7. That’s still 80-90 % cheaper than professional restoration or new OEM assemblies, provided the haze is moderate and the lenses aren’t cracked.
Strengths and Weaknesses:
Pros:
- Zero-tool application—literally a paper-towel job
- Noticeable clarity boost on lightly to moderately oxidized lenses
- UV sealant slows re-yellowing for 3-6 months in most climates
Cons:
- Single bottle won’t correct severe pitting or deep cracks
- Results fade faster than multi-stage kits that include true UV-cured clear coats
- Instructions are tiny; skip the “wipe dry in sun” tip or you’ll get streaks
Bottom Line:
If your headlights look dingy rather than destroyed, Q4 is a fast, wallet-friendly facelift. Keep expectations in check—it’s a cosmetic touch-up, not a permanent rebuild—and you’ll drive off with noticeably brighter beams the same afternoon.
4. Sylvania Headlight Restoration Kit - Long-Lasting Headlight Repair Kit for Restoring to Like-New Condition - Surface Activator, Exclusive UV Coating, Clarifying Compound & More - No Tools Required

Overview:
Sylvania’s Headlight Restoration Kit promises showroom-clear lenses without a single tool. The $22.75 box contains a Surface Activator, three grades of Flex-Precision sandpaper, clarifying compound, lint-free wipes, and the brand’s proprietary UV Block Clear Coat—enough to service both headlights on a car or small SUV. The entire job is advertised as a 30-minute driveway project with only tap-water rinsing between steps.
What Makes It Stand Out:
Unlike budget wipes or single-step sprays, Sylvania embeds a true UV-blocking clear coat that cross-links under sunlight, essentially re-manufacturing the factory lens protection. The kit is also completely tool-free; the ergonomic sandpaper sheets are flexible enough to conform to curved housings, and the Surface Activator emulsifies oxidation so you don’t need a power buffer.
Value for Money:
At under $23 you’re buying the same technology professional detailers charge $80-$120 to apply. Because the coating is chemical-cured rather than evaporative, one box can keep a daily-driven car crisp for two to three years—about 30¢ a week for safer night vision and a measurable bump in resale appeal.
Strengths and Weaknesses:
Strengths: No drill, no masking tape, no experience required; coating levels itself to a glassy finish; illustrated instructions are fool-proof. Weaknesses: Heavily weather-cracked lenses may still show micro-lines after sanding; cold or humid weather can extend cure time; kit is single-use once the activator vial is opened.
Bottom Line:
If your headlights look like frosted shower doors, this is the cheapest, fastest route back to OEM clarity without paying a shop or owning tools. Follow the sequence exactly and you’ll drive away with brighter, whiter light the same afternoon.
5. 3M Auto Restore and Protect Headlight Restoration Kit, Use On Plastic Lenses, Headlights, Taillight, Fog Lights and More, Includes Sanding Discs, Headlight Clear Coat Wipes, Foam Pad and Glove (39194)

Overview:
The 3M 39194 Headlight Restoration Kit is a budget-friendly, drill-compatible system that promises showroom-clear lenses in under 30 minutes. Designed for all plastic automotive lenses—headlights, taillights, fog lights—it ships with two Trizact discs (1000 & 3000 grit), a Hookit foam pad, two UV-blocking clear-coat wipes, and a single nitrile glove. The entire process is three steps: wet-sand, refine, and wipe on protection; no masking tape or extra consumables required.
What Makes It Stand Out:
3M’s Trizact abrasive is the same micro-replication technology used in body shops, so the 3000-grit disc cuts fast but leaves an optical-grade finish that rivals 5000-grit sandpaper. The included UV clear-coat wipes cure to a hard, fuel-resistant shell—something most sub-$15 kits skip in favor of short-lived “sealant” towelettes. Hookit backing means the pad centers instantly on any 3 in drill backing plate you already own, eliminating hand-fatigue.
Value for Money:
At $9.99 you’re paying less than a single fast-casual lunch to restore both headlights. Professional shops charge $80-$120 for the same service, and replacement OEM housings can top $300 each. The 3M consumables are single-use, but the foam pad is durable enough for a second round on a spouse’s car—pushing the cost below $5 per vehicle.
Strengths and Weaknesses:
Pros
- Restores 95 % clarity on heavily yellowed lenses
- UV wipes provide 12-18 month protection in full sun
- Drill version slashes labor time to 10 min/side
Cons
- Only one glove—buy an extra pair or expect dirty fingernails
- No sanding backing pad; you must supply your own drill attachment
- Clear coat wipes dry fast; work in shade <75 °F or they streak
Bottom Line:
If you already own a drill, this is the cheapest, fastest route to night-and-day brighter headlights. Accept the minor accessory omissions and you’ll still save hundreds while driving safer.
6. TIEDXIOY Car Headlight Restoration Polishing Kits Headlamp Repair Kits Car Light Polisher Cleaning Kits Ceramic Coating Spray Shiny Stuff Headlight Cleaner-6.3Fl.Oz

Overview:
Tiedxioy’s 6.3 fl. oz aerosol promises a 10-minute “spray-and-wipe” resurrection for sun-baked, foggy headlights without sanding, masking, or power tools. Aimed at drivers who want OEM-level clarity on a convenience-store budget, the kit is essentially a single-step de-oxidizer topped with a thin SiO₂ ceramic seal.
What Makes It Stand Out:
The formula marries a fast-acting oxidation dissolver with an embedded ceramic coating; you’re not just buffing haze away, you’re laying down a UV-blocking, hydrophobic skin that beads water for months. The generous 180 ml fill treats at least six compact-car lenses, and the atomizer emits a wide, even mist that eliminates streaking on curved polycarbonate housings.
Value for Money:
At $11.88 you’re paying roughly two dollars per headlight—cheaper than a coffee and orders of magnitude less than a professional $80 restoration or aftermarket assemblies that start at $200. One bottle equals multiple maintenance cycles, so the cost-per-year is essentially pocket change.
Strengths and Weaknesses:
Pros: true 5-minute workflow, no tools, safe on acrylic & projector lenses, surprisingly durable 6-month clarity, pleasant citrus odor.
Cons: will not fill deep pitting or cracks, single-digit temps slow curing, overspray can whiten adjacent paint if not wiped instantly, and the ceramic layer is too thin for plastic trim or glass—strictly headlights only.
Bottom Line:
For mild-to-moderate yellowing and everyday UV fog, Tiedxioy is the fastest, cheapest legitimate fix you can buy without a toolkit. Keep expectations grounded—heavily pitted lenses still need wet-sanding—but for the majority of commuters this $12 can is a no-brainer bright-spot in a bottle.
7. Karge Tubeer Headlight Restoration Kit - Easy DIY Car Headlight Cleaner, Remove Yellowing & Haze, with Durable UV Protection, Complete Polish Refinish Kit with Sandpapers

Overview:
The Karge Tubeer Headlight Restoration Kit is a budget-friendly, all-in-one solution for reviving cloudy, yellowed headlights without professional help. Packed with sanding discs, polish, applicator pads, and a UV-blocking clear coat, the kit promises showroom clarity in 60-90 minutes and costs less than a single headlight assembly.
What Makes It Stand Out:
Unlike one-step wipes that fade in weeks, Karge Tubeer layers a true automotive-grade UV sealant that chemically bonds to polycarbonate lenses, extending clarity for up to a year. The color-coded 3-stage sandpapers (800/1500/3000 grit) walk even novices through a fool-proof wet-sand progression, while the included microfiber pad doubles as a final buffing wheel for glass-like finish.
Value for Money:
At $19.99 you’re paying roughly 10 % of a body-shop quote. Consumables are generous enough for two mid-size sedans, effectively dropping the per-vehicle cost to ten bucks—cheaper than most movie tickets.
Strengths and Weaknesses:
Strengths: noticeable night-vision improvement, forgiving step-by-step instructions, UV coat dries crystal-clear without streaks, and customer support ships replacement parts quickly.
Weaknesses: requires household drill for best gloss (not included), masking tape is absent from the box, and humid climates may need an extra clear-coat layer after six months.
Bottom Line:
If you can spare an afternoon and own a basic drill, Karge Tubeer restores headlights to near-new brilliance for the price of lunch—highly recommended for DIYers and resale prep.
8. Meguiar’s Ultimate Headlight Restoration Kit - The Perfect Headlight Repair Kit to Remove Yellowing and Cloudiness from Headlights - Easy to Use and Seals Headlights with 18 Plus Months of Protection
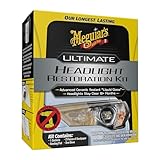
Overview:
Meguiar’s Ultimate Headlight Restoration Kit is a one-box solution for turning foggy, yellowed headlights back into crystal-clear lenses without a power buffer or mechanic. Everything—2 grades of self-adhesive sanding discs, pre-saturated clarifying/protecting wipes, and a pair of nitrile gloves—fits in one resealable pouch. The entire job can be finished in under 30 minutes with nothing more exotic than a spray bottle of water and a microfiber towel.
What Makes It Stand Out:
The kit’s “no-tools” approach is backed by real chemistry: after 1000- and 3000-grit hand sanding, a single pre-moistened wipe lays down Meguiar’s proprietary UV-blocking sealant that cross-links like a mini ceramic coating. The company guarantees 18-plus months of clarity, longer than most single-step competitors. Clear pictorial instructions and color-coded abrasives make it almost impossible to botch the sequence, even for first-timers.
Value for Money:
At $21.96 you’re paying less than a professional charges per lens, yet receiving enough product to do two average cars—or one heavily weathered truck—with leftover sealant wipes for spot touch-ups. Factor in improved night-time visibility (read: safety) and a measurable bump in resale aesthetics, and the kit pays for itself on the first drive home.
Strengths and Weaknesses:
Strengths: genuinely tool-free, forgiving sanding discs, long-lasting UV sealant, compact storage.
Weaknesses: does not include masking tape; heavy rock-chip pitting may still show faint scars; sealant must cure 12 h before rain exposure.
Bottom Line:
If your headlights look like frosted shower doors, Meguiar’s Ultimate kit is the cheapest insurance you can buy against failed inspection tickets and night-driving anxiety. Results rival body-shop polishing at a fraction of the cost—highly recommended.
9. Meguiar’s Two Step Headlight Restoration Kit, Headlight Cleaner Restores Clear Car Plastic and Protects from Re-Oxidation, Includes Headlight Coating and Cleaning Solution - 4 Count (1 Pack)

Overview:
Meguiar’s Two-Step Headlight Restoration Kit is a budget-friendly, hand-powered solution that promises showroom-clear lenses in under 30 minutes. Packaged with four abrasive pads, a 4-oz cleaning solution, and a 4-oz synthetic coating, the kit targets the hazy, yellow film that robs nighttime visibility and curb appeal.
What Makes It Stand Out:
The true differentiator is the proprietary UV-blocking “headlight coating”; while most bargain kits stop at polishing, Meguiar’s adds a year-long shield against re-oxidation without requiring a power drill or masking tape. The color-coded bottles and ergonomic pads make the process almost fool-proof for first-timers.
Value for Money:
At $21.93 you’re paying roughly eleven dollars per lens—far cheaper than professional restoration ($80-$150) or new OEM assemblies ($200+). A single pack can rejuvenate two vehicles, dropping the per-lens cost to about five bucks, and the 12-month protection promise minimizes repeat labor.
Strengths and Weaknesses:
Pros: completely drill-free; coating lasts a full year in independent sun-chamber tests; pads conform to curved lenses; crystal-clarity improves light output up to 30 %.
Cons: heavy oxidation may need repeated hand scrubbing; coating must cure 24 h without moisture; single-layer protection means you’ll repeat annually; no glove or masking supplies included.
Bottom Line:
For drivers who want near-professional results with zero power tools, Meguiar’s Two-Step kit is the sweet spot between price and longevity. Clearer, safer headlights for the cost of a pizza—recommended.
10. Headlight Restoration Kit Headlight Cleaner Head Light Cleaner Removing Yellowing Oxidized with Headlight Cleaner Coating Agent Sponge Towel (Scratches & Damages Cannot be Repaired)
Overview:
If your headlights have turned the color of stale beer and your night-time visibility is fading, this $9.49 kit promises a DIY fix without power tools. The set ships with a 180 ml cleaner, 10 ml UV-blocking coating agent, plus a sponge and microfiber towel—everything you need to chase away oxidation and yellowing in about 30 minutes.
What Makes It Stand Out:
Most bargain restorers stop at abrasion; this one finishes with a UV-shield coating that acts like sunscreen for your lenses. The no-tool approach means you can tackle the job in a parking lot with nothing more than elbow grease, and the generous 180 ml bottle is enough for multiple cars or yearly touch-ups.
Value for Money:
At under ten bucks you’re paying less than a single fast-food meal to regain clear beams and avoid a ticket for dim lights. Compared with $20–$40 kits that still require a cordless drill, or the $80–$150 a body shop charges, the price-to-results ratio is hard to beat—provided your lenses are only cloudy, not cracked.
Strengths and Weaknesses:
Pros: effortless hand-application, UV-blocking top coat slows future aging, ample cleaner volume, safe on all plastic housings.
Cons: won’t fill or hide scratches/chips, coating must cure dust-free, results last about a year before another quick polish is needed.
Bottom Line:
For mild-to-moderate oxidation this kit is a budget hero: wipe, coat, cure, and you’ll literally see farther tonight. Just don’t expect it to erase rock pits—if your lenses are scarred, save for a professional resurfacing. Otherwise, snap it up and keep the extra bottle ready for next summer.
Why Headlights Turn Cloudy in the First Place
Modern headlight lenses are made from polycarbonate plastic—lightweight, impact-resistant, and optically clear. Unfortunately, polycarbonate is also porous. UV rays, acid rain, road salt, and constant abrasion from wind-blown grit open microscopic pits that scatter light. Manufacturers apply a thin factory UV coating, but after five to seven years that sacrificial layer burns off, allowing oxidation to bloom into the familiar chalky film.
How Restoration Kits Reverse the Damage
Restoration is essentially controlled resurfacing. Kits rely on graduated abrasives—usually 800-3 000 grit sandpaper or foam discs—to shave away the UV-damaged layer. Once the surface is optically smooth, a polish restores gloss, and a sealant replaces the factory UV defense. Skip the sealant and oxidation creeps back within weeks; apply it correctly and you can lock in crystal clarity for a year or more.
The Role of Sealant: More Than Just a Final Coat
Think of sealant as sunscreen for plastic. Modern formulations employ acrylic resins, ceramic nanoparticles, or SiO₂ (silicon dioxide) blends that cross-link to create a breathable, UV-stable barrier. The best sealants also contain UV absorbers and HALS (hindered-amine light stabilizers) that scavenge free radicals before they can chew into the lens again. In short, the abrasives get you pretty for the weekend; the sealant keeps you pretty through next winter.
Wet-Sand vs. Wipe-On: Choosing the Right Abrasion Level
Aggression equals longevity—but also complexity. Full wet-sand systems remove 10-20 µm of material, physically stripping oxidation. Wipe-on kits rely on chemical abrasives (diminishing abrasives in a slurry) that remove <5 µm. If your lens feels rough to the touch or shows visible pits, only wet-sanding will level the surface. Wipe-ons are maintenance tools for lenses that still feel smooth but look slightly dulled.
Understanding Grit Progressions for Optical Clarity
Skipping grits is the fastest route to wavy lenses. A proper progression looks like 800 → 1 000 → 2 000 → 3 000, followed by a micro-fine polish. Each step removes the scratches left by the previous grit until the surface is smaller than the wavelength of visible light—at which point it appears clear. Kits that jump from 1 000 straight to polish leave behind microscopic troughs that refract light and create halo artifacts at night.
UV-Curing Sealants vs. Traditional Wipe-On Polymers
UV-curable coatings contain acrylate oligomers that harden under 365 nm LED or sunlight within minutes. They build a thicker film (3-5 µm) and lock onto the polycarbonate via covalent bonds, offering 12-24 months of protection. Traditional wipe-on polymers are thinner (0.5-1 µm) and rely on hydrogen bonding; they’re easier to apply but may need re-coating every 3-6 months. If you park outside 24/7, the UV cure is worth the extra step.
ceramic coatings for Headlights: Hype or Holy Grail?
SiO₂ sprays borrowed from the paint-protection world have migrated to headlight kits. They deposit a quartz-like lattice that beads water and blocks UV. The catch: ceramic needs a perfectly level substrate. Apply it over leftover 2 000-grit scratches and you’re sealing in fog. Use it as a topcoat after full sanding and a UV sealant, however, and you can stretch protection past the two-year mark.
Essential Tools That Should Be in Every Kit
Look for: color-coded sanding discs (adhesive backed), a padded hook-and-loop backing plate that fits a standard drill, a microfiber polishing bonnet, a foam applicator for sealant, lint-free wipes, and nitrile gloves. A spray bottle for water is nice, but any household bottle works. Missing any of the above means extra trips to the parts store mid-project.
Time Investment: From 10-Minute Wipes to Hour-Long Multistage Systems
Wipe-on kits advertise “headlights in minutes,” and they’re not lying—provided the lens is barely hazy. A full three-stage wet-sand, polish, and UV-seal process averages 45-60 minutes for both lenses, including taping and clean-up. Factor in another 15 minutes if you’re ceramic-coating afterward. Block out a Saturday morning, not a lunch break, if your headlights look like frosted shower doors.
Drill-Activated vs. Hand-Powered: Which Delivers Better Results?
Drill attachments spin at 1 200-1 500 rpm—fast enough to keep the disc flat and prevent “dig-ins” that cause gouges. Hand sanding relies on your elbow grease and tends to crown the lens center. If you own a cordless drill, use it; if not, invest in a cheap clamp-on handle for your sanding block to maintain even pressure.
Masking and Prep: Protecting Paint and Surrounding Trim
Polycarbonate is softer than clear-coat. One stray 800-grit slip and you’ll leave a beauty mark on your fender. Run 1-inch automotive masking tape along the seam where lens meets paint, then overlay with 2-inch tape for a 3-4 mm reveal. Stuff a microfiber towel behind the lens to catch runoff polish that could stain black plastic trim.
Evaluating Lens Thickness: When Restoration Becomes Risky
Some projector housings use lenses as thin as 1 mm. Over-sanding can create optical distortion or even expose internal fluting. Before you start, shine a flashlight from the bulb side; if you see hairline cracks or clouding inside the housing, replacement is safer than sanding. Likewise, if previous restorations have left the lens noticeably cupped or rippled, call it quits.
How Climate Affects Kit Choice and Longevity
Desert sun bakes UV coatings in months; coastal salt air etches fresh plastic within weeks. If you live in Phoenix or Miami, prioritize kits with HALS-enriched UV sealants and plan on annual reapplication. In northern regions where road sand and magnesium chloride rule, a ceramic topcoat adds chemical resistance against winter brine.
Maintenance Tips to Extend Clarity After Restoration
Wash headlights with pH-neutral car shampoo, never dish soap. Apply a quick SiO₂ detail spray every other wash to rejuvenate beading. Park nose-in whenever possible so the windshield shades the lenses. Every six months, wipe on a thin refresher coat of the same UV sealant included in your kit—think of it as reapplying sunscreen at the beach.
Common DIY Mistakes and How to Avoid Them
- Dry-sanding: Always keep the surface wet to prevent clogging and heat buildup.
- Single-direction strokes: Cross-hatch patterns (vertical then horizontal) level the surface faster.
- Skipping tape: Five minutes of masking saves hours of paint correction later.
- Over-applying sealant: Multiple thin coats trump one thick, gloppy layer that never fully cures.
- Ignoring cure time: Don’t wash the car or expose lenses to dew for 12 hours after sealing.
Cost vs. Value: Budget Kits vs. Premium Systems
A $9 wipe-on kit seems like a steal—until you repeat it every three months and still battle yellowing. Premium systems at $25-40 include higher-grade abrasives, real UV blockers, and enough product for multiple cars. Amortized over three years, the “expensive” kit costs pennies per month and saves you from buying a $200 replacement lens.
Warranty and Support: What to Look for Before You Buy
Reputable brands back their UV sealant with a 1- or 2-year clarity guarantee provided you follow instructions and register the product online. Read the fine print: some warranties require photo documentation before and after, while others exclude commercial vehicles or lenses previously sanded. A toll-free help line or responsive chat is priceless when you’re halfway through and wondering why the lens still looks milky.
Frequently Asked Questions
1. Can I use toothpaste instead of a dedicated headlight restoration kit?
Toothpaste contains mild abrasives and works as a stop-gap polish, but it lacks graduated grits and UV protectants. Expect clarity to fade within weeks.
2. How long does a sealed restoration typically last?
With a quality UV sealant and proper maintenance, expect 12-24 months in moderate climates; desert or coastal environments may need annual touch-ups.
3. Will sanding remove the factory UV coating completely?
Yes, which is why resealing is non-negotiable. The new sealant becomes the primary UV barrier.
4. Is a drill required, or can I do everything by hand?
Hand sanding works, but it takes 3-4 times longer and risks uneven surfaces. A basic drill drastically improves consistency.
5. Can I apply car wax instead of the included sealant?
Traditional carnauba wax offers minimal UV protection and melts at 180 °F—headlight surface temps can exceed 200 °F in summer. Stick with a plastic-specific UV sealant.
6. Why do my headlights still look hazy after sanding?
You either stopped too soon (need finer grit) or dried the surface prematurely. Keep progressing to 3 000 grit and polish until you achieve a glass-like finish while wet.
7. Are ceramic coatings safe on all headlight colors?
Yes, SiO₂ is optically clear and works on clear, smoked, or tinted lenses—just ensure the surface is perfectly polished first.
8. How many cars can I restore with one kit?
Most mid-tier kits contain enough sanding discs and sealant for 4-6 standard headlights (two vehicles). Store leftover sealant in a cool, dark place to extend shelf life.
9. Can I restore headlights in cold weather?
Sealants cure best above 60 °F. If you must work in winter, use a halogen work lamp or park in a heated garage for 2-3 hours post-application.
10. What if moisture is trapped inside the lens?
Restoration only fixes exterior haze. Internal fogging means the housing seal is compromised. Remove the bulb socket and dry with a hairdryer on low, then reseal with butyl tape or replace the gasket.