That yellowed, cloudy haze on your headlights isn’t just an eyesore—it’s a serious safety hazard that’s quietly diminishing your nighttime visibility by up to 80%. While countless DIY kits promise crystal-clear results, the real difference between a restoration that lasts three months versus three years comes down to one critical component: the sealant. Think of it this way: you wouldn’t paint a car without clear coat protection, yet most enthusiasts focus solely on the sanding and polishing steps, completely overlooking the protective barrier that locks in those results.
The headlight restoration market has evolved dramatically, with modern sealants incorporating ceramic nanoparticles and advanced UV inhibitors that bond molecularly with polycarbonate lenses. But here’s what the marketing doesn’t tell you: not all “long-lasting” sealants are created equal, and the application process matters just as much as the chemistry itself. Whether you’re a weekend warrior or a seasoned detailer, understanding what separates premium sealant technology from bargain-bin promises will save you hours of rework and keep your headlights showroom-clear through brutal winters and scorching summers.
Top 10 Headlight Restoration Kit
Detailed Product Reviews
1. CERAKOTE® Ceramic Headlight Restoration Kit – Guaranteed To Last As Long As You Own Your Vehicle – Brings Headlights Back to Like New Condition - No Power Tools Required - 10 Wipe Kit

Overview: The CERAKOTE Ceramic Headlight Restoration Kit positions itself as a premium, long-term solution for cloudy headlights. This kit promises permanent results through its proprietary ceramic coating technology, eliminating the need for power tools with a straightforward three-step process. Designed for vehicle owners seeking durable protection rather than temporary cosmetic fixes, the kit includes oxidation remover wipes, sanding materials, and ceramic coating wipes.
What Makes It Stand Out: The lifetime ownership guarantee sets this kit apart from competitors. Unlike traditional sealants that degrade within months, Cerakote’s ceramic coating chemically bonds to the headlight surface, providing UV protection that lasts as long as you own the vehicle. The tool-free design reduces risk of paint damage while making it accessible to novices. The three-step process—oxidation removal, sanding, and ceramic coating—can be completed in about 30 minutes.
Value for Money: At $17.95, this kit costs more than basic alternatives but significantly less than professional restoration ($100-200). The permanent protection justifies the premium over $10-15 kits requiring reapplication every 6-12 months. When amortized over vehicle ownership, it offers exceptional value.
Strengths and Weaknesses: Strengths include the durable ceramic finish, straightforward application, and lifetime UV protection guarantee. The no-tool approach prevents accidental damage. Weaknesses include a slightly higher upfront cost and the need for careful application to achieve proper bonding. Results depend heavily on following instructions precisely.
Bottom Line: Ideal for drivers wanting a one-and-done solution without investing in power tools. The Cerakote kit delivers professional-grade, permanent protection that makes it worth the modest premium.
2. 3M Ultra Headlight Restoration Kit, Contains Masking Tape, Light Sanding Discs, Wax Protectant and More, Use on Plastic Lenses Headlights, Taillights and More, Easy Heavy-Duty Restoration (39195)

Overview: The 3M Ultra Headlight Restoration Kit leverages decades of abrasive technology expertise to deliver professional-grade results. This comprehensive kit addresses heavily oxidized headlights with a multi-stage sanding system and includes masking tape, wax protectant, and various grit discs. Designed for flexibility, it works both as a manual kit or with a standard household drill for faster results.
What Makes It Stand Out: 3M’s proprietary abrasive technology removes yellowing without damaging the underlying plastic, a common risk with aggressive sanding. The kit’s versatility stands out—you can achieve excellent results by hand or speed the process with a drill. The inclusion of professional-grade masking tape and wax protectant demonstrates attention to detail often missing in budget kits.
Value for Money: Priced at $14.50, this kit strikes an excellent balance between cost and capability. It’s cheaper than premium ceramic options while offering more comprehensive materials than basic kits. The ability to restore multiple lights and the professional results rival $100+ services.
Strengths and Weaknesses: Strengths include the trusted 3M brand reputation, flexible tool requirements, and complete component set. The progressive sanding system (500 to 3000 grit) ensures clarity. Weaknesses include a more complex, time-consuming process than wipe-based kits, and optimal results really require a drill. The wax protectant may need reapplication sooner than ceramic coatings.
Bottom Line: Perfect for DIY enthusiasts wanting professional results with control over the process. The 3M Ultra kit offers exceptional quality and flexibility at a mid-range price point.
3. Botou 2026 New Headlight Restoration Polish, Automotive Headlight Cleaner Oxidized and Yellowed Head Light Restoring Kit, with Coating Agent, Towel and Sponge (1Set)

Overview: The Botou 2026 Headlight Restoration Kit targets drivers seeking immediate results with minimal effort. This spray-based system promises to restore headlight clarity in minutes without complicated procedures or power tools. The kit includes restoration fluid, a small coating agent, sponge, and towel—streamlining the process to spray, wait, and wipe.
What Makes It Stand Out: Speed is the defining feature. While most kits require 30-60 minutes of sanding and curing, Botou’s formula works in minutes. The spray application eliminates physical strain and technical skill requirements, making it accessible to anyone. The kit works on both plastic and glass headlights, offering versatility uncommon in sanding-based systems.
Value for Money: At $16.99, it competes directly with mid-range kits but trades long-term durability for convenience. It’s priced fairly for quick cosmetic improvement but may not match the longevity of $17-22 ceramic or multi-stage kits. For leased vehicles or short-term solutions, it offers reasonable value.
Strengths and Weaknesses: Strengths include lightning-fast application, utter simplicity, and no tool requirements. The spray format reaches complex curves easily. Weaknesses include questionable long-term durability compared to mechanical restoration, limited coating volume (10ml), and lack of brand recognition. The rapid results may indicate surface-level treatment rather than deep restoration.
Bottom Line: Best for time-pressed individuals needing quick improvement before selling or inspecting a vehicle. For lasting restoration, consider more comprehensive alternatives.
4. Sylvania Headlight Restoration Kit - Long-Lasting Headlight Repair Kit for Restoring to Like-New Condition - Surface Activator, Exclusive UV Coating, Clarifying Compound & More - No Tools Required

Overview: The Sylvania Headlight Restoration Kit brings over a century of lighting expertise to address headlight degradation. This premium kit targets not just cosmetic clarity but optimal light output restoration, critical for night driving safety. The comprehensive system includes surface activator, premium sandpaper, clarifying compound, and an exclusive UV block clear coat—everything needed for two headlights without requiring tools.
What Makes It Stand Out: Sylvania’s lighting authority lends credibility unmatched by generic brands. The exclusive UV block clear coat is specifically formulated to maintain light transmission, not just appearance. The surface activator chemically prepares the lens for maximum coating adhesion, a professional touch absent in most kits. The clarifying compound polishes to optical clarity rather than just “good enough.”
Value for Money: At $22.75, it’s the most expensive option reviewed, but Sylvania’s specialization justifies the premium. Professional headlight replacement costs $200-400 per assembly. This kit restores original equipment quality light output, making it a safety investment rather than just cosmetic.
Strengths and Weaknesses: Strengths include superior UV protection, brand expertise, and focus on actual light performance. The comprehensive 4-step process ensures thorough restoration. Weaknesses include the highest price point and more complex application than wipe-only kits. The process demands patience and careful technique.
Bottom Line: The top choice for safety-conscious drivers prioritizing optimal night visibility. Sylvania’s expertise delivers results that justify the premium price.
5. 3M Auto Restore and Protect Headlight Restoration Kit, Use On Plastic Lenses, Headlights, Taillight, Fog Lights and More, Includes Sanding Discs, Headlight Clear Coat Wipes, Foam Pad and Glove (39194)

Overview: The 3M Auto Restore and Protect Kit offers the brand’s trusted quality at a budget-conscious $9.83 price point. This streamlined kit focuses on essential restoration components—Trizact refining discs, clear coat wipes, foam pad, and glove—providing core functionality without frills. Designed for moderate oxidation, it delivers 3M’s abrasive technology in an accessible package.
What Makes It Stand Out: The aggressive pricing from a premium brand is remarkable. It includes 3M’s signature Trizact discs (1000 and 3000 grit) that cut quickly while minimizing scratches. The kit works with or without a drill, offering flexibility. At under $10, it removes the financial barrier for first-time users hesitant to invest in more expensive kits.
Value for Money: Exceptional value. No other kit from a major brand approaches this price while including genuine abrasive technology. It’s perfect for single-vehicle restoration or experimenting before committing to premium options. However, you’ll need to supply masking tape and possibly additional pads.
Strengths and Weaknesses: Strengths include unbeatable price, trusted 3M quality, and effective Trizact technology. The simple 2-disc system is less intimidating. Weaknesses include minimal components—no tape, limited clear coat wipes, and no sanding block. Best for mild to moderate oxidation; heavily damaged lights may need additional materials. Durability likely shorter than ceramic kits.
Bottom Line: An excellent entry point for budget-minded DIYers or those with lightly oxidized headlights. It delivers genuine 3M performance at a fraction of typical cost.
6. Meguiar’s Ultimate Headlight Restoration Kit - The Perfect Headlight Repair Kit to Remove Yellowing and Cloudiness from Headlights - Easy to Use and Seals Headlights with 18 Plus Months of Protection
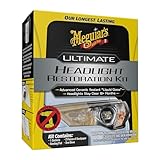
Overview: Meguiar’s Ultimate Headlight Restoration Kit represents the gold standard for DIY headlight restoration. This comprehensive system tackles mild to severe yellowing and oxidation through a multi-stage process that delivers genuinely professional-grade results. Designed for enthusiasts who demand lasting clarity, the kit combines mechanical abrasion with chemical sealing to rejuvenate neglected headlights and dramatically improve nighttime visibility.
What Makes It Stand Out: The dual-grit sanding system (1000 and 3000 grit) allows for progressive refinement, while the proprietary Ultimate Headlight Sealant provides exceptional UV protection for over 18 months. Unlike quick-fix solutions, this kit physically removes damage rather than temporarily masking it. The pre-saturated wipes simplify application, eliminating messy mixing or measuring while ensuring even coating distribution.
Value for Money: At $22.56, this kit sits in the premium tier but justifies its cost through durability and brand reputation. Comparable professional services cost $75-150, making this an economical alternative. The extended protection period means fewer reapplications, saving money long-term. For severely damaged headlights, this investment pays dividends in both appearance and safety.
Strengths and Weaknesses: Pros: Trusted brand reputation; 18+ month UV protection; Professional results without tools; Comprehensive sanding system; Crystal-clear finish Cons: Requires significant manual effort; Multi-step process takes time; Sanding may intimidate beginners; Higher price than basic kits
Bottom Line: For those seeking durable, professional results and willing to invest elbow grease, this kit delivers exceptional value. It’s the ideal choice for moderately to severely damaged headlights where longevity matters most.
7. WenFeng Headlight Restoration Kit – Automotive Headlamp Restoration Fluid Kit for Oxidized and Yellowed,Car Headlight Cleaner for All Vehicles That Restores Clarity
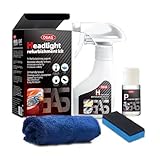
Overview: The WenFeng Headlight Restoration Kit offers a streamlined approach to headlight renewal, prioritizing speed and simplicity over aggressive restoration. This spray-based system targets light to moderate oxidation with a user-friendly process that works on both plastic and glass lenses, making it versatile for various vehicle types and ideal for quick cosmetic improvements.
What Makes It Stand Out: The 180ml restoration fluid works in minutes through a simple spray-and-wipe method, eliminating the need for sanding or complex procedures. The inclusion of a separate coating agent creates a protective layer, while the microfiber towel ensures a streak-free finish. Its compatibility with glass lenses distinguishes it from many competitors that only work on plastic surfaces.
Value for Money: Priced at $16.99, this kit offers solid mid-range value for drivers seeking quick improvements. While less comprehensive than premium kits, it costs significantly less than professional services. However, the protection duration isn’t specified, potentially requiring more frequent reapplication than higher-priced alternatives. Best suited for maintenance rather than heavy restoration.
Strengths and Weaknesses: Pros: Extremely easy to use; Fast results in minutes; Works on glass and plastic; Affordable price point; No power tools needed Cons: Not effective for heavy oxidation; Unspecified protection duration; May require frequent reapplication; Less durable than sanding kits
Bottom Line: Perfect for maintenance and light restoration tasks, this kit suits DIY beginners or those needing a quick fix before selling a vehicle. For severely clouded headlights, consider a more aggressive sanding-based system.
8. XPERTCHEMY Headlight Restoration Kit-Headlight Cleaner Removing The Heavy-Duty Yellowing, Clouding and Stains, Even Buffs Out Unsightly Hairline Scratches,No Power Tools Needed

Overview: The XPERTCHEMY Headlight Restoration Kit positions itself as a professional-grade solution with advanced ceramic protection at a budget-friendly price point. This comprehensive kit addresses heavy-duty yellowing, clouding, and even hairline scratches through a meticulous three-step process that rivals more expensive alternatives while including thoughtful accessories.
What Makes It Stand Out: The exclusive ceramic UV protector chemically bonds with headlight resin, creating a durable 18-month shield without leaving sticky residue. The kit includes thoughtful extras like masking tape and protective gloves often sold separately. The progressive sanding system (P2000 to P3000 grit) ensures proper surface preparation for optimal coating adhesion and professional results.
Value for Money: At just $14.99, this kit represents exceptional value, undercutting most competitors while including premium features like ceramic coating and complete accessories. It’s arguably the best bang-for-buck option for thorough restoration, offering technology typically found in kits costing twice as much. The included components eliminate additional purchases.
Strengths and Weaknesses: Pros: Ceramic coating technology; Complete accessory package; Excellent price; Professional-grade results; 18-month protection Cons: Lesser-known brand; More complex than spray-only kits; Requires careful application; Instructions could be clearer
Bottom Line: For budget-conscious buyers wanting premium features, this kit is unmatched. The ceramic protection and comprehensive components make it ideal for those seeking professional results without the premium price tag.
9. WAZNFYV Headlight Restoration Kit, Automotive Headlight Cleaner Oxidized and Yellowed Head Light Restoring Kit for All Vehicle Types (400, Grams)

Overview: The WAZNFYV Headlight Restoration Kit delivers a straightforward solution for reviving oxidized and yellowed headlights across all vehicle types. This 400-gram spray-based system emphasizes convenience through its simple three-step application process, making it accessible for DIY enthusiasts of any skill level who need a universal solution.
What Makes It Stand Out: The universal compatibility ensures effectiveness on cars, trucks, and SUVs without modification. The generous 400-gram quantity provides ample product for multiple applications or larger headlights. The spray-wipe-dry process eliminates complexity, while the protective layer helps prevent future oxidation without requiring specialized tools or equipment.
Value for Money: At $16.99, this kit offers competitive pricing, though the unspecified protection duration and vague formulation details raise questions about long-term durability. It provides good value for quick cosmetic improvements but may not match the longevity of premium kits with explicit UV protection claims. The quantity helps offset uncertainty about concentration.
Strengths and Weaknesses: Pros: Universal vehicle compatibility; Simple 3-step process; Good quantity (400g); No tools required; Quick application Cons: Vague protection duration claims; Unknown brand reputation; May lack aggressive cleaning power; Generic formulation
Bottom Line: A solid choice for routine maintenance and light oxidation across diverse vehicle fleets. However, the lack of specific durability claims makes it better suited for quick fixes rather than long-term restoration projects.
10. Meguiar’s Two Step Headlight Restoration Kit, Headlight Cleaner Restores Clear Car Plastic and Protects from Re-Oxidation, Includes Headlight Coating and Cleaning Solution - 4 Count (1 Pack)

Overview: Meguiar’s Two Step Headlight Restoration Kit simplifies the restoration process for drivers seeking clarity without complexity. This streamlined system from a trusted brand removes oxidation and yellowing while providing year-long protection through an innovative coating, all without requiring power tools or traditional sanding, making it approachable for beginners.
What Makes It Stand Out: The revolutionary two-step process eliminates intimidating sanding stages, using abrasive pads with cleaning solution instead. This makes it far more approachable for beginners while still delivering respectable results. The 12-month protection coating helps maintain clarity longer than basic cleaners, and the Meguiar’s brand ensures quality formulation and reliable performance.
Value for Money: At $21.93, it offers a slight savings over the Ultimate kit while maintaining brand reliability. The reduced effort and time investment add value for those prioritizing convenience, though the shorter protection period (12 vs 18+ months) and less aggressive cleaning represent tradeoffs. Perfect for those intimidated by multi-stage kits.
Strengths and Weaknesses: Pros: Simple two-step process; No power tools or sanding; Trusted brand; 12-month protection; Improved safety and visibility Cons: Less effective on severe damage; Shorter protection than Ultimate kit; May require reapplication sooner; Abrasive pads less thorough than sanding
Bottom Line: Ideal for moderately oxidized headlights and users wanting professional brand quality with minimal effort. Choose this for convenience; opt for the Ultimate kit for maximum durability on heavily damaged lenses.
Why Headlight Clarity Matters More Than You Think
Beyond the obvious aesthetic improvement, clear headlights directly impact your vehicle’s safety profile and resale value. Cloudy lenses scatter light instead of projecting it, creating hot spots and dark zones that reduce your effective illumination distance. Insurance studies have linked deteriorated headlights to increased accident rates during dawn, dusk, and nighttime driving. Moreover, during pre-purchase inspections, buyers perceive foggy headlights as evidence of overall neglect, often negotiating hundreds off the asking price. A proper restoration with a durable sealant doesn’t just improve visibility—it signals meticulous maintenance to potential buyers.
The Science Behind Headlight Oxidation and UV Damage
Modern headlights are crafted from polycarbonate plastic, chosen for its impact resistance and lightweight properties. However, this material is inherently porous and susceptible to UV degradation. Manufacturers apply a factory UV hard coat, but after years of sun exposure, acid rain, and road debris, this protective layer fails. Oxidation then attacks the lens surface at a microscopic level, creating a chalky, pitted texture that diffuses light. Simply cleaning the surface doesn’t remove this damaged layer; you must physically abrade it away before applying a new protective sealant that can withstand the same brutal conditions.
What Makes a Sealant “Long-Lasting”?
The term “long-lasting” gets thrown around liberally in product marketing, but true durability hinges on three factors: chemical composition, cross-linking density, and UV inhibitor concentration. Premium sealants form a semi-permanent bond with the polycarbonate, creating a sacrificial layer that degrades instead of the lens itself. This isn’t about thickness—it’s about molecular adhesion. A quality sealant should maintain its hydrophobic properties and optical clarity for at least 12 months in outdoor conditions, with top-tier formulations pushing 24-36 months before requiring renewal.
Understanding Sealant Chemistry: Acrylics vs. Ceramics vs. Silicones
Acrylic sealants offer decent clarity and ease of application but typically last 6-12 months before breaking down. Silicone-based formulas provide better water beading and flexibility, lasting 12-18 months in moderate climates. Ceramic-infused sealants represent the current pinnacle, incorporating SiO2 (silicon dioxide) nanoparticles that create a harder, more chemically resistant barrier. These ceramics can achieve 18-36 month lifespans, resisting everything from automatic car wash detergents to road salt. The trade-off? Ceramics demand more precise application and longer curing times.
UV Inhibitors: The Unsung Heroes of Durability
A sealant without robust UV inhibitors is like sunscreen without SPF—technically present but functionally useless. Look for formulations that explicitly mention benzotriazole or hindered amine light stabilizers (HALS). These compounds absorb UV radiation and release it as harmless heat, preventing the photochemical breakdown of both the sealant and the underlying polycarbonate. The concentration matters: premium kits include sealants with 3-5% UV inhibitor content, while budget options might contain less than 1%.
Key Components of a Professional-Grade Restoration Kit
A truly comprehensive kit should include more than just sandpaper and a single-step polish. Professional-grade systems provide a logical progression of abrasives, multiple polishing compounds, and specialized applicators designed for the unique contours of headlight lenses. The sealant itself should be packaged separately with its own applicator pad, indicating it’s not just an afterthought but a dedicated protective system.
Sanding Abrasives: Grit Progression Matters
Effective restoration requires a minimum three-step sanding process: 800-grit to remove heavy oxidation, 1500-grit to refine the scratches, and 3000-grit to prepare for polishing. Kits that skip directly to 2000-grit or higher force you to work harder and longer, often leaving micro-scratches that become visible under sunlight. The best kits include wet/dry sandpaper with durable backing that won’t disintegrate during use, plus explicit instructions for lubrication techniques that prevent clogging and ensure even material removal.
Polishing Compounds: From Cutting to Finishing
Single-compound systems are a red flag. Professional results demand at least two stages: a cutting polish with mild abrasives to remove sanding haze, followed by a finishing polish that restores optical clarity. The cutting stage should use aluminum oxide or diminishing abrasives, while the finishing polish relies on chemical cleaners and micro-fillers to achieve that glass-like appearance. Some premium kits include a third, ultra-fine polish specifically formulated for polycarbonate, which eliminates the micro-marring that cheaper kits leave behind.
Application Tools: Pads, Cloths, and Applicators
The difference between streaky, uneven sealant application and a flawless finish often comes down to tool quality. Foam applicator pads should be closed-cell to prevent product absorption and ensure thin, even coats. Microfiber cloths need a 300+ GSM weight and a plush nap to buff off residue without scratching. Kits that include masking tape and surface prep wipes demonstrate attention to detail, protecting paintwork and ensuring the lens is surgically clean before sealant application.
The Sealant Itself: What to Look For
Beyond chemistry, evaluate the application method. Brush-on sealants tend to be thicker but risk streaking. Wipe-on formulas offer better control but require multiple thin layers. Spray-on ceramics provide the most even coverage but demand careful masking. The ideal kit includes 15-20ml of sealant—enough for multiple applications on both headlights with room for error. Packaging in an opaque, airless pump bottle indicates the manufacturer understands that UV exposure and air contact degrade the formula before application.
Manual vs. Drill-Activated Kits: Which Delivers Better Results?
Manual kits rely on elbow grease and hand-sanding blocks, giving you maximum control but requiring significant physical effort. They’re ideal for lightly oxidized lenses or situations where you can’t access power near the vehicle. Drill-activated kits use foam pads and polishing bonnets chucked into a standard cordless drill, dramatically speeding up the process and delivering more consistent pressure. The caveat? High RPMs can generate enough heat to melt polycarbonate if you’re not careful. Modern kits include speed limiters or specifically designed low-RPM pads that mitigate this risk, making them safe for beginners who follow instructions precisely.
The Multi-Stage Restoration Process Explained
Rushing the process is the number one reason sealants fail prematurely. Each stage builds upon the previous one, and skipping steps compromises the entire system. Think of it as building a house—you wouldn’t install a roof on a weak foundation. Professional detailers allocate 45-90 minutes per headlight, with most of that time spent on preparation rather than the final sealant application.
Stage 1: Wet Sanding Techniques for Deep Oxidation
Always sand wet, using a spray bottle to keep the surface lubricated. This prevents sandpaper clogging and controls dust. Use a foam sanding block to maintain even pressure across the lens’s curved surface. Work in straight, overlapping passes—never circular motions, which can create low spots. After each grit, thoroughly rinse and inspect under a bright LED light. You’re not done with 800-grit until the entire surface has a uniform, milky appearance with no clear spots remaining.
Stage 2: Polishing to Optical Clarity
Polishing requires a clean workspace; even a single grain of sand from the previous stage will create new scratches. Apply polish to the pad, not the lens, and work in small sections using moderate pressure. For drill-activated systems, keep the drill moving constantly to prevent heat buildup. The lens will transition from milky white to hazy clear, then to optically perfect. When you can read newsprint through the lens at arm’s length, you’re ready for sealant.
Stage 3: Sealant Application for Long-Term Protection
Surface contamination is your enemy here. Wipe the lens with an isopropyl alcohol solution (70% IPA, 30% water) to remove polishing oils. Apply sealant in thin, overlapping strokes—thick layers don’t cure properly and will peel. Most ceramics require 5-10 minutes of flash time before buffing, while acrylics need immediate removal. Work in a crosshatch pattern to ensure complete coverage, and resist the urge to touch the lens during the 24-hour curing period.
Water-Based vs. Solvent-Based Sealants: Performance Differences
Water-based sealants are environmentally friendly, low-odor, and clean up easily, but they typically cure softer and have shorter lifespans. They’re more forgiving to apply, making them suitable for novices. Solvent-based formulas cure harder and bond more aggressively to polycarbonate, but they emit strong fumes and require careful application to prevent streaking. The latest hybrid formulas use water as a carrier but cross-link through solvent evaporation, offering the best of both worlds. For maximum longevity in harsh climates, solvent-based ceramics remain the gold standard.
How to Evaluate Sealant Longevity Claims
Manufacturers test their products in controlled lab environments using accelerated weathering chambers. These tests simulate sun exposure with xenon arc lamps and rain with water spray, but they can’t replicate real-world variables like road salt, bird droppings, and automatic car wash brushes. A “2-year sealant” in Arizona might last 8 months in Minnesota. Always look for warranties that cover specific environmental conditions rather than blanket time claims.
Understanding “1-Year Protection” vs. Real-World Conditions
A 1-year sealant typically means 12 months of maintained hydrophobicity and UV protection in moderate climates with proper maintenance. If you live in a region with extreme UV index (above 8) or frequent freeze-thaw cycles, expect 50-70% of the stated lifespan. Parking in a garage versus on the street can double sealant life, as can hand-washing versus automated washes. The most honest manufacturers provide regional lifespan estimates rather than universal claims.
The Role of Proper Prep Work in Sealant Durability
Even the best sealant will fail within months if applied over micro-scratches or polishing residue. The final wipe-down with IPA is non-negotiable. Some professionals go further, using a panel wipe solution containing 10-15% IPA and specialized surfactants that dissolve oils without streaking. Inspect the lens at a low angle with a bright light; any haze or swirl pattern indicates you need to re-polish before sealing. This extra 10 minutes of work can add a year to your sealant’s effective life.
Common Mistakes That Shorten Sealant Lifespan
Even premium kits produce disappointing results when users cut corners. The most frequent error is insufficient sanding—stopping at 2000-grit leaves a textured surface that sealants can’t fully fill, leading to premature failure. Another is applying sealant in direct sunlight; the heat accelerates curing before the product can level, creating high spots that peel within weeks.
Inadequate Surface Preparation
Polycarbonate releases plasticizers and oils over time, especially on older lenses. A simple wash isn’t enough—you must chemically strip the surface. Beyond IPA wipes, some pros use a dedicated plastic degreaser or even a light clay bar treatment on the lens. This removes embedded contaminants that sanding misses. Skipping this step is like painting over grease; the sealant simply won’t adhere where contamination exists.
Applying Sealant in Poor Conditions
Ideal application conditions are 60-75°F with humidity below 60%. Cold temperatures slow curing and prevent proper bonding, while high humidity can cause sealant to blush or turn milky. Wind introduces dust particles that embed in the curing layer. If you must work in less-than-ideal conditions, extend flash times and consider using a portable canopy. Never apply sealant when rain is forecast within 24 hours.
Skipping the Curing Process
That “drive immediately” claim on some kits is marketing fluff. All sealants, even fast-curing formulas, require a minimum 4-hour cure before exposure to moisture. Full hardness and chemical resistance develop over 24-72 hours. During this window, avoid touching the lens, don’t cover the vehicle, and keep it out of dew or rain. Some enthusiasts go as far as placing a small fan near the headlights to ensure consistent airflow during curing.
Advanced Techniques for Maximum Sealant Adhesion
For truly obsessive durability, consider a two-stage sealing process. Apply a thin base layer of ceramic sealant, let it cure for 1 hour, then apply a second layer. This builds a denser cross-linked network. Some professionals use a primer specifically designed for polycarbonate before the main sealant, similar to automotive paint systems. While this adds time, it can extend sealant life by 40-50% in extreme environments. Another pro tip: warming the lens slightly with a heat gun (not exceeding 100°F) before application opens the polycarbonate’s pores, allowing deeper sealant penetration.
Maintaining Your Restored Headlights: Post-Application Care
Your restoration is only as good as your maintenance routine. Harsh chemicals, abrasive brushes, and neglect will degrade even the best sealant in months. Establish a gentle cleaning protocol that preserves the protective layer while removing contaminants that could etch through it over time.
Washing Techniques That Won’t Degrade the Sealant
Use a pH-neutral car shampoo (pH 6-8) and a microfiber wash mitt dedicated to the headlights. Avoid wheel cleaners, bug removers, and degreasers on the lenses—these contain solvents that attack sealants. Pressure washers are fine if you maintain a 12-inch distance and avoid direct spray at the sealant’s edge where it meets the paint. After washing, apply a spray sealant or quick detailer formulated for headlights every 3-4 washes to replenish the hydrophobic layer.
Top-Up Treatments: When and How
Even the best sealants gradually lose hydrophobicity as the topmost layer wears away. Test this by sprinkling water on the lens; if it doesn’t bead and sheet off, it’s time for a top-up. Use a spray ceramic sealant—apply to a clean, dry lens, wipe on with a microfiber applicator, let it flash, and buff off. This 5-minute process every 6 months can extend your main sealant’s life by 50% or more. Never top-up over a contaminated surface; always wash and decontaminate first.
Cost vs. Value: Investing in Premium Sealant Technology
Budget kits ($10-20) typically include acrylic sealants that last 3-6 months, requiring annual reapplication. Mid-range kits ($30-50) offer silicone-ceramic hybrids achieving 12-18 months of protection. Premium systems ($60-100) feature true ceramic sealants with 2-3 year lifespans and include enough material for multiple applications. When you factor in your time—3 hours for a proper restoration—a $20 kit you repeat yearly costs more in labor than a $80 kit you apply once every three years. The math becomes clearer when you consider professional restoration services charge $75-150 per vehicle.
Environmental Factors That Impact Sealant Durability
Geography plays a massive role in sealant performance. Coastal areas bombard headlights with salt spray that accelerates chemical breakdown. Desert regions expose lenses to intense UV radiation and abrasive dust. Northern climates subject headlights to freeze-thaw cycles and magnesium chloride road treatments. For coastal regions, choose sealants with enhanced chemical resistance. Desert dwellers should prioritize UV inhibitor concentration above all else. Snow belt residents need flexible sealants that won’t crack when temperatures plummet. Some manufacturers now offer region-specific formulations—if available, they’re worth the premium.
Professional vs. DIY: When to Choose a Kit
Deep pitting from rock chips, internal moisture fogging, or severe yellowing that penetrates beyond the surface layer indicates professional restoration or replacement is needed. DIY kits excel at removing surface oxidation and restoring clarity to lenses with intact structural integrity. If your headlights have a rough, sandpaper-like texture even after washing, a DIY kit will work. If the damage is smooth but deeply discolored, you need professional wet sanding with power tools. Internal condensation means the lens seal has failed—no amount of external restoration will fix that.
How to Test Your Sealant’s Effectiveness at Home
Beyond the water beading test, use a UV flashlight to check for uniform coverage. Shine it at a 45-degree angle in a dark garage; any areas where the beam diffuses indicate thin or missing sealant. For a more quantitative test, apply a piece of blue painter’s tape to the sealed lens, leave it in direct sun for a week, then remove it. If the uncovered area has yellowed compared to the protected strip, your sealant is failing. Another method: swipe a cotton ball soaked in rubbing alcohol across the lens. If it removes the sealant easily, you applied too thin a layer or the product was defective.
Frequently Asked Questions
How long should a quality headlight sealant actually last in real-world conditions?
In moderate climates with proper application and maintenance, a true ceramic sealant should maintain protective properties for 18-24 months. However, in extreme UV environments or areas with harsh winters, expect 12-18 months of optimal performance before needing a top-up treatment.
Can I apply a sealant without sanding if my headlights are only slightly hazy?
Light surface haze can sometimes be corrected with a heavy-cut polish alone, but the sealant’s bond will be significantly weaker. The sanding process creates a microscopically rough surface that allows mechanical adhesion. Without it, you’re relying solely on chemical bonding, which typically reduces sealant lifespan by 60-70%.
What’s the difference between a headlight sealant and a ceramic coating for paint?
While both may contain SiO2, headlight sealants are formulated specifically for polycarbonate’s flexibility and lower heat tolerance. Paint ceramics cure harder and can crack on plastic. Headlight sealants also contain higher concentrations of UV inhibitors since lenses face direct sunlight, unlike vertical paint panels.
How soon can I wash my car after applying headlight sealant?
Wait a minimum of 4 hours before any water contact, and 24 hours before the first proper wash. Use a pH-neutral shampoo and avoid high-pressure sprays directly on the lenses for the first week. Full chemical resistance develops over 7 days, so avoid bug removers and wheel cleaners during this period.
Will these restoration kits work on all headlight lens types?
Most kits work on standard polycarbonate lenses found on 95% of vehicles. However, some luxury brands use coated acrylic or glass lenses. Acrylic scratches more easily and requires finer abrasives, while glass lenses can’t be sanded and need specialized compounds. Check your owner’s manual or consult a dealer before starting.
Can I use regular car wax instead of a dedicated headlight sealant?
Car wax lacks the UV inhibitors and chemical bonding agents necessary for polycarbonate protection. It will bead water initially but typically fails within 4-6 weeks on headlights due to heat cycling and direct UV exposure. Some waxes also contain cleaners that can haze plastic over time.
How do I know if my headlights need restoration versus just a good cleaning?
Clean the lens thoroughly, then spray it with water. If the water sheets off evenly and you can see clearly through the wet lens, it’s just dirty. If the water beads in some areas and the lens still looks cloudy when wet, the UV coating has failed and oxidation has penetrated the surface—restoration is required.
What happens if I skip the sealant step after polishing?
Polished polycarbonate begins re-oxidizing within days without protection. You’ll notice haze returning within 2-4 weeks, and severe yellowing within 2-3 months. The sanding process also removes any remaining factory UV protection, leaving the raw plastic extremely vulnerable. Sealant isn’t optional—it’s the entire point of the restoration.
Can I apply multiple layers of sealant for better protection?
Two thin layers are better than one thick layer, but more isn’t always better. Most sealants achieve maximum cross-linking density in 2-3 layers. Additional coats beyond this create a thicker but not stronger barrier that’s prone to cracking and peeling. Always allow proper flash time between layers and never exceed the manufacturer’s recommended number of applications.
Are drill-activated kits safe for beginners, or should I stick to manual methods?
Modern drill kits are safe for beginners if you follow three rules: keep the drill moving constantly, use light pressure, and work at low speeds (1200-1800 RPM). The risk of damage comes from dwelling in one spot or applying too much pressure. Manual kits eliminate heat risks but require significantly more effort and technique to achieve uniform results. If you own a drill and can practice on a spare piece of plastic first, the powered route delivers superior, more consistent outcomes.