That yellowed, foggy look on your headlights isn’t just an eyesore—it’s a silent safety hazard reducing your nighttime visibility by up to 80%. While countless DIY solutions promise crystal-clear results, drill-attachment headlight restoration kits have revolutionized the game, transforming what was once a tedious hand-rubbing marathon into a precision power-tool operation. Whether you’re a weekend warrior or a seasoned detailer, understanding what makes these kits effective is the difference between headlights that shine like new and ones that need redoing in three months.
The automotive care landscape has evolved dramatically, and drill-based systems now dominate professional circles for good reason. They deliver consistent pressure, uniform motion, and professional-grade results in a fraction of the time. But not all kits are created equal, and knowing which features truly matter will save you money, frustration, and potentially your headlights themselves.
Top 10 Headlight Restoration Kit
Detailed Product Reviews
1. CERAKOTE® Ceramic Headlight Restoration Kit – Guaranteed To Last As Long As You Own Your Vehicle – Brings Headlights Back to Like New Condition - No Power Tools Required - 10 Wipe Kit

Overview:
The CERAKOTE® Ceramic Headlight Restoration Kit offers a professional-grade solution for permanently restoring cloudy, yellowed headlights. This three-step system uses ceramic coating technology originally developed for aerospace applications, promising lifetime protection without requiring power tools. The kit includes oxidation remover wipes, sanding materials, and ceramic coating wipes designed to chemically bond with your headlights.
What Makes It Stand Out:
Unlike traditional kits that rely on temporary sealants, this product features a genuine ceramic coating that forms a permanent UV-protective barrier. The “lasts as long as you own your vehicle” guarantee demonstrates exceptional confidence in product durability. The wipe-based application system eliminates the mess and complexity of liquid coatings, while the chemical bonding process creates a harder, more resilient finish than conventional polymer sealants.
Value for Money:
At $17.95, this kit sits in the mid-range price bracket but delivers premium ceramic technology typically found in professional services costing $100+. The lifetime protection eliminates the need for repeated applications, making it more economical long-term than budget kits requiring annual re-treatment. Compared to replacement lenses at $200+ per headlight, the value proposition is compelling.
Strengths and Weaknesses:
Strengths include permanent ceramic UV protection, tool-free application, aerospace-grade technology, and straightforward three-step process. The kit provides sufficient materials for two headlights with careful use. Weaknesses involve limited abrasive power for severely damaged lenses, potential learning curve with wipe application technique, and no power tool option for faster results. The 30-minute process requires careful attention to achieve optimal bonding.
Bottom Line:
This is the ideal choice for vehicle owners seeking a one-time, permanent solution rather than a temporary fix. The ceramic coating technology justifies the slightly higher price point, making it perfect for daily drivers and long-term vehicle ownership. Skip this only if your headlights have extreme physical damage requiring heavy sanding.
2. 3M Ultra Headlight Restoration Kit, Contains Masking Tape, Light Sanding Discs, Wax Protectant and More, Use on Plastic Lenses Headlights, Taillights and More, Easy Heavy-Duty Restoration (39195)

Overview:
The 3M Ultra Headlight Restoration Kit leverages the company’s legendary abrasive technology to deliver professional-quality restoration for heavily oxidized plastic lenses. This comprehensive kit includes a disc pad holder, multiple sanding discs (500, 800, and 3000 grit), Trizact refining disc, and protective wipes. Designed for use with or without a drill, it tackles severe yellowing and surface degradation.
What Makes It Stand Out:
3M’s proprietary abrasive system progressively refines lenses from coarse 500-grit removal to mirror-like 3000-grit finish without scratching. The inclusion of a disc pad holder and multiple grit stages allows customization based on damage severity. The Trizact technology creates exceptionally uniform surfaces for optimal clarity. Masking tape inclusion shows attention to paint protection during aggressive sanding.
Value for Money:
Priced at $14.58, this kit offers exceptional value from a premium brand. The multi-stage abrasive system rivals professional shop methods costing $75-150. While requiring more effort than wipe-only kits, the superior results on heavily damaged lenses justify the investment. The reusable disc pad holder adds value for future maintenance, and the comprehensive component list eliminates additional purchases.
Strengths and Weaknesses:
Strengths include professional-grade abrasives, versatile drill/manual operation, paint protection supplies, and proven 3M quality. The progressive grit system handles everything from light haze to severe oxidation. Weaknesses involve longer process time (45-60 minutes), potential intimidation factor for beginners, and requirement of a drill for optimal efficiency. The wax-based protectant may need reapplication within 12-18 months.
Bottom Line:
Choose this kit for severely degraded headlights where maximum clarity is paramount. The 3M abrasive technology delivers unmatched results on heavily oxidized lenses, making it ideal for restoration enthusiasts and those comfortable with power tools. It’s the best option for bringing the worst headlights back to showroom condition.
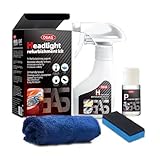
3. Botou 2026 New Headlight Restoration Polish, Automotive Headlight Cleaner Oxidized and Yellowed Head Light Restoring Kit, with Coating Agent, Towel and Sponge (1Set)

Overview:
Botou’s 2026 Headlight Restoration Kit takes a streamlined approach with a spray-on formula designed for rapid results. The kit includes 180ml of restoration fluid, 10ml of coating agent, application sponge, and towel. Marketed as a fast-acting solution, it promises to remove yellowing and oxidation in minutes without complex procedures or specialized equipment.
What Makes It Stand Out:
The spray application format dramatically simplifies the restoration process, eliminating tedious sanding for light to moderate oxidation. The two-phase system (restoration fluid followed by protective coating) addresses both cleaning and protection in under 15 minutes. The generous 180ml fluid volume provides enough product for multiple applications or maintenance treatments across several vehicles.
Value for Money:
At $16.99, this kit offers middle-ground pricing with above-average product quantity. The spray format reduces labor time significantly, making it cost-effective for those valuing convenience over perfection. While not as durable as ceramic or multi-stage systems, the ability to quickly reapply extends value. It’s substantially cheaper than professional services while providing more product than most competitors.
Strengths and Weaknesses:
Strengths include exceptionally easy spray application, fast results, generous product volume, and suitability for both plastic and glass surfaces. The process requires minimal skill and no power tools. Weaknesses involve questionable longevity compared to mechanical restoration, limited effectiveness on severe oxidation, and unknown brand reputation. The thin coating may degrade within 6-12 months, requiring reapplication.
Bottom Line:
This kit suits vehicle owners seeking quick cosmetic improvement with minimal effort. It’s perfect for lightly to moderately oxidized headlights and maintenance touch-ups. However, those with severely degraded lenses or seeking multi-year protection should invest in a more comprehensive system. Consider it a convenient, fast-acting solution rather than a permanent fix.
4. Sylvania Headlight Restoration Kit - Long-Lasting Headlight Repair Kit for Restoring to Like-New Condition - Surface Activator, Exclusive UV Coating, Clarifying Compound & More - No Tools Required

Overview:
Sylvania’s Headlight Restoration Kit brings the lighting giant’s century of expertise to lens refurbishment. This chemical-focused system includes surface activator, premium sandpaper, clarifying compound, and an exclusive UV block clear coat. Designed as a complete solution for two headlights, it emphasizes restoring light output for improved night driving safety without requiring power tools.
What Makes It Stand Out:
The exclusive UV-blocking clear coat leverages Sylvania’s lighting technology knowledge, specifically engineered to maintain optical clarity and prevent future degradation. The surface activator chemically prepares the plastic for optimal coating adhesion—a step missing from many kits. The clarifying compound polishes to optical grade, ensuring maximum light transmission rather than just cosmetic improvement.
Value for Money:
At $22.75, this is the premium-priced option, but Sylvania’s lighting expertise justifies the cost for safety-conscious drivers. The specialized UV coating and chemical preparation system deliver longer-lasting results than basic kits. Compared to reduced visibility and accident risk from degraded headlights, the investment is minimal. Professional headlight replacement costs 10x more, making this economically sound.
Strengths and Weaknesses:
Strengths include Sylvania’s brand reputation, optical-grade clarifying compound, exclusive UV coating technology, and focus on light output restoration. The chemical preparation ensures superior coating adhesion. Weaknesses involve the highest price point, manual sanding requirement for best results, and potentially longer process time. The kit may be over-engineered for lightly oxidized lenses.
Bottom Line:
This kit is ideal for safety-focused drivers prioritizing night visibility over simple aesthetics. Sylvania’s lighting expertise translates to a superior final result that maximizes headlight performance. The premium price is justified by the specialized UV coating and optical clarity. Choose this for daily drivers where night visibility is critical, but consider cheaper options for cosmetic-only restoration needs.
5. 3M Auto Restore and Protect Headlight Restoration Kit, Use On Plastic Lenses, Headlights, Taillight, Fog Lights and More, Includes Sanding Discs, Headlight Clear Coat Wipes, Foam Pad and Glove (39194)

Overview:
The 3M Auto Restore and Protect Kit offers a budget-friendly entry point into professional-grade headlight restoration. This simplified kit includes two Trizact refining discs (1000 and 3000 grit), two quick clear coat wipes, a foam pad with Hookit attachment, and a disposable glove. Designed for moderate oxidation, it balances 3M quality with affordability and simplicity.
What Makes It Stand Out:
Despite being the budget option, it includes 3M’s patented Trizact abrasive technology, which uses microreplicated pyramid structures for consistent cutting and finishing. The Hookit attachment system ensures secure disc mounting whether using a drill or manual application. The kit’s minimalism is its strength—focusing on essential steps without overwhelming beginners with excessive components.
Value for Money:
At $9.93, this is exceptional value from an industry leader. The Trizact discs alone justify the price, offering professional-grade finishing at a fraction of typical cost. While less comprehensive than premium kits, it delivers 80% of the results for 50% of the price. The clear coat wipes provide adequate protection for budget-conscious users, and the reusable foam pad adds ongoing value.
Strengths and Weaknesses:
Strengths include unbeatable price, 3M’s trusted Trizact technology, simple two-stage sanding process, and inclusion of protective glove. The kit is beginner-friendly and quick to complete. Weaknesses involve limited grit progression for severe oxidation, minimal protective coating compared to ceramic alternatives, and potential need for reapplication within 12 months. The single glove is a minor inconvenience.
Bottom Line:
This is the perfect entry-level kit for first-time users or those with moderately oxidized headlights seeking professional results on a budget. The 3M quality assurance at under $10 makes it a no-brainer for cost-conscious consumers. While not the most durable or comprehensive option, it delivers impressive clarity improvements with minimal investment and risk.
6. Meguiar’s Ultimate Headlight Restoration Kit - The Perfect Headlight Repair Kit to Remove Yellowing and Cloudiness from Headlights - Easy to Use and Seals Headlights with 18 Plus Months of Protection
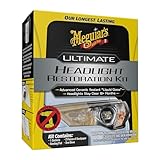
Overview:
The Meguiar’s Ultimate Headlight Restoration Kit promises professional-grade results for restoring cloudy, yellowed headlights. This comprehensive kit tackles mild to heavy oxidation using a multi-stage process that includes sanding and sealing. Designed for DIY enthusiasts who want lasting clarity without professional service costs, it combines abrasive restoration with advanced protective coating technology. The kit includes everything needed to transform dull lenses into crystal-clear headlights, emphasizing both immediate results and long-term protection.
What Makes It Stand Out:
This kit distinguishes itself with its 18+ month UV protection sealant, significantly longer than many competitors. The dual-grade sandpaper system (1000 and 3000 grit) allows for progressive refinement, addressing everything from heavy oxidation to fine polishing. Unlike simpler wipe-on solutions, this kit provides a true restoration process that physically removes damage rather than just masking it. The pre-saturated sealing wipes simplify the final protective step, ensuring even application without additional tools or mixing requirements.
Value for Money:
At $22.56, this kit sits in the mid-range price point but delivers premium results. Professional headlight restoration services typically cost $75-150 per vehicle, making this a substantial savings. The 18-month protection promise means fewer applications over time compared to cheaper kits requiring quarterly treatments. While slightly pricier than basic restoration fluids, the inclusion of quality sandpaper and durable sealant justifies the cost for those seeking lasting results.
Strengths and Weaknesses:
Strengths: Exceptional 18+ month UV protection; dual-grit sanding system for thorough restoration; trusted Meguiar’s brand quality; no power tools needed; comprehensive kit.
Weaknesses: Requires more effort than wipe-only kits; sanding process may intimidate beginners; slightly higher price point.
Bottom Line:
The Meguiar’s Ultimate Headlight Restoration Kit is ideal for car owners willing to invest modest effort for professional-quality, long-lasting results. It outperforms quick-fix solutions and delivers excellent value through its durable protection.
7. WenFeng Headlight Restoration Kit – Automotive Headlamp Restoration Fluid Kit for Oxidized and Yellowed,Car Headlight Cleaner for All Vehicles That Restores Clarity
Overview:
The WenFeng Headlight Restoration Kit offers a streamlined approach to headlight restoration with its 180ml fluid-based system. Marketed as a quick solution for oxidized and yellowed headlights, this kit prioritizes speed and simplicity over multi-stage processes. Compatible with both plastic and glass lenses across all vehicle types, it appeals to users seeking immediate improvement without extensive labor. The kit includes restoration fluid, coating agent, and microfiber cloth for a complete application.
What Makes It Stand Out:
This kit’s primary differentiator is its rapid application process—simply shake, spray, and wipe. The 180ml volume provides generous coverage for multiple applications, and the inclusion of a separate coating agent adds a protective layer often missing from basic spray kits. Its versatility across plastic and glass lenses broadens its utility beyond typical plastic-only restorers. The straightforward three-step process eliminates the intimidation factor of sanding, making it accessible to absolute beginners.
Value for Money:
Priced at $16.99, this kit offers solid value for casual users prioritizing convenience. While cheaper than sanding kits, it competes directly with other spray-based solutions. The dual-bottle system (restoration fluid + coating agent) provides better protection than single-solution products. However, results may not match physically abrasive kits for severely damaged headlights. For moderate oxidation, it delivers acceptable results at a fair price, though frequent reapplication may be necessary.
Strengths and Weaknesses:
Strengths: Extremely easy to use; works on glass and plastic; quick application; affordable price; includes protective coating.
Weaknesses: Limited effectiveness on heavy oxidation; shorter protection duration; results less dramatic than sanding kits; requires reapplication sooner.
Bottom Line:
The WenFeng kit suits drivers with mildly cloudy headlights who value speed and simplicity over maximum restoration. It’s a budget-friendly maintenance solution rather than a complete restoration system.
8. XPERTCHEMY Headlight Restoration Kit-Headlight Cleaner Removing The Heavy-Duty Yellowing, Clouding and Stains, Even Buffs Out Unsightly Hairline Scratches,No Power Tools Needed

Overview:
The XPERTCHEMY Headlight Restoration Kit positions itself as a professional-grade solution for severely degraded headlights. This comprehensive kit addresses heavy-duty yellowing, clouding, stains, and even hairline scratches through a manual, multi-step process. With ceramic UV protection technology, it targets enthusiasts seeking durable, long-lasting results without power tools. The kit includes extensive components from masking tape to multiple sanding discs and specialized wipes.
What Makes It Stand Out:
The exclusive ceramic coating wipes create a chemical bond with headlight resin, curing to form a durable 18-month protective layer that wipes away cleanly without sticky residue. The progressive sanding system (P2000 to P3000 grit) allows for controlled abrasion, while the eight oxidation remover wipes provide thorough chemical cleaning. The inclusion of protective gloves and masking tape demonstrates attention to detail often overlooked in budget kits. This is a true restoration system, not a cosmetic cover-up.
Value for Money:
At $14.99, this kit delivers remarkable value for its comprehensive component list. Competing kits with ceramic coating typically cost $20-30, making this an affordable entry into professional-grade restoration. The 18-month protection promise rivals premium brands at a fraction of the cost. While requiring more effort than spray kits, the thorough approach yields superior results on heavily damaged headlights, potentially saving hundreds in replacement costs.
Strengths and Weaknesses:
Strengths: Ceramic UV protection for 18 months; comprehensive component kit; addresses heavy damage; professional-grade results; excellent price for features.
Weaknesses: Multi-step process demands patience; no power tool option for faster sanding; instructions may overwhelm novices; results depend on careful application.
Bottom Line:
XPERTCHEMY offers exceptional value for those tackling severely oxidized headlights. The ceramic protection and thorough restoration process make it a top choice for DIYers wanting professional results on a budget.
9. WAZNFYV Headlight Restoration Kit, Automotive Headlight Cleaner Oxidized and Yellowed Head Light Restoring Kit for All Vehicle Types (400, Grams)

Overview:
The WAZNFYV Headlight Restoration Kit promises instant clarity restoration for all vehicle types through a simple spray-and-wipe application. This 400-gram kit targets oxidation, discoloration, and yellowing with a focus on convenience and universal compatibility. Designed for DIY enthusiasts seeking quick results without complex procedures, it emphasizes both immediate improvement and preventive protection. The kit works across cars, trucks, and SUVs with a straightforward three-step process.
What Makes It Stand Out:
The kit’s universal compatibility and instant results claim differentiate it in a crowded market. The 400-gram quantity suggests generous product volume for multiple applications. Its emphasis on forming a protective layer to prevent future oxidation addresses a common weakness of basic cleaners. The spray-wipe-dry process eliminates any learning curve, making it accessible to users intimidated by multi-component kits. The kit’s versatility across all vehicle types adds practical value for multi-car households.
Value for Money:
At $16.99, this kit offers competitive pricing for a spray-based solution. The larger 400-gram size may provide more applications than typical 180ml kits, improving long-term value. However, without specific protection duration claims, its longevity remains uncertain compared to kits promising 12-18 months. For mild to moderate oxidation, it delivers fair value, but severely damaged headlights may require more aggressive treatment. It represents a middle-ground option between basic cleaners and comprehensive restoration kits.
Strengths and Weaknesses:
Strengths: Simple 3-step process; universal vehicle compatibility; generous product quantity; includes protective layer; no tools required.
Weaknesses: Vague protection duration; limited power on heavy oxidation; unclear component details; may require frequent reapplication; results less dramatic than sanding kits.
Bottom Line:
The WAZNFYV kit is a decent all-purpose solution for maintaining moderately clear headlights. Best suited for regular upkeep rather than restoring severely degraded lenses, it offers convenience at a reasonable price.
10. Meguiar’s Two Step Headlight Restoration Kit, Headlight Cleaner Restores Clear Car Plastic and Protects from Re-Oxidation, Includes Headlight Coating and Cleaning Solution - 4 Count (1 Pack)

Overview:
Meguiar’s Two Step Headlight Restoration Kit simplifies headlight restoration to its essential elements with a cleaning solution and protective coating system. This $21.93 kit targets oxidation and yellowing without requiring sanding or power tools, using abrasive pads instead. The approach balances effectiveness with accessibility, promising year-long protection through a straightforward process that most users can complete in under 30 minutes. It includes cleaning solution, coating, and pads for a complete restoration experience.
What Makes It Stand Out:
The true two-step process (clean then coat) eliminates the complexity of sanding while still providing physical abrasion through specialized pads. This hybrid approach addresses moderate damage more effectively than pure chemical cleaners while remaining simpler than full sanding kits. The Meguiar’s brand reputation ensures quality formulations, and the 12-month protection guarantee provides realistic expectations. The no-drill requirement makes it safer for paint and headlights compared to power tool methods that can cause irreversible damage.
Value for Money:
Priced at $21.93, this kit offers good value for those wanting better-than-basic results without full restoration effort. It costs less than the Ultimate kit while still providing reputable Meguiar’s quality. Professional services remain far more expensive, and this kit’s year-long protection reduces reapplication frequency. While not as cheap as basic sprays, its pad-based cleaning justifies the premium over purely chemical solutions, hitting a sweet spot between effort and results for most consumers.
Strengths and Weaknesses:
Strengths: Trusted brand; simple two-step process; no sanding required; 12-month protection; abrasive pads provide physical cleaning; safe for paint.
Weaknesses: Less effective on severe oxidation than sanding kits; pads wear out quickly; higher price than spray-only kits; limited component count.
Bottom Line:
Meguiar’s Two Step Kit is perfect for users wanting noticeable improvement with minimal effort. It successfully bridges the gap between basic cleaners and intensive restoration, delivering reliable results for moderately cloudy headlights.
Why Headlight Clarity Matters More Than You Think
Cloudy headlights create a dangerous cascade of problems that extend far beyond cosmetic concerns. When polycarbonate lenses oxidize, they scatter light in unpredictable patterns, creating glare for oncoming drivers while simultaneously reducing your own effective illumination range. This isn’t a minor inconvenience—it’s a documented factor in nighttime accident rates.
Modern vehicles rely on precisely engineered beam patterns to meet federal safety standards. Even a 30% reduction in light transmission can mean the difference between spotting a pedestrian at 200 feet versus just 80 feet. At highway speeds, that translates to nearly a full second of reduced reaction time. Insurance companies have begun noting headlight condition in accident reports, and some states are now including lens clarity in annual safety inspections.
Beyond safety, there’s a financial sting. Dealerships routinely deduct $500-$1,000 from trade-in values for vehicles with severely degraded headlights, citing “appearance and safety concerns.” Professional replacement lenses can cost $300-$600 per assembly, making a quality restoration kit look like an absolute bargain.
The Drill Attachment Advantage: Power Meets Precision
Manual restoration kits demand significant elbow grease and rely on inconsistent hand pressure that creates uneven results. Drill-attachment systems eliminate these variables by delivering uniform rotational speed and consistent contact pressure across the entire lens surface. This mechanical advantage isn’t about laziness—it’s about achieving professional-grade results that last.
The orbital or rotary motion of a drill attachment mimics the action of professional paint correction tools, breaking down oxidation layers systematically rather than haphazardly. Most importantly, these systems maintain the exact same polishing pattern from start to finish, preventing the micro-scratches and swirl marks that plague hand-polishing attempts. For severely oxidized headlights that have progressed beyond surface hazing into deep yellowing, this power becomes not just helpful but essential.
Understanding the Restoration Process: What Actually Happens
Headlight lenses aren’t glass—they’re polycarbonate plastic coated with a thin UV-resistant layer from the factory. Years of sun exposure, road debris, and chemical contaminants gradually destroy this protective coating, allowing the raw plastic to oxidize. This oxidation isn’t just surface dirt; it’s a chemical alteration of the plastic’s molecular structure.
A proper restoration process works in three distinct phases. First, wet sanding mechanically removes the oxidized layer and any remaining factory coating, revealing fresh polycarbonate beneath. Second, progressive polishing uses increasingly fine abrasives to eliminate sanding scratches and restore optical clarity. Third, a UV-blocking sealant creates a new protective barrier, preventing immediate re-oxidation. Skip any step, and your results will be temporary at best.
Key Components Every Quality Kit Should Include
The hallmark of a comprehensive drill-attachment kit lies in its component completeness. At minimum, look for a threaded backing plate that securely attaches to your drill’s chuck—preferably with a universal 1/4-inch shank. This plate should feature hook-and-loop (Velcro) attachment for quick pad changes.
Sanding discs must include multiple grit stages, typically ranging from coarse 800-grit for heavy oxidation to fine 3000-grit for final smoothing. These should be explicitly labeled for wet sanding; dry sanding on polycarbonate generates heat that can warp the lens. Polishing pads come in varying firmness levels, with softer foam for finishing and firmer foam for cutting compounds. The kit should also contain at least two distinct polishing compounds: a cutting compound for scratch removal and a finishing polish for clarity.
Sanding Pad Grit Progression: The Secret to Success
The single biggest mistake DIYers make is jumping grits or rushing the sanding sequence. Professional results demand a methodical progression that removes previous scratches while introducing progressively smaller ones. Start with 800-grit to remove heavy oxidation, but understand that this leaves deep scratches visible to the naked eye.
Move to 1000-grit to eliminate 800-grit scratches, then 1500-grit, 2000-grit, and finally 3000-grit. Each step should take roughly 2-3 minutes per headlight with a drill running at 1,200-1,500 RPM. Skipping from 800-grit directly to 2000-grit might seem efficient, but you’ll spend three times longer polishing and still risk visible scratch patterns. The magic happens in the gradual transition, not in any single miraculous product.
Polishing Compounds: What Separates Pros from Amateurs
Polishing compounds aren’t universal; they contain specific abrasive sizes and types designed for particular stages of refinement. A quality kit includes a cutting compound with aluminum oxide or diminishing abrasive technology—these particles break down as you polish, becoming finer and reducing the risk of burning through the lens.
The finishing polish should be chemically distinct, often containing cerium oxide or optical-grade polishing agents that create a glass-like finish. Color-coded pads matter: yellow or orange foam pads are typically cutting pads, while white or black pads serve for finishing. The compound-to-pad pairing is critical; using a cutting compound on a finishing pad achieves nothing, while finishing polish on a cutting pad creates unnecessary work.
Sealants and UV Protection: The Critical Final Step
Restoring clarity without applying UV protection is like painting a car without clearcoat—the results will degrade within weeks. The best kits include a dedicated headlight sealant, not generic wax or polish. These sealants contain UV inhibitors and acrylic resins that chemically bond to the polycarbonate, creating a sacrificial layer that takes the sun’s abuse instead of the lens itself.
Application technique matters as much as the product. The sealant should be applied in thin, overlapping passes and allowed to cure for the manufacturer-specified time—typically 30 minutes to 2 hours. Some advanced formulas require multiple layers for maximum protection. Avoid kits that promise “one-step” sealing during the polishing process; these compromise longevity for convenience and rarely last more than a month.
Drill Compatibility: Not All Tools Are Created Equal
Your drill’s specifications directly impact restoration quality. Variable speed control is non-negotiable; fixed-speed drills run too fast and generate heat that melts polycarbonate. Ideal kits work with drills operating between 1,200 and 2,000 RPM, with a sweet spot around 1,500 RPM for most sanding and polishing stages.
Cordless drills are perfectly acceptable, provided they have sufficient torque and battery life. A 20V lithium-ion drill typically runs 30-40 minutes continuously—enough for one complete restoration. Chuck size matters; most backing plates require a 3/8-inch or 1/2-inch chuck. Impact drivers should be avoided entirely; their hammering action creates uneven pressure patterns and can crack the backing plate.
Safety Gear: Protecting Yourself During Restoration
The restoration process generates fine plastic dust and uses chemical compounds that demand proper protection. Safety glasses are mandatory; polycarbonate dust is abrasive and can cause corneal scratches. A NIOSH-approved N95 respirator or better prevents inhalation of micro-particles that can lodge in lung tissue.
Chemical-resistant nitrile gloves protect your skin from polishing compounds that contain solvents and abrasives. Long sleeves are advisable, as airborne dust settles on arms and can cause irritation. Finally, use quality automotive masking tape to protect adjacent paint and trim—not the cheap beige painter’s tape that leaves residue. The tape should be at least 1.5 inches wide to create a proper barrier.
Time Investment: What to Expect from Start to Finish
A realistic time budget prevents rushed work and disappointing results. For moderately oxidized headlights, plan on 45 minutes per lens from masking to final sealant cure. Severely yellowed lenses may require 60-75 minutes each. This breaks down as: 10 minutes for thorough cleaning and masking, 15 minutes for progressive wet sanding, 15 minutes for polishing stages, 5 minutes for sealant application, and 10-30 minutes for curing time.
The process isn’t continuous—you’ll spend several minutes between stages cleaning the lens and changing pads. Budget a full afternoon for your first attempt on a pair of headlights. Speed comes with experience, but rushing the learning curve produces amateur results. The good news? Your second vehicle will take half the time as you develop muscle memory for the process.
Common Mistakes That Ruin Headlight Restoration
Even with a quality kit, technique errors can sabotage results. The number one mistake is insufficient lubrication during wet sanding. Water isn’t just for cooling; it suspends abrasive particles and prevents clogging. Dry spots create deep, uneven scratches that require starting over.
Another critical error is applying downward pressure. Let the drill’s weight and the abrasive do the work—pressing harder doesn’t remove oxidation faster, it just creates heat and uneven surfaces. Using a drill speed that’s too high (above 2,500 RPM) melts the plastic, creating a wavy surface that scatters light. Finally, failing to clean the lens between grit stages contaminates finer pads with coarse particles, essentially re-introducing deep scratches you’re trying to eliminate.
Maintenance Tips to Extend Your Results
Properly restored and sealed headlights can remain crystal-clear for 1-3 years, but maintenance dramatically affects longevity. Wash headlights with pH-neutral car shampoo only; harsh detergents strip sealants. Apply a dedicated headlight sealant or ceramic coating every 6 months as a maintenance layer—this takes 10 minutes but doubles protection life.
Park facing away from direct sunlight when possible, or use a car cover. UV exposure is the primary degradation factor, and even the best sealants have finite lifespans. Avoid automatic car washes with abrasive brushes; they create micro-scratches that accelerate hazing. If you live in a high-UV climate like Arizona or Florida, consider applying a clear paint protection film after restoration for decade-long clarity.
When to Choose a Drill Kit Over Manual Methods
Drill-attachment kits shine brightest when dealing with moderate to severe oxidation. If your headlights have progressed beyond surface hazing into distinct yellowing or visible pitting, the power and consistency of a drill system becomes essential. Manual kits simply can’t generate the uniform motion needed to level deeply damaged surfaces.
These kits also make economic sense for multiple vehicles. Once you own the backing plate and pads, you can purchase refill sanding discs and compounds for subsequent restorations at minimal cost. If you’re restoring headlights for friends, family, or as a side business, the time savings alone justify the investment. For light hazing that hasn’t penetrated the factory UV coating, a manual kit might suffice, but drill systems handle the full spectrum of damage with professional results.
Cost vs. Value: Understanding Price Points
Budget kits ($15-$25) typically include minimal components: a basic backing plate, three grits of sanding discs, and a single all-in-one polish/sealant. These work for mild cases but lack the compound progression and quality sealants needed for lasting results. You’ll likely repeat the process within 6-12 months.
Mid-range kits ($30-$50) represent the sweet spot for most DIYers. They include proper grit sequences, separate cutting and polishing compounds, and a legitimate UV sealant. The backing plates are more durable, and pad quality improves noticeably. These kits deliver 1-2 year clarity when used correctly.
Premium kits ($60-$100) justify their cost through professional-grade sealants that last 2-3 years, higher-quality abrasives that cut faster with less risk, and often include maintenance products. For luxury vehicles or severe cases, the additional investment pays dividends in longevity and finish quality. Consider your vehicle’s value and your tolerance for repeating the process when deciding.
Frequently Asked Questions
How long does a drill-attachment headlight restoration typically last?
With proper technique and a quality UV sealant, results typically last 1-3 years. Budget kits with inferior sealants may show hazing within 6 months, while premium ceramic-based sealants can protect for 3+ years. Maintenance applications of sealant every 6 months can double the effective lifespan.
Can I use my impact driver instead of a regular drill?
No. Impact drivers create a hammering action that delivers inconsistent pressure and can crack the backing plate or damage the lens. Use a variable-speed drill with a standard chuck, operating in continuous rotation mode at 1,200-2,000 RPM for optimal results.
What’s the difference between wet sanding and dry sanding for headlights?
Wet sanding is mandatory for polycarbonate headlights. Water acts as a lubricant, cooling agent, and particle suspension system. Dry sanding generates excessive heat that warps the plastic and clogs abrasive discs, leading to uneven removal and deep scratches that are difficult to polish out.
Will restoration kits work on headlights with cracks or chips?
Kits cannot repair physical damage. Cracks and chips require lens replacement. However, kits can restore clarity to the remaining undamaged areas. Severe pitting from road debris may improve but won’t disappear completely—restoration works on oxidation, not structural damage.
Do I need to remove my headlights from the vehicle?
Almost never. Quality kits include wide masking tape to protect adjacent paint and trim. Removing headlights often requires bumper removal and introduces alignment issues. The process is designed to be performed in place, though thorough masking is critical.
How do I know when to move to the next sanding grit?
The lens should appear uniformly dull with no glossy spots remaining from the previous grit stage. Run your fingernail across the surface—if you feel distinct scratches from the current grit, continue sanding. Each grit should completely remove scratches from the previous stage before progressing.
Can I use a cordless drill, or does it need to be corded?
Cordless drills work perfectly provided they have adequate torque and battery life. A 20V lithium-ion drill typically completes one full restoration on a single charge. Lower voltage drills may lack the power to maintain consistent speed under load, compromising results.
What’s the ideal weather for performing headlight restoration?
Perform the work in shade with temperatures between 60-80°F. Direct sunlight heats the lens, causing compounds to dry too quickly and creating application issues. High humidity extends sealant curing time, while cold temperatures below 50°F prevent proper chemical bonding.
Why do my headlights look hazy again after just a few months?
This indicates sealant failure. Either the kit included an inadequate sealant, the sealant wasn’t applied correctly, or environmental factors (intense UV, harsh car washes) degraded it prematurely. Re-polish with a finishing polish and apply a premium ceramic-based sealant for longer protection.
Is there a risk of burning through the headlight lens?
With proper technique, virtually zero risk. Polycarbonate lenses are 3-5mm thick, and restoration removes only 0.1-0.2mm of material. The danger comes from excessive heat (drill speed too high) or over-sanding one spot. Keep the drill moving constantly and maintain recommended speeds for complete safety.