Foggy, yellowed headlights aren’t just an eyesore—they’re a safety hazard that can cut nighttime visibility by up to 80%. If you’ve noticed your beams looking dimmer or your car failing inspection for light output, chances are the culprit isn’t the bulb but the lens. The good news? You don’t need a pricey trip to the body shop. Modern headlight lens restoration kits have made DIY rejuvenation cheaper, faster, and surprisingly satisfying—provided you know what separates a bargain-bin wipe from a pro-grade system.
Below, we’ll unpack everything that matters when shopping for a restoration kit: the science behind lens degradation, the tool types that actually work, and the hidden costs that can sneak up on first-timers. By the end, you’ll be able to walk into any auto-parts store (or click “add to cart”) with the confidence of a seasoned detailer.
Top 10 Headlight Lens Restoration Kits
Detailed Product Reviews
1. CERAKOTE® Ceramic Headlight Restoration Kit – Guaranteed To Last As Long As You Own Your Vehicle – Brings Headlights Back to Like New Condition - No Power Tools Required - 10 Wipe Kit

Overview:
The CERAKOTE® Ceramic Headlight Restoration Kit promises a lifetime of crystal-clear lenses without ever plugging in a tool. At $17.95 you get ten pre-saturated wipes and a hand-sanding pack that strip away yellow oxidation, then lock in the clarity with a true UV-blocking ceramic coating—the same technology used on firearm finishes. The entire job is completed in about thirty minutes on the driveway with nothing more aggressive than your own elbow grease.
What Makes It Stand Out:
Unlike silicone-based competitors that fade in six months, Cerakote’s coating chemically bonds to polycarbonate, creating a glass-like shell that the company guarantees for the life of your ownership. The kit is also 100% manual—no drills, no buffers, no risk of burning through expensive factory lenses.
Value for Money:
Professional headlight restoration runs $80-$150 and still needs re-coating every year. This one-and-done $18 kit pays for itself the first rainy night you actually see the road, and the lifetime pledge means you’ll never spend another dime on headlight upkeep.
Strengths and Weaknesses:
Pros: genuinely permanent ceramic protection; no tools or electrical skills needed; compact wipes travel well for touch-ups; made in USA.
Cons: hand-sanding stage can be tedious on heavily pitted lights; coating must stay dry 24 h; single-use wipes leave some waste if only one lamp is cloudy.
Bottom Line:
If your headlights look like frosted mugs and you want them fixed forever for the price of a pizza, buy this box. The Cerakote kit is the easiest, longest-lasting DIY solution on the market today.
2. 3M Ultra Headlight Restoration Kit, Contains Masking Tape, Light Sanding Discs, Wax Protectant and More, Use on Plastic Lenses Headlights, Taillights and More, Easy Heavy-Duty Restoration (39195)

3M Ultra Headlight Restoration Kit (39195) – Product Review
Overview:
The 3M Ultra Headlight Restoration Kit is a budget-friendly, drill-compatible solution designed to restore clarity to foggy, yellowed plastic lenses. Packaged with everything from 500-grit sanding discs to 3,000-grit Trizact refining discs, plus masking tape, wax protectant, and a disc pad holder, the kit promises professional-grade results on headlights, taillights, fog, and directional lights without specialized tools.
What Makes It Stand Out:
3M’s color-coded, stepped abrasive system is the star: aggressive 500-grit discs knock off heavy oxidation, 800-grit finishing discs smooth the surface, and 3,000-grit Trizact refines to optical clarity. The included Quick Headlight Clear Coat wipes on in minutes and cures to a UV-blocking shell, extending the life of the restoration far beyond wipe-on sealants offered by competitors.
Value for Money:
At $15.49, the kit costs less than a single aftermarket headlight housing and includes enough consumables for two average sedans. When paired with a household drill, you avoid the $80–$120 professional shop fee, recouping the purchase price after the first use.
Strengths and Weaknesses:
Pros:
- Progressive grits produce showroom clarity in under 30 min
- UV-protective wipe-on coating slows future yellowing
- Supplies for taping and post-polish sealing included
Cons:
- Requires a drill; hand-sanding option is labor-intensive
- Single-step sealant lacks spray-clear longevity
- No glove or microfiber cloth included
Bottom Line:
For DIYers who already own a drill, the 3M Ultra kit is the fastest, most complete sub-$20 path to crystal-clear headlights. Accept the minor ergonomic quirks and you’ll brighten both your lenses and your wallet.
3. 3M Auto Restore and Protect Headlight Restoration Kit, Use On Plastic Lenses, Headlights, Taillight, Fog Lights and More, Includes Sanding Discs, Headlight Clear Coat Wipes, Foam Pad and Glove (39194)

Overview:
The 3M 39194 kit revives sun-fogged plastic lenses in under 30 minutes. Everything you need—two Trizact discs, two UV-blocking clear-coat wipes, a Hookit foam pad, and one nitrile glove—fits in a sandwich-sized pouch. Designed for hand or drill use, the system turns chalky, yellowed headlights into crystal-clear lenses without removing them from the vehicle.
What Makes It Stand Out:
3M’s color-coded Trizact 1000/3000 grit discs cut fast then refine to a factory-smooth finish, while the proprietary UV-clear-coat wipes cure to a hard, fuel-resistant shell that outlastes wipe-on “sealers” sold by competitors. The Hookit pad centers the discs perfectly on any 3 in. backing plate, eliminating wobble and gouging common with cheap hook-and-loop kits.
Value for Money:
At $9.98 you’re paying less than a single aftermarket bulb, yet the kit can restore both headlights and still have enough abrasive left for taillights or fog lights. Professional shops charge $75-$120 for the same service, so the ROI is immediate the first time you skip a detailing appointment.
Strengths and Weaknesses:
Pros: fool-proof 2-step abrasive progression, genuine UV blockers built into final wipe, works by hand or drill, leaves OEM-level gloss.
Cons: single glove is flimsy, no masking tape included, clear-coat wipes dry quickly in humid air, not reusable once opened.
Bottom Line:
If your lenses are hazed—not cracked or pitted—this is the cheapest, longest-lasting DIY fix available. Buy it, spend 20 minutes in the shade, and enjoy night-visible headlights for another three to four years.
4. Sylvania Headlight Restoration Kit - Long-Lasting Headlight Repair Kit for Restoring to Like-New Condition - Surface Activator, Exclusive UV Coating, Clarifying Compound & More - No Tools Required

Overview:
The Sylvania Headlight Restoration Kit promises showroom-clear lenses in under an hour without power tools. Packaged for two headlights, the boxed set pairs a proprietary Surface Activator, multi-grit sandpaper, clarifying compound, and a UV-blocking clear coat that the century-old lighting giant claims will keep yellowing at bay long after cheaper kits fail.
What Makes It Stand Out:
Unlike budget wipes that only mask oxidation, Sylvania’s 4-step system chemically re-bonds the polycarbonate before sealing it with a German-engineered UV coating normally reserved for new OEM assemblies. The kit is also totally manual—no drill, masking tape, or buffing wheel required—making it apartment-friendly and safe for first-timers.
Value for Money:
At $22.75 you’re paying roughly eleven dollars per lens; a professional shop charges $75-$120 for the same service. Factor in the included UV block (the component that prevents re-yellowing) and the price undercuts most 3M or Rain-X bundles that make you buy the protective coat separately.
Strengths and Weaknesses:
Pros: tool-free, clear illustrated instructions, durable UV sealant, enough product for two cars if lenses are only lightly hazed.
Cons: hand sanding is tiring on severely oxidized lights; drying times are weather-sensitive; kit lacks latex gloves—bring your own.
Bottom Line:
If your headlights are cloudy but not deeply pitted, Sylvania’s kit delivers pro-level clarity and lasting protection for the cost of a pizza. Stock a pair of gloves and set aside a sunny afternoon; you’ll drive away with brighter, safer beams and money still in your wallet.
5. 3M Headlight Lens Restoration System, 39008, 1 Kit

Overview: The 3M Headlight Lens Restoration System (39008) is a drill-powered kit that promises to turn foggy, yellowed headlights crystal-clear in about an hour. Instead of paying $80–$150 per pair at a body shop, you attach the included 3-inch discs to your own corded or cordless drill, wet-sand through 500-, 800-, and 3000-grit stages, then polish with the supplied 1-oz rubbing compound. The box contains everything except masking tape, water, and the drill itself, so you can start restoring right in your driveway.
What Makes It Stand Out: 3M’s color-coded, hook-and-loop discs let you step up through grits without guessing, and the tiny 3-inch diameter conforms to curved lenses better than generic 5-inch sanding pads. The final Trizact disc uses micro-replicating technology that leaves a uniform 3000-grit finish, so the polish stage takes only a minute or two. The kit is OEM-approved by several car manufacturers, giving it credibility that no-name brands lack.
Value for Money: At $22.98 you get six 500-grit gold discs, four 800-grit white discs, one Trizact refining disc, a disc pad holder, and enough rubbing compound for at least two mid-size cars. That breaks down to roughly $11 per vehicle—far cheaper than aftermarket assemblies that can cost $200+ each.
Strengths and Weaknesses:
Pros: Fast drill-powered sanding; clear, numbered instructions; professional-grade 3M abrasives; long-lasting UV results when topped with a sealant.
Cons: Requires a drill and moderate hand skill; single 1-oz compound packet may run short on heavily pitted lenses; no included UV clear-coat, so re-yellowing is possible within a year if you skip protection.
Bottom Line: If you already own a drill and are comfortable with wet-sanding, the 3M 39008 kit delivers body-shop clarity at a DIY price. Add a $10 UV sealant afterward and you’ll save hundreds while driving safer at night.
6. Meguiar’s Ultimate Headlight Restoration Kit - The Perfect Headlight Repair Kit to Remove Yellowing and Cloudiness from Headlights - Easy to Use and Seals Headlights with 18 Plus Months of Protection
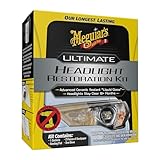
Overview: Meguiar’s Ultimate Headlight Restoration Kit promises showroom-clear lenses for under twenty-five bucks. Cloudy, yellowed headlights that cut night vision by up to 80% are sanded, polished, and sealed in about 30 minutes per lamp—no drill, no buffer, no prior experience required.
What Makes It Stand Out: The kit’s two-stage sanding discs (1000 & 3000 grit) knock down severe oxidation fast, but the real hero is the pre-saturated UV-blocking sealant wipe. It lays down a ceramic-clear coating that Meguiar’s guarantees for 18+ months, twice the longevity of most wipe-on competitors. Everything fits in one glove-box-sized pouch, so you can restore a lease return in a parking-lot lunch break.
Value for Money: At $21.96 you’re paying less than a single aftermarket headlight assembly (often $150+ each) and getting enough product for two average sedans. Factor in improved night safety and potential inspection failures avoided, and the kit literally pays for itself the first use.
Strengths and Weaknesses:
Pros: completely hand-operated; sealant dries crystal-clear with no haze; 18-month UV warranty; ample sandpaper for SUVs; excellent illustrated instructions.
Cons: heavy oxidation requires elbow grease—arthritic hands may struggle; single-use sealant wipe dries quickly in humid air; does not fix interior moisture or cracked lenses.
Bottom Line: If your headlights look like frosted mugs and you’re comfortable with 10 minutes of wet-sanding per side, this kit delivers professional beam clarity for the cost of a pizza. It’s the cheapest safety upgrade you can make in your driveway tonight.
7. POLIWELL Headlight Restoration Kit 3 Easy Steps to Restore Sun Damaged Headlights Polish Headlights Lens Restore Cleaner DIY Polishing, Sanding Discs, Scouring Pads for Electric Drill, Total 24Pack

Overview:
POLIWELL’s 24-piece kit promises showroom-clear headlights in three drill-powered steps: wet-sand, polish, seal. Designed for DIYers who already own a cordless drill, the set tackles the full spectrum of oxidation—from faint yellowing to chalky, sun-blasted lenses—in about 30 minutes per light.
What Makes It Stand Out:
The progressive P1000 → P3000 → P5000 sanding discs are color-coded and hook-and-loop backed, eliminating guesswork and sticky adhesive mess. A built-in spray bottle, generous 10 m roll of masking tape, and a soft interface pad mean you won’t pause mid-job to hunt for supplies. The final UV-blocking coat is genuinely automotive-grade, not the thin silicone oil competitors toss in.
Value for Money:
At $19.99 you get enough consumables to restore two complete vehicles (four headlights) and still have spare discs left over. A professional shop charges $80–$120 per pair; this kit pays for itself after the first use and stores compactly for touch-ups.
Strengths and Weaknesses:
Pros: Clear on-box instructions, drill attachment saves elbow grease, UV coat lasts 12+ months, works on taillights and fog lamps too.
Cons: Requires a drill (not included); sanding step can leave swirl marks if you rush; single-use gloves missing from kit; UV coat tube is small—order extra for larger trucks.
Bottom Line:
If you own a drill and can spare an afternoon, POLIWELL delivers pro-level clarity at a shade-tree price. Stock an extra UV coat and you’ll keep headlights brilliant for years.
8. Mothers NuLens Headlight Renewal Kit — Quickly Restores & Maintains Clarity on All Headlight Types – Includes PowerPlastic 4Lights Polish, 8 oz. with Protective, Oxidation-Inhibiting Polymers (07251)

Overview:
The Mothers NuLens Headlight Renewal Kit is a one-stop, drill-powered solution for turning foggy, yellowed headlights back to showroom clarity. Intended for every DIYer, the box packs an 8 oz. bottle of PowerPlastic 4Lights polish, a proprietary 3-inch PowerBall foam polishing tool, backing plate, and color-coded restoration discs—everything you need except the cordless drill.
What Makes It Stand Out:
Instead of multi-stage wet-sanding systems, NuLens streamlines the job into a single, mess-minimizing polishing step. The PowerBall’s tapered fingers reach compound curves while centrifugal force forces the oxidation-inhibiting polymer coating into the plastic, leaving a slick, UV-resistant shell that resists re-yellowing far longer than cheap wipes or sprays.
Value for Money:
At $17.71 you’re paying less than a professional shop charges per lens, yet the 8 oz. bottle handles at least six average cars. Factor in the reusable PowerBall and backing plate and the cost per restoration drops below three dollars—exceptional return for safety and resale appeal.
Strengths and Weaknesses:
Pros: Fast 10-minute job per lens; no masking or water required; protective polymers extend clarity; clear directions; economical multi-car quantity.
Cons: Not ideal for severe UV cracking—deep pits may still need wet-sand prep; PowerBall wears thin after ~10 uses; cardboard packaging flimsy.
Bottom Line:
For lightly to moderately oxidized headlights, Mothers NuLens delivers near-professional clarity with half the effort and a fraction of the price. Keep expectations realistic on heavily pitted lenses, but for routine restoration it’s an easy recommend.
9. Rain-X 610153 Headlight Restoration Kit - Car Light Lens Cleaner/Restorer with Sanding & Polishing Drill Attachments & Sealant Wipe, Removes Scratches & Oxidation- All in 1 Long Lasting Formula

Overview:
Rain-X 610153 is a drill-powered, 4-step kit that turns foggy, yellowed headlights into showroom-clear lenses for under twenty bucks. You get three sanding discs (P800, P1500, P3000), a foam polish pad that threads onto any household drill, 1 oz polish, and a single-use UV-blocking sealant wipe. The entire job takes 25–35 minutes per lens and requires nothing more than masking tape, a spray bottle, and a drill.
What Makes It Stand Out:
The included drill arbor means you’re cutting with machine speed and consistency, not elbow grease. Rain-X layers on a legitimate UV sealant—many budget kits skip this step, so yellowing returns in months. The progressive sanding sequence is color-coded on the disc backs, eliminating guesswork for first-timers.
Value for Money:
At $19.29 you’re paying less than a single headlight polish at a detailing shop (typically $80-$120). The sealant is rated for 12 months; even if you repeat the job yearly, you’re still four years of clarity for the price of one professional service.
Strengths and Weaknesses:
Pros: Drill attachment cuts labor by 70 %; sealant really slows re-oxidation; clear pictorial instructions; enough polish for two small cars.
Cons: Single sealant wipe—no spares for touch-ups; sanding discs clog quickly on heavily pitted lenses; cardboard backing on discs can delaminate if drill speed is too high.
Bottom Line:
For DIYers who already own a drill, this is the cheapest, fastest route to night-and-day brighter headlights. Just work wet, keep the rpm moderate, and buy a second kit for the spare sealant—your future self will thank you.
10. Meguiar’s Two Step Headlight Restoration Kit, Headlight Cleaner Restores Clear Car Plastic and Protects from Re-Oxidation, Includes Headlight Coating and Cleaning Solution - 4 Count (1 Pack)

Overview:
Meguiar’s Two-Step Headlight Restoration Kit promises showroom-clear lenses without power tools. For $21.93 you get four single-use pouches—each containing a pre-soaked abrasive pad and a foil sachet of synthetic coating—enough to refresh two average headlights or four fog lights. The entire job is finished by hand in under 15 minutes per lens, making it one of the fastest DIY solutions on the market.
What Makes It Stand Out:
The kit’s “no-drill” philosophy is its headline act: the cleaning pad is pre-impregnated with a micro-abrasive slurry that levels oxidation as you scrub, while the final wipe-on coating chemically cross-links into a UV-shielding film rated for a full year. Meguiar’s bundles four complete treatments in one box, so you can maintain your own car and still help a friend—or hit the lenses again at the six-month mark for unbeatable clarity.
Value for Money:
At roughly $5.50 per full treatment, the kit costs less than a single professional headlight polish and delivers comparable initial results. Because the coating lasts 12 months, the per-year expense drops to under six dollars, dwarfing off-the-shelf wipes that fog back up in a season.
Strengths and Weaknesses:
Pros: genuinely tool-free; noticeable night-vision improvement; four complete sets in one pack; coating repels dust and washer fluid.
Cons: heavily oxidized lenses may still need a 2000-grit pass first; single-use pouches create plastic waste; coating must cure dry for four hours—no rain or dew allowed.
Bottom Line:
If your headlights are yellowed but not deeply pitted, this kit is the quickest, cheapest way to restore safe nighttime brightness and keep them clear for a year—no garage gadgets required.
Why Headlight Lenses Degrade in the First Place
Modern headlights are molded from polycarbonate plastic—tough enough to absorb rock impacts, but porous enough to surrender to UV rays, ozone, and acid rain. Over time, the factory UV-clearcoat oxidizes, creating microscopic cracks that scatter light and trap grime. Heat cycles from the bulb accelerate the process, turning a once-crystal lens into a hazy marble. Understanding this chemistry is key: any restoration method that doesn’t re-establish UV protection is basically a short-term polish, not a fix.
How Restoration Kits Actually Work
Forget the toothpaste myth—real kits rely on graduated abrasion followed by re-sealing. You’re essentially sanding off the dead plastic, then laying down a new optical surface. Some systems stop at 3,000-grit and call it “clear,” while others progress to 8,000-grit and finish with a ceramic coating. The sequence—clean, sand, compound, polish, protect—never changes; only the abrasives, applicators, and curing chemistry do.
Wet-Sand vs. Wipe-On: Two Philosophies Explained
Wet-sand systems use sealed discs or papers lubricated with water to level the lens. They’re messier and demand a power drill or hand-sander, but they remove heavy oxidation in minutes. Wipe-on kits rely on chemical abrasives suspended in a solvent; you scrub, wipe, and walk away. They’re convenient for light haze, yet struggle with crusty, decade-old lenses. Choosing between them starts with an honest look at lens severity, not marketing hype.
UV Protection: The Make-or-Break Feature
A restored lens without fresh UV blockers will re-oxidize—often within weeks. Premium kits incorporate true automotive-grade clearcoats or ceramic resins that cross-link under sunlight, forming a flexible shield. Budget offerings may only include a thin silicone or acrylic sealant that evaporates after a few car washes. Check the curing mechanism: air-dry, wipe-off products rarely exceed 6-month durability, whereas two-part catalyzed coatings can last 3–4 years.
Drill-Activated vs. Hand-Powered Abrasives
Drill-activated backing plates spin foam or micro-mesh discs at 1,200–1,500 RPM, cutting labor time by 70%. The risk? Heat build-up can melt polycarbonate edges if you linger in one spot. Hand-powered kits trade speed for control; you’ll sweat more, but you’re less likely to dish out the lens. If you’ve never touched a power tool, start manual; if you’re comfortable waxing your car with a dual-action polisher, the drill route is faster and usually yields a glossier finish.
Single-Step vs. Multi-Stage Systems
Single-step pens or wipes promise “headlights in 5 minutes.” They’re essentially colored oils that mask yellowing until the next rainstorm. Multi-stage boxes contain 3–7 bottles: degreaser, sanding films, compound, polish, UV coat, and sometimes lint-free cloths. The extra steps feel tedious, but each layer optically refines the surface. Think of it like nail polish—one coat chips, four coats shine.
Lens Severity: Matching the Kit to the Damage
Grade 1 haze looks like a light film; Grade 5 is pitted, chalk-white, and you can scratch it with a fingernail. Most wipe-ons cap out at Grade 2. If your fingernail catches, you need sanding. Skip this self-diagnosis and you’ll burn through half a kit with zero visual payoff. Pro tip: snap a photo with your phone flash at night—if the beam pattern is blurred or haloed, you’re closer to Grade 4.
Tape & Masking Supplies: Don’t Skip the Perimeter
Polycarbonate scratches at 3 on the Mohs scale—softer than steel wool, softer than your fingernail. One stray 800-grit particle dragged across clearcoat equals a permanent swirl. Quality kits include automotive-grade masking tape rated for 24-hour water exposure. If yours doesn’t, spring for 3M Safe-Release; it’s cheaper than repainting a fender.
Clarity Meter Readings: What “90 % Optical Clarity” Really Means
Manufacturers love throwing out percentages, but few explain the baseline. A new OEM headlight meters around 100 % on a BYK-Gardner haze-gard. A sun-baked lens can drop to 40 %. A competent restoration should bring it back to 85–92 %. Anything above that enters show-car territory and usually requires machine polishing beyond what a driveway kit offers. If the box claims “110 % clarity,” it’s marketing fluff—there’s no scale past the original factory surface.
ceramic coatings vs. Traditional Sealants
Ceramic coatings embed SiO2 nanoparticles that form a glass-like lattice, shedding water and road salt for 2–3 years. Traditional polymer sealants bead nicely for 6–9 months but eventually evaporate. The trade-off is cost and prep: ceramics demand a dust-free final wipe and 24-hour cure away from dew. If you park outside year-round, ceramic is worth the upcharge; garaged weekend cars can live happily on a good polymer.
Waterless vs. Rinse-Required Formulas
Eco-conscious brands now market waterless compounds that turn into a dust you buff away. They save gallons and keep runoff out of storm drains, but they load up pads faster and can dust-bomb your engine bay. Rinse-required systems flush abraded plastic away continuously, keeping discs sharper. In drought regions, waterless is a responsible compromise; elsewhere, a garden hose and biodegradable soap remain the gold standard.
Budget vs. Premium: Where Extra Dollars Go
A $9 kit pays for solvents and 1,000-grit paper in a blister pack. A $45 kit funds color-coded sanding films, foam-backed discs, a syringe-applied UV coat, and sometimes microfiber gloves. The delta isn’t just materials—it’s R&D: premium brands test for impact on ADAS cameras, yellowing index under SAE J576, and tape adhesion on urethane bumpers. If your car has adaptive cruise or lane-keeping, the extra money buys peace of mind that the lens coating won’t interfere with IR beams.
Safety Gear You’ll Need Beyond the Box
No kit ships with a respirator, yet polycarbonate dust is an airway irritant. Add N95 masks, nitrile gloves, and eye protection. A cheap spray bottle with distilled water keeps sanding films lubricated and reduces clogging. Finally, drape an old bed sheet over the front of the car; airborne grit loves landing on freshly polished hoods.
Environmental Impact & Responsible Disposal
Micro-plastic slurry is nasty stuff. Capture rinse water in a 5-gallon bucket, let solids settle overnight, then pour off the clear top layer on gravel or grass—never into storm drains. Cure leftover UV coatings in the open jar until rubbery, then trash the solid. Some auto-parts chains accept spent sanding discs as “plastic residue,” but call ahead. Taking ten minutes for proper disposal keeps rivers—and your conscience—clear.
Timeline Expectations: From Setup to Final Cure
Expect 45–90 minutes of active labor plus 2–24 hours of cure time. Wet-sand steps alone consume 20–40 minutes per lens for a first-timer. UV coatings vary: wipe-off sealants are drive-away in 30 minutes, two-part ceramics need overnight humidity-controlled curing. Plan for a cloudy day or a shaded garage; direct sunlight can skin a UV coat before it levels, trapping swipe marks forever.
Maintenance Schedule After Restoration
Even the best coating isn’t immortal. Wash headlights with pH-neutral soap every second car wash, then apply a spray-on SiO2 booster every six months. Avoid petroleum-based waxes—they yellow plastics. If you notice water no longer beading, it’s time for a quick polish and a fresh sealant layer, not another full sanding. Think of it like sunscreen: reapply before you burn.
Frequently Asked Questions
How long does a typical DIY restoration last before the lenses haze again?
With a quality UV-ceramic topcoat and proper maintenance, expect 2–4 years of clarity; wipe-on sealants may fade in 6–12 months.Can I use a headlight kit on motorcycle or boat windows?
Yes, as long as the surface is polycarbonate or acrylic; always test the coarsest grit on a hidden corner first.Will sanding remove the factory DOT markings or headlight leveling lines?
No, those are molded into the inside lens; you’re only abrading the outer surface.Is a power drill absolutely necessary, or can I achieve the same results by hand?
Hand sanding works, but it takes 3–4 times longer and requires strict grit discipline; a drill simply speeds material removal.My headlights have tiny cracks inside the plastic—will a kit fix that?
No, interior cracks indicate lens failure; restoration only addresses outer oxidation, not structural damage.Do I need to remove the headlight assembly from the car?
Usually no, provided you mask surrounding paint; only vintage cars with sealed beams require removal.Are ceramic coatings safe for adaptive cruise control and lane-keeping cameras mounted behind the lens?
Yes, cured SiO2 is optically clear in the IR spectrum, but avoid overlapping onto the camera’s clear aperture to prevent glare.Can I apply car wax or polymer sealant over the new UV coating for extra gloss?
Skip traditional wax; it can yellow. Instead, use a plastic-specific UV booster every six months.What’s the ideal temperature range for applying restoration chemicals?
60–80 °F (15–27 °C) with low humidity ensures proper curing; avoid direct sunlight or dew.How do I know when it’s time to replace the headlight instead of restoring it?
If the lens is deeply pitted to the point of opacity, the inside is sandblasted, or the housing seal is compromised (allowing condensation), replacement is safer and more cost-effective.