There’s something undeniably special about sliding into a classic car with its original vinyl interior intact. That distinct aroma, the subtle texture under your fingertips, the way it transports you back to an era when automotive design was as much about artistry as engineering. But vintage vinyl is a finicky mistress—decades of sun exposure, temperature swings, and well-meaning but misguided cleaning attempts can transform supple seating into cracked, faded disappointment. The right care regimen doesn’t just clean; it preserves a piece of automotive history.
The market is flooded with modern interior products promising miracles, but vintage vinyl demands a different approach. What works on today’s synthetic leather can be disastrous on fifty-year-old vinyl formulations. This guide cuts through the noise, focusing on the essential product categories and features that actually matter when maintaining, restoring, or protecting the interior of your classic ride. We’re talking about the science behind effective care, the application techniques that separate amateurs from experts, and the critical details that keep your interior looking period-correct while extending its life for decades to come.
Top 10 Vintage Vinyl Car Interior Products
Detailed Product Reviews
1. 3D Leather, Vinyl & Plastic Conditioner | Restores, Conditions & Protects Car Interiors | Non-Greasy UV Protection for Seats, Steering Wheels, & Trim |16 oz
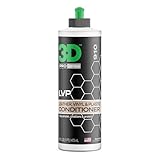
Overview: The 3D Leather, Vinyl & Plastic Conditioner is a professional-grade interior treatment designed for modern automotive surfaces. This 16-ounce bottle delivers comprehensive restoration and protection for leather, vinyl, and plastic components throughout your vehicle’s cabin, engineered specifically for today’s high-tech interior materials.
What Makes It Stand Out: This conditioner distinguishes itself with a genuinely non-greasy, matte finish that avoids the shiny, slippery residue common with traditional products. Its biodegradable, VOC-compliant formula features natural mink oil and is proudly manufactured in the USA. The UV protection technology prevents cracking and fading while maintaining surface flexibility, making it suitable for both automotive and household applications across multiple surface types.
Value for Money: At $18.99 ($1.19 per ounce), this product sits in the mid-range price category. While premium-priced compared to basic protectants, its professional formulation, multi-surface versatility, and concentrated effectiveness justify the cost. One bottle treats multiple vehicles, offering better long-term value than cheaper alternatives requiring frequent reapplication.
Strengths and Weaknesses: Strengths include non-oily finish, UV protection, biodegradable ingredients, versatility across surfaces, and professional results. Weaknesses are the higher price point for casual users and unsuitability for suede, nubuck, or Alcantara materials. The matte finish may disappoint those preferring high-gloss shine.
Bottom Line: An excellent choice for enthusiasts seeking professional-grade interior care without greasy residue. The eco-friendly formula and superior protection make it worth the premium for serious car owners prioritizing long-term preservation over short-term savings.
2. Moyishi Wood Grain Vinyl Sticker Decal Roll Car Interior Home Office Furniture DIY Film Wrap 30cmx100cm (Brown)

Overview: This wood grain vinyl decal roll offers an affordable DIY solution for transforming interior surfaces. Measuring 30cm by 100cm, this brown film provides a quick aesthetic upgrade for automotive interiors, furniture, or office spaces without permanent modification or professional installation costs.
What Makes It Stand Out: The product’s exceptional DIY-friendliness sets it apart—requiring only a heat gun and squeegee for bubble-free application on non-porous surfaces. Its remarkable conformability allows it to contour complex shapes and bends seamlessly. The 5-7 year outdoor durability rating indicates robust construction that protects underlying surfaces from further decay while maintaining appearance.
Value for Money: At $9.99, this represents exceptional value for budget-conscious renovators. Compared to professional reupholstering or replacement costs, this film delivers dramatic transformation for pennies on the dollar. The generous dimensions cover multiple small projects, maximizing utility per dollar spent across automotive and household applications.
Strengths and Weaknesses: Strengths include affordability, easy installation, durability, versatility across applications, and protective qualities. Weaknesses involve the learning curve for perfect application, potential for peeling if improperly installed, and artificial appearance that may not satisfy purists. Requires careful surface preparation for optimal adhesion.
Bottom Line: Perfect for DIY enthusiasts seeking dramatic interior transformations on a minimal budget. While professional results demand patience and practice, the unbeatable price and durability make this an outstanding value for experimental upgrades and surface protection.
3. Leather Recoloring Balm,8.5oz Leather Color Restorer,Beige Leather Repair kit for Furniture and Car Interior,Leather Couch Scratch Repair,Leather Dye Paint for Faded,Cracked and Damaged Leather

Overview: This 8.5-ounce beige leather recoloring balm offers a comprehensive solution for restoring faded, cracked, and damaged leather items. Designed for both automotive interiors and household furniture, it penetrates deep to repair imperfections while restoring original texture and elasticity across numerous leather and vinyl applications.
What Makes It Stand Out: The advanced formula provides dual-action restoration—filling cracks while simultaneously rejuvenating color and adding a protective layer. Its remarkably quick drying time (10-20 minutes air dry or 1-2 minutes with a hairdryer) enables efficient DIY repairs without professional skills. The versatile beige shade matches numerous interior schemes, making it practical for diverse projects.
Value for Money: Priced at $19.99 for 8.5 ounces, this balm delivers solid value for targeted restoration projects. While not inexpensive, it costs significantly less than professional leather repair services or replacement furniture. The comprehensive formula eliminates need for separate conditioners and dyes, consolidating expenses into one effective solution.
Strengths and Weaknesses: Strengths include easy application, rapid drying, deep penetration for crack repair, versatility across leather and vinyl items, and safety assurance. Weaknesses involve color matching limitations, potential for uneven application on large surfaces, and limited effectiveness on severely damaged leather requiring structural repair rather than cosmetic treatment.
Bottom Line: An excellent DIY solution for moderate leather restoration needs. Ideal for refreshing faded automotive seats and furniture with minor damage. While not a miracle worker for extensively cracked leather, it provides impressive results for the price and skill level required.
4. BSCPAM Black Leather Recoloring Balm,Leather Couch Scratch/Stain Remover,Leather Repair kit for Vinyl Furniture and Car Interior,Leather Dye Paint for Scratched and Faded Leather Couches

Overview: BSCPAM’s black leather recoloring balm is a professional-grade repair kit designed to restore scratched, stained, and faded leather and vinyl surfaces. This comprehensive solution addresses multiple forms of damage while providing protective benefits for automotive and furniture applications with an all-inclusive approach.
What Makes It Stand Out: The complete DIY kit includes not just the recoloring balm but also sponges, gloves, powder puffs, brush, putty knife, and manual—everything needed for professional results. Its specialized formula penetrates leather fibers to repair scratches, cracks, and stains while creating a protective barrier against future damage, extending item lifespan significantly beyond cosmetic improvement.
Value for Money: At $19.99, this kit represents outstanding value. Comparable professional leather repair services cost hundreds of dollars, while purchasing tools separately would exceed this price point. The included accessories eliminate additional purchases, making it a true all-in-one solution for multiple repair projects across various leather and vinyl items.
Strengths and Weaknesses: Strengths include comprehensive tool kit, professional-grade formula, versatility across leather and vinyl, effective scratch and stain removal, and protective coating. Weaknesses are limited to black color option only, potential for amateur-looking results without practice, and inability to repair deep structural tears or holes requiring professional intervention.
Bottom Line: The ultimate DIY leather repair kit for black leather restoration. The included tools and professional formula deliver exceptional value, making it ideal for automotive interiors and furniture with scratches and fading. A must-have for black leather owners seeking cost-effective rejuvenation.
5. Car Interior Film Wood Wrap Self-Adhesive Wood Textured Car Interior Film Panel Wrap Stickers Vintage (W1305)

Overview: This self-adhesive wood textured film offers a vintage aesthetic upgrade for automotive interiors. Measuring 200cm by 30cm, this roll provides ample material for panel wrapping and decorative applications without requiring professional installation or chemical adhesives, making it accessible to all skill levels.
What Makes It Stand Out: The vintage wood design appeals to drivers seeking classic styling, while the self-adhesive backing simplifies installation dramatically—no heat gun required for basic applications. The film’s trimmable nature allows precise customization for complex dashboard contours and panel shapes, enabling personalized interior transformations with minimal equipment.
Value for Money: At $12.29, this film offers excellent affordability for aesthetic upgrades. The generous length covers extensive interior areas, making it cheaper per square foot than many competitors. It provides budget-friendly renewal while protecting original surfaces from wear and UV damage, preserving underlying materials and potential resale value.
Strengths and Weaknesses: Strengths include easy self-adhesive application, generous dimensions, customizable sizing, vintage aesthetic appeal, and protective qualities. Weaknesses involve potential adhesion issues on textured surfaces, possible bubble formation without proper technique, artificial appearance upon close inspection, and durability concerns in high-temperature automotive environments.
Bottom Line: An affordable, user-friendly option for drivers wanting vintage wood interior styling. While professional results require patience and surface preparation, the price and ease of use make it ideal for experimental customization. Best suited for flat or gently curved panels rather than complex contours.
6. Leather Restore Leather Color Repair, Black 1 OZ - Repair, Recolor and Restore Couch, Furniture, Auto Interior, Car Seats, Vinyl and Shoes

Overview: The Leather Restore Leather Color Repair offers a compact solution for rejuvenating black leather and vinyl items. This 1-ounce bottle promises to tackle scuffs, scratches, and cracks while restoring faded surfaces to their former glory. Designed for furniture, auto interiors, shoes, and accessories, it positions itself as a quick-fix option for DIY enthusiasts looking to avoid costly professional repairs.
What Makes It Stand Out: Its three-in-one approach—repair, recolor, and restore—simplifies leather care into a single application. The formula dries quickly and creates a flexible finish that won’t rub off or peel, which is crucial for high-traffic items like car seats and furniture. Being made in the USA adds a layer of quality assurance, and the ready-to-use formula eliminates mixing or complicated preparation.
Value for Money: At $9.99, this product delivers exceptional value for small-scale repairs. One ounce is sufficient for touching up multiple minor imperfections, making it far more economical than replacing a leather couch or hiring a restoration service. For those with black leather items showing early signs of wear, it’s an affordable preventative maintenance tool.
Strengths and Weaknesses: Strengths include its ease of use, fast drying time, versatile application, and genuine repair capabilities beyond mere cosmetic cover-up. The made-in-USA quality is reassuring. However, the single-ounce quantity limits its use to small projects, and the black color may not perfectly match all black leather shades. It’s not ideal for large area restoration.
Bottom Line: Perfect for minor touch-ups on black leather and vinyl, this product is a cost-effective solution for extending the life of your belongings. Keep expectations realistic—it’s a spot treatment, not a miracle worker.
7. Faux Leather Fabric, 55" Wide 1.3mm Thicken Upholstery Fabric by The Yard Soft Marine Vinyl Fabric Vintage PU Leather Sheets for Crafts Sewings Chairs Seats Wallets Cushions, 1 Yard Black

Overview: This Faux Leather Fabric provides a practical alternative to genuine leather for DIY projects and upholstery needs. Measuring 55 inches wide and 1.3mm thick, this marine-grade vinyl comes pre-cut at one yard (36 inches), offering a substantial material for various creative applications. Designed with pet owners in mind, it addresses common concerns about durability and maintenance.
What Makes It Stand Out: The pet-friendly construction features a PVC surface with brushed backing that’s specifically engineered to resist claws, chewing, and scratching. Its water-resistant and oil-resistant properties make it exceptionally easy to clean—just a quick wipe with a damp cloth removes most stains. The vintage textured grain provides an authentic leather appearance without the ethical concerns or high maintenance of real leather.
Value for Money: At $16.99 per yard, this fabric sits in the mid-range for quality faux leather, offering excellent durability for the price. The thickness (1.3mm) suggests longevity, making it suitable for high-use items like chair seats or pet furniture. For crafters and home DIYers, one yard can yield multiple smaller projects, maximizing value.
Strengths and Weaknesses: Strengths include superior pet resistance, easy maintenance, versatile applications, and realistic texture. The water and oil resistance is genuinely practical. However, the folded packaging creates stubborn creases that require effort to remove, and multiple yard orders don’t ship continuously. The material may also lack the breathability of genuine leather.
Bottom Line: An excellent choice for pet owners and DIY enthusiasts seeking durable, low-maintenance upholstery material. Just be prepared to work out packaging creases before starting your project.
8. Chemical Guys SPI_401 Vintage Series Leather Conditioner Car Interiors, Furniture, Apparel, Sneakers, Boots, and More (Works on Natural, Synthetic, Pleather, Faux Leather and More), 128 fl oz (1 Gal)
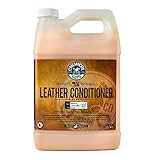
Overview: The Chemical Guys Vintage Series Leather Conditioner arrives in an impressive 128-ounce gallon size, targeting serious leather enthusiasts and professional detailers. This water-based formula, enriched with Vitamin E and Aloe extracts, promises to moisturize and restore leather’s supple feel across a vast range of applications—from car interiors to furniture, apparel, and accessories.
What Makes It Stand Out: The sheer volume sets it apart, offering enough product for dozens of applications across an entire household’s leather collection. Its refined formula penetrates deeply without leaving a greasy residue, drying to the touch while maintaining a subtle, pleasant leather scent. The versatility to work on natural, synthetic, pleather, and faux leather makes it a universal solution.
Value for Money: While $91.99 represents a significant upfront investment, the per-ounce cost is substantially lower than smaller bottles. For households with multiple leather vehicles, furniture pieces, and accessories, this bulk purchase eliminates repeated buying. Professional detailers will find it particularly cost-effective for client work.
Strengths and Weaknesses: Strengths include massive quantity, high-quality nourishing ingredients, non-greasy finish, universal leather compatibility, and professional-grade results. The Vitamin E and Aloe combination genuinely restores softness. However, the gallon size requires proper storage to prevent drying out, and the price point is overkill for casual users with minimal leather items. The large container can be cumbersome to handle.
Bottom Line: A premium, bulk solution for serious leather care. If you maintain numerous leather items or work professionally, this gallon offers unbeatable long-term value. Occasional users should opt for smaller sizes.
9. Leather Recoloring Balm,8.5oz Leather Color Restorer,Gray Leather Repair kit for Furniture and Car Interior,Leather Couch Scratch Repair,Leather Dye Paint for Faded,Cracked and Damaged Leather

Overview: This Leather Recoloring Balm offers an 8.5-ounce solution for restoring gray leather and vinyl items showing signs of age. Marketed as a comprehensive repair system, it targets cracks, wear, scratches, and fading across furniture, automotive interiors, and accessories. The cream-based formula promises deep penetration to restore both appearance and texture.
What Makes It Stand Out: The advanced formula goes beyond surface coloring, penetrating leather to fill imperfections and restore original elasticity. It creates a protective layer that resists future wear, extending the lifespan of treated items. The flexible drying options—air dry in 10-20 minutes or accelerate with a hairdryer in 1-2 minutes—accommodate different project timelines. The safety-conscious formulation provides peace of mind.
Value for Money: At $19.99 for 8.5 ounces, this balm offers excellent coverage for the price, positioning it as a mid-range option that avoids the high cost of professional restoration or replacement. The protective benefits add long-term value by preventing further damage, making it a smart investment for preserving expensive leather furniture.
Strengths and Weaknesses: Strengths include generous quantity, deep-penetrating formula, protective finish, quick drying time, versatile gray color, and user-friendly application. The safety assurance is notable. However, gray may not match all leather tones, and severely damaged leather might require multiple applications or prep work. Results depend heavily on proper surface preparation.
Bottom Line: An effective, user-friendly solution for restoring gray leather items. Ideal for DIYers wanting to revive faded furniture or car interiors without professional expense. Manage expectations for heavily cracked leather.
10. BSCPAM Medium Brown Leather Recoloring Balm with 100ml Mink Oil,Leather Couch Scratch Remover,Leather Repair kit for Vinyl Furniture and Car Interior,Leather Dye Paint,Mink Oil for Leather

Overview: The BSCPAM Medium Brown Leather Recoloring Balm distinguishes itself by including 100ml of mink oil alongside the color restorer, creating a two-step repair and conditioning system. This comprehensive kit targets furniture, automotive interiors, and various leather accessories, providing both aesthetic restoration and deep nourishment in one package.
What Makes It Stand Out: The inclusion of mink oil sets this apart from standard recoloring balms, offering deep conditioning that enhances luster while providing a protective shield against harsh conditions. The complete DIY toolkit—featuring sponges, gloves, powder puffs, brush, putty knife, and manual—eliminates the need for separate supply purchases. The dual-action approach addresses both surface damage and leather health.
Value for Money: At $22.99, this kit delivers exceptional value by bundling recoloring balm, conditioning oil, and application tools. Purchasing these components separately would cost significantly more. For those needing both color restoration and conditioning, it’s a cost-effective alternative to professional services, which can run hundreds of dollars.
Strengths and Weaknesses: Strengths include the all-in-one convenience, mink oil conditioning bonus, comprehensive tool set, versatile application, and professional-level results potential. The medium brown color suits many traditional leather items. However, mink oil may darken some leathers beyond the intended shade, and the fixed color limits matching options. The included tools, while functional, are basic quality.
Bottom Line: An outstanding starter kit for complete leather restoration. The mink oil addition provides genuine conditioning benefits beyond cosmetic repair. Perfect for DIYers tackling medium brown leather items who want professional results without the professional price tag.
Understanding Vintage Vinyl: Why It Demands Special Care
Vintage vinyl isn’t the same material you’ll find in a 2024 model year vehicle. Early vinyl formulations from the 1950s through the 1980s used different plasticizers, stabilizers, and base compounds that break down in unique ways. These materials are more porous, more susceptible to UV degradation, and often contain lead-based stabilizers that modern chemicals can react with negatively. The topcoat layers are thinner and less resilient, meaning aggressive cleaners strip away protective finishes that can never be replaced. Understanding this chemical composition is the first step in selecting products that work with the material rather than against it.
The Anatomy of a Quality Vinyl Cleaner
A proper vintage vinyl cleaner must accomplish three things simultaneously: dissolve embedded grime without disturbing the substrate, lift contaminants without requiring excessive mechanical agitation, and leave behind no residue that could accelerate future deterioration. Look for water-based formulations with chelating agents that bind to metal ions in old grime. The ideal product will have a dwell time of 2-5 minutes, allowing it to break down contaminants before you ever touch the surface. Avoid anything with alcohol content above 5%, as it can extract essential plasticizers from aging vinyl.
pH-Balanced Formulations: The Non-Negotiable Feature
The pH scale is where most DIY restorers go wrong. Vintage vinyl thrives in a slightly acidic to neutral environment (pH 5.5-7.0). Products that are too alkaline (pH 8+) will saponify natural oils and break down the vinyl’s molecular structure over time. Too acidic (pH 4-), and you risk degrading any remaining factory protective coatings. Quality cleaners will explicitly state their pH range on the label or technical data sheet. If you can’t find this information, that’s your first red flag. For reference, many all-purpose cleaners sit at pH 11-13—catastrophic for vintage materials.
Surfactant Technology: Cutting Through Decades of Grime
Modern surfactants are marvels of chemical engineering, but not all are appropriate for classic car interiors. You want non-ionic surfactants that emulsify oils without creating excessive foam. Foam is the enemy—it traps dirt particles against the surface during cleaning, creating micro-scratches. The best formulations use a blend of fast-acting surfactants for surface dirt and slower-penetrating ones for deep-set grime in textured patterns. This dual-action approach means you’re not scrubbing harder, you’re just letting chemistry do the heavy lifting.
Conditioners vs. Cleaners: Knowing When to Use What
This is perhaps the most misunderstood aspect of vinyl care. Cleaners remove; conditioners add. Using a conditioner on dirty vinyl seals contaminants inside the material, creating a petri dish of slow deterioration. Conversely, over-cleaning without subsequent conditioning leaves vinyl dry and vulnerable. The rule is simple: always clean first, condition second. But timing matters—wait 24-48 hours after deep cleaning before applying conditioner. This allows any residual moisture to evaporate from the vinyl’s pores and ensures the conditioner bonds to the actual material, not water molecules trapped inside.
UV Inhibitors: Your First Line of Defense Against Fading
UV damage is cumulative and irreversible. Quality protectants must contain UV absorbers like benzophenone or benzotriazole compounds, not just UV blockers like titanium dioxide. Absorbers convert UV radiation into harmless heat, while blockers simply reflect it—and often leave a white cast unsuitable for vintage aesthetics. The concentration matters: look for products listing UV inhibitors in the first five ingredients. Anything lower is likely present in trace amounts only for marketing purposes. Reapplication every 4-6 weeks is non-negotiable for cars that see regular sunlight.
Emollient Rich Formulas: Restoring Suppleness Without Greasiness
The greasy dash is the hallmark of amateur detailing. Quality conditioners use dry emollients like isopropyl myristate or dimethicone that absorb completely within 30-45 minutes. These compounds mimic the original plasticizers lost to outgassing and heat cycling. Avoid petroleum distillates—they create a temporary shine but actually degrade vinyl over time by breaking down remaining plasticizers. The test is simple: apply the product, wait an hour, then press a clean white cloth against the surface. If you see residue, the formula is too heavy for vintage applications.
Protectants: The Invisible Shield for Your Interior
Think of protectants as sunscreen and conditioner as moisturizer. Protectants create a sacrificial layer that takes the environmental abuse so your vinyl doesn’t have to. The best formulations are polymer-based, creating a breathable membrane that allows moisture vapor to escape while blocking liquid water and contaminants. This is crucial because trapped moisture accelerates mold growth and plasticizer migration. Look for products that specifically mention “cross-linking polymers”—these form a more durable, flexible barrier that lasts 6-8 weeks versus the 2-week protection of basic silicone sprays.
Matte vs. Gloss Finish: Achieving Authentic Vintage Aesthetics
Original equipment manufacturers used specific sheen levels that varied by era and model. A 1960s muscle car likely had a low-gloss (30-40% reflectance) interior, while a 1970s luxury barge might have been closer to semi-gloss (50-60%). Modern products often default to high-gloss because it looks “new” to untrained eyes. Seek out protectants that offer sheen control or are specifically marketed as “factory finish” or “original sheen.” You can also dial back gloss by buffing with a dry microfiber cloth 15 minutes after application, effectively creating a custom finish that matches your car’s era.
Anti-Static Properties: Keeping Dust at Bay
Static electricity is vinyl’s silent enemy, attracting dust that contains abrasive particles and acidic compounds. Quality protectants include anti-static agents like quaternary ammonium compounds that dissipate electrical charge. This is particularly important for cars stored in dry climates or those with period-correct wool carpeting that generates static. The effectiveness diminishes after 3-4 weeks, so regular reapplication is key. Test anti-static properties by running a microfiber cloth across the surface—if you feel the familiar drag of static, it’s time to reapply.
Application Tools: Just as Important as the Product Itself
The finest chemistry in the world is worthless if applied incorrectly. Your tool selection directly impacts results and risk of damage. For vintage vinyl, think gentle and precise rather than aggressive and fast. The wrong brush can create permanent texture damage in seconds; the wrong cloth can leave lint that becomes embedded in aging pores. Invest in quality tools once, and they’ll serve you for decades of careful maintenance.
Microfiber Madness: Selecting the Right Grade
Not all microfiber is created equal. For vintage vinyl, you want 70/30 blend (polyester/polyamide) with a density of 300-350 GSM for cleaning, and 200-250 GSM for application. The heavier cloths have more absorbency for lifting dissolved grime, while lighter ones ensure even product distribution without over-application. Avoid “plush” or “shaggy” microfiber—the long fibers can catch on cracked edges and loose stitching. Look for edgeless designs or those with silk-sealed edges to prevent scratching. White microfiber is preferable because it shows dirt, indicating when you’ve loaded the cloth with contaminants and need to flip to a clean section.
Brush Basics: Natural Bristles vs. Synthetic
For textured vinyl—think 1970s basketweave or 1960s Madrid grain—brushes are essential for agitating cleaners from the valleys without flattening the peaks. Natural boar’s hair brushes offer the right balance of stiffness and flexibility, with cut ends that won’t scratch. Synthetic brushes, even “soft” ones, often have molded tips that can be too aggressive. The ideal brush has bristles 1-1.5 inches long, allowing them to flex and reach deep textures. Never use nylon brushes, even for stubborn stains—they’ll create micro-fissures that accelerate cracking.
The Pre-Cleaning Inspection Protocol
Before touching any product to your interior, conduct a systematic inspection. Document everything with photos using both standard and macro lenses. You’re looking for six critical issues: active cracking, plasticizer bleed (sticky surface), color transfer, seam separation, foam degradation underneath, and previous product buildup. Test plasticizer bleed by pressing a clean white cloth against the surface for 30 seconds—any stickiness or color transfer indicates you’ll need a specialized degreasing step before general cleaning. This inspection tells you which products to use and, more importantly, which techniques to avoid.
Spot Testing: The Step You Can’t Skip
The arrogance of skipping spot testing has ruined more vintage interiors than any single product ever could. Test in three places: an inconspicuous area (under the seat), a moderately exposed area (side bolster), and the most damaged area you’re willing to risk. Apply the product, wait the full recommended dwell time plus 50%, then inspect for color change, texture alteration, or sheen shift. Wait 24 hours and inspect again—some reactions are delayed. This isn’t just about product safety; it’s about understanding how your specific vinyl will respond. Different production batches from the same manufacturer can react differently after decades of aging.
Deep Cleaning Techniques for Textured Vinyl
Textured vinyl is a dirt magnet, with decades of grime packed into every valley. The two-bucket method is non-negotiable: one bucket with diluted cleaner, one with clean water for rinsing your tool. Work in 12x12 inch sections, applying cleaner and letting it dwell for 3 minutes. Then use your boar’s hair brush in overlapping circular motions, applying just enough pressure to see the bristles flex slightly. Immediately wipe with a damp microfiber, then dry microfiber. The key is keeping the surface wet until the final wipe—letting cleaner dry on the surface is the fastest way to cause irreversible discoloration.
Tackling Stubborn Stains: Oil, Ink, and Unknown Substances
Vintage cars collect mysteries. For oil-based stains (decades of hair oil, mechanical grease), you need a dedicated degreaser with a high KB value (solubility rating) but low evaporation rate. Apply, cover with plastic wrap to prevent evaporation, and let it work for 15-20 minutes. For ink, a targeted approach using a cotton swab with a mild solvent works best—never spray solvents broadly. For unknown stains, start with the mildest approach and escalate slowly. The hierarchy is: water-based cleaner → pH-neutral cleaner → enzyme cleaner → solvent-based cleaner. Each step up the ladder increases risk, so exhaust each level before progressing.
The Conditioning Process: Restoring Life Without Overdoing It
Over-conditioning is worse than under-conditioning. Too much product creates a tacky surface that attracts dirt and can actually soften the vinyl to the point of deformation. Apply conditioner sparingly—one dime-sized amount per square foot is sufficient. Warm the vinyl slightly with a hair dryer on low setting before application; this opens the pores for better absorption. Massage in with a foam applicator pad using linear motions along the vinyl’s grain pattern. After 30 minutes, buff with a dry microfiber. If the surface feels slick, you’ve used too much—remove excess with a slightly damp cloth and re-buff.
Protecting Stitching and Piping: Often Overlooked Details
The thread used in vintage interiors is often cotton or early nylon, both of which degrade differently than vinyl. Protectants designed for vinyl can wick into stitching and cause it to rot from the inside out. Apply protectant to vinyl surfaces using a foam applicator, carefully avoiding seams. Then use a small artist’s brush to apply a dedicated fabric protectant just to the stitching. For leather piping (common in premium models), use a leather-specific conditioner that won’t migrate onto adjacent vinyl. This targeted approach prevents cross-contamination and addresses each material’s unique needs.
Climate Considerations: Adjusting Your Approach
Your local environment dictates product selection and frequency. In desert climates, prioritize conditioners with humectants that draw moisture from the air—glycerin-based formulas work well. In humid regions, focus on anti-mildew additives and lighter protectants that breathe better. Cold climates demand products that remain flexible at low temperatures; some polymers become brittle below 40°F, cracking when you sit on the seats. If you store your car in winter, apply a heavy conditioner in fall, then a light protectant layer before storage. This creates a moisture barrier without suffocating the material.
Storage and Shelf Life: Maximizing Your Investment
Quality vintage vinyl care products aren’t cheap, and their active ingredients degrade over time. Store all products in a climate-controlled environment between 60-75°F. Heat accelerates separation of emulsions; cold can cause polymers to precipitate out of solution. Once opened, most water-based products have a 12-18 month effective life. Solvent-based products last longer—up to 3 years—if properly sealed. Write the opening date on the bottle with a permanent marker. If a product separates and won’t remix after vigorous shaking, discard it. Using degraded products is like playing Russian roulette with your interior; the chemical balance is compromised and unpredictable reactions are guaranteed.
Building a Maintenance Schedule: Prevention Over Cure
The difference between a survivor interior and a restored one often comes down to consistency, not product choice. Establish a tiered schedule: light dusting weekly with an anti-static cloth, monthly cleaning of high-touch areas (door panels, seat bolsters), quarterly full interior cleaning, and bi-annual conditioning. Mark these on a calendar and treat them like oil changes—non-negotiable maintenance. For cars that sit unused, increase conditioning frequency while decreasing cleaning frequency. A car in storage needs conditioning every 3 months to replace plasticizers lost to heat cycling, but cleaning only when you see visible dust accumulation.
Frequently Asked Questions
How do I know if my vintage vinyl is beyond saving?
When cracks penetrate through the entire material thickness and you can see the fabric backing, you’ve reached the point of no return. Surface cracks can be managed, but structural failure requires professional re-skinning or replacement. Test by gently pulling at a crack—if it widens significantly or you see white stress marks, the substrate is compromised.
Can I use leather care products on vintage vinyl?
Only if you enjoy accelerated degradation. Leather conditioners contain proteins and oils that vinyl can’t absorb, creating a sticky surface that attracts dirt and promotes microbial growth. Some leather cleaners are pH-appropriate and safe, but always check the label for vinyl compatibility. When in doubt, use products specifically formulated for vinyl.
Why does my vinyl feel sticky even after cleaning?
That’s plasticizer migration—the vinyl is literally sweating out its own softening agents as it breaks down. Standard cleaners won’t fix this. You need a specialized degreasing step followed by a plasticizer-reducing treatment. In severe cases, the stickiness returns within days, indicating the vinyl has reached end-of-life and needs replacement.
How do I restore color to faded vinyl without dyeing?
You don’t, really. Quality care prevents further fading but can’t reverse UV damage. Some conditioners contain optical brighteners that create the illusion of color restoration, but it’s temporary. For actual color restoration, you need professional refinishing with vinyl-specific dyes. Be wary of DIY dye kits—they often lack the flexibility to move with the vinyl and crack within months.
Is it safe to use a steam cleaner on vintage vinyl?
Absolutely not. Steam exceeds 212°F, which is hot enough to instantly drive out remaining plasticizers and cause immediate shrinkage and cracking. It also delaminates any remaining factory topcoat. The only exception is professional systems that operate below 150°F with precise control, and even then, only on vinyl confirmed to be in excellent condition.
How do I handle vinyl that’s already cracking?
Stop using any product containing solvents. Switch to a water-based conditioner only, applied very lightly. The goal shifts from restoration to preservation—stabilizing what’s left. Keep the car out of direct sunlight completely, as UV will accelerate crack propagation. Some specialists offer crack-filling treatments, but these are temporary cosmetic fixes, not structural repairs.
What’s the white powder on my old vinyl?
That’s degraded plasticizer and stabilizer compounds leaching to the surface, often called “vinyl bloom.” It’s a sign of advanced degradation. Clean it gently with a damp microfiber—no chemicals. Then apply a light, high-quality conditioner to temporarily replace some of what’s been lost. This powder will return, and each time it does, the vinyl is weaker.
Can I wax my vinyl interior for extra protection?
Wax is for paint, not vinyl. Automotive waxes contain abrasives and solvents that damage vinyl finishes. They also create a buildup that’s nearly impossible to remove without aggressive cleaning. Use a dedicated vinyl protectant instead. If you want “wax-like” durability, look for polymer-based protectants that specifically mention “buildable layers.”
How long should I wait after cleaning before using my car?
Minimum 24 hours for the interior to fully dry and for any residual cleaner to off-gas. With vintage vinyl, moisture trapped in pores can cause mildew or accelerate foam degradation underneath. Leave windows cracked in a garage during this period. If you must drive sooner, use a moisture-absorbing product inside and keep windows open for ventilation.
Are “miracle” restoration products worth the hype?
If they claim to “restore” or “repair” vinyl, be skeptical. No topical product can rebuild molecular bonds or replace lost substrate material. The best products clean, condition, and protect—they don’t perform miracles. Anything promising to “fill cracks” or “restore flexibility” permanently is likely a short-term cosmetic fix that may cause long-term damage. Stick with proven chemistry over marketing magic.