That tiny chip in your windshield might seem harmless now, but every bump in the road and temperature swing is working against you. What starts as a small starburst can spiderweb across your entire field of vision in a matter of days, turning a simple fix into a costly full replacement. The good news? Modern windshield repair technology has evolved dramatically, putting professional-grade solutions literally in the palm of your hand. Whether you’re dealing with rock chips, bullseye damage, or annoying surface scratches, understanding how to select and use the right repair kit can save you hundreds of dollars while maintaining your vehicle’s structural integrity and your safety on the road.
Before you rush to buy the first kit you see online, it’s crucial to understand that not all windshield damage is created equal—and neither are the tools designed to fix it. The difference between a crystal-clear, lasting repair and a frustrating, visibility-impairing failure often comes down to knowledge, not just equipment. This comprehensive guide will walk you through everything you need to know about windshield repair and scratch removal technology, helping you make an informed decision that protects both your wallet and your windshield.
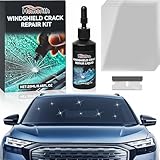
Top 10 Windshield Repair Kit
Detailed Product Reviews
1. Rain-X 600001 Windshield Repair Kit - Quick and Easy Durable Resin Based Windshield Repair Kit for Chips and Cracks, Good for Round Damage Below 1" in Diameter and Cracks Smaller Than 12" in Length

Overview:
The Rain-X 600001 Windshield Repair Kit offers a budget-friendly solution for minor windshield damage. Designed to address chips under 1 inch and cracks shorter than 12 inches, this resin-based system aims to prevent damage spread while restoring structural integrity. The kit includes all necessary components for multiple repairs on laminated windshields, emphasizing simplicity and universal fit for most vehicle types.
What Makes It Stand Out:
This kit’s simplicity is its hallmark. The durable resin formula strengthens glass beyond its original state, creating a permanent bond when applied correctly. Unlike complex professional systems, Rain-X emphasizes minimal steps and universal compatibility. The brand’s reputation for automotive glass treatments adds credibility, while the inclusion of curing strips and clear instructions makes it accessible for DIYers with no prior experience. The pro-tip guidance helps users avoid common pitfalls like air pockets and contamination.
Value for Money:
At $11.49, this represents excellent value for drivers facing minor windshield damage. Professional repairs typically cost $50-100, making this kit a cost-effective alternative for small chips. The ability to perform multiple repairs further enhances its economic appeal, though results depend heavily on following instructions precisely and repairing damage before contamination occurs. It’s an ideal entry-level option for first-time users.
Strengths and Weaknesses:
Strengths:
- Extremely affordable entry point
- Simple, straightforward application process
- Durable resin strengthens glass effectively
- Suitable for multiple repairs
- Reputable brand with proven track record
Weaknesses:
- Requires direct sunlight for curing
- No specialized tools like vacuum plungers
- Results vary significantly with user technique
- Limited to smaller damage sizes
- Cannot repair contaminated cracks effectively
Bottom Line:
The Rain-X kit is ideal for budget-conscious drivers dealing with fresh, small windshield damage who are willing to follow instructions meticulously for satisfactory DIY results.
2. Permatex 09103 Automotive Windshield Repair Kit For Chipped And Cracked Windshields. Permanent Air-Tight Repairs, With Repair Syringe & Plunger, 9-piece Kit

Overview:
The Permatex 09103 Automotive Windshield Repair Kit positions itself as a professional-grade solution for bullseye damage up to 1.25 inches. This 9-piece kit features a sophisticated syringe and plunger system that creates permanent air-tight repairs without mixing requirements, making it suitable for most laminated windshield glass. The system focuses on delivering professional results through controlled resin application.
What Makes It Stand Out:
Permatex’s state-of-the-art spring-lock delivery system sets it apart from basic kits. This advanced mechanism ensures consistent resin pressure and deep penetration into cracks, mimicking professional equipment. The comprehensive instruction manual with photographic guides eliminates guesswork, while the natural daylight curing process removes the need for UV lamps. The kit’s ability to handle slightly larger bullseye damage (1.25" vs typical 1") provides added versatility that many competitors lack.
Value for Money:
Priced at $13.99, this kit strikes a balance between affordability and professional features. It costs slightly more than basic alternatives but offers superior application control through its syringe system. The permanent, air-tight results can save hundreds in replacement costs, making it a wise investment for those prioritizing repair quality over absolute lowest price. The 9-piece configuration ensures you have all necessary components.
Strengths and Weaknesses:
Strengths:
- Advanced spring-lock syringe system
- Professional-quality air-tight seals
- Handles larger bullseye damage (1.25")
- Photo-enhanced instructions
- No mixing or UV light needed
Weaknesses:
- Limited to bullseye-type damage
- Fewer repairs per kit than some competitors
- Curing time depends on sunlight intensity
- Slightly higher price point
- Requires steady hands for syringe operation
Bottom Line:
Permatex delivers professional-level results for focused bullseye repairs, making it perfect for users seeking reliable, permanent fixes with guided precision.
3. Windshield Repair Kit, Windshield Crack Repair Kit with Suction Cup Curing Light, 4 Pcs Car Glass Repair Kit Quick Fix for Chips & Cracks, Windshield Chip Repair Kit, Automotive Nano Fluid(Yellow)

Overview:
This professional-grade windshield repair kit combines advanced vacuum technology with a powerful UV curing light for comprehensive damage repair. Engineered to fix chips, bullseyes, stars, and cracks up to 12 inches, the system uses 20PA pressure vacuum holder and nano fluid resin to deliver results in 5-10 minutes without mixing. The yellow-colored kit includes four repair assemblies for multiple applications.
What Makes It Stand Out:
The integrated UV curing lamp with multiple timer and exposure modes represents a significant upgrade over sunlight-dependent kits. This allows controlled, consistent curing regardless of weather conditions. The 20PA vacuum technology ensures deep resin penetration, preventing air bubbles and maximizing repair strength. Its versatility in handling various crack types—from simple chips to complex spider webs—makes it a true multi-purpose solution for comprehensive automotive glass restoration.
Value for Money:
At $16.97, this kit commands a premium but justifies it through professional features. The UV lamp alone adds value by enabling repairs in any environment, while the vacuum system enhances success rates. For drivers facing varied damage types or living in cloudy climates, the investment pays dividends in convenience and reliability compared to repeated professional visits. The four-piece set extends its value further.
Strengths and Weaknesses:
Strengths:
- Powerful UV curing lamp with adjustable settings
- 20PA vacuum for superior resin penetration
- Repairs multiple damage types up to 12 inches
- Quick 5-10 minute process
- No mixing required
Weaknesses:
- Higher price point
- UV lamp requires power source
- More complex than basic kits
- Learning curve for optimal results
- Suction cup may struggle on curved surfaces
Bottom Line:
This kit excels for enthusiasts seeking professional-grade versatility and weather-independent operation, delivering superior results for diverse windshield damage scenarios.
4. BLUTOKS Windshield Repair Kit, 2 PCS Windshield Crack Repair Kit with Suction Cup Curing Light, Automotive Nano Fluid Vehicle Windscreen Tool, Glass Repair Kit for Chips and Cracks (Navy)

Overview:
The BLUTOKS kit offers a dual-package solution featuring professional-grade repair technology with powerful vacuum assistance and UV curing capabilities. Each kit utilizes 20PA vacuum holders and nano fluid resin to repair chips, cracks, spider webs, and scratches up to 12 inches long, promising near-invisible finishes in 5-10 minutes. The navy-colored packaging contains two complete repair systems.
What Makes It Stand Out:
The two-kit package provides exceptional value for families with multiple vehicles or those wanting a backup for future damage. The 20PA vacuum technology creates airtight seals that force resin deep into damage, while the multi-mode UV lamp ensures proper curing. Its ability to handle extensive damage types—including half-moon cracks and holes—demonstrates remarkable versatility. The emphasis on shear strength and structural integrity restoration positions it as a safety-focused solution beyond cosmetic fixes.
Value for Money:
At $16.99 for two complete kits, this represents outstanding value—effectively $8.50 per repair system. This pricing undercuts many single-kit competitors while delivering premium features. For households with multiple cars or frequent highway drivers, the dual-pack configuration eliminates reordering delays and provides significant long-term savings over professional services that charge $60-120 per repair.
Strengths and Weaknesses:
Strengths:
- Two complete kits for the price of one
- Powerful 20PA vacuum technology
- Comprehensive damage type coverage
- Multi-mode UV curing lamp
- Emphasis on structural integrity restoration
Weaknesses:
- Requires electrical outlet for UV lamp
- More components increase complexity
- Storage space needed for two kits
- Vacuum seal effectiveness varies by glass curvature
- Instructions may be overwhelming for beginners
Bottom Line:
BLUTOKS delivers unmatched value through its dual-kit packaging, making it the smart choice for multi-vehicle households seeking professional-grade repair capabilities.
5. Windshield Crack Repair Kit,2025 Latest Upgraded Glass Crack Repair Kit,5MinQuick-Glass Repair Liquid,Long-Lasting for Windshields, Windows, Mirrors,All Crack Types Windshield Repair Kit (Black).

Overview:
Marketed as the 2025 latest upgraded solution, this budget-friendly kit promises comprehensive repair capabilities across multiple glass surfaces. Using high-transparency imported resin and multi-layer curing technology, it addresses bullseyes, star-shaped cracks, radial patterns, and reticular damage on windshields, windows, mirrors, and even headlight covers in just five minutes. The black packaging emphasizes its advanced formulation.
What Makes It Stand Out:
This kit’s remarkable versatility extends beyond automotive glass to industrial equipment and household mirrors, breaking traditional limitations. The nano-scale crack injection technology maximizes glass integrity restoration, while the advanced multi-layer curing ensures durability. Its universal application approach—covering laminated glass, side windows, sunroofs, and rearview mirrors—provides unmatched flexibility. The five-minute repair claim appeals to time-conscious users seeking immediate results without specialized equipment.
Value for Money:
At $9.99, this is the most affordable option reviewed, offering exceptional versatility per dollar. While lacking specialized tools like UV lamps or vacuum systems, its low price point makes it accessible for emergency repairs and experimentation. The multi-surface capability essentially provides several repair kits in one, though effectiveness may vary across different glass types compared to dedicated automotive systems with targeted engineering.
Strengths and Weaknesses:
Strengths:
- Lowest price point in category
- Unprecedented multi-surface versatility
- Quick five-minute application
- High-transparency imported resin
- Covers extensive crack type variations
Weaknesses:
- No UV curing lamp included
- Lacks vacuum pressure system
- “Latest upgraded” claim lacks verification
- Effectiveness varies by surface type
- Durability claims need independent testing
Bottom Line:
This ultra-affordable, highly versatile kit suits experimental users and those needing emergency repairs across multiple glass types, though specialized automotive kits may outperform it for dedicated windshield work.
6. WOOKKIT Windshield Repair Kit 2 Bottles Car Windshield Crack Repair Kit Nano Glass Repair Liquid Adhesive Solution for Fix Chips Bullseye

Overview: The WOOKKIT Windshield Repair Kit positions itself as a professional-grade solution for DIY glass repair. With two bottles of nano glass repair liquid, this kit promises to restore over 90% of original glass strength and transparency by penetrating cracks at the molecular level. Designed for automotive windshields, phone screens, and mirrors, it offers a versatile approach to fixing common glass damage.
What Makes It Stand Out: This kit’s professional-grade nano repair technology sets it apart from standard resin fillers. It specifically targets bullseye, star, spiderweb, and linear cracks with UV-resistant, waterproof resin that cures in under 30 minutes. The multi-surface compatibility spans from -40°F to 200°F, making it suitable for extreme climates. The kit includes everything needed for 4-6 repairs without requiring drills or pumps.
Value for Money: At $9.99 for two bottles, this kit delivers exceptional savings compared to dealership repairs costing $100-200. Each repair costs approximately $2-2.50, representing an 80% cost reduction. The inclusion of curing films, applicators, and detailed instructions eliminates hidden expenses.
Strengths and Weaknesses: Strengths include advanced nano-technology, quick curing time, impressive temperature tolerance, and comprehensive crack type coverage. The UV-resistant resin prevents yellowing over time. Weaknesses include dependence on sunlight or UV lamp for curing, potential difficulty with deep or contaminated cracks, and a learning curve for first-time users. Results may vary based on damage age and cleanliness.
Bottom Line: For budget-conscious drivers seeking professional-quality results, the WOOKKIT kit offers impressive technology at an unbeatable price. It’s ideal for repairing fresh damage under 6 inches, though professional assessment is recommended for complex cracks affecting driver vision.
7. popalula Windshield Chip Repair Kit - 2025 Upgrade Car Windshield Crack Repair Kit, Glass Repair Liquid for Cracks and Chips, Rock Chip Repair Kit for Fix Windows, Mirrors, Glasses, All Crack Types
Overview: The popalula Windshield Chip Repair Kit arrives as a 2025 upgrade promising five-minute repairs for various glass damages. This kit uses imported high-transparency resin with multi-layer curing technology to address chips, cracks, and bullseyes before they spread. It’s engineered as a comprehensive DIY solution for automotive and household glass surfaces.
What Makes It Stand Out: The five-minute repair claim is notably aggressive in this category, appealing to impatient DIYers. Its comprehensive damage coverage includes bullseyes, star-shaped, single-line, radial, and reticular cracks—more types than many competitors. The multi-layer curing technology ensures deep penetration into nano-scale cracks, creating durable bonds that withstand temperature shifts and vibrations for years.
Value for Money: Priced at $12.99, this single-bottle kit sits in the mid-range for DIY repair solutions. While more expensive than some two-bottle kits, its advanced resin formula and broad compatibility with windshields, sunroofs, mirrors, and even headlight covers justify the premium. It still saves 70-80% versus professional replacement.
Strengths and Weaknesses: Strengths include rapid repair time, extensive crack type coverage, high-transparency resin, and remarkable versatility across glass surfaces. The no-drill, no-glass-removal process simplifies DIY execution. Weaknesses include a single resin bottle limiting repair quantity, potential overpromising on five-minute cure time (actual curing may require longer), and limited effectiveness on older, contaminated cracks.
Bottom Line: The popalula kit excels for users needing quick, versatile repairs across multiple glass types. Its 2025 upgrade status suggests refined formulation. Best suited for fresh damage under one inch diameter, it’s a solid choice for proactive vehicle maintenance.
8. J-B Weld 2100 Windshield Saver Repair Kit, 0.025 fl. oz

Overview: The J-B Weld 2100 Windshield Saver Repair Kit brings the trusted brand’s reputation for reliable adhesives to automotive glass repair. This compact kit focuses on minimizing the appearance of chips and star-shaped cracks in laminated windshields, preventing minor damage from spreading into costly replacements.
What Makes It Stand Out: J-B Weld’s brand recognition instills confidence in a market flooded with unknown manufacturers. The kit’s straightforward approach targets small damage up to 1-1/4 inches diameter without overpromising miraculous results. Its simplicity appeals to DIY novices who want a no-fuss solution from a name they trust.
Value for Money: At $12.95 for 0.025 fl oz, the per-ounce cost appears high, but the J-B Weld premium reflects quality assurance and brand reliability. For single, small-chip repairs, it’s cost-effective compared to $75+ professional services. However, quantity is limited compared to multi-bottle competitors at similar price points.
Strengths and Weaknesses: Strengths include trusted brand reputation, straightforward application process, and focused effectiveness on small chips and stars. The kit is specifically designed for laminated windshields, ensuring proper compatibility. Weaknesses include limited resin volume, lack of advanced nano-technology claims, minimal accessories, and no mention of UV curing requirements or temperature tolerance. It’s less versatile than competitor kits.
Bottom Line: J-B Weld’s kit is perfect for brand-loyal customers needing a simple, reliable fix for small windshield chips. While not the most advanced or economical option, it delivers trustworthy results for minor damage. Choose this for single-incident repairs rather than ongoing maintenance needs.
9. NASILOOP Windshield Repair kit, Quick and Efficiency Glass Repair Fluid, Car Windshield Crack Repair Resin Kit for Fixing Chips, Bulls-Eye, Cracks and Star-Shape Cack-2 Pack

Overview: The NASILOOP Windshield Repair Kit offers a two-pack solution emphasizing exceptionally fast curing and long-term durability. Using specially-engineered polymers, this kit promises to repair chips, bullseyes, star-shaped cracks, and even cracks up to 12 inches long through a magical chemical reaction that cross-links at the molecular level.
What Makes It Stand Out: The kit’s ability to handle cracks up to 12 inches is impressive, exceeding most DIY kit limitations. Its high-speed curing formula works rapidly upon contact, filling every nook and cranny. The two-bottle packaging provides backup for multiple repairs or larger jobs, while the user-friendly design promises professional results without expertise.
Value for Money: At $9.95 for two bottles, this kit offers excellent value, matching competitors’ pricing while claiming superior polymer technology. The ability to address larger cracks potentially saves $200-400 on windshield replacement, making it highly cost-effective for substantial damage that other kits can’t handle.
Strengths and Weaknesses: Strengths include the 12-inch crack capacity, fast-curing formula, two-bottle quantity, and deep molecular bonding claims. The comprehensive damage type coverage adds versatility. Weaknesses include potentially exaggerated marketing language (“magical chemical reaction”), unclear curing method requirements, and limited brand recognition. Large crack repairs may still be visible and could compromise windshield integrity.
Bottom Line: NASILOOP is ideal for drivers facing larger cracks who want to avoid immediate replacement. While claims should be approached realistically, the two-bottle value and extended crack capacity make it worth trying for substantial damage. Professional inspection is strongly recommended for cracks over 6 inches.
10. tuncate Windshield Repair Kit for Chips and Cracks– 4 Pack Glass Repair Kit with Enhanced Injection Head for Chips, Cracks & Star-Shaped Cracks, Quick & Easy DIY Fix for Windshields, Black

Overview: The tuncate Windshield Repair Kit distinguishes itself with a four-pack configuration and enhanced injection head for quick DIY fixes. Featuring a nano-enhanced resin formula that achieves 120MPa compressive strength, this kit promises almost undetectable repairs across extreme temperatures from -4°F to 104°F.
What Makes It Stand Out: The four-bottle quantity is unmatched in this price range, making it ideal for fleet vehicles or multiple cars. The enhanced injection head improves resin delivery precision, while the three-dimensional mesh structure creates superior strength exceeding ordinary glass by 30%. Safety certification highlighting child/pet-friendly, odorless, and biodegradable properties addresses health concerns.
Value for Money: At $8.91 for four bottles, this kit offers the lowest per-repair cost in the category—approximately $2.25 per repair. The value proposition is exceptional for families with multiple vehicles or small business fleets. Despite the low price, it includes advanced nano-formulation and safety certifications typically found in premium kits.
Strengths and Weaknesses: Strengths include unbeatable quantity-to-price ratio, enhanced injection head, impressive strength claims, comprehensive safety certifications, and extreme temperature tolerance. The 97% light transmittance ensures minimal visual impact. Weaknesses include lesser-known brand, potential quality control concerns with budget pricing, and limited information on UV curing requirements. The “10-minute repair” claim may not include full curing time.
Bottom Line: The tuncate kit is the value champion for multi-vehicle households or fleet operators. Its four-bottle pack and safety certifications make it practical and reassuring. While brand recognition is low, the feature set and price point are compelling for proactive maintenance of minor chips and cracks.
Understanding Windshield Damage: What Can Be Repaired?
Types of Windshield Damage
Windshield damage falls into distinct categories, each requiring a specific approach. Bullseye breaks are circular with a clean impact point, typically the easiest to repair. Star breaks radiate outward from a central point, creating multiple legs that can spread if untreated. Combination breaks merge these patterns, presenting a more complex challenge. Surface scratches differ entirely—they’re shallow abrasions that affect visibility but don’t compromise structural integrity. Understanding your damage type is the first step toward selecting the appropriate repair strategy, as using the wrong method can worsen the problem or create optical distortions that make driving unsafe.
The Science Behind Glass Repair
Modern windshields aren’t simple glass—they’re laminated safety glass, consisting of two layers of glass bonded to a polyvinyl butyral (PVB) interlayer. When damage occurs, it typically penetrates only the outer layer, leaving the inner layer intact. Repair works by injecting specialized resin into these voids, which then cures to restore optical clarity and approximately 80-95% of the glass’s original strength. This process prevents further cracking by eliminating stress concentrations at the damage points and creating a permanent seal against moisture and debris that would otherwise accelerate deterioration.
How Windshield Repair Kits Work
Resin Technology Explained
The heart of any repair kit is its resin formulation. Professional-grade resins are typically acrylic-based compounds with specific viscosity ratings measured in centipoise (cP). Lower viscosity resins (20-50 cP) flow easily into tight cracks but may shrink more during curing, while higher viscosity formulations (100-200 cP) fill larger voids but require more pressure to inject properly. The best kits include multiple resin types for different damage scenarios. UV-curing resins dominate the market, using photoinitiators that activate when exposed to specific wavelengths of ultraviolet light, typically 365nm, creating a polymerization reaction that hardens the material within minutes.
The Curing Process
Curing isn’t just about hardening—it’s about achieving optimal optical properties and bond strength. The process involves a carefully controlled chemical reaction where monomers link to form polymer chains. Temperature plays a critical role; most resins cure best between 70-80°F. Inadequate UV exposure results in tacky, weak repairs, while overexposure can cause yellowing and brittleness. Premium kits include curing lights with calibrated output and timers, ensuring you achieve the full rated strength of 2,500-3,000 psi, which is essential for maintaining the windshield’s role in passenger airbag deployment and roof crush resistance during rollovers.
Key Features to Consider When Choosing a Repair Kit
Resin Quality and Viscosity
When evaluating kits, resin quality should be your primary consideration. Look for optically clear formulations with low shrinkage rates—ideally under 3%. The resin should be VOC-compliant and automotive-grade, meaning it’s specifically designed for laminated glass applications. Some advanced formulas include silane coupling agents that chemically bond to the glass surface, creating a permanent repair that won’t delaminate over time. Multiple viscosity options in a single kit indicate a more versatile, professional-oriented system capable of handling everything from hairline cracks to deep pitting.
Applicator Design and Precision
The applicator mechanism determines how effectively you can deliver resin into the damage without creating air pockets. Bridge-style applicators use suction cups to mount directly over the chip, providing stable, perpendicular pressure that’s crucial for even resin distribution. Syringe-based systems offer more portability but require steadier hands. The best designs feature vacuum cycles that first remove air from the crack before injection, preventing trapped bubbles that cause visible defects. Look for precision-machined components with O-ring seals that maintain consistent pressure throughout the 5-10 minute injection process.
Curing Light Technology
Your repair is only as good as your curing light. LED-based UV lights have largely replaced older fluorescent models, offering concentrated 365nm output with 5-10 watt power ratings. The light pattern should be uniform across the damage area, without hot spots that cause uneven curing. Battery-powered units provide flexibility for outdoor repairs, while AC-powered models ensure consistent output for multiple repairs. Some advanced lights include built-in timers and automatic shutoff features, preventing overexposure while you work on other aspects of the repair.
Kit Completeness and Accessories
A comprehensive kit should include more than just resin and an applicator. Professional setups provide pit polish for leveling the surface after curing, razor blades for removing excess resin, cleaning swabs with 99% isopropyl alcohol, and curing strips to protect the resin during UV exposure. Some include depth gauges to assess damage severity and drill bits for creating access points in tight cracks. The inclusion of a detailed instruction manual with troubleshooting guides indicates a manufacturer that stands behind their product and understands the learning curve involved in quality repairs.
Types of Windshield Repair Kits
Professional-Grade Kits
Professional kits, typically used by mobile repair technicians, feature higher resin volumes (30-50ml vs. 5-10ml in consumer kits), industrial-grade applicators with replaceable parts, and powerful curing lights. These systems often cost $150-300 but can perform 50+ repairs, making them economical for serious enthusiasts or those managing vehicle fleets. They include advanced features like pressure gauges, multiple resin viscosities, and sometimes even crack expanders that use heat to open tight cracks for better resin penetration. The learning curve is steeper, but the results rival shop repairs.
Consumer-Level Kits
Designed for occasional use, these kits prioritize simplicity over versatility. They typically use single-viscosity resins in pre-measured tubes and simplified applicators with fewer adjustment options. Priced between $15-40, they’re perfect for addressing one or two chips but may struggle with complex damage patterns. The curing lights are often weaker, requiring longer exposure times, and the resin volumes limit you to 3-5 repairs. While convenient, they demand optimal conditions—clean damage, moderate temperatures, and patience—to achieve acceptable results.
Hybrid Solutions
Emerging hybrid kits bridge the gap between professional and consumer tiers, offering professional-quality resins in smaller quantities with user-friendly applicators. These kits, typically $50-100, include video tutorials via QR codes, smartphone apps for damage assessment, and customer support hotlines. They represent the sweet spot for car enthusiasts who want shop-quality results without investing in full professional equipment. Many include innovative features like adjustable vacuum cycles and interchangeable injector tips for different damage types.
Scratch Removal vs. Chip Repair: Different Tools, Different Goals
Understanding Glass Scratch Depth
Not all windshield damage requires resin injection. Surface scratches occupy the outermost layer of glass and are measured by depth—light scratches affect only the surface polish and can be buffed out, while deep scratches penetrate the glass surface and may require professional intervention. The fingernail test is your first diagnostic: if your nail catches in the scratch, it’s likely too deep for DIY removal. Understanding this distinction prevents you from using inappropriate methods that could worsen the damage or create optical distortion across your field of vision.
Polishing Compounds vs. Resin Fillers
Scratch removal relies on abrasive polishing compounds that gradually level the surrounding glass to match the scratch depth. These cerium oxide or aluminum oxide formulations work through mechanical action, removing microscopic layers of glass. This differs fundamentally from resin injection, which fills voids. Using polishing compounds on chips spreads the damage, while applying resin to scratches creates visible bumps. Quality scratch removal kits include progressive grits—from 3,000 to 50,000 grit—and require careful technique to avoid creating a wavy surface that distorts light and impairs visibility, especially at night.
Safety Considerations and Limitations
When DIY Repair Is Unsafe
Your safety is non-negotiable. DIY repair is inappropriate for damage in the driver’s critical viewing area (the “acute area” roughly 12 inches wide centered on the steering wheel), cracks longer than 12 inches, damage that penetrates both glass layers, or chips within 2 inches of the windshield edge. These scenarios compromise the windshield’s structural role in accident protection. Additionally, if the damage has been contaminated with washer fluid, road salt, or has existed for months, the success rate drops dramatically, and professional evaluation becomes essential.
Understanding Structural Integrity
A windshield contributes up to 60% of your vehicle’s cabin structural integrity in a rollover and provides the backstop for passenger airbag deployment. A proper repair restores most of this strength, but improper technique can create stress risers that actually weaken the surrounding glass. The repair must achieve a bond strength of at least 2,200 psi to maintain safety standards. This is why pressure testing and quality resins matter—not just for appearance, but for your protection. Never compromise on kit quality when safety is at stake.
Step-by-Step Guide to Using a Repair Kit
Preparation Phase
Success begins with meticulous preparation. Park in a shaded area with the windshield temperature between 70-80°F. Clean the damage and surrounding 6-inch area with a glass cleaner, then flush the chip with 99% isopropyl alcohol to remove hidden debris. Use a fine pick to remove loose glass fragments, being careful not to enlarge the damage. Create a dam around the area with tape if working on a sloped surface. This 10-15 minute preparation phase determines 80% of your repair quality—rushing here guarantees failure.
Application Process
Mount the applicator bridge precisely over the damage, ensuring perpendicular alignment. Apply vacuum cycles to remove air from the crack—typically 3-5 cycles of 30 seconds each. Inject resin slowly, watching it flow into the damage through a magnifying glass. The resin should fill all legs of a star break or the entire circular area of a bullseye. Apply slight pressure to help the resin penetrate, but avoid forcing it, which can create new cracks. The entire injection process should take 5-10 minutes, with patience being your most valuable tool.
Curing and Finishing
Once the damage is completely filled, apply a curing strip or tape over the area to prevent oxygen inhibition (which causes tackiness). Position your UV light 1-2 inches from the surface and cure for the manufacturer-specified time—typically 5-10 minutes for LED lights, longer for weaker units. After curing, remove the strip and scrape away excess resin with a razor blade held at a 45-degree angle. Polish the area with a glass polish to restore optical clarity. The repair should be smooth to the touch and nearly invisible from most angles.
Common Mistakes That Ruin Repairs
Contamination Issues
The number one cause of repair failure is contamination. Using tap water instead of alcohol leaves mineral deposits that block resin penetration. Touching the damage with bare fingers transfers oils that prevent bonding. Repairing a wet windshield traps moisture that causes future expansion and cracking. Even airborne dust settling during the repair process creates visible defects. Always work in a clean environment, use lint-free cloths, and keep the repair area covered when not actively working on it. A single speck of debris can turn an invisible repair into an eyesore.
Temperature and Humidity Factors
Resin chemistry is temperature-sensitive. Below 60°F, resin becomes too viscous to flow properly; above 90°F, it cures prematurely before penetrating fully. Humidity above 60% introduces moisture that interferes with the polymerization reaction. Many failed repairs occur in garages that seem climate-controlled but have cold glass surfaces. Always measure the glass temperature, not the air temperature, and use a heat gun on low setting to gently warm the area if needed. Conversely, cool the glass with a damp cloth if it’s too hot.
Rushing the Process
DIY repair is not a five-minute job. Rushing the vacuum cycle leaves trapped air bubbles. Insufficient injection time results in incomplete filling. Under-curing produces weak, tacky repairs that fail within weeks. The entire process, from preparation to final polish, requires 30-45 minutes of focused attention. Trying to speed it up by using more pressure, stronger lights, or skipping steps inevitably compromises the result. Remember: you’re not just filling a chip; you’re restoring a critical safety component of your vehicle.
Cost Analysis: DIY vs. Professional Repair
Upfront Kit Costs
A quality consumer kit ($25-50) handles 3-5 repairs, bringing per-repair cost to $5-15. Professional-grade kits ($150-300) spread across 50+ repairs cost $3-6 per use. Compare this to professional mobile repair services at $75-150 per chip, and the economics favor DIY for multiple vehicles or frequent damage. However, factor in the value of your time and the risk of a failed repair that necessitates a $300-500 windshield replacement. For single, simple chips, DIY offers clear savings; for complex damage or luxury vehicles, professional service provides insurance-backed peace of mind.
Long-Term Value Considerations
Beyond immediate cost, consider long-term value. A successful DIY repair prevents the damage from spreading, potentially saving the windshield. Failed repairs often make the damage worse, eliminating professional repair options. Quality kits retain resale value—professional equipment can be sold after use, recouping 40-60% of the investment. Additionally, many insurance policies waive deductibles for professional repairs but not DIY attempts, affecting your out-of-pocket risk. Calculate the total cost of ownership, including potential replacement costs if DIY fails, before deciding which route to take.
Environmental Factors Affecting Repairs
Temperature Extremes
Glass expands and contracts significantly with temperature changes—about 0.000005 inches per inch per degree Fahrenheit. Repairing a windshield in direct summer sun (140°F surface temperature) and then parking in a cool garage creates stress that can crack the repair. Similarly, winter repairs on cold glass that then heat up in sunlight risk failure. Ideally, repair at stable temperatures and avoid extreme swings for 24 hours post-repair. Some advanced resins include flex agents that accommodate minor thermal movement, but no repair survives severe thermal shock.
Humidity and Moisture
Water is resin’s enemy. High humidity introduces moisture that creates cloudy repairs and weak bonds. Rain-soaked damage requires thorough drying—sometimes 24-48 hours in a dry environment—before repair. Some professionals use moisture-evacuation techniques with heat and vacuum, but this is risky for DIYers. If water has penetrated the crack, it often carries dissolved salts and minerals that remain after drying, contaminating the repair area. In humid climates, consider using a dehumidifier in your garage or waiting for a dry day with humidity below 50%.
Maintenance and Care for Your Repair Kit
Resin Storage
Unopened resin typically has a 12-24 month shelf life when stored in a cool, dark place. Once opened, oxygen and UV exposure begin degrading it. Always recap immediately after use, squeeze air from tubes, and store in the original light-blocking container. Some premium resins include stabilizers that extend opened life to 6 months, but most consumer resins degrade within 30-60 days. Write the opening date on each container and discard resin that becomes cloudy, thick, or discolored. Using expired resin is the fastest path to a failed repair.
Tool Longevity
Applicators require maintenance too. Clean all resin residue from injectors and seals after each use using the provided cleaning fluid. Lubricate O-rings with silicone grease to prevent drying and cracking. Store suction cups flat and clean to maintain their seal. Curing lights need periodic bulb replacement—even LEDs degrade over time, losing UV output. Test your light’s effectiveness by timing how long it takes to cure a drop of resin on glass; if it takes significantly longer than specified, the bulbs need replacement. Properly maintained professional tools last 5-10 years.
Warranty and Support: What to Look For
Manufacturer Guarantees
Reputable manufacturers stand behind their products with satisfaction guarantees and technical support. Look for companies offering at least a 30-day money-back guarantee and a warranty against defective components. Some professional kit makers provide repair-failure insurance, covering windshield replacement costs if their product fails when used according to directions. This demonstrates confidence in their formulation. Read warranty terms carefully—many exclude damage from improper use, which is broadly defined. Save all packaging and receipts; warranty claims often require proof of purchase and original packaging codes.
Technical Support Availability
Quality manufacturers provide multiple support channels: detailed video tutorials, phone hotlines staffed by technicians, and email support with 24-hour response times. Before purchasing, test their support by sending a question. The response quality indicates how much help you’ll receive when facing a challenging repair. Some companies offer online damage assessment tools where you upload photos for expert evaluation. This level of support transforms a product purchase into a service relationship, dramatically improving your success rate, especially for first-time users.
Advanced Techniques for Challenging Repairs
Working with Edge Cracks
Damage within 2 inches of the windshield edge is particularly problematic because the edge is under constant stress from flexing and temperature changes. While generally not recommended for DIY, advanced technicians use specialized techniques: creating a small drill hole at the crack’s end to relieve stress, using ultra-low viscosity resin that penetrates under pressure, and applying structural support bridges during curing. These repairs have a 50-70% success rate even in professional hands. If you must attempt an edge repair, use the highest quality professional kit and accept that failure may necessitate replacement.
Dealing with Contaminated Damage
Old damage filled with road grime, oil, or washer fluid requires aggressive cleaning before repair. Some professionals use a fine drill bit to create access and remove contaminated glass, but this risks expanding the damage. A safer DIY approach involves repeated flushing with alcohol, extended vacuum cycles to draw out contaminants, and using a surfactant-enhanced resin that wets contaminated surfaces better. However, heavily contaminated damage older than 6 months has less than a 30% success rate. Recognize when damage is beyond DIY capabilities to avoid wasting time and materials.
Troubleshooting Failed Repairs
Identifying Common Failure Points
If your repair looks cloudy, the resin didn’t fully penetrate—usually due to insufficient vacuum or injection time. Visible lines indicate trapped air from rushing the process. A yellowed appearance means UV overexposure or expired resin. If the damage continues spreading, the repair didn’t achieve adequate bond strength, often from under-curing or contamination. A raised bump suggests too much resin was injected. Each failure type has a specific cause and potential remedy, but understanding what went wrong is essential before attempting correction.
When to Attempt a Second Repair
You can sometimes salvage a failed repair if the resin is still pliable or if the damage hasn’t been contaminated by the first attempt. Remove uncured resin with alcohol and a razor blade, then reassess the damage. If the first repair used insufficient resin, you can often inject more and re-cure. However, if the resin fully cured with visible defects, attempting to fix it usually makes it worse. The rule of thumb: one proper repair is ideal, a second attempt is risky, and a third attempt is almost always futile. Know when to call a professional or accept that replacement is necessary.
Frequently Asked Questions
How long does a DIY windshield repair last?
A properly executed repair using quality resin and full curing lasts the lifetime of the windshield. The resin forms a permanent bond with the glass, preventing further spreading of the damage. However, repairs in high-stress areas or those exposed to extreme temperature fluctuations may develop issues over 5-10 years. The key factors are resin quality, complete curing, and absence of contamination. Professional repairs and DIY repairs using the same resins have identical longevity when performed correctly. The repair won’t “wear out,” but underlying stress or incomplete initial penetration can cause delayed failures.
Can I repair a crack longer than 6 inches?
Most consumer kits are designed for damage under 6 inches, but professional-grade kits can address cracks up to 12 inches in ideal conditions. However, cracks longer than 6 inches compromise the windshield’s structural integrity significantly, and even professional repairs have lower success rates. Many states have legal restrictions on repairing cracks in the driver’s line of sight, regardless of length. For cracks exceeding 6 inches, professional evaluation is strongly recommended. These often require specialized equipment like injector systems that can traverse the crack length and may indicate underlying structural issues that warrant windshield replacement.
What’s the difference between resin and epoxy?
Windshield repair resins are specifically formulated acrylic-based compounds designed for optical clarity, UV stability, and bonding to glass. Epoxies are two-part adhesives that cure through chemical reaction, often yellowing and becoming brittle under UV exposure. While epoxies provide strong bonds for many materials, they lack the optical properties and flexibility needed for windshield repair. Quality resins include silane coupling agents that chemically bond to glass silicates, achieving 2,500+ psi bond strength while remaining optically clear for decades. Never substitute general-purpose epoxy for windshield repair resin—it will fail optically and structurally.
Will the repair be completely invisible?
No repair is 100% invisible, but a quality repair achieves 85-95% optical clarity, making it nearly undetectable from most angles. The goal is preventing damage spread and restoring structural integrity, not achieving perfection. Factors affecting visibility include damage size, contamination level, and your skill level. Bullseye repairs often disappear completely, while star breaks may show faint lines where legs were filled. The repaired area may slightly alter light refraction, creating a subtle “watermark” effect visible at certain angles. Professional repairs and quality DIY repairs achieve similar visibility levels—both aim for functional restoration over cosmetic perfection.
Can I use a repair kit in cold weather?
Temperature significantly impacts repair success. Below 60°F, resin becomes too thick to penetrate cracks, and curing slows dramatically. While you can warm the glass with a heat gun or vehicle heater, rapid temperature changes create stress that can crack the windshield. The ideal repair environment is 70-80°F with stable conditions. If you must repair in cold weather, pre-warm the kit components and glass gradually, maintain temperature throughout the 30-45 minute process, and avoid post-repair temperature swings for 24 hours. Some premium resins include cold-weather formulations, but they’re still limited to 50°F minimum.
How soon can I wash my car after repair?
Wait at least 24 hours before washing your vehicle. High-pressure car washes can force water into the uncured resin edges, causing cloudiness or delamination. The resin continues developing full strength for 72 hours post-repair. Hand washing is safer after 24 hours, but avoid direct high-pressure spray on the repaired area for a full week. Rain is fine after 2-3 hours, as it won’t generate the pressure of a car wash. Some fast-cure resins claim earlier wash times, but the 24-hour rule ensures maximum bond development and long-term durability.
Is DIY repair legal and insurance-compliant?
DIY repairs are legal, but insurance compliance varies. Many insurance companies waive deductibles for professionally repaired chips but won’t reimburse DIY attempts. Some policies require professional repair to maintain comprehensive coverage on the windshield. If DIY repair fails and the damage spreads, your insurance may deny a subsequent replacement claim, arguing the damage was aggravated. Always document the original damage with photos before repair. For leased vehicles, check your lease agreement—some require professional repairs to avoid end-of-lease penalties. When in doubt, contact your insurance agent before proceeding.
Can I repair damage near the edge of the windshield?
Damage within 2 inches of the edge is problematic because the edge experiences constant flexing and stress. While professional technicians sometimes succeed using specialized techniques, DIY success rates drop below 30% for edge cracks. The stress concentration at the windshield perimeter means repairs often fail quickly, and the damage may indicate the windshield is already experiencing structural issues that require replacement. If you attempt an edge repair, use a professional-grade kit with structural support bridges and understand that failure may necessitate immediate replacement. Most experts recommend replacement for edge damage.
What should I do if the resin won’t cure?
Uncured resin usually indicates insufficient UV exposure, expired resin, or oxygen inhibition. First, extend UV exposure time by 50% and ensure your curing light is positioned correctly at 365nm wavelength. Check that curing strips are covering the resin to block oxygen. If the resin remains tacky after 20 minutes of proper UV exposure, it’s likely expired or contaminated—remove it with alcohol and start over with fresh resin. Test your UV light by curing a drop of resin on a separate glass piece; if it cures there, the issue is application, not the light. Never leave tacky resin on the windshield—it will yellow and collect dirt.
Are windshield repair kits environmentally friendly?
Compared to windshield replacement, repair is highly eco-friendly, preventing 25 pounds of glass and 5 pounds of PVB interlayer from entering landfills per windshield. Most resins are VOC-compliant and contain no heavy metals. However, the acrylic resins are petroleum-based and not biodegradable. The environmental impact comes from manufacturing and disposal of small plastic components and expired resin tubes. Some manufacturers offer take-back programs for used components. The most sustainable approach is buying only the resin volume you need, properly maintaining tools for long-term use, and ensuring successful repairs that prevent replacement. A single kit preventing one windshield replacement offsets its manufacturing footprint significantly.